


ADVANTIUM® OVEN
GE Profile™
SAFETY INFORMATION . . . . . . . . .3
ADVANTIUM
Getting to Know Advantium?. . . . . . . . . . . .9 Features . . . . . . . . . . . . . . . . . . . . . . . . . . . . . 10 Controls . . . . . . . . . . . . . . . . . . . . . . . . . . . . . 11
SPEEDCOOKING
Power Level. . . . . . . . . . . . . . . . . . . . . . . . . . 12
Cooking Tips . . . . . . . . . . . . . . . . . . . . . . . . . 13
Cookware. . . . . . . . . . . . . . . . . . . . . . . . . . . . 13
Pre-set Speedcook Menu . . . . . . . . . . . . . . 14
Repeat Last . . . . . . . . . . . . . . . . . . . . . . . . . . 16
Resume . . . . . . . . . . . . . . . . . . . . . . . . . . . . . 16
My Recipe . . . . . . . . . . . . . . . . . . . . . . . . . . . 16
Things That Are Normal . . . . . . . . . . . . . . . 17
CONVECTION BAKING . . . . . . . . . 18
BROILING AND TOASTING . . . . . 19
WARMING AND PROOFING . . . 20
MICROWAVING
Cookware. . . . . . . . . . . . . . . . . . . . . . . . . . . . 21
Pre-Set Selections . . . . . . . . . . . . . . . . . . . . 21
Cook By Time . . . . . . . . . . . . . . . . . . . . . . . .22
Power Levels. . . . . . . . . . . . . . . . . . . . . . . . .22
My Recipes . . . . . . . . . . . . . . . . . . . . . . . . . .22
Cooking Tips . . . . . . . . . . . . . . . . . . . . . . . . .22
Defrost . . . . . . . . . . . . . . . . . . . . . . . . . . . . . .23
Sensor Cooking . . . . . . . . . . . . . . . . . . . . . 24
OTHER FEATURES . . . . . . . . . . . . . 26
CARE AND CLEANING . . . . . . . . . 29
TROUBLESHOOTING. . . . . . . . . . . .32
WARRANTY. . . . . . . . . . . . . . . . . . . . . 34
OPTIONAL KITS . . . . . . . . . . . . . . . . .35
CONSUMER SUPPORT . . . . . . . . . 36
Write the model and serial numbers here:
Model #_________________
Serial # _________________
Find these numbers on a label inside the oven.
OWNER’S MANUAL
PSA9240
ESPAÑOL
Para consultar una version en español de este manual de instrucciones, visite nuestro sitio de internet GEAppliances.com.
GE is a trademark of the General Electric Company. Manufactured under trademark license.
http://geadvantium.com |
49-40678-3 12-16 GEA |

THANK YOU FOR MAKING GE APPLIANCES A PART OF YOUR HOME.
Whether you grew up with GE Appliances, or this is your first, we’re happy to have you in the family.
We take pride in the craftsmanship, innovation and design that goes into every GE Appliances product, and we think you will too. Among other things, registration of your appliance ensures that we can deliver important product information and warranty details when you need them.
Register your GE appliance now online. Helpful websites and phone numbers are available in the Consumer Support section of this Owner’s Manual. You may also mail in the pre-printed registration card included in the packing material.
2 |
|
49-40678-3 |

IMPORTANT SAFETY INFORMATION
READ ALL INSTRUCTIONS BEFORE USING THE APPLIANCE

 WARNING To reduce the risk of burns, electric shock, fire, injury to persons, or exposure to excessive microwave energy:
When using electrical appliances, basic safety precautions should be followed, including the following:
Ŷ 5HDG DOO LQVWUXFWLRQV EHIRUH XVLQJ WKLV DSSOLDQFH
Ŷ 5HDG DQG IROORZ WKH VSHFLILF SUHFDXWLRQV LQ WKH
PRECAUTIONS TO AVOID POSSIBLE EXPOSURE TO EXCESSIVE MICROWAVE ENERGY section on page 7.
Ŷ 8VH WKLV DSSOLDQFH RQO\ IRU LWV LQWHQGHG XVH DV described in this manual. Do not use corrosive chemicals or vapors in this appliance. This oven is specifically designed to heat, dry or cook food, and is not intended for laboratory or industrial use.
Ŷ 7KLV DSSOLDQFH PXVW RQO\ EH VHUYLFHG E\ TXDOLILHG service personnel. Contact nearest authorized service facility for examination, repair or adjustment.
INSTALLATION
Ŷ ,QVWDOO RU ORFDWH WKLV DSSOLDQFH RQO\ LQ DFFRUGDQFH with the provided installation instructions.
ŶThis appliance must be grounded. Connect only to properly grounded outlet. See “GROUNDING INSTRUCTIONS” found on page 7.
Ŷ 7KLV PLFURZDYH RYHQ LV 8/ OLVWHG IRU LQVWDOODWLRQ RYHU both gas (less than 60,000BTU) and electric ranges.
Ŷ 7KLV RYHU WKH UDQJH RYHQ LV GHVLJQHG IRU XVH RYHU UDQJHV QR ZLGHU WKDQ Ǝ ,W PD\ EH LQVWDOOHG RYHU ERWK JDV DQG HOHFWULF FRRNLQJ HTXLSPHQW
Ŷ Do not operate this appliance if it has a damaged power cord or plug, if it is not working properly, or if it has been damaged or dropped.
Ŷ .HHS FRUG DZD\ IURP KHDWHG VXUIDFHV
ŶDo not let cord hang over the edge of the table or counter
Ŷ 'R QRW LPPHUVH FRUG RU SOXJ LQ ZDWHU
Ŷ 'R QRW FRYHU RU EORFN DQ\ RSHQLQJV RQ WKH appliance.
Ŷ 'R QRW VWRUH WKLV DSSOLDQFH RXWGRRUV 'R QRW XVH WKLV product near water—for example, in a wet basement, near a swimming pool, near a sink or in similar locations.
Ŷ 'R QRW PRXQW WKLV DSSOLDQFH RYHU D VLQN
TO REDUCE THE RISK OF FIRE IN THE CAVITY:
Ŷ Do not overcook food. Carefully attend appliance when paper, plastic or other combustible materials are placed inside the oven to facilitate cooking.
Ŷ 5HPRYH ZLUH WZLVW WLHV DQG PHWDO KDQGOHV IURP paper or plastic containers before placing them in the oven.
Ŷ ,I PDWHULDOV LQVLGH WKH RYHQ LJQLWH NHHS WKH RYHQ door closed, turn the oven off and disconnect the power cord or shut off power at the fuse or circuit breaker panel.
Ŷ 'R QRW VWRUH DQ\ PDWHULDOV LQ WKLV RYHQ ZKHQ QRW LQ use. Do not leave paper products, cooking utensils or food in the cavity when not in use. All racks should be removed from oven when not in use.
Ŷ 'R QRW RSHUDWH WKH PLFURZDYH IHDWXUH ZLWKRXW IRRG LQ the oven.
Ŷ 'R QRW XVH WKH 6HQVRU )HDWXUHV WZLFH LQ VXFFHVVLRQ on the same food portion. If food is undercooked
DIWHU WKH ILUVW FRXQWGRZQ XVH &22. %< 7,0( IRU additional cooking time.
Ŷ 7KH ZLUH RYHQ UDFN VKRXOG QRW EH XVHG IRU speedcook or microwave cooking to prevent arcing
TO REDUCE THE RISK OF BURNS:
Ŷ %H FDUHIXO ZKHQ RSHQLQJ FRQWDLQHUV RI KRW IRRG 8VH pot holders and direct steam away from face and hands.
Ŷ 9HQW SLHUFH RU VOLW FRQWDLQHUV SRXFKHV RU SODVWLF bags to prevent build-up of pressure.
Ŷ %H FDUHIXO ZKHQ WRXFKLQJ WKH WXUQWDEOH GRRU UDFNV or walls of the oven which may become hot during use.
Ŷ /LTXLGV DQG FHUWDLQ IRRGV KHDWHG LQ WKH PLFURZDYH oven can present a risk of burn when removing them from the microwave. The potential for a burn is greater in young children, who should not be allowed to remove hot items from the microwave.
INFORMATION SAFETY
READ AND SAVE THESE INSTRUCTIONS
49-40678-3 |
3 |

SAFETY INFORMATION
IMPORTANT SAFETY INFORMATION
READ ALL INSTRUCTIONS BEFORE USING THE APPLIANCE

 WARNING Continued OPERATING
Ŷ $V ZLWK DQ\ DSSOLDQFH FORVH VXSHUYLVLRQ LV necessary when used by children.
Ŷ 'R QRW RSHUDWH WKH RYHQ ZLWKRXW WKH WXUQWDEOH LQ place. The turntable must be unrestricted so it can turn.
Ŷ 'R QRW VWRUH DQ\WKLQJ GLUHFWO\ RQ WRS RI WKH microwave oven surface when the microwave oven is in operation.
Ŷ 2YHUVL]HG IRRGV RU RYHUVL]HG PHWDO XWHQVLOV VKRXOG not be inserted in a microwave/convection oven as they may create a fire or risk of electric shock.
Ŷ Do not use paper products in oven when appliance is operating in any cooking mode except microwave.
Ŷ 6RPH SURGXFWV VXFK DV ZKROH HJJV DQG VHDOHG containers—for example, closed jars—are able to explode and should not be heated in this oven.
Ŷ 'R QRW RYHUFRRN SRWDWRHV 7KH\ FRXOG GHK\GUDWH DQG catch fire, causing damage to your oven.
Ŷ 'R QRW FRYHU UDFNV RU DQ\ RWKHU SDUW RI WKH RYHQ ZLWK meal foi. This will cause overheating of the oven.
Ŷ &RRN PHDW DQG SRXOWU\ WKRURXJKO\
PHDW WR DW OHDVW DQ ,17(51$/ WHPSHUDWXUH RI ) and poultry to at least an INTERNAL temperature
RI ) &RRNLQJ WR WKHVH WHPSHUDWXUHV XVXDOO\ protects against foodborne illness.
Ŷ 7KLV RYHQ LV QRW DSSURYHG RU WHVWHG IRU PDULQH XVH
CLEANING
Ŷ .HHS WKH RYHQ IUHH IURP JUHDVH EXLOGXS
Ŷ 'R QRW FOHDQ ZLWK PHWDO VFRXULQJ SDGV 3LHFHV FDQ burn off the pad and touch electrical parts involving a risk of electric shock.
Ŷ :KHQ FOHDQLQJ VXUIDFHV RI GRRU DQG RYHQ WKDW comes together on closing the door, use only mild, nonabrasive soaps, or detergents applied with a clean sponge or soft cloth. Rinse well.
SUPER HEATED WATER
Ŷ /LTXLGV VXFK DV ZDWHU FRIIHH RU WHD DUH DEOH WR be overheated beyond the boiling point without appearing to be boiling. Visible bubbling or boiling when the container is removed from the microwave oven is not always present. THIS COULD RESULT IN VERY HOT LIQUIDS SUDDENLY BOILING OVER WHEN THE CONTAINER IS DISTURBED OR A SPOON OR OTHER UTENSIL IS INSERTED INTO THE LIQUID.
Ŷ 7R UHGXFH WKH ULVN RI LQMXU\ WR SHUVRQV
'R QRW RYHUKHDW WKH OLTXLG
6WLU WKH OLTXLG ERWK EHIRUH DQG KDOIZD\ WKURXJK heating it.
-Do not use straight-sided containers with narrow necks.
-After heating, allow the container to stand in the microwave oven for a short time before removing the container.
-Use extreme care when inserting a spoon or other utensil into the container.
WARNING Arcing can occur during both speedcooking and microwave cooking. If you see arcing, press the CANCEL/OFF pad and correct the problem.
Arcing is the microwave term for sparks in the oven. Arcing is caused by:
Ŷ 0HWDO RU IRLO WRXFKLQJ WKH VLGH RI WKH RYHQ
Ŷ )RLO QRW PROGHG WR IRRG XSWXUQHG HGJHV DFW OLNH antennas).
Ŷ 8VH IRLO RQO\ DV UHFRPPHQGHG LQ WKLV PDQXDO
Ŷ 0HWDO FRRNZDUH XVHG GXULQJ HLWKHU VSHHGFRRN RU microwave cooking (except for the pans provided with the oven).
Ŷ 0HWDO VXFK DV WZLVW WLHV SRXOWU\ SLQV RU gold-rimmed dishes, in the oven.
Ŷ 5HF\FOHG SDSHU WRZHOV FRQWDLQLQJ VPDOO PHWDO pieces being used in the oven.
READ AND SAVE THESE INSTRUCTIONS
4 |
49-40678-3 |
IMPORTANT SAFETY INFORMATION
READ ALL INSTRUCTIONS BEFORE USING THE APPLIANCE
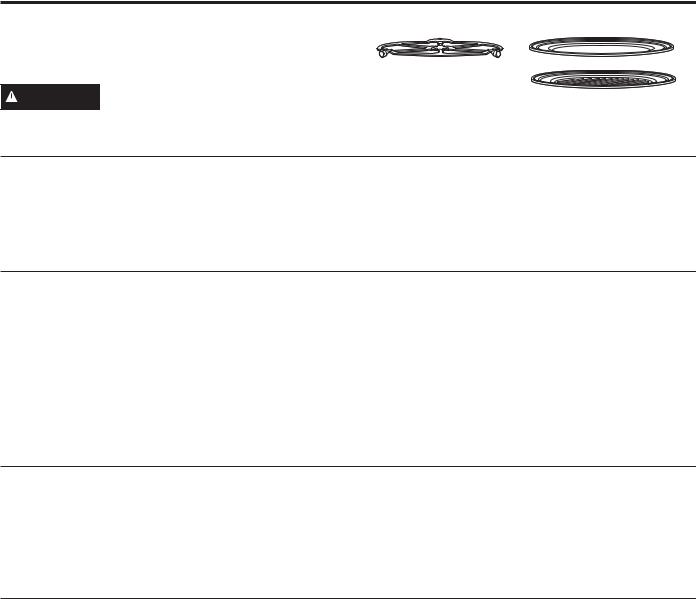
 WARNING SPEEDCOOK OVEN-SAFE COOKWARE
Ŷ The oven and door will get very hot when speedcooking.
Ŷ Cookware will become hot because of heat transferred from the heated food. Oven mitts will be needed to handle the cookware.
Ŷ 'R QRW XVH FRYHULQJV FRQWDLQHUV RU FRRNLQJ roasting bags made of foil, plastic, wax or paper when speedcooking.
Ŷ 'R QRW FRYHU WKH WXUQWDEOH ZLUH RYHQ UDFN WUD\V RU any part of the oven with metal foil. This will cause arcing in the oven.
Ŷ 8VH WKH QRQ VWLFN PHWDO WUD\ LQ WKH VDPH ZD\ \RX would use a shallow baking pan or baking tray.
Ŷ 3ODFH IRRG GLUHFWO\ RQ WKH WUD\V ZKHQ FRRNLQJ unless prompted by the oven to do otherwise.
Ŷ 'R QRW XVH WKH ZLUH RYHQ UDFN IRU VSHHGFRRNLQJ
Ŷ $Q\ RYHQ VDIH GLVK FDQ EH XVHG LQ \RXU RYHQ
Recipes in the Advantium Cookbook were tested in Pyrex® glass cookware and Corningware® ceramic casseroles. Cook times and results may vary when using other types of oven-safe dishes. Place them directly on the trays.
Ŷ 8VH RI WKH FOHDU JODVV WUD\ ZKHQ VSHHGFRRNLQJ ZLOO result in inferior cooking performance.
The turntable must always |
Put food directly on the metal |
be in place when using the |
tray to speedcook, convection |
oven. |
bake, warm or toast. |
Put food directly on the metal grill tray to speedcook.
INFORMATION SAFETY

 WARNING OVEN-SAFE COOKWARE FOR BAKING, BROILING, WARMING, PROOFING & TOASTING
Ŷ The oven and door will get very hot when baking, broiling, warming, proofing or toasting.
Ŷ Cookware will become hot. Oven mitts will be needed to handle the cookware.
Ŷ 'R QRW FRYHU GLVKHV RU XVH SODVWLF FRQWDLQHUV plastic cooking/roasting bags, plastic wrap, wax paper or paper when broiling or toasting.
Ŷ 8VH WKH QRQ VWLFN PHWDO WUD\ LQ WKH VDPH ZD\ \RX would use a shallow baking pan or baking tray.
Ŷ 8VH WKH DOXPLQXP EDNLQJ VKHHW RQ WKH ZLUH RYHQ rack, and place them on the non-stick metal tray when baking on two levels, broiling or toasting foods.
Ŷ 3ODFH IRRG GLUHFWO\ RQ WKH WUD\V ZKHQ FRRNLQJ unless prompted by the oven to do otherwise.
Ŷ $Q\ RYHQ VDIH GLVK FDQ EH XVHG LQ \RXU RYHQ
Recipes in the Advantium Cookbook were tested in Pyrex® glass cookware and Corningware® ceramic casseroles. Cook times and results may vary when using other types of oven-safe dishes. Place them directly on the trays.
Ŷ 8VH RI WKH FOHDU JODVV WUD\ ZKHQ EDNLQJ EURLOLQJ warming, proofing or toasting will result in inferior cooking performance.
Put food directly on the metal
JULOO WUD\ DV UHTXLUHG WR EURLO
The turntable must always be in place when using the oven.
Put food directly on the metal tray or in the appropriate dish and place on wire oven rack when baking or warming.
Put food or oven-safe cookware directly on the metal tray to convection bake, warm or toast.
READ AND SAVE THESE INSTRUCTIONS
49-40678-3 |
5 |

SAFETY INFORMATION
IMPORTANT SAFETY INFORMATION
READ ALL INSTRUCTIONS BEFORE USING THE APPLIANCE
 WARNING MICROWAVE-SAFE COOKWARE
Make sure to use suitable cookware during microwave cooking. Most glass casseroles, cooking dishes, measuring cups, custard cups, pottery or china dinnerware which does not have metallic trim or glaze with a metallic sheen can be used. Some cookware is labeled “suitable for microwaving.”
Ŷ 3ODFH IRRG RU PLFURZDYDEOH FRQWDLQHU GLUHFWO\ RQ the clear glass tray to cook your food.
Ŷ 8VH RI WKH QRQ VWLFN PHWDO WUD\ GXULQJ PLFURZDYH cooking will result in inferior cooking performance.
Ŷ &RRNZDUH PD\ EHFRPH KRW EHFDXVH RI KHDW transferred from the heated food. Oven mitts may be needed to handle the cookware.
Ŷ 'R QRW XVH UHF\FOHG SDSHU SURGXFWV 5HF\FOHG paper towels, napkins and waxed paper may contain metal flecks which could cause arcing or ignite. Paper products containing nylon or nylon filaments should be avoided, as they may also ignite.
Ŷ 8VH IRLO RQO\ DV GLUHFWHG LQ WKLV PDQXDO :KHQ XVLQJ
IRLO LQ WKH RYHQ NHHS WKH IRLO DW OHDVW Ǝ DZD\ IURP the sides of the oven.
Ŷ ,I \RX XVH D PHDW WKHUPRPHWHU ZKLOH FRRNLQJ PDNH sure it is safe for use in microwave ovens.
Ŷ 6RPH IRDP WUD\V OLNH WKRVH WKDW PHDW LV SDFNDJHG on) have a thin strip of metal embedded in the bottom. When microwaved, the metal can burn the floor of the oven or ignite a paper towel.
Ŷ 3DSHU WRZHOV ZD[HG SDSHU DQG SODVWLF ZUDS FDQ EH used to cover dishes in order to retain moisture and prevent spattering. Be sure to vent plastic wrap so steam can escape.
Ŷ 1RW DOO SODVWLF ZUDS LV VXLWDEOH IRU XVH LQ PLFURZDYH ovens. Check the package for proper use.
Ŷ ³%RLODEOH´ FRRNLQJ SRXFKHV DQG WLJKWO\ FORVHG SODVWLF bags should be slit, pierced or vented as directed by package. If they are not, plastic could burst during or immediately after cooking, possibly resulting in injury. Also, plastic storage containers should be at least partially uncovered because they form a tight seal. When cooking with containers tightly covered with plastic wrap, remove covering carefully and direct steam away from hands and face.
Ŷ 3ODVWLF FRRNZDUH 3ODVWLF FRRNZDUH GHVLJQHG IRU microwave cooking is very useful, but should be used carefully. Even microwave-safe plastic may not be as tolerant of overcooking conditions as are glass or ceramic materials and may soften or char if subjected to short periods of overcooking. In longer exposures to overcooking, the food and cookware could ignite.
Ŷ 'R QRW XVH WKH ZLUH RYHQ UDFN IRU PLFURZDYLQJ
)ROORZ WKHVH JXLGHOLQHV
1.Use microwave-safe plastics only and use them in strict compliance with the cookware manufacturer’s recommendations.
2.Do not microwave empty containers.
3.Do not permit children to use plastic cookware without complete supervision.
The turntable must always |
The clear glass tray |
be in place when using the |
should always be in place |
oven. |
when microwaving. |
READ AND SAVE THESE INSTRUCTIONS
6 |
49-40678-3 |

IMPORTANT SAFETY INFORMATION
READ ALL INSTRUCTIONS BEFORE USING THE APPLIANCE
PRECAUTIONS TO AVOID POSSIBLE EXPOSURE TO EXCESSIVE MICROWAVE ENERGY
(a)Do Not Attempt to operate this oven with the door open since open-door operation can result in harmful exposure to microwave energy. It is important not to defeat or tamper with the safety interlocks.
(b)Do Not Place any object between the oven front face and the door or allow soil or cleaner residue to accumulate on sealing surfaces.
(c)Do Not Operate the oven if it is damaged.
It is particularly important that the oven door close properly and that there is no damage to the:
(1)door (bent),
(2)hinges and latches (broken or loosened),
(3)door seals and sealing surfaces.
(d)The Oven Should Not be adjusted or repaired by
DQ\RQH H[FHSW SURSHUO\ TXDOLILHG VHUYLFH SHUVRQQHO
GROUNDING INSTRUCTIONS

 WARNING Improper grounding can result in a risk of electric shock.
7KLV DSSOLDQFH PXVW EH FRQQHFWHG WR D JURXQGHG PHWDOOLF SHUPDQHQW ZLULQJ V\VWHP RU DQ HTXLSPHQW JURXQGLQJ
FRQGXFWRU VKRXOG EH UXQ ZLWK WKH FLUFXLW FRQGXFWRUV DQG FRQQHFWHG WR WKH HTXLSPHQW JURXQGLQJ WHUPLQDO RU OHDG on the appliance.
READ AND SAVE THESE INSTRUCTIONS
INFORMATION SAFETY
49-40678-3 |
7 |

SAFETY INFORMATION
IMPORTANT SAFETY INFORMATION
READ ALL INSTRUCTIONS BEFORE USING THE APPLIANCE
THE VENT FAN
The fan will operate automatically under certain
FRQGLWLRQV VHH 9HQW )DQ VHFWLRQ 7DNH FDUH WR prevent the starting and spreading of accidental cooking fires while the vent fan is in use.
ŶClean the underside of the Advantium often. Do not allow grease to build up on the Advantium or the fan filters.
ŶIn the event of a grease fire on the surface units below the Advantium, smother a flaming pan on the surface unit by covering the pan completely with a lid, a cookie sheet or a flat tray.
ŶUse care when cleaning the vent fan filters. Corrosive cleaning agents, such as lye-based oven cleaners, may damage the filters.
ŶWhen preparing flaming foods under the Advantium, turn the fan on.
ŶNever leave surface units beneath your Advantium unattended at high heat settings. Boilovers cause smoking and greasy spillovers that may ignite and spread if the Advantium vent fan is operating. To
PLQLPL]H DXWRPDWLF IDQ RSHUDWLRQ XVH DGHTXDWH sized cookware and use high heat on surface units only when necessary.
NOTICE: PACEMAKERS
Most pacemakers are shielded from interference from electronic products, including microwaves. However, patients with pacemakers may wish to consult their physicians if they have concerns.
STATE OF CALIFORNIA PROPOSITION 65 WARNINGS
 WARNING This product contains one or more chemicals known to the State of California to cause cancer, and birth defects or other reproductive harm.
READ AND SAVE THESE INSTRUCTIONS
8 |
49-40678-3 |
Getting to Know Advantium
What is Advantium?
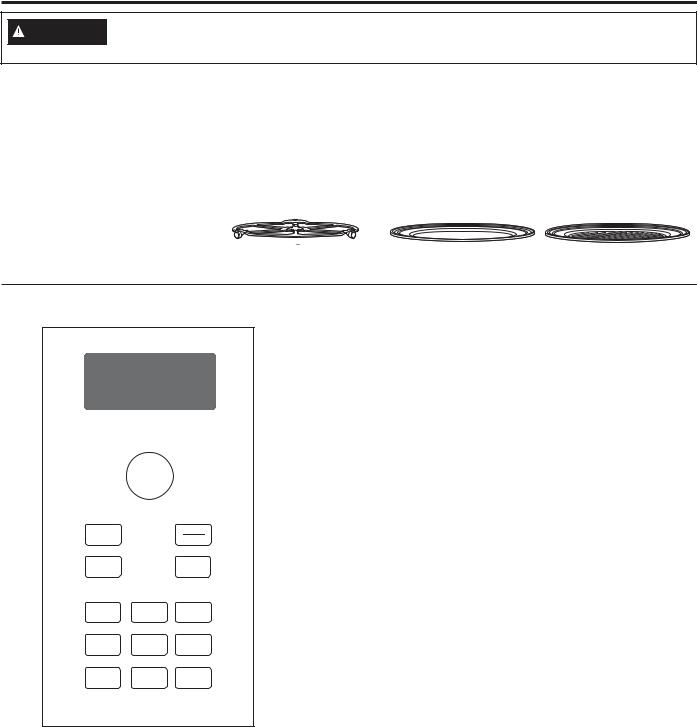
The new Advantium oven uses breakthrough Speedcook technology to harness the power of light. The Advantium oven cooks the outside of foods much like conventional radiant heat, while also penetrating the surface so the inside cooks simultaneously.
While halogen light is the primary source of power, a convection system and ceramic heater assists in
the cooking, with a “microwave boost” added in some
FRRNLQJ DOJRULWKPV )RRG FRRNV HYHQO\ DQG IDVW retaining its natural moisture.
The Advantium oven is capable of speedcooking, convection baking, broiling, toasting, warming, proofing and microwaving. The Speedcook feature is the biggest benefit of the Advantium oven.
1R SUHKHDWLQJ LV UHTXLUHG WR VSHHGFRRN 3ODFH WKH IRRG in the oven and start cooking immediately. Time is saved because there is no preheat and because speedcook cooks faster.
$GYDQWLXPQRZ.WR*HWWLQJ ADVANTIUM:
49-40678-3 |
9 |

ADVANTIUM: )HDWXUHV
Features
Throughout this manual, features and appearance may vary from your model.
1 |
3 |
4 |
|
||
|
2 |
|
5 |
10 |
6 |
11 |
|
9 |
7 |
8 |
|
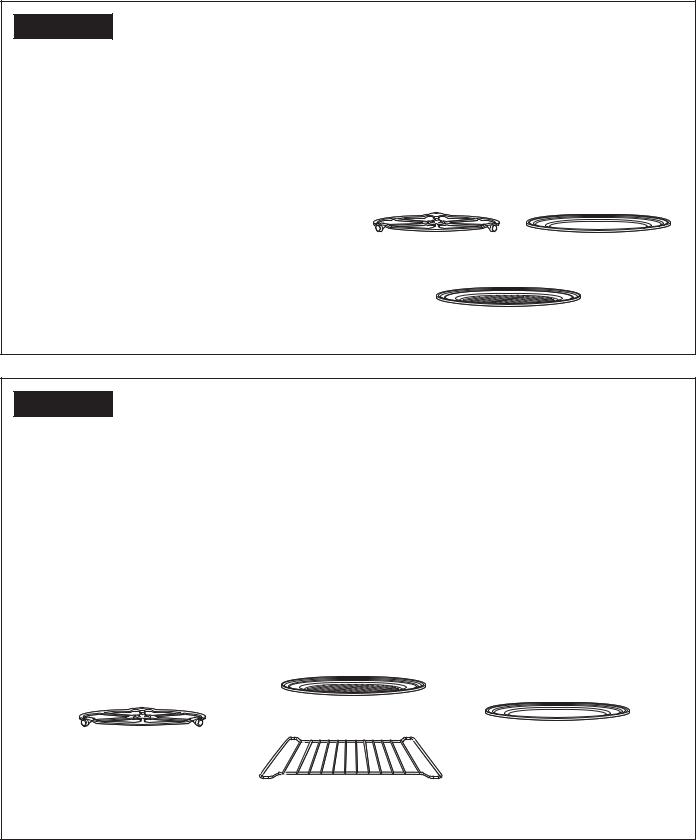
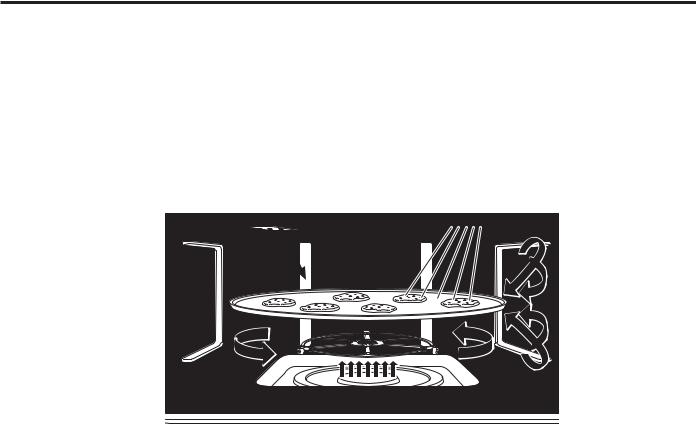
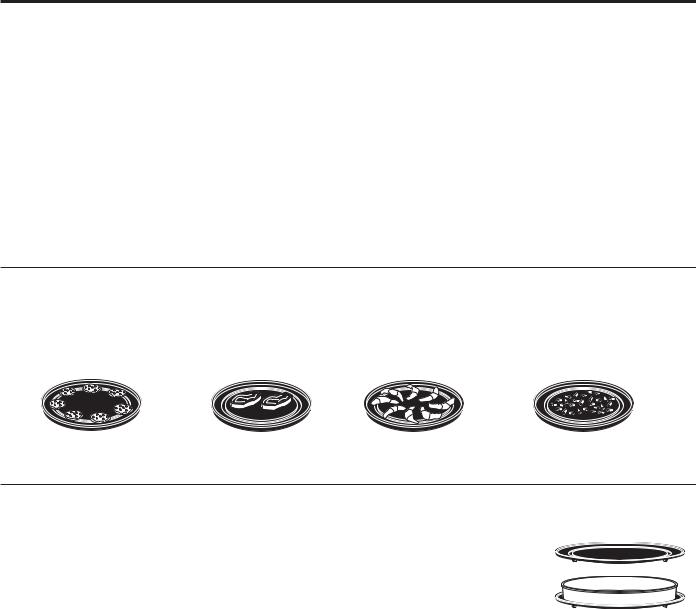
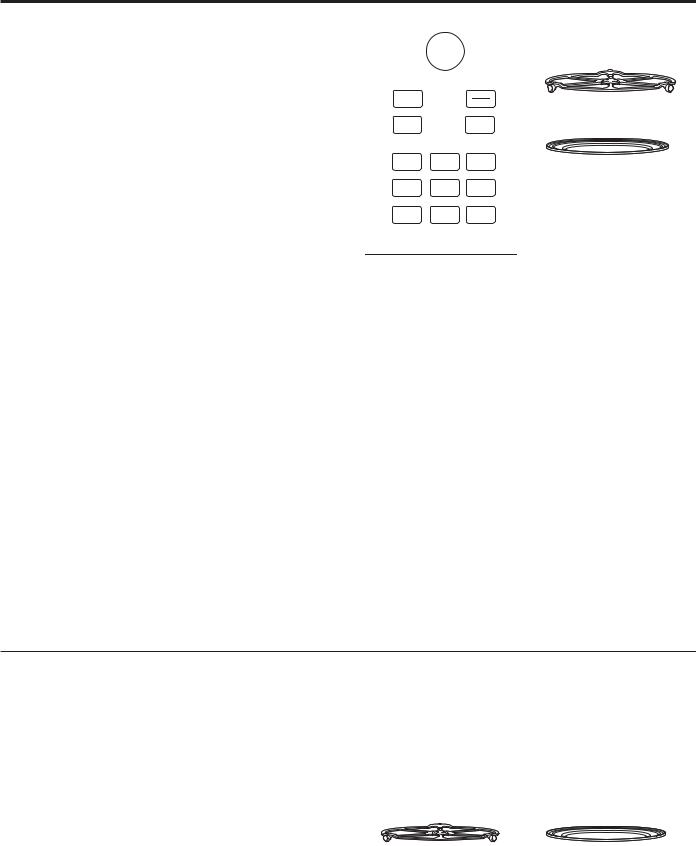
1.Turntable
The turntable must always be in place, on the oven floor, for all cooking. Be sure the turntable is seated securely over the spindle in the center of the oven.
2.Metal Tray or Metal Grill Tray
Put food directly on the metal tray and place on the turntable when using the speedcook, broil, and toast.
3.Wire Oven Rack
Put food directly on a metal tray or in an oven-safe dish on the wire oven rack only when convection baking or warming.
4.Clear Glass Tray
Place on the turntable when using the microwave features. Place food or microwave-safe cookware directly on the tray.
5.Upper Halogen Lamps
Two 1200W halogen lamps cook food from above in speedcook, broil and toast.
6.Window
Allows cooking to be viewed while keeping microwaves confined in the oven.
7.Door Handle
Pull to open the door.
8.Door Latches
The door must be securely latched for the oven to operate.
9.Lower Ceramic Heater
One 500W ceramic heater cooks food from the bottom in speedcook, broil and toast.
10.Control Panel
The pads used to operate the oven are located on the control panel.
11.Convection System
One 1550W heating element cooks food with a convection fan circulating the hot air throughout the cavity in speedcook, broil, convection bake, toast and warm.
10 |
49-40678-3 |
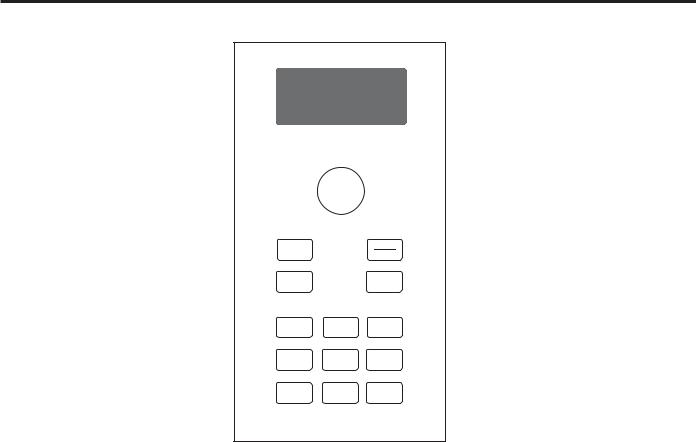
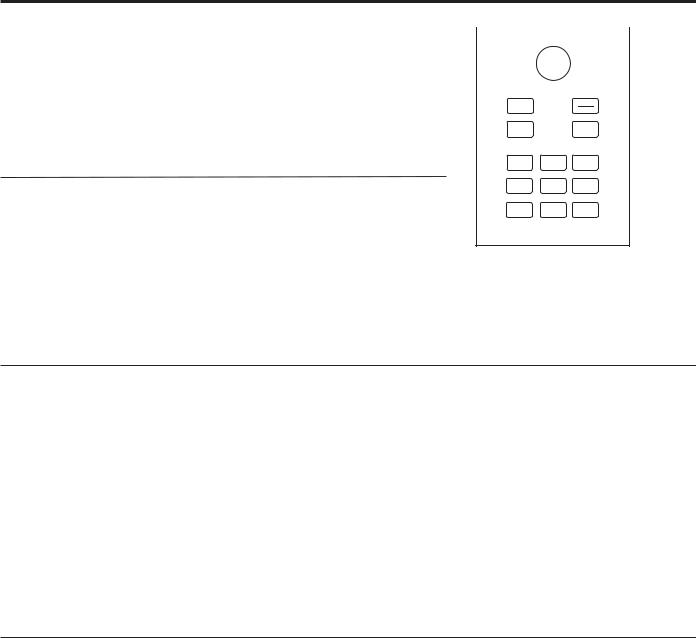
Controls
With your Advantium oven, you can cook with high-intensity halogen lights, ceramic heaters and convection heating element, and/or conventional microwave energy.
|
|
to S |
|
|
rn |
el |
|
|
e |
||
u |
|
c |
|
|
t |
||
T |
|
|
|
|
P |
|
|
|
r |
|
|
r |
|
|
te |
|
|
|
|
e |
n |
|
||
|
|
|
|
ss toE |
|
|
Back |
|
|
|
|
|
Start |
|
|
|
|
|
Pause |
|
|
|
|
|
|
|
|
Help |
|
|
|
|
|
Cancel |
|
|
|
|
|
Off |
|
|
|
|
|
|
|
|
|
|
|
|
|
|
Lock Controls |
|
|
|
|
|
|
Hold 3 Sec |
Speed |
Convection |
Micro |
||||
Cook |
|
|
|
Bake |
|
wave |
Settings |
|
|
Options |
|
Add |
|
|
|
|
30 Sec |
|||
|
|
|
|
|
|
|
Timer |
|
|
Surface |
|
Vent Fan |
|
On/Off |
|
|
|
Light |
|
|
|
|
|
|
|
||
SELECTOR DIAL
Turn to select. Press to enter.
Turn to select food, power level, or temperature selections. Also use the dial to increase (turn clockwise) or decrease (turn counterclockwise) time. Simply press the button to enter the selection.
BACK
Press this pad to step back one or more levels in the programming process.
HELP
Press this pad to find out more about your oven’s features.
DISPLAY
Shows feature selections and information about the oven when in use.
START/PAUSE
Press this pad to start or pause any cooking function.
CANCEL/OFF
Press this pad to cancel ALL oven programs except clock, auto night light, timer, vent fan, and surface light.
SPEEDCOOK
Press this pad to access the pre-set speedcook menu or to set your own speedcook program.
CONVECTION BAKE
Press this pad to use convection bake.
MICROWAVE
Press this pad to access the microwave menu or to set your own microwave program.
SETTINGS
Press this pad to set the clock and access Turntable On/Off, Auto Conversion, Auto Nightlight, Beeper Volume, Reminder, and Temperature Units.
OPTIONS
Press this pad to access Repeat Last, Broil, Proof, Toast, Warm and Delay Start.
ADD 30 SEC
Starts the microwave for 30 seconds of cooking time. An additional 30 seconds is added to the remaining cooking time each time the pad is pressed.
TIMER ON/OFF
Press this pad to set a minute and seconds timer.
SURFACE LIGHT
Press this pad to turn the cooktop light on and off.
VENT FAN
Press this pad to turn the vent fan on and off.
Controls ADVANTIUM:
49-40678-3 |
11 |
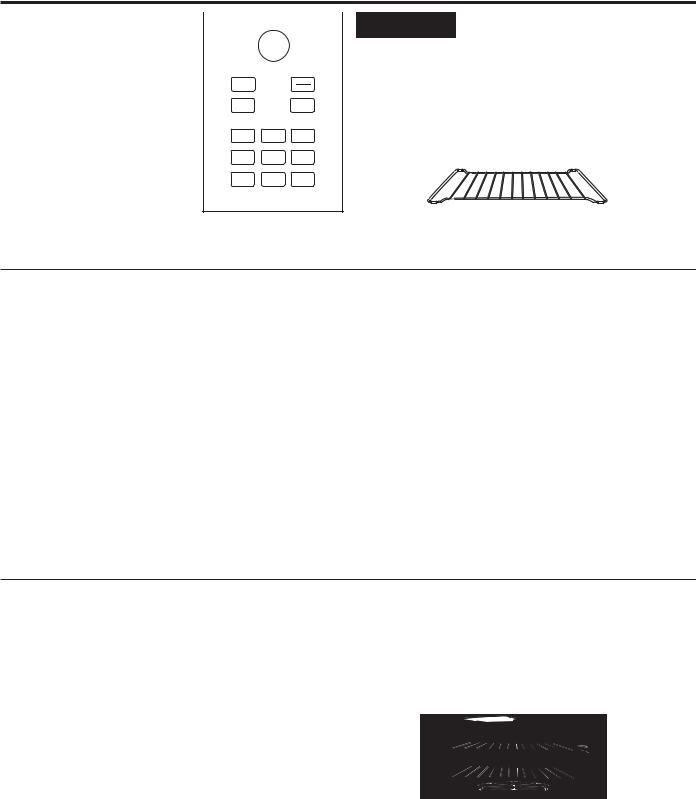
SPEEDCOOKING
Speedcooking
WARNING When using speedcook programs, remember that the oven, door and dishes will be very hot!
Prior to the first use of your oven, the clock must be set. See the Clock section.
Before you begin, make sure the turntable is in place. Use the metal tray and your own glass or ceramic cookware, if needed.
Ŷ ,I WKH GRRU LV RSHQHG GXULQJ FRRNLQJ WKH RYHQ ZLOO VWRS Ŷ 6SHHGFRRNLQJ PHDWV LQ WKH RYHQ PD\ SURGXFH VPRNH
and PAUSE will appear in the display. Close the door
and press the START/PAUSE pad to resume cooking. Ŷ 7R FRRN IRU DGGLWLRQDO WLPH DIWHU D FRRNLQJ F\FOH KDV been completed, use the Resume feature as instructed
Ŷ $W DQ\ WLPH GXULQJ FRRNLQJ \RX FDQ FKDQJH WLPH RU on the display. power levels by selecting EDIT.
The turntable must always be in |
Put food directly on the metal tray or metal grill |
place when using the oven. |
tray to speedcook. |
Speedcook Power Level
|
rn |
to Se |
|
|
|
le |
|
||
u |
|
c |
||
T |
|
|
|
t |
|
P |
|
|
|
r |
|
|
r |
|
|
te |
|
|
|
|
e |
n |
|
||
|
|
|
|
ss toE |
|
|
Back |
|
|
|
|
|
Start |
|
|
|
|
|
Pause |
|
|
|
|
|
|
|
|
Help |
|
|
|
|
|
Cancel |
|
|
|
|
|
Off |
|
|
|
|
|
|
|
|
|
|
|
|
|
|
Lock Controls |
|
|
|
|
|
|
Hold 3 Sec |
Speed |
Convection |
Micro |
||||
Cook |
|
|
|
Bake |
|
wave |
Settings |
|
|
Options |
|
Add |
|
|
|
|
30 Sec |
|||
|
|
|
|
|
|
|
Timer |
|
|
Surface |
|
Vent Fan |
|
On/Off |
|
|
|
Light |
|
|
|
|
|
|
|
||
The Advantium uses power from high intensity halogen lamps, a ceramic heater, a convection system and microwaves to cook food from the top, bottom and interior simultaneously to seal in moisture and flavor.
When using the pre-set menu foods, the power levels are already selected for you. However, power levels can be adjusted when using pre-set menu foods and MY RECIPE.
Each power level gives you halogen lamp or ceramic heater power and microwave energy for a certain percentage of the time or provides heating from the convection system.
)RU H[DPSOH
U–07 Upper halogen lamp and ceramic heater on 70% of the time.
L–07 Lower ceramic heater on 70% of the time. M–03 Microwave on 30% of the time.
&± &RQYHFWLRQ HOHPHQW KHDWV RYHQ WR )
NOTE: Be careful when adjusting power levels so that you do not overcook or undercook food.
3UHVV WKH 63(('&22. SDG DQG VHOHFW \RXU IRRG
(follow instructions from Using the pre-set speedcook menu).
2.When display shows EDIT, SAVE or START, turn the dial to select EDIT.
If you do not want to change one of the settings, just press the dial to move to the next selection.
3.Press the dial if you do not want to adjust cooking time.
4.Turn the dial clockwise to increase or counterclockwise to decrease the upper power level. Press the dial to enter.
5.Turn the dial to change the lower power level. Press the dial to enter.
6.Turn the dial to change the microwave power level. Press the dial to enter.
7.Turn the dial to change the convection power level. Press the dial to enter.
8.Press the Start/Pause pad or the selector dial to start cooking.
12 |
49-40678-3 |
Speedcooking
Speedcook Power Level (cont)
Follow these general guidelines when selecting the best U=, L=, M= and C= settings for your favorite recipes:
8 6HOHFW D KLJKHU VHWWLQJ IRU WKLQ IRRGV UHTXLULQJ a golden brown top (example: fish fillets, toast, boneless chicken breasts). Select a lower setting for thicker foods and foods with high sugar or fat content (example: muffins, roasts, casseroles) or
WKDW UHTXLUH D ORQJHU FRRN WLPH
L = Select a higher setting for thick or dense foods that
M = Select a higher setting to shorten cooking time for dense or heavy foods (example: casseroles, whole chicken). Select a lower setting for delicate foods
H[DPSOH EUHDGV RU IRRGV UHTXLULQJ ORQJHU FRRN times for tender results (example: stew, pot roast).
C = Select a lower setting for more delicate foods that cook at lower temperatures. Select a higher setting (7 or above) for more robust foods or foods that
FRRN DW WHPSHUDWXUHV DERYH )
PD\ QRW FRRN TXLFNO\ LQ WKH FHQWHU H[DPSOH VWHDNV casseroles). Select a lower setting for thin foods (example: cookies).
Cooking Tips
Arrange food on the metal trays as shown to ensure |
)UHVK PHDW FKLFNHQ ILVK RU VHDIRRG WKDW KDV EHHQ IUR]HQ |
|
consistent and even browning. |
should be thawed before cooking. (The microwave de- |
|
Foods can touch but should not overlap. |
IURVW IHDWXUH FDQ EH XVHG )RU RWKHU IUR]HQ SUHSDFNDJHG |
|
foods, follow package directions. |
||
|
SPEEDCOOKING
Circular pattern |
Side by side pattern |
Spoke pattern |
Single layer |
(Example: biscuits, cookies) |
(Example: meats and poultry) |
(Example: crescent |
(Example: appetizers) |
|
|
rolls, breadsticks) |
|
Speedcook Cookware
Ŷ &RRNZDUH ZLOO EHFRPH KRW 2YHQ PLWWV ZLOO EH QHHGHG |
Ŷ |
|
to handle the cookware. |
Ŷ |
|
Ŷ )ROORZ FRRNZDUH VXJJHVWLRQV RQ WKH RYHQ GLVSOD\ RU |
||
|
||
in the Cookbook. |
|
|
Ŷ 3ODFH IRRG GLUHFWO\ RQ WKH PHWDO WUD\ ZKHQ FRRNLQJ |
|
|
unless prompted by the oven to do otherwise. |
Ŷ |
|
Ŷ 8VH WKH PHWDO WUD\ LQ WKH VDPH ZD\ \RX ZRXOG XVH D |
|
|
shallow baking pan or baking tray. |
|
|
Ŷ ,Q DGGLWLRQ WR WKH FRRNZDUH SURYLGHG \RX FDQ XVH |
|
|
non-metal casserole dishes, pie plates and other |
|
|
heat-safe cookware. Place them directly on the metal |
|
|
tray. |
|
%H VXUH WR VHOHFW D VL]H WKDW ZLOO URWDWH HDVLO\
3ODFH WKH PHWDO WUD\ RQ WKH turntable. Place glass or ceramic cookware on the tray.
'R QRW XVH FRRNZDUH RU
coverings made of paper, plastic, or foil when cooking during a speedcook cycle.
49-40678-3 |
13 |
SPEEDCOOKING
Speedcooking
Pre-set Speedcook Menu
|
rn |
to Se |
|
|
|
le |
|
||
u |
|
c |
||
T |
|
|
|
t |
|
P |
|
|
|
r |
|
|
r |
|
|
te |
|
|
|
|
e |
n |
|
||
|
|
|
|
ss toE |
|
|
Back |
|
|
|
|
|
Start |
|
|
|
|
|
Pause |
|
|
|
|
|
|
|
|
Help |
|
|
|
|
|
Cancel |
|
|
|
|
|
Off |
|
|
|
|
|
|
|
|
|
|
|
|
|
|
Lock Controls |
|
|
|
|
|
|
Hold 3 Sec |
Speed |
Convection |
Micro |
||||
Cook |
|
|
|
Bake |
|
wave |
Settings |
|
|
Options |
|
Add |
|
|
|
|
30 Sec |
|||
|
|
|
|
|
|
|
Timer |
|
|
Surface |
|
Vent Fan |
|
On/Off |
|
|
|
Light |
|
|
|
|
|
|
|
||
The Advantium is already pre-set to cook over 175 popular foods.
3UHVV WKH 63(('&22. SDG
If no selection is made within 15 seconds, the display will return to blank.
2.Turn the selector dial to select the type of food category you want. Press the dial to enter.
3.Turn the selector dial to select the specific food (menu selection). Press the dial to enter.
4.Turn the selector dial to select amount, size and/
RU GRQHQHVV LI UHTXLUHG WKH RYHQ ZLOO SURPSW \RX
Press the dial after each selection.
5.Once the display shows: EDIT, SAVE or START press the START/PAUSE pad or the selector dial to start cooking.
7XUQ WKH IRRG RYHU ZKHQ WKH RYHQ VLJQDOV 7851 )22'
OVER (for certain foods).
:KHQ WKH RYHQ VLJQDOV &+(&. IRU '21(1(66 FKHFN to see if your food is done to your liking (for certain foods).
To review settings during cooking, press the selector dial.
If you enter an undesired selection at any time, simply
SUHVV WKH %$&. SDG DQG UH HQWHU WKH GHVLUHG VHOHFWLRQV
Speedcooking meats in the oven may produce smoke.
14 |
49-40678-3 |

Speedcooking
Pre-Set Speedcook Menu Selections
Per USDA Guidelines, cook meat to an INTERNAL |
Cooking to these temperatures usually protects against |
|||||||
WHPSHUDWXUH RI DW OHDVW ) DQG SRXOWU\ WR DQ |
IRRGERUQH LOOQHVV )RU PRUH LQIRUPDWLRQ VHH |
|||||||
,17(51$/ WHPSHUDWXUH RI DW OHDVW ) |
www.foodsafety.gov. |
|
|
|
|
|||
|
|
|
|
|
|
|
|
|
Food Category |
Menu Selection |
|
)ood Category |
Menu Selection |
|
Food Category |
Menu Selection |
|
|
|
|||||||
Appetizers |
Bagel Bites |
|
Chicken |
Bone-In |
|
Sandwich |
Corn Dog (frozen) |
|
|
Cheese Sticks |
|
|
Boneless |
|
|
Crescent Roll Hot Dog |
|
|
(JJ 5ROOV )UR]HQ |
|
|
)LOOHW IUR]HQ |
|
|
Grilled Sandwich |
|
|
Jalapeño Poppers |
|
|
)LQJHU IUR]HQ |
|
|
Pocket Sandwich |
|
|
0HDW %DOOV )UR]HQ |
|
|
)ULHG IUR]HQ |
|
6HDIRRG |
&RG )LOOHWV |
|
|
Nachos |
|
|
Nugget (frozen) |
|
|
)LVK 6WLFNV IUR]HQ |
|
|
Nuts, Roasted |
|
|
Patty (frozen) |
|
|
)UR]HQ %UHDGHG |
|
|
Onion Rings |
|
|
Tender (frozen) |
|
|
2UDQJH 5RXJK\ )LOOHW |
|
|
Pizza Rolls |
|
|
Wings (frozen) |
|
|
Salmon |
|
|
Soft Pretzels (frozen) |
|
|
Whole |
|
|
Shellfish |
|
|
7DTXLWRV IUR]HQ |
|
Desserts |
Brownie Mix |
|
|
Swordfish Steak (1”) |
|
Breads |
Biscuits |
|
|
Cookies |
|
|
Talapia |
|
|
Bread Sticks |
|
|
Pie (fresh fruit) |
|
|
Tuna Steaks |
|
|
Cheese Bread |
|
|
Pie Crust |
|
|
Whitefish/Cod |
|
|
Crescent Rolls |
|
|
Rolls (refrigerated) |
|
Side Dish |
Casserole |
|
|
Dinner Rolls |
|
|
Turnovers |
|
|
Refried Beans (16 oz) |
|
|
Garlic Bread |
|
Entree |
Egg Rolls (frozen) |
|
|
Roasted Asparagus |
|
|
Texas Toast |
|
|
Meatloaf (9x5) |
|
|
Roasted Bell Pepper |
|
Breakfast |
Belgian Waffles |
|
|
7DTXLWRV IUR]HQ |
|
|
Roasted Chilies (3-6) |
|
|
Breakfast Pizza |
|
0HDWV |
)LOHW 0LJQRQ |
|
|
Roasted Corn (1-4) |
|
|
)UHQFK 7RDVW |
|
|
Hamburger |
|
|
Roasted Garlic |
|
|
Hashbrown Patties |
|
|
Lamb Chops |
|
|
Roasted Mixed Vegetables |
|
|
Pancakes (frozen) |
|
|
Pork Chops |
|
|
Scalloped Potatoes |
|
|
Rolls (refrigerated) |
|
|
Ribeye Steak |
|
|
|
|
|
Sausage Biscuit |
|
|
Sirloin Steak |
|
|
|
|
|
Sausage Links |
|
|
Strip Steak |
|
|
|
|
|
Sausage Patties |
|
|
T-Bone Steak |
|
|
|
|
|
Strudel (frozen) |
|
|
Tenderloin |
|
|
|
|
|
Turnovers |
|
3L]]D |
'HOL )UHVK |
|
|
|
|
|
Waffles (frozen) |
|
|
)UR]HQ 3L]]D |
|
|
|
|
|
|
|
|
Use Precooked Crust |
|
|
|
|
|
|
|
Potatoes |
Baked Potato |
|
|
|
|
|
|
|
|
Hashbrown Patties |
|
|
|
|
|
|
|
|
)UR]HQ )ULHV |
|
|
|
|
|
|
|
|
)UR]HQ 1XJJHW |
|
|
|
|
|
|
|
|
Sweet Potato/Yam |
|
|
|
|
|
|
|
|
|
|
|
|
|
SPEEDCOOKING
49-40678-3 |
15 |
SPEEDCOOKING
Speedcooking
Repeat Last
Use this time saving feature for cooking repetitive items like cookies or appetizers.
NOTE: The last program used is stored for two hours.
1.Press OPTIONS and select REPEAT LAST.
2.The last pre-set food will be displayed.
3.Press the START/PAUSE pad or the selector dial to start cooking.
Resume Feature
1.If your food needs to cook a bit longer, you can restart the oven by pressing the START/PAUSE pad or selector dial.
5(680( &22.,1* ZLOO EH GLVSOD\HG DQG WKH RYHQ will restart immediately at 10% of the original time.
The program stays in memory for 5 minutes. After that you will need to begin the program again. See the Pre-Set Speedcook Menu section.
My Recipe - Custom Speedcooking
The Advantium gives you the flexibility to cook your favorite dishes.
If you want to cook a food item that is not among the pre-set selections, use MY RECIPE to custom speedcook.
3UHVV WKH 63(('&22. SDG DQG VHOHFW 0< 5(&,3(
Press the dial to enter. Select NEW RECIPE.
If no entries are made within 15 seconds, the display will return to blank.
2.Turn the selector dial to select the cooking time. Press the dial to enter.
The display will prompt you to select the power level(s).
|
rn |
to S |
el |
ec |
u |
|
|
||
T |
|
|
|
t |
|
P |
|
|
|
|
r |
|
|
r |
|
|
t |
|
te |
|
|
|
e |
ss |
n |
|
||
|
|
|
oE |
|
|
||
Back |
|
|
|
|
|
|
Start |
|
|
|
|
|
|
Pause |
|
|
|
|
|
|
|
|
|
Help |
|
|
|
|
|
|
Cancel |
|
|
|
|
|
|
Off |
|
|
|
|
|
|
|
|
|
|
|
|
|
|
|
|
Lock Controls |
|
|
|
|
|
|
|
Hold 3 Sec |
Speed |
Convection |
Micro |
|||||
Cook |
|
|
Bake |
|
|
wave |
|
Settings |
|
Options |
|
Add |
|||
|
|
30 Sec |
|||||
|
|
|
|
|
|
|
|
Timer |
|
Surface |
|
Vent Fan |
|||
On/Off |
|
|
Light |
|
|
||
|
|
|
|
|
|||
3.Turn the dial to select the upper power level. Turn the dial clockwise to increase or counterclockwise to decrease the upper power level. Press the dial to enter.
4.Turn the dial to select the lower power level. Press the dial to enter.
5.Turn the dial to select the microwave power level. Press the dial to enter.
6.Press the START/PAUSE pad or press the selector dial to start cooking.
)RU SRZHU OHYHO DQG FRRNLQJ WLPH VXJJHVWLRQV XVH \RXU cooking guide, cookbook and the pre-set speedcook menu selections.
My Recipe - to enter and save
Add and save up to 30 of your own Speedcook or microwave recipes, or pre-set Speedcook menu recipes
DV D IDYRULWH UHFLSH 2QFH LW¶V GRQH \RX FDQ TXLFNO\ recall your favorite so that your food cooks just the way you want it every time!
3UHVV WKH 63(('&22. RU 0,&52:$9( SDG
2.Turn the dial to select MY RECIPE. Press the dial to enter.
3.Turn the dial until NEW RECIPE appears. Press the dial to enter.
(17(5 &22. 7,0( DSSHDUV 7XUQ WKH GLDO WR VHOHFW the cooking time. Press the dial to enter.
The display will prompt you to select the power level(s).
5.Turn the dial clockwise to increase or counterclockwise to decrease the power level(s). Press the dial to enter.
)RU SRZHU OHYHO DQG FRRNLQJ WLPH VXJJHVWLRQV XVH \RXU cooking guide or cookbook.
6. Select SAVE from the summary screen.
63(// 7+( )22' 1$0( DSSHDUV 7XUQ WKH GLDO WR the first letter of your food description and press the dial to enter. Continue this process to spell the rest of the food name. Press the START/PAUSE pad to save the recipe and its name.
16 |
49-40678-3 |

Speedcooking
My Recipe - Custom Speedcooking (cont)
My Recipe - to find and use
To find and use stored recipes:
3UHVV WKH 63(('&22. RU 0,&52:$9( SDG
2.Turn the dial to select MY RECIPE.
3.The recipe names you entered will appear.
4.Turn dial until the recipe you want is displayed and press the dial to enter.
5.Press the START/PAUSE pad or press the selector dial to start cooking.
My Recipe - to adjust or change
To adjust or change stored recipes:
3UHVV WKH 63(('&22. RU 0,&52:$9( SDG
2.Turn the dial to select MY RECIPE.
3.Turn the dial to the recipe you want to change. Press the dial to enter. Current settings appear.
4.Select EDIT.
5.Turn the dial to adjust the cooking time and press the dial to enter.
6.Turn the dial to change the power level(s) and press the dial to enter each power level.
7.Turn the dial to change the recipe name. Press the dial to enter each letter change.
8.Press the START/PAUSE pad to save the revised recipe.
)RU SRZHU OHYHO DQG FRRNLQJ WLPH VXJJHVWLRQV XVH \RXU cooking guide or cookbook.
My Recipe - to delete |
|
|
To delete stored recipes: |
3. |
Select the recipe you would like to delete. |
3UHVV WKH 63(('&22. RU 0,&52:$9( SDG |
4. |
Turn the dial to select DELETE. |
2. Turn the dial to select MY RECIPE. |
|
|
Things that are Normal
Cooking Times
Ŷ :KHQ VSHHGFRRNLQJ SUH VHW PHQX IRRGV \RX PD\
VHH 237,0,=,1* &22. 7,0( LQ WKH GLVSOD\ VHYHUDO seconds after you press START/PAUSE. The oven automatically senses the electrical voltage level in your home and adjusts the cooking time up or down for proper cooking.
Cooling Fans
ŶThe fans will be on during cooking. At the end of cooking, the fans may continue to run for a short time to cool internal components. The fans will automatically shut off when the internal parts of the oven have cooled. The screen will display “Oven is Cooling”.
ŶThe oven vent will emit warm air while the oven is on.
ŶThe exhaust fan may come on automatically if the oven becomes hot. See Automatic fan section.
Lights
ŶWhen the oven is on, light may be visible around the door or outer case.
ŶThe halogen lights will dim and cycle on and off during a speedcook cycle, sometimes even at full power levels. This is normal. The oven senses the heat level and adjusts automatically.
Oven Heat
Ŷ 1R SUHKHDWLQJ WLPH LV UHTXLUHG GXULQJ VSHHGFRRN cycles. The oven begins cooking immediately.
ŶThe door and inside of the oven will be very hot. Use caution when opening the door and removing food. Be cautious of steam or vapor that may escape from around the door.
ŶDo not use cookware or coverings made of paper, plastic, or foil when speedcooking.
ŶWhen cooking for an extended period of time, the oven may automatically reduce the power levels to maintain the appropriate level of oven heat.
Sounds
ŶClicks and a fan blowing are normal sounds during cooking. The electronic control is turning components on and off.
Interference
ŶTV/radio interference might be noticed while using the microwave, similar to the interference caused by other small appliances. It does not indicate a problem with the microwave. Move the radio or TV as far away from the microwave as possible, or check the position of the TV/radio antenna.
SPEEDCOOKING
49-40678-3 |
17 |
CONVECTION BAKING
Convection Baking
Convection baking allows you to cook foods the same way as a conventional oven, using an
element to heat the air inside the oven. Any oven temperature from
) WR ) PD\ EH VHW
A fan gently circulates heated air throughout the oven, over and around the food. Because the heated air is kept constantly moving, some foods cook slightly faster than in regular oven cooking.
|
rn |
to S |
el |
ec |
u |
|
|
||
T |
|
|
|
t |
|
P |
|
|
|
|
r |
|
|
r |
|
|
t |
|
te |
|
|
|
e |
ss |
n |
|
||
|
|
|
oE |
|
|
||
Back |
|
|
|
|
|
|
Start |
|
|
|
|
|
|
Pause |
|
|
|
|
|
|
|
|
|
Help |
|
|
|
|
|
|
Cancel |
|
|
|
|
|
|
Off |
|
|
|
|
|
|
|
|
|
|
|
|
|
|
|
|
Lock Controls |
|
|
|
|
|
|
|
Hold 3 Sec |
Speed |
Convection |
Micro |
|||||
Cook |
|
|
Bake |
|
|
wave |
|
Settings |
|
Options |
|
Add |
|||
|
|
30 Sec |
|||||
|
|
|
|
|
|
|
|
Timer |
|
Surface |
|
Vent Fan |
|||
On/Off |
|
|
Light |
|
|
||
|
|
|
|
|
|||
Before you begin, make sure the metal rack is in place. Both racks may be used for two level cooking.
 WARNING When baking, remember that the oven, door and dishes will be very hot!
Per USDA Guidelines, cook meat to an INTERNAL
WHPSHUDWXUH RI DW OHDVW ) DQG SRXOWU\ WR DQ
,17(51$/ WHPSHUDWXUH RI DW OHDVW ) &RRNLQJ WR these temperatures usually protects against foodborne
LOOQHVV )RU PRUH LQIRUPDWLRQ VHH ZZZ IRRGVDIHW\ JRY
Put food directly on the metal tray or in the appropriate dish and place on wire oven rack when baking or warming.
How to Convection Bake
3UHVV &219(&7,21 %$.( SDG
2.Turn the dial to set the temperature and press the dial to enter.
3.Press the dial to enter and confirm the selection.
To start immediately without setting a cook time, select START or press the START/PAUSE pad:
To set a cook time:
7XUQ WKH GLDO DQG VHOHFW &22. 7,0(
2.Turn the dial to set the cook time and press the dial to enter.
3.To start the cook time immediately, place the food in
WKH RYHQ DQG VHOHFW 67$57 &22. 7,0( 7KHQ SUHVV the dial or the START/PAUSE pad to start. The cook time will immediately start to count down.
To start cook time after preheat, select START PREHEAT. The oven will signal once the oven reaches the cooking temperature. Place the food in the oven and press the START/PAUSE pad. The cook time will begin to count down.
If the oven door is opened during cooking, “Pause” will appear in the display. Close the door and press START/ PAUSE pad.
Cook times are shown in hours and minutes and can be set to a maximum of 2 hours 59 minutes. Time can be changed during cooking by turning the dial.
Cooking Tips
Ŷ 0HWDO SDQV DUH UHFRPPHQGHG IRU DOO W\SHV RI EDNHG products, but especially where browning is important.
Ŷ 'DUN RU GXOO ILQLVK PHWDO SDQV DUH EHVW IRU EUHDGV DQG pies because they absorb heat and produce crisper crust.
Ŷ 6KLQ\ DOXPLQXP SDQV DUH EHWWHU IRU FDNHV FRRNLHV RU muffins because they reflect heat and help produce a light tender crust.
Ŷ *ODVV RU JODVV FHUDPLF FDVVHUROH RU EDNLQJ GLVKHV are best suited for egg and cheese recipes due to the cleanability of glass.
Ŷ :KHQ EDNLQJ RQ RQH OHYHO XVH WKH ORZHU OHYHO 7KH WRS clips are to only be used in two level baking.
18 |
49-40678-3 |
Broiling and Toasting
Broil and toast use the upper lamps and lower heater to broil or toast food similar to a conventional oven.
Before you begin, make sure the turntable is in place. Use the metal tray when toasting and when broiling.
 WARNING When baking or toasting, remember that the oven cavity, the oven door and dishes will be very hot!
The turntable must |
|
always be in place when |
|
using the oven. |
Put food directly on the metal |
|
tray or the metal grill tray. |
How to Broil
1. |
Press the OPTIONS pad. |
If the oven door is opened during cooking, “Pause” will |
2. |
Turn the dial to BROIL and press to enter. |
appear in the display. Close the door and press the |
3. |
Place the food in the oven and select START or |
START/PAUSE pad. |
|
press the START/PAUSE pad to start.
Cooking Tips for Broiling
ŶBroiling times may be shorter in the Advantium oven because of the use of halogen lamps. Make sure to monitor food closely to get the desired results.
Ŷ )RU EHVW UHVXOWV ZKHQ EURLOLQJ SODFH IRRG GLUHFWO\ RQ the metal tray.
Ŷ %URLOLQJ PHDWV LQ WKH RYHQ PD\ SURGXFH VPRNH
Ŷ ,I SUHKHDWLQJ WKH RYHQ WR EURLO PHDW SUHKHDW ZLWK WKH metal tray in the oven and place food on the hot metal tray for best searing of meat.
Ŷ )RU EHVW SHUIRUPDQFH SUHKHDW WKH RYHQ IRU PLQXWHV when broiling meat. Chicken performs best with no preheating.
Ŷ )RRGV VKRXOG EH WXUQHG KDOIZD\ WKURXJK EURLOLQJ WLPH
ŶRemove thinner pieces as needed to prevent overcooking and drying.
How to Toast
1.Press the OPTIONS pad.
2.Turn the dial to TOAST and press to enter.
3.Turn the dial to set the toast time, place the food in the oven and select START or press the START/ PAUSE pad to start.
If the oven door is opened during cooking, “Pause” will appear in the display. Close the door and press the START/PAUSE pad.
Cooking Tips for Toasting
Ŷ )RU EHVW UHVXOWV ZKHQ WRDVWLQJ XVH WKH PHWDO WUD\
ŶNo turning is necessary for most foods.
ŶWhen toasting nuts, stir halfway through the cooking time.
ŶToast thicker pieces a longer time, thinner pieces a shorter time.
TOASTING AND BROILING, BAKING,
49-40678-3 |
19 |
WARMING AND PROOFING
Warming and Proofing
Warming
The WARM feature will keep hot, cooked foods at serving temperature. Always start with hot food. Use cookware and utensils that can withstand temperatures
XS WR )
1.Press the OPTIONS pad.
2.Turn the dial to select WARM. Press the dial to enter.
3.Turn the dial to select the level of moisture you want. See the chart and tips below. Press the dial to enter.
4.Select START or press the START/PAUSE pad to start. The oven starts warming immediately and shows the amount of warming time to complete.
If the oven door is opened during warming, “Pause” will appear in the display. Close the door and press the START/PAUSE pad.
To Crisp Stale Items:
Ŷ 6HOHFW WKH &5,63 VHWWLQJ 3UHKHDW WKH RYHQ IRU minutes.
NOTE: Only preheat when crisping stale items.
Ŷ 3ODFH IRRG RU GLVKHV GLUHFWO\ RQ WKH PHWDO WUD\
Ŷ &KHFN FULVSQHVV DIWHU PLQXWHV $GG WLPH DV needed.
Tips for Crisp Food
Ŷ /HDYH IRRG XQFRYHUHG
Ŷ 'R QRW XVH SODVWLF FRQWDLQHUV RU SODVWLF ZUDS
Ŷ 3UHKHDWLQJ LV QRW QHFHVVDU\ H[FHSW IRU FULVSLQJ VWDOH items. (See To Crisp Stale Items.)
Tips for Moist Food
Ŷ &RYHU IRRG ZLWK OLG RU DOXPLQXP IRLO
Ŷ 'R QRW XVH SODVWLF FRQWDLQHUV RU SODVWLF ZUDS
Ŷ 3UHKHDWLQJ LV QRW QHFHVVDU\
Proofing
The proofing feature automatically provides an appropriate temperature for the proofing process, and therefore does not have a temperature adjustment.
1. Press the OPTIONS pad.
7XUQ WKH GLDO WR VHOHFW 3522) DQG SUHVV WR HQWHU
3.Select START or press the START/PAUSE pad to start. The oven starts proofing immediately and shows the amount of proofing time to complete.
Ŷ &KHFN EUHDG SURGXFWV HDUO\ WR DYRLG RYHU SURRILQJ
Ŷ 7R DYRLG ORZHULQJ WKH RYHQ WHPSHUDWXUH DQG lengthening proofing time, do not open the oven door unnecessarily.
|
rn |
to Se |
|
|
|
le |
|
||
u |
|
c |
||
T |
|
|
|
t |
|
P |
|
|
|
|
r |
|
|
r |
|
|
t |
|
te |
|
|
|
e |
ss |
n |
|
||
|
|
|
oE |
|
|
||
Back |
|
|
|
|
|
|
Start |
|
|
|
|
|
|
Pause |
|
|
|
|
|
|
|
|
|
Help |
|
|
|
|
|
|
Cancel |
|
|
|
|
|
|
Off |
|
|
|
|
|
|
|
|
|
|
|
|
|
|
|
|
Lock Controls |
|
|
|
|
|
|
|
Hold 3 Sec |
Speed |
Convection |
Micro |
|||||
Cook |
|
|
Bake |
|
|
wave |
|
Settings |
|
Options |
|
Add |
|||
|
|
30 Sec |
|||||
|
|
|
|
|
|
|
|
Timer |
|
Surface |
|
Vent Fan |
|||
On/Off |
|
|
Light |
|
|
||
|
|
|
|
|
|||
The turntable must always be in place when using the oven.
Put food or oven-safe cookware directly on the metal tray to warm.
Temperature and Moisture Selection Chart
)RRG 7\SH |
Moisture Setting |
Casseroles |
MOIST |
Chili/Soup |
MOIST |
Pancakes, waffles |
MOIST |
Pizza |
CRISP |
Potatoes, baked |
CRISP |
Chips/Crackers |
CRISP |
NOTES:
Ŷ 'R QRW XVH WKH SURRILQJ PRGH IRU ZDUPLQJ IRRG RU keeping food hot. The proofing oven temperature is not hot enough to hold foods at safe temperatures. Use the WARM feature to keep food warm.
Ŷ 3URRILQJ ZLOO QRW RSHUDWH LI WKH RYHQ LV WRR KRW $OORZ the oven to cool before proofing.
The turntable must always |
Put bread dough in a |
be in place when using |
bowl/bread pan and place |
the oven. |
on the metal tray to proof. |
20 |
49-40678-3 |
Microwaving
Make sure the turntable is in place. Use the clear glass tray.
Place food or microwavable container directly on the clear glass tray to cook your food.
Cookware
Make sure that cookware is suitable for microwaving.
|
rn |
to Se |
|
|
|
le |
|
||
u |
|
c |
||
T |
|
|
|
t |
|
P |
|
|
|
|
r |
|
|
r |
|
|
t |
|
te |
|
|
|
e |
ss |
n |
|
||
|
|
|
oE |
|
|
||
Back |
|
|
|
|
|
|
Start |
|
|
|
|
|
|
Pause |
|
|
|
|
|
|
|
|
|
Help |
|
|
|
|
|
|
Cancel |
|
|
|
|
|
|
Off |
|
|
|
|
|
|
|
|
|
|
|
|
|
|
|
|
Lock Controls |
|
|
|
|
|
|
|
Hold 3 Sec |
Speed |
Convection |
Micro |
|||||
Cook |
|
|
Bake |
|
|
wave |
|
Settings |
|
Options |
|
Add |
|||
|
|
30 Sec |
|||||
|
|
|
|
|
|
|
|
Timer |
|
Surface |
|
Vent Fan |
|||
On/Off |
|
|
Light |
|
|
||
|
|
|
|
|
|||
The turntable must always be in place when using the oven.
The clear glass tray should always be in place when microwaving.
MICROWAVING
Microwave Pre-Set Selections
Ŷ Cook |
ŶBeverage |
ŶMelt |
ŶReheat |
||
|
%\ )RRG 7\SH |
-Water (8 oz) |
-Butter |
–Beverage |
|
|
-By Time |
-Coffee (8 oz) |
-Caramel |
–Casserole |
|
|
-By Time 1 & 2 |
-Tea (8 oz) |
-Cheese |
–Chicken |
|
ŶDefrost |
-Milk (8 oz) |
-Chocolate Chips |
–Pasta |
||
-Hot Cocoa (8 oz) |
-Marshmallow |
–Pizza |
|||
|
-1.0 lb Quick |
||||
|
|
|
±3ODWH RI )RRG |
||
|
-By Time |
ŶPopcorn |
ŶSimmer |
||
|
–Rice |
||||
|
%\ )RRG 7\SH |
(2.9 or 3.5 oz) |
ŶSoften |
||
–Soup |
|||||
|
-By Weight |
|
|||
|
|
-Butter |
–Steaks/Chops |
||
|
-Melt |
|
|||
|
|
-Cream Cheese |
–Vegetables |
||
|
-Soften |
|
|||
|
|
)URVWLQJ R] |
|
||
|
|
|
|
||
-Ice Cream
1. Press the MICROWAVE pad.
If no selection is made within 15 seconds, the display will return to blank.
7XUQ WKH GLDO WR VHOHFW &22. '()5267
BEVERAGE, POPCORN, MELT, REHEAT, SIMMER
DQG 62)7(1
To review settings during cooking, press the selector dial.
If the door is opened during cooking, the oven will stop and PAUSE will appear in the display. Close the door and press START/ PAUSE to resume cooking.
If you enter an undesired selection at any time, simply
SUHVV WKH %$&. SDG DQG UH HQWHU WKH GHVLUHG VHOHFWLRQV
3.Turn the dial to find the food you want to cook, defrost or reheat. Press the dial to enter.
4.Turn the selector dial to select the type, amount, weight and/or size as prompted by the oven. Press the dial after each selection.
5.Press the dial or the START/PAUSE pad to start cooking.
49-40678-3 |
21 |

MICROWAVING
Microwaving
Cook By Time
8VH &22. %< 7,0( WR PLFURZDYH IRRG WKDW LV QRW LQ WKH pre-set microwave selections.
1. Press the MICROWAVE pad.
7XUQ WKH GLDO WR VHOHFW &22. %< 7,0( DQG SUHVV WKH dial to enter.
3.Turn the dial to set the cook time and press the dial to enter.
4.Turn the dial to set the power level and press the dial to enter.
5.Press the dial or the START/ PAUSE pad to start cooking.
<RX PD\ RSHQ WKH GRRU GXULQJ &22. %< 7,0( WR FKHFN the food. Close the door and press START/PAUSE to resume cooking.
Cook By Time 1 & 2
8VH &22. %< 7,0( WR PLFURZDYH IRRG WKDW UHTXLUHV WZR GLIIHUHQW WLPHV DQG SRZHU OHYHOV
1. Press the MICROWAVE pad.
7XUQ WKH GLDO WR VHOHFW &22. DQG SUHVV WKH GLDO WR enter.
7XUQ WKH GLDO WR VHOHFW &22. %< 7,0( DQG press the dial to enter.
4.Turn the dial to set the first time and press the dial to enter. Repeat for the first power level, the second time, and the second power level.
5.Press the dial or the START/PAUSE pad to start cooking.
Microwave Power Level(s)
The microwave power level is automatically set on all
PLFURZDYH IHDWXUHV EXW \RX FDQ FKDQJH LW IRU &22. %< 7,0( &22. %< 7,0( $'' 6(& DQG '()5267 %< 7,0(
)LUVW IROORZ GLUHFWLRQV IRU &22. %< 7,0( &22. %< 7,0( 0,&52 RU '()5267 %< 7,0(
2.Select START or press the START/PAUSE pad to start.
3.Press EDIT to change the cooking time and then the microwave power level. Press the dial to enter cooking time and power level changes.
Here are some examples of uses for various power levels:
High 10: )LVK EDFRQ YHJHWDEOHV ERLOLQJ OLTXLGV
Med-High 7: Gentle cooking of meat and poultry; baking casseroles and reheating.
Medium 5: Slow cooking and tenderizing for stews and less tender cuts of meat.
Low 2 or 3: Defrosting; simmering; delicate sauces.
Warm 1: .HHSLQJ IRRG ZDUP VRIWHQLQJ EXWWHU
Add 30 Sec
Press ADD 30 SEC repeatedly for 30 second increments |
The power level is automatically set at high, but you |
of microwave cooking time. Oven starts immediately. |
can change it for more flexibility. See Microwave Power |
|
Levels section for instructions. |
My Recipes
See the MY RECIPE sections in the Speedcook section of this book for instructions on how to save, use, change or delete a microwave custom recipe.
Cooking Tips
Ŷ :KHQ FRRNLQJ EDFRQ OD\HU VWULSV RQ D SODWH &RYHU |
Ŷ |
)RU IUR]HQ YHJHWDEOHV IROORZ WKH SDFNDJH LQVWUXFWLRQV |
each layer with a paper towel. |
|
for adding water. |
Ŷ :KHQ FRRNLQJ YHJHWDEOHV XVH D PLFURZDYH VDIH |
Ŷ |
)RU IUHVK YHJHWDEOHV DGG WDEOHVSRRQV RI ZDWHU IRU |
casserole or bowl. Cover with a microwave-safe lid or |
|
each serving. |
vented plastic wrap. |
|
|
22 |
49-40678-3 |
 Loading...