

Page 1

Page 2
LIMITED WARRANTY CONTENTS
1
Getting Started. . . . . . . . . . . . . . . . . . . . . . . . . . . . . . . . . . . . . . . . . . . . . . . 2
Installation of FINAL FANTASY
®
VIII . . . . . . . . . . . . . . . . . . . . . . . . . . . . . . . 3
Playing FINAL FANTASY VIII . . . . . . . . . . . . . . . . . . . . . . . . . . . . . . . . . . . . . 4
Basic Controls. . . . . . . . . . . . . . . . . . . . . . . . . . . . . . . . . . . . . . . . . . . . . . . . 5
Prologue . . . . . . . . . . . . . . . . . . . . . . . . . . . . . . . . . . . . . . . . . . . . . . . . . . . . 6
Main Characters . . . . . . . . . . . . . . . . . . . . . . . . . . . . . . . . . . . . . . . . . . . . . . 7
World Map Screen . . . . . . . . . . . . . . . . . . . . . . . . . . . . . . . . . . . . . . . . . . . 10
Shops & Collecting Information. . . . . . . . . . . . . . . . . . . . . . . . . . . . . . . . . . 11
Menu Screen. . . . . . . . . . . . . . . . . . . . . . . . . . . . . . . . . . . . . . . . . . . . . . . . 12
Battle Screen . . . . . . . . . . . . . . . . . . . . . . . . . . . . . . . . . . . . . . . . . . . . . . . 17
Junction System. . . . . . . . . . . . . . . . . . . . . . . . . . . . . . . . . . . . . . . . . . . . . . 20
Card Game/Triple Triad . . . . . . . . . . . . . . . . . . . . . . . . . . . . . . . . . . . . . . . 30
Chocobo World . . . . . . . . . . . . . . . . . . . . . . . . . . . . . . . . . . . . . . . . . . . . . . 32
Credits . . . . . . . . . . . . . . . . . . . . . . . . . . . . . . . . . . . . . . . . . . . . . . . . . . . . 34
Mini-Walkthrough . . . . . . . . . . . . . . . . . . . . . . . . . . . . . . . . . . . . . . . . . . . . 36
The checkered destinies of two men who repeatedly plunge
their mighty souls into battle
Important Note: Detailed information about the game can also be found in the study panel on
Squall's desk located in the classroom on the second floor of Balamb Garden and in the Menu
Screen under <Tutorial>.
For a period of ninety (90) days from the date of purchase, Square Electronic Arts L.L.C. (SQEA) warrants to the
original purchaser of this SQEA software product that the medium on which this computer program is recorded
is free from defects in materials and workmanship. SQEA agrees for a period of ninety (90) days from the date of
purchase, to either repair or replace, at its option, free of charge, any SQEA software product that does not meet
the above warranty, postage paid, with proof of purchase. This warranty is not applicable to normal wear and tear.
This warranty shall not be applicable and shall be void if the defect in the SQEA software product has arisen
through abuse, unreasonable use, mistreatment or neglect.
LIMITATIONS – The above warranty is in lieu of all other warranties, and no other representations or claims of any
nature shall be binding on or obligate SQEA. ANY IMPLIED WARRANTIES APPLICABLE TO THIS SOFTWARE
PRODUCT, INCLUDING WARRANTIES OF MERCHANTABILITY, COURSE OF DEALING IN TRADE AND FITNESS
FOR A PARTICULAR PURPOSE, ARE LIMITED TO THE NINETY (90) DAY PERIOD DESCRIBED ABOVE. IN NO
EVENT WILL SQEA BE LIABLE FOR ANY SPECIAL, INCIDENTAL, OR CONSEQUENTIAL DAMAGES RESULTING
FROM POSSESSION, USE OR MALFUNCTION OF THIS SQEA SOFTWARE PRODUCT. Some states do not allow
limitations as to how long an implied warranty lasts and/or exclusions or limitations of incidental or consequential
damages so the above limitations and/or exclusions of liability may not apply to you. This warranty gives you
specific rights, and you may also have other rights that vary from state to state.
NOTICE – This manual and the software described in this manual are copyrighted. All rights in the manual and the
software are reserved. No part of this manual or the described software may be copied, reproduced, translated,
or reduced to any electronic medium or machine-readable form without the prior written consent of SQEA. The
described software may not be reversed engineered, decompiled or otherwise disassembled.
RETURNS WITHIN 90 DAY WARRANTY PERIOD– To replace defective media within the 90-day warranty period,
send the defective media, a copy of the original sales receipt, a return address, and a small note describing the
difficulties you are experiencing to Electronic Arts Customer Warranty, P.O. Box 9025, Redwood City, CA 94065-
9025. If you have warranty questions, you can also contact Customer Warranty at (650) 628-1900, fax (650) 628-
5999. Hours of operation: Monday - Friday, 8:30am - 11:45am and 1pm - 4:30pm, Pacific Standard Time.
RETURNS AFTER WARRANTY – To replace defective media after the ninety (90) day warranty period has expired,
send the original CD to the Electronic Arts’ address above. Enclose a statement of the defect, your name, your
return address, and a check or money order for $7.50.
REPLACEMENT MEDIA – The above provisions apply to any replacement media or software provided by SQEA
hereunder, including the above warranties and limitations.
TECHNICAL SUPPORT – For technical support questions, you can call (650) 628-1009. Representatives are
available Monday through Friday 8:30 - 11:45 am or 1:00 - 4:30 pm, Pacific Standard Time.
Tech Support Fax: (650) 628-5999
Internet e-mail: support@ea.com
Warranty inquiries: warranty@ea.com
World Wide Web: Access our web site at http://www.ea.com/tech_support
Electronic Arts Technical Support, P.O. Box 9025, Redwood City, CA 94063-9025
SQUARESOFT GAME TIPS
Game Tips are available for all SQUARESOFT titles:
U.S.
1-900-407-KLUE (1-900-407-5583) $.95/min. Automated Tips, $1.25/min. Live Assistance.
Canada: 1-900-451-KLUE (1-900-451-5583) $1.50/min. Automated Tips only.
Prices subject to change. Callers under 18 years of age must obtain permission from a parent or guardian
before calling. Game tips are available for callers within the U.S. and Canada only. Touch-tone phone required.
Game counselors are available Monday-Friday, 8am - 5pm, Pacific Standard Time. Automated support is
available 24 hours a day, 7 days a week.
SQUARESOFT Online
Shop online or register for upcoming sweepstakes, prizes, and more at www.squaresoft.com!
Page 3

INSTALLATION OF FINAL FANTASY VIII
3
Place the CD labeled “Install Disc” into your computer’s CD-ROM
drive. If your computer is “Autorun” enabled, the startup screen will
appear on your screen momentarily. If the startup screen does not
appear you must open the “My Computer” icon on your desktop,
click on your CD-ROM drive, then double-click on the “Startup.exe”
icon. You will see the FINAL FANTASY VIII startup screen with 4
options to choose from. The 4 options to choose from are:
INSTALL
Click on the Install icon to begin installation of FINAL FANTASY VIII. When the “Welcome”
screen appears, please read through the text and select either “Next” to continue or “Cancel”
to exit without installing. Next, you will see the “Select Components” screen. Here you can
choose to install “FF8 Program Files” only or install “Optional Game Data” as well. “Optional
Game Data” is not required to be installed for FINAL FANTASY VIII to run, but doing so will
decrease loading times during gameplay.
The default install destination is “C:\Program Files\Square Soft, Inc\FINAL FANTASY VIII”. If you
want to install FINAL FANTASY VIII in a different location, click on “Browse” and change the
default setting to your desired location.
Next you may choose a Program Folder for FINAL FANTASY VIII. You should continue with the
default unless you want to select a different Program Folder.
Congratulations! FINAL FANTASY VIII will now be installed on your computer.
INSTALL DIRECTX 6.1
FINAL FANTASY VIII requires the installation of DirectX 6.1 on your computer system. If your
system does not have DirectX 6.1 of if you are using a previous version of DirectX, click on
“Install DirectX 6.1”. DirectX will analyze your computer’s hardware. Once it is finished, follow
the on-screen prompts to finish installation. The system may request that you restart the
computer. If so, you must restart the computer before you attempt to run FINAL FANTASY VIII.
README
Click “Readme” to view the game's Readme.txt file for any addendum or errata.
EXIT
Click on Exit to quit the FINAL FANTASY VIII Startup screen.
YAMAHA SOFTWARE SYNTHESIZER
FINAL FANTASY VIII includes an upgrade for owners of the Yamaha S-YXG50/70/100 software
MIDI synthesizer. If you already have this software installed on your computer, you can find the
upgrade on the Install Disc. Please consult the Readme.txt for additional information.
2
GETTING STARTED
SYSTEM REQUIREMENTS
COMPUTER
FINAL FANTASY®VIII requires an IBM®PC or 100% compatible computer. The game can be
enjoyed without the use of a 3D accelerated video card, but only the Software Renderer will
be available.
With a 3D accelerated video card, the minimum CPU speed required is a Pentium
®
200Mhz
with 32MB of RAM and an 8MB 3D accelerated video card.
Without a 3D accelerated video card, the minimum CPU speed required is a Pentium®II
266Mhz with 64MB of RAM and a 4MB 2D video card.
OPERATING SYSTEM
You must have Windows®95/98 with DirectX 6.1 or higher installed on your system. DirectX 6.1
is included in your installation CD.
DRIVES
Standard installation of FINAL FANTASY VIII requires a minimum of 300MB free uncompressed
hard drive space plus space for saved games (additional space required for DirectX
installation and Windows swap file).
Optional Game Data may also be installed that will require an additional 300MB of free
uncompressed hard drive space. This will offer slightly faster loading times during gameplay.
You must also have an 8x speed or faster CD-ROM drive to play FINAL FANTASY VIII.
CONTROLS
FINAL FANTASY VIII supports keyboard and/or gamepad controllers. Your gamepad must be
calibrated and configured properly through the “Game Controller” settings in your Windows
Control Panel.
VIDEO
FINAL FANTASY VIII requires a minimum of 4MB DirectX 6.1 compatible video card for
software rendering. You can enhance your gaming experience by utilizing a recommended
8MB 3D accelerated video card.
AUDIO
FINAL FANTASY VIII will work with any DirectX 6.1 compatible sound card. Your card must be
configured to playback digital and MIDI audio.
Page 4
PLAYING FINAL FANTASY VIII
54
PLAYING FINAL FANTASY VIII
STARTING OR CONTINUING FINAL FANTASY VIII
After installation you must insert “DISC 1” in your CD-ROM drive before starting or if you are
continuing a previously saved game. If you are continuing a game from disc 2, 3, or 4, you will be
prompted to insert the correct disc before continuing. To start playing, go to the program group
containing FINAL FANTASY VIII in the Windows 95/98 start menu and select “FINAL FANTASY
VIII”. The intro screens will begin to play, and then the floating credit screen will appear. Press
[OK] (X key) to skip to the start screen. At the start screen you will have three options:
New Game—Starts a new FINAL FANTASY VIII game. You must have Disc 1 in your CD-ROM
before starting a new game.
Continue ?—This option will let you continue from your previously saved game. Press [OK]
(X key) to enter to the Save File list. Select the correct Save File from 1 - 30 and press [OK]
(X key). Go to the Save Game you want to continue and press [OK] (X key) to continue. You will
be prompted to insert Disc 1, 2, 3, or 4 if the correct disc is not in the CD-ROM drive.
Credits—View the credits.
Exiting a Game—Press and hold Ctrl-Q to exit the game.
FINAL FANTASY VIII CONFIGURATION
When you first start FINAL FANTASY VIII you will see the Configuration
Screen. This menu screen will detail your current graphic and sound
settings. You can change the settings anytime after by selecting it from
the FINAL FANTASY VIII program groups in the Windows 95/98 start
menu. Here you will find four tabs to choose from. The four tabs are:
CURRENT SETTINGS
Shows the current setting FINAL FANTASY VIII will run for your game.
GRAPHICS
You can configure your desired graphic setup here. Click on a tab labeled “Display”, to choose
either your recommended 3D accelerator or Primary Display Driver. The other tab, “Renderer”,
chooses either Software Renderer or 3D Hardware Acceleration. Select the one that complements
your “Display” setting. You may also select the Display resolution with 2 options; 640x480
(Quarter Screen), or 640x480 (Full Screen). The Quarter Screen option will run slightly faster than
the Full Screen option, but you trade off by having a smaller viewing area. The area on the right
shows the Direct3D features that your PC supports. Do not be alarmed if your settings do not
support all the 3D features. You can still play FINAL FANTASY VIII without some features. See the
Readme file or 3D card troubleshooting.
SOUND
The sound driver setting should be automatically configured to your sound card. Press the test
button to hear if your sound card is working properly. If you do not hear anything, change your
sound driver to match your sound card. If your sound card supports stereo sound you can reverse
the left and right channels by checking the “Reverse Speakers” box. Here, you may also select
your DirectMusic port. The port should be automatically set to use the default DirectMusic port.
If the selected port supports reverb or chorus effects, you may select these by checking the
“Reverb” or “Chorus” boxes.
INPUT
You can configure your desired input here. The input will be automatically set for Keyboard and
default keys for the controls. To assign new keys for each input, click on the control you want to
change and input the new key. You may reset to the default settings by clicking on “Reset to
default keys.”
To assign new button functions to your game controller, select “Controller” in the “Control Type”
section. Click on the control you want to change, and press the new button on your controller.
(refer to page 15 for in-game settings)
BASIC CONTROLS
You can play FINAL FANTASY VIII with the keyboard or a game controller supported by
DirectX 6.1. Basic controls of FINAL FANTASY VIII can be divided into four categories: (Default
controls shown below and throughout the manual. Controls may be reconfigured in the game
or in the Configuration.)
MENU SCREEN
KEYBOARD GAME CONTROLLER
cursor keys directional pad Move Cursor / Switch
screens between Status
Attack & Defense and
Elemental Attack &
Defense while in the
Magic Junction Menu
XB2Execute / Open Status
Windows in the Status
Menu
AB1Open Limit Break Screen
(Applies only in Status
Screen)
WB4Cancel
Q or E B5 or B6 Switch between
corresponding character /
GF.
NOTE: To reset to the Main Menu, press Control-R.
FIELD SCREEN
KEYBOARD GAME CONTROLLER
cursor keys directional pad Move
S B10 Pause
DB3Open Menu Screen
XB2Talk / Execute
Commands
AB1Talk / Challenge to
Card Game
WB4Cancel, Walk
(when used with the
cursor keys)
Control-Q n/a Press and hold to Quit
Control-R n/a Press and hold to
Reset
BATTLE SCREEN
KEYBOARD GAME CONTROLLER
cursor keys directional pad Move Cursor / Select
Commands
S B10 Display help / Pause
FB9Hold down to hide battle
info
DB3Change to another active
character
XB2Execute
AB1Scroll status window /
Increase GF’s Attack Power
while “F” is held down
(Only when GF Ability
“Boost” is learned)
WB4Cancel
QB5Turn ON/OFF Target
window
EB6Trigger Squall’s gunblade
Z + C B7 + B8 Escape (press both keys
simultaneously)
Control-Q n/a Press and hold to Quit
Control-R n/a Press and hold to Reset
WORLD MAP
KEYBOARD GAME CONTROLLER
cursor keys directional pad Move
S B10 Pause
FB9Toggle World Map
display
DB3Open Menu
XB2Get ON/OFF Vehicles
*
AB1Move Vehicles forward
WB4Move Vehicles
backward
QB5Turn camera angle
counterclockwise
EB6Turn camera angle
clockwise
CB8Change Point of View
(POV)
Control-Q n/a Press and hold to Quit
Control-R n/a Press and hold to Reset
* Refer to page 10 on how to operate vehicles.
Page 5
MAIN CHARACTERS
76
PROLOGUE
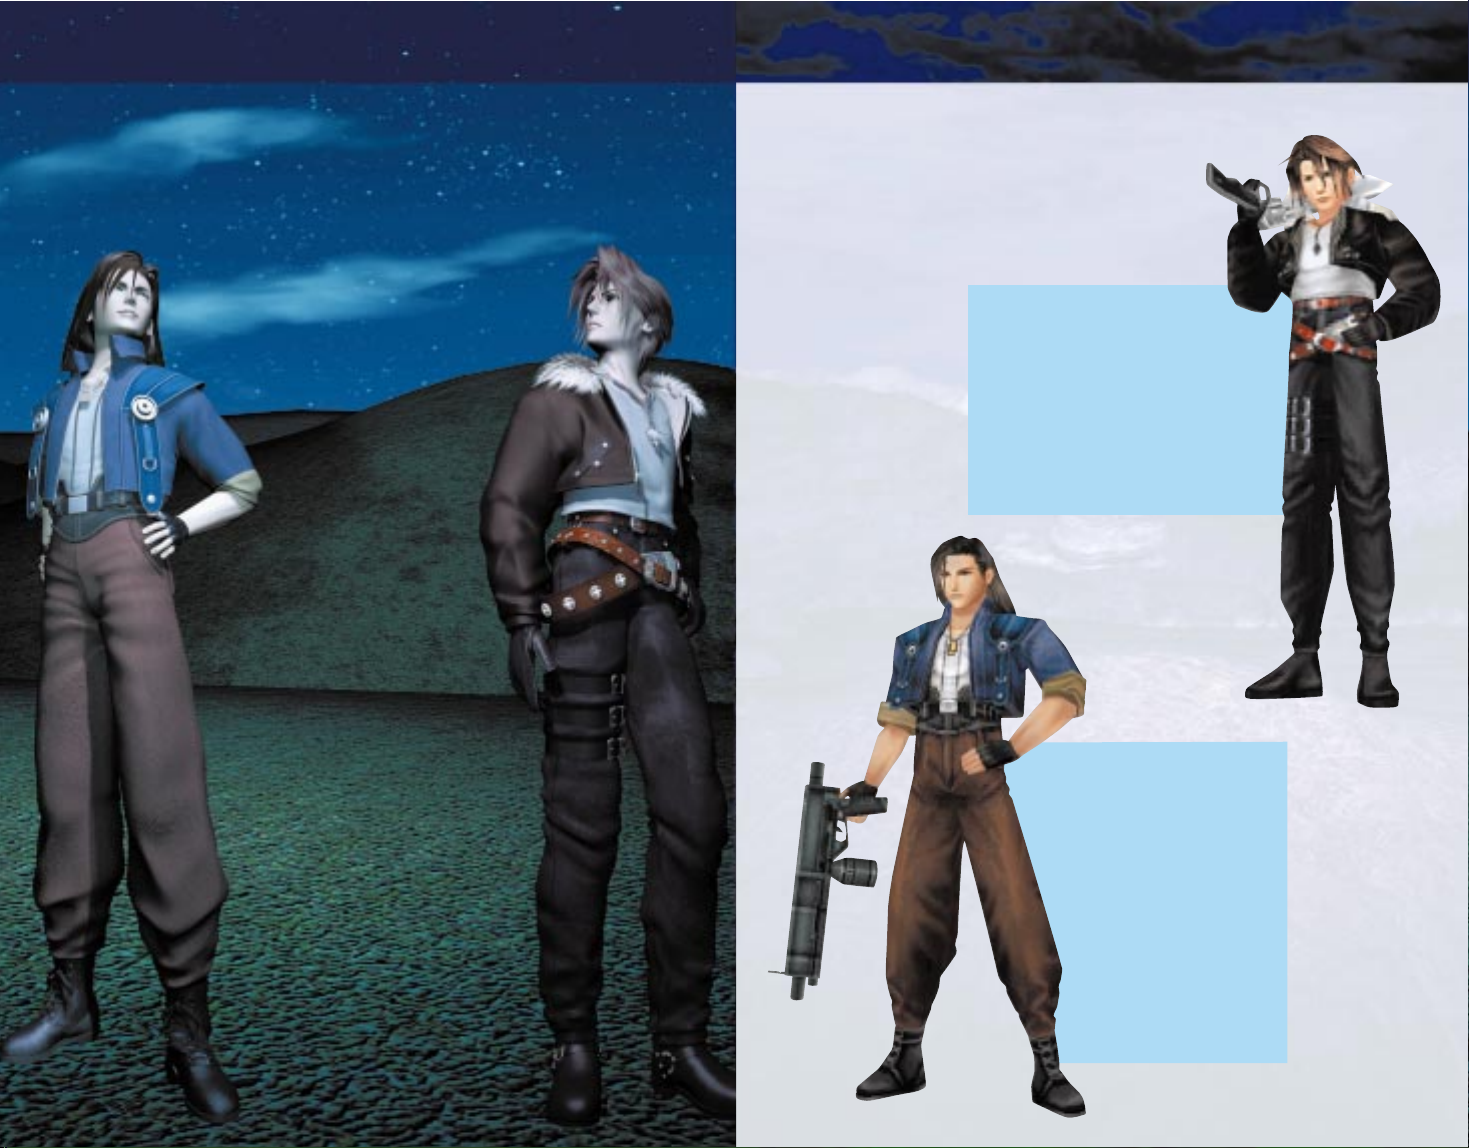
Squall and Laguna; two men linked mysteriously
by fate. The friends, rivals, and beautiful women
whom they encounter all come together to create
a striking and moving drama.
Age: 27 Height: 5'9"
A passionate man whose pen is
truly mightier than the sword
An ex-soldier turned journalist,
Laguna is a strong willed man
with amazing energy. His
compassion for the
unfortunate drives him to
help the weak and bring
down their oppressors.
Using his writing as a mighty
instrument of justice, he
stands strong against the
evils of the world.
LAGUNA LOIRE
At the forefront of a rising tide of violence
brought on by Galbadia’s war declaration is
a SeeD cadet named Squall Leonhart.
Serious to a fault, Squall has earned himself
the reputation of being a lone wolf.
A chance encounter with the free-spirited
Rinoa Heartilly, however, turns his universe
upside down. Having thrived on discipline,
Squall finds Rinoa's carefree attitude
fascinating. Yet there is no time to ponder
these thoughts, for the job of dealing with
the sorceress behind Galbadia's irrational
hostility has fallen to SeeD and Squall.
In FINAL FANTASY VIII, the player will
assume the roles of Squall and
Laguna to advance the story.
At times, Squall is known to fall
into a “dreamlike” state. It is during these
periods that he encounters Laguna.
What destiny awaits these two characters?
At what point does the story between
the two cross?
Who is Laguna…?
Age: 17 Height: 5'8"
The taciturn and reluctant hero
A cadet in SeeD, the special combat unit
of the Balamb Garden Military Academy.
His aloof and anti-social behavior makes
him appear selfish and lacking a sense of
team unity. Squall dislikes having others
involved in his affairs and is best
described as a lone wolf.
SQUALL LEONHART
Page 6
MAIN CHARACTERS
98
MAIN CHARACTERS
Age: 17 Height: 6'0"
An expert gunman and
consummate lady’s man
Irvine is known as the “Best
Shooter in Garden.” His
reputation for cherishing the
company of women is almost as well
known as his accuracy with a gun.
Although he seems to be uncaring
and frivolous at first glance, in
reality he is sensitive and serious.
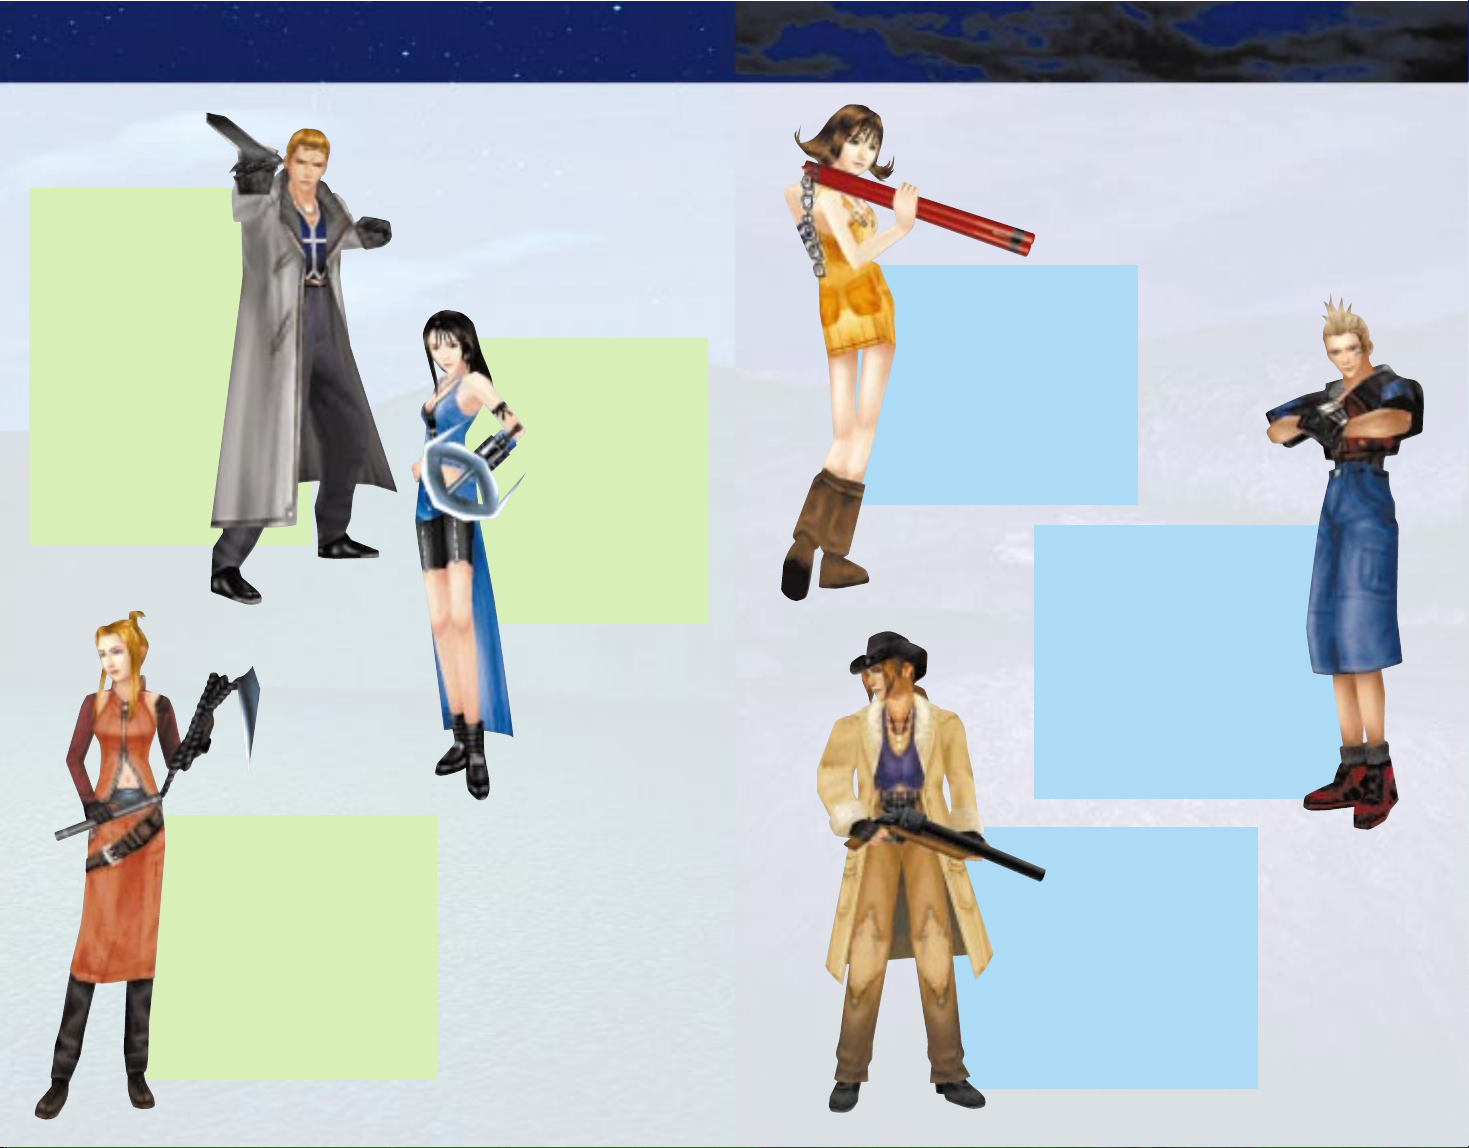
IRVINE KINNEAS
Age: 18 Height: 6'2"
Squall’s rival who causes
havoc within Garden
A candidate for SeeD.
Although Seifer is a
naturally gifted soldier,
his inability to take
orders and control his
temper has earned him
the label of
“problematic.”
Although recognizing
and praising Squall’s
abilities, Seifer
regards him as his
ultimate rival.
SEIFER ALMASY
Age: 17 Height: 5' 3 1/2"
A beautiful, spirited
young woman
A lively individual
with the ability to
touch people’s hearts.
Open and honest with
her feelings, she speaks
her mind without
reservation. Driven by her
ambitions, she can be
difficult at times.
RINOA HEARTILLY
Age: 18 Height: 5'6"
A top-notch member of SeeD
who serves as Squall’s instructor
A SeeD cadet at the age of 15,
Quistis now instructs Squall and
his companions at Balamb Garden.
Contrary to her cool exterior, she
occasionally has a difficult time
coping with frustration and, as a
result, can become depressed over
trivial matters.
QUISTIS TREPE
Age: 17 Height: 5' 1 1/2"
A spunky young woman with
a carefree spirit
Selphie seems out of place in
a military academy because of
her innocent appearance and
light-hearted personality. Her
happy-go-lucky disposition and
laid-back attitude tend to catch
others off guard.
SELPHIE TILMITT
Age: 17 Height: 5'5"
A Garden Cadet with
unsurpassed martial arts skills
Aspiring to become like his
grandfather who was once a
soldier, Zell entered Garden
at the age of 13. Not being one to
think matters through, he is known to
act on impulse rather than reasoning.
At heart however, he is an honest,
dedicated young man.
ZELL DINCHT
Page 7
SHOPS & COLLECTING INFORMATION
1110
WORLD MAP SCREEN
It will be necessary to stop by cities to gather information and to use shops in order for the
player to complete the game successfully. To speak to a character, press the X key. The party
can also buy and sell useful items at shops located throughout the world (shop types are
listed below).
Junk Shop Remodel weapons and increase their power.
Refer to "Modifying Weapons" described below.
Shop Buy or sell items.
Hotel Restores HP and removes Status Abnormalities for both characters and GFs
by staying overnight. Saving is also possible at this location.
Study Panel Gather various information related to the game.
It would be best to use the Study Panel along with this instruction manual.
MODIFYING WEAPONS
Characters may sometimes receive items such as rods or screws
after winning a battle. Not useful in themselves, these items or
parts can be taken to a Junk Shop where together with the proper
specifications, they can be used to modify and upgrade a
character's weapon for a fee (the stronger the upgrade, the more
expensive the cost will be). The specifications for making
modifications can be found in magazines located throughout the
world. As modifications become more powerful, the parts needed for the modification will
become harder to find. Modified weapons increase in Attack Power and Hit Rate.
MONEY IS RECEIVED AS SALARY
After Squall becomes a SeeD member, the player's party will be entitled to a salary based
upon his SeeD rank. The disbursement of this salary will be credited to the party
automatically at regular intervals.
A globe will be displayed on the bottom right of the World Map.
For Squall and his party, the map is a helpful tool in confirming
where they are while traveling across the world. On this
map, a gunblade will be displayed. The gunblade is an indicator
that shows where the player is located on the World Map and the
direction in which the player is heading.
VEHICLES ON THE WORLD MAP
As the player moves forward in the story, vehicles such as cars and
spaceships will enable the player to move more freely across the
world. The following operation applies to all vehicles in the game.
Press the X key to get on or off a vehicle, press the A key to move
forward, and press the W key to move backwards. Press the
left or right cursor keys to determine the
direction in which the vehicle will move.
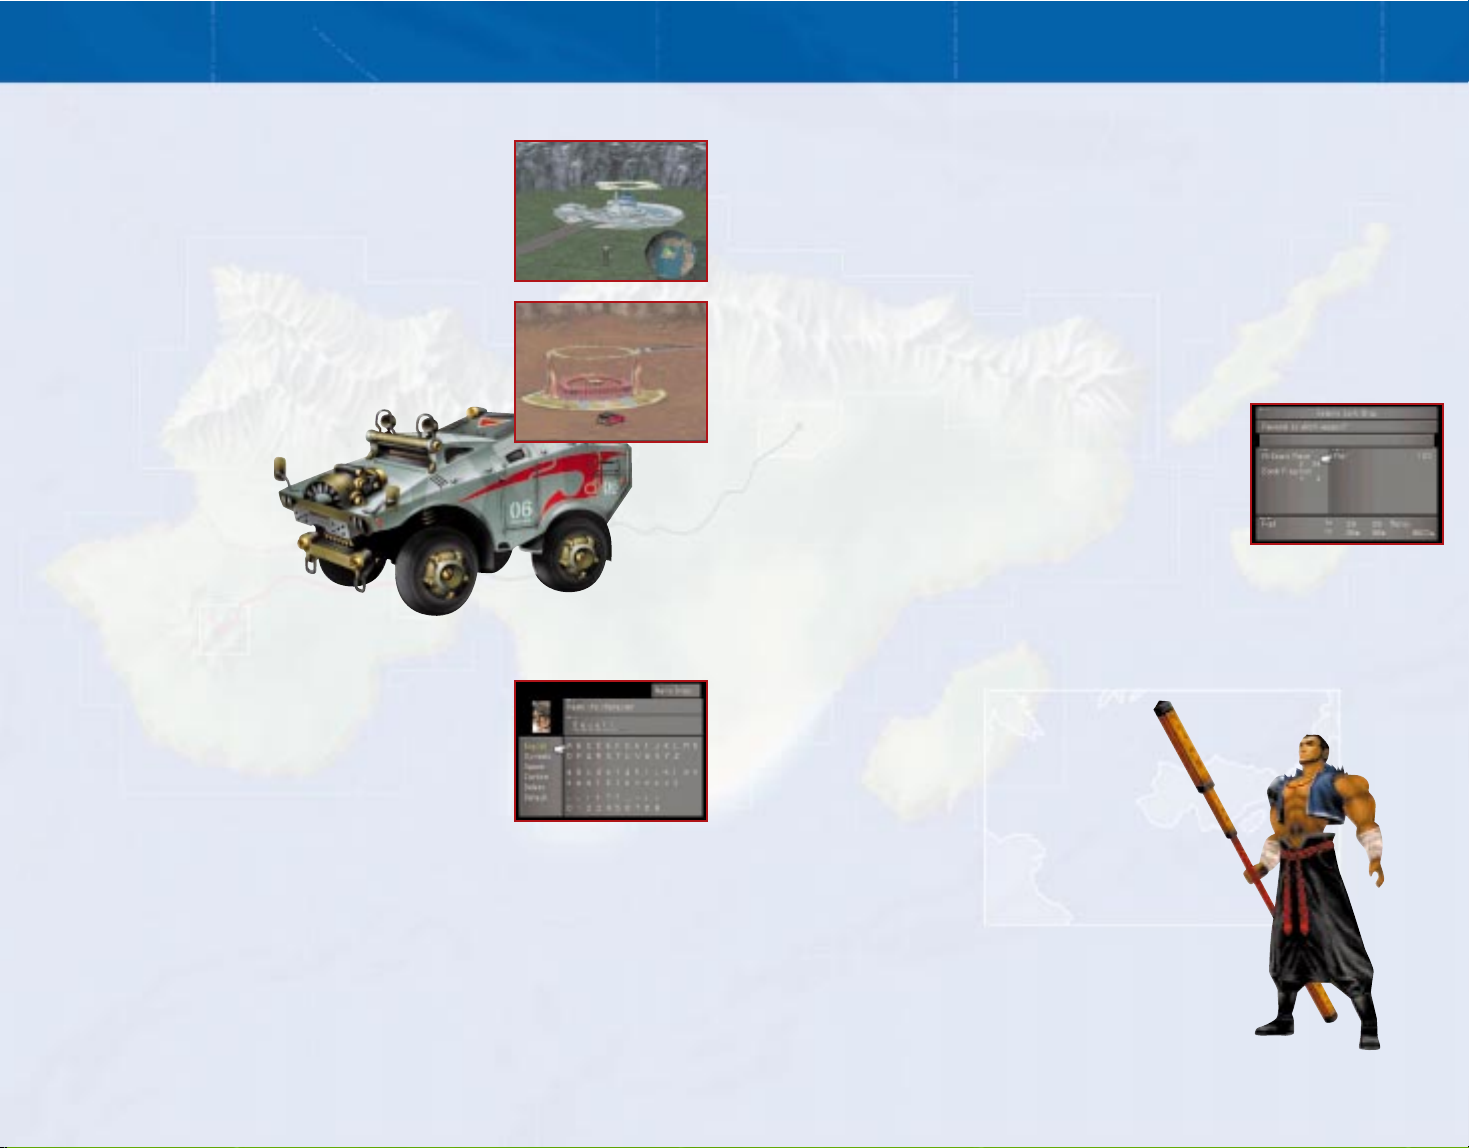
ENTERING CHARACTER & GUARDIAN FORCE NAMES
The Name Entering Screen for Squall shown on the right will be displayed when he comes
under player control for the first time. It also appears when Squall
meets new members of his party or obtains new Guardian Forces.
To rename a character or Guardian Force, use the cursor keys to
select a letter and press the X key to choose it (Press the W key to
delete). After the new name is entered, use the cursor keys to
select <Confirm> and press the X key to complete the renaming
process.
Page 8

MENU SCREEN
1312
MENU SCREEN
2. MAGIC - USING MAGIC
The Magic menu heading provides access to the Magic Screen, in
which the player can use recovery magic such as Cure and Esuna
on injured characters. Other commands in this menu allow the
player to rearrange the order of magic in the Battle Window or to
exchange magic between characters. Characters who have not
Junctioned the <Magic> Command Ability (see page 24) will not
be able to use magic during battle.
Use Select the magic to be used with the cursor keys and execute the
command by pressing the X key.
Exchg. Exchange magic between characters.
All Take all magic from another character.
Rearrange Designate how the order of magic appears when the <Magic> command is
selected during battle.
Press the D key to display the Menu Screen.
On this screen, the player can check the level
of each character, their current HP and
maximum HP, and the location. The right side
of the screen displays various menu
headings, the length of playtime, and the
amount of money in possession. When Squall
becomes a member of SeeD, his SeeD rank
will also be displayed here. Use the cursor
keys to select a menu heading and open it by
pressing the X key. To exit the Menu Screen,
press the W key.
LEARN TO USE THE MENU HEADINGS
There are a total of eleven menu headings in the Menu Screen. With the exception of
<Junction> and <GF>, nine of the menu headings will be explained below.
Junction Refer to page 20
Guardian Force (GF) Refer to page 22
1. ITEM - USING ITEMS
The Item menu heading provides access to the Item Screen that
lets the player use recovery items on injured characters or
organize items in inventory. When the Item Screen is displayed,
the player can select <Use>, <Rearrange>, <Sort>, or <Battle>
using the cursor keys and execute the command by pressing the
X key. Since <Item> is also a Command Ability (see page 24), it
needs to be Junctioned so that it can be used during battle. Descriptions of the commands in
the Item Screen are as follows.
Use Select the item to be used with the cursor keys, and press the X key
to execute the command.
Rearrange Rearrange the order of items manually.
Sort Organize the order of items automatically.
Battle Designate how the order of items appears when the <Item> command
is selected during battle.
1
2
3
5
6
7
8
4
9
JUNCTION SCREEN ICONS
A key to various icons
which appear in the Junction Menus.
ELEMENTAL ATTACK/DEFENSE
STATUS ATTACK/DEFENSE
KO - Character has zero HP.
Poison - HP decreases with each action.
Petrify - Turns target into stone, disabling the
target’s commands.
Darkness - Target becomes blind, decreasing
its Hit Rate.
Silence - Magic, GF, and Draw commands
become disabled.
Berserk - Target’s strength increases, but
commands become disabled.
Zombie - Applying recovery magic and items
causes damage.
Sleep - Puts target to sleep
Slow - Slows down target.
Stop - Stops target and disables commands.
Confuse - Disables target’s commands, they
perform commands at random.
Drain - Drains and absorbs HP from target
that was attacked.
Curse - Disables Limit Breaks. (NOTE: Not in
Status Attack Screen)
Fire
Ice
Thunder
Earth
Poison
Wind
Water
Holy
Status Attack
Status Defense
Elemental Attack
Elemental Defense
Junction Ability
Command Ability
Character Ability
GF Ability
Party Ability
Menu Ability
Page 9

MENU SCREEN
1514
MENU SCREEN
4. STATUS ATTACK
Enhance physical attacks with attributes that cause Status Abnormalities. Values can be
augmented by Junctioning magic to “Status Attack.” This status window only appears when
magic has been Junctioned to “Status Attack.”
Status Screen 3
Guardian Forces of the party.
1. GF
This window displays the GFs who have joined the party, and the
degree of compatibility between the character and the Guardian
Forces. When a symbol is displayed to the left of the name of the
GF, it means that the character has Junctioned that Guardian
Force. The degree of compatibility between the two parties is represented by the red bar and
number displayed to the right. Refer to page 27 regarding the changes in the degree of
compatibility and the details of the effects.
Status Screen 4
List of Limit Breaks and the setting of automatic functions.
1. SPECIAL
There are characters such as Squall and Zell who require button
entries when invoking a “Limit Break,” a special technique that
delivers a tremendous amount of damage to the enemy (see page
17). If the player would like to have the button entries
automatically done, set the cursor to auto mode <ON> using the cursor keys.
4. ABILITY - USE ABILITIES ON THE MENU SCREEN
The Ability menu heading provides access to the Ability Screen where the player can use
Menu Abilities learned by the Guardian Forces (see page 25). Once in the Ability Screen,
select the ability to be used with the cursor keys and press the X key to execute. The Ability
Command can be selected only after the GF acquires a Menu Ability. In the beginning, since
no abilities have been learned, the command is displayed in a gray font, showing that it
cannot be used at that time.
5. SWITCH - SWITCH PARTY MEMBERS
The Switch menu heading allows the player to change party members at Save Points and on
the World Map. It is up to the player to determine the characters that will be included or
excluded from the active party. In the Switch menu, the Junction Exchange heading allows the
player to transfer powers (Junctioned GF, magic, and abilities) from one character to another.
Refer to the Menu screen under <Tutorial> for more information regarding this feature.
6. CARD - CONFIRM ACQUIRED CARDS
The player will be able to check the mini-game cards the party currently possesses. There are
ten levels of cards, corresponding to the ten pages in this display. To view cards on different
pages, press the cursor keys left or right.
7. CONFIGURATION - CHANGE GAME SETTINGS
The player will be able to change game settings. Press the cursor keys up and down to select
headings, and change settings by pressing the cursor keys left and right. Press the X key only
when selecting <Customize> under the Controller setting.
3. STATUS - UNDERSTANDING
CHARACTER ABILITIES
The Status menu heading allows the
player to check the various attributes of
the characters in the party. Select the
Status heading and then a character to
open up the Status Screen for that
character. Once the Status Screen is open,
three other Status Windows can be
opened by pressing the X key. Press the
Q key or E key to switch between
different characters to view their Status
Screens.
Basic Character Attributes
1. HELP Additional information about the selected heading
2. Name Character Name
3. LV (Level) Character Level
4. HP (Hit Point) Current HP / Maximum HP
5. Current EXP (Experience Point) Acquired Experience Points
6. Next Level Experience Points necessary to Level UP
7. Strength Strength of Physical Attacks
8. Vitality Endurance against Physical Attacks
9. Magic Strength of Magic Attacks
10. Spirit Endurance against Magic Attacks
11. Speed The speed at which the Active Time Battle gauge fills up
12. Luck Affect Evasion Rate, Hit Rate and chance for first strike
13. Evasion The probability of avoiding Physical Attacks
14. Hit Accuracy of Physical Attacks
15. COMMAND Command Junctioned for battle (refer to page 24)
16. Weapon Currently equipped weapon
17. ABILITY Ability that has been Junctioned (refer to page 24)
Status Screen 2
Resistance to and the augmentation of Elemental Attacks and
Status Abnormalities. (See page 13 for key to icons.)
1. ELEMENTAL DEFENSE
Resistance to Elemental Attacks such as fire and lightning. By
Junctioning (see page 28) magic to “Elemental Defense,” the
defense values can be augmented.
2. STATUS DEFENSE
Resistance to attacks which cause Status Abnormalities. Like “Elemental Defense,” values can
be augmented by Junctioning magic to “Status Defense.”
3. ELEMENTAL ATTACK
Enhance physical attacks with elemental attributes. Values can be augmented by Junctioning
magic to “Elemental Attack.” This status window only appears when magic has been
Junctioned to “Elemental Attack.”
3
4
5
2
1
6
7
8
9
11
15
17
16
12
13
14
10
Page 10

BATTLE SCREEN
1716
MENU SCREEN
Controller Switch between initial setting <Normal> and <Customize> which will allow
the player to change the Controller configuration.
Cursor Switch between <Initial> and <Memory> which will display the cursor at
the previously entered command.
ATB Switch between <Active> time where time continues to flow or <Wait>
where time stops while making command selection during battle.
Scan Switch between <Once> and <Always>. Selecting <Always> will display
the Scan Screen for those enemies that have been Scanned previously.
Camera Movement Adjust between <0%> and <100%>. The higher the number, the more the
camera moves.
Battle speed Adjust battle speed.
Battle message Adjust the speed of the message display during battle.
Field message Adjust the speed of the message display on the field.
Sound Adjust the volume of sound effects in the game.
8. TUTORIAL - EXPLANATION OF VARIOUS FUNCTIONS
WITHIN THE GAME
In addition to this instruction manual and the study panel in
Balamb Garden, this menu heading will provide help whenever
needed during the game.
9. SAVE - SAVE GAME DATA
This command can be selected when standing adjacent to a
Save Point, or on the World Map.
The Battle Screen contains information that is
crucial for survival. It is necessary to understand
the information being presented and its
significance in order to think strategically during
battle. The section on the right details the
information shown on the Battle Screen.
1. Message Window
Messages will be displayed here during battle.
2. Character Graphics
A
▼ symbol will appear above the head of the character whose turn is active.
3. Command Window
Lists the commands that may be used during battle. Initially, only
Physical Attacks using the <Attack> command can take place, but by
adding Command Abilities through Junctioning, the player will be
able to use various commands such as <Magic>, <Draw>, and
<Items> (Refer to page 24 for details).
4. Character Name / HP / ATB Gauge
This area displays the Character Name, current HP value and Active Time Battle gauge. When
the ATB Gauge fills up to the right, the player will be able to enter a command. Press the D
key to switch to another active character.
SURVIVING BATTLES
In order to survive battles, the player will need to be knowledgeable of combat situations.
The following section explains how to deal the maximum amount of damage, how to retreat,
and Status Abnormalities.
DAMAGE THE ENEMY TO THE MAXIMUM WITH CRITICAL HITS
The main character, Squall, is equipped with a gunblade. Press the E key just as the gunblade
strikes an enemy to deal more damage to the target.
RETREAT BY RUNNING AWAY
Escape battle by holding down the Z key and C key simultaneously. But the player should be
aware that there are some enemies from which escape is not possible.
LIMIT BREAKS - APPEAR IN TIMES OF NEED
When a character is in a critical situation, a may appear next to
the <Attack> command of a character, this means that a Limit
Break is available. Limit Breaks are powerful techniques unique to
each character. When the player holds down the right cursor key
and then presses the X key while is showing, the Limit Break
will be activated.
Squall Press the E key in sync with the mark that appears on the gauge. If the
[Renzokuken] timing is correct, damage will double. A finishing move may also be activated
at random.
▼
▼
1
2
4
3
Page 11

BATTLE SCREEN
1918
BATTLE SCREEN
Seifer Selecting <Fire Cross> will automatically activate “No Mercy”, an attack that
[Fire Cross] strikes all enemies in range.
Zell Once this Limit Break is triggered, continue pressing the button entries listed
[Duel] on the screen until the time limit displayed reaches 0. Each successful entry
will unleash a damaging combo attack.
Quistis A list of acquired Blue Magic will be displayed when this Limit Break is
[Blue Magic] activated. Select the technique to be used and press the X key to trigger
its effects.
Selphie Once this Limit Break is triggered, it will randomly determine what type of
[Slot] magic will be activated, and how many times. After the random selection is
complete, the player can select <Cast> to activate the selected magic or
<Do over> to go through the random selection process again.
Irvine When this Limit Break is triggered, an option to select the types of ammunition
[Shot] will appear. After the selection is complete, the ATB Gauge will begin to run
backwards. At this point, the player will be able to shoot bullets by pressing
the E key until the gauge decreases to 0.
Rinoa Rinoa’s Limit Breaks involve attacks with her dog, Angelo. After selecting
[Combine] <Combine>, depending on the situation and learned techniques, one attack
will automatically be activated.
Main Status Abnormalities and their Cures
It is possible to receive Status Abnormalities from enemy attacks. Some examples of these
effects and their respective cures are listed below.
[Status Abnormalities which remain after battle]
Poison HP decreases with activity. Cure with Antidote (item).
Petrify Character cannot participate in battle. Cure with Soft (item).
Darkness Physical Attack Hit Rate decreases. Cure with Eye Drops (item).
Silence Character cannot use the <Magic>, <GF>, or <Draw> commands. Cure with
Echo Screen (item).
• The above abnormalities (Poison, Petrify, Darkness, and Silence) may also be cured with
Remedy (item) or Esuna (magic).
Zombie Recovery items and magic effects deal damage. Cure by using Holy Water
(Item) or Dispel (magic).
KO Once the HP of a party member reaches 0, that party member can no longer
participate in the battle.Recover with Phoenix Down (item) or Recovery magic.
[Status Abnormalities during battle]
Sleep ATB Gauge stops when the character falls asleep. Cure when hit by Physical
Attacks or with the passage of time.
Curse Limit Breaks cannot be activated. Cure with the passage of time or with
Holy Water (item).
Berserk Character will attack enemies automatically. The player will have no control
over the character.
Confuse Commands will be randomly selected. The player will have no control over
the character.
•The above abnormalities (Sleep, Curse, Berserk, and Confuse) may also be cured with
Remedy (item) or Esuna (magic).
Slow The ATB Gauge decreases its speed. Cure with the passage of time, Esuna
(Magic), or Haste (Magic).
BATTLE COMPLETION
A battle may end in one of two ways. Both are discussed below.
ANNIHILATION OF THE ENEMY
When the player defeats all the enemies in the battle, the party
acquires Experience Points and Ability Points (even when the party
runs away, if damage has been dealt to the enemy, some Experience
Points will be awarded). When a certain amount of Experience Points
are obtained, the character will Level UP. At other times, the party
may find valuable items dropped by defeated enemies. Leveling UP
also applies to GFs that have been Junctioned to fighting characters
(see page 25).
GAME OVER WHEN THE ENTIRE PARTY IS UNABLE TO
CONTINUE
If the HP of the entire party reaches 0, if they all become petrified,
or if the time limit is exceeded on timed events, the game will
be over.
Page 12

JUNCTION SYSTEM
2120
JUNCTION SYSTEM
GLOSSARY OF TERMS
JUNCTION
In this game, Junction refers to equipping characters with things
other than physical objects such as weapons and armors. Basically,
this involves Guardian Forces (see below). It also allows the player
to equip (or Junction) characters with magic.
GF
GF is the abbreviation for Guardian Force. Guardian Forces can be
summoned during battle. In FINAL FANTASY VIII, Junctioning a GF
with a character allows the GF to Level UP in the same way the
characters do. As a GF grows stronger, it will grant Special Abilities to
the character with whom it is Junctioned.
DRAW
Characters are able to draw certain elements from enemies and
possess those drawn elements as magic. In FINAL FANTASY VIII,
since magic cannot be bought in shops, a commonly used method to
obtain magic is to draw it directly from enemies. It is also possible to
obtain magic through draw points and by refining magic from items.
BASIC KNOWLEDGE OF THE JUNCTION SYSTEM
The newly introduced Junction System enables the player to change a character’s qualities and
direction of growth. Grasping an understanding of the terms related to the Junction System
listed on the right will enable the player to understand the flow of the Junction System
illustrated below.
FLOW OF THE JUNCTION SYSTEM
1. Obtain a Guardian Force (GF) (see page 22)
Obtaining a GF will allow the player to use the Junction System.
2. Select an Ability to be Learned by the GF (see page 24)
Use the <GF> command on the Menu Screen to choose an ability to
be learned by the GF
3. Junction the GF (see page 25)
Junction the GF by selecting <Junction> on the Menu Screen.
4. Junction Ability (see page 26)
Junction the ability that a GF possesses to a character.
DRAW MAGIC FROM THE ENEMY
Once a GF has been successfully Junctioned to a character, the
<Draw> command may be Junctioned. After Junctioning the <Draw>
command, draw magic from enemies during battle (see page 26).
5. Junction Magic (see page 28)
Junction magic that has been drawn from enemies to the character’s
stats (e.g. HP, Str, EL-A/D, etc.).
3
4
2
1
Page 13

JUNCTION SYSTEM
2322
JUNCTION SYSTEM
SELECTING THE GUARDIAN FORCE’S LEARNED ABILITIES
SELECT THE DIRECTION OF GROWTH FOR THE GF
To select an ability to be learned by a GF, press the D key to display the Menu Screen and
select the <GF> menu heading on the screen. Guardian Forces that are available to learn
abilities will be displayed. Select the desired GF with the X key and the Abilities Screen
shown below will appear. Using the <Learn> menu heading on this screen, the player will be
able to check the status of the GF and select the ability for the GF to learn. This ability will be
gained once enough Ability Points (AP) have been accumulated through battles.
GF Status Screen Displays the basic ability values of the GF
1. Notice Window Display the <Learn> command which opens the Abilities Screen
2. Name Display the name of the GF
3. LV Display the level of the GF
4. HP Display current HP / Maximum HP
5. Current EXP Display Experience Points acquired
6. Next Level Display Experience Points necessary to Level UP
7. Learning Display the name of the ability being learned. Current AP /
Necessary AP to gain the ability
8. Compatibility Represent the compatibility between the characters and the GFs
(See page 27 for details)
GUARDIAN FORCES
In order to utilize the Junction System, it is necessary to obtain a GF.
This is possible by defeating a GF itself or by drawing one out of a
boss monster. There may be other times when the player will be
able to obtain a GF in unexpected locations.
GUARDIAN FORCES OBTAINED IN THE BEGINNING OF THE GAME
The first Guardian Forces can be obtained at the beginning of the game in Balamb Garden by
reviewing the study panel. By accessing the <Tutorial> command on the study panel, the
player will be able to obtain two Guardian Forces, Quezacotl and Shiva.
GUARDIAN FORCES
Guardian Forces have tremendous power that can provide a party with extraordinary strength.
A few of the Guardian Forces are introduced below.
Quezacotl
Spirit which governs lightning
Appears amongst lightning clouds
and showers the enemy with
“Thunder Storm.”
Shiva
Spirit which manipulates ice
Freezes surrounding objects with “Diamond Dust” and
damages all enemies with extreme cold.
Ifrit
Demon spirit that commands fire
Summons and then unleashes “Hell Fire,” a
massive ball of flame that burns all enemies.
7
1
6
5
4
3
2
Page 14

JUNCTION SYSTEM
2524
JUNCTION SYSTEM
PARTY ABILITIES
These abilities provide special effects that benefit the entire party. Only one character needs
to have a Party Ability set in order for it to take effect.
Example:
Alert Prevent back attacks and first strikes by enemies
Move-Find Find hidden Save Points and Draw Points
GF ABILITIES
These abilities increase the power of the Guardian Forces. Unlike other abilities, these
abilities do not need to be Junctioned to take effect.
Example:
SumMag+20% Increase effect of attacks from Summon Magic by 20%
GFHP+20% Increase GF HP by 20%
MENU ABILITY
These abilities will be added to the <Ability> menu heading on the Menu Screen. They do not
need to be Junctioned to characters and can be used at any time.
Example:
Haggle Purchase items in shops at a discounted price
F Mag-RF By refining certain items, a character will be able to create “Fire” magic
JUNCTION GF
Junctioning the GF is crucial to the character’s power
After selecting the ability to be learned by the GF, it is ready to be
Junctioned. Select <Junction> on the Menu Screen and press the X
key. Select the character who will Junction the GF using the cursor
keys and press the X key. After that, select the headings <Junction>
and <GF> respectively. A window will now appear displaying the
GFs. The names of GFs that are ready to be Junctioned will appear
in white font while already Junctioned GFs will be displayed in gray.
Learned Abilities of each GF may be viewed by selecting a GF and
pressing the A key. Select the GF that is to be Junctioned with the cursor keys and press the
X key. After completing the selection, press the W key to exit this menu.
GF Growth Rate
Like the characters, the Guardian Forces grow and mature. While Junctioned to a character, the
GFs will also receive Experience Points after every battle. On occasions where several GFs are
Junctioned, the Experience Points are divided evenly between the Junctioned Guardian
Forces. With 300 Experience Points, if only one GF is Junctioned, it will receive 300 points, but
if two GFs are Junctioned, each will receive an equal distribution of 150 points. When a certain
level of Experience Points have been attained, the GF will Level UP, and its HP and Attack
Power will increase.
Using Learned Commands - The only abilities that can be used are the ones the GF has
learned.
Learn - Select the ability to be learned by the GF
When the player presses the X key on the GF Status Screen, the abilities that may be learned
will be displayed in a window to the right of the screen. Select the ability to be learned using
the cursor keys and press the X key to execute the command. If the ability has already been
learned, the word “Complete!” will be displayed.
FLOW OF LEARNING NEW ABILITIES
1. Select Ability - Select the ability to be learned by the GF using the cursor keys, and press
the X key to execute the command.
2. Battle - Battle while the GF is Junctioned (see page 25) and collect AP.
3. Acquire Ability - Once enough AP has been collected, the GF will learn the ability. Repeat
steps 1 through 3 to learn more abilities.
SIX TYPES OF ABILITIES WITH VARIOUS CHARACTERISTICS
JUNCTION ABILITIES
These abilities allow the player to Junction magic to character stats, letting players customize a
character’s characteristics (see page 28 for details).
Example:
HP-J Junction magic to HP
Str-J Junction magic to Strength
COMMAND ABILITIES
These abilities allow the player to add or customize commands on a character’s Battle Window.
Example:
Magic Make the <Magic> command available, allowing characters to cast magic on or
off the battlefield
GF Make the <GF> command available, allowing characters to summon Guardian
Forces during battle
CHARACTER ABILITIES
These abilities add special skills and improve the values of an individual character’s stats by
setting them in the Ability Window located below the Command Window while Junctioning.
Normally, a character has only two slots available for this type of abilities. However, the player
will be able to Junction more after certain abilities are learned by the GF.
Example:
Str+20% Character’s Strength will increase by 20%
Mug Change the <Attack> command to <Mug>
Cover Receive attacks in place of another party member
Page 15

JUNCTION SYSTEM
2726
JUNCTION SYSTEM
3. GF - Like the characters, GFs receive damage if they get attacked
while they are being summoned
When the <GF> command is executed, the GF will take the place of
the character who summoned it and shield that character with its life
force. The ATB Gauge will turn blue and begin decreasing. When the
gauge reaches its end, the GF will appear and unleash its power.
During the summoning process however, the GF is vulnerable to
enemy attacks, and will take damage in place of the character who summoned it. If the GFs HP
ever reaches 0, summoning that GF will not be possible for the remainder of the battle.
Restoring Guardian Force HP
There are two ways to restore the HP of the GF who has received damage during the
summoning process. One method is to stay at an Inn. Another way is to use recovery items
specific to the GF. Such items are sold in shops. The symbol “G” designates a GF specific item.
It is best to purchase them whenever they are available.
Depending on compatibility, the summoning time for a GF may
decrease
A degree of compatibility exists between the GF and the character that has summoned the GF.
The higher the compatibility number, the quicker the summoning process takes place. In order
to increase the compatibility between a character and a GF, the character should summon that
GF often and use magic with the same or similar properties as the GF. There is a possibility,
though, that the compatibility of the GFs which have not been summoned will somewhat
decrease. The best way to avoid getting a GF jealous or to increase the compatibility between
a GF and character is to Junction only one GF to a character and use it exclusively.
4. Item - Use items during battle
It is possible to use items stored in inventory during
battle. If the player would like to use recovery items or
attack items during battles, the <Item> Command Ability
needs to be Junctioned in advance.
JUNCTION MAGIC
Characters with a Junctioned Guardian Force can also have magic Junctioned to their stats. To
Junction magic manually, enter the Junction Screen and select <Junction>. When the <Magic>
command becomes available, select it to enter the Magic Junction Screen. To Junction magic
automatically, choose <Auto> in the Junction Screen instead of <Junction>. A new screen will
appear, giving the player three new options; <Atk>, <Mag> and <Def>. These options refer to
a style of play the player would like their character to be suited for. When the selection is
made, magic will be Junctioned according to the style chosen (see page 28).
* <Magic> and <Auto> commands will not be available if the character does not possess
any magic.
JUNCTION ABILITIES
Determine Abilities to be used during battle
Select <Abilities> on the Junction Menu for the Battle Window (the
screen will be automatically switched to this screen after exiting the
GF/Magic Junctioning Menu if the character does not possess any
magic). Here, in addition to deciding what commands will be
available during battles by Junctioning Command Abilities, the
player can customize characters by Junctioning Character Abilities and Party Abilities. To do
so, select the slot where an ability will be Junctioned using the cursor keys and press the
X key. Then, use the cursor keys to select the ability that will be Junctioned and press the
X key again. Press the W key to exit this menu.
One Point of Advice
Command Abilities that are available in the beginning of the game
The four Command Abilities that become available immediately after obtaining a GF are the
most basic and important commands to know and understand.
1. Draw - Obtain magic
One of the most frequently used commands is <Draw>, which enables the player to draw out
the element of enemies in the form of magic. Since it is the most common way characters will
be able to obtain magic, players should Junction this command to characters right away. If a
player wants to cast magic immediately after it is drawn out of an enemy during battle, select
<Cast> using the cursor keys and press the X key. If not, the player can select <Stock> using
the same method to store the magic for use at another time.
2. Magic - Use magic during battle
Once spells have been drawn out and stocked with the <Draw> command, using them will
require the <Magic> command. Selective use of magic is an important strategic element in the
game. Fire magic should be used against enemies who are weak against fire, while stocking up
on Cure magic can prevent the destruction of the party when fighting against enemies who do
not have Cure available to be drawn. In the beginning, it will be useful to have members who
can use both <Draw> and <Magic> commands.
Page 16

JUNCTION SYSTEM
2928
JUNCTION SYSTEM
3. Junctioned Stat Values are Based on the Amount of Magic in Stock
The greater the quantity of the magic being Junctioned, the higher the stat value.
It is important to remember that along with the compatibility of magic, Junctioned stat values
are also based on the amount of magic it is Junctioned to in stock. The more magic in stock,
the greater the plus value becomes, and vice versa. If the player uses up the magic that is
Junctioned during battle, the stat with which the magic was Junctioned returns to its base value
and the plus unit disappears.
When the number of the magic in stock is 99
Basic value + α (large)
The greater the number of magic being Junctioned, the more stats will improve.
When the number of the magic in stock is 1
Basic value + α (small)
Use <Junction> to customize characters
The newly created Junction System makes its debut in FINAL
FANTASY VIII. Its purpose is to enable the player to customize their
characters freely. How will the player combine the GF necessary for
character development, and how will the player Junction abilities
and magic to stats? How will the player distribute the magic that is
obtained during battle? Will the player use magic during battle, or
will the player stock the magic to increase the character’s power? Perhaps the player will
distribute them evenly. Success and failure are based on the player’s judgment, his or her
ability to manipulate the different variables of the Junction System will determine how well
the characters accomplish their goals in the game.
JUNCTION MAGIC
Increase a Character’s stats with magic that has been drawn out. In
order to Junction magic, two conditions must be fulfilled.
1. A GF that has learned the appropriate Junction Ability is
Junctioned.
2. The character possesses magic.
With these two conditions, it is possible to Junction magic to a character’s stat and increase its
value. After selecting the <Junction> command on the Menu Screen, select the <Junction> and
<Magic> headings respectively. When the Junction Ability Window is displayed, it is necessary
to decide which magic will be Junctioned with a stat that is available for Junctioning (displayed
in white font). Switching between the Junction Ability Window can be accomplished by
pressing the left or right cursor keys.
One Point of Advice
Warning when Junctioning magic
“Junctioning Magic” does not mean magic should be attached to stats at random. Benefit from
the Junction system by utilizing the hints listed below.
1. Basics of Magic Junction
It is not possible to Junction the same magic to different stats.
This is a basic rule when considering Junctions between magic and each stat. This simply
means that it is not possible to Junction the same magic to different stats at the same time. It
is best to Junction magic to each Junctionable stat and observe how the numerical values
change. When the figures increase, the numbers are yellow. If there is no change, the numbers
are white. If the values decrease, the numbers are displayed in red. The player can decide
which attribute to Junction after observing the change in values. Another option is to use the
<Auto> command, which is the third heading in the Junction Menu. When <Auto> is selected,
<Atk>, <Mag>, and <Def> are displayed; the player should select the choice which best
meets their needs with the cursor keys and press the X key to execute the command. Once
selected, magic will be automatically Junctioned to the stats which best fits the
selection made.
2. Compatibility Between Magic and Junctioned Stat
Depending on the Junctioned magic, the maximum stat value may
fluctuate. Compatibility exists between certain stats and magic that
are Junctioned. For instance, “Cure,” which recovers HP, should be
Junctioned to HP, and “Protect,” which increases physical endurance
during battle, should be Junctioned to Vitality. The value of
these stats will be greater with compatible magic than with
unrelated magic.
Page 17

CARD GAME/TRIPLE TRIAD
3130
CARD GAME/TRIPLE TRIAD
LOCAL RULES
Some examples of the local rules that may be encountered later in the game.
HANDS:
Open: All ten cards will be facing up so the player can see them
Random: Five cards will be selected automatically from the player’s collection of cards
REWARDS:
One: The winner of the game can choose one card from the opponent’s hand and keep it
Diff: The winner of the game can choose a number of cards equal to the difference
between the winning score and losing score
All: The winner of the game can keep all cards used by the opponent
Direct: Each player gets to keep the cards they captured at the end of the game
A detailed description of the Triple Triad rules can be found on the Tutorial Menu in the Menu
Screen and on the study panel in Balamb Garden. Press the D key to open the Menu Screen
and select the <Tutorial> command. Use the cursor keys to select <Card Game Rules> and
press the X key to read more about Triple Triad.
Triple Triad is a card game similar to dominos that lets party members duel non-player
characters (NPC's) with the cards they have in their possession. The winner of the game gets to
select a card from the playing hand of their opponent.
There are three ways to obtain game cards. Characters can obtain cards by winning a challenge
against a NPC, by defeating monsters, or by using the
<Card> Command during battle. The <Card> command
is an ability that can be learned only by a GF and must
be Junctioned prior to battle.
To challenge a character, the player must first possess
more than five cards. When this condition is met (by
talking to the man next to the elevator on the second
floor of Balamb Garden), press the A key when facing a
character to initiate the challenge.
BASIC RULES
The basic rules of the game are simple. The character and the opponent will start with a hand
of five cards each. Each card represents a point. The character gains or loses points as they
capture or lose cards. After the computer randomly selects who goes first, each player places
one card at a time on the 3X3 grid until all nine slots on the grid are filled. The winner of the
game is the one who possesses the most points at the end of the game. Keep in mind that as
the player progresses through FINAL FANTASY VIII, “local rules” may change the way the game
is played.
CARD VALUES
Each card has four numbers. Each number represents the strength of a side on the card, and
can have a value between 1 and 10 (a 10 on a card is denoted as an “A”). If the player places a
card on the grid next to a card that has a smaller number on the side adjacent to the player’s
card, the weaker card will be captured by the player and converted to their color. At the same
time, the player gains a point, while the opponent loses a point (points are based on the
number of cards a player currently controls, counting captured cards and cards not yet in play).
For instance, the opponent places a card that has a 3 on the right side in the top left corner of
the grid. To capture this card, the player can place any card that has a number larger than 3 on
its left side to the right of the opponent’s card.
There are four types of cards a player can collect:
• Monsters
• Bosses
• GFs
• Characters
The most common cards are monster cards, followed by boss cards, GF cards, and character
cards. The more powerful a card is, the harder it is to find. Later on in the game, an ability can
be learned by the GFs that lets the player convert cards in his or her possession into rare
items needed for weapon upgrades and magic refinement.
Page 18

CHOCOBO WORLD
33
HOW TO PLAY
Understanding the various menus
There are three different screens in Chocobo World. Refer to the following information to learn
how to play on each screen. Playing methods and battle arrangements are explained below.
WALKING SCREEN
Main Game Screen Move Boco in any direction
up cursor key Walk Boco to the North
down cursor key Walk Boco to the South
left cursor key Walk Boco to the West
right cursor key Walk Boco to the East
Ctrl key Display Menu Screen
BATTLE SCREEN
The screen changes to the Battle Screen when encountering an enemy, thus initiating a battle.
left/right cursor key By pressing them alternately, the ATB counter reaches 0 sooner.
BATTLE & LEVELING UP
Upon encountering an enemy, the Walking Screen will change to the Battle Screen when
encountering an enemy after an Event. While in battle the player will see 2 boxed numbers in
the bottom-middle portion of the screen. These numbers are referred to as the ATB counter.
The number on the left represents the counter for the enemy and the number on the right
represents the counter for Boco. The first counter to reach 0 will get to attack. Upon winning a
battle, Boco will receive magic stones to use towards leveling up. If the stones line up in a row,
Boco's level will increase.
MAP SCREEN
Display's Map number, time clock, and movement methods.
up/down cursor keys Changes the direction Boco is walking
left/right cursor keys Toggle through menus
STATUS SCREEN
Lists Boco's weapon strength, Level, and current HP. This screen will also list an ID number for
Chocobo World. This ID number is specific to every game of Chocobo World.
ITEM SCREEN
The items found in Chocobo World are categorized in 4 different classes: A, B, C, D. These item
classes will determine what type of items the player will receive when transferred into the game
(“A” being the rare or hard to find items, and “D” being the common items).
EVENT SCREEN
This screen contains 2 options, Event ON and Event OFF. Event ON will allow the player to
initiate an Event manually. Event OFF will automatically force Boco to initiate the Event.
MOVE SCREEN
The Move Screen will determine how far Boco will divert from his course to reach an event.
up/down cursor key Increases or decreases the range in which Boco will divert from
his course
DEFEAT
When defeated, Boco will continue to sleep until his HP is completely restored. It is possible to
wake Boco up during sleep, but it is best to wait until his HP is recovered completely.
CHOCOBO WORLD
32
After obtaining the Chocobo in the actual game, the player will then be able to communicate
with Chocobo World. Select <SAVE> on the Menu Screen, then Select Chocobo World. If the
player would like to save in the “Home“ mode, it will be necessary to save the game data
using the regular save method in FINAL FANTASY VIII.
Boco A Chicobo (baby Chocobo) who follows Chocobo
MiniMog A lost, infant Mog
Moomba A cat-like friend who finds weapons for Boco
Cactuar A cactus-like friend who finds items for Boco
EVENTS OCCUR WHEN BOCO ENCOUNTERS FRIENDS
While moving on the Walking Screen, Boco will encounter one of the many dots
placed on the map. These dots will trigger an "Event," which can result in a battle, Cactuar who
hands out items or various other characters and friends who await Boco's appearance in order
to help him out along his journey.
WHAT TO DO
BOCO EMBARKS ON AN EPIC JOURNEY
Playing Chocobo World will enable the player to enjoy the options listed in the following
section.
1. Finding MiniMog
One of the events in Chocobo World will enable the player to find the character MiniMog.
When found, MiniMog will accompany Boco on his journey and help him out in battle when
the "Standby" option is selected (see "How to Play" on the current page or in Chocobo World
Save menu).
2. Raise the Chicobo
Boco, who can be summoned in battle as a Guardian Force (GF) by using the Gysahl Greens in
battle, can only be raised in Chocobo World. For information on how to raise Boco, refer to the
section, "Battling and Leveling up" on page 33.
3. Collecting Items
Items found in Chocobo World can be brought back into the world of FINAL
FANTASY VIII. By choosing the "World" option in the Chocobo World Save
Menu, all items Boco finds will be transferred into the player's Item Menu.
4. Finding Moomba
Throughout the game of Chocobo World, Boco will encounter Moomba
who will give him new weapons to use in battle. These weapons come in
the form of 4 numbers that will be used to determine how much damage
Boco will inflict on an enemy. When Moomba is found the player will have
the option of choosing between the new weapon found or keeping the
existing weapon.
5. Fighting Enemies
Many of the events in Chocobo World are random battles with various
enemies. Once defeated, Chocobo will slowly gain the ability to raise his level
(see "Battle & Leveling Up").
Page 19

CREDITS
3534
CREDITS
Compatibility Testing
Chief Engineer Bennett Neale
Compatibility Technician Justin Dornan
Assistant Technician Jeff Love
SQUARE ELECTRONIC ARTS L.L.C.
Senior Customer Service Manager Rick Thompson
Assistant Customer Service Manager Fernando Bustamante
Customer Service Lead Alaine DeLeon
Customer Support Representatives Patrick Cervantes
James Dilonardo
Caroline Liu
John Montes
Mark Abarca
Mark Acero
Alan DeGuzman
Ryan Riley
PR and Events Manager Lisa M. Ahern
Assistant PR Manager Francine DeMore
Business Development Manager Elaine Di Iorio
Product Coordinator Beth Faust
Sales Coordinator Sean Montgomery
Media Planner Kyoko Yamashita
Creative Planner Keiko Kato
Assistant Product Managers Mitsuru George Torii
Andrew Shiozaki
Product Associates Andy Hsu
Irene Sam
Brad Varey
Product Administrative Assistant Mari Nishikawa
Marketing Assistant Rika Maruya
Marketing Manager Kenji Mimura
Vice Chairman Yoshihiro Maruyama
President Jun Iwasaki
Package/Manual Design Steven Wright
Beeline Group, Inc.
Special Thanks Randy Fujimoto
Shun Moriya
Yumi Yoshida
RAD Game Tools, Inc.
Beeline Group Inc.
Saatachi & Saatchi Los Angeles
C.H.E.N. PR
Virtual InterActive
BradyGAMES
SHOREWOOD PACKAGING CORP.
The Kenwood Group
Mike Givens
Judah Mehler
Bennett Neale
SQUARE CO., LTD.
Executive Producers Hironobu Sakaguchi
Tomoyuki Takechi
Producer Shinji Hashimoto
Publicity Producer Michio Okamiya
Director Yoshinori Kitase
Music Composer Nobuo Uematsu
Main Programmer Ken Narita
Battle System Designer Hiroyuki Itou
Character Design &
Battle Visual Director Tetsuya Nomura
Art Director Yusuke Naora
Scenario Writer Kazushige Nojima
Image Illustrator Yoshitaka Amano
CG Supervisor Satoshi Tsukamoto
Movie Director Motonori Sakakibara
Movie Character Model Director Hiroshi Kuwabara
Character Modeling Director Tomohiro Kayano
Real-Time Polygon Director Akira Fujii
Battle Effect Director Shintaro Takai
Motion Director Tatsuya Kando
Card Game &
Battle Camera Director Takayoshi Nakazato
Lead Field Designers Kenzo Kanzaki
Tetsuya <T2> Takahashi
Yukio Nakatani
Kazuyuki Ikumori
VFX & Composite Hiroshi Matsuyama
Event Script Programmer Shun Moriya
Battle Programmers Hiroshi Harata
Kentarow Yasui
Event Director Hiroki Chiba
Map Directors Takeshi Endo
Masaru Oka
World Map Director Ikuya Dobashi
Sound Programmer Minoru Akao
Sound Editor Eiji Nakamura
Production Manager Akira Kashiwagi
Localization Department
General Manager Koji Yamashita
Localization Director Aiko Ito
Coordination Director Tchie Tokoro
Localization Engineer Richard Honeywood
Marketing General Manager Yuji Shibata
Marketing Managers Akira Kaneko
Yasuhiro Suzuki
Assistant Manager Tomomi Nishigaki
Localization Assistant Yuichi Yamada
SQUARE SOFT, INC.
Executive Producer Masahiro Nakajima
Project Lead Jay Fong
Senior Software Engineers Jay Fong
Anthony Ignacio
Software Engineers Kevin Christensen
Scott Coventon
Kazumasa Fuseya
Davide Pasca
Yoshinori "Goro" Uenishi
Network Administration Sami Zuhuruddin
Terry Jung
Localization Management Masahiro Nakajima
Localization Specialists Yutaka Sano (Lead)
Ryo Taketomi
Maki Yamane
Alexander O. Smith
Editors Brian Bell
Richard Amtower
Associate Producer Aki Kozu
Quality Assurance Manager Jonathan Williams
Assistant QA Manager Mike Givens
Lead Product Analyst Ben Norman
Assistant Lead Analyst Judah Mehler
Product Analysts Jesse Cheek
T.D. Shimonishi
Jason Wheeler
Tam Nguyen
Ban Du
Mohammed A. C. Wright
Mikey Nguyen
Richard Williams
Drew Jennings
ELECTRONIC ARTS
Customer Quality Control Jacob Fernandez
Benjamin Crick
Dave Knudson
Micah Pritchard
Darryl Jenkins
Andrew Young
Tony Alexander
Page 20

The following is a brief walkthrough for the beginning of FINAL
FANTASY® VIII for the PC. If you don’t want to know what’s
coming, don’t read this section.
Should you choose to read on, you’ll
discover useful tips and strategies for getting started and
for defeating the first Boss.
SPOILER ALERT!
Strategy content provided by
The Classroom
At the start of the game simply follow
Squall’s instructor, Quistis Trepe, until
she releases everyone from class. Speak
with the other students, and then return
to Squall’s desk and access the Study
Panel. Select the Tutorial section titled
“new” and you’ll automatically receive
your first two Guardian Forces (GF),
Quezacotl and Shiva. Before you equip
your two new GFs, take some time to go through the Tutorial
section and learn all about the basic controls and concepts in
FINAL FANTASY VIII.
Most of the time, you can return here if
you have a question about how the game works.
You can also access the Tutorial menu heading in the
Main Menu.
REMINDER:
After you finish the Tutorial section, you should consider
looking through the rest of the choices on the Study Panel. If
you’ve had your fill, shut down the Study Panel and exit the
classroom.
After your run-in with another student, you should head down
to the first floor and check out the Directory. The Directory
serves as a simple guide to the entire SeeD Garden facility. As
you can see, the complex is very large. You may want to explore
all of the areas now, or you can head for the Front Gate and
meet Quistis.
On your way to the elevator, make sure
you stop and talk to the person standing on the
side of the walkway. This person will give you
your first seven cards. It isn’t much of a deck, but
it’s enough to let you challenge another player.
FREE CARDS:
Mini-Walkthrough
Page 21

Front Gate
The great outdoors beckons at the end
of this long corridor. If you’re not driving
to your next objective, you must exit the
Garden through the Front Gate.
Infirmary
You’ll remember the Infirmary from the
beginning of the game. Dr. Kadowaki, the
residing physician, is always here to give
advice or play a game of cards.
Quad
The Quad is the home of the Garden
Festival, but there’s not much going on
here… yet. Stop by and join the Garden
Festival committee if you like.
Library
Not only can you meet a lot of
interesting people here, you can also pick
up useful information and a magazine.
Make sure you stop in often.
Touring the SeeD Garden
The Garden is very large and full of all kinds of activity. There
are 10 major areas that you’ll visit quite often, as well as
several minor locations that you’ll only see at specific points in
the story. The following information provides a brief rundown
of the major locations and what you’ll find at each one.
Dormitory
This is where you’ll find Squall’s room.
At various times during the game, you’ll
be asked to return here. You can use
Squall’s bed to restore any lost Hit Points
(HP) for your party members or GFs, or
save your game using the Save Point.
Parking Lot
Any and all vehicles used by SeeD are
stored here. You’ll typically only come
here when you need a set of wheels.
Training Center
Those wishing to brush up on their
fighting skills can visit the Training Center
any time. There are monsters roaming
freely inside the Training Center, so use
caution when entering. This is a great
place to build up Squall and his GFs at
the beginning of the game.
Page 22

Cafeteria
Hot dogs are a staple of the SeeD diet.
The Cafeteria has hot dogs occasionally,
but they always go fast. This is a great
area to meet up with people. You should
definitely stop by if you’re looking to
meet someone new.
Classroom
The classrooms are all located on the
second floor, however, Squall only has
access to Quistis’ classroom. This is also
the best place to learn more about the
game by accessing the Study Panel at
Squall’s desk in the back.
Cid’s Office
Headmaster Cid runs the SeeD Garden
from his third floor office. You can only
visit his office when he permits, so don’t
bother looking for an entrance, because
there isn’t one yet.
Leaving the Garden
After you’ve finished exploring, you should head for the Front
Gate where Quistis is patiently waiting. Speak with her and
she’ll join you on your journey to the Fire Cavern.
Before you head east to the Fire Cavern, explore the area a bit
and prepare yourself for the challenge ahead. Right now, the
only magic spells your characters have are those drawn from
the Draw Points inside the Garden. By fighting the creatures
living in the plains, forests, and beaches surrounding the
Garden, you can acquire several more useful spells and some
needed experience.
Be on the lookout for Fastitocalon-Fs
and Glacial Eyes. Both of these monsters
carry Blizzard magic that will come in
handy in the Fire Cavern. Most of its
inhabitants have a weakness against ice
attacks. Glacial Eyes also carry Cure
magic that is used to heal injured party
members. It’s also useful for raising a
character’s vital statistics through
Junctioning.
To get a real jump start, head down to the beach located to
the south of the Garden. This is where you’ll encounter
Fastitocalon-Fs. They’re not the strongest monsters in the area,
but each battle is worth six AP. After only a few fights, you can
teach your new GFs a couple of new abilities.
There are two
things you’ll find on your way to the Front
Gate. Along the stairs, you’ll notice some
energy emanating from the ground. This
is known as a Draw Point. One of your
characters can draw Cure magic from this
Draw Point assuming that the chosen
character has the Draw command
equipped. Be on the lookout for such Draw Points throughout the
game. Remember to stop back at all the Draw Points that you find
during the game, as most of them tend to regenerate.
There are also two card players in this area. There’s the man
working the turnstiles and a person dressed in yellow, who
randomly appears just after the turnstiles. Both are fairly skilled
players, so you may want to wait until you have a better deck
before challenging them.
ON YOUR WAY OUT:
Page 23

If you REALLY want to prepare for
the Fire Cavern, teach Quezacotl the T-Mag-RF ability,
which reveals the Mid Mag-RF ability. With this second
ability, you can refine five Blizzard spells into one
Blizzara spell (a stronger type of Ice magic). Learning Mid
Mag-RF requires 60 AP, so you’ll have to fight at least 15
groups of Fastitocalon-Fs to learn the T Mag-RF and Mid
Mag-RF abilities.
You may also want to devote some time to building
Shiva’s I Mag-RF ability. With this ability, you can turn
the Fish Fins (obtained by defeating Fastitocalon-Fs) into
Water magic, which is also useful in the Fire Cavern.
These extra preparations are time-consuming, but will
help you complete your objective in the Fire Cavern more
quickly.
EXTRA PREPARATION:
When you feel prepared, head due east
from the Garden to find the Fire Cavern,
which is set in a small hill beyond the forest.
Start off by teaching both Quezacotl and Shiva the Boost
ability. This ability enables you to strengthen a GF’s attack by
holding the “F” key and tapping the “A” key on your keyboard
during the GF’s animation. You may then want to work on
boosting each GF’s HP by teaching them the GFHP+10% ability.
The Fire Cavern
When you reach the Fire Cavern, Quistis will give you some
quick instructions on how to Junction magic and how to use
Squall’s Gunblade. You can skip the Junctioning tutorial by
pressing the “W” key on your keyboard.
The quicker you can
make your way through the Fire Cavern to
complete your objective, the better your chance of
earning a higher SeeD ranking. You’ll learn more
about your SeeD ranking later in the game.
WHY CHOOSE A TIME LIMIT?
The Fire Cavern is full of fire-based creatures, which makes
them particularly weak against Ice magic. Most of the time, you
won’t need to use magic to defeat your enemies; however,
stronger enemies like Bombs take too long to defeat with just
brute force. Don’t waste time drawing magic on your way
through the Fire Cavern. There will be plenty of time for that on
your way back out.
Approach the Garden Faculty
members guarding the Fire Cavern’s
entrance, and choose a time limit for
your test. Twenty or 30 minutes
should be more than enough. You can
try for 10 minutes if you spent some
time leveling up outside, or if it’s your
second time playing the game. After
choosing your time limit, the clock will
begin ticking away.
Page 24

The path through the Fire
Cavern is very straightforward.
You’ll want to stay on the main
path except to draw some Fire
Spells from a Draw Point off
to the right side of the path.
When you reach the end of the
path, you’ll face your greatest
challenge thus far.
Quezacotl has an ability known as Card
that enables you to transform a weakened enemy
into a playing card. Chances are you won’t have the
ability yet, but once you acquire it you’ll want to
return here and transform several Bombs into cards.
They are one of the strongest cards you can find at
this point of the game.
GREAT CARD!
Your main objective for the Fire Cavern is to defeat the
Guardian Force known as Ifrit, a fire-based GF. Ifrit is tough,
but it has one major weakness—Ice magic. Hopefully, you
have a healthy supply of Blizzard or Blizzara spells and you’ve
equipped the GF Shiva on either Squall or Quistis.
From the beginning of the battle, mercilessly pound on Ifrit
with Blizzard or Blizzara and repeatedly summon Shiva using
the GF ability. Don’t worry about using your normal attacks.
They won’t cause much damage to Ifrit, and your goal is to
defeat the Boss as quickly as possible. Fire magic is
ineffective against Ifrit; it will only restore its HP.
Locations:
Fire Cavern
Elemental:
Fire
GF; uses fire magic. It’s a strong opponent but,
as it is a part of Garden’s exam, not impossible to defeat.
Weak
vs Ice
Absorbs
Fire
Level Draw
6 Fire, Cure, Scan
Level Item (Drop) Rate: 255/256
178/256 51/256 15/256 12/256
6 G-Returner G-Returner G-Returner G-Returner
Level Item (Steal) Rate: 0/256
178/256 51/256 15/256 12/256
6 n/a n/a n/a n/a
GUARDIAN FORCE ALERT
!
GUARDIAN FORCE ALERT
!
IFRIT
Page 25

If Shiva is defeated during the fight, don’t be afraid to
summon Quezacotl. It won’t inflict as much damage as Shiva,
but it still causes more damage than Squall’s Gunblade or
Quistis’ Chain Whip.
For winning the battle, you receive a
G-Returner, Ifrit’s Card, and you gain
the ability to Junction with Ifrit.
Congratulations on defeating Ifrit!
You’re well on your way to becoming a
full-fledged member of SeeD, but your
quest has only just begun.
Want more? Pick up the BradyGAMES Official FINAL FANTASY®
VIII Strategy Guide for the PC to help you unlock all of the game’s
secrets!
• Complete Walkthrough
• Bestiary
• Boss Strategy
• Plus Much More!
www.bradygames.com
ISBN-1-56686-962-5 UPC 7-52073-86962-5
$19.99
 Loading...