


 Loading...
P3PC-3272-01EN
Getting Started
Thank you for purchasing the color image scanner ScanSnap S1100 (hereinafter referred to as "the ScanSnap"). This manual describes the preparation required for use of the ScanSnap. Follow the preparation procedures described in this manual. For features and functions, basic operations, and daily care of the ScanSnap, refer to the Operator's Guide which is available on the Setup DVD-ROM. Keep this manual in a safe place so that you can refer to it at any time when using the ScanSnap.
Microsoft, Windows, Windows Vista, Excel, and PowerPoint are either registered trademarks or trademarks of Microsoft Corporation in the United States and/or other countries.
Apple, the Apple logo, Mac, Mac OS, iPhoto, and Rosetta are trademarks of Apple Inc.
Other company names and product names are the registered trademarks or trademarks of the respective companies.
October 2010 All Rights Reserved, Copyright © PFU LIMITED 2010
Checking the Components
Make sure that all items shown below are included in the package.
ScanSnap (× 1) |
Getting Started (× 1) |
USB cable (× 1) |
|
(This manual) |
|
Setup DVD-ROM (× 1) |
Rack2-Filer (× 1) |
|
(Exclusive to S1100 with Rack2-Filer) |
||
If any other packaging is provided, make sure to store it as well. Make sure to handle the components with care.
The box and packaging materials are required for storage and transportation of the ScanSnap. Do not throw them away.
If anything is missing or damaged, contact your FUJITSU scanner dealer or an authorized FUJITSU scanner service provider.
1

Read the Safety Precautions
Before using the ScanSnap, make sure to read and understand "Safety Precautions" (page 9).
Symbols Used in This Manual
The following symbols are used in this manual.
This symbol alerts operators to particularly important information. Be sure to read this information.
This symbol alerts operators to helpful advice regarding operations.
This symbol indicates operations using Windows®.
This symbol indicates operations using Mac OS.
Referring to the Operator's Guide
To refer to the "Operator's Guide", insert the Setup DVD-ROM into the DVD-ROM drive, and follow the procedure below.
Click the [Manuals] button in the [ScanSnap Setup] dialog box, and then the [ScanSnap Manager] button.
Double-click the [Operator's Guide] icon in the [ScanSnap] window.
Installing the Software
Windows® Installation (J page 3)
Mac OS Installation (J page 4)
Do not connect the ScanSnap to your computer before installing the software.
2

Windows® Installation
■ Software
You can install the following software:
zScanSnap Manager (Scanner driver)
zScanSnap Organizer (File management application)
zCardMinder (Business card management application)
zABBYY FineReader for ScanSnap (OCR application)
To use Evernote for Windows and/or Scan to SharePoint, the required software should also be installed.
For details about each software and its installation procedures, refer to "Installing the Software" in the Operator's Guide.
■ System Requirements
Operating |
Windows® 7 |
Windows Vista® |
Windows® XP |
system |
(32-bit/64-bit) |
(32-bit/64-bit) (*1) |
(32-bit) (*2) |
CPU |
Intel® Core™ 2 Duo |
2.2 GHz or higher |
recommended |
(Minimum: Intel® Pentium® 4 1.8 GHz) |
|
||
Memory |
32-bit: 1 GB or more |
512 MB or more (1 GB or more |
|
64-bit: 2 GB or more |
recommended) |
|
|
|
|
||
Display resolution |
800 × 600 pixels or higher |
|
|
Hard disk space |
1940 MB or more of free hard disk space |
|
|
(2390 MB or more of free hard disk space is required for using |
|||
(*3) |
with Rack2-Filer) |
|
|
|
|
|
|
|
|
|
|
USB port (*4) |
USB 2.0 / USB 1.1 |
|
|
|
|
|
|
*1: Service Pack 1 or later is required *2: Service Pack 3 or later is required
*3: If .NET Framework 3.5 SP1 is not installed, maximum of 500 MB of additional free hard disk space is required for it.
*4: When using USB 3.0 port, it works as USB 2.0.
zIf the CPU or the memory do not meet the required specifications, or the type of USB port or USB hub is USB 1.1, the scanning speed will slow down.
zWhen the font size is large, some screens may not be displayed properly. In that case, use a smaller font size.
zThe actual increase in used disk space after installation and the required disk space for installation may differ from each other depending on your Windows® system disk management.
3

■ Installation
1. Turn on the computer and log on as a user with Administrator privileges.
2.
D The [ScanSnap Setup] dialog box appears.
If the [ScanSnap Setup] dialog box does not appear, double-click "ScanSnap.exe" in the DVD-ROM via Windows Explorer.
3.
4.
Click the [Install Products] button.
DThe [Install Products] dialog box appears.
Click the [ScanSnap] button.
Follow the instructions on the screen to continue with the installation.
If installation is not completed successfully, click the [Manuals] button in the [ScanSnap Setup] dialog box, and then the [Troubleshooting (installation)] button, and refer to Troubleshooting (installation).
Mac OS Installation
■ Software
You can install the following software:
zScanSnap Manager (Scanner driver)
zABBYY FineReader for ScanSnap (OCR application)
zCardiris (Business card text-recognition application)
To use Evernote for Mac, it should also be installed.
For details about each software and its installation procedures, refer to "Installing the Software" in the Operator's Guide.
4
■ System Requirements
Operating |
Mac OS X v10.6 (*2) |
Mac OS X v10.5 |
Mac OS X v10.4 |
system (*1) |
|
|
|
|
Intel® Core™ 2 Duo |
2.4 GHz or higher |
recommended |
CPU |
(Minimum: Intel® Core™ Duo 1.83 GHz, PowerPC® G5 |
||
|
1.6 GHz) |
|
|
Memory |
1 GB or more |
512 MB or more |
|
|
(1 GB or more recommended) |
||
|
|
||
Display |
1024 × 768 pixels or higher |
|
|
resolution |
|
||
|
|
|
|
Hard disk space |
1390 MB or more of free hard disk space |
|
|
USB port (*3) |
USB 2.0 / USB 1.1 |
|
|
*1: It is recommended to apply the latest updates to Mac OS.
*2: Rosetta must be installed to use Cardiris. You can install Rosetta from the [Optional Installs] package on the Mac OS installation disc.
*3: When using USB 3.0 port, it works as USB 2.0.
If the CPU or the memory do not meet the required specifications, or the type of USB port or USB hub is USB 1.1, the scanning speed will slow down.
■ Installation
1. Turn on the computer and log in as a user with Administrator privileges.
2. Insert the Setup DVD-ROM into the DVD-ROM drive.
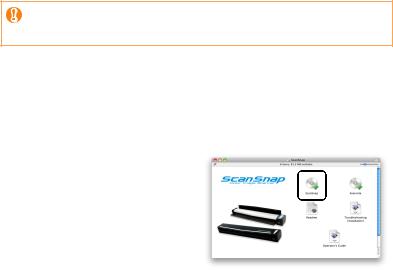
D The [ScanSnap] window appears.
3.Double-click the [ScanSnap]
icon.
Follow the instructions on the screen to continue with the installation.
5
Loading...