


R
OWNER’S MANUAL
MANUEL
D’UTILISATION
MANUAL DEL
PROPIETARIO
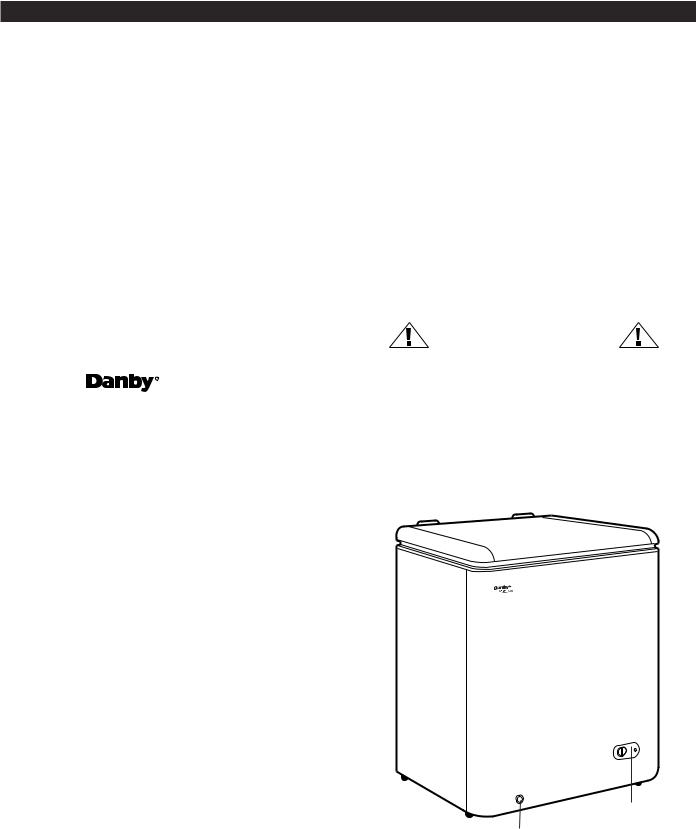
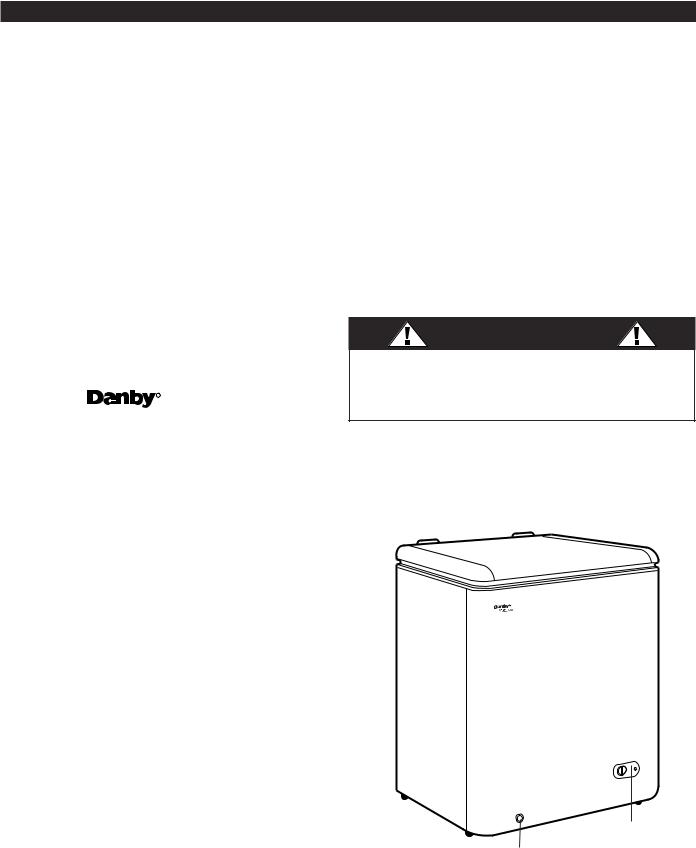
Model• Modèle • Modelo
DCF700W
CAUTION:
Read and Follow All Safety
Rules and Operating
Instructions Before First Use
of This Product.
PRÉCAUTION:
Veuillez lire attentivement les consignes de sécurité et les instructions d’utilisation avant l’utilisation initiale de ce produit.
PRECAUCIÓN:
Lea y observe todas las reglas de seguridad y las instrucciones de operación antes de usar este producto por primera vez.
COMPACT CHEST FREEZER
Owner’s Manual . . . . . . . . . . . . . . . . . . . . . . . . 1-4
•Introduction
•Installation
•Operation
•Care and Maintenance
•Warranty
CONGÉLATEUR HORIZONTAL COMPACT
Manuel d’utilisation . . . . . . . . . . . . . . . |
. . . . . .5-8 |
•Introduction
•Installation
•Fonctionnement
•Soins et entretien
•Garantie
CONGELADOR DE ARCÓN COMPACTO
Manual del propietario . . . . . . . . . . . . . . . . . . .9-12
•Introducción
•Instalación
•Operación
•Cuidado y Mantenimiento
•Garantía
Danby Products Limited, PO Box 1778, Ontario, Canada N1H 6Z9 Danby Products Inc., PO Box 669, Findlay, Ohio, USA 45839-0669
550C.8.00
Introduction
Thank you for choosing a Danby Millennium Chest Freezer. This Owners Manual provides information necessary for the proper care and maintenance of your new freezer. If properly maintained, your freezer will give you many years of trouble free operation. To avoid difficulties, read instructions completely before starting. This manual contains information for the installation and operation of your Danby Millennium Chest Freezer.
For easy reference, you may want to attach a copy of your sales receipt to this page. Note following information provided. This information will be needed when you contact a Customer Service Representative. The model and serial number identification plate is located on the rear (exterior) wall of the freezer cabinet.
Model Number: ________________________ Date of Purchase: _______________________________
Serial Number: ________________________ Dealer’s Name and Address: _______________________
|
|
______________________________________________ |
|
|
|
||
If problems arise, contact an authorized service |
CAUTION |
||
representative or call Danby TOLL FREE: |
The hinge of a chest freezer is under tension. |
||
1-800-26-Danby |
|
||
R |
You must exercise EXTREME CAUTION before |
||
Keep these instructions for future reference. |
attempting to remove, replace and/or adjust. |
||
|
|||
Features |
|
|
|
|
|
||
• |
7.0 cu. ft. (198 litres). |
|
|
• |
FRONT MOUNT THERMOSTAT: |
|
|
|
Easy access control knob controls the desired |
|
|
|
temperature inside the freezer. The proper |
|
|
|
food storage temperature is -18°C (0°F). Turns |
|
|
|
the motor on as soon as the temperature rises |
|
|
|
above the desired level. |
|
|
•RUST RESISTANT INTERIOR: Aluminum liner for long lasting durability.
•IN-WALL CONDENSER: Helps reduce ice build-up.
•DEFROST DRAIN:
For easy removal of melted ice during
defrosting. It is recommended that you defrost your freezer once or twice a year.
• R134a + R141b INSULATION: |
|
70 mm (2 3/4") insulation is environment friendly |
Front mount |
and provides energy efficient insulated walls. |
thermostat |
|
Defrost Drain |
•GROSS WEIGHT: 52 kg / 114.6 lbs.
•NET WEIGHT: 41 kg / 90.38 lbs
1
ATTENTION
ELECTRICAL RATING
The “serial rating plate” indicates the voltage and frequency the freezer is designed for.
Due to possible variations in line voltage (caused by overloading of circuits), it is advisable to install a separate fuse circuit from the meter panel. This will help to eliminate current fluctuation which might cause motor trouble.
GROUNDING INSTRUCTIONS
This appliance must be grounded. In the event of an electrical short circuit, grounding reduces the risk of electrical shock by providing an escape wire for the electrical current. This appliance is equipped with a cord having a grounding wire with a grounding plug. The plug must be plugged into an outlet that is properly installed and grounded.
DO NOT USE AN EXTENSION CORD
Use an exclusive wall outlet. Do not connect your freezer to extension cords or together with any other appliance in the same wall outlet. Do not splice the cord.
IMPORTANT WARNING
An empty freezer is a very dangerous attraction to children. Remove either the gasket or lid from unused appliances, or take some other action that will guarantee
it harmless.
DON’T WAIT DO IT NOW!
Installation
Location
Points to consider when locating your freezer:
1.Locate the freezer in such a manner that extension cords are not necessary.
2.Due to lid and hinge arrangement, it is impossible to install freezer directly against the wall. The spacing on the back is essential for maintaining proper air circulation around the freezer.
3.Select a location with reasonable year round temperatures. Do not operate freezer when surrounding air temperature is below 0°C.
However, it will not harm freezer to stand in any temperature below 0°C provided the temperature control is set to avoid running the unit. In order to keep operating cost down, do not place freezer near a stove, furnace, heat register or in direct sunlight. If the place selected for your freezer is damp or moist, as in basements, place freezer on wooden blocks. (2 or 3 2 x 4’s under entire length will assure adequate support).
Operation
Starting the Freezer
The freezer is ready to operate as received when connected to the power supply. After starting, close lid and allow freezer to operate. The unit will run from 1 to 2 hours (possibly longer, depending on conditions) before operating temperature is reached. It will then start and stop (cycle) at fairly regular intervals. It is recommended that food should not be placed in freezer until you are satisfied that it is operating regularly and no final adjustments are necessary.
Once your freezer is starting and stopping (cycles) regularly, it is ready to freeze and store foods. The proper food storage temperature is -18°C (0°F). Do not operate freezer at temperatures below -19°C (-3°F), since it does not improve food preservation and only results in longer unit (cycle) running time. It is not advisable to freeze more than 25 kg. (50 lbs.) of food in a freezer in any 24 hour period. It will take 15 or more hours of unit running time to freeze this amount of food. When adding fresh, unfrozen food packages, store them against the walls of the freezer.
In view of the value of the contents of your freezer, it is advisable to inspect contents and operation regularly.
2
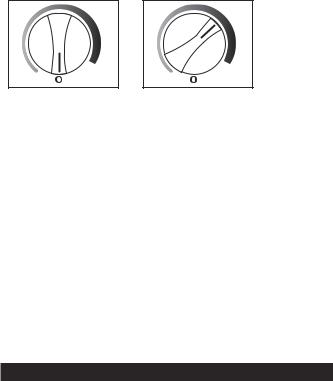
Setting The Temperature Control
The temperature of the freezer compartment
is controlled by adjusting/setting the thermostat control knob, located on the front of the freezer cabinet
Fig. 14 |
Fig. 15 |
To start the freezer and achieve maximum cooling quickly:
•Turn the temperature control knob clockwise to the furthest (maximum) setting on the darker blue (wide) section if the graduated control dial.
•Allow the freezer to turn at this setting for 3-4 hours.
•When maximum cooling is achieved, turn back the temperature control knob setting to the 2 o’clock position on the graduated blue control| dial. See Fig.15.
•To turn off the freezer (no cooling) rotate the control knob to the “0” (off) position. See Fig. 14.
Care and Maintenance
Defrosting
Moisture will be introduced into the cabinet during lid openings and the addition of unfrozen food packages. The moisture will accumulate in the form of frost mostly on the upper part of the freezer liner walls.
Accumulation of frost up to 6 mm (1/4") on the liner is not harmful. However, when it becomes heavier, it should be removed as it retards cooling resulting in longer running (cycle) times. Frost may be removed with a wooden spatula or a plastic defrosting scoop by simply scraping off the accumulations from the side of the walls. Do not use any sharp instruments as this may result in damage to the liner wall and/or sealed system, voiding any and/or all warranties which may be in effect.
Under average conditions, defrosting will not be necessary more than once or twice a year.
Besides frost, food particles and other foreign substances may may accumulate and soil the liner. For proper defrosting and cleaning, the following method is recommended:
a)Unplug freezer.
b)Quickly remove all frozen food and store them in baskets, cartons or other suitable containers. Keep them well covered with blankets to avoid excessive temperature rise.
c)A kettle/pot of hot water placed in the center of the liner will greatly accelerate defrosting.
d)With the help of a wooden spatula or a plastic defrosting scoop, remove the frost and ice off the liner walls as soon as it becomes loose (approximately 15 minutes from start). Using a piece of cloth soaked in hot water, the process can be considerably accelerated. As soon as the ice has fallen to the bottom, remove it. Do not let it melt in the freezer as this will increase defrosting and cleaning time.
Cleaning
Now the liner is ready to be cleaned. Sprinkle baking soda on the bottom and walls. This will help in cleaning and odor removal. In order to retain the finish of the freezer cabinet inside and outside, wash only with warm water and mild soap, then rinse and dry. Do not use under any circumstances, a grit soap or a kitchen scouring cleanser as they tend to scratch the finish.
Electrical and Mechanical Failure
In the event of a general power failure, it is important to keep the contents of your freezer frozen. For your protection, it is recommended to locate a dealer of dry ice (solidified carbon dioxide) as soon as possible in order to know where to go in case of an emergency. Many ice cream manufacturers use dry ice and this will keep the contents of your freezer at safe temperatures until the emergency has passed.
In case of failure, it is recommended to keep the freezer well covered with blankets. This will help preserve the “cold” inside the freezer. If no help is available within 12 hours, the freezer contents should be transferred into a neighbors’ freezer (if available).
In the event of mechanical or electrical failure of the freezer, contact your dealer immediately and give him complete information of your freezer, the model number and the serial number. These are shown on the serial plate located on the rear (exterior) cabinet wall.
3
Introduction
Danby Millennium sont reconnaissants de votre achat du congélateur horizontal compact. Ce manuel d’utilisation vous offre des renseignements pratiques pour le soin et l’entretien de votre nouveau congélateur. Un congélateur bien entretenu vous pourvoira plusieurs années de service sans ennui. Pour éviter des ennuis, veuillez lire toutes les instructions avant de mettre le congélateur en marche. Ce manuel contient les renseignements pour l’installation et l’utilisation de votre congélateur horizontal Danby Millennium.
Nous vous conseillons de joindre une copie de votre facture d’achat à cette page pour que les renseignements vous soient à la portée de la main. Veuillez y inscrire les renseignements. Ces données sont nécessaires lorsque vous contactez un représentan de service. La plaque d’identification qui contient le numéro de modèle et de série du congélateur est situé sur la paroi arrière extérieur du boîtier.
Numéro de modèle: _________________________ Date d’achat: ______________________________________________
Numéro de série:___________________________ Nom et adresse du détaillant: _________________________________
______________________________________________
Si ces renseignements ne vous aident pas à résoudre le problème, consultez votre représentant de service autorisé ou appelez Danby au numéro SANS FRAIS:
1-800-26-DANBY R
Veuillez conserver ces instructions.
Caractéristiques
•7,0 pi3 (198 litres).
•THERMOSTAT INSTALLE AU DEVANT:
Bouton de contrôle facile à trouver règle la température à l’intérieur du congélateur. La température de conservation est -18°C (0°F). Il met le moteur en marche aussitôt que la température s’éleve du degré exigé.
•PAROIS INTÉRIEURS ANTI-ROUILLE: Parois en aluminium résistant.
•CONDENSATEUR ENCASTRE:
Aide à réduire l’accumulation de givre
• DRAIN D’ÉCOULEMENT:
La glace fondue peut être enlevée facilement durant le dégivrage. Il est recommandé que le congélateur soit dégivré une ou deux fois par an.
• ISOLATION R134a + R141b:
Isolation de 70 mm (2 3/4 po.) est bonne pour l’environnement et pourvoit des murs isolés à haut rendement.
•POIDS GROSSIER: 52 kg/ 114.6 lbs.
•POIDS NET: 41 kg / 90.38 lbs.
PRÉCAUTION
La charnière d’un congélateur horizontal est sous tension. PRENEZ GARDE pendant le déplacement, le rechange ou l’ajustement.
|
Thermostat |
|
Drain d’écoulement |
installé sur le |
|
devant |
||
|
5
 Loading...