


)25<2856$)(7<Read these instructions carefully before operating the unit.
32859275(6e&85,7eLire attentivement ces instructions avant d’utiliser l’appareil.
3$5$686(*85,'$'Lea y observe todas las reglas de seguridad y las instrucciones de operación antes
de usar este producto.
2:1(5¶686($1'&$5(*8,'(
*8,'('¶87,/,6$7,21(7'(175(7,(1
*8Ë$'(87,/,=$&,Ï1<&8,'$'23$5$(/3523,(7$5,2
PORTABLE DEHUMIDIFIER
DESHUMIDIFICATEUR PORTATIF
DESHUMIDIFICADOR PORTÁTIL
(1*/,6+
02'(/02'Ê/(02'(/2
DDR60B3WP
DDR70B3WP
DANBY PRODUCTS LIMITED, ONTARIO, CANADA N1H 6Z9
DANBY PRODUCTS INC., FINDLAY, OHIO, USA 45840
18.11.14

1-800-263-2629
(1-800-26-DANBY)
DO NOT RETURN THIS UNIT TO THE RETAILER
WITHOUT FURTHER INSTRUCTIONS
Dear valued customer, we hope your Danby product purchase fulfills all
your requirements. Your satisfaction is our priority!
Please contact us at our toll free consumer service number for any inquiries
you may have about your new unit.
NE PAS RETOURNER CET APPAREIL CHEZ LE
DÉTAILLANT SANS CONSIGNES SUPPLÉMENTAIRES
Cher(ère) client(e) important(e), nous espérons que votre produit Danby
répond à tous vos besoins. Votre satisfaction est notre priorité!
Veuillez nous contacter au numéro gratuit de service après-vente, si
vous avez des questions quelconques à propos de votre nouvel appareil.
NO DEVUELVA ESTA UNIDAD A LA TIENDA SIN
INSTRUCCIONES ADICIONALES
Estimado cliente, esperamos que el producto Danby que ha comprado
satisfaga completamente sus necesidades. Su satisfacción
es nuestra prioridad!
Por favor, contáctenos gratuitamente a nuestro número de Servicio al
Cliente para cualquier pregunta que tenga sobre su nuevo electrodoméstico.
Danby 28.08.2014

TO OBTAIN WARRANTY SERVICE YOU MUST PROVIDE A VALID PROOF OF
PURCHASE. PLEASE STAPLE YOUR RECEIPT TO THIS PAGE FOR FUTURE
REFERENCE.
POUR OBTENIR LE SERVICE SUR GARANTIE, VOUS DEVEZ FOURNIR UNE
PREUVE D’ACHAT VALIDE. VEUILLEZ AGRAFER VOTRE REÇU À CETTE PAGE
POUR RÉFÉRENCE FUTURE.
PARA OBTENER SERVICIO DE GARANTÍA, DEBE PROVEER UN RECIBO ORIGINAL. POR FAVOR ENGRAPE SU RECIBO A ÉSTA PÁGINA EN CASO QUE
NECESITE HACER UN RECLAMO.
IMPORTANT - GROUNDING METHOD
This product is factory equipped with a power supply cord that has a three-pronged grounded plug. It must
be plugged into a mating grounding type receptacle in accordance with the National Electrical Code and
applicable local codes and ordinances. If the circuit does not have a grounding type receptacle, it is the
responsibility and obligation of the customer to exchange the existing receptacle in accordance with the
National Electrical Code and applicable local codes and ordinances. The third ground prong should not,
under any circumstances, be cut or removed. Never use the cord, the plug or the appliance when they show
any sign of damage. Do not use your appliance with an extension cord unless it has been checked and tested by a qualifi ed electrician or electrical supplier.
IMPORTANT - MÉTHODE POUR LA MISE À LA TERRE
Ce produit arrive d’origine avec un cordon d’alimentation équipé d’une prise à trois fi ches. Il doit être
branché dans une prise avec une fi che de mise à la terre en conformité avec le Code national de l’électricité
et les codes et règles locaux applicables. Si la prise murale n’a pas de mise à la terre, il est de la
responsabilité et l’obligation du client de changer la prise existante pour la rendre conforme au Code
national de l’électricité et aux codes et règles locaux applicables. La fi che de mise à la terre ne doit pas, en
aucune circonstance, être coupée ou retirée. Si vous apercevez des signes de dommage, n’utilisez jamais le
cordon d’alimentation, la prise ou l’appareil. N’utilisez jamais l’appareil avec une rallonge sauf si elle a été
vérifi ée et testée par un électricien qualifi é ou un fournisseur de matériel électrique.
IMPORTANTE- MÉTODO DE CONEXIÓN A TIERRA
Este producto viene equipado con un cable eléctrico que tiene un enchufe de tres patas conexión a tierra.
Este debe colocarse en una toma de corriente con conexión a tierra de acuerdo con el Código nacional de
electricidad y códigos y ordenanzas locales correspondientes. Si el circuito no cuenta con una toma de
corriente con conexión a tierra, es responsabilidad y obligación del cliente sustituir la toma de corriente
actual de acuerdo con el Código nacional de electricidad u códigos u ordenanzas locales correspondientes.
Bajo ninguna cicunstancia se debe cortar o eliminar la tercera pata de conexión a tierra. Nunca utilice el
cable, el enchufe o el artefacto cuando muestre un signo de daño visible. No utilice el artefacto con una
extensión salvo que un proveedor eléctrico o electricista califi cado la inspeccione y la pruebe.

CONTENTS
TABLE DES MATIÈRES
ÍNDICE
PORTABLE DEHUMIDIFIER
Owner’s Use and Care Guide .................................................1-13
• Welcome
• Important Safety Information
• Features
• Installation Instructions
• Operation Instructions
• Care and Maintenance
• Troubleshooting
• Warranty
DÉSHUMIDIFICATEUR PORTATIF
Guide d’utilisation et d’entretien..............................................14-27
• Bienvenue
• Consignes de sécurité importantes
• Caractéristiques
• Consignes d’installation
• Consignes d’utilisation
• Soins et entretien
• Dépannage
• Garantie
DESHUMIDIFICADOR PORTÁTIL
Guía del utilización y cuidado para el propietario...................28-41
• Bienvenido
• Instrucciones de seguridad importantes
• Instrucciones d’instalación
• Características
• Instrucciones operadoras
• Cuidado y maintenimiento
• Solucion sugerida
• Garantía
CAUTION:
Read and follow all safety rules and operating
instructions before fi rst use of this product.
PRÉCAUTION :
Veuillez lire attentivement les consignes de
sécurité et les instructions d’utilisation avant
l’utilisation initiale de ce produit.
PRECAUCIÓN:
Veuillez lire attentivement les consignes de
sécurité et les instructions d’utilisation avant
l’utilisation initiale de ce produit.
WARNING
Improper connection of the grounding plug can
result in risk of fi re, electric shock and/or injury to
persons associated with the appliance. Check with
a qualifi ed service representative if in doubt that
the appliance is properly grounded.
AVERTISSEMENT
Une fi che de mise à la terre mal branchée peut
entraîner un risque d’incendie, de choc électrique
ou de blessures aux personnes qui utilisent
l’appareil. Si vous n’êtes pas certain que l’appareil
est correctement mis à la terre, consultez un
préposé du service qualifi é.
ADVERTENCIA
El conectar indebidamente el enchufe de conexión
a tierra puede crear riesgos de incendio, descarga
eléctrica y/o oscasionar lesiones a las personas
que usen el aparato. Si tiene dudas sobre la
debida conexión a tierra del aparato, consulte un
representante de servicios califi cado.
Model • Modèle • Modelo
DDR60B3WP / DDR70B3WP
Welcome
Welcome to the Danby family. We are proud of our quality products, and we believe in dependable service, like you will
find in this Owner’s Use and Care Guide, and like you will receive from our friendly customer service department. Best
of all, you will experience these values each and every time you use your Danby appliance. That is important, because
your new appliance will be a part of your family for a long time.
Note the information below; you will need this information to obtain service under warranty.
To receive service, you must provide the original receipt.
Serial
Date of Purchase:
Number:
NEED HELP?
Before you call for service, here are a few things you can do to help
us serve you better:
Read this Owner’s Use and Care Guide:
It contains instructions to help you use and maintain your
appliance properly.
If you received a damaged appliance:
Immediately contact the retailer (or builder) that sold you the
appliance.
Save time and money:
Check the Troubleshooting section at the end of the guide before calling. This section helps you solve common problems that may occur.
If you do need service, you can relax, knowing help is only a phone
call away.
1-800-26-
(1-800-263-2629)
1

Important Safety Information
READ AND FOLLOW ALL SAFETY INSTRUCTIONS
NOTE
The WARNING instructions issued in this manual are not meant to cover all possible conditions and situations that may
occur. Person(s) installing, maintaining, or operating the appliance must exercise caution and care. Failure to install,
maintain, and/or operate the equipment according to the manufacturer’s instructions may result in conditions which can
produce personal injury and damage to your unit and/or property damage. Contact your dealer, service agent, and/or the
manufacturer about any problems or conditions you do not fully understand. For Danby Customer Service call (1-800-
263-2629).
ELECTRICAL REQUIREMENTS
To reduce the risk of fi re, electric shock, or personal injury, all wiring and grounding must conform with the latest edition of
Local and National Electrical codes.
• It is the customer’s responsibility to have the wiring and fuses checked by a qualifi ed electrician to make sure adequate
electrical power is available.
• This appliance is designed to operate on an effectively grounded, separately branched, polarized, 3-wire, 120 Volt
60 Hertz (alternating current) circuit protected by a 15 ampere fuse, equivalent fuse or circuit breaker. The three-prong
grounding plug on the power cord should be plugged directly into the aforementioned receptacle rated 110/120 V.A.C.
• Do not connect the dehumidifi er to a multiple socket outlet that is also being used for other electrical appliances.
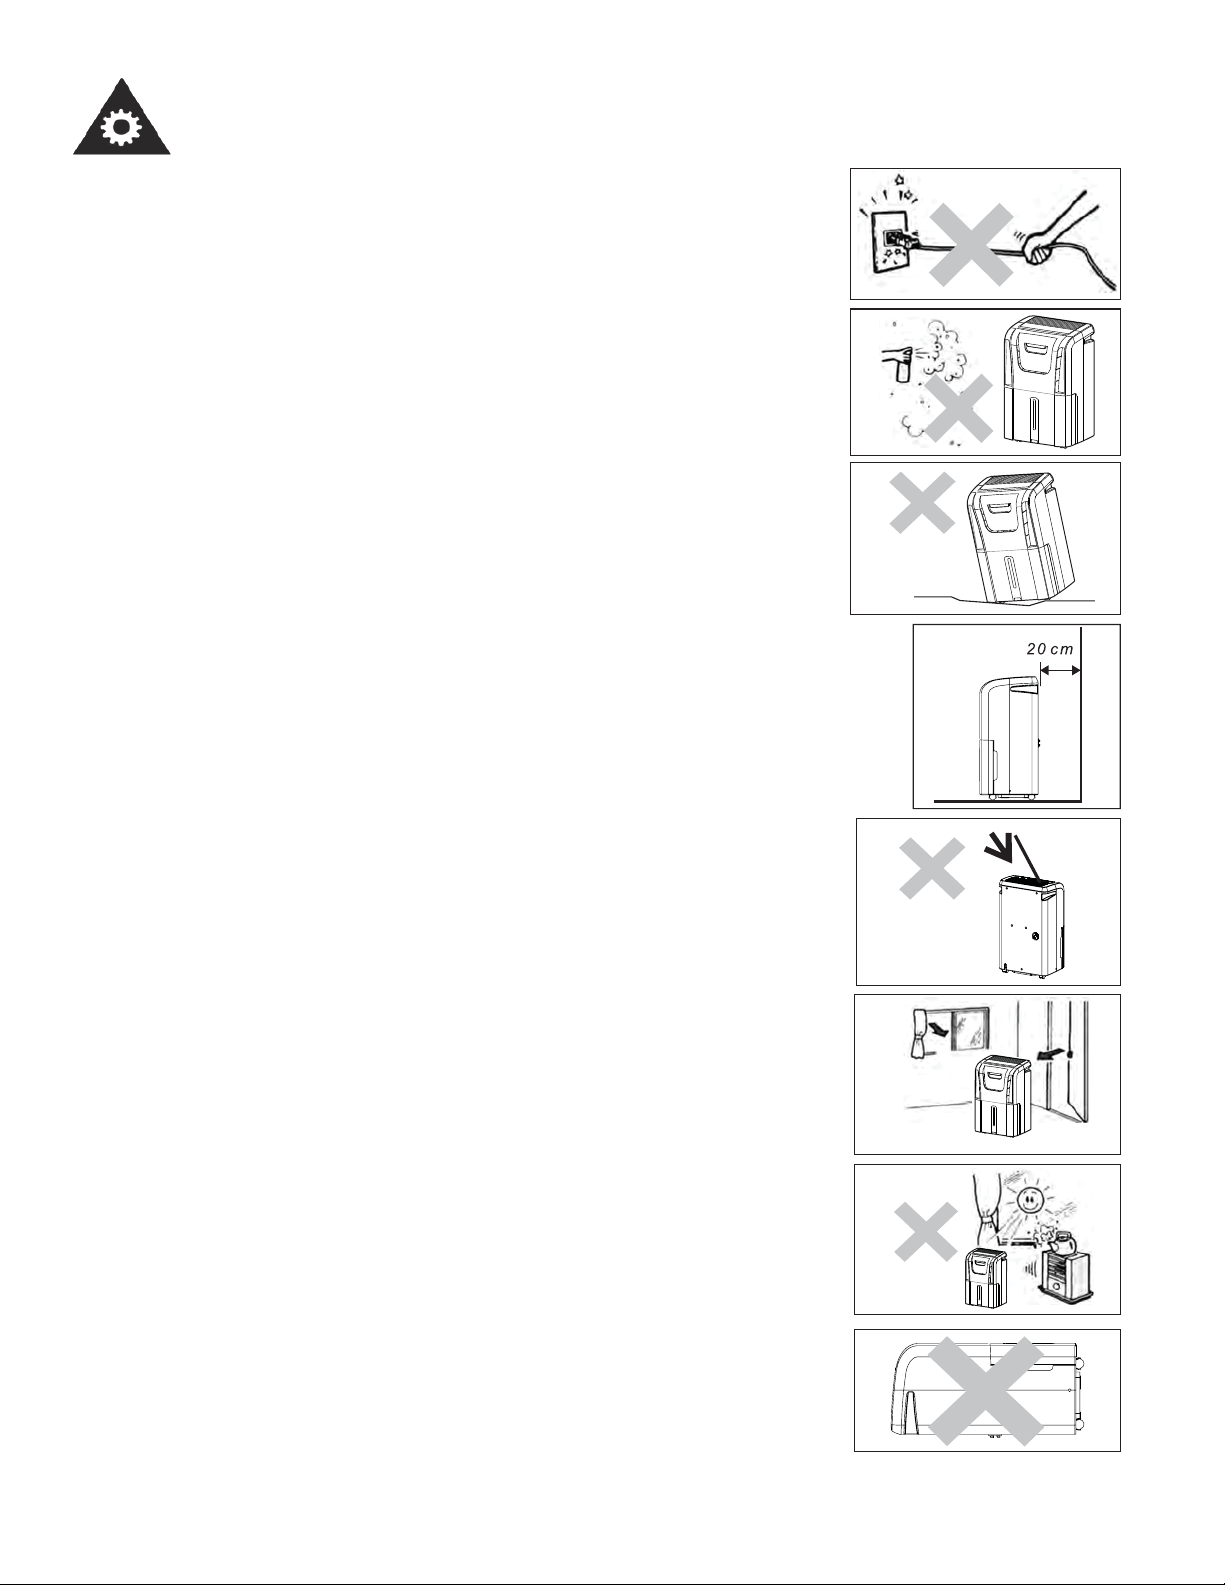
FOR YOUR SAFETY: To reduce the risk of fi re or explosion, do not store or use gasoline or other fl ammable va-
pors or liquids in the vicinity of this or any other appliance.
GROUNDING INSTRUCTIONS
Improper connection of the equipment-grounding conductor can result in a risk of electrical shock. Check with a qualifi ed
electrician or serviceperson if you are in doubt as to whether your appliance outlets are properly grounded.
• This appliance must be grounded. In the event of malfunction or breakdown, grounding will reduce the risk of electrical
shock by providing a path of least resistance for electrical current. This appliance is equipped with a cord that has an
equipment-grounding conductor and 3 prong grounding plug. The plug must be connected into an outlet that is properly
installed and grounded in accordance with all local codes and ordinances.
• Do not modify the plug provided with this appliance. If it will not fi t the outlet, have a proper outlet installed by a qualifi ed
electrician.
• If the household electrical supply does not meet the above specifi cations, or if you are not sure your home has an
effective ground, have a qualifi ed electrician or your local electrical utility company check it and correct any problems.
SAVE THESE INSTRUCTIONS
2

Important Safety Information
READ AND FOLLOW ALL SAFETY INSTRUCTIONS
SAFETY PRECAUTIONS
When using this dehumidifi er, always follow basic safety precautions, including the following:
• Use this appliance only for its intended purpose as described in this Owner’s Manual.
• Do not remove the Styrofoam in the fl oat which is located in the bucket.
• This dehumidifi er must be properly installed and grounded as described in this manual before it is used.
• Never operate this dehumidifi er in an area that is likely to accumulate standing water. If this condition develops, for your
safety disconnect the power supply before stepping into the water.
• Never unplug your dehumidifi er by pulling on the power cord. Always grip the plug fi rmly and pull straight out from the
receptacle.
• Replace immediately all electric service cords that have become frayed or otherwise damaged. A damaged power
supply cord must be replaced with a new power supply cord obtained from the manufacturer and not repaired. Do not
use a cord that shows cracks or abrasion damage along its length or at either the plug or connector end.
• If the receptacle does not match the plug, the receptacle must be changed out by a qualifi ed electrician.
• Turn the dehumidifi er OFF and unplug it before cleaning.
• For your safety, do not store or use combustible materials, gasoline or other fl ammable vapors or liquids in the vicinity of
this or any other appliance.
• All dehumidifi ers contain refrigerants, which under federal law must be removed prior to product disposal. If you are
disposing of a product with refrigerants, check with the company handling disposal about what to do. Check for
local regulatory compliance regarding the approved and safe disposal of this appliance.
• Do not use outdoors.
• This dehumidifi er is intended for indoor residential applications only. This dehumidifi er should not be used
for commercial or industrial applications.
SAVE THESE INSTRUCTIONS
3
Installation Instructions
LOCATION
• Select a suitable location, making sure you have easy access to an electrical outlet (avoid the use of extension cords).
• Make sure there are no obstructions restricting airfl ow through the front air intake grill. Maintain a minimum clearance
of at least 20 cm (8”) between adjacent walls and the back of the unit, to allow for proper air circulation and maximum
effi ciency. To achieve maximum operating effi ciency from your dehumidifi er, the recommended (room ambient) operating
temperatures should be between 5°C (41°F) and 35°C (95°F).
• It is important to remember the effi ciency of a dehumidifi er will be affected/infl uenced by the rate at which new humid
air (moisture) is allowed to infi ltrate the same space/area. To maintain effi ciency, the dehumidifi er must be operated in an
enclosed area. Keep all doors and windows closed.
• Do not use this unit outdoors. This dehumidifer is intended for indoor residential applications only. This dehumidifi er
should not be used for commercial or industrial applications.
• Place the dehumidifi er on a smooth, level fl oor strong enough to support the unit with a full bucket of water.
• Place the unit where it has access to an electrical outlet.
• This unit has 4 castors which can move freely. Do not force castors to move over carpet, and refrain from moving the
unit with water in the bucket (the unit may tip over and spill water). Protect wood fl oors from possible spillage or
scratches when moving unit.
• Remove accessory bag from bucket and store it in a safe place.
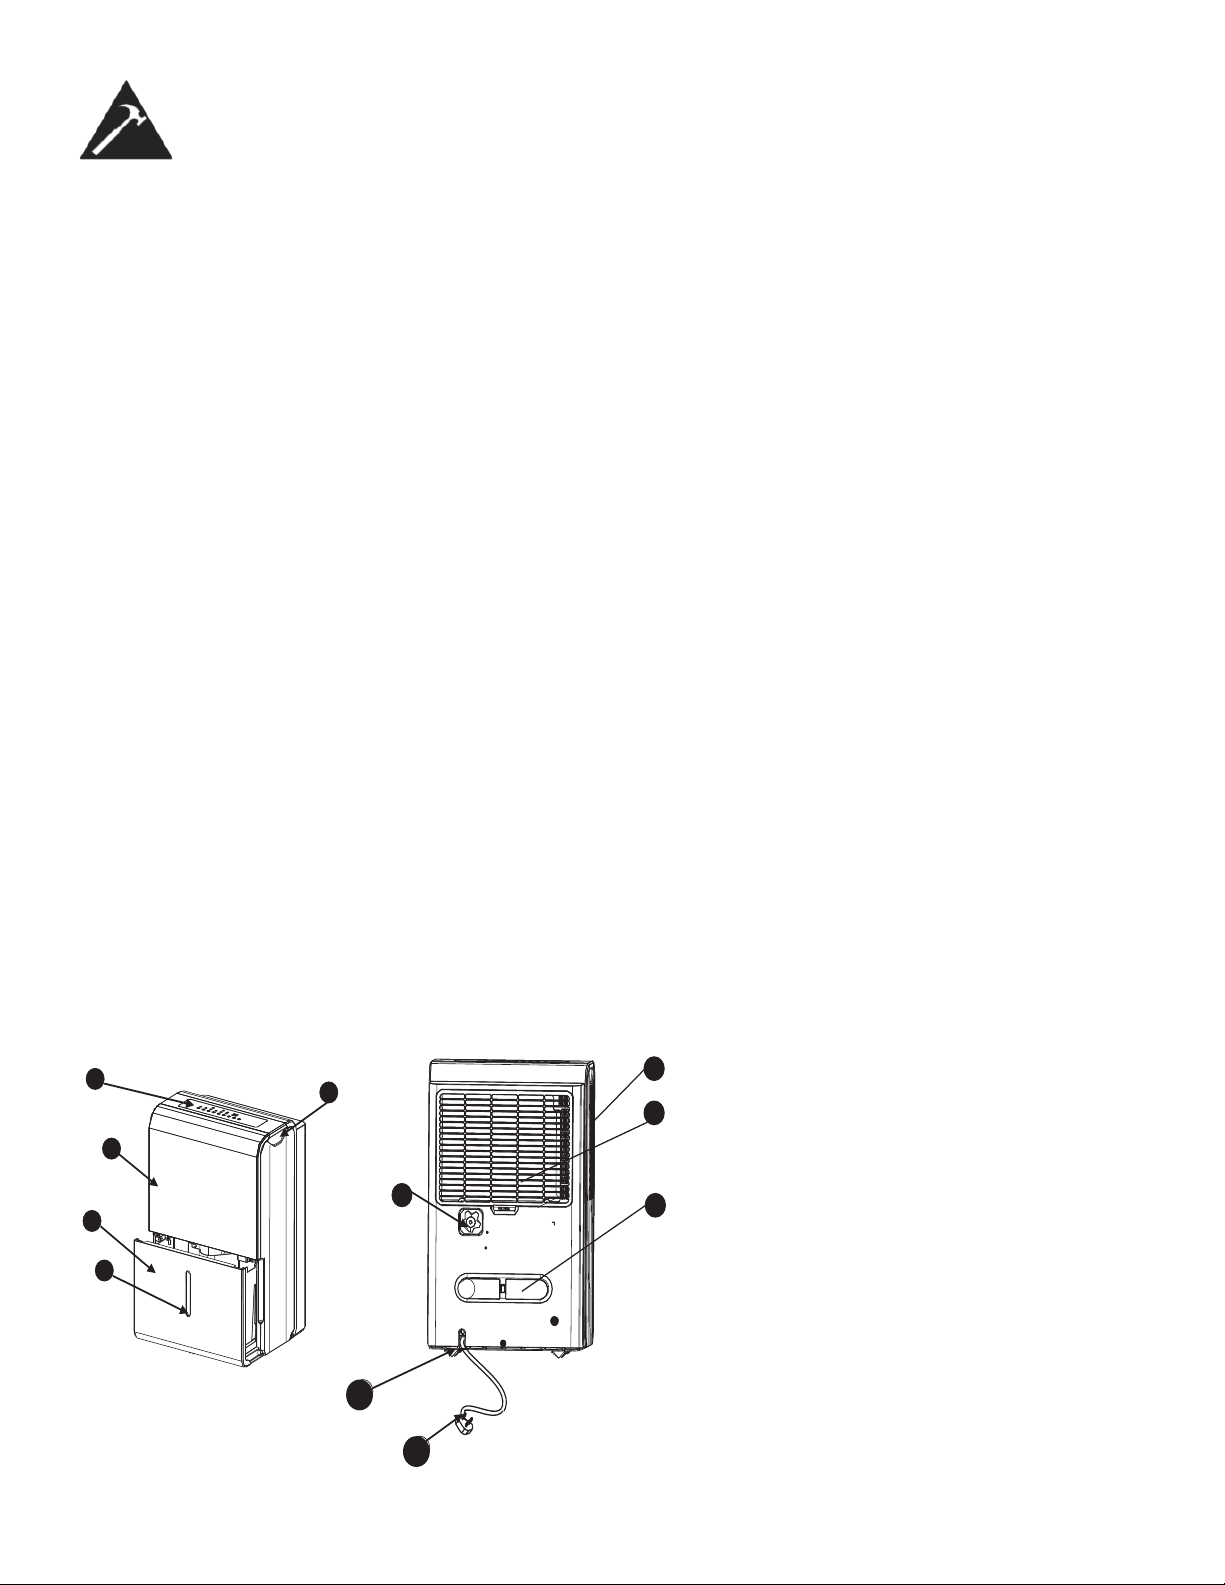
FEATURES
1
2
3
4
5
6
1. Control Panel
2. Front Panel
3. Water Bucket
4. Water Level Window
7
5. Carrying Handle (both sides)
8
6. Continuous Drain Hose Outlet
9
7. Air Outlet Grill
8. Air Filter
9. Power Cord Buckle
10. Caster
10
11. Power Cord and Plug
11
4

Operating Instructions
CASTOR INSTALLATION (some models)
Castor installation is recommended to avoid damage to fl oors.
1. Remove the castors from the bucket of the dehumidifi er.
2. Position the dehumidifi er on its side.
3. Locate the arrow on the bottom of the dehumidifi er and insert the castor
according to the arrow direction.
4. Slide the castor in as far as it will go. The castor will snap into place.
5. Repeat steps 1 to 4 for the other 3 castors.
CONTROL PANEL INSTRUCTIONS
NOTE: The control panel of the unit you purchased may be slightly different depending on the model number.
10
8
When you push the button to change operation modes, the unit will make a beeping sound to indicate that it is
changing modes.
1. Continue Button: Press to activate the continuous dehumidifying operation.
2. Filter Button: This product has a check fi lter feature that is a reminder to clean the air fi lter for more effi cient oper-
ation. The check fi lter light will illuminate after 250 hours of operation. To reset this function after cleaning the fi lter,
press the reset fi lter button and the light will go off.
3. Fan button: Controls the fan speed. Press to select either high (turbo) or normal fan speed. Set the fan control to
high for maximum moisture removal. When the humidity has been reduced and quiet operation is preferred, set the
fan control back to normal.
4. Power Button: Press to turn the dehumidifi er on or off.
5. (
6. Timer Button: Press to initiate the auto-start and auto-stop feature. Set a start or stop time from 0.0 to 24 hours using
7. Display: Shows the actual (± 5% accuracy) room humidity level in a range of 30% RH to 90% RH. Otherwise, dis-
8. Comfort: This function allows you to be comfortable by automatically adjusting the humidity level with the fl uctuating
/ ) Buttons: The humidity level can be set within a range of 35% RH (Relative Humidity) to 85% RH in 5%
increments using these buttons. For drier air, press the (
damp air, press the ( ) button and set a higher percentage value (%).
the ( ) and ( ) keys.
plays selection when programming humidity or timer.
room temperatures. The humidity level cannot be adjusted in this setting.
2
1
9
3
6
) button and set to a lower percentage value (%). For more
7
5
4
Note: The fan does not shut off the moment you remove the bucket, the fan will shut off after 2-3 minutes.
5

Operating Instructions
INDICATOR LIGHT FUNCTIONS
Note: Depending on the humidity conditions of the surrounding environment, the dehumidifi er may not start automatically
when the “on/off” button is pressed (see dehumidifying mode instructions for details).
9. Bucket Full Indicator Light: When the bucket is full and/or incorrectly positioned inside the cabinet, the bucket full
light will turn on and remain on until the bucket is emptied and/or correctly re-positioned. This condition will result in the
immediate shut down of the dehumidifying system (both compressor and fan motor operation are terminated). This is a
safety feature. When the bucket is emptied and/or correctly re-positioned, the dehumidifi er will resume operation automat-
ically. NOTE: It may take several minutes before operating conditions resume.
10. Auto-defrost: When frost builds on the evaporator coils, the compressor will cycle off and the fan will continue to run
until the frost disappears.
NOTE:
Memory Setting: Each time the unit is disconnected / re-connected and/or in the event of a power failure, the electronic
circuit board automatically defaults to the last program setting that was used. After the unit has stopped, it may take several minutes before operating conditions resume.
Auto-restart: If the unit shuts off unexpectedly due to a power outage, it will restart with the previous function settings
automatically when the power resumes.
ERROR CODES
AS - Humidity sensor error -- Unplug the unit and plug it back in. If error repeats, call for service.
ES - Temperature sensor error -- Unplug the unit and plug it back in. If error repeats, call for service.
P2 (or Eb) - Bucket is full or the bucket is not in correct position -- Empty the bucket and/or adjust it to the proper position.
EC - Please ensure that the room ambient temperature matches the recommended operating temperature for the unit,
5°C (41°F) - 35°C (95°F). If the temperature is within this range, call for service.
E3 - Unit Malfunction, unplug the unit and plug it back in. If error repeats, call for service.
TIMER FUNCTIONS
Follow these steps to program the Auto-on or Auto-off feature using the control panel:
Auto-off:
1. When the unit is on, and the TIMER button is pressed, the timer off indicator light illuminates to indicate that the autooff program is initiated.
2. Press or hold the UP or DOWN button to change the ‘Auto’ time by 0.5 hour increments, up to 10 hours (then at 1 hour
increments up to 24 hours). The unit control will count down the time remaining until start.
3. Within 5 seconds of setting auto-off time, press the TIMER button again to complete the auto-off program.
Auto-on:
4. When the unit is off, and the TIMER button is pressed, the auto-on program is initiated. Set the auto-on time as in step
2 above. Within 5 seconds of setting auto-on time, press the TIMER button again to complete the auto-on program.
NOTE: When the auto-on and auto-off times are set, within the same program sequence, TIMER ON OFF indicator lights
illuminate indicating that both ON and OFF times are now programmed.
NOTE: Turning the unit ON or OFF at any time, changing the on/off timer setting to 0.0, and a P2 error code will cancel the
Auto-on/off functions.
6

Operating Instructions
WATER TANK OPERATION
The water tank holds accumulated condensed water and, by means of a safety switch, controls both the water level and
operation of the dehumidifi cation process.
When the water tank is full and/or accidentally displaced inside the cabinet, the fl oat switch actuator (inside the tank)
breaks contact with the safety switch. This condition results in the immediate shut down of the compressor and fan motor
system, preventing moisture from being condensed.
Note: On some models, the fan will continue to run for approximately 2-3 minutes after the unit has stopped and
the bucket has been removed. As a result, water may drip from the tray onto the base of the unit, and then onto
the fl oor. Please ensure that you protect your wood and carpet from such leakage.
IMPORTANT
Never tamper with or attempt to defeat the water level (safety) fl oat switch system. Proper installation
of the water tank is crucial in maintaining reliable dehumidifi er operation.
DEHUMIDIFYING
Dehumidifying is a means of removing moisture from the air. A dehumidifi er will help to protect your home and valued
possessions from damage due to swelling caused by moisture in the air. Essentially a dehumidifi er removes moisture from
air as moist air passes over a dehumidifying (evaporator) coil. Moisture is condensed on the evaporator coil, drained, and
collected inside an internal (removable) water tank located at the front of the unit. The exhausted air being returned into
the room environment is elevated several degrees causing the surrounding air temperature to increase (slightly). This
process also contributes to lowering the relative humidity of the surrounding air.
Note: For optimal performance, ensure that the unit is set at least 10% lower than the relative humidity level. It is normal
for the humidity to vary by 5% above or below the set humidity. It is recommended that in normal conditions, the humidity
be set at 40-45%.
DEHUMIDIFYING MODE INSTRUCTIONS
When the unit is fi rst connected to the electrical outlet, the power light will not light up until the “on/off” button is pressed.
When the “on/off” button is pressed, the power light turns on and the dehumidifi er automatically defaults to:
Display: Current ambient room humidity (RH%)
Humidity Setting: 60% RH
Fan Speed: High.
Note: Depending on humidity conditions of the surrounding environment, the dehumidifi er may not start automatically
under the default setting (this is an indication that the humidity level of the surrounding environment is lower than the
“default” setting of 60% RH). Therefore, it may be necessary to scroll through each of the different dehumidifi er settings
35%-55% until the “humidistat” (sensor) recognizes conditions that will allow the unit to operate.
Dehumidifying Mode Selection:
1. The unit enters dehumidify mode when the ON/OFF button is pressed.
2a. Press the / buttons to select a desired RH operating value (35%-85%).
OR
2b. Press the continuous button. When continuous mode is selected, the humidistat (sensor) will be by-passed and the
compressor will operate non-stop regardless of humidity conditions.
Fan Speed Selection:
3. You can choose a fan speed (normal/turbo) using the keypad. The speed you select is identifi ed by the (illuminated)
indicator light located directly above the selection made.
7
Operating Instructions
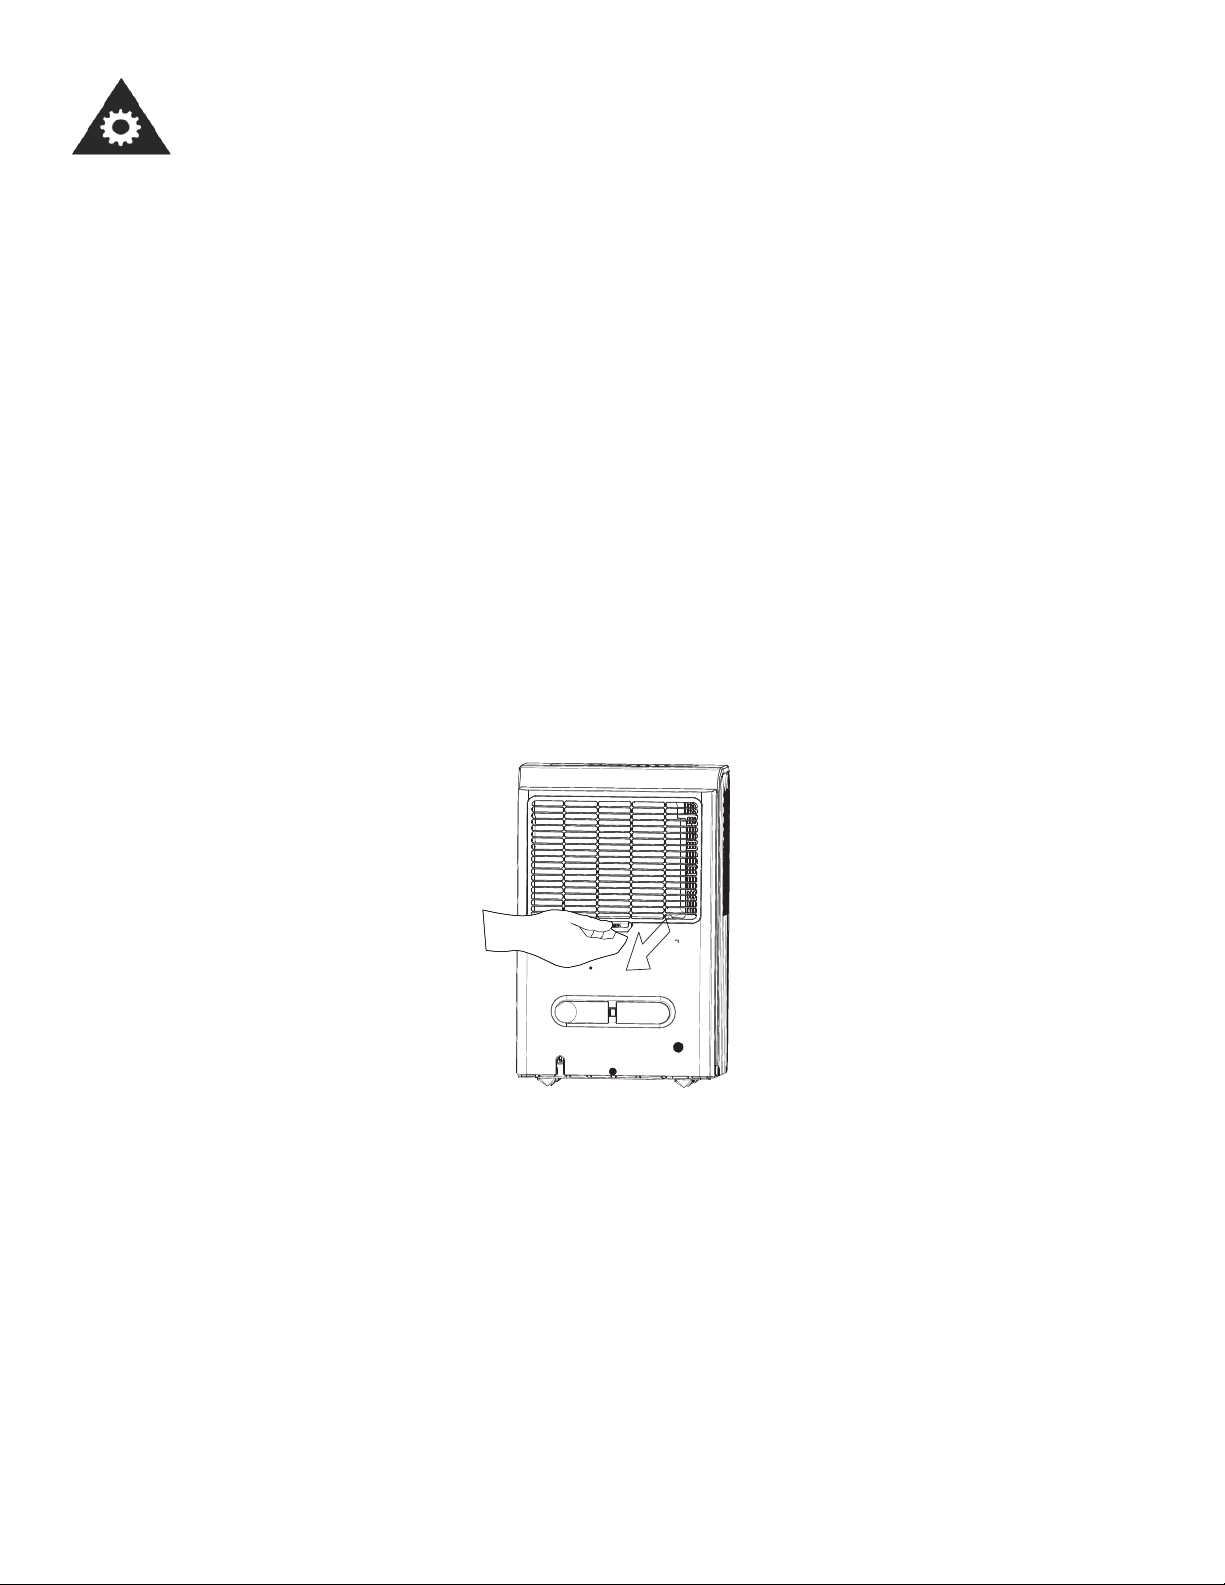
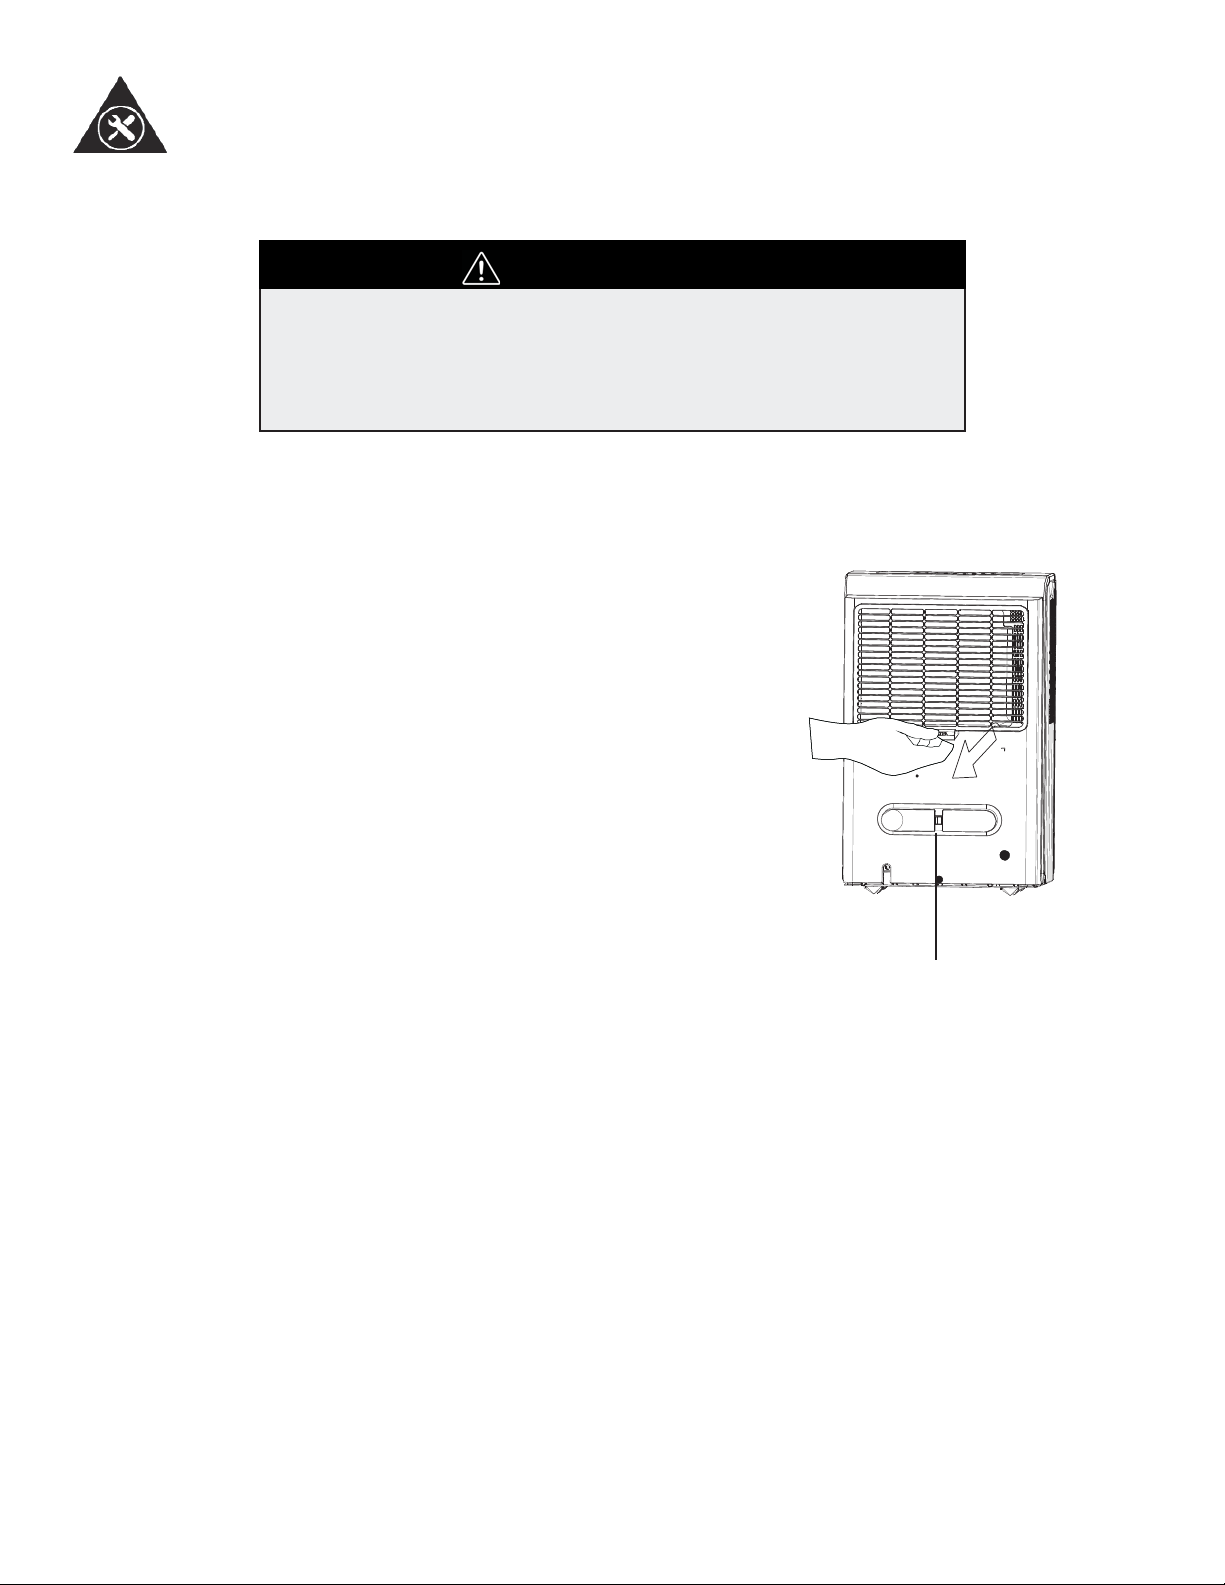
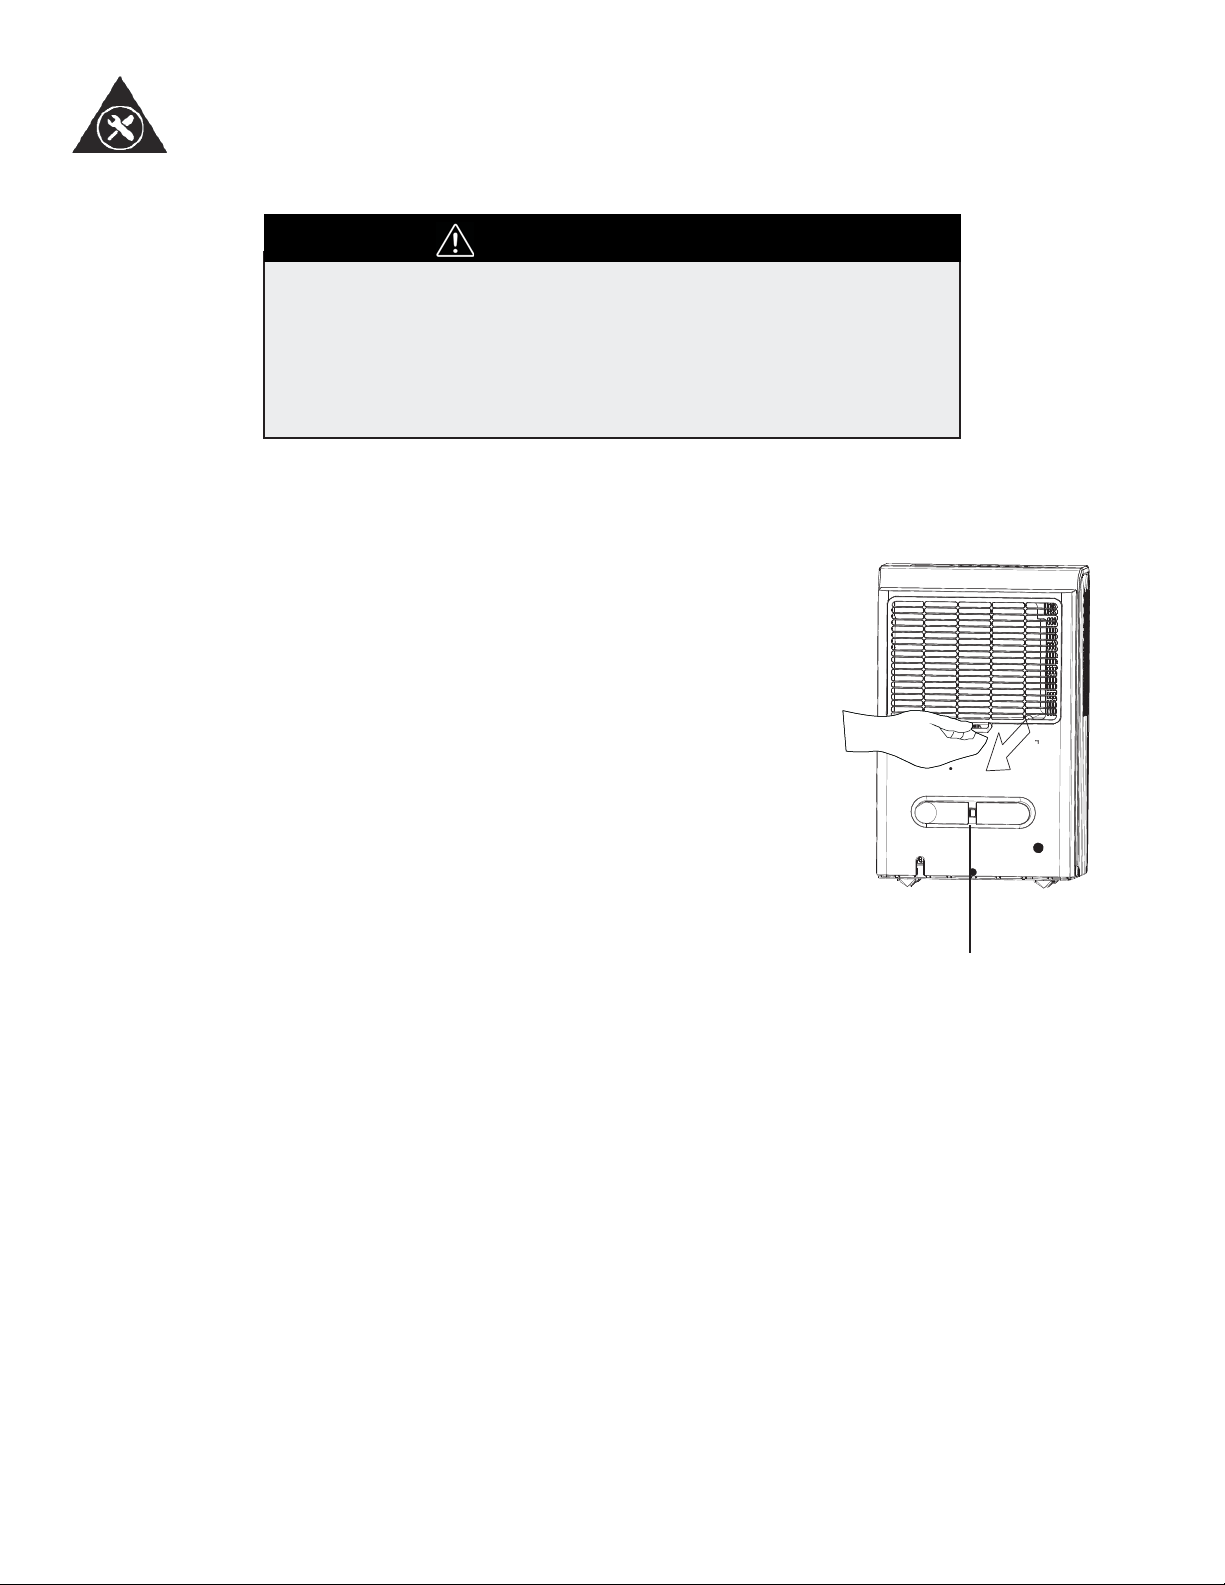
AIR FILTER
Note: All the pictures in the manual are for explanatory purposes only. The actual shape of the unit you purchased may be
slightly different, but the operation and functions are the same.
Your dehumidifi er features a removable Air Filter. This fi lter is located at the front of the unit (behind the air intake grill)
directly above the water tank compartment. The air fi lter plays an important role in helping to reduce (minimize) dust/
dirt particles from the surrounding environment. A blocked/clogged air fi lter reduces air intake, impacting negatively on
operating effi ciency. To maintain maximum operating effi ciency, the fi lter must be checked and cleaned regularly (every 2
weeks). More frequent cleaning may be required depending upon indoor air quality.
IMPORTANT: Never operate the unit without the air fi lter in place.
AIR FILTER REMOVAL:
1. Pull fi lter outwards.
2. Clean the fi lter thoroughly using a vacuum cleaner or wash using lukewarm water and mild detergent. Dry thoroughly
before re-installing.
3. To re-install the air fi lter, slide the fi lter back inside the tracks.
8
Operating Instructions
REMOVING COLLECTED WATER
1. Pull out the bucket a little.
There are two ways to remove collected water:
1. Use the bucket
When the unit is off and the bucket is full, the unit will beep 8 times, the
bucket full indicator light will fl ash, and the digital display shows P2.
When the unit is on and the bucket is full, the compressor turns off and
the fan turns off after drying the water off the condenser for 30 seconds.
The unit will then beep 8 times and the bucket full indicator light will
fl ash, and the digital display shows P2.
2. Hold both sides of the
bucket with even strength and
pull it out from the unit.
3. Pour the water out.
If the pump hose drops when you
remove the bucket, ensure it is reinstalled properly.
To empty the full bucket, slowly pull out the bucket. Grip the left and
right handles securely, and carefully pull it straight out so water does
not spill. Do not put the tank on the fl oor because the bottom of the
bucket is uneven. Otherwise the bucket will fall and cause water to spill.
Discard the water and return the bucket to the unit. The bucket must
be placed and properly positioned for the dehumidifi er to operate. The
machine will restart when the bucket is restored in its correct position.
Note: When you remove the bucket, do not touch any parts inside of
the unit. Doing so may damage the product. Be sure to push the bucket
gently all the way into the unit. Banging the bucket against anything or
failing to push it in securely may cause the unit not to operate. When
you remove the bucket, if there is some water inside the unit you must
dry it. The power button fl ashes when the bucket is not properly in
place.
Remove the plastic
cover by turning it
counter-clockwise.
Drain hose
2. Continuous draining:
Water can be automatically emptied into a fl oor drain by attaching the
unit to an ID ≥ 5/16” water hose with a ID:M=1 female threaded end
(not included, a standard garden hose works well). Install the drain
hose. The adaptor is found in the accessory bag located in the bucket.
Remove the plastic cover from the back drain outlet of the unit and set it
aside. Remove the bucket, then insert the drain hose through the drain
outlet of the unit and securely press it into the connector on the front of
the unit.
Install the female threaded end of the water hose into the adaptor A
(see B4), then lead the water hose to the fl oor drain or a suitable drain-
age facility. Make sure the hose is secure so there are no leaks. Direct
the hose toward the drain, making sure that there are no kinks that will
stop the water from fl owing. Place the end of the hose into the drain
and make sure the end of the hose is level or declining to let the water
fl ow smoothly. Place the bucket back in the unit and make sure that it is
located correctly. Select the desired humidity setting and fan speed on
the unit for continuous draining to start.
9
Operating Instructions
CAUTION
1. DO NOT pull on the power cord to avoid breakage, potential danger or
injury.
2. DO NOT use insecticide/ repellents, oil or paint/spray paint around the
machine, these might cause damage to plastic parts or start a fi re.
3. DO NOT place the unit on uneven ground to avoid shaking, noise and
water leakage.
4. Always keep the unit 20 cm or more from the wall to dissipate heat
properly.
1.
2.
3.
4.
5. DO NOT drop anything into the machine.
6. Close all windows to allow for the maximum possible effi ciency for
removing moisture.
7. Keep the machine away from any type of heat source.
8. When moving or putting in storage, do not place the dehumidifi er on its
side or upside down.
5.
6.
7.
8.
10
Care and Maintenance
CLEANING
IMPORTANT
1. Be sure to unplug the unit before cleaning or servicing.
2. Do not use gasoline, paint thinner or other chemicals to clean the
unit.
3. Do not wash the unit directly under a tap or using a hose. It may
cause electrical damage.
4. If the power cord is damaged, contact the service depot immediately.
1. Clean the grill and case
Use water and a mild detergent. Do not use bleach or abrasives. Do
not splash water directly onto the main unit. Doing so may cause an
electric shock, cause the insulation to deteriorate, or cause the unit
to rust. The air intake and outlet grills become dirty easily, so use a
vacuum attachment or brush to clean.
2. Clean the bucket
Every few weeks, clean the bucket to prevent growth of mold, mildew and bacteria. Partially fi ll the bucket with clean water and add a
small amount of mild detergent. Swish it around in the bucket, empty
and rinse. Note: Do not use a dishwasher to clean the bucket. After
cleaning, the bucket must be placed and properly positioned for the
dehumidifi er to operate.
3. Clean the air fi lter
Remove and clean the fi lter every two weeks based on normal oper-
ating conditions.
Caution: DO NOT operate the dehumidifi er without a fi lter be-
cause dirt and lint will clog it and affect performance.
4. When not using the unit for long periods of time
After turning the unit off, wait one day before emptying the bucket.
Clean the main unit, water bucket and air fi lter. Cover the unit with a
plastic bag. Wrap the cord around the power cord buckle. Store the
unit upright in a dry, well ventilated place.
Power cord buckle
11

Troubleshooting
Occasionally, a minor problem may arise, and a service call may not be necessary- use this troubleshooting guide for a
possible solution. If the unit continues to operate improperly, call an authorized service depot or Danby’s Toll Free Num-
ber for assistance.
Tel: 1-800-26 - (1-800-263-2629)
PROBLEM POSSIBLE CAUSE SOLUTION
Dehumidifi er does
not start
Dehumidifi er does
not dry the air as it
should
Dehumidifi er runs
too much
Frost appears on
the coils
Controls cannot be
set
Fan noise • Air is moving through the
Water on fl oor • Hose connection may be
• The dehumidifi er is un-
plugged
• The fuse is blown/circuit
breaker is tripped
• Dehumidifi er has reached
its preset level or bucket is
full
• Bucket is not in the proper
position
• Power failure
• Did not allow enough time
to remove the moisture
• Airfl ow is restricted
• Dirty fi lter
• The humidity control may
not be set low enough
• Doors and windows may
not be closed tightly
• Clothes dryer may be blowing moisture-laden air into
the room
• Room temperature is too
low
• Area to be dehumidifi ed is
too large
• Doors and windows are
open
• Unit has been recently
turned on, or room temperature is below 5°C (41°F)
• The compressor will turn
off and the fan will automatically continue to run for
approx. 3 minutes at a fi xed
setting
dehumidifi er
loose
• Bucket used to collect water, but the hose is attached
• Make sure the plug is pushed completely into the outlet
• Check the house fuse/circuit breaker box and replace the
fuse or reset the breaker
• The unit turns off automatically when either condition
occurs. Change to a lower setting or empty the bucket and
replace properly
• The bucket must be in place and securely seated for the
unit to operate.
• There is a protective time delay (up to 3 minutes) to prevent tripping of the compressor overload. For this reason,
the unit may not start normally for 3 minutes after it is
turned back on.
• When fi rst installed, allow at least 24 hours to maintain the
desired dryness
• Make sure there are no curtains, blinds or furniture blocking the front or back of the dehumidifi er. See the “Location”
section.
• See the “Air fi lter” section
• For drier air, press the button and set to a lower percent
value (%)
• Check that all doors, windows and other openings are
securely closed
• Install the dehumidifi er away from the dryer. The dryer
should be vented to the outside.
• Moisture removal is best at higher room temperatures.
Lower room temperatures will reduce the moisture removal
rate. Modes are designed to be operated at temperatures
above 5°C (41°F)
• The capacity of your dehumidifi er may not be adequate
• Close all doors and windows
• This is normal. Frost will usually disappear within 60 minutes. See the “Defrost” section
• This is normal. Wait approximately 3 minutes and set the
fan as desired.
• This is normal
• Check the hose connection. See “Continuous Drain” section
• Disconnect the hose if using the bucket to collect water,
see “Continuous Drain” section.
12

LIMITED CARRY-IN APPLIANCE WARRANTY
LIMITED IN-HOME APPLIANCE WARRANTY
This quality product is warranted to be free from manufacturer’s defects in material and workmanship, provided that the unit is used under the normal operating
This quality product is warranted to be free from manufacturer’s defects in material and workmanship, provided that the unit is
conditions intended by the manufacturer.
used under the normal operating conditions intended by the manufacturer.
This warranty is available only to the person to whom the unit was originally sold by Danby Products Limited (Canada) or Danby Products Inc. (U.S.A.) (hereafter
This warranty is available only to the person to whom the unit was originally sold by Danby Products Limited (Canada) or
“Danby”) or by an authorized distributor of Danby, and is non-transferable.
Danby Products Inc. (U.S.A.) (hereafter “Danby”) or by an authorized distributor of Danby, and is non-transferable.
TERMS OF WARRANTY
Plastic parts, are warranted for thirty (30) days only from purchase date, with no extensions provided.
Plastic parts, are warranted for thirty (30) days only from purchase date, with no extensions provided.
First 24 months
First Year
To obtain
service
To obtain
Service
Boundaries of
Boundaries of
in-home service
In Home Service
During the first twenty four (24) months, any functional parts of this product found to be defective, will be
repaired or replaced, at warrantor’s option, at no charge to the ORIGINAL purchaser.
During the rst twelve (12) months, any functional parts of this product found to be defective, will be repaired or replaced, at warrantor’s
option, at no charge to the ORIGINAL purchaser.
Danby reserves the right to limit the boundaries of “In Home Service” to the proximity of an Authorized
Service Depot. Any appliance requiring service outside the limited boundaries of “In Home Service” ,it
Danby reserves the right to limit the boundaries of “In Home Service” to the proximity of an Authorized Service Depot. Any app liance
will be the consumer’s responsibility to transport the appliance (at their own expense) to the original
requiring service outside the limited boundaries of “In Home Service” , it will be the consumer’s responsibility to transport the appliance (at
retailer (point of purchase) or a service depot for repair. See “Boundaries of In Home Service” below.
their own expense) to the original retailer (point of purchase) or a service depot for repair. See “Boundaries of In Home Serv ice” below.
Contact your dealer from whom your unit was purchased, or contact your nearest authorized Danby
Contact your dealer from whom your unit was purchased, or contact your nearest authorized Danby service depot, where service
service depot, where service must be performed by a qualified service technician. If service is performed
must be performed by a qualied service technician.
on the units by anyone other than an authorized service depot, or the unit is used for commercial
If service is performed on the units by anyone other than an authorized service depot, or the unit is used for commercial appli cation, all
application, all obligations of Danby under this warranty shall be void.
obligations of Danby under this warranty shall be void.
If the appliance is installed in a location that is 100 kilometers (62 miles) or more from the nearest
If the appliance is installed in a location that is 100 kilometers (62 miles) or more from the nearest service center your unit must be
service center your unit must be delivered to the nearest authorized Danby Service Depot, as service
delivered to the nearest authorized Danby Service Depot, as service must only be performed by a technician qualied and certif ied for
must only be performed by a technician qualified and certified for warranty service by Danby. Transpor-
warranty service by Danby. Transportation charges to and from the service location are not protected by this warranty and are t he
tation charges to and from the service location are not protected by this warranty and are the responsi-
responsibility of the purchaser.
bility of the purchaser.
TERMS OF WARRANTY
Nothing within this warranty shall imply that Danby will be responsible or liable for any spoilage or damage to food or other c ontents of this appliance, whether due
Nothing within this warranty shall imply that Danby will be responsible or liable for any spoilage or damage to food or other
to any defect of the appliance, or its use, whether proper or improper.
contents of this appliance, whether due to any defect of the appliance, or its use, whether proper or improper.
EXCLUSIONS
EXCLUSIONS
Save as herein provided, by Danby, there are no other warranties, conditions, representations or guarantees, express or
Save as herein provided, Danby, there are no other warranties, conditions, representations or guarantees, express or implied, m ade or intended by Danby or its
implied, made or intended by Danby or its authorized distributors and all other warranties, conditions, representations or
authorized distributors and all other warranties, conditions, representations or guarantees, including any warranties, conditio ns, representations or guarantees
guarantees, including any warranties, conditions, representations or guarantees under any Sale of Goods Act or like legislation
under any Sale of Goods Act or like legislation or statue is hereby expressly excluded. Save as herein provided, Danby shall no t be responsible for any damages
or statute is hereby expressly excluded. Save as herein provided, Danby shall not be responsible for any damages to persons
to persons or property, including the unit itself, howsoever caused or any consequential damages arising from the malfunction o f the unit and by the purchase of
or property, including the unit itself, howsoever caused or any consequential damages arising from the malfunction of the unit
the unit, the purchaser does hereby agree to indemnify and hold harmless Danby from any claim for damages to persons or propert y caused by the unit.
and by the purchase of the unit, the purchaser does hereby agree to indemnify and hold harmless Danby from any claim for
damages to persons or property caused by the unit.
No warranty or insurance herein contained or set out shall apply when damage or repair is caused by any of the following:
1) Power failure.
No warranty or insurance herein contained or set out shall apply when damage or repair is caused by any of the following:
1) Power failure.
2) Damage in transit or when moving the appliance.
2) Damage in transit or when moving the appliance.
3) Improper power supply such as low voltage, defective house wiring or inadequate fuses.
3) Improper power supply such as low voltage, defective house wiring or inadequate fuses.
4) Accident, alteration, abuse or misuse of the appliance such as inadequate air circulation in the room or abnormal operating con ditions
4) Accident, alteration, abuse or misuse of the appliance such as inadequate air circulation in the room or abnormal operating
conditions (extremely high or low room temperature).
5) Use for commercial or industrial purposes (ie. If the appliance is not installed in a domestic residence).
6) Fire, water damage, theft, war, riot, hostility, acts of God such as hurricanes, floods etc.
7) Service calls resulting in customer education.
8) Improper Installation (ie. Building-in of a free standing appliance or using an appliance outdoors that is not approved for
outdoor application). Proof of purchase date will be required for warranty claims; so, please retain bills of sale. In the event
Proof of purchase date will be required for warranty claims; so, please retain bills of sale. In the event warranty service is required, present this document to our
warranty service is required, present this document to our AUTHORIZED SERVICE DEPOT.
AUTHORIZED SERVICE DEPOT.
(extremely high or low room temperature).
5) Use for commercial or industrial purposes (ie. If the appliance is not installed in a domestic residence).
6) Fire, water damage, theft, war, riot, hostility, acts of God such as hurricanes, oods etc.
7) Service calls resulting in customer education.
8) Improper Installation (ie. Building-in of a free standing appliance or using an appliance outdoors that is not approved for out door application).
GENERAL PROVISIONS
GENERAL PROVISIONS
Danby Products Limited
Danby Products Limited
PO Box 1778, Guelph, Ontario, Canada N1H 6Z9
PO Box 1778, Guelph, Ontario, Canada N1H 6Z9
Telephone: (519) 837-0920 FAX: (519) 837-0449
Telephone: (519) 837-0920 FAX: (519) 837-0449
Warranty Service
Warranty Service
Carry-In
In-home
1-800-263-2629
1-800-263-2629
07/14
04/09
Danby Products Inc.
PO Box 669, Findlay, Ohio, U.S.A. 45840
Telephone: (419) 425-8627 FAX: (419) 425-8629
PO Box 669, Findlay, Ohio, U.S.A. 45840
Telephone: (419) 425-8627 FAX: (419) 425-8629
Danby Products Inc.

Bienvenue
Bienvenue dans la famille Danby. Nous sommes fiers de la qualité de nos produits et nous croyons fermement au service par une assistance fiable. Vous le découvrirez à la lecture de ce guide facile d’utilisation et vous en aurez la confirmation par notre service d’assistance à la clientèle. Mais ce qui est encore mieux, vous pourrez bénéficier de ces avantages à chaque utilisation de votre appareil. Ceci est important parce que votre nouvel appareil fera partie de votre
famille pour longtemps.
Veuillez noter les informations ci-dessous; ces renseignements seront nécessaires si votre appareil a besoin
d’entretien ou pour les demandes de renseignements généraux. Pour bénéficier d’une opération de maintenance ou de dépannage, le reçu original sera exigé.
Numéro de modèle :
Numéro de serie :
Date d’achat :
BESOIN D’ASSISTANCE ?
Veuillez trouver quelques conseils avant de faire appel à nos
services, cela nous aidera à mieux vous servir :
Lisez ce guide :
Il comprend des instructions pour l’utilisation et l’entretien
adapté de votre appareil.
Si votre nouvel appareil est endommagé :
Contactez immédiatement le revendeur (ou le fabricant).
Gagnez du temps et de l’argent :
Avant de faire appel à nos services, consultez à nouveau
la section « Dépannage ». Cette section vous aidera à
résoudre des problèmes courants.
Si une réparation est nécessaire, ne vous inquiétez pas, la
solution est au bout du fil.
1-800-26-
(1-800-263-2629)
14

Consignes de sécurité importantes
LISEZ TOUTE L’INFORMATION DE SÉCURITÉ AVANT UTILISATION
REMARQUE
Les consignes d'AVERTISSEMENT publiées dans ce manuel ne sont pas supposées couvrir toutes les conditions et situ-
ations éventuelles qui peuvent se produire. La ou les personnes qui installent, entretiennent ou utilisent l’appareil doivent
faire preuve de précaution et de prudence. Si vous n’installez pas, n’entretenez pas ou n’utilisez pas l’appareil conformément aux instructions du fabricant, il peut se produire des situations présentant des risques de blessures corporelles, de
dommages à l’unité ou autres dommages matériels. Communiquez avec votre concessionnaire, votre représentant ou le
fabricant en cas de problèmes ou de conditions que vous ne comprenez pas bien. Pour parler au service à la clientèle
de Danby, composez le (1-800-263-2629).
ALIMENTATION
ÉLECTRIQUE
Afi n de réduire le risque d'incendie, de choc électrique ou de blessures, tout le câblage et toute la mise à la masse
doivent se conformer à la dernière édition des codes d'électricité locaux et nationaux.
• Il incombe au client de faire vérifi er le câblage et les fusibles par un électricien qualifi é pour s'assurer que l'alimentation
électrique disponible est appropriée.
• Cet appareil est conçu pour fonctionner avec un circuit bien mis à la masse, à branchement séparé, polarisé, à trois fi ls
de 120 volts et 60 hertz (courant alternatif). Ce circuit doit être protégé par un fusible de 15 ampères, un fusible équivalent
ou un coupe-circuit. La fi che à trois broches mise à la masse sur le cordon d'alimentation doit être branchée directement
dans la prise susmentionnée de puissance nominale 110/120 V (c.a.).
• Ne branchez pas le déshumidifi cateur à une prise femelle multiple qui sera également utilisée pour d'autres appareils
électriques.
POUR VOTRE SÉCURITÉ : Afi n de réduire le risque d'incendie ou d'explosion, n'entreposez pas ou n'utilisez pas
d'essence ou d'autres vapeurs ou de liquides infl ammables à proximité de cet appareil.
MISE À LA TERRE
CONSIGNES
Le mauvais branchement d'un conducteur mis à la masse d'équipement peut résulter dans un risque de choc électrique.
Vérifi ez avec un électricien ou un technicien qualifi é si vous n'êtes pas certain que les prises de vos appareils sont bien
mises à la masse.
Cet appareil doit être mis à la masse. En cas de mauvais fonctionnement ou de panne, la mise à la masse réduira le
risque de choc électrique en offrant un circuit avec le moins de résistance au courant électrique. Cet appareil est équipé
d'un cordon électrique avec un conducteur et une fi che à trois broches mis à la masse. La fi che doit être branchée dans
une prise bien installée et mise à la masse conformément aux codes et ordonnances locaux.
• Ne modifi ez pas la fi che livrée avec cet appareil. Si elle ne s'adapte pas à la prise, faites installer une prise adéquate par
un technicien qualifi é.
• Si l'alimentation électrique de votre maison ne satisfait pas aux spécifi cations susmentionnées ou si vous n'êtes
pas certain que votre maison a une mise à la terre effi cace, demandez à un technicien qualifi é ou à une compagnie
d'électricité de le vérifi er et de rectifi er tous les problèmes.
GARDEZ CES INSTRUCTIONS
15

Consignes de sécurité importantes
LISEZ TOUTE L’INFORMATION DE SÉCURITÉ AVANT UTILISATION
MESURES DE SÉCURITÉ
Lors de l’utilisation de ce déshumidifi cateur, suivez toujours les mesures de sécurité de base, y compris les suivantes :
• N’utilisez cet appareil qu’aux fi ns pour lesquelles il est conçu, tel que décrit dans ce guide d’utilisation.
• Ne pas retirer le morceau de styromousse dans le récipient, puisque celui-ci agit comme indicateur du niveau d’eau.
• Ce déshumidifi cateur doit être installé et mis à la terre correctement, tel que décrit dans ce guide, avant d’être utilisé.
• Ne faites jamais fonctionner ce déshumidifi cateur à un endroit où de l’eau stagnante est susceptible de s’accumuler.
Dans une telle situation, pour votre sécurité, débranchez l’alimentation avant de marcher dans l’eau.
• Ne débranchez jamais votre déshumidifi cateur en tirant sur le cordon d’alimentation. Tenez toujours la fi che fermement
et tirez bien droit pour la retirer de la prise.
• Remplacez immédiatement tous les cordons d’alimentation effi lochés ou qui présentent d’autres dommages. Un
cordon d’alimentation endommagé doit être remplacé par un nouveau cordon obtenu auprès du fabricant; il ne doit
pas être réparé. N’utilisez pas un cordon qui présente des fi ssures ou des dommages causés par l’abrasion, soit sur le
cordon lui-même, soit à l’extrémité de la fi che ou du raccord.
• Si la prise ne correspond pas à la fi che, la prise doit être changée par un électricien qualifi é.
• Éteignez le déshumidifi cateur et débranchez-le avant de le nettoyer.
• Pour votre sécurité, n’entreposez et n’utilisez pas de matières combustibles, d’essence ou d’autres liquides ou vapeurs
infl ammables à proximité de cet appareil ou de tout autre appareil.
• Tous les déshumidifi cateurs contiennent des fl uides frigorigènes qui, en vertu des lois fédérales, doivent être enlevés
avant que le produit soit mis au rebut. Si vous vous débarrassez d’un produit contenant des fl uides frigorigènes,
demandez conseil à l’entreprise qui s’occupe de la mise au rebut pour connaître la marche à suivre. Vérifi ez le respect
des réglementations locales concernant la mise au rebut approuvée et sécurisée de cet appareil.
• N’utilisez pas cet appareil à l’extérieur.
• Le déshumidifi cateur est uniquement conçu pour des utilisations résidentielles à l’intérieur. Ce déshumidifi cateur ne doit
pas servir à des utilisations commerciales ou industrielles.
GARDEZ CES INSTRUCTIONS
16

Consignes d’utilisation
EMPLACEMENT
• Choisissez un emplacement approprié et assurez-vous d’avoir accès à une prise électrique (évitez d’utiliser des rallonges électriques).
• Assurez-vous qu’il n’y a aucun obstacle limitant la circulation d’air passant par la grille frontale d’entrée d’air. Maintenez
un dégagement minimal d’au moins 20 centimètres (8 po) entre les murs adjacents et le dos de l’unité, afi n de permettre
une bonne circulation d’air et une effi cience optimale. Afi n d’obtenir un rendement opérationnel optimal pour votre déshu-
midifi cateur, les températures (ambiantes de la pièce) de fonctionnement recommandées devraient s’élever à entre 5 °C
(41 °F) et 35 °C (95 °F).
• Il est important de se rappeler que l’effi cience d’un déshumidifi cateur sera affectée/infl uencée par le taux auquel on
laisse infi ltrer de l’air nouveau et humide (humidité) dans le même espace/la même zone. Afi n de maintenir l’effi cience, le
déshumidifi cateur doit fonctionner dans une zone close. Gardez toutes les portes et fenêtres fermées.
• N’utilisez pas cet appareil à l’extérieur. Ce déshumidifi cateur ne doit être utilisé qu’à l’intérieur à des fi ns d’usage
résidentiel. Ce déshumidifi cateur ne doit pas être utilisé à des fi ns commerciales ou industrielles.
• Mettez le déshumidifi cateur sur un plancher lisse à niveau suffi samment robuste pour soutenir l’appareil avec un
réservoir d’eau plein.
• Placez l’appareil où vous avez accès à une prise électrique
• Cet appareil a quatre roulettes qui peuvent se déplacer librement. Ne forcez pas les roulettes à se déplacer sur la
moquette et évitez de déplacer l’appareil lorsqu’il y a de l’eau dans le réservoir (il peut basculer et renverser l’eau).
Protégez les sols en bois contre les risques de déversements ou de rayures en déplaçant l’appareil.
• Enlevez le sac d’accessoires du réservoir et rangez-le dans un lieu sûr.
CARACTÉRISTIQUES
1
2
3
5
6
1. Panneau de commandes
2. Panneau frontal
3. Réservoir d’eau
4. Fenêtre de niveau d’eau
7
5. Poignée (des deux côtés)
8
6. Sortie de drain continu
9
7. Grille de sortie d’air
8. Filtre à air
4
9. Bande (utilisée pour entreposer l’appareil)
10
10. Roulette
11. Cordon d’alimentation et fi che
11
17

Consignes d’utilisation
INSTALLATION DES ROULETTES (certains modèles seulement)
L’Installation des roulettes est recommandée afi n d’éviter d’endommager le
plancher.
1. Dégager les roulettes du bac du déshumidifi cateur.
2. Placer le déshumidifi cateur en appui sur le côté.
3. Déterminer l’emplacement de la fl èche au bas du déshumidifi cateur et insérer
la roulette selon la direction de la fl èche.
4. Enfoncer la roulette en la faisant glisser aussi loin que possible. La roulette
s’emboîte.
5. Répéter les étapes 1 à 4 pour les trois autres roulettes.
CONSIGNES RELATIVES AU PANNEAU DE COMMANDE
*REMARQUE : Le panneau de commande de l’appareil que vous avez acheté peut être légèrement différent en fonction
du numéro de modèle.
10
8
Lorsque vous poussez sur le bouton pour modifi er les modes de fonctionnement, l’appareil émettra un signal
sonore pour indiquer un changement de modes.
1. Bouton mode continu : Appuyez dessus pour activer le fonctionnement continu du déshumidifi cateur.
2. Bouton fi ltre : Ce produit a une fonction de vérifi cation du fi ltre à titre de rappel qu’il faut nettoyer le fi ltre à air en vue
d’un fonctionnement plus effi cace. Le témoin de vérifi cation du fi ltre s’illuminera après 250 heures de fonctionnement.
Pour remettre cette fonction à zéro après avoir nettoyé le fi ltre, appuyez sur le bouton de remise à zéro de la fonction
fi ltre et le témoin s’éteindra.
3. Bouton ventilateur : Régule la vitesse du ventilateur. Appuyez dessus pour choisir la vitesse du ventilateur élevée
(turbo) ou normale. Réglez la vitesse du ventilateur à élevée pour une élimination optimale de l’humidité. Lorsque
l’humidité a été réduite et que vous préférez le fonctionnement silencieux, réglez à nouveau la vitesse du ventilateur à
nornal.
4. Bouton de mise en marche : Appuyez dessus pour mettre en marche ou éteindre le déshumidifi cateur.
5. Boutons ( / ) : Le niveau d’humidité pour être réglé dans une marge de 35% d’HR (humidité relative) à 85%
d’HR par incréments de 5% à l’aide de ces boutons. Pour un air plus sec, appuyez sur le bouton ( ) et réglez à un
pourcentage inférieur (%). Pour un air plus humide, appuyez sur le bouton ( ) et réglez à un pourcentage plus élevé
(%).
6. Bouton minuterie : Appuyez dessus pour activer la fonction de démarrage et d’arrêt automatiques. Réglez un délai
de démarrage et d’arrêt de 0 à 24 heures à l’aide des touches ( ) et ( ).
7. Affi chage : Indique le niveau d’humidité réel de la pièce (exactitude de ± 5%) dans une marge d’HR de 30% à 90%.
Dans le cas contraire, affi che la sélection lors de la programmation de l’humidité ou de la minuterie.
8. Confort : Cette fonction vous permet de garder le confort en réglant le niveau d’humidité automatiquement selon le
réglage de la température. Le niveau d’humidité ne peut pas être ajusté lorsque l’appareil est sous la fonction de «
Confort ».
Remarque : Le ventilateur ne s’éteindra pas au moment où vous retirez le récipient, mais plutôt après 2-3 minutes.
2
1
9
3
6
7
5
4
18

Consignes d’utilisation
FONCTIONS DE TÉMOIN
Remarque : En fonction des conditions d’humidité du milieu ambiant, le démarrage automatique du déshumidifi cateur
peut ne pas fonctionner lorsque vous appuyez sur le bouton « marche/arrêt » (reportez-vous aux consignes du mode de
déshumidifi cation pour obtenir de plus amples détails).
9. Témoin indicateur du réservoir plein : Lorsque le réservoir est plein ou mal placé dans le coffre, le témoin de
remplissage d’eau s’allume et reste allumé jusqu’à ce que le réservoir soit vidé ou remis dans la bonne position. Cette
condition entraînera un arrêt immédiat du système de déshumidifi cation (le fonctionnement du compresseur et du
ventilateur s’arrête). C’est un dispositif de sécurité. Quand le réservoir est vidé ou remis dans la bonne position, le
déshumidifi cateur se remet automatiquement en marche. Remarque : Il peut falloir plusieurs minutes pour retourner aux
conditions de fonctionnement.
10. Dégivrage automatique : Lorsque le givre s’accumule sur les serpentins de l’évaporateur, le cycle du compresseur
s’arrêtera et le ventialateur continuera à fonctionner jusqu’à ce que le givre disparaisse.
REMARQUE :
Réglage de la mémoire : Chaque fois que vous branchez/débranchez l’appareil ou en cas de panne de courant, le circuit
électronique se remet automatiquement par dédaut au dernier programme utilisé. Après l’arrêt de l’appareil, il peut falloir
plusieurs minutes pour retourner aux conditions de fonctionnement.
Redémarrage automatique : Si l’appareil s’arrête de manière impromptue à cause d’une panne de courant, il
redémarrera automatiquement avec les réglages précédents lorsque le courant revient.
CODES D’ERREUR
AS - Erreur du détecteur d’humidité -- Débranchez l’appareil et rebranchez-le. Si l’erreur se répète, veuillez contacter un
technicien.
ES - Erreur du détecteur de température -- Débranchez l’appareil et rebranchez-le. Si l’erreur se répète, veuillez
contacter un technicien.
P2 (ou Eb) - Le réservoir est plein ou le réservoir n’est pas en bonne position -- Videz le réservoir ou réglez-sur la
position appropriée.
EC - Assurez-vous que la température ambiante de la pièce corresponde à la température recommandée pour le
fonctionnement optimal de l’appareil 5°C (41°F) - 35°C (95°F). Si la température corresponde à cet intervalle, veuillez
contacter un technicien.
E3 -L’appareil ne fonctionne pas, débranchez l’appareil et rebranchez-le. Si l’erreur se répète, veuillez contacter un
technicien.
MINUTERIE FONCTIONS
Suivez ces étapes pour programmer la fonction de démarrage et d’arrêt automatiques sur le panneau de commande :
Arrêt automatique :
1. Quand l’appareil est allumé que vous appuyez sur bouton MINUTERIE, le témoin de minuterie s’allume et indique le
programme d’arrêt automatique est activé.
2. Maintenez le bouton HAUT ou BAS enfoncé pour modifi er la durée « automatique » par incréments de 0,5 heure,
jusqu’à 10 heures (puis par incréments d’une heure jusqu’à 24 heures). La commande de l’appareil comptera le
temps restant jusqu’au démarrage.
3. Dans les 5 secondes suivant le réglage de l’arrêt automatique, appuyez à nouveau sur le bouton MINUTERIE pour
exécuter le programme d’arrêt automatique.
Démarrage automatique :
4. Quand l’appareil est éteint et que vous appuyez sur le bouton MINUTERIE, le programme de démarrage automatique
est lancé. Réglez le temps d’ici le démarrage automatique comme à l’étape 2 ci-dessus. Dans les 5 secondes suivant
le réglage du démarrage automatique, appuyez à nouveau sur le bouton MINUTERIE pour terminer le programme
d’arrêt automatique.
Remarque : Lorsque les temps de démarrage et d’arrêt automatiques sont réglés, dans le même ordre de
programmation, les témoins de la MINUTERIE MARCHE ARRÊT sont désormais programmés.
Remarque : Le DÉMARRAGE ou l’ARRÊT à n’importe quel moment, la modifi cation du réglage de la minuterie marche/
arrêt pour 0,0 et un code d’erreur P2 annuleront la fonction de démarrage/arrêt automatique.
19

Consignes d’utilisation
FONCTIONNEMENT DU RÉSERVOIR D’EAU
Le réservoir d’eau contient l’eau condensée accumulée. À l’aide d’un interrupteur de sécurité, il contrôle le niveau
d’eau et le fonctionnement du processus de déshumidifi cation - par exemple, lorsque le réservoir d’eau est plein ou
accidentellement déplacé dans le coffre, le fl otteur (à l’intérieur du réservoir) n’est plus en contact avec l’interrupteur
de sécurité. Cette condition entraînera un arrêt immédiat du compresseur et du moteur du ventilateur, ce qui évite une
condensation de l’humidité.
Remarque : Sur certains modèles, le ventilateur continue de fonctionner pendant environ 2-3 minutes une fois
que l’appareil a été arrêté et le réservoir retiré. Par conséquent, de l’eau risque de s’écouler du plateau sur la
base de l’appareil, puis sur le sol. Veuillez vous assurer que vous avez bien protégé vos parquets et moquettes
contre ce genre de fuite.
IMPORTANT
Ne modifi ez jamais, ni ne tentez de contrecarrer le système d’interrupteur à fl otteur du niveau d’eau (système
de sécurité). Il est primordial de bien installer le réservoir d’eau pour maintenir un fonctionnement fi able du
déshumidifi cateur.
DÉSHUMIDIFICATION
La déshumidifi cation est un moyen d’éliminer l’humidité dans l’air. Un déshumidifi cateur aidera à protéger votre maison
et vos précieuses possesions contre les dommages (gonfl ement) causé par l’humidité dans l’air. Fondamentalement,
un déshumidifi cateur élimine l’humidité dans l’air lorsque l’air humide passe sur un serpentin déshumidifi cateur
(évaporateur). L’humidité est condensée sur le serpentin évaporateur, drainée et recueillie à l’intérieur d’un réservoir
d’eau interne (amovible) situé à l’avant de l’appareil. L’air évacué dans la pièce est élevé de plusieurs degrés, ce qui fait
augmenter (légèrement) la température ambiante de l’air. Ce processus contribue également à réduire l’humidité relative
de l’air ambiant.
Remarque : Pour assurer une performance optimale, veuillez vérifi er que l’humidité de l’appareil soit réglée à un
minimum de 10% de moins que le niveau d’humidité relative. Il est normal que l’humidité varie de 5% de plus ou de moins
que le niveau d’humidité réglée. Il est recommandé que l’humidité soit réglée à 40-45% dans des conditions normales.
CONSIGNES RELATIVES AU MODE DE DÉSHUMIDIFICATION
Lorsque l’appareil est branché pour la première fois à la prise électrique, le témoin (vert) ne s’allumera pas avant que
vous appuyiez sur le bouton « marche / arrêt ». Lorsque vous appuyez sur le bouton « marche / arrêt », le témoin s’allume
et le déshumidifi cateur se met par défaut en mode :
Affi chage : Humidité ambiante actuelle de la pièce (%HR)
Réglage de l’humidité : HR de 60%
Vitesse du ventilateur : Élevée
Remarque : En fonction des conditions d’humidité du milieu ambiant, le déshumidifi cateur peut ne pas démarrer
automatiquement selon le réglage par défaut (c’est un signe que le niveau d’humidité du milieu ambiant est inférieur au
réglage par « défaut » d’HR de 60%). Par conséquent, il peut être nécessaire de faire défi ler chaque réglage différent du
déshumidifi cateur de 35% - 55% jusqu’à ce que « l’humidostat » (capteur) détermine des conditions qui permettront à
l’appareil de fonctionner.
Sélection du mode de déshumidifi cation :
1. L’appareil passe en mode de déshumidifi cation lorsque vous appuyez sur le bouton « marche/arrêt ».
2a. Appuyez sur les boutons / pour choisir la valeur opérationnelle d’HR (35%-85%).
OU
2b. Appuyez sur le bouton MODE CONTINU. Quand le mode CONTINU est choisi, l’humidostat (capteur) sera contourné
et le compresseur fonctionnera sans interruption sans égard aux conditions d’humidité.
Sélection de la vitesse du ventilateur :
3. Vous pouvez choisir la vitesse du ventilateur (normale/turbo) à l’aide du clavier. La vitesse que vous sélectionnez est
indiquée par le témoin (allumé) qui se trouve directement au-dessus de votre choix.
20

Consignes d’utilisation
FILTRE À AIR
REMARQUE : Toutes les photographies du manuel ne sont qu’à titre d’explication. La forme réelle de l’appareil que
vous avez acheté peut être légèrement différente, mais les commandes et les fonctions sont identiques.
Les fonctions de votre déshumidifi cateur comprennent un fi ltre à air, à l’avant de l’appareil (derrière la grille d’entrée
d’air) directement au-dessus du réservoir d’eau. Le fi ltre à air joue un rôle important dans la réduction des particules de
poussière dans le milieu ambiant. Un fi ltre à air bloqué/obstrué réduit l’entrée d’air, ce qui a une incidence négative sur
l’effi cience. Pour maintenir une effi cacité de fonctionnement optimale, le fi ltre doit être vérifi é et nettoyé régulièrement
(toutes les 2 semaines) ou quand le témoin de vérifi cation du fi ltre s’allume. Un nettoyage plus fréquent peut être
nécessaire en fonction de la qualité de l’air intérieur.
Important : Ne faites jamais fonctionner l’appareil sans le fi ltre à air.
ENLEVER LE FILTRE À AIR :
1. Tirez fi ltrer.
2. Nettoyez le fi ltre avec un aspirateur ou lavez-le à l’eau tiède avec un détergent doux. Séchez-le bien avant de le
réinstaller.
3. Pour réinstaller le fi ltre à air, faites-le glisser derrière dans les rails et poussez vers l’intérieur.
21
Consignes d’utilisation
ENLÈVEMENT DE L’EAU RECUEILLIE
1. Tirez un peu le réservoir.
2. Tenez les deux côtés du
réservoir avec une égale et
tirez-le en dehors de l’appareil.
3. Jetez l’eau.
Il y a deux manières d’enlever l’eau recueillie.
1. Utilizez le réservoir
Quand l’appareil est éteint, si le réservoir est plein, l’appareil émettra
un signal sonore 8 fois, le témoin de remplissage du réservoir
clignotera et l’affi chage numérique indiquer P2.
Quand l’appareil est allumé, si le réservoir est plein, le compresseur
s’éteint et le ventilateur s’éteint après avoir séché l’eau sur le condensateur pendant 30 secondes. Ensuite, l’appareil émettra un signal
sonore 8 fois et le témoin de remplissage du réservoir plein, retirez-le
lentement du déshumidifi cateur. Saisissez bien les poignées gauche et
droite et retirez-le soigneusement en position verticale pour que l’eau
ne se renverse pas. Ne mettez pas le réservoir sur le plancher parce
que le fond est inégale. Sinon, le réservoir basculera et l’eau se renversera. Jetez l’eau et remettez le réservoir dans l’appareil. Le réservoir
doit être en place et bien positionné pour que le déshumidifi cateur
fonctionne. L’appareil se remettra en marche quand le réservoir est
remis dans la bonne postition.
Remarque : Lorsque vous enlevez le réservoir, ne touchez aucune
partie à l’intérieur de l’appareil. Sinon, vous pouvez endommager le
produit. Soyez sûr de pousser doucement le réservoir tout au fond de
l’appareil. Si vous cognez le réservoir contre quelque chose ou si vous
ne le poussez pas bien dedans, il se peut que l’appareil ne fonctionnera pas. Lorsque vous enlevez le réservoir, s’il y a de l’eau à l’intérieur de l’appareil, vous devez le sécher.
Si le tuyau de la pompe tombe lorsque vous
retirez le seau, réinstallez-le correctement.
Enlever le couvercle
en plastique (tourner
dans le sens inverse des aiguilles)
Tuyau de
vidange
2. Vidange continue
L’eau peut être automatiquement vidée dans un siphon de sol en connectant l’appareil avec un tuyau d’arrosage fl exible de diam. int. ≥ 7,94
mm (5/16 po) avec un embout fi leté femelle M=1 (non inclus, un tuyau
d’arrosage standard fonctionne bien). Installez le tuyau de vidange.
Enlevez le couvercle en plastique de la sortie de drainage à l’arrière
de l’appareil et mettez-le de côté. Enlevez le réservoir, puis insérez le
tuyau de drainage à travers la sortie de vidange de l’appareil et appuyez fermement sur le connecteur à l’avant de l’appareil.
Installez l’extrémité fi letée femelle du tuyau au siphon de sol ou à une
installation de drainage appropriée. Assurez-vous que le tuyau est
bien connecté de sorte qu’il n’y ait pas de fuite. Dirigez le tuyau vers le
drain, en veillant à ce qu’il n’y ait pas de nœud qui arrête le passage
de l’eau. Placez l’extrémité du tuyau dans le drain et assurez-vous que
l’extrémité du tuyau est au même niveau ou en pente afi n de permettre
que l’eau s’écoule facilement. Remettez le réservoir dans l’appareil
et assurez-vous qu’il est bien placé. Sélectionnez le réglage d’humidité souhaité et la vitesse du ventilateur de l’appareil pour démarrer la
vidange continue.
22

Consignes d’utilisation
PRÉCAUTION
1. NE PAS tirer sur le cordon d’alimentation afi n d’éviter la rupture, des
dangers potentiels ou des blessures.
2. NE PAS utiliser d’huile à insecte ou de la peinture en vaporisateur autour
de l’appareil : cela pourrait causer du dommage aux pièces de plastique
ou faire démarrer un incendie.
3. NE PAS placer l’appareil sur un plancher inégal pour éviter le
tremblement, le bruit et les fuites d’eau.
4. Tourjours garder l’appareil à 20 cm ou plus d’un mur afi n de dissiper la
chaleur correctement.
1.
2.
3.
4.
5. NE LAISSEZ RIEN tomber dans l’appareil.
6. Fermez toutes les fenêtres afi n de laisser le plus d’effi cacité possible
pour l’enlèvement de l’humidité.
7. Gardez l’appareil loin de toute source de chaleur.
8. Lors du déplacement ou de l’entreposage, ne placez pas le
déshumifi cateur sur le côté ou à l’envers et évitez les secousses
violentes.
5.
6.
7.
8.
23
Soins et entretien
NETTOYAGE
AVERTISSEMENT
1. Veillez à débrancher l’appareil avant de le nettoyer ou de procéder à
son entretien.
2. N’utilisez pas d’essence, de diluant ou d’autres produits chimiques
pour nettoyer l’appareil.
3. Ne lavez pas l’appareil directment sous le robinet ou à l’aide d’un
tuyau : vous pourriez vous électrocuter ou causer un incendie.
4. Si le cordon d’alimentation est endommagé, il doit être réparé par le
fabricant ou l’un de ses représentants de l’entretien.
1. Nettoyez la grille et le coffre
Utilisez de l’eau et un détergent doux. N’utilisez pas d’eau de javel, ni de produits abrasifs. Ne projetez pas d’eau directement sur l’appareil principal. Cela
risquerait de provoquer un choc électrique, de causer la détérioration de l’isolation ou de rouiller l’appareil. Les grilles d’entrée et de sortie d’air deviennent
sales facilement, dans ce cas utiliser un aspirateur ou une brosse de nettoyage.
2. Nettoyer le réservoir
À quelques semaines d’intervalle, nettoyez le réservoir pour empêcher la croissance de moisissures et de bactéries. Remplissez partiellement le réservoir
avec de l’eau propre et ajoutez un peu de détergent doux. Remuez le mélange
dans le réservoir, videz-le et rincez-le. Remarque : Ne lavez pas le réservoir
au lave-vaisselle. Après le nettoyage, le réservoir doit être mis en place et bien
placé pour que le déshumidifi cateur fonctionne.
3. Nettoyer le fi ltre à air
Enlevez et nettoyez le fi ltre toutes les deux semaines en fonction de des condi-
tions de fonctionnement normales.
Mise en garde : NE FAITES PAS fonctionner le déshumidifi cateur sans
fi ltre, car la poussière et les peluches l’obstrueront et affecteront son ren-
dement.
4. Lorsque vous n’utilisez pas l’appareil pendant de longues périodes de
temps
Après l’arrêt de l’appareil, attendez une journée avant de vider le réservoir.
Nettoyez l’appareil principal, le réservoir d’eau et le fi ltre à air. Couvrez l’appareil
avec un sac en plastique. Enroulez le cordon autour de la boucle Entreposez
l’appareil en position verticale dans un endroit sec et bien aéré.
Cordon boucle
24
Dépannage
De temps en temps, un problème est mineur et un appel de service peut ne pas être nécessaire. Utilisez ce guide de
dépannage pour trouver une solution possible. Si l’unité continue de fonctionner incorrectement, appelez un dépôt de
service autorisé ou le numéro sans frais de Danby pour obtenir de l’assistance.
Tel: 1-800-26- (1-800-263-2629)
PROBLÈME CAUSE POSSIBLE SOLUTION
Le déshumidifi ca-
teur ne se met pas
en marche
Le déshumidifi ca-
teur n’assèche pas
l’air comme il le
devrait
Le déshumidifi -
cateur fonctionne
trop
Apparition de givre
sur les serpentins
• Le déshumidifi cateur est
débranché
• Le fusible est grille/le disjoncteur est déclenché
• Le déshumidifi cateur à
atteint son niveau prérégle
ou le seau est plein
• Le seau n’est pas remis en
place au bon endroit
• Panne de courant
• Une période insuffi sante
a été allouée pour enlever
l’humidité
• La circulation de l’air est
bloquée
• Le fi ltre est sale
• Le contrôle de l’humidité
n’est peut-être pas réglé
assez bas
• Il est possible que les
portes et les fenêtres ne
soient pas bien fermées
• La sécheuse souffl e peut-
être de l’air humide dans la
pièce
• La température de la pièce
est trop basse
• La pièce à déshumidifi er est
trop grande
• Les portes et les fenêtres
sont ouvertes
• L’appareil vient d’être mis
en marche ou la température de la pièce est inférieure à 5°C (41°F)
• Assurez-vous que la fi che du déshumidifi cateur est com-
plètement enfoncée dans la prise
• Vérifi ez la boîte à fusibles / à disjoncteurs de la maison;
remplacez le fusible ou réinitialisez le disjoncteur
• Le déshumidifi cateur s’éteint automatiquement dans l’un
ou l’autre cas. Passez à un réglage moins élevé ou videz
le seau et remettez-le en place
• Le seau doit être en place et bien installé pour que le
déshumidifi cateur fonctionne.
• Il y a un délai de protection (maximum de 3 minutes) pour
empêcher que le protecteur de surcharge du compresseur
se déclenche. Pour cette raison, il est possible que l’appareil ne reprenne pas son fonctionnement normal pendant 3
minutes après avoir été remis en marche
• Lorsque l’appareil vient d’être installé, allouez au moins 24
heures pour atteindre la déshumidifi cation souhaitée
• Assurez-vous qu’il n’y a pas de rideaux, de stores ou de
meubles qui bloquent l’avant ou l’arrière du déshumidifi ca-
teur. Voir la section « L’emplacement »
• Voir la section « Filtre à air »
• Pour obtenir un air plus sec, appuyez sur la touche et
réglez un pourcentage plus bas (%)
• Assurez-vous que les portes, les fenêtres et les autres
ouvertures sont bien fermées
• Installez le déshumidifi cateur à l’écart de la sécheuse. L’air
de la sécheuse doit être évacué à l’extérieur.
• Les températures plus élevés sont préférables pour la
déshumidifi cation de l’air. Les températures moins élevées
réduisent le taux de déshumidifi cation. Les modèles sont
conçus pour être utilisés à des températures supérieures à
5°C (41°F)
• La capacité de votre déshumidifi cateur ne suffi t peut-être
pas
• Fermez toutes les portes et les fenêtres qui donnent sur
l’extérieur
• Cela est normal. Le givre disparaît normalement en moins
de 60 minutes. Voir la section « Dégivrage automatique »
25
Dépannage (suite)
PROBLÈME CAUSE POSSIBLE SOLUTION
Les commandes ne
peuvent pas être
réglées
Ventilateur bruyant • L’air traverse le déshumidi-
Présence d’eau sur
le sol
• Le compresseur s’arrête
et le ventilateur continue automatiquement à
fonctionner pendant environ 3 minutes au réglage
sélectionné
fi cateur
• Le tuyau est peut-être mal
raccordé
• Vous voulez utiliser le sau
pour recueillir l’eau, mais le
tuyau est raccordé
• Cela est normal. Attendez environ 3 minutes, puis réglez le
ventilateur à la vitesse souhaitée
• Cela est normal
• Vérifi ez le raccordement du tuyau. Voir la section « drain-
age continu »
• Débranchez le tuyau si vous utilisez le seau pour recueillir
l’eau. Voir la section « Drainage continu »
26
LIMITED IN-HOME APPLIANCE WARRANTY
This quality product is warranted to be free from manufacturer’s defects in material and workmanship, provided that the unit is used under the normal operating
conditions intended by the manufacturer.
Cet appareil de qualité est garanti exempt de tout vice de matière première et de fabrication, s’il est utilisé dans les conditions
This warranty is available only to the person to whom the unit was originally sold by Danby Products Limited (Canada) or Danby Products Inc. (U.S.A.) (hereafter
normales recommandées par le fabricant.
“Danby”) or by an authorized distributor of Danby, and is non-transferable.
Cette garantie n’est offerte qu’à l’acheteur initial de l’appareil vendu par Danby Products Limited (Canada) ou Danby Products
Inc. (E.- U.A.) (ci-après « Danby ») ou par l’un des ses distributeurs agréés et elle ne peut être transférée.
Plastic parts, are warranted for thirty (30) days only from purchase date, with no extensions provided.
Les pièces en plastique sont garanties pendant trente (30) jours seulement à partir de la date de l’achat, sans aucune prolongation prévue.
First Year
Premiers 24 mois
To obtain
Pour bénéficier
Service
du service
Limites de
Boundaries of
l’entretien à
In Home Service
domicile
During the rst twelve (12) months, any functional parts of this product found to be defective, will be repaired or replaced, at warrantor’s
Pendant les premiers vingt-quatre (24) mois, toutes les pièces fonctionnelles de ce produit qui s’avèrent
option, at no charge to the ORIGINAL purchaser.
défectueuses seront réparées ou remplacées, selon le choix du garant, sans frais à l’acheteur INITIAL.
Danby reserves the right to limit the boundaries of “In Home Service” to the proximity of an Authorized Service Depot. Any app liance
Le client sera responsable pour le transport et tous les frais d’expédition de tout appareil exigeant le
requiring service outside the limited boundaries of “In Home Service” , it will be the consumer’s responsibility to transport the appliance (at
service au dépot de service autorisé le plus proche. S’adresser au détaillant qui a vendu l’appareil, ou à
their own expense) to the original retailer (point of purchase) or a service depot for repair. See “Boundaries of In Home Serv ice” below.
la station technique agréée de service la plus proche, où les réparations doivent être effectuées par un
Contact your dealer from whom your unit was purchased, or contact your nearest authorized Danby service depot, where service
technicien qualifié. Si les réparations sont effectuées par quiconque autre que la station de service
must be performed by a qualied service technician.
agréée où à des fins commerciales, toutes les obligations de Danby en vertu de cette garantie seront
If service is performed on the units by anyone other than an authorized service depot, or the unit is used for commercial appli cation, all
annulées.
obligations of Danby under this warranty shall be void.
Si l'appareil est installé à plus de 100 kilomètres (62 milles) du centre de service le plus proche, il doit
If the appliance is installed in a location that is 100 kilometers (62 miles) or more from the nearest service center your unit must be
être livré à l'atelier de réparation autorisé par Danby le plus proche, car l'entretien doit uniquement être
delivered to the nearest authorized Danby Service Depot, as service must only be performed by a technician qualied and certif ied for
réalisé par un technicien qualifié et certifié pour effectuer un entretien couvert par la garantie de Danby.
warranty service by Danby. Transportation charges to and from the service location are not protected by this warranty and are t he
Les frais de transport entre votre domicile et le lieu de l'entretien ne sont pas couverts par la présente
responsibility of the purchaser.
garantie et doivent être acquittés par l'acheteur.
GARANTIE LIMITÉE SUR
APPAREIL ÉLECTROMÉNAGER
TERMS OF WARRANTY
CONDITIONS
Aucune partie de la garantie ne prévoit implicitement que le fabricant sera tenu responsable des dommages subis par les
Nothing within this warranty shall imply that Danby will be responsible or liable for any spoilage or damage to food or other c ontents of this appliance, whether due
aliments ou d’autres types de contenu, qu’ils soient causés par la défectuosité de l’appareil ou par son usage adéquat ou
to any defect of the appliance, or its use, whether proper or improper.
inadéquat.
EXCLUSIONS
Save as herein provided, Danby, there are no other warranties, conditions, representations or guarantees, express or implied, m ade or intended by Danby or its
En vertu de la présente, il n’existe aucune autre garantie, condition ou représentation, qu’elle soit exprimée ou tacite, de façon
authorized distributors and all other warranties, conditions, representations or guarantees, including any warranties, conditio ns, representations or guarantees
manifeste ou intentionnelle, par Danby ou ses distributeurs agréés. De même, sont exclues toutes les autres garanties,
under any Sale of Goods Act or like legislation or statue is hereby expressly excluded. Save as herein provided, Danby shall no t be responsible for any damages
conditions ou représentations, y compris les garanties, conditions ou représentations en vertu de toute loi régissant la vente
to persons or property, including the unit itself, howsoever caused or any consequential damages arising from the malfunction o f the unit and by the purchase of
de produits ou de toute autre législation ou règlement semblables. En vertu de la présente, Danby ne peut être tenue respon-
the unit, the purchaser does hereby agree to indemnify and hold harmless Danby from any claim for damages to persons or propert y caused by the unit.
sable en cas de blessures corporelles ou des dégâts matériels, y compris à l’appareil, quelle qu’en soit les causes. Danby ne
peut pas être tenue responsable des dommages indirects dus au fonctionnement défectueux de l’appareil. En achetant
l’appareil, l’acheteur accepte de mettre à couvert et de dégager Danby de toute responsabilité en cas de réclamation pour
No warranty or insurance herein contained or set out shall apply when damage or repair is caused by any of the following:
toute blessure corporelle ou tout dégât matériel causé par cet appareil.
EXCLUSIONS
GENERAL PROVISIONS
1) Power failure.
CONDITIONS GÉNÉRALES
2) Damage in transit or when moving the appliance.
La garantie ou assurance ci-dessus ne s’applique pas si les dégâts ou réparations sont dus aux cas suivants :
3) Improper power supply such as low voltage, defective house wiring or inadequate fuses.
1) Panne de courant.
4) Accident, alteration, abuse or misuse of the appliance such as inadequate air circulation in the room or abnormal operating con ditions
2) Dommage subis pendant le transport ou le déplacement de l’appareil.
3) Alimentation électrique incorrecte (tension faible, câblage défectueux, fusibles incorrects).
4) Accident, modification, emploi abusif ou incorrect de l’appareil tel qu'une circulation d'air inadéquate dans la pièce ou des
conditions de fonctionnement anormales (température extrêmement élevée ou basse).
5) Utilisation dans un but commercial ou industriel (à savoir, si l'appareil n'est pas installé dans un domicile résidentiel).
6) Incendie, dommages causés par l’eau, vol, guerre, émeute, hostilités, cas de force majeure (ouragan, inondation, etc.).
7) Visites d’un technicien pour expliquer le fonctionnement de l’appareil au propriétaire.
Proof of purchase date will be required for warranty claims; so, please retain bills of sale. In the event warranty service is required, present this document to our
8) Installation inappropriée (par exemple, encastrement d'un appareil autoportant, ou utilisation extérieure d'un appareil non
AUTHORIZED SERVICE DEPOT.
conçu à cet effet). Une preuve d’achat doit être présentée pour toute demande de réparation sous garantie. Prière de garder
le reçu. Pour faire honorer la garantie, présenter ce document à la station technique agréée ou s’adresser à :
(extremely high or low room temperature).
5) Use for commercial or industrial purposes (ie. If the appliance is not installed in a domestic residence).
6) Fire, water damage, theft, war, riot, hostility, acts of God such as hurricanes, oods etc.
7) Service calls resulting in customer education.
8) Improper Installation (ie. Building-in of a free standing appliance or using an appliance outdoors that is not approved for out door application).
Warranty Service
Service sous garantie
In-home
En atelier
Danby Products Limited
Danby Products Limited
PO Box 1778, Guelph, Ontario, Canada N1H 6Z9
PO Box 1778, Guelph, Ontario, Canada N1H 6Z9
Téléphone : (519) 837-0920 Télécopieur: (519) 837-0449
Telephone: (519) 837-0920 FAX: (519) 837-0449
1-800-263-2629
1-800-263-2629
0714
04/09
Danby Products Inc.
PO Box 669, Findlay, Ohio, U.S.A. 45840
Téléphone: (419) 425-8627 Télécopieur: (419) 425-8629
PO Box 669, Findlay, Ohio, U.S.A. 45840
Telephone: (419) 425-8627 FAX: (419) 425-8629
Danby Products Inc.

Bienvenido
Bienvenido a la familia Danby. Estamos orgullosos de nuestros productos de alta calidad y creemos en el servicio confiable. Usted lo podrá apreciar en este manual fácil de usar, y lo escuchará enlas voces amistosas de nuestro departamento de servicio al consumidor. Sobre todo, usted apreciará estas ventajas cada vez que use su unidad. Eso es
importante, ya que su nuevo artefacto formará parte de su familia por mucho tiempo.
Por favor escriba la siguiente información; esta información será necesaria si su inidad requiere servicio o para
hacer consultas generales. Para recibir servicio técnico debe sonstrar el recibo original.
Número de modelo:
Número de serie:
Fecha de la compra:
NECESITA AYUDA
Antes de solicitar servicio, hay algunas cosas que puede hacer para
ayudarnos a servirle mejor:
Lea este manual:
Contiene instrucciones que lo ayudarán a mantener correctamente su
unidad.
Si usted recibe un artefacto dañado:
Llame inmediatamente al distribuidor (o constructor) que se lo
vendió.
Ahorre tiempo y dinero:
Lea la sección de Diagnóstico de problemas antes de llamar. Esta
sección le ayudará a resolver problemas comunes que pudieran
ocurrir.
Si necesita asistencia, no se preocupe y llámenos.
1-800-26-
(1-800-263-2629)
28

Instrucciones de seguridad importantes
LEA Y SIGA TODAS LAS INSTRUCCIONES DE SUGERIDAD
NOTA
Las instrucciones de ADVERTENCIA emitidas en este manual no tienen como objetivo cubrir todas las posibles
condiciones y situaciones que puedan tener lugar. Las personas que instalan, realizan el mantenimiento u operan el
aparato deben tener precaución y cuidado. No instalar, realizar el mantenimiento u operar el equipo de acuerdo con las
instrucciones del fabricante puede llevar a condiciones que pueden producir lesiones personales y daño a su unidad o
daños materiales.Comuníquese con su vendedor, agente de servicio o con el fabricante ante problemas o condiciones
que no comprende totalmente. Para comunicarse con el Servicio al cliente de Danby, llame al (1-800-263-2629).
REQUISITOS
ELÉCTRICOS
Para reducir el riesgo de incendio, descarga eléctrica o lesión personal, todo la instalación eléctrica y toda la conexión
a tierra deben cumplir con la última edición de Local and National Electrical codes (Códigos locales y nacionales
de electricidad).
• El cliente es responsable de hacer que un electricista califi cado controle los cables y fusibles para garantizar que se
encuentre disponible la energía eléctrica adecuada.
• Este artefacto está diseñado para funcionar en un circuito de 120 voltios 60 Hertz (corriente alterna), de 3 cables,
polarizado, derivado de forma separada, con conexión a tierra efi caz, protegido por un fusible de 15 amperios, un fusible
equivalente o un disyuntor. El enchufe de tres clavijas con conexión a tierra en el cable de alimentación debe enchufarse
directamente a un receptáculo como el antes mencionado con potencia de 110/120 voltios de CA.
• No conecte el deshumidifi cador a una salida de tomacorriente múltiple que se utilice también para otros
artefactos eléctricos.
PARA SU SEGURIDAD: Para reducir el riesgo de incendio o explosión, no almacene ni utilice gasolina ni otros
vapores o líquidos infl amables cerca de este ni de ningún otro artefacto.
CONEXIÓN A TIERRA
INSTRUCCIONES
Una conexión inadecuada del conductor de conexión a tierra del equipo puede dar como resultado un riesgo de descarga
eléctrica. Verifi que con un electricista califi cado o con personal de servicio si tiene dudas respecto a si los enchufes de su
artefacto tienen una buena conexión a tierra.
• Este artefacto debe conectarse a tierra. En el caso de un mal funcionamiento o avería, la conexión a tierra reducirá el
riesgo de descarga eléctrica, ya que dará una vía de menor resistencia para la corriente eléctrica. Este artefacto está
equipado con un cable que posee un conductor de conexión a tierra del equipo y un enchufe de conexión a tierra de
3 clavijas. El enchufe debe conectarse a un tomacorriente que esté correctamente instalado y conectado a tierra en
cumplimiento con todos los códigos y ordenanzas locales.
• No modifi que el enchufe que se provee con este artefacto. Si no concuerda con el tomacorriente, llame a un electricista
califi cado para que le instale un tomacorriente adecuado.
• Si el suministro eléctrico del hogar no cumple con las especifi caciones antes mencionadas o si no está seguro de que
su hogar tenga una conexión a tierra efi caz, llame a un electricista califi cado o a la empresa de servicios eléctricos local
para que lo verifi quen y lo corrijan en caso de problemas.
GUARDE ESTAS INSTRUCCIONES
29

Instrucciones de seguridad importantes
LEA Y SIGA TODAS LAS INSTRUCCIONES DE SUGERIDAD
PRECAUCIONES DE SEGURIDAD
Al usar este deshumidifi cador, siga siempre las precauciones de seguridad básicas, incluidas las siguientes:
• Utilice este artefacto solamente para su uso previsto según se describe en este Manual del propietario.
• No remueva la espuma de estireno del recipiente ya que funciona como un fl otador para el nivel de agua.
• Este deshumidifi cador debe estar correctamente instalado y conectado a tierra según se describe en este manual antes
de su uso.
• Nunca haga funcionar este deshumidifi cador en un área que pueda acumular agua estancada. Si se da esta condición,
para su seguridad, desconecte el suministro de electricidad antes de pisar el agua.
• Nunca tire del cable de alimentación para desenchufar el deshumidifi cador. Tome siempre el enchufe con fi rmeza y tire
de él en línea recta para quitarlo del receptáculo.
• Reemplace de inmediato todos los cables de servicio eléctrico que se hayan pelado o dañado de alguna otra forma.
Se debe reemplazar, y no reparar, un cable de suministro de energía dañado con un nuevo cable de suministro de
energía que se obtenga del fabricante. No utilice un cable que presente grietas o daños por abrasión en cualquier
parte o en el extremo del enchufe o del conector.
• Si el receptáculo no coincide con el enchufe, un electricista califi cado debe cambiar el receptáculo.
• Apague y desenchufe el deshumidifi cador antes de limpiarlo.
• Para su seguridad, no almacene ni utilice materiales combustibles, gasolina ni otros vapores o líquidos infl amables
cerca de este o cualquier otro artefacto.
• Todos los deshumidifi cadores contienen refrigerantes, los que según las leyes federales deben extraerse antes de
desechar el producto. Si se deshace de un producto con refrigerantes, controle con la empresa que se encarga de los
desechos para saber qué hacer. Revise el cumplimiento regulatorio local respecto del desechado aprobado y seguro de
este aparato.
• No utilizar en el exterior.
• Este deshumidifi cador está previsto para aplicaciones interiores hogareñas únicamente. Este deshumidifi cador no debe
usarse para aplicaciones comerciales ni industriales.
GUARDE ESTAS INSTRUCCIONES
30

Instrucciones d’instalación
UBICACIÓN
• Seleccione una ubicación adecuada; asegúrese de tener fácil acceso a un tomacorriente eléctrico (evite el uso de
cables de extensión).
• Asegúrese de que no haya obstrucciones que limiten el fl ujo de aire a través de la rejilla de entrada de aire frontal.
Mantenga un espacio libre mínimo de al menos 20 cm (8 in) entre las paredes adyacentes y la parte trasera de la
unidad para permitir una correcta circulación de aire y una máxima efi cacia. Para obtener la máxima efi cacia de
funcionamiento de su deshumidifi cador, las temperaturas de funcionamiento (temperatura ambiente) recomendadas
deben encontrarse entre los 5 ºC (41 ºF) y los 35 ºC (95 ºF).
• Es importante recordar que la efi cacia de un deshumidifi cador se verá afectada o infl uenciada por la velocidad en
que se permite que el nuevo aire húmedo (humedad) infi ltre el mismo espacio o área. Para mantener la efi cacia, el
deshumidifi cador debe funcionar en un área cerrada. Mantenga todas las puertas y ventanas cerradas.
• No utilice esta unidad al aire libre. Este deshumidifi cador está previsto para aplicaciones interiores hogareñas
únicamente. Este deshumidifi cador no debe utilizarse para aplicaciones comerciales ni industriales.
• Coloque el deshumidifi cador en un piso parejo y nivelado que sea lo sufi cientemente resistente como para soportar la
unidad con una cubeta llena de agua.
• Coloque la unidad donde se tenga acceso a un tomacorriente eléctrico.
• Esta unidad tiene 4 ruedecillas que pueden moverse libremente. No fuerce el movimiento de las ruedas sobre la
alfombra y absténgase de mover la unidad con agua en la cubeta (la unidad puede volcarse y derramarse el agua).
Proteger los pisos de madera de posibles derrames o rayones al mover la unidad.
• Extraiga la bolsa de accesorios de la cubeta y guárdela en un lugar seguro.
CARACTERÍSTICAS
1. Panel de control
2. Panel frontal
3. Cubeta de agua
4. Ventana de nivel de agua
1
5
2
6
3
4
7
5. Manija (ambos lados)
8
6. Salida de manguera de drenaje
9
7. Rejilla de salida de aire
8. Filtro de aire
9. Cable de alimentación y enchufe
10
10. Ruedecilla
11. Bandita (solo para almacenar la unidad)
11
31

Instrucciones operadoras
INSTALACIÓN DE LAS RUEDECILLAS (algunos modelos)
Se recomienda instalar las ruedecillas para evitar el daño de los pisos.
1. Retire las ruedecillas de la cubeta del deshumidifi cador.
2. Coloque el deshumidifi cador sobre su lado.
3. Ubique la fl echa en la parte inferior del deshumidifi cador e inserte siguien-
do la dirección de la fl echa.
4. Deslice la ruedecilla hasta donde se pueda. La ruedecilla se enganchará
en su lugar.
5. Repita los pasos 1 a 4 para las otras 3 ruedecillas.
INSTRUCCIONES DEL PANEL DE CONTROL
NOTA: El panel de control de la unidad que adquirió puede diferir un poco dependiendo del número de modelo.
10
8
Al presionar el botón para cambiar los modos de funcionamiento, la unidad emitirá un pitido para indicar que
está cambiando los modos.
1. Botón para constante: Presione este botón para activar el funcionamiento constante del deshumidifi cador.
2. Botón del fi ltro: Este producto tiene una función de control de fi ltro que sirve como recordatorio para limpiar el fi ltro
de aire para un funcionamiento más efi caz. La luz de control de fi ltro se iluminará luego de 250 horas de funciona-
miento. Para restablecer esta función luego de limpiar el fi ltro, presione el botón para restablecer el fi ltro y la luz se
apagará.
3. Botón del ventilador: Controla la velocidad del ventilador. Presione este botón para seleccionar la velocidad alta
(turbo) o normal del ventilador. Establezca el control del ventilador en alto para una máxima extracción de la humedad. Una vez extraída la humedad y si se prefi ere un funcionamiento silencioso, establezca el control del ventilador
nuevamente en normal.
4. Botón de encendido: Presione este botón para encender y apagar el deshumidifi cador.
5. Botones ( / ): El nivel de humedad puede establecerse dentro de un rango de entre 35% de HR (humedad
relativa) y 85% de HR con incrementos de 5% mediante estos botones. Para un aire más seco, presione el botón
( ) y establezca un valor porcentual (%) más bajo. Para un aire más húmedo, presione el botón ( ) y establezca
un valor porcentual (%) más alto.
6. Botón del temporizador: Presione este botón para iniciar la función de arranque automático y detención automáti-
ca. Establezca una hora de inicio de detención de 0,0 a 24 horas mediante las teclas ( ) y ( ).
7. Pantalla: Muestra el verdadero nivel de humedad ambiente (± 5% de precisión) en un rango de entre 30% de HR y
90% de HR. De no ser así, muestra la selección al programar la humedad o el temporizador.
8. Confort: Esta función le permite mantener la comodidad, ajustando el nivel de humedad de forma automática de
acuerdo con el ajuste de la temperatura. El nivel de humedad no se puede ajustar en esta opción.
Nota: El ventilador no se apaga ni bien remueve el recipiente, el ventilador se apaga 2-3 minutos después.
2
1
9
3
6
7
5
4
32

Instrucciones operadoras
FUNCIONES DE LA LUZ INDICADORA
Nota: Según las condiciones de humedad en el entorno, el deshumidifi cador quizás no arranque automáticamente al
presionar el botón de encendido y apagado (consulte las instrucciones de modos del deshumidifi cador para obtener det-
alles).
9. Luz indicadora de cubeta llena: Cuando la cubeta está llena o mal colocada dentro del gabinete, la luz de cubeta
llena se enciende y permanece encendida hasta que se vacía la cubeta o hasta que se la vuelve a colocar en su posición
correcta. Esta condición hará que el sistema de deshumidifi cación se apague de inmediato (se fi nalizan el funcionamiento
del motor del ventilador y del compresor). Esta es una función de seguridad. Cuando se vacía la cubeta o se la vuelve a
colocar correctament, el deshumidifi cador retomará su funcionamiento automáticament.
NOTA: Puede tardar varios minutos antes de que se retomen las condiciones de funcionamiento.
10. Descongelamiento automático: Cuando se acumula escarcha en las bobinas del evaporador, el compresor termina
su ciclo y el ventilador sigue funcionando hasta wue desaparece la escarcha.
NOTA :
Ajuste de la memoria: Cada vez que desconecta o vuelve a conectar la unidad o en el caso de un corte de luz, el table-
ro de circuito electrónico automáticamente queda en el último ajuste de programa que se usó. Luego de que la unidad se
detuvo, puede tardar varios minutos antes de retomar las condiciones de functionamiento.
Reinicio automático: Si la unidad se apagó inesperadamente debido a un corte de luz, se reiniciará automáticamente al
volver la luz con el ajuste de función anterior.
CÓDIGOS DE ERROR
AS - Error del sensor de humedad. Desenchufe la unidad y enchúfela nuevamente. Si el error se repite, llame para obten-
er servicio.
ES - Error del sensor de temperatura. Desenchufe la unidad y enchúfela nuevamente. Si el error se repite, llame para
obtener servicio.
P2 (o Eb) - La cubeta está llena o no está en la posición correcta. Vaciar la cubeta o ajustarla en lo ubicación adecuada.
EC - Asegurese que la temperatura ambiente coincide con la temperatura recomendada para la correcta operación de la
unidad, 5°C (41°F) - 35°C (95°F). Si la temperatura esta dentro de este rango, llame para obtener servicio.
E3 - Mal funcionamiento de la Unidad, desenchufe la unidad y enchúfela nuevamente. Si el error se repite, llame para
obtener servicio.
FUNCIONES DEL TEMPORIZADOR
Siga estos pasos para programar la función de encendido automático y apagado automático con el panel de control:
Apagado automático:
1. Cuando la unidad está encendida y se presiona el botón del TEMPORIZADOR, la luz indicadora de temporizador
apagado indica que se inició el programa de apagado automático.
2. Presione o mantenga presionado el botón para AUMENTAR o DISMINUIR y así cambiar la hora del “automático” con
incrementos de 0,5 horas, hasta 10 horas (luego con incrementos de 1 hora, hasta 24 horas). El control de la unidad
hará el conteo para atrás del tiempo que resta hasta el inicio.
3. En los 5 segundos posteriores a haber establecido la hora de apagado automático, presione nuevamente el botón del
TEMPORIZADOR para completar el programa de apagado automático.
Encendido automático:
4. Cuando la unidad está apagada y se presiona el botón del TEMPORIZADOR, se inicia el programa de encendido au-
tomático. Establezca la hora de encendido automático igual que en el paso 2 antes mencionado. En los 5 segundos
posteriores a haber establecido la hora de encendido automático, presione nuevamente el botón del TEMPORIZADOR para completar el programa de encendido automático.
NOTA: Cuando se establecen las horas de encendido automático y apagado automático, dentro de la misma secuencia
de programa, las luces indicadoras de TEMPORIZADOR ENCENDIDO APAGADO se iluminan para indicar que ya se
encuentran programadas las horas de ENCENDIDO y de APAGADO.
NOTA: El encender o apagar la unidad en cualquier momento, el cambiar el ajuste del temporizador de encendido y apagado a 0,0 y un código de error P2 cancelarán al función de encendido o apagado automático.
33

Instrucciones operadoras
FUNCIONAMIENTO DEL TANQUE DE AGUA
El tanque de agua mantiene agua condensada acumulada y, por medio de un interruptor de seguridad, controla tanto el
nivel de agua como el funcionamiento del proceso de deshumidifi cación (es decir, cuando el tanque de agua está lleno o
de forma accidental se desplaza dentro del gabinete, el accionador del fl otador [dentro del tanque] corta el contacto con
el interruptor de seguridad). Esta condición apaga de inmediato el sistema del motor del compresor y del ventilador, lo
que evita que se condense la humedad.
Nota: En algunos modelos, el ventilador continuará funcionando aproximadamente por 2 o 3 minutos después
de que la unidad haya dejado de funcionar y que la cubeta se haya retirado. Como resultado, el agua puede
gotear desde la bandeja hacia la base de la unidad, y luego al piso. Asegúrese de proteger del goteo sus pisos de
madera y alfombrados.
IMPORTANTE
Nunca toque ni intente inutilizar el sistema del fl otador para el nivel de agua
(seguridad). Una correcta instalación del tanque de agua es fundamental para
mantener un funcionamiento fi able del deshumidifi cador.
DESHUMIDIFICACIÓN
El deshumidifi car es una forma de extraer la humedad del aire. Un deshumidifi cador ayudará a proteger a su hogar
y a sus valiosas pertenencias de daños (hinchazón) ocasionados por la humedad en el aire. Fundamentalmente,
un deshumidifi cador extrae la humedad del aire a medida que la humedad pasa por la bobina de deshumidifi cación
(evaporador). la humedad se condensa en la bobina del evaporador, se drena y se recolecta dentro de un tanque de
agua interno (desmontable) que está ubicado en la parte frontal de la unidad. El aire emanado que se regresa al entorno
aumenta varios grados, lo que hace que se incremente (levemente) la temperatura del aire del entorno. Este proceso
también contribuye a disminuir la humedad relativa del aire del entorno.
Nota: Para obtener el rendimiento óptimo, asegúrese de que la unidad esté ajustada por lo menos a un 10% menos
que el nivel de humedad relativa. Es normal que la humedad varíe un 5% por encima y por debajo de la humedad
seleccionada. Le recomendamos que, bajo condiciones normales, ajuste la humedad entre 40 y 45%.
MODO DE DESHUMIDIFICACIÓN INSTRUCCIONES
Cuando la unidad se conecta por primera vez al tomacorriente eléctrico, la luz de encendido (verde) no se encenderá
hasta que no se presione el botón de encendido y apagado. Cuando se presiona el botón de encendido y apagado, la luz
de encendido se enciende y el deshumidifi cador automáticamente queda de forma preestablecida en:
Pantalla: Humedad ambiente actual (HR%)
Ajuste de humedad: 60%HR
Velocidad del ventilador: Alta
Nota: Según las condiciones de humedad del entorno, el deshumidifi cador quizás no arranque automáticamente con el
ajuste preestablecido (esto indica que el nivel de humedad del entorno es inferior al del ajuste "preestablecido" de 60%
HR). Por lo tanto, quizás sea necesario deslizarse a través de cada ajuste diferente del deshumidifi cador de entre 35% y
55% hasta que el "humidistado" (sensor) identifi que las codiciones que permitirán que la unidad funcione.
Selección de modo de deshumidifi cación:
1. La unidad ingresa al modo de deshumidifi cación cuando se presiona el botón de encendido y apagado.
2a. Presione los botones / para seleccionar el valor de funcionamiento de HR deseado (entre 35% y 85%)
O
2b. Presione el botón de CONSTANTE. Cuando se selecciona el modo CONSTANTE, se ignora el humidistado (sensor)
y el compresor funciona sin parar, sin importar las condiciones de humedad.
Selección de velocidad del ventilador:
3. Puede elegir una velocidad de ventilador (normal/turbo) con el teclado. La velocidad seleccionada se identifi ca con la
luz indicadora (iluminada) que se encuentra directamente sobre la selección realizada.
34

Instrucciones operadoras
FILTRO DE AIRE
Nota: Todas las imágenes en el manual están presentes solo a modo explicativo. La forma real de la unidad que adquirió
puede diferir un poco, pero las operaciones y las funciones son las mismas.
Su deshumidifi cador cuenta con un fi ltro de aire desmontable que se ubica en la parte frontal de la unidad (detrás de la
rejilla de entrada de aire) directamente sobre el compartimento para el tanque de agua. El fi ltro de aire cumple un papel
importante al ayudar a reducir las partículas de polvo o suciedad que provienen del entorno. Un fi ltro de aire bloqueado
u obstruido redice la entrada de aire, lo que tiene un impacto negativo en la efi cacia de funcionamiento. Para mantener
una máxima efi cacia de funcionamiento, se debe controlar y limpiar el fi ltro con frecuencia (cada 2 semanas) o cuando se
ilumina la luz de control de fi ltro. Se puede requerir una limpieza más frecuente según la calidad de aire del interior.
IMPORTANTE: Nunca haga funcionar la unidad sin el fi ltro de aire en su lugar.
EXTRACCIÓN DEL FILTRO DE AIRE:
1. Tire del fi ltro hacia abajo.
2. Limpie bien el fi ltro con una aspiradora o lávelo con agua tibia y detergente suave. Seque por completo antes de
volver a instalarlo.
3. Para volver a instalar el fi ltro de aire, deslice la parte trasera del fi ltro dentro de los rieles y empuje hacia adentro.
4. Presione el botón para restablecer el fi ltro.
35

Instrucciones operadoras
EXTRACCIÓN DEL AGUA ACUMULADA
1. Tire un poco de la cubeta para quitarla.
2. Sostenga ambos lados de la
cubeta con la misma fuerza y jale
de ella para quitarla de la unidad.
3. Tire el agua.
Hay dos formas de extraer el agua acumulada.
1. Usar la cubeta
Al apagar la unidad, si la cubeta está llena, la unidad emite 8 pitidos, la
luz indicadora de la cubeta llena parpadea y la pantalla digital muestra
P2. Al encender la unidad, si la cubeta está llena, el compresor se apaga y el ventilador se apaga depués de secar el condensador durante
30 segundos. Luego, la unidad emite 8 pitidos, la luz indicadora de
cubeta leena parpadea y la pantalla digital nuestra P2.
Para vaciar la cubeta llena, extraiga lentamente la cubeta. Tome las
manijas derecha e izquierda fi rmemente y con cuidado tire en línea
recta de manera tal que no se derrame agua. No coloque el tanque
en el piso, ya que la aparte de abajo de la cubeta es irregular. De lo
contrario, la cubeta se caerá y se derramará el agua. Deseche el agua
y regrese la cubeta a la unidad. La cubeta debe estar en su lugar y
apoyada fi rmemente para que funcione el deshumidifi cador. La máqui-
na se reiniciará cuando la cubeta se regrese a su posición correcta.
Nota: Cuando extraiga la cubeta, no toque ninguna pieza en el interior
de la unidad. Si lo hace, puede dañar el producto. Asegúrese de empujar suavement la cubeta hacia adentro de la unidad. Si se golpea la
cubeta contra algo o si no se la fi ja bien, la unidad quizás no funcione.
Cuando extraiga la cubeta, si queda algo de agua en la unidad, debe
secarla. El botón de encendido parpadea cuando el recipiente no está
colocado correctamente en su lugar.
Si la manguera de la bomba desciende cuando
quitar el cubo, asegúrese de que está instalado
correctamente.
Quite la cubierta de
plástico girando en
sentido contrario a las agujas del reloj.
Manguera
de drenaje
2. Drenaje constante
El agua se puede vaciar de forma automática al drenaje del piso si se
conecta la unidad a una manguera de aqua ≥ 5/16 in ID con extremo
roscado hembra ID:M=1 (no incluido, una manguera de jardín estándar funciona bien). Instale la manguera de drenaje en el adaptador
A como se muestra en B1. El adaptador se encuentra en la bolsa de
accesorios que está en la cubeta. Extraiga la cubierta plástica de la
salida de drenaje posterior de la unidad y déjela a un lado. Extraiga la
cubeta, luego introduzca la manuera de drenaje a través de la salida
de drenage de la unidad y presione fi rmemente para introducirla en el
conector que se encuentra en la parte frontal de la unidad (consulte B2
y B3).
Ajuste el adaptador A y la unidad con dos tornillos (se encuentran en
la bolsa del Manual del propietario). Instale el extremo roscado hembra de la manguera de drenaje dentro del adaptador A (consulte B4),
luego dirija la manguera de agua hacia el drenaje del piso o hacia una
instalación de drenaje adecuada. Asegúrese de que la manguera esté
fi rme de manera tal que no haya pérdidas. Dirija la manguera hacia
el drenaje; asegúrese de que no esté doblada lo que puede impedir
que fl uya el agua. Coloque el extremo de la maguera en el drenaje y
asegúrese de que el extremo de la manguera esté parejo o en declive
para permitir que el agua fl uya sin problemas. Vuelva a colocar la
cubeta en la unidad y asegúrese de que esté bien ubicada. Seleccione
el ajuste de humedad y la velocidad del ventilador que desee en la
unidad para que comience el drenage constante.
36

Instrucciones operadoras
PRECAUCIONES
1. NO tire del cable de alimentación para evitar su ruptura, posibles peligros o
lesiones.
2. NO use insecticida/aceite/pintura en aerosol cerca del aparato; estos elemen-
tos pueden dañar las piezas de plástico o provocar un incendio.
3. NO coloque la unidad sobre terreno irregular para evitar vibraciones, ruidos
y derrames de agua.
4. Siempre mantenga la unidad a 20 cm de la pared o más para que el calor se
disipe correctamente.
5. NO deje caer ningún objeto dentro del aparato.
1.
2.
3.
4.
6. Cierre todas las ventanas para permitir la máxima efi ciencia posible para
quitar la humedad.
7. Mantenga el aparato alejado de cualquier tipo de fuente de calor.
8. Cuando traslade o guarde el deshumidifi cador, no lo coloque de costado ni
en posición invertida, para evitar que se bambolee.
5.
6.
7.
8.
37
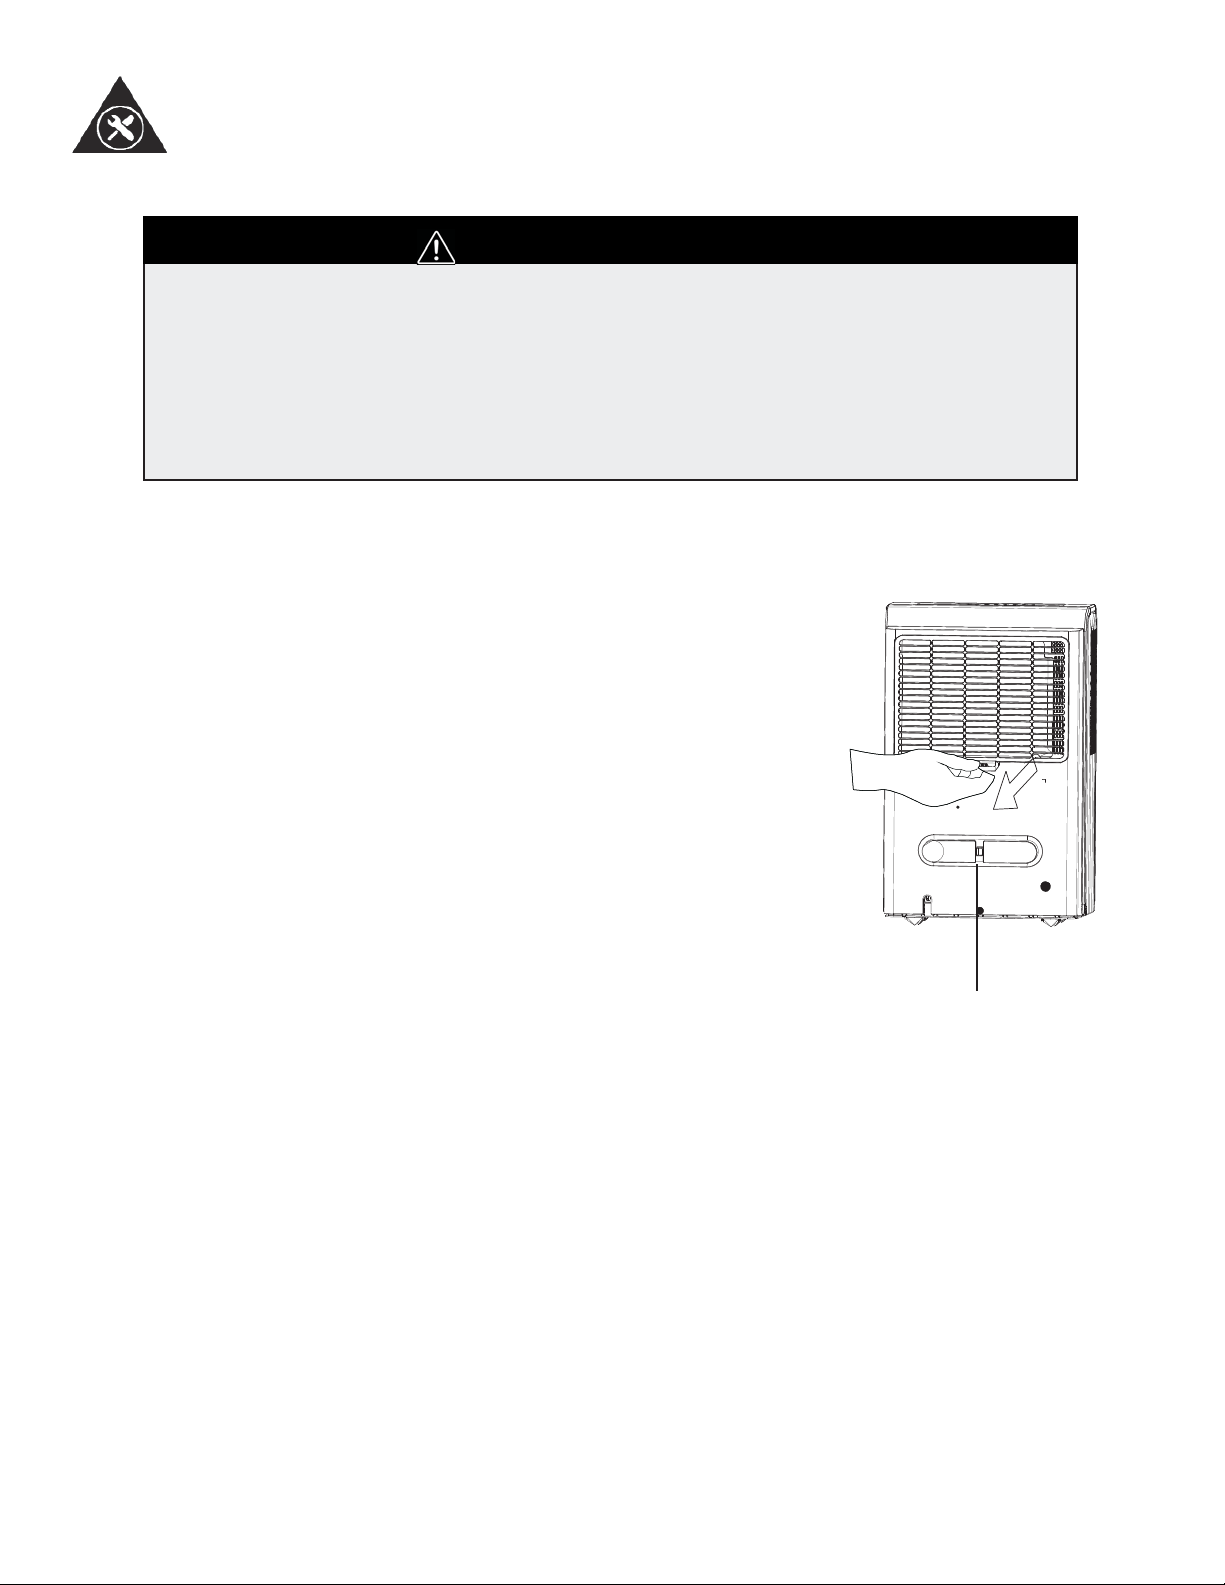
Cuidado y mantenimiento
LIMPIEZA DE LA UNIDAD
IMPORTANTES
1. Asegúrese de desenchufar el aparato antes de la limpieza y el mantenimiento.
2. No use gasolina, benceno, diluyente de pintura ni ningún otro producto químico para
limpiar esta unidad, estas sustancias dañarán/deformará los componentes de plástico y el
acabdo lustrado.
3. Nunca intente limpiar la unidad vertiendo agua directamente sobre ninugna de las áreas
superfi ciales; esto provocará el deterioro de los componentes eléctricos y del aislamiento
del cableado
4. Si el cable eléctrico está dañado, póngase en contacto con el centro de servicio técnico
inmediatamente.
1. Limpie la rejilla y la caja
Utilice agua y un detergente suave. No use lejía ni abrasivos. No arroje agua
directamente a la unidad principal. Hacer esto puede provocar una descarga
eléctrica, puede deteriorar la aislación o hacer que la unidad se herrumbre. Las
rejillas de entrada y salida de aire se ensucian fácilmente, por lo tanto, use un
accesorio de aspiradora o un cepillo para limpiarlas.
2. Limpie la cubeta
Cada algunas semanas, limpie la cubeta para evitar que crezcan moho, mildiú
y bacterias. Llene una parte de la cubeta con agua limpia y añada un poco de
detergente suave. Agite el agua en la cubeta, vacíe la cubeta y enjuáguela.
Nota: No utilice un lavavajillas para limpiar la cubeta. Después de la limpieza,
la cubeta debe estar en su lugar y apoyada fi rmemente para que funcione el
deshumidifi cador.
3. Limpie el fi ltro de aire
Extraiga y limpie el fi ltro cada dos semanas según las condiciones normales de
funcionamiento.
Precaución: NO haga funcionar el deshumidifi cador sin un fi ltro, ya que la
suciedad y las pelusas lo obstruirán y afectarán su rendimiento.
4. Cuando no use la unidad durante largos periodos
Luego de apagar la unidad, espere un día antes de vaciar la cubeta. Limpie la
unidad principal, la cubeta de agua y el fi ltro de aire. Cubra la unidad con una
bolsa plástica. Enrolle el cable y alrededor de la hebilla. Guarde la unidad en
posición vertical en un lugar seco y bien ventilado.
Cordon boucle hebilla de
cable de alimentación
38

Solución sugerida
A menudo, los problemas son sencillos y no es necesario hacer una llamada de reparación, use esta guía de resolución
de problemas para encontrar una posible solución. Si la unidad sigue funcionando mal, llame a los números gratuitos de
un centro Danby de servicio autorizado.
Tel: 1-800-26- (1-800-263-2629)
PROBLEMA POSIBLE CAUSA SOLUCIÓN
El deshumidifi ca-
dor no arranca
El deshumidifi -
cador no seca el
aire como debería
hacerlo
El deshumidifi -
cador funciona
durante demasiado
tiempo
Aparece escarcha
en las bobinas
• El deshumidifi cador está
desenchufado
• El fusible está quemado/
saltó el disyuntor
• El deshumidifi cador ha al-
canzado su nivel preestablecido o la cubeta está llena
• La cubeta no está en su
posición correcta
• Corte de luz
• No permitió que transcurra suffi ciente tiempo para
extraer la humedad
• El fl ujo de aire está limitado
• Filtro sucio
• El control de humedad no
se puede regular lo sufi ci-
entemente bajo
• Quizás las puertas u ventanas no están bien cerradas
• La secadora de ropa puede
estar desipidiendo aire
ileno de humedad en la
habitación
• La temperatura ambiente es
demasiado baja
• El área a deshumidifi car es
demasiado grande
• Las puertas y ventanas
están abiertas
• El deshumidifi cador recién
se encendió o la temperatura ambiente es inferior a los
5°C (41°F)
• Asegúrese de que el enchufe del deshumidifi cador esté
totalmente introducido en el tomacorriente
• Controle la caja de fusibles / disyuntor del hogar y reemplace el fusible o restablezca el disyuntor
• El deshumidifi cador se apaga automáticamente cuando
ocurre cualquiera de estas condiciones. Cambie a un
ajuste inferior o vacíe la cubeta y vuelva a colocarla correctamente
• La cubeta debe estar en su lugar y apoyada fi rmemente
para que functionne el deshumidifi cador
• Hay un retraso de protección (de hasta 3 minutos) para
evitar que salte el dispositivo frente a la sobrecarga del
compresor. Por esta razón, quizás la unidad no comience
con la deshumidifi cación normal durante 3 minutos luego
de volver a encenderla
• Al instalarlo por primera vez, permita que transcurran al
menos 25 horas para mantener la sequedad deseada
• Asegúrese de que no haya cortinas, persianas ni muebles
que bloqueen la parte frontal o trasera del deshumidifi ca-
dor. Consulte al sección “Ubicación”
• Consulte la sección “Filtro de aire”
• Para un aire más seco, presione el botón y establezca
un valor porcentual (%) màs bajo
• Verifi que que todas las puertas, ventanas y otras apertu-
ras estén bien cerradas
• Instale el deshumidifi cador lejos de la secadora. La seca-
dora debe tener salida al exterior
• La extracción de humedad funciona mejor a temperaturas
ambiente superiores. Las temperaturas ambientes más
bajas reducirán la tasa de extracción de humedad. Los
modelos están diseñados para funcionar a temperaturas
superiores a los 5°C (41°F)
• La capacidad del su deshumidifi cador quizás no sea ade-
cuada
• Cierre todas las puertas y ventanas que dan al exterior
• Esto es normal. La escarcha generalmente desaparece
dentro de los 60 minutos. Consulte la sección “Descongelación”
39

Solución sugerida (continuado)
PROBLEMA POSIBLE CAUSA SOLUCIÓN
No se pueden establecer los controles
Ruido en el ventilador
Agua en el piso • La conexión de la mangu-
• El compresor se apagará y
el ventilador continuará funcionando automáticamente
durante aproximadamente 3
minutos a un ajuste establecido
• El aire se está moviendo a
través del deshumidifi cador
era puede estar fl oja
• Deseo usar la cubeta para
recolectar agua, pero hay
una manguera conectada
• Esto es normal. Espere aproximadamente 3 minutos y
establezca el ventilador según lo desee
• Esto es normal
• Controle la conexión de la manguera. Consulte la sección
“Drenaje”
• Desconecte la manguera si usa la cubeta para recolectar
agua. Consulte la sección “Drenaje continuo”
40

GARANTÍA LIMITADA PARA
LIMITED IN-HOME APPLIANCE WARRANTY
ELECTRODOMÉSTICO
This quality product is warranted to be free from manufacturer’s defects in material and workmanship, provided that the unit is used under the normal operating
conditions intended by the manufacturer.
Este producto de calidad está garantizado contra defectos de fabricación, incluyendo partes y mano de obra, siempre y cuando
la unidad se utilice bajo las condiciones normales de funcionamiento para las que fue diseñado.
This warranty is available only to the person to whom the unit was originally sold by Danby Products Limited (Canada) or Danby Products Inc. (U.S.A.) (hereafter
Esta garantía está solamente disponible para la persona que haya comprado originalmente esta unidad directamente de
“Danby”) or by an authorized distributor of Danby, and is non-transferable.
Danby Products Limited (Canada) o Danby Products Inc. (U.S.A.) (en adelante “Danby”) o uno de sus distribuidores autorizados, y no es transferible.
Plastic parts, are warranted for thirty (30) days only from purchase date, with no extensions provided.
Las piezas plásticas, se autorizan por treinta (30) días solamente a partir de la fecha de la compra, sin las extensiones
proporcionadas.
First Year
Primeros 24 meses
To obtain
Service
Para obtener
servicio
Boundaries of
In Home Service
Límites del servicio
técnico a domicilio
Nothing within this warranty shall imply that Danby will be responsible or liable for any spoilage or damage to food or other c ontents of this appliance, whether due
to any defect of the appliance, or its use, whether proper or improper.
Nada dentro de esta garantía implica que Danby será responsable por cualquier daño que hayan sufrido los alimentos u otros
contenidos de este aparato, ya sea debido a un defecto del aparato, o su uso, adecuado o inadecuado.
During the rst twelve (12) months, any functional parts of this product found to be defective, will be repaired or replaced, at warrantor’s
option, at no charge to the ORIGINAL purchaser.
Durante los primeros 24 meses, cualquier parte en buen estado de este producto que resulte defectuosa, incluyendo cualquier sistema sellado, será reparado o reemplazado, a opción del fabricante, sin
cargo para el comprador ORIGINAL.
Danby reserves the right to limit the boundaries of “In Home Service” to the proximity of an Authorized Service Depot. Any app liance
requiring service outside the limited boundaries of “In Home Service” , it will be the consumer’s responsibility to transport the appliance (at
Danby se reserva el derecho de limitar la cobertura de "Servicio en Domicilio" sujeto a la proximidad de
their own expense) to the original retailer (point of purchase) or a service depot for repair. See “Boundaries of In Home Serv ice” below.
un Taller de Servicio Autorizado. Para todo artefacto que requiera servicio fuera del área limitada de
Contact your dealer from whom your unit was purchased, or contact your nearest authorized Danby service depot, where service
"Servicio en Domicilio", el cliente será responsable por transportar dicho artefacto hasta el Taller de
must be performed by a qualied service technician.
Servicio Autorizado mas cercano. Consulte "Límites del servicio técnico a domicilio", a continuación.
If service is performed on the units by anyone other than an authorized service depot, or the unit is used for commercial appli cation, all
Comuníquese con el distribuidor donde haya comprado la unidad, o llame al Taller de Servicio Autor-
obligations of Danby under this warranty shall be void.
izado más cercano, donde debe ser reparada por un técnico calificado. Si esta unidad es reparada en
otro lugar que no sea un Taller de Servicio Autorizado, o si la unidad se utiliza para aplicaciones
If the appliance is installed in a location that is 100 kilometers (62 miles) or more from the nearest service center your unit must be
comerciales, Danby no se hará responsable de ninguna forma y la garantía será anulada.
delivered to the nearest authorized Danby Service Depot, as service must only be performed by a technician qualied and certif ied for
Si el electrodoméstico está instalado en un lugar que se encuentra a 100 kilómetros (62 millas) o más
warranty service by Danby. Transportation charges to and from the service location are not protected by this warranty and are t he
del centro de servicios más cercano, se debe llevar la unidad al Centro de servicios Danby autorizado
responsibility of the purchaser.
más cercano, ya que dicho servicio sólo puede realizarlo un técnico calificado y certificado por Danby
para prestar servicios de garantía. Los cargos por transporte desde y hacia el lugar en que se
efectúe el servicio técnico no están cubiertos por esta garantía y son de responsabilidad del comprador.
CONDICIONES DE LA GARANTÍA
Save as herein provided, Danby, there are no other warranties, conditions, representations or guarantees, express or implied, m ade or intended by Danby or its
authorized distributors and all other warranties, conditions, representations or guarantees, including any warranties, conditio ns, representations or guarantees
Salvo lo aquí indicado por Danby, no existen otras garantías, condiciones o representaciones, explícitas o implícitas, concre-
under any Sale of Goods Act or like legislation or statue is hereby expressly excluded. Save as herein provided, Danby shall no t be responsible for any damages
tas o intencionales por parte de Danby o sus distribuidores autorizados y todas las demás garantías, condiciones o represen-
to persons or property, including the unit itself, howsoever caused or any consequential damages arising from the malfunction o f the unit and by the purchase of
taciones, incluyendo cualquier garantía, condiciones o representaciones bajo cualquier Acta de Venta de Productos o
the unit, the purchaser does hereby agree to indemnify and hold harmless Danby from any claim for damages to persons or propert y caused by the unit.
legislación o estatuto similar, quedan de esta forma expresamente excluidas. Salvo lo aquí indicado, Danby no serán responsables por ningún daño a personas o bienes, incluyendo la propia unidad, sin importar su causa, o de ningún daño indirecto
causado por el desperfecto de la unidad, y al comprar esta unidad, el comprador acepta por la presente, indemnizar y
proteger a Danby contra cualquier reclamo por daños a personas o bienes causados por la unidad.
No warranty or insurance herein contained or set out shall apply when damage or repair is caused by any of the following:
1) Power failure.
2) Damage in transit or when moving the appliance.
No se considerará ninguna de estas garantías o seguros cuando el daño o la necesidad de reparación sea el producto de los
3) Improper power supply such as low voltage, defective house wiring or inadequate fuses.
siguientes casos:
1) Falla del suministro eléctrico.
4) Accident, alteration, abuse or misuse of the appliance such as inadequate air circulation in the room or abnormal operating con ditions
2) Daños en tránsito o durante el transporte de la unidad.
3) Alimentación incorrecta, como bajo voltaje, instalación eléctrica defectuosa o fusibles inadecuados.
4) Accidente, modificación, abuso o uso incorrecto del artefacto, tal como insuficiente ventilación del ambiente o condiciones
de operación anormales (temperatura ambiente extremadamente alta o baja).
5) Utilización comercial o industrial (v.g., si el electrodoméstico no está instalado en una vivienda particular).
6) Incendio, daños por agua, robo, guerra, disturbios, hostilidades, actos de fuerza mayor como huracanes, inundaciones, etc.
7) Pedidos de servicio debido a desinformación del usuario.
Proof of purchase date will be required for warranty claims; so, please retain bills of sale. In the event warranty service is required, present this document to our
8) Instalación inadecuada (v.g., instalación empotrada de un electrodoméstico diseñado como unidad independiente o uso de
AUTHORIZED SERVICE DEPOT.
un electrodoméstico al aire libre que no esté aprobado para dicho fin).
(extremely high or low room temperature).
5) Use for commercial or industrial purposes (ie. If the appliance is not installed in a domestic residence).
6) Fire, water damage, theft, war, riot, hostility, acts of God such as hurricanes, oods etc.
7) Service calls resulting in customer education.
8) Improper Installation (ie. Building-in of a free standing appliance or using an appliance outdoors that is not approved for out door application).
TERMS OF WARRANTY
EXCLUSIONS
EXCLUSIONES
GENERAL PROVISIONS
CONDICIONES GENERALES
Para acceder a la garantía se solicitará un comprobante de compra; por lo tanto, guarde su recibo. En caso de necesitar
servicio de garantía, presente ese documento al TALLER DE SERVICIO AUTORIZADO.
Warranty Service
In-home
Servicio de Garantía
Danby Products Limited
Danby Products Limited
PO Box 1778, Guelph, Ontario, Canada N1H 6Z9
PO Box 1778, Guelph, Ontario, Canada N1H 6Z9
Telephone: (519) 837-0920 FAX: (519) 837-0449
Telephone: (519) 837-0920 FAX: (519) 837-0449
Garantia para lievar a taller de servicio
1-800-263-2629
1-800-263-2629
04/09
07/14
Telephone: (419) 425-8627 FAX: (419) 425-8629
Danby Products Inc.
PO Box 669, Findlay, Ohio, U.S.A. 45840
Telephone: (419) 425-8627 FAX: (419) 425-8629
PO Box 669, Findlay, Ohio, U.S.A. 45840
Danby Products Inc.

NOTES / REMARQUES / NOTAS :
__________________________________________________________________________________________
__________________________________________________________________________________________
__________________________________________________________________________________________
__________________________________________________________________________________________
__________________________________________________________________________________________
__________________________________________________________________________________________
__________________________________________________________________________________________
__________________________________________________________________________________________
__________________________________________________________________________________________
__________________________________________________________________________________________
__________________________________________________________________________________________
__________________________________________________________________________________________
__________________________________________________________________________________________
__________________________________________________________________________________________
__________________________________________________________________________________________
__________________________________________________________________________________________
__________________________________________________________________________________________
__________________________________________________________________________________________
__________________________________________________________________________________________
__________________________________________________________________________________________
__________________________________________________________________________________________
__________________________________________________________________________________________

FOR YOUR SAFETY: Read these instructions carefully before operating the unit.
POUR VOTRE SÉCURITÉ: Lire attentivement ces instructions avant d’utiliser l’appareil.
PARA SU SEGURIDAD: Lea y observe todas las reglas de seguridad y las instrucciones de operación antes
de usar este producto.
PORTABLE DEHUMIDIFIER
All repair parts are available for purchase or special
order when you visit your nearest service depot.To
request service and/or the location of the service
depot nearest you, call the TOLL FREE number.
When requesting service or ordering parts, always
provide the following information:
• Product Type
• Model Number
• Part Number
• Part Description
DESHUMIDIFICATEUR PORTATIF
Todas las piezas de reparación disponibles para la
compra o la orden especial cuando usted visita su
depósito más cercano del servicio. Para pedir
servicio y/o la localización del depósito del servicio
lo más cerca posible usted, llama Danby gratis.
DESHUMIDIFICADOR PORTÁTIL
Toutes les pièces de rechange ou commandes
spéciales sont disponibles à votre centre de
service régional autorisé. Pour obtenir le service
et/ou la localité de votre centre de service régional,
signalez le NUMÉRO D’APPEL SANS FRAIS.
Ayez les renseignements suivants à la portée de la
main lors de la commande de pièce ou service:
• Type de produit
• Numéro de modèle
• Numéro de pièce
• Description de la pièce
Al pedir servicio o pidiendo piezas, proporcione
siempre la información siguiente:
• Tipo de producto
• Número de modelo
• Número de pieza
• Descripción de la parte
• OWNER’S USE AND CARE GUIDE
• GUIDE D’UTILISATION ET D'ENTRETIEN
• GUÍA DE UTILIZACIÓN Y CUIDADO PARA EL PROPIETARIO
Printed in China
Imprimé en Chine
Impreso en China
Danby Products Limited, Guelph, ON, Canada N1H 6Z9
Danby Products Inc., Findlay, Ohio, USA 45840
1-800-26-
(1-800-263-2629)
MODEL • MODÈLE • MODELO
DDR60B3WP
DDR70B3WP
 Loading...