


Danby DBC434A1BSSDD User Manual [en, es, fr]

MODEL • MODÈLE • MODELO
DBC434A1BSSDD
FREE STANDING BEVERAGE CENTER
CENTRE DE BREUVAGES AUTONOME
CENTRO DE BEBIDAS AUTÓNOMO
Owner’s Use and Care Guide
Guide d’utilisation et soins de Propriètaire
Manual de Instructions pare el Uso y Cuidado de su Unidad
•
•
•
V2.05.13.DM
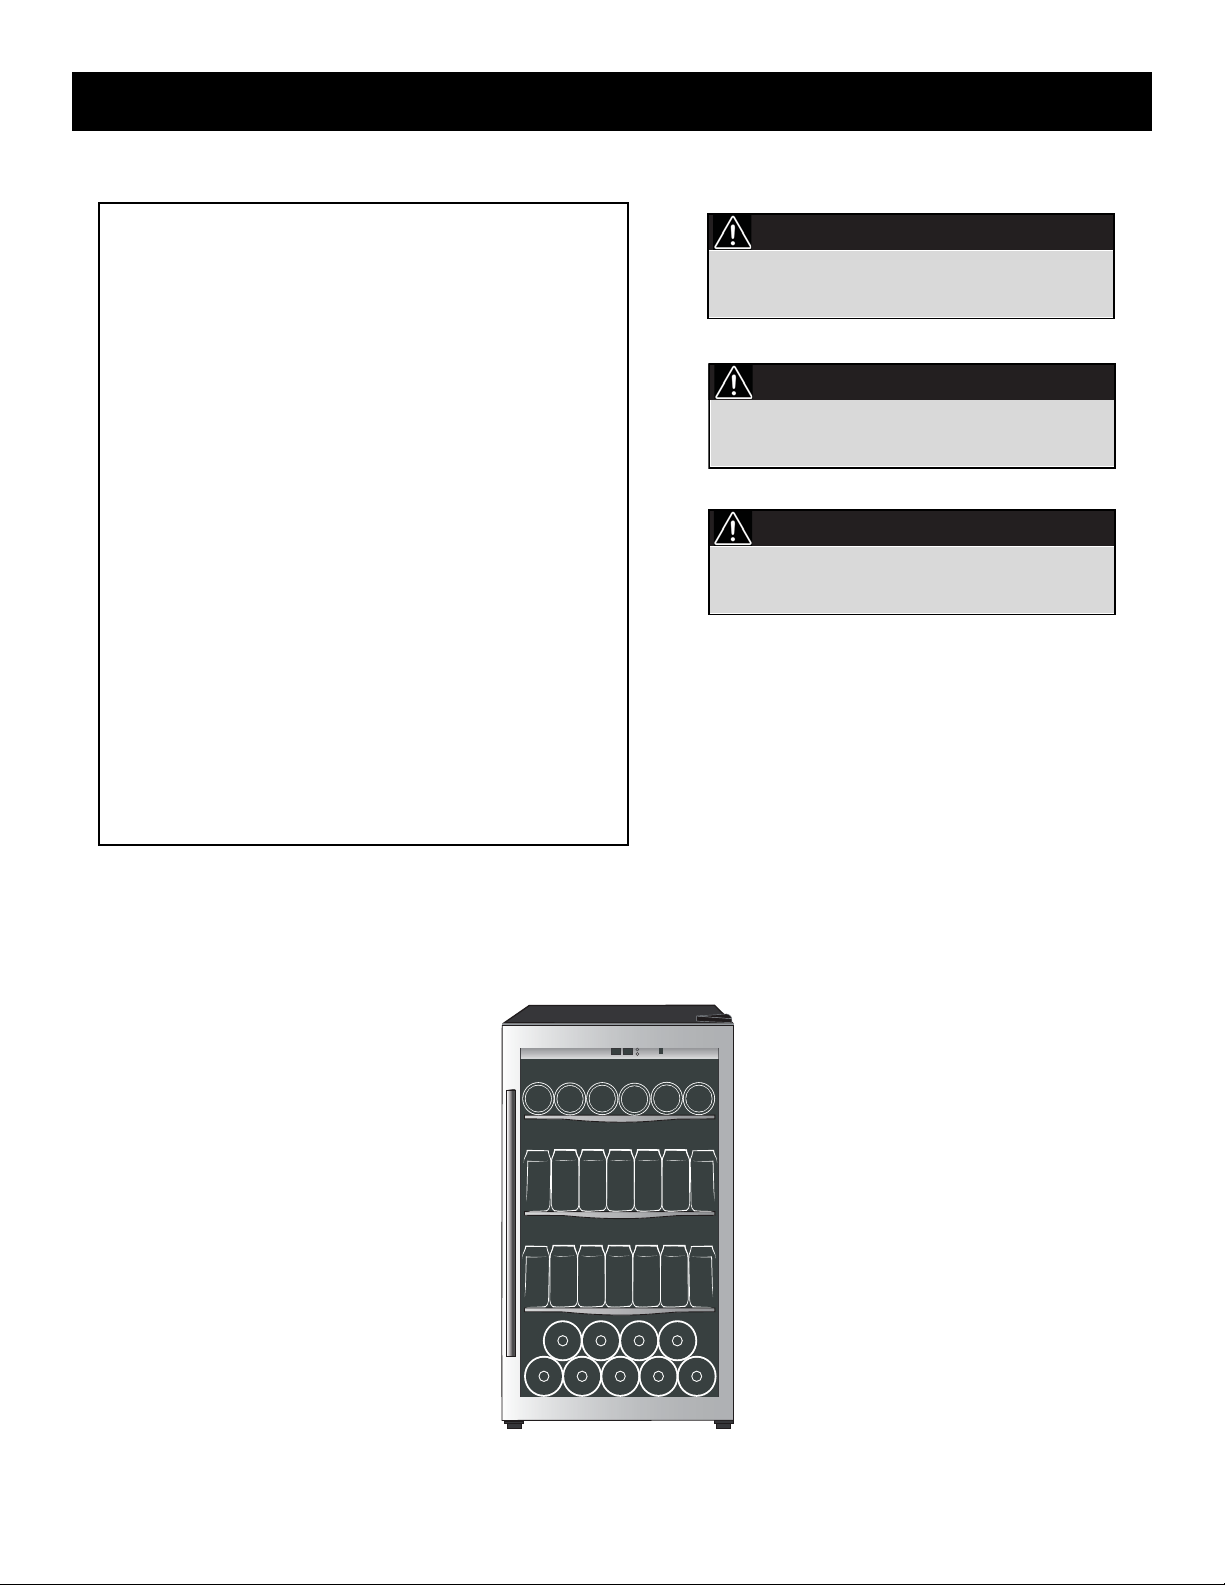
FREE STANDING BEVERAGE CENTER
Owner’s Use and Care Guide .............................
• Safety Instructions
• Installation Instructions
• Operating Instructions
• Care and Maintenance
• Troubleshooting
• Warranty
CENTRE DE BREUVAGES AUTONOME
Guide d’utiliser et soin de propriètaire .............
• Consignes de Sécurité Important
• Instructions d'installation
• Consignes d’utilisation
• Soins et entretien
• Dépannage
• Garantie
1-10
11-20
CENTRO DE BEBIDAS AUTÓNOMO
Guide d’utiliser et soin de propriètaire .............
• Instrucciones de Seguridad Importantes
• Instrucciones de instalación
• Operación
• Limpieza y Mantenimiento
• Solución Sugerida
• Garantia
21-30
CAUTION:
PRECAUTION:
PRECAUCION:
Read and follow all safety rules and
operating instructions before first use of this
product.
Veuillez lire attentivement les consignes de
sécurité et les instructions d’utilisation avant
l’utilisation initiale de ce produit.
Lea y observe todas las reglas de seguridad
y las instrucciones de operación antes de
usar este producto por primera vez.
MODEL • MODÈLE • MODELO DBC434A1BSSDD
Contents

Welcome to the Danby family. We’re proud of our quality products, and we believe in dependable service; like you will
find in this owner’s use and care guide, and like you will receive from our friendly customer service department. Best of
all, you will experience these values each and every time you use your Danby Appliance. That’s important, because your
new appliance will be a part of your family for a long time.
For easy reference, may we suggest that you attach a copy of your sales receipt to this page, and note the information
below; you will need this information to obtain service under warranty.
Model No:
Serial No:
Date Purchased:
Before you call for service, there are a few things you can do to help us
serve you better.
Read this Owner’s Use and Care Guide:
It contains instructions to help you use and maintain your appliance
properly.
If you received a damaged appliance:
Immediately contact the builder (or dealer) that sold you the Beverage
Center.
Save time and money:
Check the Trouble shooting section before calling. This section helps you
solve common problems that may occur.
If you do need service, you can relax knowing help is only a phone call
away.
Need Help?
Tel: 1-800-26-
(1-800-263-2629)
1
Welcome

ELECTRICAL
REQUIREMENTS
This appliance must be grounded. In the event of an electrical short circuit, grounding reduces the risk of
electrical shock by providing an escape wire for the electrical current.
This appliance is equipped with a cord having a grounding wire with a
grounding plug. The plug must be plugged into an outlet that is properly
installed and grounded.
An empty beverage center is a very dangerous attraction to children. Remove the door from unused appliances, or take some
other action that will guarantee it harmless.
IMPORTANT WARNING
WARNING
Improper use of the grounding plug can result in a risk of electric
shock. Consult a qualified electrician or serviceman if the grounding instructions are not completely understood, or if doubt exists
as to whether the appliance is properly grounded.
DANGER: Risk off child entrapment. Before you throw away your old
beverage center:
• Take off the doors.
• Leave the shelves in place so that children may not easily climb in.
DON’T WAIT DO IT NOW!
DO NOT USE AN EXTENSION CORD
Use an exclusive wall outlet. Do not connect your beverage center to
extension cords or together with any other appliance in the same wall
outlet.
SAFETY
PRECAUTIONS
• This appliance must be grounded.
Connect only to a properly
grounded outlet. See “Grounding
Instructions” section on page 3.
• Do not operate this appliance
if it has a damaged power cord or
plug, if it is not working properly,
or if the appliance has been
damaged or dropped.
• Do not splice the power cord that
is equipped with this appliance.
• Keep power cord away from
heated surfaces.
• Do not immerse power cord,
plug or the appliance itself in
water.
• Do not use this product near
water-for example, in a wet
basement, near a swimming
pool or near a sink.
• Do not use corrosive
chemicals or vapors in this
appliance.
• Use this appliance only for
it’s intended use, asdescribed
in this manual.
• Do not store perishable food
items such as (but not limited
to) meats and dairy products
in your beverage centre.
• Store beverages in sealed
.. bottles only.
• See door surface cleaning
instructions in the Care and
Cleaning section(s) of this
manual.
• Do not cover or block any
openings on the appliance.
• This appliance is intended for
household use only. Do not
attempt to operate or store this
appliance outdoors.
• This appliance should be
serviced only by qualified service
personnel. Contact the nearest
authorized service facility for
examination, repair or adjustment.
SAVE THESE INSTRUCTIONS
2
Important Safety Information
This appliance must be grounded.
In the event of an electrical short
circuit, grounding reduces the risk
of electric shock by providing an
escape wire for the electric current.
This appliance is equipped with a
power cord having a grounding
wire with a grounding plug. The
plug must be plugged into an outlet that is properly installed and
grounded.
Consult a qualified electrician or
service technician if the grounding
instructions are not completely
understood, or if doubt exists as
to whether the appliance is properly grounded.
If the outlet is a standard 2-prong
wall outlet, it is your personal
responsibility and obligation to
have it replaced with a properly
grounded 3-prong wall outlet.
For best operation, plug this appliance into its own electrical outlet
to prevent flickering of lights,
blowing of fuse or tripping of
circuit breaker.
Do not under any circumstances
cut or remove the third (ground)
prong from the power cord.
Do not use an adapter plug with
this appliance.
Do not use an extension cord
with this appliance. If the power
cord is too short, have a qualified
electrician or service technician
install an outlet near the
appliance.
GROUNDING
INSTRUCTIONS
WARNING!
Improper use of the grounding plug can result in a risk of
electrical shock.
LOCATION
REQUIREMENTS
DO...
• Select a location with a
strong, level floor.
• Allow 5 inches of space
between the back of the
appliance and any adjacent
wall.
• Avoid direct sunlight and
heat. Direct sunlight may
affect the acrylic coating,
heat sources nearby will
cause higher electricity
consumption.
DO NOT...
• Use this appliance
outdoors: This appliance is
intended for household use
only. Do not attempt to
operate or store this
appliance outdoors.
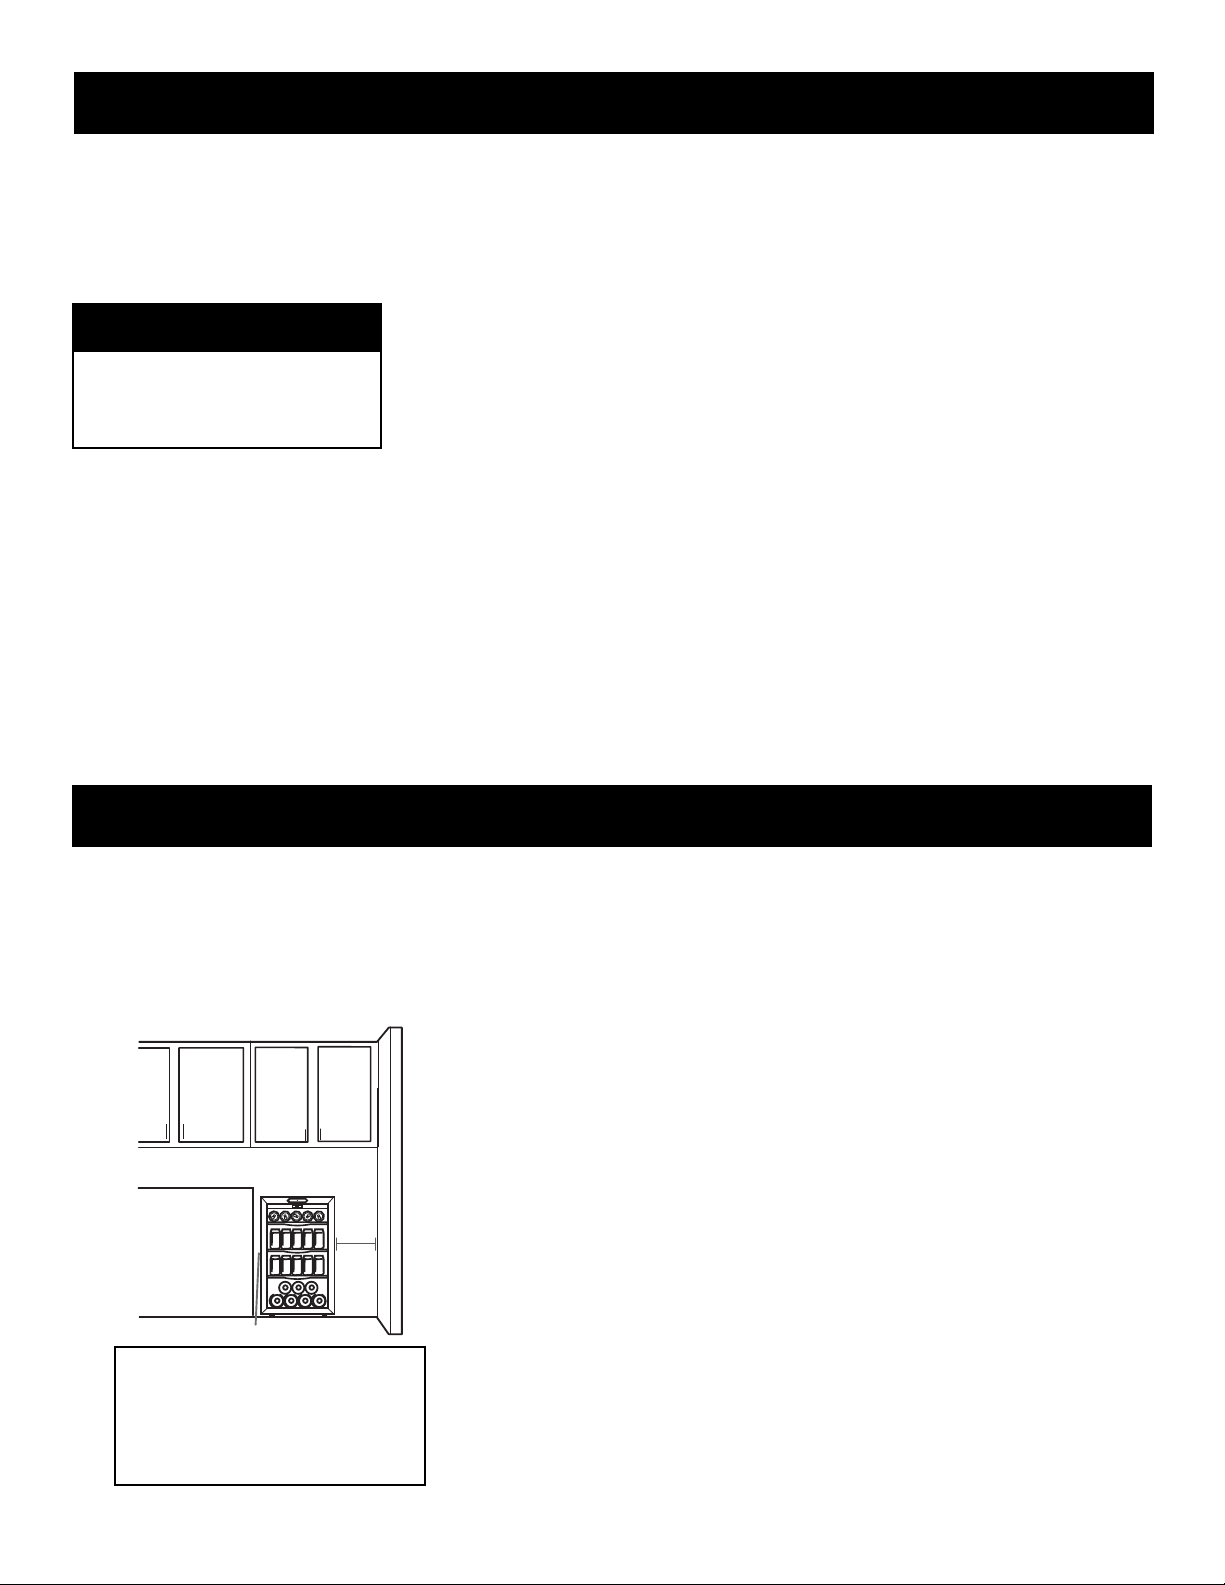
• Build this appliance
into an enclosure: This
appliance is designed for a
free-standing application
only and is not intended to
be “built-in”.
Allow 13 1/4” (33.7 cm) of
space between the (hinge)
side of the door and any
adjacent wall to
accommodate door swing.
13.25
in.
5 in.
3
Important Safety Information
Installation Instructions
Installation Instructions
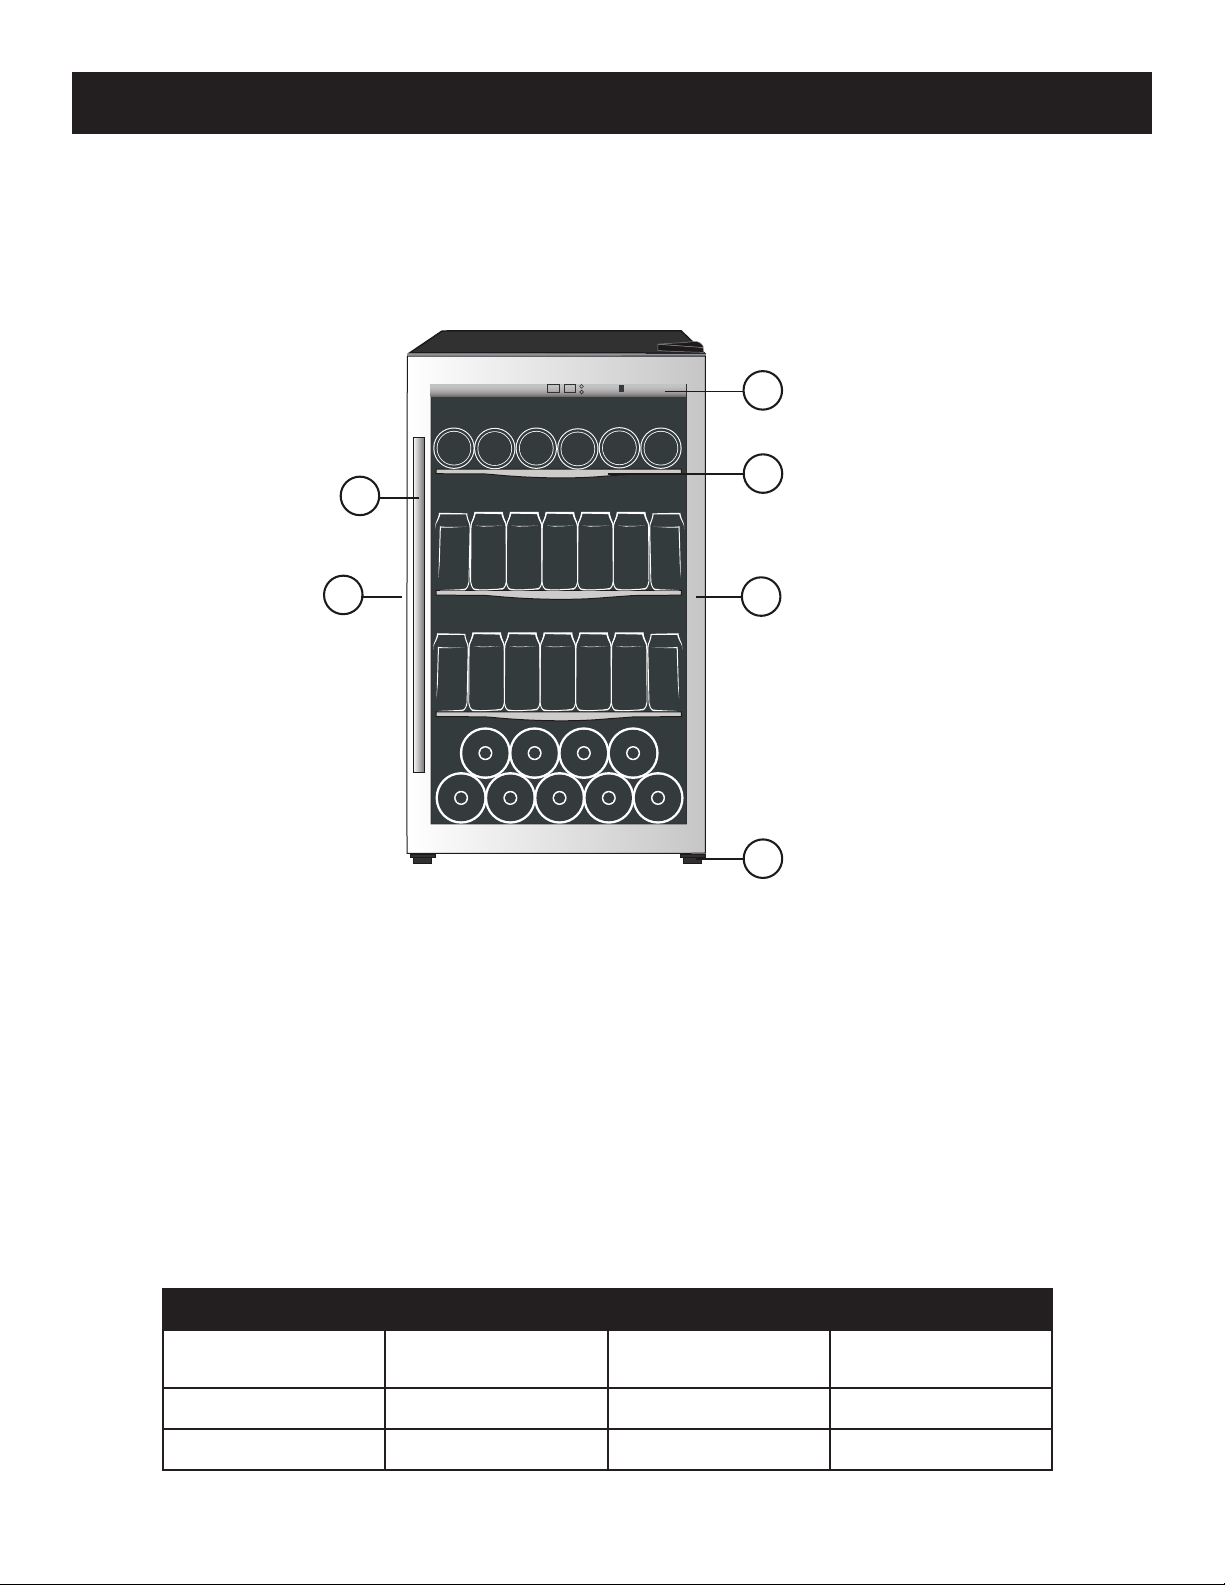
FEATURES OF YOUR
BEVERAGE CENTRE
2
1
4
6
1. Electronic Display and Controls: For
viewing and regulating the temperature of
the Beverage Center.
2. Handle
3. Tempered Glass Door: Tinted for UV
protection while still allowing for easy
interior viewing.
3
5
5. Leveling Legs
6. Magnetic Door Gaskets: Tight fitting
seals retain all the cooling power and
humidity levels.
4. Stainless Steel Color Trim Shelves
Specifications
Width 19.41 in. / 493 mm
Height 33.11 in. / 841 mm Net Weight 84 lbs / 38 kg
Depth 24.92 in. / 633 mm
Temperature Range
(Minimum ~Maximum)
4
39 ~ 64°F / 4~18°C
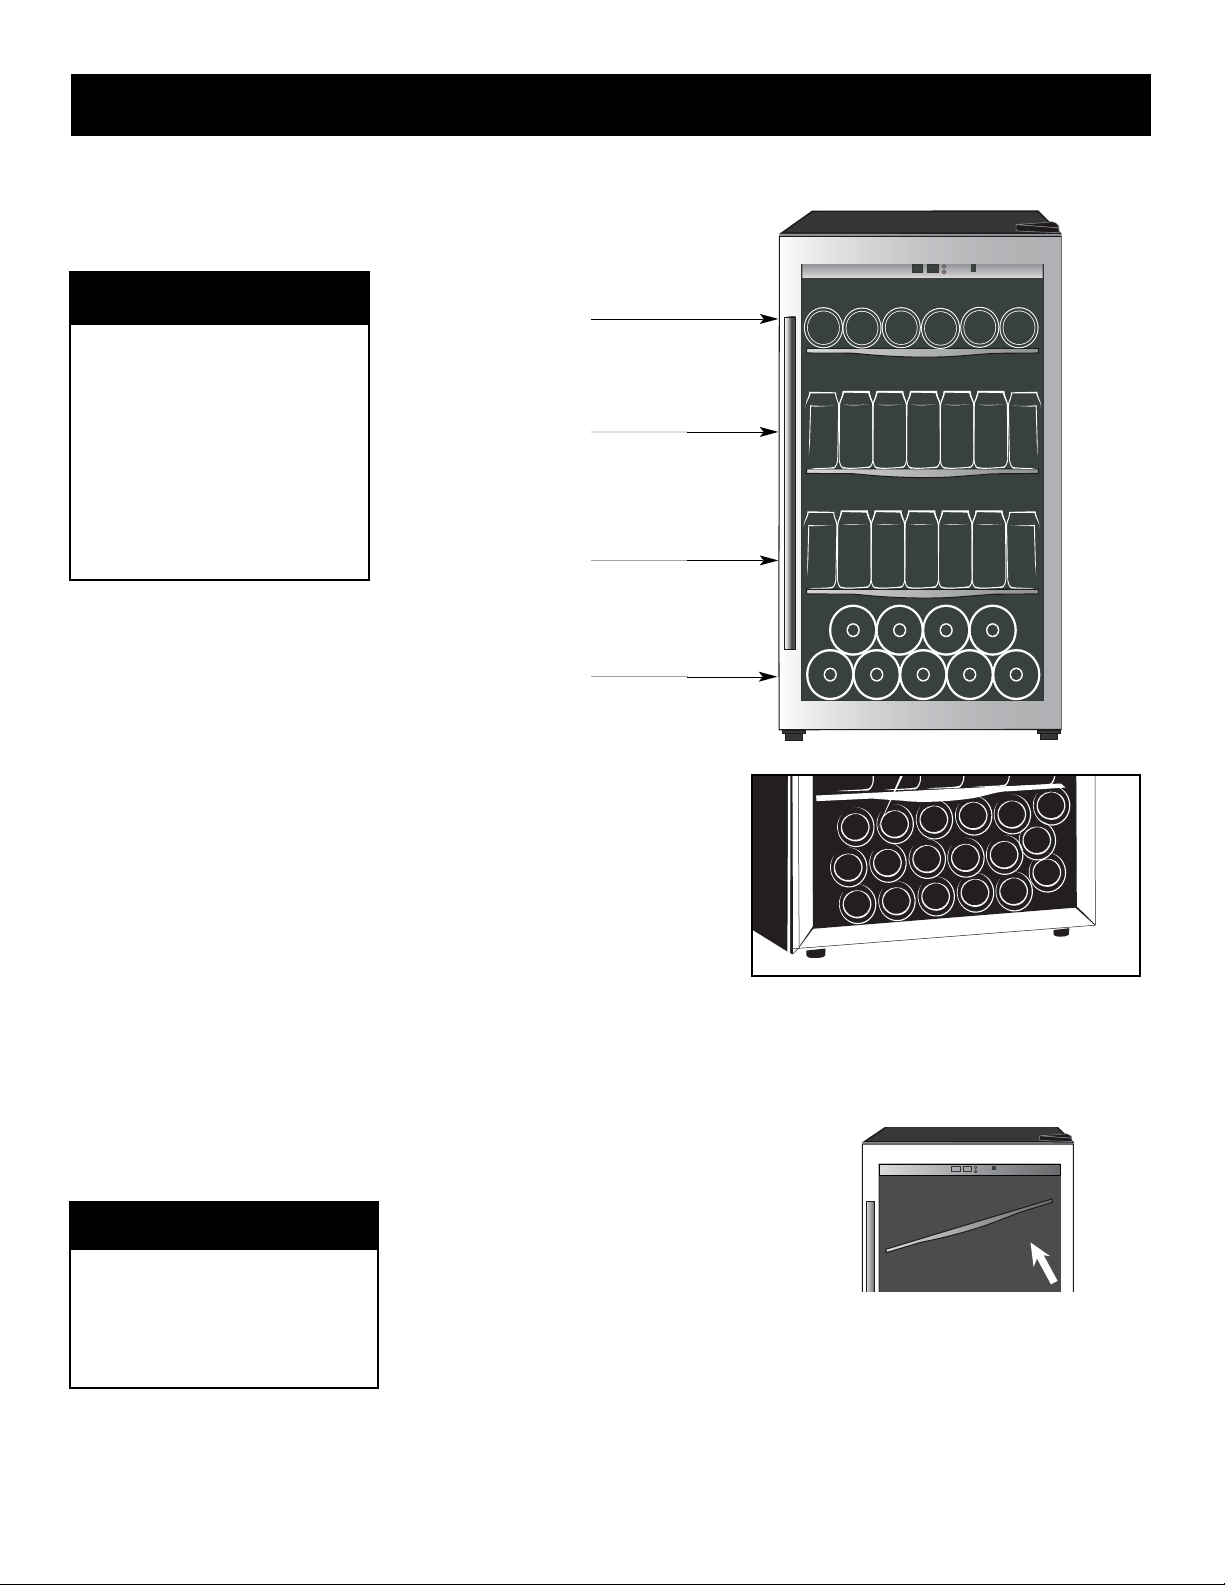
To remove a shelf from its
locked position, tilt the shelf as
shown in Fig. A and pull outward.
To re-install, ensure the shelf is
resting securely on the support
brackets and push the shelf
inward until it locks into place.
Fig. A
Top Shelf: Holds 18
cans laying on their
sides.
2
nd
and 3rdMiddle
Shelves: Each holds 35
cans (70 total) standing
vertically.
Base:
Holds up to 9 wine
bottles.
Alternate base: Holds
36 cans, when the cans
are stacked laying on
their sides.
SHELF
INSTRUCTIONS
BEVERAGE STORAGE
IMPORTANT!
Do not cover shelves with
aluminum foil or any other
material that will prevent
adequate air circulation
within the cabinet.
IMPORTANT!
The maximum* capacity of
the DBC434A1BSSDD is
124 (350ml) cans or 88 cans
and 9 (750ml) wine bottles.
*When stocked as per
instructions.
Store beverages in sealed
bottles only.
5
Installation Instructions

6
TOOLS REQUIRED
Phillips #2 screwdriver and an adjustable wrench.
WARNING
Excessive Weight hazard use two or more
people when moving the wine cooler.
Rubber cover
Screws
Decorative cover
Screws
Top Hinge
Decorative nail
Screws
Lower hinge
Cabinet leg
Extrusion-board
of lamp switch
Screws
1
2
3
4
5
6
7
8
9
10
11
1. Close the door and take out rubber cover (1), unscrew two screws (2) and remove decorative cover
(3).(Fig.1).
2. Unscrew screws (4) and take out top hinge (5), then remove the door. (Fig.2)
3. Put the door aside safely and take out two screws (11) at the bottom, pull out extrusion-board of lamp switch
(10) and fix it at top of door. (Fig.5)
4. Pull out decorative nail (6) from left top of cabinet. (Fig.3)
5. Unscrew 3 screws (7) from right bottom of cabinet and remove lower hinge (8). (Fig.4)
6. Pull out cabinet leg (9) from left bottom of cabinet and fix it onto right bottom of cabinet. (Fig.4)
7. Fix the lower hinge (8) onto left bottom of cabinet with screws (7). (Fig.4)
8. The door revolves 180 degrees, put lower door axis to aim at lower hinge (8) and install the door onto lower
hinge (8), then close the door carefully. (Fig.5)
9. Fix top hinge (5) onto left top of cabinet with screws (4), adjust door and install decorative cover (3) and rubber
cover (1). (Fig.6)
10. Block 3 screw holes at right top of cabinet with spare decorative nail.
Installation Instructions
DOOR REVERSAL
INSTRUCTIONS

CONTROLS OF YOUR
BEVERAGE CENTER
SETTING THE
TEMPERATURE
• To switch the display between the Fahrenheit (°F) and Celsius (°C)
scale, depress the UP and DOWN control buttons
simultanously for approximately five (5) seconds
• The temperature range can be set as low as 39°F(4°C) or as high
as 64°F (18°C) to suit your specific storage requirements. Each
depression of the UP or DOWN button will allow you to adjust
the temperature in 1° degree increments within the aforementioned
range.
IMPORTANT!
In the event of a power fail ure, wait 3 to 5 minutes
before rest arting.
1. Indicator light illuminates to signify the
cooling mode is currently in operation.
2. Set Temperature Display: Display screen
shows the temperature setting (see ‘Setting
the temperature’ below)
3. Cabinet Temperature Display:
Display screen shows the current cabinet
temperature.
4. °C/°F : Adjacent indicator light denotes which
scale of temperature is displayed.
5. ‘ ’ Button: Used to raise the temperature
(warmer) in 1° degree increments.
‘ ’ Button: Used to decrease the
temperature (cooler) in 1° degree increments.
6. ‘||’ Switch: Continuous illumination.
‘O’ Switch: Illumination only when the door is open.
Operating Instructions
7
2
1
3
4
5
6

HELPFUL HINTS
Allow the door to remain open for a few minutes after manual cleaning
to air out and dry the inside of the cabinet.
HOW TO CLEAN
THE INSIDE
Walls, Floor, Inside Window, and Shelves
Water deposits and dust can be removed with a damp cloth.
HOW TO CLEAN
THE OUTSIDE
Outer Case
It’s important to keep the area
clean where the door seals
against the cabinet. Clean this
area with a sudsy cloth. Rinse
and then dry.
Door surface
Use only mild, non-abrasive
detergents applied with a clean
sponge or soft cloth. Rinse well.
Control Panel and Door
Wipe with a damp cloth and dry
thoroughly. Do not use cleaning
sprays, large amounts of soap
and water, abrasive or sharp
objects on the panel, they can
damage it. Some paper towels
may also scratch the control
panel and door glass.
IMPORTANT!
Never use any commercial or
abrasive cleaners or sharp
objects on any part of the beverage center.
IMPORTANT!
Do not use cleaners containing ammonia or alcohol.
Ammonia or alcohol can damage the appearance of the
appliance.
WARNING!
Be certain the power is off before cleaning any part of this appliance.
8
Care and Maintenance
 Loading...