


 Loading...
WordPerfect

Table of contents
WordPerfect
Getting started in WordPerfect. . . . . . . . . . . . . . . . . . . . . . . . . . . . . . . . . .1
Discovering WordPerfect . . . . . . . . . . . . . . . . . . . . . . . . . . . . . . . . . . . . . . . . . . 1 Exploring the work area . . . . . . . . . . . . . . . . . . . . . . . . . . . . . . . . . . . . . . . . . . . 2 Creating and opening documents . . . . . . . . . . . . . . . . . . . . . . . . . . . . . . . . . . . . 3 Entering and inserting text . . . . . . . . . . . . . . . . . . . . . . . . . . . . . . . . . . . . . . . . . 4 Selecting and deleting text . . . . . . . . . . . . . . . . . . . . . . . . . . . . . . . . . . . . . . . . . 6 Performing Web searches powered by Yahoo! . . . . . . . . . . . . . . . . . . . . . . . . . . . 7
Working with files . . . . . . . . . . . . . . . . . . . . . . . . . . . . . . . . . . . . . . . . . . . .9
Inserting files into active documents . . . . . . . . . . . . . . . . . . . . . . . . . . . . . . . . . . 9 Counting words. . . . . . . . . . . . . . . . . . . . . . . . . . . . . . . . . . . . . . . . . . . . . . . . . 10 Converting multiple files . . . . . . . . . . . . . . . . . . . . . . . . . . . . . . . . . . . . . . . . . . 11 Saving documents . . . . . . . . . . . . . . . . . . . . . . . . . . . . . . . . . . . . . . . . . . . . . . . 12
Viewing and navigating . . . . . . . . . . . . . . . . . . . . . . . . . . . . . . . . . . . . . .15
Switching document views . . . . . . . . . . . . . . . . . . . . . . . . . . . . . . . . . . . . . . . . 15 Using Reveal Codes. . . . . . . . . . . . . . . . . . . . . . . . . . . . . . . . . . . . . . . . . . . . . . 16
Formatting pages . . . . . . . . . . . . . . . . . . . . . . . . . . . . . . . . . . . . . . . . . . .19
Setting page margins. . . . . . . . . . . . . . . . . . . . . . . . . . . . . . . . . . . . . . . . . . . . . 19 Choosing page size and orientation . . . . . . . . . . . . . . . . . . . . . . . . . . . . . . . . . . 20 Customizing page sizes . . . . . . . . . . . . . . . . . . . . . . . . . . . . . . . . . . . . . . . . . . . 21 Making text fit a specific number of pages. . . . . . . . . . . . . . . . . . . . . . . . . . . . . 24 Creating and deleting columns . . . . . . . . . . . . . . . . . . . . . . . . . . . . . . . . . . . . . 25
Formatting text . . . . . . . . . . . . . . . . . . . . . . . . . . . . . . . . . . . . . . . . . . . . .29
Modifying font settings . . . . . . . . . . . . . . . . . . . . . . . . . . . . . . . . . . . . . . . . . . . 29 Copying the format of text . . . . . . . . . . . . . . . . . . . . . . . . . . . . . . . . . . . . . . . . 32
Formatting paragraphs . . . . . . . . . . . . . . . . . . . . . . . . . . . . . . . . . . . . . . .35
Indenting text . . . . . . . . . . . . . . . . . . . . . . . . . . . . . . . . . . . . . . . . . . . . . . . . . . 35 Justifying text . . . . . . . . . . . . . . . . . . . . . . . . . . . . . . . . . . . . . . . . . . . . . . . . . . 36 Changing the spacing between lines and paragraphs . . . . . . . . . . . . . . . . . . . . . 38
Table of contents |
iii |

Adding tab stops . . . . . . . . . . . . . . . . . . . . . . . . . . . . . . . . . . . . . . . . . . . . . . . . 39 Changing the alignment of tab stops . . . . . . . . . . . . . . . . . . . . . . . . . . . . . . . . . 41 Moving tab stops . . . . . . . . . . . . . . . . . . . . . . . . . . . . . . . . . . . . . . . . . . . . . . . . 42 Removing and restoring tab stops . . . . . . . . . . . . . . . . . . . . . . . . . . . . . . . . . . . 42
Editing documents . . . . . . . . . . . . . . . . . . . . . . . . . . . . . . . . . . . . . . . . . .45
Finding and replacing text . . . . . . . . . . . . . . . . . . . . . . . . . . . . . . . . . . . . . . . . . 45 Cutting, copying, and pasting text and graphics . . . . . . . . . . . . . . . . . . . . . . . . 48 Copying and pasting text from a Web browser . . . . . . . . . . . . . . . . . . . . . . . . . 49 Moving text and graphics. . . . . . . . . . . . . . . . . . . . . . . . . . . . . . . . . . . . . . . . . . 49 Reviewing documents . . . . . . . . . . . . . . . . . . . . . . . . . . . . . . . . . . . . . . . . . . . . 50 Routing documents . . . . . . . . . . . . . . . . . . . . . . . . . . . . . . . . . . . . . . . . . . . . . . 52 Comparing documents . . . . . . . . . . . . . . . . . . . . . . . . . . . . . . . . . . . . . . . . . . . . 54 Controlling document comparisons . . . . . . . . . . . . . . . . . . . . . . . . . . . . . . . . . . 56
Working with footnotes and endnotes. . . . . . . . . . . . . . . . . . . . . . . . . . .59
Inserting footnotes and endnotes . . . . . . . . . . . . . . . . . . . . . . . . . . . . . . . . . . . . 59 Finding footnotes and endnotes . . . . . . . . . . . . . . . . . . . . . . . . . . . . . . . . . . . . . 61 Modifying the display of footnotes and endnotes on a page . . . . . . . . . . . . . . . . 63
Numbering . . . . . . . . . . . . . . . . . . . . . . . . . . . . . . . . . . . . . . . . . . . . . . . .65
Numbering pages . . . . . . . . . . . . . . . . . . . . . . . . . . . . . . . . . . . . . . . . . . . . . . . 65 Changing the appearance of page numbers . . . . . . . . . . . . . . . . . . . . . . . . . . . . 67
Printing . . . . . . . . . . . . . . . . . . . . . . . . . . . . . . . . . . . . . . . . . . . . . . . . . . .69
Setting up a printer . . . . . . . . . . . . . . . . . . . . . . . . . . . . . . . . . . . . . . . . . . . . . . 69 Setting up a print job. . . . . . . . . . . . . . . . . . . . . . . . . . . . . . . . . . . . . . . . . . . . . 72 Previewing a print job . . . . . . . . . . . . . . . . . . . . . . . . . . . . . . . . . . . . . . . . . . . . 73 Printing documents . . . . . . . . . . . . . . . . . . . . . . . . . . . . . . . . . . . . . . . . . . . . . . 75 Controlling a print job . . . . . . . . . . . . . . . . . . . . . . . . . . . . . . . . . . . . . . . . . . . . 76 Printing double-sided pages . . . . . . . . . . . . . . . . . . . . . . . . . . . . . . . . . . . . . . . . 78 Printing document sections and comments . . . . . . . . . . . . . . . . . . . . . . . . . . . . 79 Printing file details. . . . . . . . . . . . . . . . . . . . . . . . . . . . . . . . . . . . . . . . . . . . . . . 81 Printing envelopes and labels . . . . . . . . . . . . . . . . . . . . . . . . . . . . . . . . . . . . . . . 82 Printing graphics . . . . . . . . . . . . . . . . . . . . . . . . . . . . . . . . . . . . . . . . . . . . . . . . 83 Laying out a print job . . . . . . . . . . . . . . . . . . . . . . . . . . . . . . . . . . . . . . . . . . . . 85
iv |
Table of contents |

Saving print settings . . . . . . . . . . . . . . . . . . . . . . . . . . . . . . . . . . . . . . . . . . . . . 88 Using printer commands . . . . . . . . . . . . . . . . . . . . . . . . . . . . . . . . . . . . . . . . . . 90 Printing to a file . . . . . . . . . . . . . . . . . . . . . . . . . . . . . . . . . . . . . . . . . . . . . . . . 91 Sending faxes. . . . . . . . . . . . . . . . . . . . . . . . . . . . . . . . . . . . . . . . . . . . . . . . . . . 92 Reference: Printing . . . . . . . . . . . . . . . . . . . . . . . . . . . . . . . . . . . . . . . . . . . . . . 93
Merging documents . . . . . . . . . . . . . . . . . . . . . . . . . . . . . . . . . . . . . . . . .97
Creating data for a merge . . . . . . . . . . . . . . . . . . . . . . . . . . . . . . . . . . . . . . . . . 97 Working with form documents for a merge. . . . . . . . . . . . . . . . . . . . . . . . . . . 100 Associating merge files . . . . . . . . . . . . . . . . . . . . . . . . . . . . . . . . . . . . . . . . . . 105 Performing a merge. . . . . . . . . . . . . . . . . . . . . . . . . . . . . . . . . . . . . . . . . . . . . 107 Converting merge files . . . . . . . . . . . . . . . . . . . . . . . . . . . . . . . . . . . . . . . . . . 110 Sorting, viewing, and finding data in data files . . . . . . . . . . . . . . . . . . . . . . . . 111 Editing merge data files. . . . . . . . . . . . . . . . . . . . . . . . . . . . . . . . . . . . . . . . . . 112 Selecting specific data for merges. . . . . . . . . . . . . . . . . . . . . . . . . . . . . . . . . . . 116 Merging with address books . . . . . . . . . . . . . . . . . . . . . . . . . . . . . . . . . . . . . . 117 Changing merge options . . . . . . . . . . . . . . . . . . . . . . . . . . . . . . . . . . . . . . . . . 121 Using merge commands . . . . . . . . . . . . . . . . . . . . . . . . . . . . . . . . . . . . . . . . . 122 Merge programming commands . . . . . . . . . . . . . . . . . . . . . . . . . . . . . . . . . . . 125 Working with levels, loops, and merge variables . . . . . . . . . . . . . . . . . . . . . . . 169 Working with merge expressions. . . . . . . . . . . . . . . . . . . . . . . . . . . . . . . . . . . 174 Expression terms . . . . . . . . . . . . . . . . . . . . . . . . . . . . . . . . . . . . . . . . . . . . . . . 180 Reference: The Merge toolbar and programming commands . . . . . . . . . . . . . . 184
Recordings, macros, and automation features. . . . . . . . . . . . . . . . . . . .191
Using QuickMacros. . . . . . . . . . . . . . . . . . . . . . . . . . . . . . . . . . . . . . . . . . . . . 192 Recording, saving, and storing macros. . . . . . . . . . . . . . . . . . . . . . . . . . . . . . . 193 Playing macros . . . . . . . . . . . . . . . . . . . . . . . . . . . . . . . . . . . . . . . . . . . . . . . . 195 Using macros included with WordPerfect . . . . . . . . . . . . . . . . . . . . . . . . . . . . 196 Using toolbars for macros . . . . . . . . . . . . . . . . . . . . . . . . . . . . . . . . . . . . . . . . 198 Using template macros . . . . . . . . . . . . . . . . . . . . . . . . . . . . . . . . . . . . . . . . . . 200 Editing and deleting template macros . . . . . . . . . . . . . . . . . . . . . . . . . . . . . . . 202 Triggering macros from templates. . . . . . . . . . . . . . . . . . . . . . . . . . . . . . . . . . 203 Customizing WordPerfect macros . . . . . . . . . . . . . . . . . . . . . . . . . . . . . . . . . . 206 Assigning template macros to keystrokes, menus, and toolbars . . . . . . . . . . . . 209
Table of contents |
v |

Associating toolbars with template features . . . . . . . . . . . . . . . . . . . . . . . . . . . 212 Writing and editing macros by using PerfectScript . . . . . . . . . . . . . . . . . . . . . 212 Understanding macro commands and syntax . . . . . . . . . . . . . . . . . . . . . . . . . . 214 Using macro conventions and formatting macros . . . . . . . . . . . . . . . . . . . . . . . 216 Recording macro commands in macros. . . . . . . . . . . . . . . . . . . . . . . . . . . . . . . 218 Inserting codes in macros . . . . . . . . . . . . . . . . . . . . . . . . . . . . . . . . . . . . . . . . . 218 Using macros from earlier versions of WordPerfect . . . . . . . . . . . . . . . . . . . . . 219 Using programming commands in macros . . . . . . . . . . . . . . . . . . . . . . . . . . . . 219 Using parameters in macros . . . . . . . . . . . . . . . . . . . . . . . . . . . . . . . . . . . . . . . 220 Using variables in PerfectScript . . . . . . . . . . . . . . . . . . . . . . . . . . . . . . . . . . . . 222 Using the macro command browser . . . . . . . . . . . . . . . . . . . . . . . . . . . . . . . . . 223 Using macro commands to retrieve information . . . . . . . . . . . . . . . . . . . . . . . . 224 Using OLE object commands in macros . . . . . . . . . . . . . . . . . . . . . . . . . . . . . . 225 Compiling macros . . . . . . . . . . . . . . . . . . . . . . . . . . . . . . . . . . . . . . . . . . . . . . 225 Working from the PerfectScript utility. . . . . . . . . . . . . . . . . . . . . . . . . . . . . . . 228 Testing for errors from PerfectScript . . . . . . . . . . . . . . . . . . . . . . . . . . . . . . . . 229 Editing and deleting macros. . . . . . . . . . . . . . . . . . . . . . . . . . . . . . . . . . . . . . . 230 Searching in macros . . . . . . . . . . . . . . . . . . . . . . . . . . . . . . . . . . . . . . . . . . . . . 231 Integrating with Microsoft Visual Basic for Applications . . . . . . . . . . . . . . . . . 232 Using the PerfectScript class to change WordPerfect documents . . . . . . . . . . . 239 Working with VBA methods . . . . . . . . . . . . . . . . . . . . . . . . . . . . . . . . . . . . . . 242 Accessing and manipulating applications from other applications. . . . . . . . . . . 244 Using OLE Automation. . . . . . . . . . . . . . . . . . . . . . . . . . . . . . . . . . . . . . . . . . 246 Understanding OLE Automation . . . . . . . . . . . . . . . . . . . . . . . . . . . . . . . . . . . 247 Using files with DDE Execute from previous versions of WordPerfect . . . . . . . 250 Getting online Help for macros . . . . . . . . . . . . . . . . . . . . . . . . . . . . . . . . . . . . 251
vi |
Table of contents |

Getting started in WordPerfect
This chapter tells you how to perform basic operations in WordPerfect. You can explore the work area and gain a better understanding of the basic tools and features available for creating powerful word processing documents.
In this section, you’ll learn about
•discovering WordPerfect
•exploring the work area
•creating and opening documents
•entering and inserting text
•selecting and deleting text
•performing Web searches powered by Yahoo!®
Discovering WordPerfect
WordPerfect X3 provides exceptional ease of use and complete formatting control for producing newsletters, articles, reports, proposals, books, and other documents. The popular Reveal Codes, Corel® RealTime Preview™, and Legal features help reduce the amount of time you spend on document formatting, freeing you to focus on creating content. WordPerfect X3 also provides enhanced compatibility with Microsoft Word, the new ability to import PDFs, and robust PDF publishing capabilities that ensure you can freely exchange information with colleagues and clients, regardless of the software they use.
Here’s a list of some of the new and enhanced features:
• New! Import PDF files with WordPerfect
For more information, see “Working with PDF files” in the online Help.
• Enhanced! Publish to PDF
For more information, see “Working with PDF files” in the online Help.
• New & Enhanced! Word Count
For more information, see “Counting words” in the online Help.
Getting started in WordPerfect |
1 |
• Enhanced! Document Routing
For more information, see “Routing documents” in the online Help.
• Enhanced! Pasting and exporting HTML
For more information, see “Copying and pasting text from a Web browser” on page 49 and “Working with HTML files” on page 27.
• New! Online Resources
For more information, see “Performing Web searches powered by Yahoo!” on page 7.
• New! Removing metadata
For more information, see “Excluding metadata when saving documents” in the online Help.
• New! Label formats
For more information, see “Creating labels” in the online Help.
Exploring the work area
The work area in WordPerfect includes everything you see on your screen when you start the application. The large open area is the document window.
The menu bar, located at the top of the work area just below the title bar, provides access to most of the WordPerfect commands.
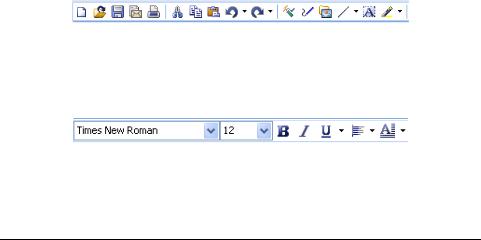
Toolbars
Many menu commands can be accessed through toolbars, located below the menu bar.
This is the WordPerfect toolbar.
The property bar is a context-sensitive toolbar that displays buttons and options related to the task you are performing. For example, when text is selected, the property bar contains only text-related commands.
This is the property bar.
By default, the property bar is located above the document window.
2 |
WordPerfect X3 User Guide |

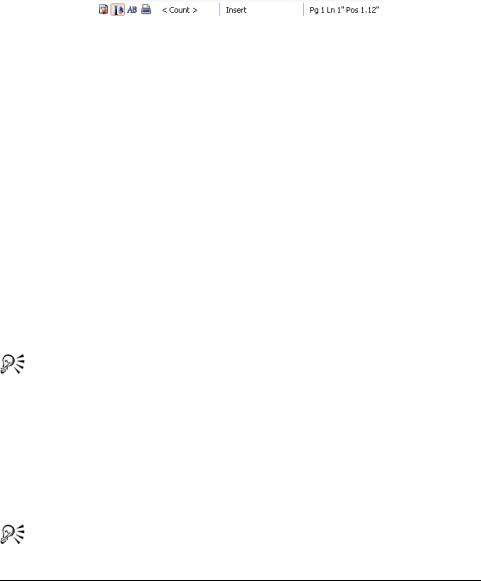
The application bar
The application bar displays information about the status of the active WordPerfect document. By default, the application bar is located below the document window.
When you open a file, a document button with the name of the file appears on the application bar. You can use document buttons to quickly move between the documents. For more information about moving between documents, see “Navigating documents” in the online Help.
These items appear on the right side of the application bar.
Creating and opening documents
You can create a document in WordPerfect by using the default template, a blank document that includes formatting elements such as margin settings, tab settings, and toolbars. WordPerfect also includes ready-made project templates that you can open and use to create a wide range of documents, including letters, fax cover sheets, calendars, and business cards.
For more information about templates, see “Creating documents using project templates” in the online Help.
You can open word-processing documents that were created in WordPerfect or in another application. The advantage of opening, rather than importing a document created in another application, is that many of the formatting attributes in the original document, such as page size, margins, font properties, bullets, and underlining are preserved. Some of the features not supported include embedded pictures, hidden text, interline spacing, kerning, macros, multiple page layouts (the first one in the document is used throughout), and OLE objects. For more information about importing files, see “Import and export file formats for WordPerfect” in the reference information section of the online Help.
To create a document by using the default template
• Click File ` New.
You can also
Create a document from a project template |
Click File ` New from project. |
|
|
Getting started in WordPerfect |
3 |

You can also apply the default template to a new document by clicking the New blank document  button on the toolbar.
To open a document
1Click File ` Open.
2Choose the drive and folder where the document is stored.
3Choose a file.
4Click Open.
You can also open a document by clicking the Open  button on the toolbar.
If you know where a file is located, you can type the full path and filename in the File name list box.
Entering and inserting text
You can enter text in the document window. You can use the shadow cursor to show where the text will be positioned.
You can also enter text in a text box so that it appears in a separate frame. You can insert text from another file.
If you have more than one document opened, you can use the application bar to insert text from one document to another document.
For information about selecting and deleting text, see “Selecting and deleting text” on page 6.
To enter text in a document window
1Click in the document window.
2Type text.
To enter text by using the shadow cursor
1 Click View ` Shadow cursor.
4 |
WordPerfect X3 User Guide |
A check mark next to the menu command indicates that the shadow cursor is enabled.
2Click anywhere on the page.
3Type text.
The shadow cursor changes appearance to show how text will be aligned when you start typing. Small arrows beside the shadow cursor point in different directions when text is left-justified, centered, or right-justified.
To enter text in a text box
1Click Insert ` Text box.
2Type text.
To insert text from another document
1Click where you want to insert the text.
2Click Insert ` File.
3Choose the drive and folder where the document is stored.
4Choose a file.
5Click Insert.
To insert text from another document by using the application bar
1Select the text you want to insert.
2Drag the selected text to the button on the application bar that displays the name of the document into which you want to insert the text, but don’t release the mouse button.
This document opens in the document window.
3Point to where you want to insert the text, and release the mouse button.
For more information about using the application bar, see “Customizing the application bar” in the online Help.
Getting started in WordPerfect |
5 |

The text you select is removed from the document. You can copy the text by holding down Ctrl while dragging.
Selecting and deleting text
You can select text, a tabular column, a rectangular block of text, or a range of text. You can also deselect text and delete text. You can also set selection options.
To select text
To select |
Do the following |
|
|
A character or word |
Drag across a character or word. |
|
|
A sentence |
Click in a sentence. Click Edit ` Select ` |
|
Sentence. |
|
|
A paragraph |
Click in a paragraph. Click Edit ` Select ` |
|
Paragraph. |
|
|
A page |
Click on a page. Click Edit ` Select ` Page. |
|
|
A document |
Click Edit ` Select ` All. |
|
|
To select a tabular column
1Select the text from the first character in the tabular column to the last character in the tabular column.
2Click Edit ` Select ` Tabular column.
To select a rectangular block of text
1Select the text from the upper left corner to the lower left corner of the block.
2Click Edit ` Select ` Rectangle.
To select a range of text in a document
1Click Edit ` Select ` Section.
2From the Select list, choose one of the following options:
6 |
WordPerfect X3 User Guide |

•Page — lets you select certain pages
•Secondary page — lets you select certain secondary pages
•Chapter — lets you select certain chapters
•Volume — lets you select certain volumes
3 Type a value in the Range box.
To deselect text
• Click anywhere outside the selected text.
To delete text
1Select the text you want to delete.
2Press Delete.
You can also delete text by clicking after the text you want to delete and pressing Backspace.
To set the selection options for a document
1Click Tools ` Settings.
2Click Environment.
3In the Environment settings dialog box, click the General tab.
4Enable the Automatically select whole words when dragging to select text check box.
Performing Web searches powered by Yahoo!
WordPerfect features searching technology powered by Yahoo!, which allows you to perform a Web search directly from a document. You can choose to display or hide the Yahoo! Search bar. You can search either by selecting text or by using the Yahoo! Search bar. Using the Yahoo! Search bar gives you access to various online sites and services.
Getting started in WordPerfect |
7 |
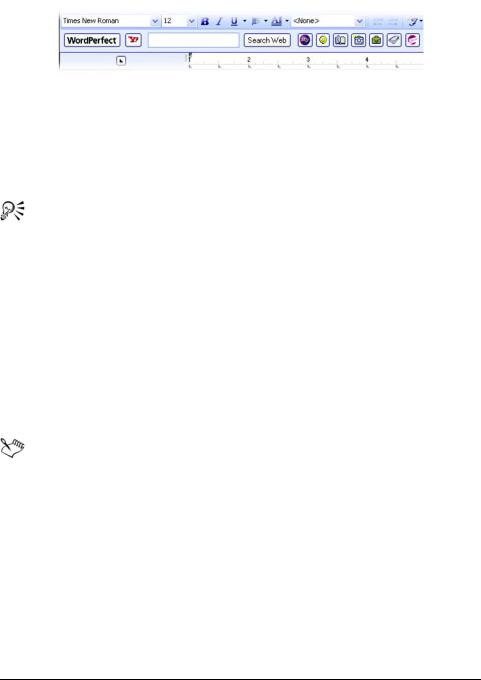
The new Yahoo! Search bar lets you quickly search the Web and access important online resources.
To display or hide the Yahoo! Search bar
• Click View ` Yahoo! Search.
You can also hide or display the Yahoo! Search bar clicking the Yahoo!  button on the toolbar.
To perform a Web search by using the Yahoo! Search bar
1In the search box on the Yahoo! Search bar, type the term you want to search.
2Click the Search Web button.
To perform a Web search by selecting text
1Select the term you want to search.
2Right-click, and click Search with Yahoo!.
You can perform a Web search by selecting text when the Yahoo! Search bar is hidden.
8 |
WordPerfect X3 User Guide |

Working with files
File management is an important part of any project. You can insert files into documents, count words in a document, and convert multiple files to the WordPerfect file format. You can save files to earlier versions of WordPerfect or to other file formats.
In this section, you’ll learn about
•inserting files into active documents
•counting words
•converting multiple files
•saving documents
Inserting files into active documents
You can insert a copy of a file into an active document.
To insert a file into an active document
1Click where you want to insert the file.
2Click Insert ` File.
3Choose All files from the File type list box.
4Choose the drive and folder in which the file is stored.
5Click a file.
6Click Insert.
For information about opening files, see “Opening and previewing files” in the online Help.
Working with files |
9 |
Counting words
With WordPerfect, you can find out how many words are in a document or in selected text. You can also verify the number of pages, paragraphs, sentences, and lines that are in the document. In addition, you have the ability to exclude various elements, such as headers, footers, footnotes, endnotes, or comments, from the word count.
The new <Count> button appears on the Application bar, making it easier than ever to count words in a document.
To count words in a document
1Click Tools ` Word count.
2Disable any of the following check boxes to exclude document elements from the count:
•Headers
•Footers
•Comments
•Footnotes
•Endnotes
•Watermarks
•Text boxes
•Box captions
3Click Update.
The word count summary appears in the Statistics area.
While working in a document, you can perform or refresh a word count by clicking the <Count> button on the Application bar.
To count words in selected text
1Select the text.
2Click Tools ` Word count.
The word count summary appears in the Statistics area.
While working in a document, you can perform or refresh a word count by clicking the <Count> button on the Application bar.
10 |
WordPerfect X3 User Guide |

Converting multiple files
The WordPerfect Office Conversion Utility lets you convert various types of files, such as files created in older versions of WordPerfect, or Microsoft Word files, to one of five WordPerfect file formats.
If you chose the standard installation of WordPerfect Office, the WordPerfect Office Conversion Utility is available by default. If the utility is not available, you can add it by modifying the installation.
For more information about using the WordPerfect Conversion Utility, see the WordPerfect Conversion Utility Help.
To install the WordPerfect Office Conversion Utility
1Close any open applications.
2On the Windows taskbar, click Start ` Settings ` Control panel.
If your operating system is Windows XP, click Settings ` Control panel.
3Double-click the Add/Remove programs icon.
4Choose WordPerfect Office X3 from the Currently installed programs list, and then click Change.
5In the InstallShield wizard, enable the Modify option, and click Next.
6In the list of features, open the WordPerfect Office X3 ` Utilities category.
7Click the icon next to the WordPerfect Conversion Utility item, and click This feature will be installed on local hard drive.
8Click Next.
9Click Install.
To convert multiple files
1On the Windows taskbar, click Start ` Programs ` WordPerfect Office X3 ` Utilities ` Conversion utility.
2Click Add.
3Choose the drive and folder in which the files you want to convert are stored. If you can’t see the files, choose All files from the File type box.
4Click Add all.
Working with files |
11 |

If you want to convert the files in the folders within the folder, enable the Include subfolders check box.
5 From the Convert to list box, choose a version of WordPerfect.
Saving documents
By default, you can save documents in WordPerfect 6/7/8/9/10/11/12/X3 format. This ensures cross-platform compatibility for documents saved in WordPerfect 6.x and later, and lets you save a document in an earlier version of WordPerfect. You can also save documents in formats other than WordPerfect, such as Microsoft Word.
WordPerfect lets you save documents in compound file format. When you save a document in compound file format, OLE compound document information is wrapped around the WordPerfect document, which lets you open the document more quickly. However, saving a document containing embedded objects in compound file format increases both the file size and the time required to open and save the file.
You can save selected text or graphics in a new WordPerfect document.
WordPerfect lets you create backup copies of documents. Creating backup copies helps prevent the loss of your work if you close a document before saving it, or if a power failure occurs.
To save a document
1Click File ` Save.
2Choose the drive and folder in which you want to save the file.
To save a file in a format other than WordPerfect, choose a file format from the File type list box.
3Type a name in the Filename box.
To embed the fonts in the document, enable the Embed fonts using TrueDoc® check box.
4Click Save.
You can also
Save changes to a document |
Click File ` Save. |
|
|
12 |
WordPerfect X3 User Guide |

You can also
Rename a file |
Right-click the file, and click Rename. Type |
|
a new name in the Filename box. |
|
|
If you have already saved the document, you will not be prompted to specify the drive, folder, and filename.
Embedding ensures that the information for all fonts used in a document is saved with the document. You may want to embed fonts if you are using an unusual font, or if you want to ensure that the font you are using is displayed properly.
A filename cannot exceed 255 characters.
You can also save a document by pressing F3 or by clicking the Save  button on the toolbar.
To save a document to a new location
1Click File ` Save as.
2From the Save in list box, choose the drive and folder in which you want to store the document.
If you want to embed the fonts in the document, enable the Embed fonts using TrueDoc check box.
3Click Save.
Embedding ensures that the information for all fonts used in a document is saved with the document. You may want to embed fonts if you are using an unusual font, or if you want to ensure that the font you are using is displayed properly.
To save selected text or a graphic in a new document
1Select the text or graphic you want to save in a new document.
2Click File ` Save.
3In the Save area, enable one of the following options:
• Selected text
Working with files |
13 |

• Selected graphic
4Click OK.
5In the Save file dialog box, choose the drive and folder in which you want to save the file.
6Type a name in the Filename box.
7Click Save.
To save a document in compound file format
1Click File ` Save as.
2Type a name in the Filename box.
3Choose WordPerfect compound file from the File type list box.
4Click Save.
If a file is password protected, WordPerfect saves OLE object information in WordPerfect format, rather than in compound file format. Saving files in WordPerfect format prevents others from using an OLE-enabled application to viewing embedded objects in a password-protected file.
To set timed document backups
1Click Tools ` Settings.
2Click Files.
3On the Document page, enable the Timed document backup every check box.
4Type a value in the minutes box.
14 |
WordPerfect X3 User Guide |
Viewing and navigating
WordPerfect lets you switch document views. You can also use Reveal Codes, which lets you quickly format long or complex documents by viewing and editing formatting codes.
In this section, you’ll learn about
•switching document views
•using Reveal Codes
Switching document views
In WordPerfect, you can view documents in four ways: draft, page, two pages, and browser preview.
In draft view, WordPerfect displays the body text of a document the way it will look when it is printed. Draft view does not display formatting such as headers, footers, and watermarks.
Page view displays a document with all of its formatting, the way it will look when it is printed.
Two pages view displays the same formatting as page view, except that two consecutive pages display side by side in the document window.
The browser preview displays a document in HTML format, suitable for an intranet or for the Web; however, WordPerfect codes with no equivalent HTML tags are either modified or deleted from the document. For more information about creating HTML documents, see “Publishing to HTML” in the online Help.
To switch the document view
•Click View, and click one of the following:
•Draft — to hide some document elements such as footers, page breaks, margins, and watermarks
Viewing and navigating |
15 |
•Page — to display the document the way it will look when printed
•Two pages — to display two consecutive pages in a document side by side
•Preview in browser — to display a document in HTML format
You can also
Switch between Preview in browser and |
Click the Change view |
button. |
Page view |
|
|
|
|
|
Display the ruler in Two pages view |
In Two pages view, click View ` Ruler. |
|
|
|
|
Using Reveal Codes
Formatting codes are inserted when you add text and formatting to a document. Reveal Codes gives you full control over document formatting, especially when copying and pasting text from various sources. For example, to remove bold formatting, you can turn on Reveal Codes, locate the <Bold> code, and then just drag it out of the Reveal Codes window. You can also double-click any code in the Reveal Codes window to make advanced alterations to the settings or styles. Codes are hidden by default; however, they can be displayed in a separate window below the active document.
This is how the text is displayed in the Reveal Codes window.
You can hide or display formatting codes. You can also customize the display of the codes; for example, you can specify the font style and color, and several other formatting options. In addition, you can print the contents of the Reveal Codes window.
For more information about printing Reveal Codes, see
To hide or display formatting codes
•Click View ` Reveal Codes.
A check mark beside Reveal Codes indicates that formatting codes are displayed.
16 |
WordPerfect X3 User Guide |

To customize the display of formatting codes
1Click Tools ` Settings.
2Click Display.
3Click the Reveal Codes tab.
4In the Format area, enable or disable any of the following check boxes:
•Wrap lines at window — to continue codes on the next line
•Show spaces as bullets — to display a bullet for each space character
•Show codes in detail — to display formatting information with codes
•Auto-display codes in Go to dialog — to display the Reveal Codes window
when a code match is found in a specific section of the document
You can also
Change the font |
Click Font, and choose a font from the Face |
|
list box. |
|
|
Change the font size |
Choose a font size from the Size list box. |
|
|
Change the font color |
In the Color area, disable the Use system |
|
colors check box. Open the Text color |
|
flyout, and click a color. |
|
|
Change the background color |
In the Color area, disable the Use system |
|
colors check box. Open the Background |
|
color flyout, and click a color. |
|
|
Use Windows system colors |
In the Color area, enable the Use system |
|
colors check box. |
|
|
Viewing and navigating |
17 |

Formatting pages
WordPerfect lets you format a document by modifying the physical arrangement of information on pages. For example, you can adjust page size and margins. You can also add columns to documents. When formatting pages, you can modify the format of an entire page or a portion of a page.
In this section, you’ll learn about
•setting page margins
•choosing page size and orientation
•customizing page sizes
•making text fit a specific number of pages
•creating and deleting columns
Setting page margins
WordPerfect lets you set margins using various methods. You can set margins by using guidelines. Guidelines are vertical or horizontal dotted lines that are displayed on pages. You can also set margins using exact measurements or the ruler.
All margin settings affect the current page and subsequent pages until you change them.
To set the margins using the margin guidelines
1Click View ` Guidelines.
2Enable the Margins check box.
3Point to one of the following guidelines:
•left vertical dotted guideline
•right vertical dotted guideline
•upper horizontal dotted guideline
•lower horizontal dotted guideline
Formatting pages |
19 |

The pointer changes to a double-sided arrow. 4 Drag the guideline to a new position.
To set the margins using exact measurements
1Click in the document where you want the margin changes to start.
2Click Format ` Margins.
3Click the Page setup tab.
4In the Document margins area, type values in any of the following boxes:
•Left — lets you specify where the left margin starts
•Right — lets you specify where the right margin starts
•Top — lets you specify where the top margin starts
•Bottom — lets you specify where the bottom margin starts
You can also
Set all margins to the last margin value |
In the Document margins area, click |
edited |
Equal. |
|
|
Set all margins to the minimum size allowed |
In the Document margins area, click |
by the current printer |
Minimum. |
|
|
You can also set margins by clicking File ` Page setup.
To set the margins using the ruler
1Point to the Margin marker  to the left or right of the ruler. The pointer changes to a double-sided arrow.
2Drag the Margin marker  to a new location on the ruler.
Choosing page size and orientation
When creating documents, you can choose the size and orientation of pages. The page size and orientation determine how a printer formats and prints pages. You can choose from preset page sizes, or you can create your own. For more information about creating custom page sizes, see “Customizing page sizes” on page 21.
20 |
WordPerfect X3 User Guide |

Page sizes are matched to the printer you have selected. A size may not be available when you change to another printer or a different computer. If the same size is not available, WordPerfect finds the best match for a page size, selecting from those available with the other printer. If the match does not work, you may need to customize a page size.
To select a preset page size
1Click File ` Page setup.
2Click the Page setup tab.
3From the Page definition list box, choose one of the following:
•Printer page types — lists all page size options for installed printers
•Standard page types — lists all page size options for most printers
4Choose a page definition from the Page definition list.
5In the Page definition applies to area, enable one of the following options:
•Current and following pages — applies the page definitions to the current and
following pages
• Current page only — applies the page definitions to the current page only
If you apply the page size definition to the current page only, WordPerfect inserts a delay code in the next page. For more information about delay codes, see “Inserting and editing delay codes” in the online Help.
To specify page orientation
1Click File ` Page setup.
2Click the Page setup tab.
3In the Orientation area, enable one of the following options:
•Portrait — prints the document on pages that have greater length than width
•Landscape — prints the document on pages that have greater width than
height
Customizing page sizes
If you require a page size that is not available in WordPerfect, you can create a custom page size. You can do this by creating a page size or modifying a preset page size. When you create a custom page size, it is added to the printer’s page size selection as a preset.
Formatting pages |
21 |

Therefore, you can apply the custom size to more than one document. If you no longer require the custom or modified page sizes, you can delete the page size or restore the default page sizes.
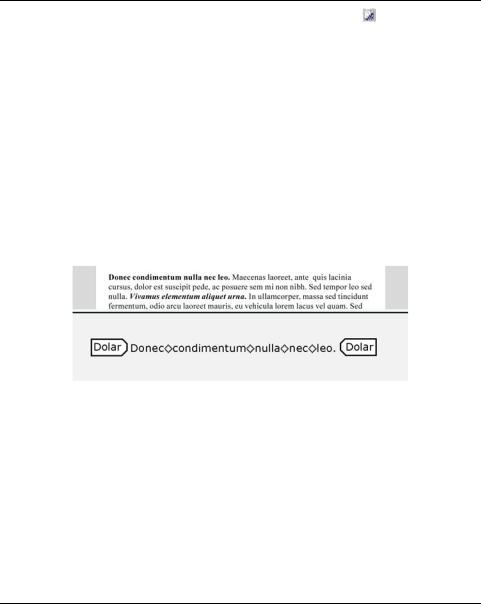
In addition, you can divide a physical page into several logical pages. Dividing pages is useful when you want to create small documents, such as pamphlets, raffle tickets, or business cards.
These are examples of how you can divide pages.
As you edit a document, each logical page is treated as a separate page. The document window also changes to show the dimensions of the logical page. After you fill a logical page, the text continues on the next logical page.
To create a custom page size
1Click File ` Page setup.
2Click the Page setup tab.
3Click Add.
4In the Add new form dialog box, type a name for the new page size in the Name box.
5Choose a predefined paper type from the Type list box.
6Choose a predefined paper size from the Size list box.
If you want to create a page size definition from a nonstandard paper size, choose
User defined size from the Size list box.
7Type values in the following boxes:
•Width
•Height
8Choose a paper source from the Source list box.
22 |
WordPerfect X3 User Guide |

You can also
Display the available page size definitions for |
In the Show page size for area, enable the |
all the installed printers |
All printers option. |
|
|
Display the available page size definitions for |
In the Show page size for area, enable the |
the printer you have selected |
Current printer only option. |
|
|
Specify a vertical printing adjustment |
In the Printing adjustment area, choose an |
|
adjustment from the Vertical list box. Type a |
|
value in the box. |
|
|
Specify a horizontal printing adjustment |
In the Printing adjustment area, choose an |
|
adjustment from the Horizontal list box. |
|
Type a value in the box. |
|
|
The paper source is not saved as part of the document. It must be redefined for each document.
All printers have a nonprintable zone. If information is formatted to print in this area, it will not print. To shift information out of the nonprintable zone, you must specify printing adjustments.
To modify a preset page size
1Click File ` Page setup.
2Click the Page setup tab.
3Choose a page definition from the Page definition list.
4Click Edit.
5Modify any of the settings.
To delete a page size
1Click File ` Page setup.
2Click the Page setup tab.
3From the Page definition list box, choose one of the following:
•Printer page types — lists all page size options for installed printers
•Standard page types — lists all page size options for most printers
4Choose a page definition from the Page definition list box.
Formatting pages |
23 |

5 Click Delete.
When you delete a page size definition, you can no longer use that definition; a document can print with a similar page definition, but it may not be an exact match.
To restore default page sizes
1Click File ` Page setup.
2Click the Page setup tab.
3From the Page definition list box, choose one of the following:
•Printer page types — lists all page size options for installed printers
•Standard page types — lists all page size options for most printers
4Click Restore.
To divide a page
1Click File ` Page setup.
2Click the Layout tab.
3In the Divide pages area, type a value in one of the following boxes:
•Columns — lets you divide a page into a specified number of columns
•Rows — lets you divide a page into a specified number of rows
Making text fit a specific number of pages
You can make selected text or all text in a document fit a specific number of pages.
To make text fit a specific number of pages
1Click in a document.
2Click Format ` Make It Fit.
3Type a value in the Desired number of pages box.
The number of pages you set must be within 50 percent of the document’s current page count.
4In the Items to adjust area, enable any of the following check boxes:
• Left margin
24 |
WordPerfect X3 User Guide |
Loading...