


 Loading...
|
|
|
USER MANUAL |
|
|
|
|
|
|
|
|
The ultimate digital sketching and painting tool™ |
|||
Copyright 1991–2003 Corel Corporation. All rights reserved. Corel® Painter™ 8 User Guide
The contents of this user guide and the associated Corel Painter software are the property of Corel Corporation and its respective licensors, and are protected by copyright. For more complete copyright information about Corel Painter, please refer to the About Corel Painter section in the Help menu of the software.
Corel, the Corel logo, Corel Painter, CorelDRAW, and Natural-Media are trademarks or registered trademarks of Corel Corporation and/or its subsidiaries in Canada, the U.S. and/or other countries. Adobe, Illustrator, Photoshop, Premiere, and PostScript are trademarks of Adobe Systems Incorporated in the United States and/or other countries. Canon is a registered trademark of Canon Inc. Cinepak is a registered trademark of Radius, Inc. EPSON Stylus is a registered trademark of Seiko Epson Corporation. Hewlett-Packard and DeskJet are registered trademarks of Hewlett Packard. Indeo is a registered trademark of Intel Corporation. JavaScript is a trademark of Sun Microsystems, Inc. Kodak is a registered trademark of Eastman Kodak Company. Mac OS, Quick Draw, and Finder are registered trademarks of Apple Computer, Inc., registered in the United States and other countries. QuickTime is a trademark used under license. QuickTime is a registered trademark of Apple Computer, Inc. in the United States and other countries. Microsoft and Windows are registered trademarks of Microsoft Corporation in the United States and/or other countries. Minolta QMS is a trademark of Minolta Co., Ltd. Netscape Navigator is a registered trademark of Netscape Communications Corporation. PANTONE® and other Pantone, Inc. trademarks are the property of Pantone, Inc. PowerPC is a registered trademark of IBM Corporation. TARGA is a registered trademark of Pinnacle Systems, Inc., registered in the U.S. and other countries. Tektronix is a registered trademark of Tektronix, Inc. Wacom, Intuos, and ToolID are trademarks or registered trademarks of Wacom Company, Ltd. Other product, font, and company names and logos may be trademarks or registered trademarks of their respective companies.

Contents
Welcome to Corel Painter 8
What’s New in Corel Painter 8? . . . . . . . 1
Redesigned User Interface . . . . . . . . . . . 1
About Your User Guide . . . . . . . . . . . . . 4
Corel Support Services . . . . . . . . . . . . . 5
The Workspace
Using the Menus and Document
Window . . . . . . . . . . . . . . . . . . . . . . . . 7
Workspace Tour . . . . . . . . . . . . . . . . . . 8
Using the Toolbox . . . . . . . . . . . . . . . . 9
Using Selectors . . . . . . . . . . . . . . . . . . 13
Using the Property Bar . . . . . . . . . . . . 14
Using the Brush Selector Bar . . . . . . . . 15
The Brush Creator . . . . . . . . . . . . . . . . 16
Working with Palettes . . . . . . . . . . . . . 16
Exploring the Palettes . . . . . . . . . . . . . 17
Setting Palette Layout . . . . . . . . . . . . . 21
Libraries and Movers . . . . . . . . . . . . . . 23
Modifying a Library . . . . . . . . . . . . . . . 26
Customizing Palettes . . . . . . . . . . . . . . 27
Creating Custom Palettes . . . . . . . . . . 28
Basics
Opening Documents . . . . . . . . . . . . . . 33
Working with Documents . . . . . . . . . . 37
Saving Files . . . . . . . . . . . . . . . . . . . . . 46
Closing Documents and Quitting
the Application . . . . . . . . . . . . . . . . . . 50
Setting Preferences . . . . . . . . . . . . . . . 50
Using Plug-ins . . . . . . . . . . . . . . . . . . . 57
Wacom Intuos Support . . . . . . . . . . . . 59
Using Textures, Patterns, and
Weaves
Using Paper Texture . . . . . . . . . . . . . . 61
Using Patterns . . . . . . . . . . . . . . . . . . 66
Using Weaves . . . . . . . . . . . . . . . . . . . 72
Color
Working with Color . . . . . . . . . . . . . . 77
Changing Paper Color . . . . . . . . . . . . . 77
The Mixer Palette . . . . . . . . . . . . . . . . 82
Using Color Sets . . . . . . . . . . . . . . . . . 85
Color Information . . . . . . . . . . . . . . . . 89
Color Variability . . . . . . . . . . . . . . . . . 89
Color Expression . . . . . . . . . . . . . . . . . 91
Annotating Colors . . . . . . . . . . . . . . . 91
Using Gradients . . . . . . . . . . . . . . . . . 93
Painting
Exploring Painting . . . . . . . . . . . . . . . . 99
Understanding Brushes . . . . . . . . . . . 100

Using a Stylus or Mouse . . . . . . . . . |
102 |
Selecting a Brush . . . . . . . . . . . . . . . |
103 |
Brush Settings . . . . . . . . . . . . . . . . . |
104 |
Where You Can Paint . . . . . . . . . . . . |
106 |
Marking the Canvas . . . . . . . . . . . . . |
106 |
Painting with Color . . . . . . . . . . . . . |
108 |
Painting with Gradients and Patterns |
112 |
Painting with Airbrushes . . . . . . . . . |
114 |
Recording and Playing Back Strokes . |
117 |
Filling Techniques . . . . . . . . . . . . . . |
118 |
Using Water Color |
|
The Water Color Layer . . . . . . . . . . . |
125 |
Working with Water Color Variants . |
126 |
Water Controls . . . . . . . . . . . . . . . . |
126 |
Digital Water Color . . . . . . . . . . . . . |
127 |
Using Liquid Ink |
|
The Liquid Ink Layer . . . . . . . . . . . . . |
131 |
Impasto |
|
The Impasto Layer . . . . . . . . . . . . . . |
135 |
Creating an Impasto Effect . . . . . . . . |
136 |
Adjusting Impasto Depth . . . . . . . . . |
136 |
Adjusting Surface Lighting . . . . . . . . |
137 |
Creating Custom Impasto Brushes . . |
138 |
Blending Impasto with Other Layers . 141 |
|
The Brush Creator |
|
Customizing Brushes . . . . . . . . . . . . |
143 |
Using the Brush Creator . . . . . . . . . . |
143 |
The Main Window . . . . . . . . . . . . . . |
144 |
Using the Randomizer . . . . . . . . . . . 146
Using the Transposer . . . . . . . . . . . . 147
Using the Stroke Designer . . . . . . . . 147
Setting Size Controls . . . . . . . . . . . . 155
Setting Spacing Controls . . . . . . . . . 158
Setting Angle Controls . . . . . . . . . . . 160
Setting Bristle Controls . . . . . . . . . . . 162
Expression Settings . . . . . . . . . . . . . 164
Setting Well Controls . . . . . . . . . . . . 165
Setting Rake Controls . . . . . . . . . . . . 167
Setting Random Controls . . . . . . . . . 169
Setting Mouse Controls . . . . . . . . . . 172
Setting Cloning Controls . . . . . . . . . 172
Setting Impasto Controls . . . . . . . . . 173
Setting Image Hose Controls . . . . . . 175
Setting Airbrush Controls . . . . . . . . . 175
Setting Water Controls . . . . . . . . . . 176
Setting Liquid Ink Controls . . . . . . . . 179
Setting Digital Water Color Controls . 182
Managing Brushes . . . . . . . . . . . . . . 183
Cloning and Tracing
Cloning Imagery . . . . . . . . . . . . . . . 187
Cloning a Document . . . . . . . . . . . . 188
Using Tracing Paper . . . . . . . . . . . . . 188
Changing Clone Source . . . . . . . . . . 190
Painting in the Clone . . . . . . . . . . . . 190
Using Auto Clone . . . . . . . . . . . . . . 191
Using Auto Van Gogh . . . . . . . . . . . 192
Point-to-Point Cloning . . . . . . . . . . . 192
Multi-Point Cloning . . . . . . . . . . . . . 193
Turning Other Brushes into Cloners . 197 |
|
Using a Selection while Cloning |
. . . . 199 |
Repeating Source Imagery . . . . |
. . . . 201 |
Filling with Transformed Cloning |
. . . 201 |
Using Selections |
|
Working with Selections . . . . . |
. . . . 203 |
Creating Selections . . . . . . . . . |
. . . . 206 |
Converting Selections to and from |
|
Shapes . . . . . . . . . . . . . . . . . . |
. . . . 210 |
Saving Selections . . . . . . . . . . . |
. . . . 210 |
Loading Selections . . . . . . . . . . |
. . . . 211 |
Combining Selections Using |
|
Boolean Operations . . . . . . . . . |
. . . . 212 |
Transforming Selections . . . . . . |
. . . . 214 |
Editing Path-Based Selections . . . |
. . . 214 |
Using the Selection Portfolio . . . |
. . . 217 |
Using Alpha Channels |
|
Understanding Alpha Channels |
. . . . 219 |
Creating Channels . . . . . . . . . . . |
. . . 220 |
Managing Channels . . . . . . . . . . |
. . . 222 |
Editing Channels . . . . . . . . . . . . |
. . . 225 |
Using Layers and Layer Masks |
|
Layer Basics . . . . . . . . . . . . . . . . |
. . . 230 |
Working with Layers . . . . . . . . . |
. . . 231 |
Creating Layers . . . . . . . . . . . . . |
. . . 232 |
Saving Files Containing Layers . . . . . 234 |
|
Deleting Layers . . . . . . . . . . . . . |
. . . 235 |
Managing Layers . . . . . . . . . . . . |
. . . 235 |
Editing Layers . . . . . . . . . . . . . . |
. . . 240 |
ii |
Table of contents |

Changing Layer Characteristics . . . . . 248 Using the Image Portfolio . . . . . . . . . 254 Working with Layer Masks . . . . . . . . 255
Using Image Effects
Basics of Applying Effects . . . . . . . . . 259
Third-party Plug-ins . . . . . . . . . . . . . 261
Orientation Effects . . . . . . . . . . . . . . 262
Correct Colors . . . . . . . . . . . . . . . . . 264
Other Tonal Control Effects . . . . . . . 268
Apply Lighting . . . . . . . . . . . . . . . . . 274
Apply Surface Texture . . . . . . . . . . . . 277
Other Surface Control Effects . . . . . . 286
Focus Effects . . . . . . . . . . . . . . . . . . 294
Esoterica Effects . . . . . . . . . . . . . . . . 299
Objects Effects . . . . . . . . . . . . . . . . . 312
Using Dynamic Plug-ins
Dynamic Plug-in Basics . . . . . . . . . . . 313
Brightness/Contrast . . . . . . . . . . . . . 315
Burn . . . . . . . . . . . . . . . . . . . . . . . . . 316
Tear . . . . . . . . . . . . . . . . . . . . . . . . . 317
Bevel World . . . . . . . . . . . . . . . . . . . 317
Equalize . . . . . . . . . . . . . . . . . . . . . . 319
Glass Distortion . . . . . . . . . . . . . . . . 320
Kaleidoscope . . . . . . . . . . . . . . . . . . 321
Liquid Lens . . . . . . . . . . . . . . . . . . . . 322
Liquid Metal . . . . . . . . . . . . . . . . . . . 326
Posterize . . . . . . . . . . . . . . . . . . . . . 331
The Image Hose
How it Works . . . . . . . . . . . . . . . . . . 334
Using the Image Hose . . . . . . . . . . . 334 Controlling the Image Hose . . . . . . . 336 Indexing . . . . . . . . . . . . . . . . . . . . . . 337 Creating Nozzles for the Image Hose 340 Nozzle Libraries . . . . . . . . . . . . . . . . 347 Creating a Nozzle from a Movie . . . . 347
Mosaics
Getting Started with Mosaics . . . . . . 351 Tile Settings . . . . . . . . . . . . . . . . . . . 354 Working with Mosaics . . . . . . . . . . . 356 Mosaic Commands . . . . . . . . . . . . . . 357 Working with Tessellation Mosaics . . 360
Image Maps . . . . . . . . . . . . . . . . . . . 406 Creating GIF Files . . . . . . . . . . . . . . . 409 Using Web-Safe Colors . . . . . . . . . . . 411 Brushes for the Web . . . . . . . . . . . . . 412
Scripting
Understanding Scripting . . . . . . . . . . 415
How Scripts Work . . . . . . . . . . . . . . . 416
The Scripts Palette . . . . . . . . . . . . . . 416
Recording Scripts . . . . . . . . . . . . . . . 417
Playing Scripts . . . . . . . . . . . . . . . . . 418
Editing Scripts . . . . . . . . . . . . . . . . . 419
Scripts and Movies . . . . . . . . . . . . . . 420
Using Shapes
About Shapes . . . . . . . . . . . . . . . . . . 365 Creating Shapes . . . . . . . . . . . . . . . . 368 Setting Shape Attributes . . . . . . . . . . 372 Editing Shapes . . . . . . . . . . . . . . . . . 373 Working with Shapes . . . . . . . . . . . . 378
Working with Text
The Text Layer . . . . . . . . . . . . . . . . . 385 Applying Effects to Text . . . . . . . . . . 386 Exporting Text . . . . . . . . . . . . . . . . . 390
The Web
Features for the Web . . . . . . . . . . . . 393
Creating Web Page Backgrounds . . . 393
Creating Web Buttons . . . . . . . . . . . 396
Using the Image Slicer . . . . . . . . . . . 397
Creating Rollovers . . . . . . . . . . . . . . . 403
Animation and Video
Creating Animations and Video . . . . 423 The Frame Stacks Palette . . . . . . . . . 424 Creating a Movie . . . . . . . . . . . . . . . 425 Modifying a Movie . . . . . . . . . . . . . . 429 Animation Considerations . . . . . . . . . 430 Combining Movies . . . . . . . . . . . . . . 431 Rotoscoping . . . . . . . . . . . . . . . . . . . 432 Saving and Exporting Movies . . . . . . 438 Animations for the World Wide Web 442
Printing
Understanding Printing . . . . . . . . . . . 445 Setting Up Printing . . . . . . . . . . . . . . 446 Printing an Image . . . . . . . . . . . . . . . 447 Color Management . . . . . . . . . . . . . 447 The Color Management Dialog Box . . 448 Options for Files Saved as Encapsulated
Corel Painter |
iii |

PostScript (EPS) . . . . . . . . . . . . . . . . |
454 |
Keyboard Shortcuts
Toolbox Commands . . . . . . . . . . . . . 456
Palette Commands . . . . . . . . . . . . . 457
File Menu Commands . . . . . . . . . . . 457
Edit Menu Commands . . . . . . . . . . . 457
Canvas Menu Commands . . . . . . . . 458
Effects Menu Commands . . . . . . . . . 458
Select Menu Commands . . . . . . . . . 458
Shapes Menu Commands . . . . . . . . 458
Window Menu Commands . . . . . . . 459
Screen Navigation . . . . . . . . . . . . . . 459
Palette Navigation . . . . . . . . . . . . . . 459
Brush Tools . . . . . . . . . . . . . . . . . . . 459
Selection Tools . . . . . . . . . . . . . . . . 460
Adjuster Tools . . . . . . . . . . . . . . . . . 461
Shape Tools . . . . . . . . . . . . . . . . . . . 462
Animation . . . . . . . . . . . . . . . . . . . . 463
Lighting . . . . . . . . . . . . . . . . . . . . . . 463
Layer Section Tools . . . . . . . . . . . . . 463
Mosaics . . . . . . . . . . . . . . . . . . . . . . 464
iv |
Table of contents |

1 Welcome to Corel Painter 8
Corel® Painter™ 8 is the leading Natural-Media® painting application. Corel Painter lets you simulate a wide range of art tools, from felt pens, charcoal, and colored pencils to water color and oils.
What’s New in Corel Painter 8?
Corel Painter lets you experiment with the widest range of Natural-Media tools. You can expand your digital drawing and painting techniques with a portfolio of new features.
Corel Painter features a redesigned user interface, including a new toolbox, Brush selector bar, property bar, Info palette, and new palette design and behavior.
Corel Painter also includes a Mixer palette that realistically mimics the traditional paint mixing experience.
Digital water color, a new Sketch effect, and more than 400 new brushes all expand your creative potential.
You can create custom brush variants using the new Brush Creator, which includes the Randomizer, Transposer, and Stroke Designer. Corel Painter also includes redesigned layer masks and channels that provide a smoother workflow and greater compatibility with Adobe® Photoshop®.
Redesigned User Interface
Corel Painter features a redesigned user interface, which is based on the following new elements.
Toolbox
The toolbox has been redesigned vertically and, by default, is docked to the top-left corner of the document window. The toolbox lets you access the tools in Corel Painter, as well as

the primary and secondary colors, and provides easy access to the Paper, Pattern, Gradient, Nozzle, Weave, and Brush Look libraries.
The toolbox can be undocked and moved anywhere inside the application window, or it can be turned off.
Property Bar
The property bar replaces the Controls palette. The property bar is context-sensitive depending on which tool is selected, providing commonly used controls for each tool.
The property bar is docked below the menu bar by default, but it can be undocked and moved to any location in the document window, or turned off.
Brush Selector
The Brush Selector lets you choose a brush category, using the Brush Category picker, and a brush variant, using the Brush Variant picker. The name of the selected brush category
and variant is displayed on the right side of the Brush Selector. You have the option to view the categories and variants by a thumbnail or list view.
The Brush Selector is docked, by default, to the top-right corner of the document window, beside the property bar. It can be undocked and moved to any location in the document window, or it can be turned off.
Palettes
The palettes have been redesigned for this version of Corel Painter, and they include the following new features:
•Group/Ungroup — You can group and ungroup palettes by dragging them together or apart to create any combination of palettes.
•Resizeable — You can increase or decrease the size of list palettes, such as the Layers, Channels, and Scripts palettes.
Info Palette
The new Info palette provides access to the following information:
•Image size preview
•Document information, such as width and height
•X and Y coordinates and the cursor position
•Context-sensitive information based on the selected tool. For example, if the Eyedropper tool is selected, the HSV and RGB information is displayed.
•Unit information, such as pixels, inches, and resolution
Mixer Palette
The new Mixer palette lets you mix colors interactively. The Mixer palette contains a Brush tool and a Palette Knife tool for applying and mixing colors, mimicking the traditional experience of mixing two or more colors on a palette.
2 |
Welcome to Corel Painter 8 |

The Mixer palette also includes an Eyedropper tool for sampling specially mixed colors from imagery, as well as Zoom and Pan tools for easy navigation in the palette. You can choose to save your Mixer palette settings for future use, and you can create a custom color set from the colors in the Mixer palette.
Digital Water Color
Digital Water Color is a simple, transparent medium that is ideal for hand painting line drawings, touching up photographs, or creating simple water color washes.
Sketch Effect
The new Sketch effect in Corel Painter lets you convert images or photographs to simple pencil drawings, while providing controls for the amount of paper grain being applied, the heaviness of the pencil line, and the desired level of detail.
New Brush Variants
Corel Painter includes over 400 new Brush variants. New brushes are included in the following categories:
•Acrylics
•Airbrushes
•Artists
•Blenders
•Calligraphy Pens
•Chalks
•Charcoals
•Colored Pencils
•Conte
•Crayons
•Digital Water Color
•Distortion
•Erasers
•Felt Pens
•F-X
•Gouache
•Image Hose
•Liquid Ink
•Oil Pastels
•Oils
•Palette Knives
•Pastels
•Pattern Pens
•Pencils
•Pens
•Photo
•Sponges
•Sumi-e
•Tinting
•Water Colors
Brush Creator
Corel Painter features a Brush Creator, which is designed to make the brush variant creation process easy and fun. The Brush Creator includes three key features:
•Randomizer — The Randomizer lets you choose an existing brush variant and randomize its properties to create a new variant. You can set the amount of randomization to determine how much of the original brush’s
Corel Painter |
3 |
properties remain—a low amount will result in variants that are very similar to the original, while a high amount will result in variants that are radically different. To help you visualize how the new brush variants will look, the Randomizer provides a brush stroke preview of each new variant.
•Transposer — The Transposer lets you change the properties of one brush variant using the properties of another. For example, you can choose the 2B Pencil and create brush variants that are mutated toward another variant, such as Charcoal. To help you visualize how the new brush variants will look, the Transposer provides a brush stroke preview of each new variant.
•Stroke Designer — The Stroke Designer lets you modify the properties of brush variants using advanced controls. The Stroke Designer has 16 different sets of controls: General, Size, Spacing, Angle, Bristle, Well, Rake,
Random, Mouse, Cloning, Impasto, Image Hose, Airbrush, Water, Digital Water, and Liquid Ink. To make the brush creation process more visual and interactive, the Stroke Designer includes a live preview that updates each time you make changes to the brush variant.
Industry-Standard Masks,
Layer Masks, and Channels
Layer Masks: The redesigned layer masks let you hide and reveal areas of layers without making permanent changes to an image.
Channels: The Channels palette lets you use alpha channels to create and store masks to modify, separate, and preserve specific areas of an image.
And So Much More...
•Thumbnail previews for Layers, Layer Masks, and Channels
•Brush cursor preview that lets you see the size of the brush you’re painting with
•Enhanced keyboard shortcuts to make it easier to transition between Corel Painter and other applications
•Enhanced file compatibility with Adobe Photoshop
•New paper textures, patterns, Image Hose nozzles, brush looks, gradients, and more!
•Extra content CD, including 100 pictures from http://www.brandxpictures.com, hundreds of brushes, paper textures, and more!
About Your User Guide
You can find answers to most of your questions in the Corel® Painter™ User Guide. It provides information you need to get the most out of Corel Painter.
The Corel Painter User Guide is for both the Mac OS® and Windows® platforms. As a convention, Mac OS commands precede Windows commands in the text.
4 |
Welcome to Corel Painter 8 |

When a modifier key differs between the Mac OS and Windows, the Mac OS modifier is listed first, followed by the Windows modifier. For example,
Command + I (Mac OS) or Ctrl + I
(Windows) means that Mac OS users would press Command + I and Windows users would press Ctrl + I.
Choosing a menu item from a menu follows the convention “Choose menu name > menu item.” For simplicity, the term “folder” refers to directories as well as folders. The Corel Painter interface for Mac OS and Windows platforms is identical, unless otherwise specified.
Registering Products
Registering products is important. Registration provides you with timely access to the latest product updates, valuable information about product releases, and access to free downloads, articles, tips and tricks, and special offers.
You can register a Corel product
•online—follow the instructions provided on the Corel Web site
•by mail—send the product registration card to the Corel Customer Service Center nearest you
•during installation—follow the instructions provided by the product setup
Corel Support Services
Corel Support Services can provide you with prompt and accurate information about product features, specifications, pricing, availability, services, and technical support. For the most current information on support services available for your Corel product, please visit www.corel.com/support.
Corel Painter |
5 |
2 The Workspace
The Corel Painter workspace has been designed to give you easy access to tools, effects, commands, and features.
The workspace is organized across a series of menus, selectors, and interactive palettes. Some features are also available in the frame of the document window.
Using the Menus and Document Window
Using the commands on the Corel Painter menu bar, you can:
•work with files and editing commands
•adjust and apply effects
•perform selection operations, work with shapes, and create animations
•control the document window or the Corel Painter workspace
The document window lets you access the following features with the click of a button:
•tracing paper
•grid
•color correction
•impasto effect
•drawing mode
•navigation
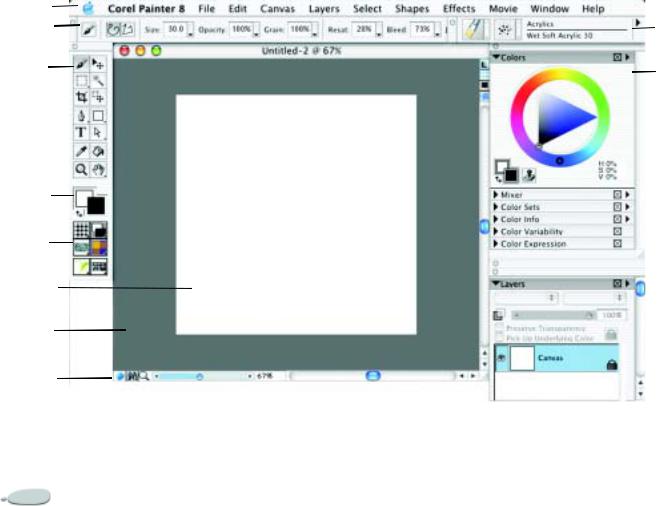
Workspace Tour
Menu bar
Property bar
Toolbox
Color
Selection box
Content selectors
Canvas
Document window
Drawing mode icon
|
|
|
|
Navigation |
Zoom slider |
||
icon |
|
|
|
Brush selector
Colors palette
Layers  palette
8 |
The Workspace |
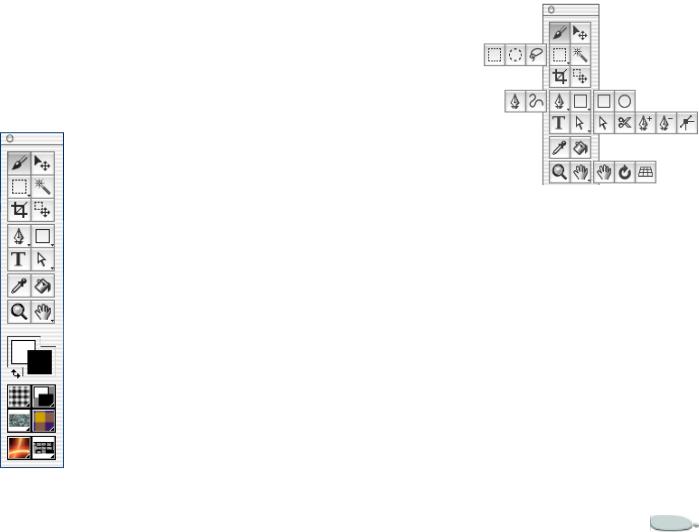
Using the Toolbox
In the toolbox, there are tools to make marks, draw shapes, fill shapes with color, view and navigate, and make selections. There are also six selectors that let you choose papers, gradients, patterns, weaves, looks, and nozzles.
The toolbox.
Some tools of similar function share a space in the toolbox. The button for only one of these tools is displayed at a time. Any tool that has a triangle in the bottom-right corner has one or more tools underneath it in a flyout menu.
The toolbox is open by default; however, it can be closed. You can move the toolbox around the document window, and you can dock the toolbox to the document window or to other palettes.
The current tool can be modified by options on the property bar, which change as you change tools. For more information, see “Using the Property Bar” on page 14.
To access tools grouped in flyout menus:
1In the toolbox, hold down the tool icon whose flyout menu you want to open.
2Choose the tool you want to use.
Some tools share a space in the toolbox. Hold down the tool button that’s displayed to open the flyout menu.
To close the toolbox
•Do one of the following:
•Click the Close button in the top corner of the toolbox.
•Choose Window menu > Hide Toolbox.
To open the toolbox, choose
Window menu > Show Toolbox.
To move the toolbox
1Place the cursor over the title bar of the toolbox.
Corel Painter |
9 |
2Drag the toolbox to a new location in the document window.
To dock the toolbox
1Place the cursor over the title bar of the toolbox.
2Drag the toolbox to the edge of the document window or a palette.
3When the toolbox lines up with the edge of the document window or palette, release the mouse button.
The toolbox will snap into place.
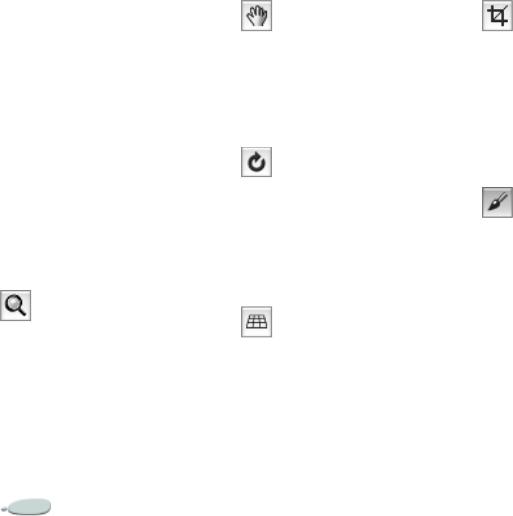
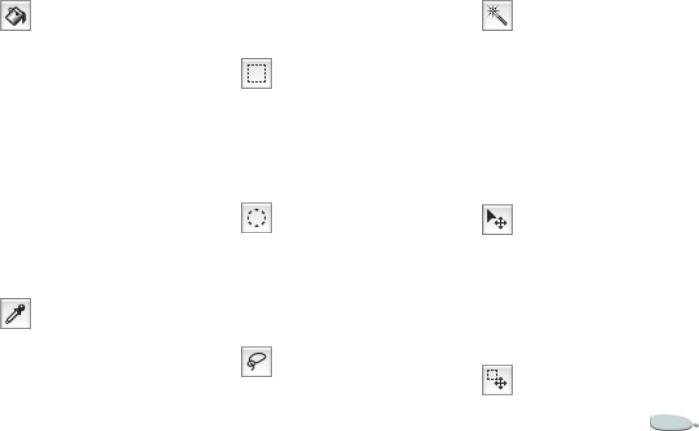
Navigation and Utility Tools
The Magnifier Tool
You can use the Magnifier tool to magnify areas of an image when you are performing detailed work, or to reduce areas to get an overall view of an image. For more information, see “Zooming” on page 37.
The Grabber Tool |
The Crop Tool |
The Grabber tool gives you a quick way to scroll an image. For more information, see “Repositioning Documents” on page 39.
The Rotate Page Tool
The Rotate Page tool lets you rotate an image window to accommodate the way you draw naturally. Refer to “Rotating Documents” on page 39 for more information.
The Perspective Grid Adjuster Tool
The Perspective Grid Adjuster tool lets you select and move the location of the perspective grid lines, the vanishing point, the horizon line, the ground line, and the picture plane. See “Using the Perspective Grid” on page 45 for more information.
The Crop tool lets you remove unwanted edges from the image. For more information, see “Cropping Images” on page 40.
Tools that Apply Color
The Brush Tool
You use the Brush tool to make marks on the Canvas or a layer. The Brush tool represents a category of marking tools. Within the Brush category are pencils, pens, chalk, an airbrush, oil paints, water colors and more.
When the Brush tool is selected, you can choose specific brushes from the Brush selector bar. For more information about selecting brushes and tools, refer to “Selecting a Brush” on page 103.
10 |
The Workspace |
You can set opacity, grain, and drawing style (freehand strokes or straight line strokes) on the property bar.
The Paint Bucket Tool
The Paint Bucket tool lets you fill an area. The property bar shows choices for what area to fill and what to fill it with. The Color Tolerance and Color Feather values let you control the extent of fill and opacity in neighboring areas. You can also choose to anti-alias a fill.
Double-click the Paint Bucket tool to specify what color in the image to lock out of your fill. For more information on the Paint Bucket tool, refer to “Filling Techniques” on page 118.
The Dropper Tool
The Dropper tool lets you pick up a color from an existing image. The property bar shows you values for the
color. When you select a color with the Dropper tool, that color becomes the current color on the Colors palette.
For more information, see “Sampling Colors from Imagery” on page 80.
The Selection Tools
The Rectangular Selection Tool
You use the Rectangular Selection tool to create rectangular selections. Refer to “Using Selection Tools” on
page 206 for more information.
The Oval Selection Tool
You use the Oval Selection tool to create oval selections. Refer to “Using Selection Tools” on page 206 for more information.
The Lasso Tool
The Lasso tool lets you draw a freehand selection. Refer to “Using Selection Tools” on page 206 for more information.
The Magic Wand Tool
The Magic Wand tool lets you click or drag in the image to select an area of similar color. Refer to “Using the Magic Wand” on page 207 for more information.
The Adjuster Tools
The Layer Adjuster Tool
The Layer Adjuster tool is used to select, move and manipulate layers. Refer to “Using Layers and Layer Masks” on page 229 for more information.
The Selection Adjuster Tool
Corel Painter |
11 |
The Selection Adjuster tool lets you select, move, and manipulate selections created with the Rectangular, Oval, and Lasso selection tools and those converted from Shapes.
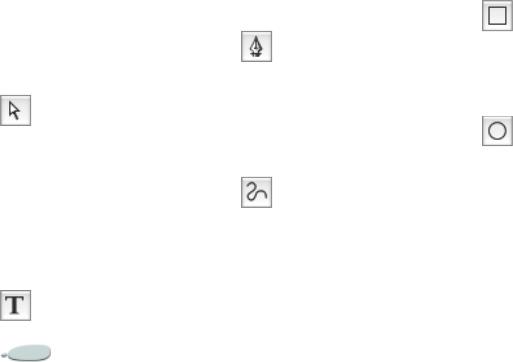
The Shape Tools
Corel Painter creates all shapes by using Bézier curves. Every shape you create automatically becomes a separate layer in the document. Shapes are listed on the Layers palette.
The Shape Selection Tool
The Shape Selection tool is for editing Bézier curves (shape paths). You use the Shape Selection tool to select and move anchor points and to adjust their control handles. Refer to “Working with Shapes” on page 378 for more information.
The Text Tool
The Text tool creates text shapes. Use the Text palette to set the font, point size, and tracking. For more information, see “Working with Text” on page 385.
The Shape Design Tools
You use the Pen tool and the Quick Curve tool to draw shapes.
The Pen Tool
The Pen tool lets you create straight lines and curves in shape objects. For more information, see “Using Shapes” on page 365.
The Quick Curve Tool
The Quick Curve tool lets you create shape paths by drawing freehand curves. For more information, see “Using Shapes” on page 365.
The Shape Objects Tools
The Shapes Objects tools create rectangular or oval shapes. When you create a shape, the details are displayed on the property bar.
For more information, see “Creating Shapes” on page 368.
The Rectangular Shape Tool
You use the Rectangular Shape tool to create rectangular shape objects.
The Oval Shape Tool
You use the Oval Shape tool to create oval shape objects.
The Shape Edit Tools
The Shape Edit tools allow you to manipulate existing shapes. For more information, see “Editing Shapes” on page 373.
12 |
The Workspace |
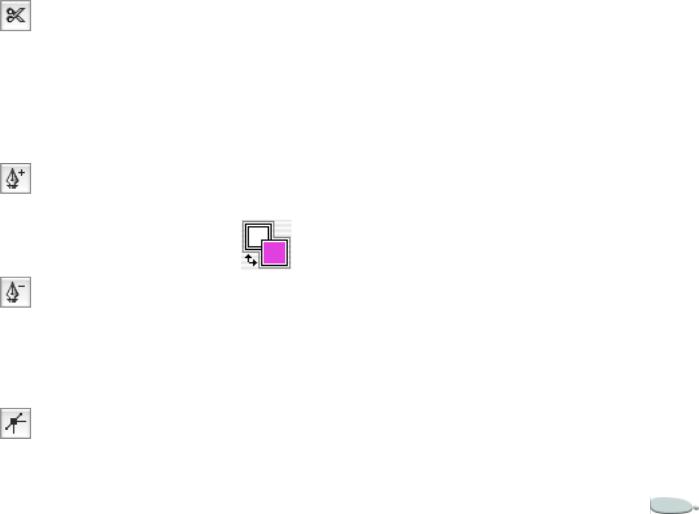
The Scissors Tool
You use the Scissors tool to cut an open or closed segment. If the segment is closed, once you click on a line or point to cut the shape path, the shape path becomes open.
The Add Point Tool
You use the Add Point tool to create a new anchor point on a shape path.
The Remove Point Tool
You use the Remove Point tool to remove an anchor point from a shape path.
The Convert Point Tool
The Convert Point tool is used to convert between smooth and corner anchor points.
The Color Selection Box
The Color Selection box lets you choose primary and secondary colors. The front rectangle displays the primary color, and the back rectangle displays the secondary color. For more information, refer to “Understanding Primary and Secondary Colors” on page 79.
The Color Selection box.
To change the primary or secondary color:
1Double-click the primary or secondary color rectangle.
2Choose a color from the Color dialog box.
Using Selectors
The selectors in the toolbox give you quick access to the libraries for the following Corel Painter elements: papers, gradients, patterns, weaves, looks, and nozzles.
You can display items in selectors as thumbnails or in a list. You can also access commands from each selector menu. If the command you want is not available, you can display the entire palette that corresponds to the selector.
To open a selector:
1Click the flyout menu arrow on the bottom-right corner of the selector you want to open.
2Choose an item from the list.
To display items as thumbnails or in a list:
1Click the flyout menu arrow on the bottom-right corner of the selector you want to open.
2Click the selector menu arrow, and choose List or Thumbnails.
Corel Painter |
13 |
To access selector menu commands:
1Click the flyout menu arrow on the bottom-right corner of the selector you want to open.
2Click the selector menu arrow, and choose a command.
To display a selector’s palette
1Click the flyout menu arrow on the bottom-right corner of the selector you want to open.
2Click the selector menu arrow, and choose Launch Palette.
Note
• This command is not available from the Look and Nozzle selectors.
Using the Property Bar
The property bar in Corel Painter is context-sensitive — it changes according to the tool you are using.
You can access settings and options for each tool, and you can change them according to your preferences using the boxes or pop-up sliders. Tool settings are retained when you switch
from one tool to another. You can also use the property bar to restore the default settings of the selected tool.
The property bar is docked horizontally to the menu bar by default. You can move the property bar anywhere in the document window, dock it under the menu bar again, or close it.
The property bar for the Rectangular Selection tool.
To access tool settings on the property bar:
•Choose a tool from the toolbox.
Tool settings are displayed on the property bar.
To change tool settings on the property bar:
1Choose a tool from the toolbox.
2Do any of the following:
•Type a value in the box next to the control, or click the arrow next to the control and adjust the pop-up slider.
•Enable or disable the check box next to the option you want to use.
Note
• Not all of these options are available for every tool. The settings change depending on the tool selected.
To reset the default tool settings:
•Click the Reset Tool button on the property bar.
Note
• The Reset Tool button on the property bar has the same icon as the selected tool in the toolbox.
To move the property bar:
•Point to the bar on the right side of the property bar, and drag it to its new location.
To dock the property bar:
•Point to the title bar of the property bar, and drag it under the menu bar.
The property bar snaps into place.
14 |
The Workspace |
To close the property bar:
•Do one of the following:
•Choose Window menu > Hide Property Bar.
•If the property bar is undocked, click the close button on the title bar.
Tip
• To show the property bar, choose Window menu > Show Property Bar.
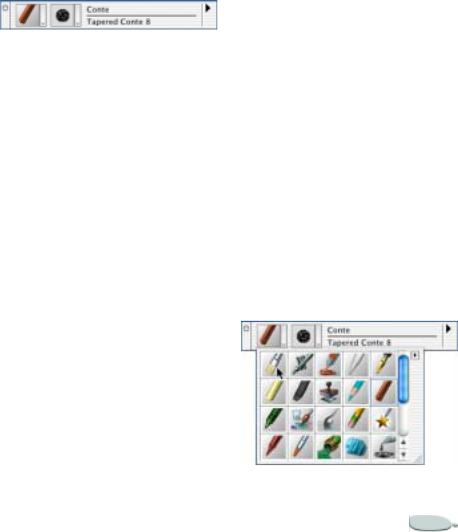
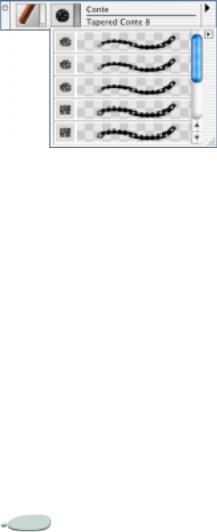
Using the Brush Selector Bar
The Brush selector bar lets you choose from a variety of brush categories and variants. Brush categories are groups of similar brushes and media. Brush variants are specific brushes and brush settings within a brush category.
The name of the selected brush category appears at the top of the Brush selector bar. The name of the selected brush variant appears under the brush category name.
The Brush selector bar.
To display the Brush selector bar:
•Choose Window menu > Show Brush Selector Bar.
To choose a brush from the Brush selector bar:
1On the Brush selector bar, click the Brush Category arrow and choose a brush category.
2Click the Brush Variant arrow, and choose a variant.
Previewing Brushes
The Brush Category selector shows you a preview of the currently selected brush category and lets you choose a new brush category. The Brush Variant selector does the same for brush variants.
You can preview brush categories and variants as thumbnails or in list format. Brush variants can also be previewed as brush strokes. The
Stroke view shows you both the dab type and brush stroke of the selected brush variant.
To display brush categories and variants as thumbnails or lists:
1On the Brush selector bar, click the Brush Category or Brush Variant arrow.
2Click the selector menu arrow, and choose List or Thumbnails.
If you’re displaying brush variants, you can also choose the Stroke view.
Note
• The Stroke view is available only on the Brush Variant selector menu.
Items in the Brush selector bar can be displayed as thumbnails.
Corel Painter |
15 |
The Stroke view is available for brush variants.
Brush Selector Bar Menu
Commands
The Brush selector bar menu commands are used for creating and loading brushes, working with brush variants, and manipulating brush strokes. For more information, see “Managing Brushes” on page 183.
Moving and Docking the
Brush Selector Bar
The Brush selector bar is displayed at the top-right of the property bar by default. It can be moved to a new location in the document window, or it can be docked to the edge of the document window or other palettes.
To move the Brush selector bar
•Point to the title bar of the Brush selector bar, and drag it to its new location.
To dock the Brush selector bar
1Point to the title bar of the Brush selector bar, and drag it to the edge of the document window or a palette.
2When the Brush selector bar is lined up with the edge of the document window or palette, release the mouse button.
The Brush selector bar snaps into place.
Closing the Brush Selector
Bar
You can close the Brush selector bar to hide it from view.
To close the Brush selector bar
•Do one of the following:
•Choose Window menu > Hide Brush Selector Bar.
•If the Brush selector bar is undocked, click the close button on the title bar.
The Brush Creator
The Brush Creator is designed to make the brush variant creation process easy and fun. You can use the Randomizer to create random brush variants, the Transposer to blend two brush variants, and the Stroke Designer to adjust the settings of brush variants. For more information, see “The Brush Creator” on page 143.
To open the Brush Creator
•Do one of the following:
•Choose Window menu > Brush Creator.
•Press Command + B (Mac OS) or Ctrl + B (Windows).
Working with Palettes
The interactive palettes in Corel Painter let you access the commands, controls, and settings available when creating documents.
16 |
The Workspace |

Showing and Hiding Palettes
You can show or hide a palette by choosing its name from the Window menu, from a selector, or by using the key combination shown on the Window menu.
To show or hide a palette:
•Do one of the following:
•Choose Window menu, and choose the palette you want to show or hide.
•Choose a selector from the toolbox, click the selector menu arrow, and choose Launch Palette.
•Use the keyboard shortcut for the palette you want to show or hide:
Press Command (Mac OS) or Ctrl (Windows) +
1 = Colors
2 = Mixer
3 = Color Sets
4 = Layers
5 = Channels
6 = Text
7 = Info
8 = Gradients
9 = Patterns
Tip
• You can also hide a palette by clicking the close box on the palette title bar.
To show or hide all palettes:
•Choose Window menu > Show/ Hide Palettes.
Exploring the Palettes
As you work with Corel Painter, you’ll use the following groups of palettes.
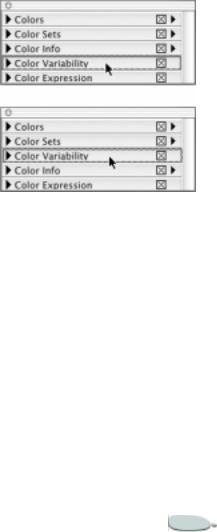
The Color Palettes
•The Colors palette lets you choose primary and secondary colors for painting in Corel Painter documents. You can also use the Clone Color option on the Colors palette. For more information, see “Working with Color” on page 77.
•The Mixer palette lets you mix and blend colors as you would on an artist’s palette. It contains its own set of tools. For more information,
see “The Mixer Palette” on page 82.
•The Color Sets palette displays the colors in the current color set. You use color sets to organize groups of colors. Some color sets are organized by both name and color relationship. For more information, refer to “Using Color Sets” on page 85.
•The Color Info palette contains color information for the selected color, in HSV or RGB values. You can also use the Clone Color option with this palette. For more information, see “Color Information” on page 89.
•The Color Variability palette contains sliders to adjust color variability values. For more information, see “Color Variability” on page 89.
•The Color Expression palette lets you determine how colors are expressed in Corel Painter documents. For more information, refer to “Color Expression” on page 91.
Corel Painter |
17 |

The Papers, Gradients,
Patterns, and Weaves
Palettes
•The Papers palette lets you choose and edit paper textures for your document. You can preview paper textures as thumbnails or in a list, and see a thumbnail preview of the selected paper. For more information, see “Using Paper Texture” on page 61 and “Choosing Paper Textures” on page 63.
•The Gradients palette lets you choose and edit gradients that can be applied to Corel Painter documents. You can preview gradients as thumbnails or in a list, and see a thumbnail preview of the selected gradient. For more information, see “Using Gradients” on page 93.
•The Patterns palette lets you choose and edit patterns. You can preview patterns as thumbnails or in a list, and see a thumbnail preview of the selected pattern. For
more information, refer to “Using Patterns” on page 66.
•The Weaves palette lets you choose and edit weaves. You can preview weaves as thumbnails or in a list, and see a thumbnail preview of the selected weave. For more information, see “Using Weaves” on page 72.
The Layers and Channels
Palettes
•The Layers palette contains thumbnail previews of all the layers in a Corel Painter document. You can use the buttons on the Layers palette to arrange layers, use plug-ins, add new layers (including Water Color and Liquid Ink layers), create layer masks, and delete layers. You can also set the composite method and depth, adjust the opacity, and lock and unlock layers. For more information, see “Using Layers and Layer Masks” on page 229.
•The Channels palette contains thumbnail previews of all the
channels in a Corel Painter document, including RGB composite channels, layer masks, and Alpha channels. The buttons on the palette can be used to load, save, and invert existing channels, and to create new channels. For more information, see “Using Alpha Channels” on page 219.
The Text and Scripts Palettes
•The Text palette lets you perform all tasks relating to text in a Corel Painter document, such as choosing fonts, adjusting opacity, and applying drop shadows. For more information, refer to “Working with Text” on page 385.
•The Scripts palette gives you access to all commands and settings relating to scripts. For example, you can open, close, play, and record scripts from the Scripts palette. For more information, see “Scripting” on page 415.
18 |
The Workspace |
The Image Portfolio and
Selection Portfolio Palettes
•The Image Portfolio contains all of the images in the current image library. You can view the images as thumbnails or in a list, as well as a thumbnail preview of the current image. For more information, see “Using the Image Portfolio” on page 254.
•The Selection Portfolio contains all of the selections in the current selection library. You can view the images as thumbnails or in a list, as well as a thumbnail preview of the current selection. For more information, see “Using the Selection Portfolio” on page 217.
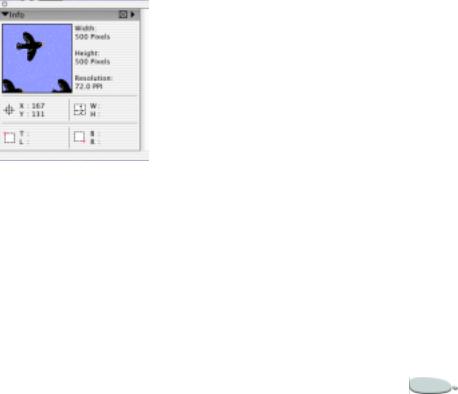
The Info Palette
The new Info palette provides you with an image preview; document information, such as width and height; X and Y coordinates and the cursor position; context-sensitive information based on the selected tool; and unit information, such as pixels, inches, and resolution.
You can choose to view a canvas preview, which shows you the contents of the canvas, or a page layout preview, which shows you the entire document. You can also choose how RGB values will display on the Info palette — as actual values, a percentage of the values, or as hexadecimal values.
The Info palette.
To choose an image preview style on the Info palette:
•On the Info palette, click the palette menu arrow, and choose Canvas Preview or Page Layout Preview.
To choose how RGB values will display on the Info palette:
1On the Info palette, click the palette menu arrow, and choose Display RGB Values As.
2Choose an option from the list.
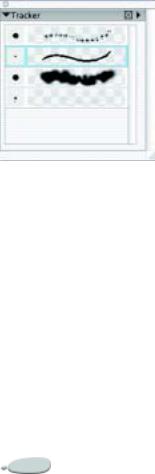
The Tracker Palette
The Tracker palette temporarily stores brush categories, variants, and dab types when you apply brush strokes to the canvas. Each time you use a new brush, the variant is saved in the Tracker palette. You can return to a brush variant you like by choosing it from the Tracker palette.
You can view the brush variants stored in the Tracker palette as thumbnail images, in a list, or as strokes. The Tracker palette can be resized to display more or fewer brush variants; however, it will only store up to 25 variants at a time.
You can clear selected brush variants, clear all brush variants, and save brush variants using the Tracker
Corel Painter |
19 |
palette. Brush variants are stored even after the document you were working on has been closed.
The Tracker palette.
To choose a brush variant from the Tracker palette:
•Click the brush variant you want to use.
To view brush variants in the Tracker palette:
•On the Tracker palette, click the palette menu arrow, and choose List, Thumbnails, or Stroke.
To resize the Tracker palette:
•Point to the resize handle in the bottom-right corner of the palette, and drag to make the palette larger or smaller.
The number of variants displayed varies according to the size of the palette.
To clear a selected brush variant from the Tracker palette:
1On the Tracker palette, click the brush variant you want to remove.
2Click the palette menu arrow, and choose Clear Selected.
To clear all brush variants from the Tracker palette:
•On the Tracker palette, click the palette menu arrow, and choose Clear All.
To save a brush variant on the Tracker palette:
1On the Tracker palette, click the brush variant you want to save.
2Click the palette menu arrow, and choose Save Variant.
3In the Save Variant dialog box, type a name in the Save As box.
Enable the Save Current Colors check box to retain current color settings.
Navigating Palettes
When a palette is displayed, it must be expanded for you to access its settings. You can collapse palettes to save screen real estate, while keeping them displayed in the application.
If you have many palettes displayed and expanded, the view of other palettes can be obscured. You can scroll through palettes to locate the elements you want to work with.
To expand or collapse a palette:
•Click the palette arrow in the top corner of the palette.
When the triangle points down, the palette is expanded. When it points to the right, the palette is collapsed.
To scroll through a palette:
• Do one of the following:
20 |
The Workspace |
•Use the scrollbar on the right side of the palette to scroll through the palette.
•Press Option + click (Mac OS) or Alt + click (Windows), and drag vertically inside the palette. The cursor changes to a hand and the palette scrolls as you drag.
Using Palette Menus
Most palettes in Corel Painter contain menus from which you can access a series of palette-specific commands. For example, you can use the palette menu on the Papers palette to capture, make, and invert paper textures, and to open the Paper Mover and library.
To access the commands on a palette menu:
• Click the palette menu arrow.
Setting Palette Layout
You can set up the palette layout in Corel Painter to best suit your working style. Palettes can be arranged in the document window to
give you easy access to the tools and controls you use most often, and to maximize screen real estate.
You can also group and reposition palettes according to your preferences, and you can dock them to the edges of the document window or other palettes.
Arranging Palettes
You can drag a palette to any location that’s convenient for your work. Corel Painter saves palette arrangements so that the next time you start the program, the workspace appears as you left it.
You can save several different palette layouts for future use, and you can later delete layouts. You can also return the palette layout to the Corel Painter default.
Arrange palettes to create a layout that is convenient for you.
To save a layout:
1Arrange your palettes the way you want them saved.
2Choose Window menu > Arrange Palettes > Save Layout.
3In the Palette Layout dialog box, type a name in the New Palette Layout box.
To use a saved layout:
•Choose Window menu > Arrange Palettes > Name of Layout.
Corel Painter restores the saved palette layout.
Corel Painter |
21 |
To delete a saved layout:
1Choose Window menu > Arrange Palettes > Delete Layout.
Corel Painter opens a dialog box listing all saved layouts.
2From the list, select the layout you want to delete.
3Click Delete.
To return to the default palette layout:
•Choose Window menu > Arrange Palettes > Default.
To resize palettes
•Drag the resize handle in the bottom-right corner of the open palette.
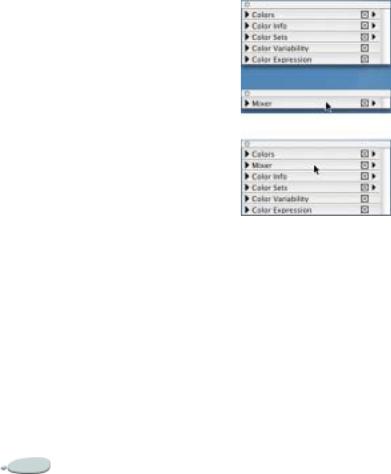
Grouping and Repositioning
Palettes
In Corel Painter, palettes appear by default in small, intuitive groupings. You can customize these groupings by moving palettes from one group to another. You can include as many or as
few palettes as you want in a group. You can also reposition items to a new location within a group.
Customized palette groupings. In this example, the Mixer palette has been grouped with the other color palettes.
To group palettes
1Place the cursor over the palette bar.
The cursor displays as a hand.
2Drag the palette bar, and place it on top of the palette with which you want to create a group.
3Release the mouse button.
A new group of palettes is formed.
4Repeat steps 1 to 3 for each palette you want to add to the group.
To ungroup palettes
1Place the cursor over the palette bar.
The cursor displays as a hand.
2Drag the palette bar away from the group.
3Release the mouse button.
The palette is removed from the group.
4Repeat steps 1 to 3 for each palette you want to ungroup.
To reposition items in grouped palettes:
1Place the cursor over the palette bar.
The cursor displays as a hand.
2Drag the palette to a new location in the group.
3Release the mouse button.
22 |
The Workspace |

Docking Palettes
If you need some room on your screen, but don’t want to collapse or group palettes, you can save valuable screen real estate by docking palettes.
This handy feature of Corel Painter lets them be docked into place when they get close to the top or bottom edge of another palette. In addition to tidying up your workspace, this feature can help keep a palette from being covered up by another palette.
To dock palettes:
1Place the cursor over the title bar of the palette you want to dock.
2Drag the palette to the top or bottom of a second palette.
3When the first palette lines up with the second palette, release the mouse button.
The palette will snap into place.
4Repeat steps 1 to 3 for each set of palettes you want to dock.
To undock palettes:
1Place the cursor over the title bar of the palette you want to undock.
2Drag the palette to another location in the workspace.
3Repeat steps 1 and 2 for each palette you want to undock.
Libraries and Movers
What are Libraries?
A library is a saved collection of similar items that can be loaded into a selector. For example, the built-in brushes (and their variants) are contained in the default brushes library, which is loaded when you open Corel Painter. You can find more brush libraries in the Corel Painter folder. As you customize brushes and other resources, you can save them into your own libraries.
Libraries are available for paper textures, patterns, gradients, weaves, brushes, looks, nozzles, layers, selections, lighting, and scripts. You can have any number of libraries, but only one of each type can be open at a time.
When you want other items, you can load alternate libraries. Libraries allow you to extend the Corel Painter tools and resources, without overloading a selector.
The methods for working with all libraries are the same, except for brushes. You can create new libraries, add items, or move items between libraries.
The methods for working with the libraries for Brushes, their categories, and variants are different. Brushes are loaded into memory when you open Corel Painter, so adding brushes to the default brush library increases the need for RAM. If you’re working close to the memory threshold, you’ll want to organize new brushes into secondary libraries. When you want a different brush set, just switch libraries. This helps Corel Painter be more efficient with memory usage. See “Using Brush Libraries” on
page 26 for more information.
It is a good idea to limit the number of resources in each library. This makes it easier to find a particular tool and helps Corel Painter manage memory.
Corel Painter |
23 |
Loading...