


 Loading...

Part One: Introduction |
1 |
getting started |
|
|
|
|
|
Part Two: WordPerfect |
17 |
creating professional-looking documents |
|
|
|
|
|
Part Three: Quattro Pro |
117 |
managing data with spreadsheets |
|
|
|
|
|
Part Four: Presentations |
169 |
making visual impact with slide shows |
|
|
|
|
|
Part Five: Utilities |
227 |
using WordPerfect Lightning, Address Book, and more |
|
|
|
|
|
Part Six: Writing Tools |
249 |
checking your spelling, grammar, and vocabulary |
|
|
|
|
|
Part Seven: Macros |
263 |
streamlining and automating tasks |
|
|
|
|
|
Part Eight: Web Resources |
273 |
finding even more information on the Internet

Handbook highlights
What’s included? . . . . . . . . . . . . . . . . . . . . . . . . . . . . . . . . . 1 What’s new? . . . . . . . . . . . . . . . . . . . . . . . . . . . . . . . . . . . . 3 Installation. . . . . . . . . . . . . . . . . . . . . . . . . . . . . . . . . . . . . . 5 Help resources . . . . . . . . . . . . . . . . . . . . . . . . . . . . . . . . . . . 9 Documentation conventions . . . . . . . . . . . . . . . . . . . . . . . 11 WordPerfect basics . . . . . . . . . . . . . . . . . . . . . . . . . . . . . . 19 Quattro Pro basics . . . . . . . . . . . . . . . . . . . . . . . . . . . . . . 119 Presentations basics. . . . . . . . . . . . . . . . . . . . . . . . . . . . . 171 WordPerfect Lightning. . . . . . . . . . . . . . . . . . . . . . . . . . . 229 Index . . . . . . . . . . . . . . . . . . . . . . . . . . . . . . . . . . . . . . . . 277

Part One: Introduction
Welcome to the Corel® WordPerfect® Office X6 Handbook! More than just a reference manual, this handbook is filled with valuable tips and insights on a wide variety of tasks and projects.
The following chapters in this introductory section are key to getting started with the software:
•“What’s new?” on page 3
•“Installation” on page 5
•“Help resources” on page 9
If you’re ready to explore specific components of the software in greater detail, see the subsequent sections in this handbook.
For an A-to-Z look at the topics covered in this manual, see the index on page 277.
What’s included?
WordPerfect Office X6 includes the following programs:
•Corel® WordPerfect® X6 — for creating professional-looking documents. See “Part Two: WordPerfect” on page 17.
•Corel® Quattro Pro® X6 — for managing, analyzing, reporting, and sharing data. See “Part Three: Quattro Pro” on page 117.
•Corel® Presentations™ X6 — for producing high-quality slide shows and drawings. See “Part Four: Presentations” on page 169.
In addition, WordPerfect Office X6 provides the following:
•utilities — supplementary tools for accomplishing specific tasks quickly and easily: taking notes, storing contact information, converting and managing files, and much more. See “Part Five: Utilities” on page 227.
Part One: Introduction |
1 |

•writing tools — built-in features for improving your spelling, grammar, style, and vocabulary. See “Part Six: Writing Tools” on page 249.
•support for macros — tools, features, and resources that can help you streamline or automate tasks. See “Part Seven: Macros” on page 263.
•Web resources — product information, support materials, social media, and more. See “Part Eight: Web Resources” on page 273.
Not all documented features are available in all versions of WordPerfect Office X6. To compare versions, please visit WordPerfect.com.
2 |
Part One: Introduction |

What’s new?
Corel WordPerfect Office X6 offers a variety of new and enhanced features.
NEW! Multiple-instance support
You can now run multiple instances of WordPerfect at a time. See “Running multiple instances of WordPerfect” on page 23.
NEW! Template for eBooks
You can now create WordPerfect documents for publication to the MOBI eBook format. See “To create an eBook” on page 37.
NEW and ENHANCED! Shipping macros
The new & updated shipping macros for WordPerfect help you perform various tasks easily. See “Shipping macros” on page 266.
ENHANCED! WordPerfect file-type support
You can now preview WordPerfect file-types from within Windows. You can also search the content of WordPerfect documents from within Windows.
ENHANCED! Reference Center
WordPerfect Office X5 saw the return — and modernization — of the Reference Center: a centralized access point to the various Help resources that install with WordPerfect Office. (See “Using the Reference Center” on page 9.)
WordPerfect Office X6 enhances the Reference Center with the following search capabilities:
•integrated Search box — From directly within the Reference Center, you can now initiate a search for information.
Part One: Introduction |
3 |

•all-in-one Help search — You can now search across multiple Help categories at a time. (Previously, searches were limited to the Help files for WordPerfect, Quattro Pro, or Presentations.) To help refine your searches, helpful tips are presented alongside your search results.
•Web search — You can now search certain WordPerfect Office websites for even more information.
ENHANCED! Help indexes
Browsing the Help files by keyword is easier than ever thanks to their revised and expanded indexes.
NEW! Reference materials
The Reference Center now includes the following reference materials:
•Quick Reference Cards — provide a “bird's-eye view” of important or complex tasks, complete with valuable tips and insights. Quick Reference Cards are offered as PDF files, so you can display them onscreen or print them out.
•Content Manual — catalog that depicts, and installs along with, the fonts and clipart included with WordPerfect Office X6
...And much more!
Sprinkled throughout this documentation are notes and tips on various additional new features and enhancements proudly brought to you by the WordPerfect Office team. Watch for the phrases “NEW for X6” and “ENHANCED for X6”.
For even more information on what’s new, along with details on additional programs and features included only with certain versions of the software, please visit the WordPerfect Office website at WordPerfect.com.
4 |
What’s new? |

Installation
In this chapter:
•“Migrating from an earlier version”
•“Installing WordPerfect Office X6”
•“Registering WordPerfect Office X6” on page 7
•“Updating WordPerfect Office X6” on page 8
Migrating from an earlier version
WordPerfect Office X6 offers numerous features that help you transfer, or “migrate,” from an earlier version of the software.
For your convenience, many such features are offered during installation. If the setup detects an earlier version of the software, you can choose to remove that version; you can also choose to migrate customized settings, user-created templates, and user-created macros from that version. See “To install WordPerfect Office X6 from DVD” on page 6.
For even more migration options, please see “Migrating from an earlier version of WordPerfect Office” in the WordPerfect Help.
Installing WordPerfect Office X6
The WordPerfect Office X6 DVD lets you install WordPerfect Office X6, as well as any DVD extras included with your purchase.
If you downloaded the software, please refer to the installation instructions included with your purchase.
After installing WordPerfect Office X6, you can use the Windows® Control Panel to modify, repair, or uninstall the software.
Part One: Introduction |
5 |

To install WordPerfect Office X6 from DVD
1Close all applications.
2Insert the WordPerfect Office X6 DVD in the DVD drive.
If the DVD does not start automatically, do one of the following:
•Click Start on the Windows® taskbar, type D:\Autorun.exe (where D is the letter that corresponds to the DVD drive), and press Enter.
•On Windows® XP, click Start ` Run, type D:\Autorun.exe, and press Enter.
3Click WordPerfect Office X6, and follow the setup instructions for installing the software.
You must enter your WordPerfect Office X6 serial number. Check your disc holder for this number, and keep it handy.
If you purchased an “upgrade” version of the software, you must enter the serial number for the earlier version if the setup cannot detect it.
The setup lets you choose to remove any earlier versions of the software detected by the setup. You can also choose to migrate settings, templates, and macros from an earlier version.
For help with installation, please visit the Corel® Install Center at Corel.com/installcenter.
To install DVD extras
1Follow steps 1 and 2 in the previous procedure.
2Click one of the following:
•Clipart, Photos, and Fonts — to install the extra content for WordPerfect Office X6, along with a PDF catalog of the fonts and clipart (“Content Manual”)
•any desired program or feature — to install that extra
3Follow the setup instructions.
4Repeat this procedure for each additional extra you want to install.
6 |
Installation |
To modify WordPerfect Office X6
1Close all applications.
2On the Windows taskbar, click Start ` Control panel.
3Click Uninstall a program.
NOTE: On Windows XP, double-click Add or remove programs.
4Double-click WordPerfect Office X6 on the Uninstall or change a program page. The setup appears.
NOTE: On Windows XP, choose WordPerfect Office X6 from the list, and click Change/Remove. The setup appears.
5Enable the Modify option, and then click Next.
6Follow the setup instructions.
To modify an installed DVD (or download) extra for
WordPerfect Office X6, choose that extra at step 4.
You can also |
|
Repair WordPerfect Office X6 |
At step 5, enable the Repair option. |
Uninstall WordPerfect Office X6 |
At step 5, enable the Uninstall |
|
option. |
Registering WordPerfect Office X6
Registering Corel® products is important. Besides activating (or updating) your Corel account, registration provides you with timely access to product updates, free downloads, tutorials and tips, special offers, and more.
Registration happens after you install WordPerfect Office X6. On the Windows taskbar, click Start ` All Programs ` WordPerfect Office X6 ` Product registration.
Part One: Introduction |
7 |

You can also:
•Wait until WordPerfect Office X6 prompts you to register.
•Click Help ` Product registration in WordPerfect.
•Visit Corel.com/support/register on the Web.
Updating WordPerfect Office X6
WordPerfect Office X6 offers a messaging service that helps keep your installation up-to-date by informing you when product updates are available. To receive messages, you require an Internet connection.
For complete information about the messaging service, you can access the Messages Help file.
To access the messaging service
• In WordPerfect, click Help ` Messages.
To update WordPerfect Office X6
• In WordPerfect, click Help ` Check for updates.
To modify the messaging settings
• In WordPerfect, click Help ` Message settings.
To access the Messages Help file
1On the Windows taskbar, click Start ` All Programs ` WordPerfect Office X6 ` Reference Center.
The Key Resources page of the Reference Center appears.
2Click Messages Help.
8 |
Installation |

Help resources
WordPerfect Office X6 offers a variety of learning resources.
For centralized, categorized access to installed resources and additional materials on the Web, you can visit the Reference Center.
For details on specific programs and features, you can use the installed Help files and the various built-in Help features.
In this chapter:
•“Using the Reference Center”
•“Using the Help files” on page 11
•“Using the built-in Help features” on page 15
Using the Reference Center
The Reference Center centralizes and categorizes the Help files and PDF resources that install with WordPerfect Office — and helps you locate additional materials on the Web.
You can access the Reference Center from within Windows, or from directly within WordPerfect Office. NEW for X6: You can perform a Help search, or a Web search, from directly with the Reference Center.
About Help files
Help files offer information in a separate window that you can keep displayed on top of the application window. For more information, see “Using the Help files” on page 11.
About PDF resources
You can access the following PDF resources from the Reference Center:
•handbook — electronic copy of the general-reference printed manual for the suite
Part One: Introduction |
9 |

•guidebook — anthology of tutorials, based on the CorelTUTOR™ Help files for the suite
•quick-reference cards (NEW for X6) — tips and insights on various topics
•user guides — detailed reference manuals, based on the main Help files for specific programs
•macro guide — programming manual, based on the Macro Help file for the suite
•content manual — catalog of installed fonts and clipart
You can access the content manual only if you’ve installed the extra content (clipart, photos, and fonts) for the software. See “To install DVD extras” on page 6.
To access the Reference Center
•Do one of the following:
•On the Windows taskbar, click Start ` All Programs ` WordPerfect Office X6 ` Reference Center.
•In WordPerfect, Quattro Pro, or Presentations, click Help ` Reference Center.
The Reference Center appears. Click a tab (on the left) to display the resources for that category; click any entry on the page to access that resource.
To perform a search from the Reference Center
1In the Reference Center, click one of the following tabs:
•Key Resources — to search a wide variety of WordPerfect Office resources
•WordPerfect — to limit searches to WordPerfect content
•Quattro Pro — to limit searches to Quattro Pro content
•Presentations — to limit searches to Presentations content
2Type a word or phrase in the search box.
10 |
Help resources |

3Enable one of the following options:
•Help Search — consults the installed Help files
•Web Search — consults select websites (Internet connection required)
4Click Search.
Results appear in a new window, which you can use to perform additional searches.
Using the Help files
Help files offer information in a separate window that you can keep displayed on top of the application window.
You can access the Help from within a program or from the Reference Center. You can browse by topic, use the index to look up keywords (ENHANCED for X6), or search for specific information. You can also print specific Help topics or entire Help sections.
You can browse or search multiple Help files — or only those for WordPerfect, Quattro Pro, or Presentations — by visiting the Reference Center. See “To perform a search from the Reference Center” on page 10.
Documentation conventions
The following table explains the documentation conventions.
When you see this |
Do this |
Click File ` New. |
Click the File menu, and click New |
|
in the menu. |
Click Format ` Justification ` Left. |
Click the Format menu, click |
|
Justification, and click Left in the |
|
submenu that displays. |
Enable a check box. |
Click the check box to place a check |
|
mark or an “X” inside the box. |
Part One: Introduction |
11 |

When you see this |
Do this |
Disable an option. |
Click the option to remove the |
|
indicator. |
Select text. |
Click and drag to highlight text. |
Click an object. |
Click anywhere on an object. |
Right-click, and click Paste. |
Press the right mouse button, and |
|
click Paste in the submenu that |
|
displays. |
Press Enter. |
Press the Enter key. |
Ctrl + Shift |
Press the Ctrl key and the Shift key |
|
at the same time. |
Not all documented features are available in all versions of WordPerfect Office. To compare versions, please visit WordPerfect.com.
To access the Help
1Do one of the following:
•In WordPerfect, Quattro Pro, or Presentations, click Help ` Help topics.
•In the Reference Center, click a Help file.
2Click one of the following tabs:
•Contents — to browse the Help file by topic
•Index — to browse the Help file by keyword
•Search — to search the Help file for a particular word or phrase. For more information, see “To search a Help file” on page 13.
12 |
Help resources |

You can also
Access tutorials
Access information on macros, macro languages (such as PerfectScript™), and macro commands
Do one of the following:
•In WordPerfect, Quattro Pro, or Presentations, click Help ` CorelTUTOR.
•In the Reference Center, click the Tutorials entry on the associated program page.
Do one of the following:
•In WordPerfect, Quattro Pro, or Presentations, click Help ` Macro commands.
•In the Reference Center, click the Macros tab, and then click the Macro Help entry.
To search a Help file
1Click the Search tab in the left pane of the Help file.
2Type a word or phrase in the search box.
For example, if you are looking for information about macros, you can type macro to display a list of relevant topics.
To search for an exact phrase, type the phrase, and enclose it in quotation marks (for example, type “writing tools” or “file formats”).
3Click the List topics button.
4Choose a topic from the list that appears, and press Enter. The topic is displayed in the right pane of the Help file.
If your search results do not include any relevant topics, check the spelling of the word or phrase you typed. Note that the English Help uses American spelling (for example, “color,” “favorite,” “center,” and “customize”), so British spellings (“colour,” “favourite,” “centre,” and “customise”) produce no results.
Part One: Introduction |
13 |

To determine the location of a displayed topic within the Help, click the Contents tab in the left pane of the Help.
You can also
Search for a word or phrase in a list of topics generated by the previous search
Search for all forms of a word
Search only the titles of Help topics
Repeat a recently performed search
Combine multiple search terms
Search multiple Help files, or search for materials on the Web
Enable the Search previous results check box.
Enable the Match similar words check box.
For example, if you type “type” and enable this check box, the search results will include topics that contain the words “types” and “typing.”
Enable the Search titles only check box.
On the search box, click the arrow that points down, and choose a word or phrase.
Type a search term in the box. Click the flyout arrow that points to the right, and choose an operator. Type another search term in the search box, and then press Enter.
See “To perform a search from the Reference Center” on page 10.
To print Help content
To |
Do the following |
Print a section |
Select the section you want to |
|
print, click Print, and enable the |
|
Print selected heading and all |
|
subtopics option. |
14 |
Help resources |

To |
Do the following |
Print a topic |
Select the topic you want to |
|
print, click Print, and enable |
|
the Print selected topic |
|
option. |
|
You can also right-click the |
|
window and click Print. |
Using the built-in Help features
WordPerfect Office programs offer the following types of built-in Help content:
•context-sensitive Help — information, relevant to the current task, on menu commands, toolbar buttons, dialog boxes, and dialog box controls
•QuickTips™— information about menu items, or about icons and buttons on the toolbars and the Toolbox
•PerfectExpert™— assistance with everyday tasks and detailed projects
To access context-sensitive Help
To get help for |
Do the following |
A menu item |
Point to the menu item, and press |
|
F1. |
A toolbar button |
Point to the toolbar button, press |
|
Shift + F1, and click the button. |
A dialog box
A dialog box control
Click Help, or press F1.
Click the Context-sensitive Help  button in the dialog box, and click the control.
Part One: Introduction |
15 |

To access a QuickTip
•Point to a menu item, icon, or button. The QuickTip appears in a balloon.
To access the PerfectExpert
•In WordPerfect, Quattro Pro, or Presentations, click Help ` PerfectExpert.
A check mark next to the PerfectExpert command indicates that the command is enabled, and the PerfectExpert panel displays in the left side of the document window.
16 |
Help resources |
Part Two: WordPerfect
WordPerfect is a powerful word-processing application that helps you produce newsletters, articles, reports, proposals, books, and other documents.
About WordPerfect
See the following chapters:
•“WordPerfect basics” on page 19
•“Windows and views” on page 23
•“Reveal Codes” on page 27
•“Navigation” on page 29
•“Microsoft Word compatibility” on page 31
Documents and templates
See the following chapters:
•“Document basics” on page 35
•“PDF import” on page 39
•“Templates” on page 41
Text
See the following chapters:
•“Text basics” on page 45
•“Text selection” on page 47
•“Text formatting” on page 49
•“Text arrangement” on page 57
•“Text organization” on page 61
Part Two: WordPerfect |
17 |

Graphics
See the following chapter:
• “Graphics” on page 65
Editing content
See the following chapters:
•“Editing basics” on page 69
•“Find and Replace” on page 73
Design and layout
See the following chapters:
•“Styles” on page 77
•“Page margins” on page 83
•“Page size and orientation” on page 85
•“Page flow” on page 89
•“Page columns” on page 91
•“Page numbering” on page 95
•“Headers and footers” on page 99
•“Footnotes and endnotes” on page 103
Sharing documents
See the following chapters:
•“Saving documents” on page 107
•“Printing” on page 111
•“PDF publication” on page 115
The WordPerfect page of the Reference Center offers extensive program help: reference topics, tutorials, tips, insights, and more. See “To access the Reference Center” on page 10.
18 |
Part Two: WordPerfect |

WordPerfect basics
This chapter tells you how to perform basic operations in WordPerfect.
In this chapter:
•“Starting WordPerfect”
•“Exploring the workspace”
•“Changing the workspace” on page 21
•“Quitting WordPerfect” on page 22
Starting WordPerfect
You can start WordPerfect as you would any other Windows program.
NEW for X6: If you start WordPerfect while the program is already running, a new instance is created. Running multiple instances of WordPerfect is useful when, for example, you need to work on multiple documents simultaneously:
•Rather than switching among document windows within WordPerfect, you can switch among WordPerfect instances in Windows.
•Rather than switching among documents at all, you can display them simultaneously across multiple monitors (if available).
To start WordPerfect
•On the Windows taskbar, click Start ` All Programs ` WordPerfect Office X6 ` WordPerfect.
Exploring the workspace
In WordPerfect, the workspace (or “work area”) refers to everything within the WordPerfect application window.
Part Two: WordPerfect |
19 |
The document window
The large open area is the document window.
The menu bar
The menu bar, located at the top of the workspace, just below the title bar, provides access to most of the WordPerfect commands.
The toolbars
Many menu commands can be accessed through toolbars, located below the menu bar.
This is the WordPerfect toolbar.
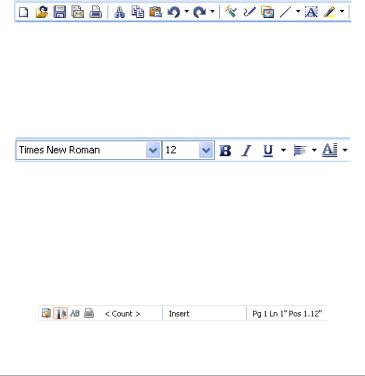
The property bar
The property bar is a context-sensitive toolbar that displays buttons and options related to the task you are performing. For example, when text is selected, the property bar contains only text-related commands.
This is the property bar.
By default, the property bar is located above the document window.
The application bar
The application bar displays information about the status of the active WordPerfect document. By default, the application bar is located below the document window.
This illustration shows items on the right side of the application bar.
20 |
WordPerfect basics |

When you open a file, a document button with the name of the file appears on the application bar. You can use document buttons to quickly move between the documents. For more information about moving between documents, see “Navigation” on page 29.
Changing the workspace
WordPerfect lets you use different workspaces for creating documents. When choosing a workspace, you are specifying the toolbars, buttons, options, and menus that WordPerfect displays.
You can customize and save workspace settings, including shadow cursor settings, measurement and ruler settings, toolbar, application bar and property bar settings. Saving your workspace settings ensures they remain in effect until you change them.
To change the workspace
1Click Tools ` Workspace manager.
2Enable one of the following options:
•WordPerfect Office mode — displays the default WordPerfect workspace
•Microsoft Word mode — simulates the Microsoft® Word workspace by positioning the WordPerfect features, including toolbars, keyboards, and menu items, where you would find the equivalent features in Microsoft Word
•WordPerfect Classic mode (version 5.1) — lets you work in the familiar visual environment of Corel WordPerfect 5.1 and use its keystrokes
•WordPerfect Legal mode — exposes the WordPerfect legal features, such as tools that let you create specialized legal documents such as cases and pleadings
Part Two: WordPerfect |
21 |

To save workspace settings
1Click Tools ` Settings.
2Click Environment.
3In the Environment settings dialog box, click the Interface tab.
4In the Save workspace area, enable one of the following options:
•Always — always saves workspace settings when quitting WordPerfect
•Never — never saves workspace settings when quitting WordPerfect
•Prompt on exit — prompts you to save workspace settings when quitting WordPerfect
Quitting WordPerfect
You can quit WordPerfect, thereby closing the application along with all of the documents you have open.
To quit WordPerfect
• Click File ` Exit.
You are prompted to save any modified documents before quitting.
22 |
WordPerfect basics |

Windows and views
In this chapter:
•“Running multiple instances of WordPerfect”
•“Switching document views”
•“Changing document display settings” on page 24
•“Working with the ruler and ruler guides” on page 25
•“Using guidelines” on page 26
For additional topics, please see “Viewing and navigating documents” in the WordPerfect Help.
Running multiple instances of WordPerfect
NEW for X6: You can run multiple instances of WordPerfect — for example, if you want to work on multiple documents across multiple monitors.
To accommodate this new multiple-instance workflow, various traditional behaviors of WordPerfect have been adjusted.
•Starting WordPerfect: If you start WordPerfect while the program is already running, a new instance is created.
•Viewing documents: You can transfer an open document to a new instance of WordPerfect. See page 25.
•Template settings: You can choose to apply template changes to all instances of WordPerfect. See page 42
•Macro behavior: Macro commands that previously applied to “all documents” now apply only to those in the current instance.
Switching document views
In WordPerfect, you can view documents in four ways: draft, page, two pages, and browser preview.
Part Two: WordPerfect |
23 |

To switch the document view
•Click View, and click one of the following:
•Draft — to hide some document elements
•Page — to display the document the way it will look when printed
•Two pages — to display two consecutive pages side by side
•Preview in browser — to display a document in HTML format
Changing document display settings
WordPerfect lets you change document display settings in several ways. You can enlarge or reduce the page display. As well, the document window can be minimized or maximized.
You can cascade or tile multiple open documents. NEW for X6: You can also transfer an open document to a new instance of WordPerfect.
To enlarge or reduce the page display
1Click View ` Zoom.
2Enable one of the following options:
•Margin width — displays a complete line or block of text within a window, with minimal white space to the right and left
•Page width — displays the width of the page, including margins
•Full page — displays all page margins in the document window
•Other — lets you enter a custom zoom percentage
To enlarge or reduce the page display, the document must be in Draft or Page view.
To minimize or maximize the document window
•Right-click the WordPerfect title bar, and click one of the following:
•Minimize
•Maximize
24 |
Windows and views |

If you want to restore a document window to its original size, right-click the title bar, and click Restore.
To cascade multiple documents
• Click Window ` Cascade.
To tile multiple documents
•Click Window, and click one of the following:
•Tile side by side
•Tile top to bottom
To transfer a document to a new instance of WordPerfect
• Click Window ` Separate.
You can also right-click the document button on the application bar and choose Separate document.
Working with the ruler and ruler guides
The ruler is used to display page format elements, such as margins, tabs, column gutters, and indentation. The ruler has two parts: the line and the tab bar.
•The line resembles a ruler and contains graduated measurements for the area between the left and right margins.
•The tab bar, the white space in the lower part of the ruler, displays the triangular shaped tab marks.
Ruler guides are black dotted vertical lines that allow you to see where the settings for your margins and indentations are in relation to where the text displays on the page. For example, when you click a tab, the ruler guide and a box containing the tab’s settings are displayed.
Part Two: WordPerfect |
25 |

To hide or display the ruler
•Click View ` Ruler.
A check mark beside Ruler indicates that the ruler is displayed.
To display ruler guides
1Click Tools ` Settings.
2Click Display.
3Click the Ruler tab.
4Enable the Show ruler guides check box.
Using guidelines
Guidelines are horizontal and vertical nonprinting lines that you can use to align tables, margins, columns, headers, and footers on a page.
To display guidelines
1Click View ` Guidelines.
2In the Display guidelines for area, enable one or more of the following check boxes:
•Tables — displays guidelines that you can drag to change the width of table columns
•Margins — displays guidelines that you can drag to change the width of margins
•Columns — displays guidelines that you can drag to change the width of columns
•Header/Footer — displays guidelines that you can drag to change the widths of headers or footers
26 |
Windows and views |
Loading...