Canon MP140 User Manual

Start Here
Easy Setup Instructions
Photo All-in-One
|
Unpack the Machine |
• Please confirm the included items against the illustration printed on the lid of the packing box. |
|
• A USB cable is necessary to connect the machine with your computer. |
|
|
|
|
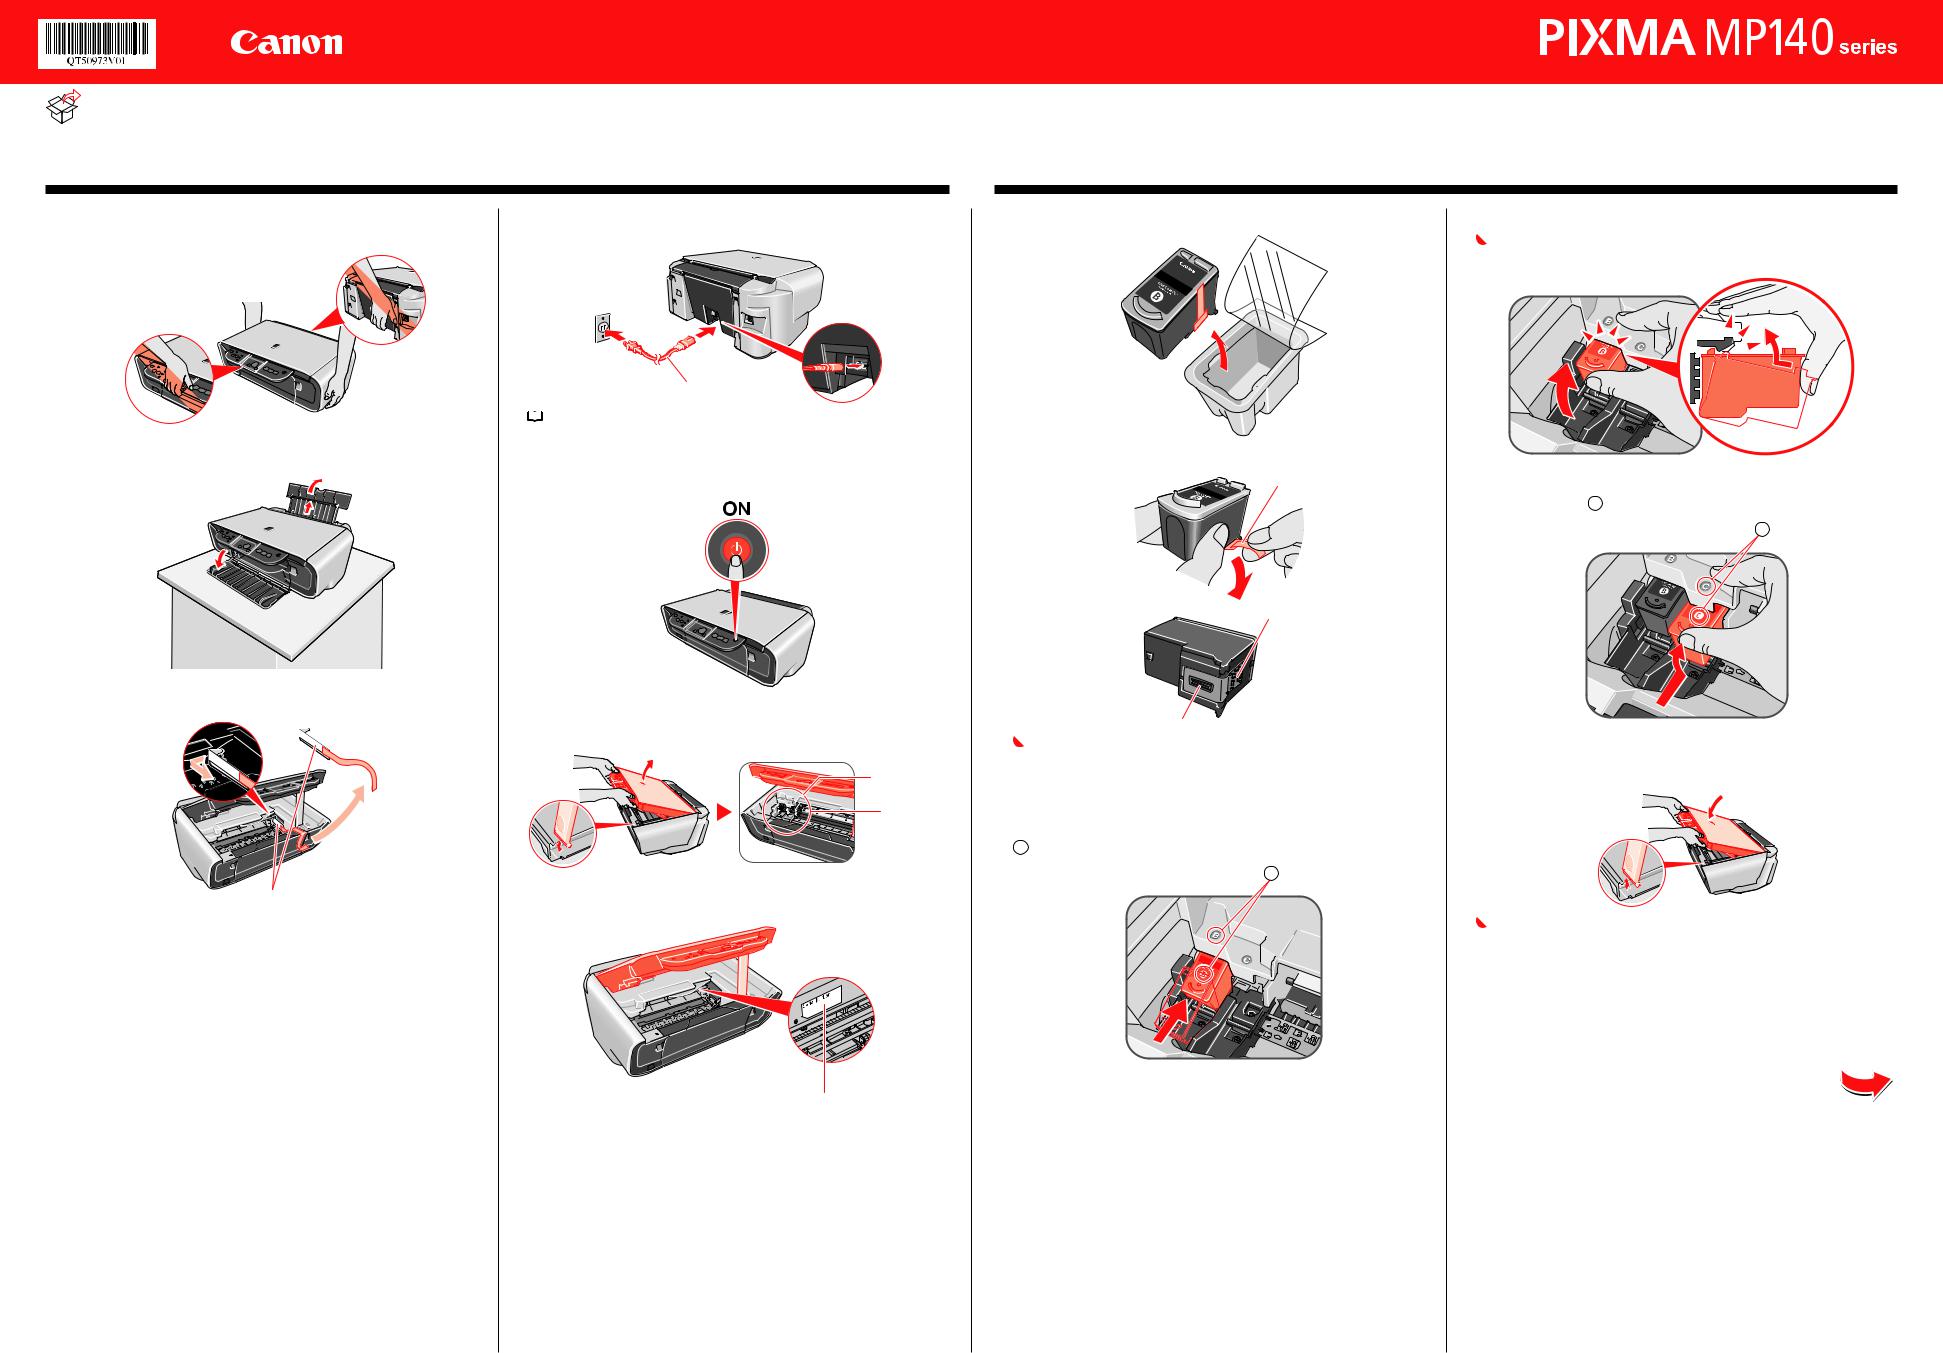
1 Prepare the Machine
 Note
Note
When moving the machine, carry the machine at both ends as shown below. Do not lift the machine by grasping the Paper Support Extension or the Operation Panel.
aPlace the machine on a flat and horizontal surface, and do not place any objects in front of the machine.
bLift the Scanning Unit (Printer Cover), then remove the Protective Material on the right side.
Protective Material
 Caution
Before turning on the machine, remove all of the shipping tapes.
cClose the Scanning Unit (Printer Cover).
dPlug the Power Cord in the back of the machine and connect the other end to the wall outlet.
Power Cord
 Note
Note
Do not connect the USB cable at this stage.
ePress the ON/OFF button to turn on the machine. The machine will initialize. Wait until the POWER lamp stops flashing and remains lit green.
fLift the Scanning Unit (Printer Cover) and pull the Scanning Unit Support down into place. The FINE Cartridge Holder automatically moves to the left.
The FINE Cartridge Holder moves to the left.
Install the FINE Cartridges here.
gWrite down the Serial Number located inside the machine. You will need this to register your product.
2 Install the FINE Cartridges
aRemove the Black FINE Cartridge from its box.
bRemove the Protective Tape gently.
Protective Tape |
Electrical Contacts
Print Head Nozzles
 Important
•Do not touch the Electrical Contacts or Print Head Nozzles on a FINE Cartridge. The machine may not print out properly if you touch it.
•Do not reattach the Protective Tape once you have removed it.
•Be careful not to stain your hands or surrounding work area with ink on the removed Protective Tape.
cInsert the Black FINE Cartridge slightly slanted into the left slot
B .
B
dPush up the FINE Cartridge until it clicks into place.
 Important
For correct machine operation, make sure the FINE Cartridge is secure in slots.
eRepeat the procedure for the Color FINE Cartridge, inserting it into the right slot C .
C
fLift the Scanning Unit (Printer Cover) to put the Scanning Unit Support back to its original position, then close the Scanning Unit (Printer Cover).
 Important
Once you have installed the FINE Cartridges, the LED will flash green. Wait for about one to two minutes, until the LED stops flashing and displays 1 and the machine has stopped making operating noises, before proceeding.
Hardware setup is complete.
Serial Number
 Loading...