


 Loading...
Brother DCP-J4120DW, MFC-J2320, MFC-J2720, MFC-J4420DW, MFC-J4620DW Web Connect Guide
...Web Connect Guide
DCP-J4120DW
MFC-J2320
MFC-J2720
MFC-J4420DW
MFC-J4620DW
MFC-J4625DW
MFC-J5320DW
MFC-J5620DW
MFC-J5625DW
MFC-J5720DW
MFC-J5920DW
Before You Use Your Brother Machine
•Applicable Models
•Definitions of Notes
•Trademarks
•Important Note
Applicable Models
This User's Guide applies to the following models:
2.7 inch Touchscreen LCD models: DCP-J4120DW/MFC-J2320/MFC-J4420DW/MFC-J5320DW
3.7 inch Touchscreen LCD models: MFC-J2720/MFC-J4620DW/MFC-J4625DW/MFC-J5620DW/MFC-J5625DW/ MFC-J5720DW/MFC-J5920DW
Related Information
• Before You Use Your Brother Machine
Definitions of Notes
We use the following symbol and convention throughout this User's Guide:
Tips icons provide helpful hints and supplementary information.
Related Information
• Before You Use Your Brother Machine
Trademarks
BROTHER is either a trademark or a registered trademark of Brother Industries, Ltd. Flickr and the Flickr logo are the trademarks and/or registered trademarks of Yahoo! Inc.
Google Drive and Picasa Web Albums are trademarks of Google Inc. Use of these trademarks is subject to Google Permissions.
Evernote and the Evernote Elephant logo are trademarks of Evernote Corporation and used under a license.
Microsoft, Windows, Windows Vista and Internet Explorer are either registered trademarks or trademarks of Microsoft Corporation in the United States and/or other countries.
Macintosh and Safari are trademarks of Apple Inc., registered in the United States and other countries.
Each company whose software title is mentioned in this manual has a Software License Agreement specific to its proprietary programs.
Any trade names and product names of companies appearing on Brother products, related documents and any other materials are all trademarks or registered trademarks of those respective companies.
Related Information
• Before You Use Your Brother Machine
Important Note
•Go to your model's Manuals page on the Brother Solutions Center at http://support.brother.com to download the other manuals.
•Not all models are available in all countries.
i
•Windows® XP in this document represents Windows® XP Professional, Windows® XP Professional x64 Edition and Windows® XP Home Edition.
•In this manual, the LCD messages of the MFC-J2720/MFC-J4620DW are used unless otherwise specified. ©2014 Brother Industries, Ltd. All rights reserved.
Related Information
• Before You Use Your Brother Machine
ii

Home > Table of Contents |
|
Table of Contents |
|
Before You Use Brother Web Connect................................................................................................ |
1 |
What Is Brother Web Connect? ..................................................................................................................... |
2 |
Accessible Services ....................................................................................................................................... |
3 |
Conditions for Using Brother Web Connect ................................................................................................... |
5 |
Service Account ................................................................................................................................... |
6 |
Internet Connection .............................................................................................................................. |
7 |
MFL-Pro Suite Installation .................................................................................................................... |
8 |
Configure the Proxy Server Settings Using the Machine's Control Panel ........................................... |
9 |
Configure the Proxy Server Settings Using Web Based Management .............................................. |
10 |
Set Up Brother Web Connect....................................................................................................................... |
11 |
Brother Web Connect Setup Overview............................................................................................... |
12 |
Create an Account for Each of the Desired Services ......................................................................... |
13 |
Apply for Brother Web Connect Access ............................................................................................. |
14 |
Register an Account on Your Brother Machine .................................................................................. |
16 |
Delete a Brother Web Connect Account on Your Machine................................................................. |
18 |
Set Up Brother Web Connect for Brother CreativeCenter.................................................................. |
20 |
Scan and Upload ................................................................................................................................. |
21 |
Scan and Upload Documents Using Brother Web Connect......................................................................... |
22 |
Upload a Document from an External Memory Device Using Brother Web Connect .................................. |
24 |
Download, Print, and Save ................................................................................................................. |
26 |
Download and Print Documents Using Brother Web Connect..................................................................... |
27 |
Download and Print Using Picasa Web Albums™, Flickr®, Facebook, Google Drive™, |
|
Evernote®, Dropbox, OneDrive and Box ............................................................................................ |
28 |
Download and Print Brother CreativeCenter Templates..................................................................... |
31 |
Download and Save a Document to an External Memory Device ............................................................... |
33 |
FaxForward to Cloud .......................................................................................................................... |
36 |
FaxForward to Cloud.................................................................................................................................... |
37 |
Turn On FaxForward to Cloud...................................................................................................................... |
38 |
Turn Off FaxForward to Cloud...................................................................................................................... |
40 |
About Outline, Scan, and Copy or Cut.............................................................................................. |
41 |
Outline, Scan, and Copy or Cut Parts of Your Documents .......................................................................... |
42 |
Outline and Scan a Document to the Cloud ....................................................................................... |
44 |
Outline and Scan a Document to a Memory Card or USB Flash Drive.............................................. |
46 |
Copy an Outlined Section................................................................................................................... |
47 |
Cut an Outlined Section ..................................................................................................................... |
48 |
NotePrint and NoteScan ..................................................................................................................... |
49 |
NotePrint and NoteScan Overview .............................................................................................................. |
50 |
Print Note Sheet and Folder Templates ............................................................................................. |
52 |
Scan a Note Sheet to the Cloud......................................................................................................... |
54 |
Scan a Note Sheet to a Memory Card or USB Flash Drive................................................................ |
55 |
Shortcut Settings ................................................................................................................................ |
56 |
Add Web Connect Shortcuts........................................................................................................................ |
57 |
Add Apps Shortcuts ..................................................................................................................................... |
59 |
Change Shortcuts ........................................................................................................................................ |
61 |
|
iii |

Home > Table of Contents |
|
Edit Shortcut Names .................................................................................................................................... |
62 |
Delete Shortcuts........................................................................................................................................... |
63 |
Use a Shortcut ............................................................................................................................................ |
64 |
Troubleshooting for Brother Web Connect ...................................................................................... |
65 |
Error Messages When Using the Brother Web Connect Feature ................................................................ |
66 |
iv

 Home > Before You Use Brother Web Connect
Before You Use Brother Web Connect
•What Is Brother Web Connect?
Certain websites provide services that allow users to upload and view images and files on the websites. Your Brother machine can scan images and upload them to these services, and also download and print images that are already uploaded to these services.
•Accessible Services
Use Brother Web Connect to access services from your Brother machine:
•Conditions for Using Brother Web Connect
•Set Up Brother Web Connect
(For the following services: Picasa Web Albums™, Flickr®, Facebook, Google Drive™, Evernote®, Dropbox, OneDrive, Box)
1
 Home > Before You Use Brother Web Connect > What Is Brother Web Connect?
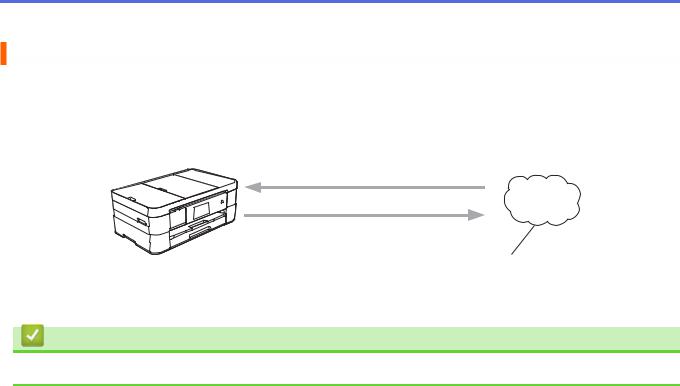
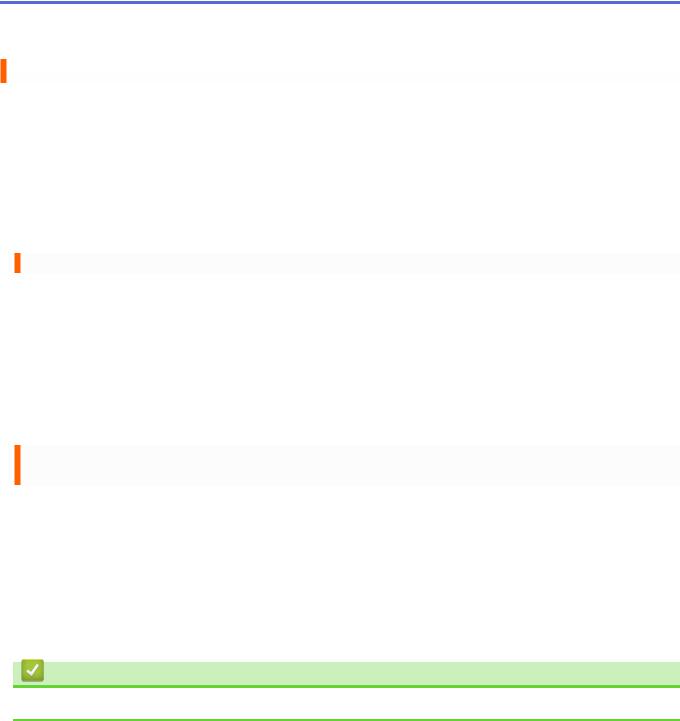
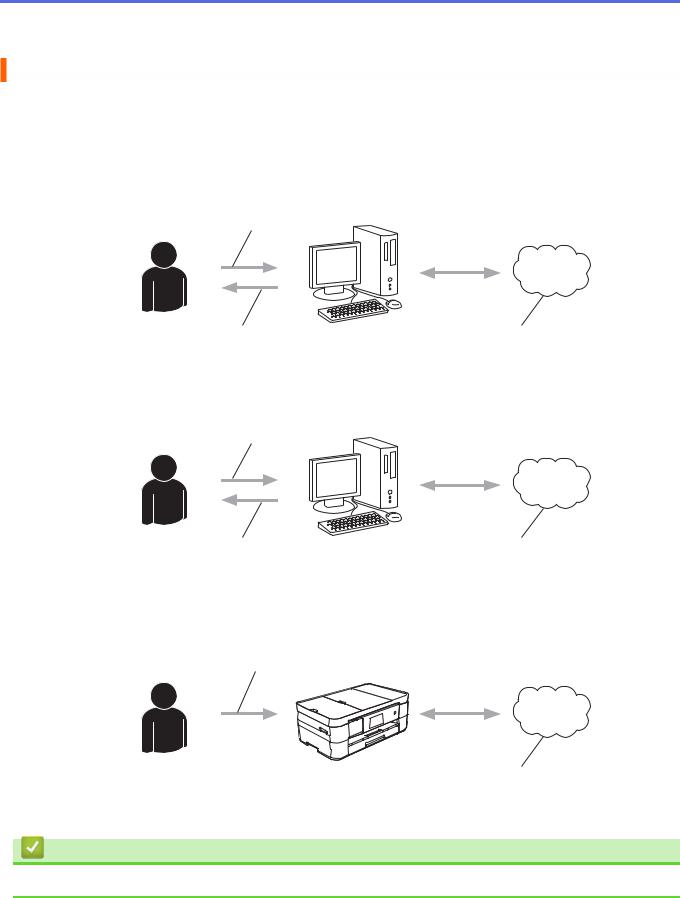
What Is Brother Web Connect?
Certain websites provide services that allow users to upload and view images and files on the websites. Your Brother machine can scan images and upload them to these services, and also download and print images that are already uploaded to these services.
Printing
1
Scanning
Web service
1. Photos, images, documents and other files
Related Information
• Before You Use Brother Web Connect
2

 Home > Before You Use Brother Web Connect > Accessible Services
Accessible Services
Use Brother Web Connect to access services from your Brother machine:
Picasa Web Albums™
An online photo sharing service. Images can be uploaded, organised into albums, and shared with other users.
URL: http://picasaweb.google.com
Google Drive™
An online document storage, editing, sharing and file synchronization service.
URL: http://drive.google.com
Flickr®
An online photo sharing service. Images can be uploaded, organised into albums, and shared with other users.
URL: http://www.flickr.com
A social networking service that also allows images to be uploaded and shared with other users. URL: http://www.facebook.com
Evernote®
An online file storage and management service.
URL: http://www.evernote.com
Dropbox
An online file storage, sharing and synchronization service.
URL: http://www.dropbox.com
OneDrive
An online file storage, sharing and managing service.
URL: https://onedrive.live.com
Box
An online document editing and sharing service.
URL: http://www.box.com
Brother CreativeCenter
A website that offers various templates, such as greeting cards, brochures and calendars that you can print on your Brother machine. (available only for certain countries)
http://www.brother.com/creativecenter
For more information about any of these services, refer to the respective service's website.
The following table describes which file types can be used with each Brother Web Connect feature:
Accessible |
Picasa Web Albums™ |
Google Drive™ |
Brother CreativeCenter |
Services |
Flickr® |
Evernote® |
|
|
|
||
|
Dropbox |
|
|
|
|
OneDrive |
|
|
|
Box |
|
Download and print |
JPEG |
JPEG/PDF/DOC/DOCX/XLS/ |
(Print only) |
images or save |
|
XLSX/PPT/PPTX |
|
them to media |
|
|
|
|
|
|
|
3
Accessible |
Picasa Web Albums™ |
Google Drive™ |
Brother CreativeCenter |
Services |
Flickr® |
Evernote® |
|
|
|
||
|
Dropbox |
|
|
|
|
OneDrive |
|
|
|
Box |
|
Upload scanned |
JPEG |
JPEG/PDF/DOCX/XLSX/ |
- |
images |
|
PPTX |
|
|
|
|
|
Upload images |
JPEG |
JPEG |
- |
saved on media |
|
|
|
|
|
|
|
FaxForward to the |
JPEG |
PDF/JPEG /TIFF |
- |
online services |
|
|
|
(available only for |
|
|
|
certain countries) |
|
|
|
|
|
|
|
 • Not all services are available in some countries.
•(For Hong Kong, Taiwan and Korea)
Brother Web Connect supports only file names written in English. Files named in the local language will not be downloaded.
Related Information
•Before You Use Brother Web Connect
•FaxForward to Cloud
4

 Home > Before You Use Brother Web Connect > Conditions for Using Brother Web Connect
Conditions for Using Brother Web Connect
•Service Account
•Internet Connection
•MFL-Pro Suite Installation
•Configure the Proxy Server Settings Using the Machine's Control Panel
•Configure the Proxy Server Settings Using Web Based Management
5
 Home > Before You Use Brother Web Connect > Conditions for Using Brother Web Connect > Service Account
Service Account
To use Brother Web Connect, you must have an account with the desired service. If you do not already have an account, use a computer to access the service's website and create an account.
You do not need to create an account to use Brother CreativeCenterBrother CreativeCenter.
Related Information
• Conditions for Using Brother Web Connect
6
 Home > Before You Use Brother Web Connect > Conditions for Using Brother Web Connect > Internet Connection
Internet Connection
To use Brother Web Connect, your Brother machine must be connected to a network that has access to the Internet, through either a wired or wireless connection.
For network setups that use a proxy server, the machine must also be configured to use a proxy server. If you are unsure of your network configuration, check with your network administrator.
 A proxy server is a computer that serves as an intermediary between computers without a direct Internet connection, and the Internet.
Related Information
• Conditions for Using Brother Web Connect
7
 Home > Before You Use Brother Web Connect > Conditions for Using Brother Web Connect > MFL-Pro Suite Installation
MFL-Pro Suite Installation
The initial installation of Brother Web Connect requires a computer that has access to the Internet and has Brother MFL-Pro Suite installed.
For Windows®:
To install Brother MFL-Pro Suite and configure the machine to be able to print over your wired or wireless network, see the Quick Setup Guide.
For Macintosh:
To install Brother Software, go to the Brother Solutions Center at http://support.brother.com.
Related Information
• Conditions for Using Brother Web Connect
8
 Home > Before You Use Brother Web Connect > Conditions for Using Brother Web Connect > Configure the Proxy Server Settings Using the Machine's Control Panel
Configure the Proxy Server Settings Using the Machine's Control Panel
If your network uses a proxy server, the following proxy server information must be configured on the machine:
•Proxy server address
•Port number
•User Name
•Password
>>DCP-J4120DW/MFC-J2320/MFC-J4420DW/MFC-J5320DW
>>MFC-J2720/MFC-J4620DW/MFC-J4625DW/MFC-J5620DW/MFC-J5625DW/MFC-J5720DW/MFC-J5920DW
DCP-J4120DW/MFC-J2320/MFC-J4420DW/MFC-J5320DW
1.Press  (Settings) > All Settings > Network > Web Connect Settings > Proxy Settings > Proxy Connection.
2.Press On.
3.Press the option that you want to set, and then enter the proxy server information. Press OK.
4.Press  .
.
MFC-J2720/MFC-J4620DW/MFC-J4625DW/MFC-J5620DW/MFC-J5625DW/ MFC-J5720DW/MFC-J5920DW
1.Press  (Settings) > All Settings > Network > Web Connect Settings > Proxy Settings > Proxy Connection.
2.Press On.
3.Press the option that you want to set, and then enter the proxy server information. Press OK.
4.Press  .
.
Related Information
• Conditions for Using Brother Web Connect
9
 Home > Before You Use Brother Web Connect > Conditions for Using Brother Web Connect > Configure the Proxy Server Settings Using Web Based Management
Configure the Proxy Server Settings Using Web Based Management
If your network uses a proxy server, the following proxy server information must be configured using Web Based Management:
•Proxy server address
•Port number
•User Name
•Password
 We recommend Microsoft® Internet Explorer® 8.0/9.0/10.0 for Windows® and Safari 5.0/6.0 for Macintosh. Make sure that JavaScript and Cookies are always enabled in whichever browser you use. If a different web browser is used, make sure it is compatible with HTTP 1.0 and HTTP 1.1.
1.Start your web browser.
2.Type "http://machine's IP address" in your browser's address bar (where "machine's IP address" is the machine's IP address).
For example: http://192.168.1.2
3.No password is required by default. Type a password if you have set one, and then click  .
.
4.Click the Network tab.
5.Click Protocol in the left navigation bar.
6.Make sure the Proxy check box is selected, and then click Submit.
7.In the Proxy field, click Advanced Setting.
8.Enter the proxy server information.
9.Click Submit.
Related Information
• Conditions for Using Brother Web Connect
10

 Home > Before You Use Brother Web Connect > Set Up Brother Web Connect
Set Up Brother Web Connect
(For the following services: Picasa Web Albums™, Flickr®, Facebook, Google Drive™, Evernote®, Dropbox, OneDrive, Box)
•Brother Web Connect Setup Overview
•Create an Account for Each of the Desired Services
•Apply for Brother Web Connect Access
•Register an Account on Your Brother Machine
You must enter your Brother Web Connect account information and configure your machine so that it can use Brother Web Connect to access the service you want.
•Delete a Brother Web Connect Account on Your Machine
•Set Up Brother Web Connect for Brother CreativeCenter
11
 Home > Before You Use Brother Web Connect > Set Up Brother Web Connect > Brother Web Connect Setup Overview
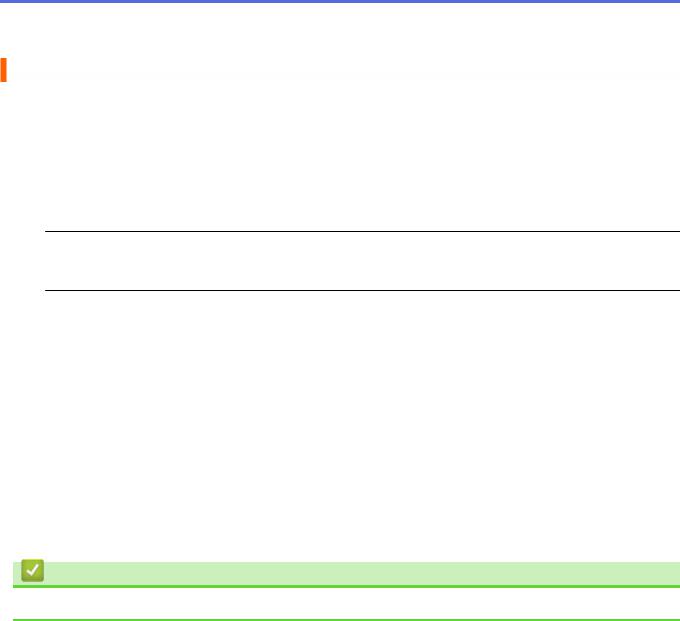
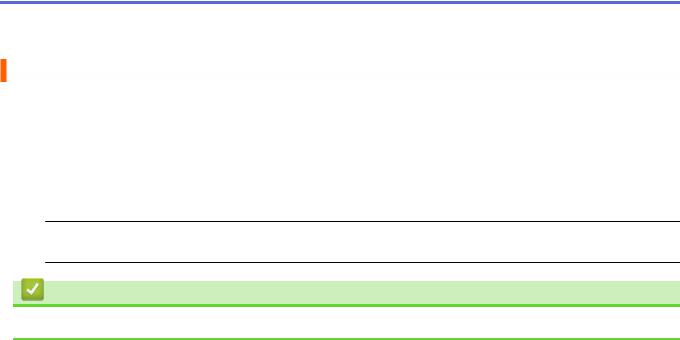
Brother Web Connect Setup Overview
Configure the Brother Web Connect settings using the following procedure (when using Brother CreativeCenter, this procedure is not necessary):
Step 1: Create an account with the desired service.
Access the service's website using a computer and create an account. (If you already have an account, there is no need to create an additional account.)
User registration
Obtain account |
Web service |
Step 2: Apply for Brother Web Connect access.
Start Brother Web Connect access using a computer and obtain a temporary ID.
Enter account information
Obtain temporary ID |
Brother Web Connect |
|
application page |
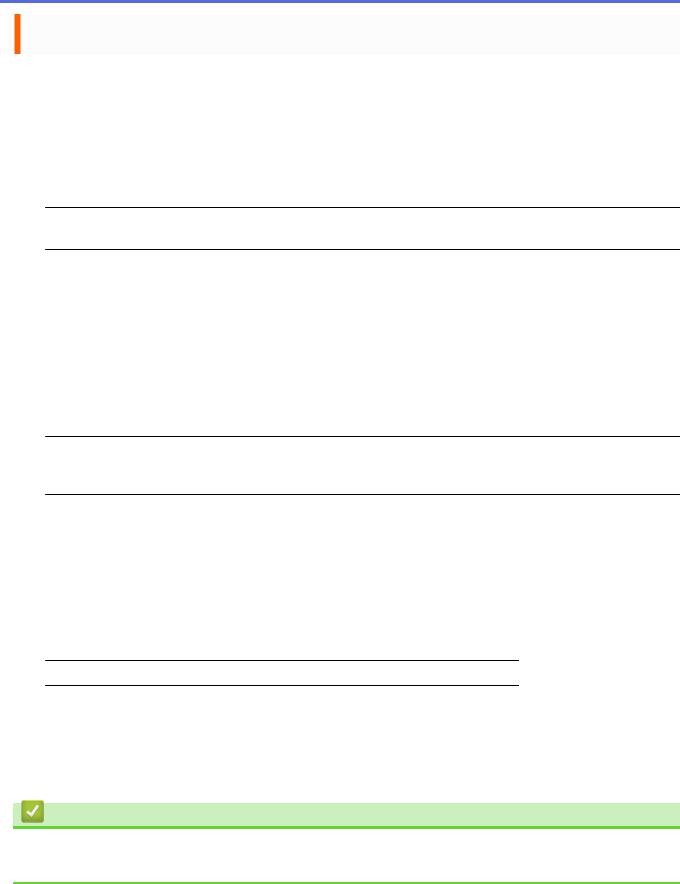
Step 3: Register your account information on your machine so you can access the desired services.
Enter the temporary ID to enable the service on your machine. Specify the account name as you would like it to be displayed on the machine, and enter a PIN if you would like to use one.
Enter temporary ID
Web service
Your Brother machine can now use the service.
Related Information
• Set Up Brother Web Connect
12
 Home > Before You Use Brother Web Connect > Set Up Brother Web Connect > Create an Account for Each of the Desired Services
Create an Account for Each of the Desired Services
To use Brother Web Connect to access an online service, you must have an account with that online service. If you do not already have an account, use a computer to access the service's website and create an account. After creating an account, log on and use the account once with a computer before using the Brother Web Connect feature. Otherwise, you may not be able to access the service using Brother Web Connect.
If you already have an account, there is no need to create an additional account.
After you finish creating an account with the desired online service, apply for Brother Web Connect access.
 You do not need to create an account if you use the service as a guest. You can use only certain services as a guest. If the service you want to use does not have a guest-user option, you must create an account.
Related Information
• Set Up Brother Web Connect
13

 Home > Before You Use Brother Web Connect > Set Up Brother Web Connect > Apply for Brother Web Connect Access
Apply for Brother Web Connect Access
To use Brother Web Connect to access online services, you must first apply for Brother Web Connect access using a computer that has Brother MFL-Pro Suite installed.
1. Access the Brother Web Connect application web page.
Option
Windows® XP
Windows Vista®
Windows® 7
Windows® 8
Description
Click  (Start) > All Programs > Brother > Brother Utilities, and then click the drop-
down list and select your model name (if not already selected). Click Use More in the left navigation bar, and then click Brother Web Connect.
Click  (Brother Utilities), and then click the drop-down list and select your model
name (if not already selected). Click Use More in the left navigation bar, and then click
Brother Web Connect.
Macintosh |
|
Click Go in the Finder bar, Applications > Brother > Utilities > Brother Web Connect. |
|
|
|
 You can also access the page directly:
Type http://bwc.brother.com into your web browser's address bar.
The web browser will access the application page. 2. Select the service you want to use.
The actual screen may differ from the screen shown above.
3.Follow the on-screen instructions and apply for access. When finished, your temporary ID will be displayed.
14
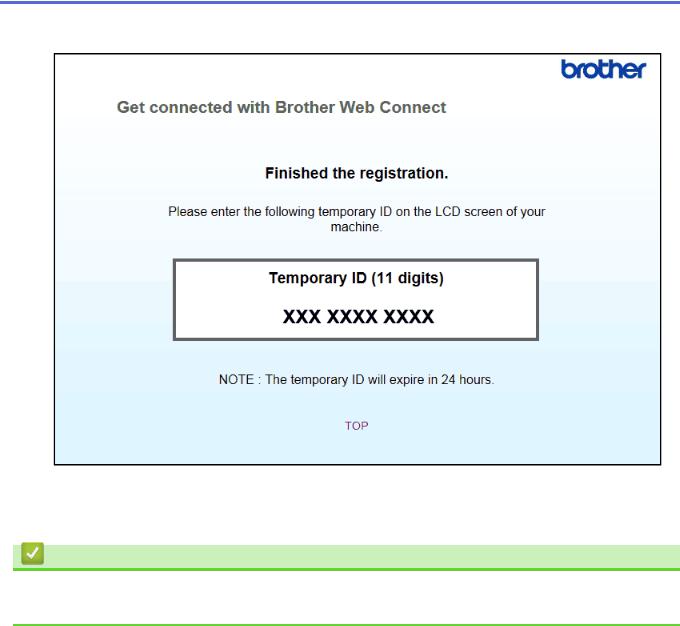
4.Make a note of your temporary ID, as you will need it to register accounts to the machine. The temporary ID is valid for 24 hours.
5. Close the web browser.
Now that you have a Brother Web Connect access ID, you must register this ID on your machine, and then use your machine to access the desired web service.
Related Information
•Set Up Brother Web Connect
•Register an Account on Your Brother Machine
15
 Home > Before You Use Brother Web Connect > Set Up Brother Web Connect > Register an Account on Your Brother Machine
Register an Account on Your Brother Machine
You must enter your Brother Web Connect account information and configure your machine so that it can use Brother Web Connect to access the service you want.
•You must apply for Brother Web Connect access to register an account on your machine.
•Before you register an account, confirm that the correct date and time are set on the machine's control panel.
•You can register up to 10 accounts on your machine.
>>DCP-J4120DW/MFC-J2320/MFC-J4420DW/MFC-J5320DW
>>MFC-J2720/MFC-J4620DW/MFC-J4625DW/MFC-J5620DW/MFC-J5625DW/MFC-J5720DW/MFC-J5920DW
DCP-J4120DW/MFC-J2320/MFC-J4420DW/MFC-J5320DW
1.Press d or c to display Web. Press Web.
2.If information regarding the Internet connection is displayed on the machine's LCD, read the information and press OK.
You will be asked if you want to display this information again in the future.
3.Press Yes or No.
 Occasionally, updates or announcements about Brother Web Connect's features will be displayed on the LCD. Read the information, and then press OK.
4.Press a or b to display the service with which you want to register. Press the service name.
5.If information regarding Brother Web Connect is displayed, press OK.
6.Press Register/Delete > Register Account.
7.The machine will prompt you to enter the temporary ID you received when you applied for Brother Web Connect access.
Press OK.
8.Enter the temporary ID using the LCD, and then press OK.
 An error message will appear on the LCD if the information you entered does not match the temporary ID you received when you applied for access, or if the temporary ID has expired. Either enter the temporary ID correctly, or apply for access again and receive a new temporary ID.
9.The machine will prompt you to enter the account name that you want to be displayed on the LCD. Press OK.
10.Enter the name using the LCD, and then press OK.
11.Do one of the following:
•To set a PIN for the account, press Yes. (A PIN prevents unauthorized access to the account.) Enter a four-digit number and press OK.
•If you do not want to set a PIN, press No.
 When the account information you entered is displayed, confirm that it is correct.
12.Press Yes to register your information as entered.
13.Press OK.
Account registration is complete and your machine can now access the service.
14.Press  .
.
16
MFC-J2720/MFC-J4620DW/MFC-J4625DW/MFC-J5620DW/MFC-J5625DW/ MFC-J5720DW/MFC-J5920DW
1.Swipe left or right, or press d or c to display the More1 screen.
2.Press Web.
3.If information regarding the Internet connection is displayed on the machine's LCD, read the information and press OK.
You will be asked if you want to display this information again in the future.
4.Press Yes or No.
 Occasionally, updates or announcements about Brother Web Connect's features will be displayed on the LCD. Read the information, and then press OK.
5.Swipe left or right, or press d or c to display the service with which you want to register. Press the service name.
6.If information regarding Brother Web Connect is displayed, press OK.
7.Press Register/Delete Account > Register Account.
8.The machine will prompt you to enter the temporary ID you received when you applied for Brother Web Connect access.
Press OK.
9.Enter the temporary ID using the LCD, and then press OK.
 An error message will appear on the LCD if the information you entered does not match the temporary ID you received when you applied for access, or if the temporary ID has expired. Either enter the temporary ID correctly, or apply for access again and receive a new temporary ID.
10.The machine will prompt you to enter the account name that you want to be displayed on the LCD. Press OK.
11.Enter the name using the LCD, and then press OK.
12.Do one of the following:
•To set a PIN for the account, press Yes. (A PIN prevents unauthorized access to the account.) Enter a four-digit number and press OK.
•If you do not want to set a PIN, press No.
 When the account information you entered is displayed, confirm that it is correct.
13.Press Yes to register your information as entered.
14.Press OK.
Account registration is complete and your machine can now access the service.
15.Press  .
.
Related Information
•Set Up Brother Web Connect
•Apply for Brother Web Connect Access
17
 Home > Before You Use Brother Web Connect > Set Up Brother Web Connect > Delete a Brother Web Connect Account on Your Machine
Delete a Brother Web Connect Account on Your Machine
>>DCP-J4120DW/MFC-J2320/MFC-J4420DW/MFC-J5320DW
>>MFC-J2720/MFC-J4620DW/MFC-J4625DW/MFC-J5620DW/MFC-J5625DW/MFC-J5720DW/MFC-J5920DW
DCP-J4120DW/MFC-J2320/MFC-J4420DW/MFC-J5320DW
1.Press d or c to display Web. Press Web.
2.If information regarding the Internet connection is displayed on the machine's LCD, read the information and press OK.
You will be asked if you want to display this information again in the future.
3.Press Yes or No.
 Occasionally, updates or announcements about Brother Web Connect's features will be displayed on the LCD. Read the information, and then press OK.
4.Press a or b to display the service that hosts the account you want to delete. Press the service name.
5.Press Register/Delete > Delete Account.
6.Press the account that you want to delete. You can delete more than one account at one time if needed. The selected account(s) will be indicated by check marks.
7.Press OK.
You will be asked to confirm your selections.
8.Press Yes to delete.
9.Press OK.
10.Press  .
.
MFC-J2720/MFC-J4620DW/MFC-J4625DW/MFC-J5620DW/MFC-J5625DW/ MFC-J5720DW/MFC-J5920DW
1.Swipe left or right, or press d or c to display the More1 screen.
2.Press Web.
3.If information regarding the Internet connection is displayed on the machine's LCD, read the information and press OK.
You will be asked if you want to display this information again in the future.
4.Press Yes or No.
 Occasionally, updates or announcements about Brother Web Connect's features will be displayed on the LCD. Read the information, and then press OK.
5.Swipe left or right, or press d or c to display the service that hosts the account you want to delete. Press the service name.
6.Press Register/Delete Account > Delete Account.
7.Press the account that you want to delete. You can delete more than one account at one time if needed. The selected account(s) will be indicated by check marks.
8.Press OK.
You will be asked to confirm your selections.
9.Press Yes to delete.
18
Loading...