


TravelPilot E1
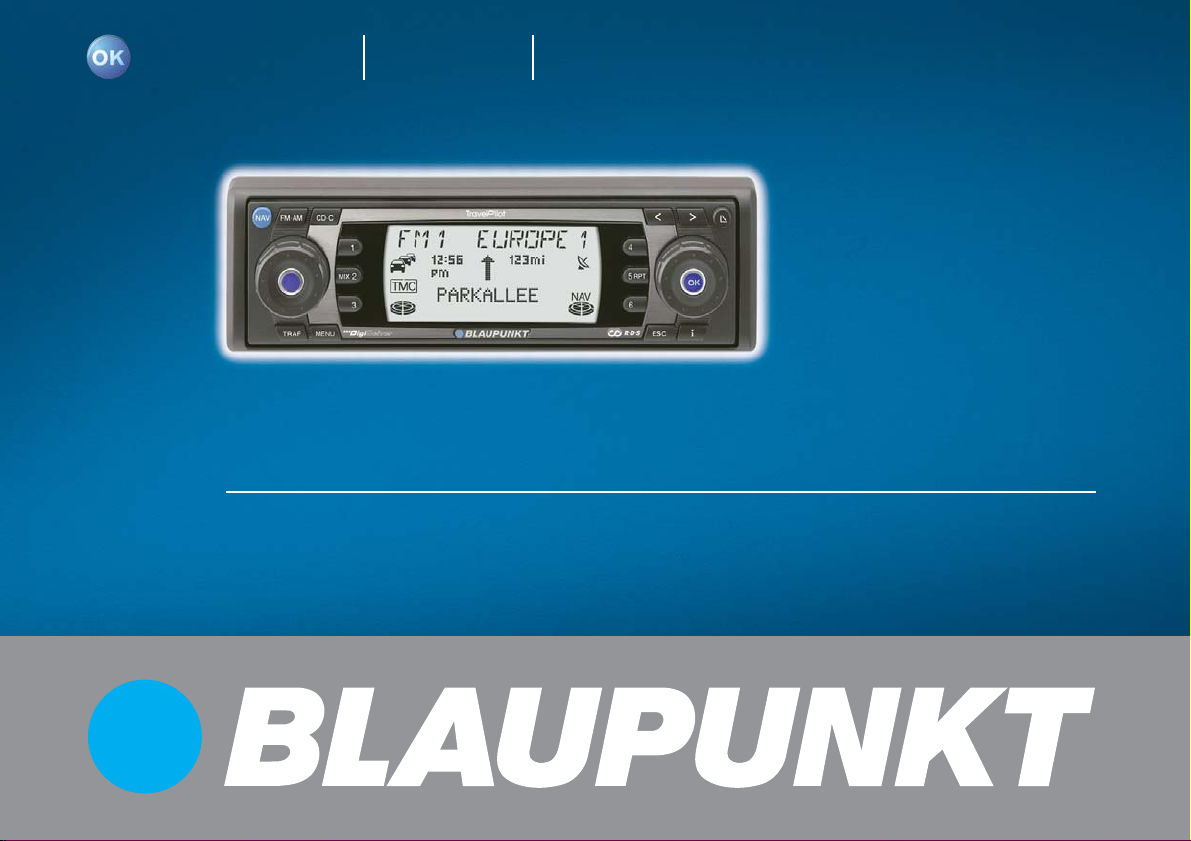
TravelPilot Navigation Radio/CD
TravelPilot E1/E2
Operating instructions
www.blaupunkt.com
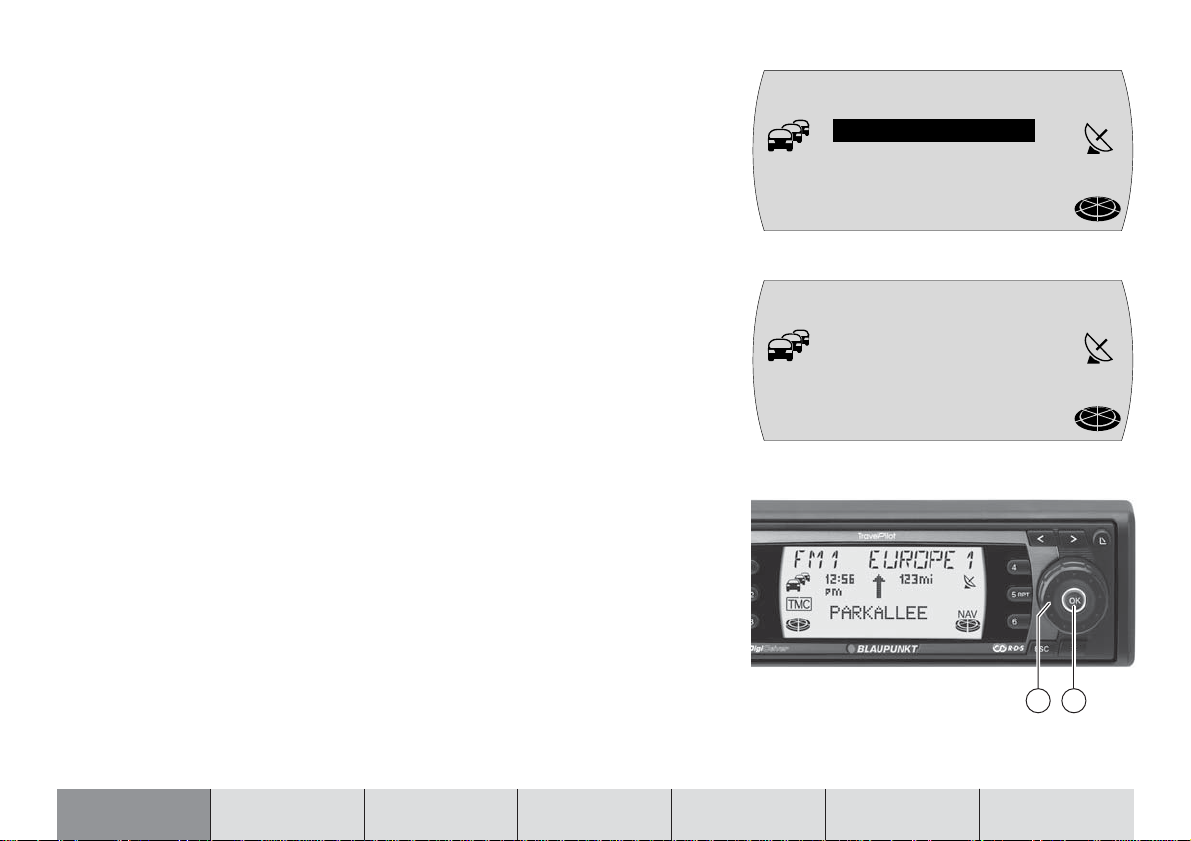
Device overview
2
2
1
4
3
5 6 7 8 9
1213141516
11
10

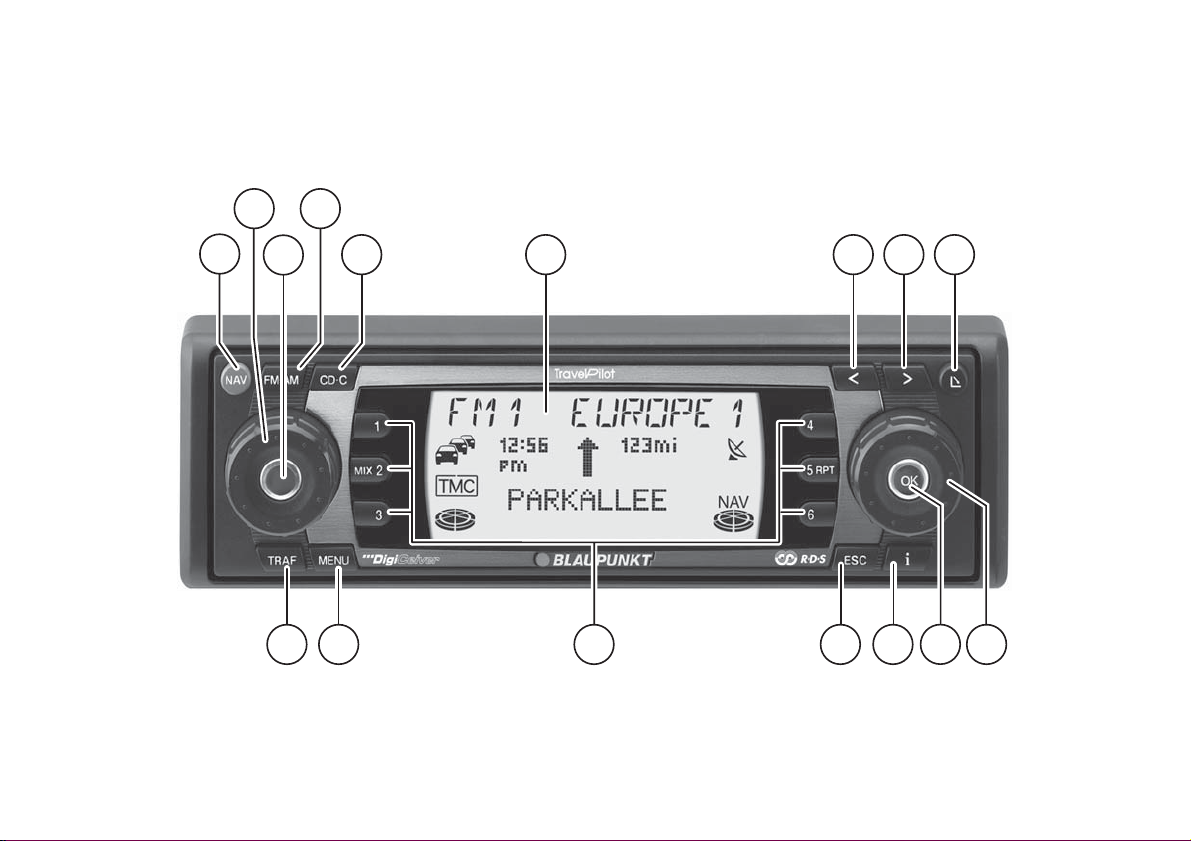
1 NAV button
Short press: Activates navigation mode and the four memory banks.
Long press: Opens the selection menu for traffic-jam
ahead and route options.
2 Volume control
3 Switches the device on/off and activates/deactivates the
mute volume function.
4 FM•AM button
Short press: Activates radio mode and selects the FM,
MW and LW wavebands.
Long press: Starts the Travelstore function.
5 CD•C button
Activates CD mode, MP3 mode or CD-changer mode.
6 Display
7
button
Radio/CD: Search downwards / Skip to the previous track.
Navigation: Deletes an entered character.
8 button
Radio/CD: Search upwards / Skip to the next track.
Navigation: Jumps to the selection list.
9 button opens the flip-release control panel and ejects a
CD.
: Menu knob
For selecting menus and characters
Radio: Tune into stations manually
; OK button
Short press: Confirms menu items
Long press: Starts the scan function
Radio: Opens the menu to select a waveband
CD changer: Opens the CD selection menu
< button
Whilst navigation is active
Short press: The current position is displayed and the last
voice output is repeated. The current destination will be
displayed if you briefly press the button again.
Long press: Opens the route list.
Whilst navigation is inactive
Short press: The current position is displayed.
List entries are displayed in full.
= ESC button
Closes menus.
Deletes characters when you are entering a destination.
Cancels navigation.
> Keypad 1 - 6
Station buttons and the navigation system’s destination
memory
Button 2 MIX: Random playback in CD mode.
Button 5 RPT: Repeat tracks in CD mode.
? MENU button
Short press: Opens the setup menu.
Long press: Opens the installation menu.
@ TRAF button
Short press: Switches traffic-information standby on/off.
Long press: For viewing TMC messages.
INTRODUCTION NAVIGATION RADIO CD / MP3 CD CHANGER SETUP APPENDIX
3

INTRODUCTION NAVIGATION
Dear Customer,
Congratulations on buying the TravelPilot
E1/E2. You can be sure you have made
the right choice in purchasing this device.
The TravelPilot E1/E2 is a radio navigation
system the size of a standard car radio.
However, it has a whole lot more to offer!
For instance, it includes the corridor and
surrounding-area functions that allow you
to listen to audio CDs during an active navigation session.
The TravelPilot E1/E2 is a reliable and
easy-to-use navigation system that will
guide you precisely to your destination.
These operating instructions will lead you
step-by-step through the functions of the
TravelPilot E1/E2 and will answer the most
frequently asked questions. You will find further information on using these operating
instructions in the section entitled “About
these instructions”.
If you have any further questions or would
like to provide suggestions regarding the
TravelPilot E1/E2, please do not hesitate
to call our telephone hotline at any time or
contact your dealer. The international telephone hotline numbers are printed at the
end of these instructions.
RADIO CD / MP3 CD CHANGER SETUP APPENDIX
Guarantee
We provide a manufacturer guarantee for
our products bought within the European
Union. For devices bought outside the European Union, the conditions of warranty
issued by our representatives responsible
for the relevant country apply.
You can view the guarantee conditions at
www.blaupunkt.de or ask for them directly
at:
Notice regarding liability
Despite constant technical developments,
the navigation system may in isolated cases provide incorrect or unoptimised navigation due to improper operation by the
user, changes to the traffic-flow regulation,
construction sites and road works, traffic
load, errors or missing information on the
navigation data media or general computer and position-fixing errors. Blaupunkt
does not accept liability and does not proBlaupunkt GmbH
Hotline
vide compensation for any damages or oth-
er drawbacks arising from this.
Robert-Bosch-Str. 200
31139 Hildesheim
Germany
4
Quick guide to navigation
N1 NAVi
LAST 1O
T
Press the NAV button 1 once to switch
from the radio or CD-changer (optional)
audio source to the main navigation menu.
Use the menu knob : to select the DESTi-
nation INPut menu item and then press the
OK button ; to enter a new destination.
You will first be asked to select the destination country. Confirm your selection by
pressing the OK button ;.
Now confirm the marked TOWN menu item
by pressing the OK button ;.
In the displayed text input line, use the
menu knob : to select the first letter or
the first number of the postcode of the place
that you want. Press the OK button ; to
accept the letter or number that you entered.
INTRODUCTION NAVIGATION RADIO CD / MP3 CD CHANGER SETUP APPENDIX
DEST INP.
MC
NAV
=OWN
BERLIN [D]
T
MC
EG ,C
Now use the menu knob : to select the
next character. To simplify text input, the
system only displays and allows you to select characters that can logically follow on
from the ones you have already entered (intelligent text-input line).
As soon as the TravelPilot E1/E2 recognises that the entry matches a place name
stored on the CD it completes the name
automatically. Furthermore, the TravelPilot
E2 stores the last 20 towns that the navigation system guided you to. This helps you
quickly find frequently-used destination
towns.
In most cases, only a few letters are needed in order to enter the place name that
you want.
When the name of the place that you are
looking for appears in the text input line,
press and hold down the OK button ; for
longer than 2 seconds or press the
ton 8.
NAV
but-
=OWN
BERLIN [D]
T
MC
The selected place name will then be dis-
played in the list of destination places.
If you want to select a different place name
from the list of destination places, you can
browse through the list by turning the menu
knob :.
As soon as the name of the place you are
looking for is displayed, press the OK but-
ton ;.
If there are several instances of the place
name you selected, the system will display
another menu containing the text input line
so that you can define the county. Enter
some more letters in order to define the
place more precisely. As soon as the place
that you want is displayed press the OK
button ;.
Note: You can switch to the selection list
at any time during the input process by
pressing the
button 8.
NAV
5
INTRODUCTION NAVIGATION
RADIO CD / MP3 CD CHANGER SETUP APPENDIX
6
SELEC=
POI
T
In the subsequent selection, choose between STREET, TOWN CENTRe or POI (point
of interest).
Streets can only be selected if the data are
available on the navigation CD that is being used.
If you selected STREET, you can subsequently also enter crossroads or house
numbers. Enter the name in the same way
as described for TOWN.
Select TOWN CENTRe if you want to be guided directly to the centre of a town district.
You can use the POI option if you want to
be guided directly to destinations like train
stations, motorway junctions or tourist attractions.
When you have finished entering the destination, the DESTinatioN IS BEING CHECKED
message appears in the display. Afterwards,
the destination appears in the display.
STREET
MC
TOWN CENTR
NAV
FM1 NDR 2
B1, KAISER
STRASSE
T
MC
Note: You now have the option of storing the destination using buttons 1 - 6
>. To store it, press and hold down the
relevant button for longer than two seconds.
Now activate navigation by pressing the OK
button ;.
Navigation begins as soon as the system
has calculated the route. Furthermore, the
system also loads the route corridor into
memory. The loading progress is indicated
by the segments of the navigation-CD symbol being filled in. You can remove the CD
once all the segments appear filled in.
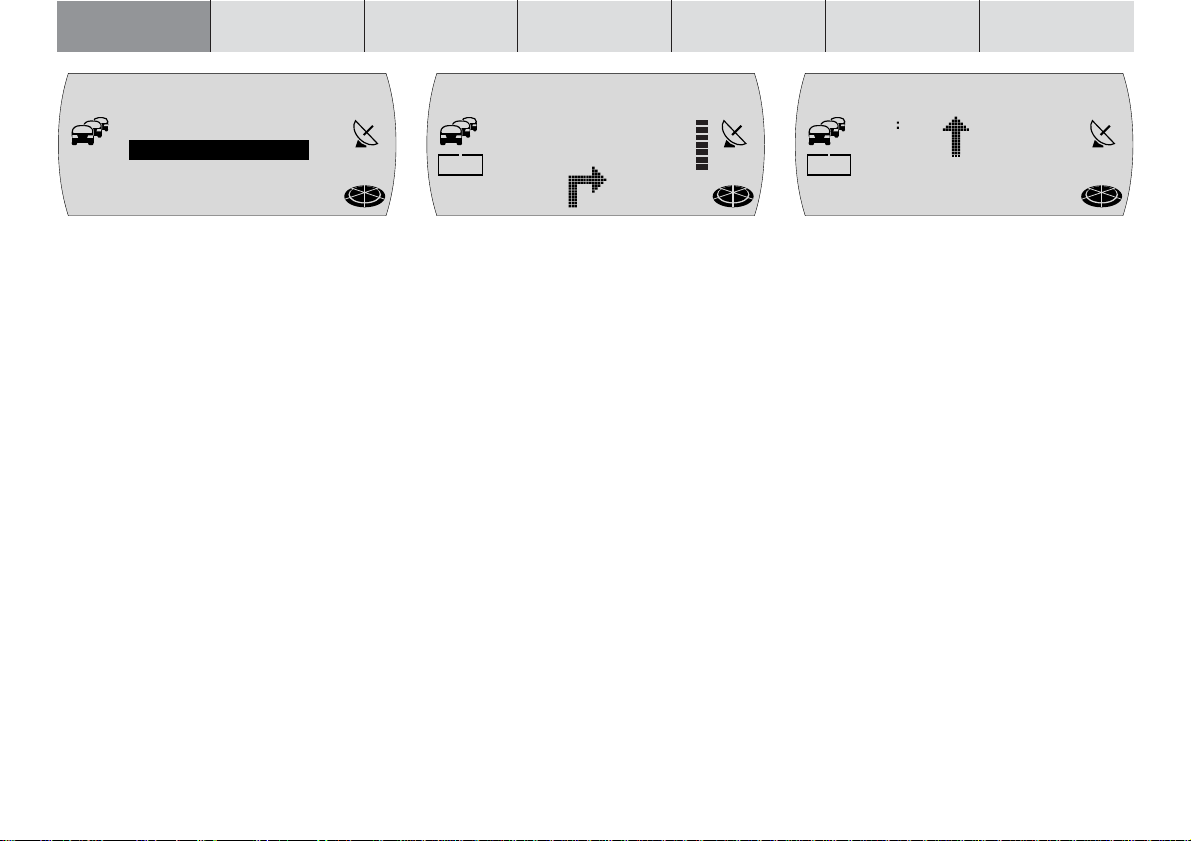
The visual driving recommendations are
shown in the middle display area.
In the display area that contains the turning instructions, you will see an indicator
bar to the right of the driving recommendations that provides a symbolic representation of the distance to the next decision point
(e.g. crossroads). Furthermore, the name
of the next road that the system suggests
you should turn off into is also displayed.
NAV
FM1 NDR 2
10 16
pm
T
MC
B6, WESTSC
HNELLWEG
If you are driving straight on, the name of
the road you are currently driving down is
displayed beneath the driving recommen-
dations. At the top right you will see the
current distance to your destination and at
the top left the estimated time of arrival.
The currently active audio source is dis-
played above the driving recommendations.
In radio mode, the station name or frequen-
cy will be shown. In CD-changer mode, the
track and CD are displayed.
You can operate the audio functions dur-
ing a navigation session by pressing but-
tons 1 - 6 >.
16mi
NAV
Safety notices
The TravelPilot E1/E2 has been designed for use in passenger cars.
Special information such as height restrictions or maximum permitted road load, which is required for navigating
lorries, trucks and buses, is not included on the navigation CDs.
Inserting/removing a CD
• For safety reasons, you should only insert or remove a CD when the vehicle is stationary.
• Only open the control panel when you want to insert or remove a CD.
• After inserting or removing a CD, close the control panel immediately to ensure that the device is ready for operation before setting off on your journey. If you do not do this, the device will switch off after 30 seconds.
Operating the device during your journey
If you do not pay attention to the road and traffic situation you could cause a serious accident.
To avoid being distracted by the TravelPilot E1/E2, please observe the following points:
• Familiarise yourself with the TravelPilot E1/E2 and how to operate it before setting off on your journey.
• Stop your vehicle at a suitable location if you want to reprogram the TravelPilot E1/E2.
• Whilst driving, only operate the TravelPilot E1/E2 if the road conditions and traffic situation allow you to do so.
• Only enter a destination whilst the vehicle is stationary.
INTRODUCTION NAVIGATION RADIO CD / MP3 CD CHANGER SETUP APPENDIX
7

INTRODUCTION NAVIGATION
Device overview .................................... 2
Quick guide to navigation .................... 5
Safety notices........................................ 7
Compatible navigation CD-ROMs...... 10
Care tips for CD-ROMs ......................... 10
About these instructions.................... 11
Detachable control panel
(flip-release panel) .............................. 12
Theft protection ..................................... 12
Detaching the release panel ................. 12
Attaching the release panel .................. 13
Switching the device on/off................ 14
Switching on/off using the vehicle
ignition................................................... 14
Selecting the operating mode ............... 15
Selecting and confirming menu items ... 15
Adjusting the volume............................. 16
Activating mute...................................... 16
Putting through telephone calls
automatically ......................................... 17
Display ................................................. 18
Switching on a coded device after
disconnection from the battery
power supply ....................................... 19
Entering the wrong numerical code ...... 20
RADIO CD / MP3 CD CHANGER SETUP APPENDIX
Navigation............................................ 21
How navigation works ........................... 21
Inserting the navigation CD................... 21
Downloading the navigation software ... 22
Corridor function.................................... 22
Surrounding area function..................... 22
Starting navigation ................................ 23
Entering a destination ........................... 24
Entering destinations using the text
input line................................................ 25
Entering a destination – Country........... 27
Entering a destination – Town............... 27
Entering a destination – Special
destination at your final destination....... 29
Entering a destination – Street, house
number and crossroads ........................ 30
Entering a destination – Centre ............ 32
Entering a destination – Special
destinations ........................................... 33
Entering a destination – Last
10 destinations ...................................... 36
Entering a destination – From the
destination memory............................... 37
Destination memory .............................. 38
Navigation ............................................. 40
Dynamic navigation............................... 43
Bypassing a traffic jam during
navigation.............................................. 46
Defining route options ........................... 47
Displaying the route list ......................... 49
Traffic announcements during
navigation.............................................. 49
Radio mode.......................................... 50
RDS functions (AF, REG)...................... 50
Switching to radio mode........................ 52
Selecting the waveband /
memory bank ........................................ 52
Tuning into a station.............................. 53
Storing stations ..................................... 54
Listening to stored stations ................... 54
Scanning receivable stations (SCAN) ... 55
Traffic information.................................. 55
CD mode .............................................. 57
Playing a CD ......................................... 57
Selecting tracks..................................... 59
Fast searching....................................... 59
Random play (MIX) ............................... 59
Scanning all the tracks on a CD
(SCAN).................................................. 60
Repeating tracks (REPEAT).................. 60
Traffic announcements during
CD mode ............................................... 60
8

MP3 mode (only TravelPilot E2) ......... 61
Preparing an MP3-CD........................... 61
Switching to MP3 mode ........................ 63
Selecting a directory.............................. 63
Selecting tracks..................................... 65
Fast seeking.......................................... 66
Random play (MIX) ............................... 66
Scanning all the tracks in a directory
(SCAN).................................................. 67
Repeating tracks (REPEAT).................. 67
Selecting MP3 info ................................ 68
CD-changer mode ............................... 69
Switching to CD-changer mode ............ 69
Selecting CDs ....................................... 70
Selecting tracks..................................... 71
Fast searching....................................... 71
Random play (MIX) ............................... 71
Scanning all tracks on all CDs (SCAN) . 72
Repeating tracks (REPEAT).................. 73
Traffic announcements during
CD-changer mode................................. 73
Steering wheel remote control........... 74
Selecting an audio source..................... 74
Adjusting the volume............................. 74
Activating navigation ............................. 74
Muting ................................................... 75
Setup – basic settings ........................ 76
Adjusting the sound and sound
distribution settings ............................... 76
Equalizer ............................................... 77
Configuring the power-on / navigation /
traffic announcement /
telephone volume and GALA settings ... 80
Configuring the radio functions ............. 81
Setting the day/night display
brightness and contrast......................... 83
Configuring the language and speech
options................................................... 84
Configuring the optimum route
(only TravelPilot E2).............................. 87
Adjusting the clock ................................ 88
Device code .......................................... 89
Installation ........................................... 90
Installation test ...................................... 90
Automatic device calibration ................. 91
Manual device calibration...................... 92
Glossary............................................... 93
Specifications...................................... 94
Installation instructions...................... 95
INTRODUCTION NAVIGATION RADIO CD / MP3 CD CHANGER SETUP APPENDIX
9
INTRODUCTION NAVIGATION
RADIO CD / MP3 CD CHANGER SETUP APPENDIX
Compatible navigation CD-R OMs
The TravelPilot E1/E2 can only be used with navigation CD-ROMs that are labelled with an “E”. If there is no CD-ROM inserted in the device, a message
informing you of this appears in the display as soon as you try to enter a destination.
Note: The TravelPilot E1/E2 is not designed for use with navigation
CD-ROMs (CD-Rs, CD-RWs) that you have burned yourself. If you
insert a CD-ROM that you have burned yourself, the text NAVIGA-
TION IS BEING ACTIVATED appears continuously in the display.
Any resulting limitations to navigation performance are not covered
by the guarantee.
Care tips for CD-ROMs
If a CD-ROM becomes dirty, never clean it using circular motions but always
wipe it from its centre to its outer edge using a soft lint-free cloth. If the CD is
very dirty, we recommend you wash the CD using standard washing-up liquid.
Again, when washing the CD, never clean it using circular motions but always
wipe it from its centre to its outer edge and leave it to dry.
We also recommend you handle both the underside and upper side of the CD
with care, since the CD structure is such that the information layer is located
directly beneath the printed layer (i.e. the label side).
10
Some comments regarding questions on reading quality:
A dirty or damaged CD can lead to the CD drive having difficulty reading the CD.
The severity of the reading error depends on the amount of dirt present or the
severity of the physical damage. Severe scratches cause data-read errors, which
lead the CD to “jump” or “get stuck” during playback. All CDs must be handled
with care and always stored in a protective case.

About these instructions
The aim of these instructions is to familiarize you with the functions of your
TravelPilot E1/E2 and to ensure that you can safely and successfully operate
the device. Before starting to use your TravelPilot E1/E2, please read these
instructions carefully and keep them in a safe place in your vehicle.
Note: Make sure you do not keep the equipment pass (enclosed in
these instructions) inside your vehicle.
To help you find the information you need as quickly as possible, these instructions use the following symbols to denote individual steps:
1 Indicates the steps informing you how to carry out a particular action in order
to achieve an intended system response to that action.
✔ Indicates the expected reaction of the device to the user’s actions or input.
Plus Point: Provides information and tips on operating the TravelPilot E1/E2.
Note: The displayed order and presence of menu items depends in
part on the navigation CD-ROM that is inserted in the drive and might
therefore differ from the pictures shown in these instructions.
INTRODUCTION NAVIGATION RADIO CD / MP3 CD CHANGER SETUP APPENDIX
11
INTRODUCTION NAVIGATION
RADIO CD / MP3 CD CHANGER SETUP APPENDIX
Detachable control panel (flip-release panel)
Theft protection
To provide protection against theft, your device is equipped with a detachable
control panel (flip-release panel) and a 4-digit device code. The device is worthless to a thief without this control panel.
Protect your device against theft by taking the control panel with you every time
you leave your vehicle. Do not leave the control panel in your vehicle – not even
in a hiding place.
The control panel has been designed to be simple to attach and detach.
Notes: Never drop the control panel. Never expose the control panel to direct sunlight or other heat sources. Store the control panel in
the supplied case. Avoid making direct skin contact with the control panel’s contacts. If necessary, clean the contacts with a lintfree cloth and some alcohol.
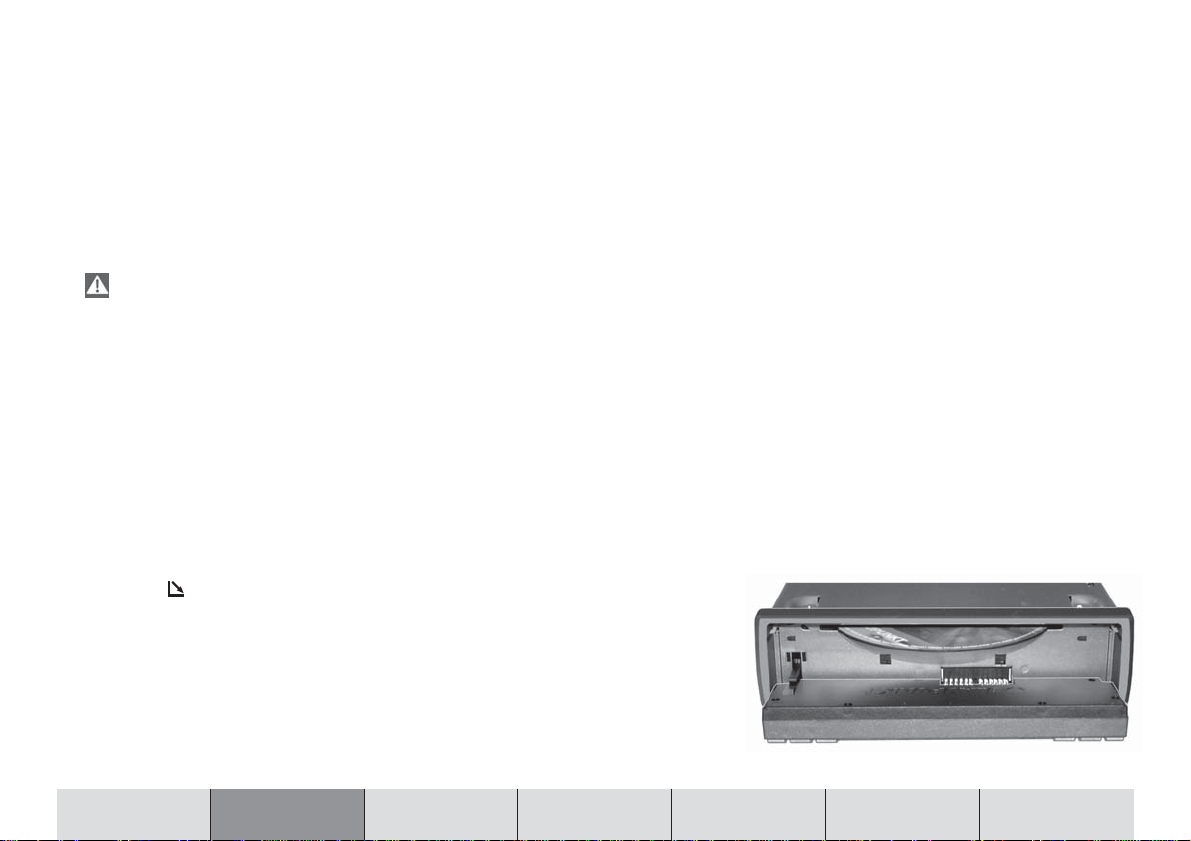
Detaching the release panel
1 Press the button 9.
✔ The release panel opens out towards you.
2 Pull the control panel straight out of the bracket.
✔ The device switches off after approx. 30 seconds when the control panel has
been detached. All the current settings are saved. Any CD already inserted
in the device remains there.
Note: The drive ejects any CD that is inserted but it will draw it back
in again automatically if you do not take out the CD.
12
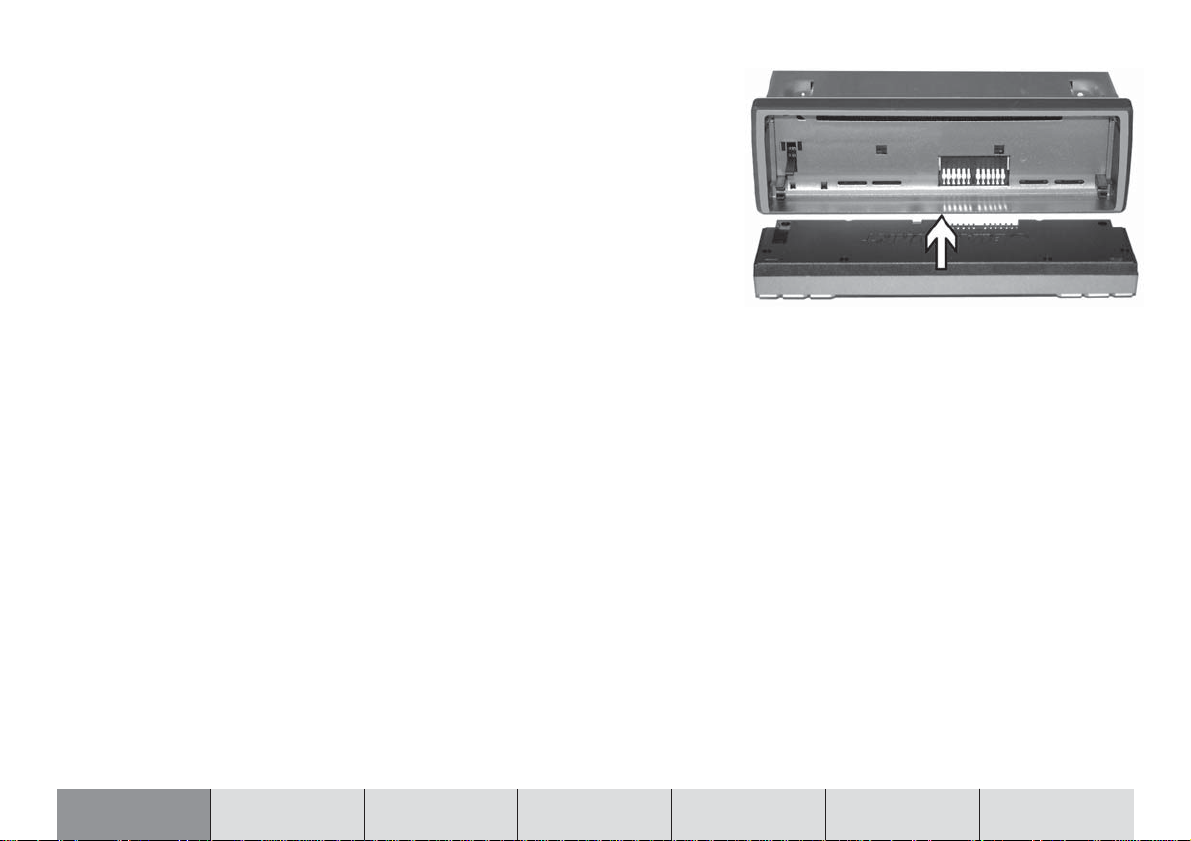
Attaching the release panel
1 Slide the control panel straight into the device’s bracket.
2 Close the control panel.
Note: When attaching the control panel, make sure you do not press
the display.
INTRODUCTION NAVIGATION RADIO CD / MP3 CD CHANGER SETUP APPENDIX
13

INTRODUCTION NAVIGATION
RADIO CD / MP3 CD CHANGER SETUP APPENDIX
Switching the device on/off
1 To switch on your TravelPilot E1/E2, press button 3.
✔ The device plays the last active audio source at the volume level that was
set when the device was last switched off. You can limit the power-on volume to a maximum value.
Note: You can find out how to limit the power-on volume in the section entitled “Configuring the power-on / navigation / traffic announcement / telephone volume and GALA settings” in the “Setup basic settings” chapter.
1 To switch off the device, press and hold down button 3 for longer than
2 seconds.
Switching on/off using the vehicle ignition
The TravelPilot E1/E2 will switch on/off simultaneously with the vehicle ignition
if it is correctly connected to the vehicle ignition and if you did not switch off the
TravelPilot by pressing button 3.
You can also operate the TravelPilot E1/E2 when the ignition is off.
1 To do so, press button 3.
The device switches off automatically after an hour so as to protect the vehicle
battery. You can repeat this procedure as often as you like. The imposed time
limit is cancelled as soon as the ignition is turned on.
Note: To ensure that the TravelPilot E1/E2 functions properly, the
device must be connected to the permanent positive power source
and to the positive power source via the ignition as described in the
installation instructions. The standby time that elapses after the
device is switched off has been set to 30 minutes.
14
3
Selecting the operating mode
To switch to navigation mode,
1 press the NAV button 1.
✔ The main navigation menu appears or, if a navigation session is already
active, the navigation (route guidance) display will appear instead.
To switch to radio mode,
1 press the FM•AM button 4.
✔ The top line of the display shows the current station name / frequency as
well as the memory bank. Beneath it you will see what stations have been
assigned to the various station buttons.
To switch to CD mode or CD-changer mode,
1 press the CD•C button 5.
✔ CD or CDC appears in the top line of the display. Beneath it you will see the
number of the CD in the CD changer, the current track and the playing time.
Selecting and confirming menu items
The right-hand menu knob : with its integrated OK button ; is the main control element on the TravelPilot E1/E2. You can use it to select menu items and
characters when entering data as well as change settings and confirm your input.
●
Selecting menu items and characters: turn the menu knob : clockwise or
anticlockwise.
●
Confirming menu items and selected items: press the OK button ;.
N1 NAVi
LAST 1O
T
DEST INP.
MC
FM1 NDR 2
NDR2 ffn
T
MC
NJOY Ante
RAD2 JUMP
NAV
NAV
11
10
INTRODUCTION NAVIGATION RADIO CD / MP3 CD CHANGER SETUP APPENDIX
15
INTRODUCTION NAVIGATION
Adjusting the volume
To increase the system volume,
1 turn the volume control 2 clockwise.
To decrease the system volume,
1 turn the volume control 2 anticlockwise.
✔ The currently set value appears in the top line of the display whilst you are
making your adjustments.
Plus Point: Whilst a spoken driving recommendation is being made by the
navigation system, you can use the volume control 2 to adjust the volume
of the driving recommendation independently of the basic volume level of
the audio source. The volume level that you set is stored automatically.
Activating mute
You can decrease the volume instantaneously.
1 Briefly press button 3.
✔ MUTE appears in the top line of the display.
Plus Point: The navigation system’s spoken driving recommendations are
not affected by this and can therefore still be heard.
To cancel mute,
1 briefly press button 3 again or turn the volume control 2.
RADIO CD / MP3 CD CHANGER SETUP APPENDIX
volume 20
NDR2 ffn
T
MC
NJOY Ante
RAD2 JUMP
mU=E
NDR2 ffn
T
MC
NJOY Ante
RAD2 JUMP
16
NAV
NAV
Putting through telephone calls automatically
If the device is properly connected to a car telephone, telephone calls will be
outputted over the loudspeakers of the TravelPilot E1/E2. TELEPHONE appears
in the display.
The call will be put through even if the TravelPilot E1/E2 is switched off. The
TravelPilot E1/E2 will then switch on for the duration of the telephone call.
You can set the volume level of the telephone call.
1 Turn the volume control 2 to adjust the volume to the preferred level.
Plus Point: During an active telephone call, you can use the volume con-
trol 2 to adjust the volume of the call independently of the basic volume
level of the audio source.
Note: If you change the volume during a call, the set volume level
will be retained by the device until the next time you switch the de-
vice off. Thereafter, when a new call arrives, the system will output
the call at the power-on volume level.
=ELEPHONE
T
MC
volume 8
TELEPHONE
NAV
INTRODUCTION NAVIGATION RADIO CD / MP3 CD CHANGER SETUP APPENDIX
17

INTRODUCTION NAVIGATION
RADIO CD / MP3 CD CHANGER SETUP APPENDIX
Display
The TravelPilot E1/E2’s display contains all the navigation information (e.g. visual driving recommendations), menus and lists, as well as the radio, CD and
CD-changer (optional) audio sources.
The display’s brightness and readability can be optimised to suit the viewing
angle in your vehicle. For further information, read the section entitled “Setting
the day/night display brightness and contrast” in the “Setup – basic settings”
chapter.
Note: Please treat the display with care. Contact with sharp objects
causes scratches and damages the covering pane. Only clean it with
a lint-free cloth and, if necessary, with some cleaning alcohol. Do
not use any solvents such as turpentine or petrol when cleaning,
since these will affect and damage the pane.
18

Switching on a coded device after disconnection
from the battery power supply
If you switch on a coded device after having disconnected it from the battery
power supply (e.g. after carrying out repairs to the vehicle), the system will display a message asking you to enter the code. You will find the numerical code
printed on your device’s equipment pass. Never keep the equipment pass in the
vehicle!
To enter the numerical code, proceed as follows:
1 For the first digit of the numerical code: press button 1 > repeatedly until
the first digit of the code appears in the display.
2 For the second digit of the numerical code: press button 2 > repeatedly
until the second digit of the code appears in the display.
3 For the third digit of the numerical code: press button 3 > repeatedly until
the third digit of the code appears in the display.
4 For the fourth digit of the numerical code: press button 4 > repeatedly until
the fourth digit of the code appears in the display.
Once you have finished entering the whole numerical code and it is shown in the
display,
5 press and hold down the OK button ; for longer than 2 seconds.
✔ The device switches on.
Alternatively, you can enter the numerical code using the menu knob : and the
OK button ;.
1 To do so, turn the menu knob : until the required digit appears in the dis-
play.
2 Press the OK button ; to mark the next input position in the numerical
code.
3 Repeat steps 1 and 2 for the remaining digits of the numerical code.
CODE
O O O O
INTRODUCTION NAVIGATION RADIO CD / MP3 CD CHANGER SETUP APPENDIX
19

INTRODUCTION NAVIGATION
Once you have finished entering the whole numerical code and it is shown in the
display,
4 press and hold down the OK button ; for longer than 2 seconds.
✔ The device switches on.
RADIO CD / MP3 CD CHANGER SETUP APPENDIX
Entering the wrong numerical code
If you inadvertently entered and confirmed the wrong numerical code, you can
enter it again. To prevent thieves from working out the numerical code by trial
and error, the device will be locked for one hour if the code is entered incorrectly
three times.
The device must then remain switched on for one hour (switched on via the
ignition) before you can try entering the code again. If the device is disconnected from the power supply during this waiting period, the countdown will be reset
and the waiting period will be set to one hour again.
It is also possible to disable the code request feature. For further information,
read the section entitled “Enabling/disabling the device code” in the “Setup –
basic settings” chapter.
CODE
WRONG CODE
20
Navigation
The navigation system in the TravelPilot E1/E2 helps you find your way to destinations quickly and safely without first having to spend time studying a roadmap. When navigation (route guidance) is active, you will be guided by the device’s voice output feature. The system will warn you in good time about approaching turning-off points. In addition, the display shows visual driving recommendations and indicates the current distance to your destination and the estimated time of arrival at your destination.
Road safety has absolute priority. Please be aware that the current way in which traffic is being directed always has priority over
the driving recommendations made by the navigation system.
How navigation works
The system works out the current vehicle position using the electronic speedometer signal, a gyroscope (which detects changes in the vehicle’s direction)
and a signal transmitted by GPS satellites (Global Positioning System). The
navigation system compares the data with the digitised map and uses this information to calculate your position and the routes used for navigation.
Inserting the navigation CD
1 Press the button 9 to open the release panel.
✔ The control panel opens out towards you and any CD that is already inserted
in the drive is ejected.
2 If a CD is ejected, take it out and then carefully push the navigation CD with
its printed side uppermost into the device’s CD compartment until you feel
some resistance. From this point onwards, the drive will draw in the CD automatically.
INTRODUCTION NAVIGATION RADIO CD / MP3 CD CHANGER SETUP APPENDIX
21
INTRODUCTION NAVIGATION RADIO CD / MP3 CD CHANGER SETUP APPENDIX
Note: If you do not take out the ejected CD, the drive will draw it
back in again automatically after approx. 10 seconds.
Downloading the navigation software
The system automatically loads the navigation software into memory from the
CD. The software remains in memory until the device is disconnected from the
operating voltage or until the system automatically shuts down fully 72 hours
after the user switches off the device. (Note: the power supply for the device
memory is switched off to conserve the vehicle battery). The system also starts
downloading from the CD if the navigation software that is loaded in the device
does not match the software that is stored on the CD.
Note: The software loading process is indicated on the display and
should not be interrupted.
NAVI SW
DOWNLOAD
T
MC
5O%
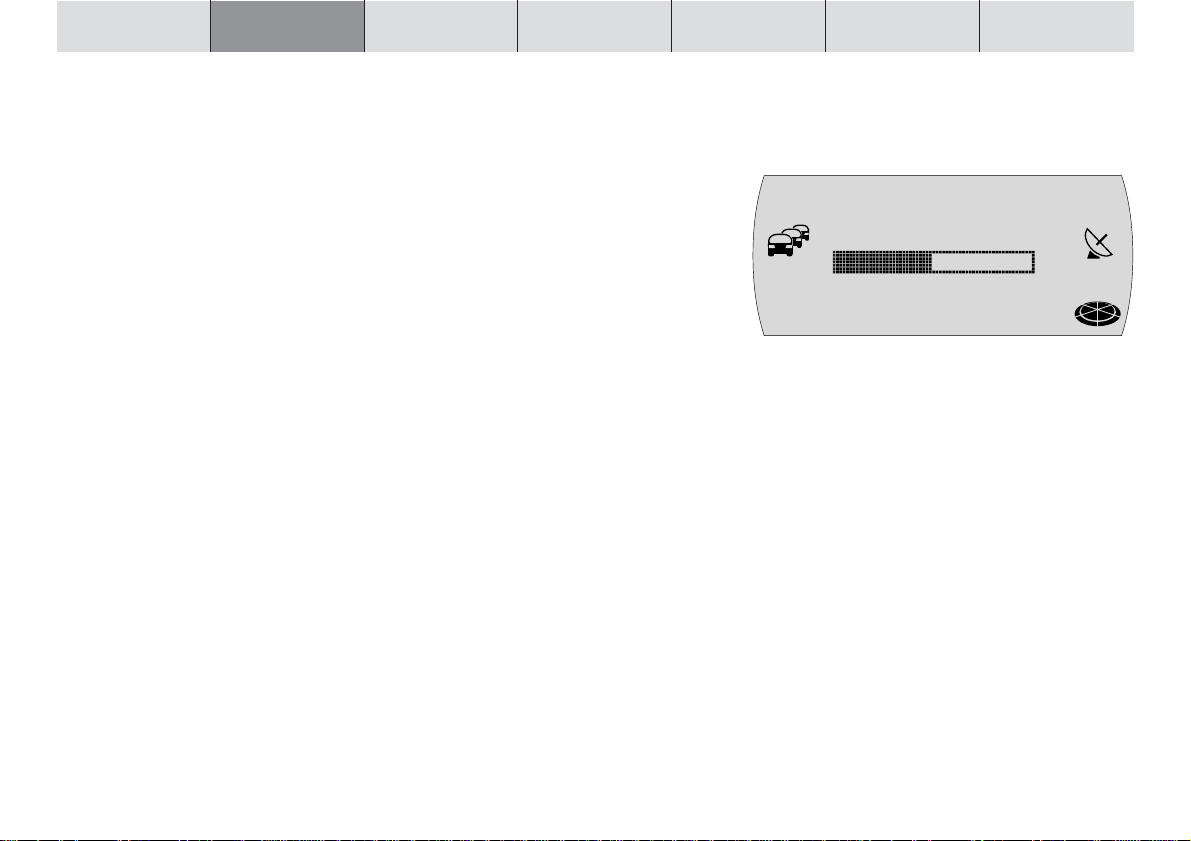
Corridor function
The corridor function is used for navigation without a CD-ROM. Once the system begins calculating the route, it loads the data necessary for navigation into
the TravelPilot E1/E2’s memory. After the loading process has completed, you
can eject the CD-ROM from the drive and insert an audio CD instead. When all
the segments of the navigation-CD symbol appear filled in, this indicates that
the loading process has ended.
Surrounding area function
The surrounding area function allows you to enter destinations within the area
stored in memory without you having to insert the CD-ROM. In order for this to
work, the system loads parts of the navigation data (depending on the vehicle
location) from the CD-ROM into the navigation memory. The navigation system
then accesses the data stored in memory when you enter a destination. The
amount of data stored in memory depends on the current operating conditions.
22
NAV
Note: Any memory available after the corridor has been loaded will
be used to store the data for the surrounding area function. The CD
symbol at the bottom right of the display indicates when data are
being loaded. Data are loaded even if there is no navigation session
currently active.
You will be asked to insert the navigation CD in certain situations when the
device needs to load new data from the CD. If you do not insert the navigation
CD after being asked to do so during the active navigation session, a compasscard symbol will appear in the display.
Notes: If a navigation session is active within the stored corridor
and you insert a CD-ROM containing navigation software that is different to the software already installed on the device, the system
will ask you whether you want to load this new software into the
device. If you decide to go ahead with this download, the system
will cancel the currently active navigation session. If you do not go
ahead with the download, a compass-card symbol will appear in the
display after your vehicle leaves the corridor.
Starting navigation
1 Whilst the device is switched on, press the NAV button 1.
✔ The main navigation menu appears.
The following destination selection options are available in the main navigation
menu:
●
LAST 10: Access the last 10 destinations
●
DESTination INPut: Enter a destination by specifying an address
Similar to the memory banks in radio mode, the navigation system also has
several memory banks at its disposal (N1, N2, N3 and N4). You can store six
destinations in each of these memory banks using buttons 1 - 6 >.
N1 NAVi
LAST 1O
T
DEST INP.
MC
NAV
INTRODUCTION NAVIGATION RADIO CD / MP3 CD CHANGER SETUP APPENDIX
23
INTRODUCTION NAVIGATION RADIO CD / MP3 CD CHANGER SETUP APPENDIX
To switch between the navigation system’s memory banks,
1 press the NAV button 1 repeatedly until the memory bank that you want
appears in the top line of the display.
Before navigation can begin, you must first insert a TravelPilot type “E” navigation CD into the drive or the necessary data must already be available in the
device’s memory. Furthermore, you must specify a destination.
N2 NAVi
LAST 1O
T
DEST INP.
MC
Entering a destination
You can enter a destination by selecting one from the destination memory or by
entering a place name or postcode, a centre, a road name, crossroads or house
number, or by selecting a special destination (e.g. a motorway junction, train
station, hotel, shopping centre, etc.). You can also enter the country name.
The main navigation menu appears in the display after you activate navigation
mode by pressing the NAV button 1.
Destinations
The following destinations are allowed:
●
the last 10 destinations,
●
the centre of a place or the centre of a city district,
●
a road,
●
a crossing where two or more roads intersect,
●
a house number or a range of house numbers,
●
special destinations such as train stations, airports, petrol stations and other
public buildings,
●
destinations from the destination memory.
24
NAV
Entering destinations using the text input line
You can use the text input line to enter data such as town names and road
names into the navigation system. The text input line is equipped with an intelligent text-input feature, which only allows you to enter characters that can logically follow on from the ones you have already entered.
Example: If you are entering a street name and there are no streets
starting with the letter A in your chosen destination town, the system will hide the letter A. Similarly, the letter C will not be displayed
if you entered B as the first letter and there are no street names in
the destination town starting with the BC letter combination.
As soon as the system finds a clear match for the characters you have entered,
it will automatically complete your text entry. This means you usually only have
to enter a few characters in order to specify a place name or street name.
Example: If, whilst in Germany, you were to enter YO as the first two
letters of a place name, the system would automatically complete
your entry with RCKGEBIET because no other feasible entry exists in
the list of place names on the Germany CD.
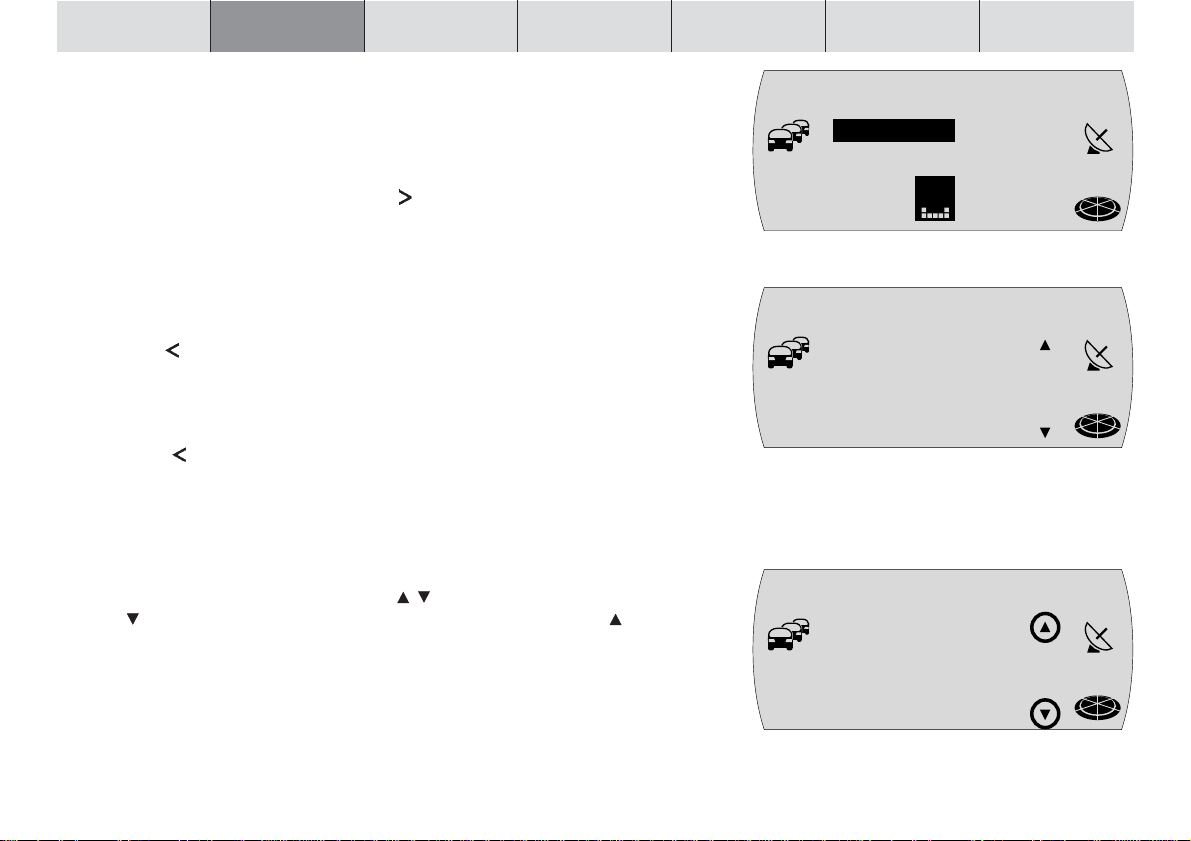
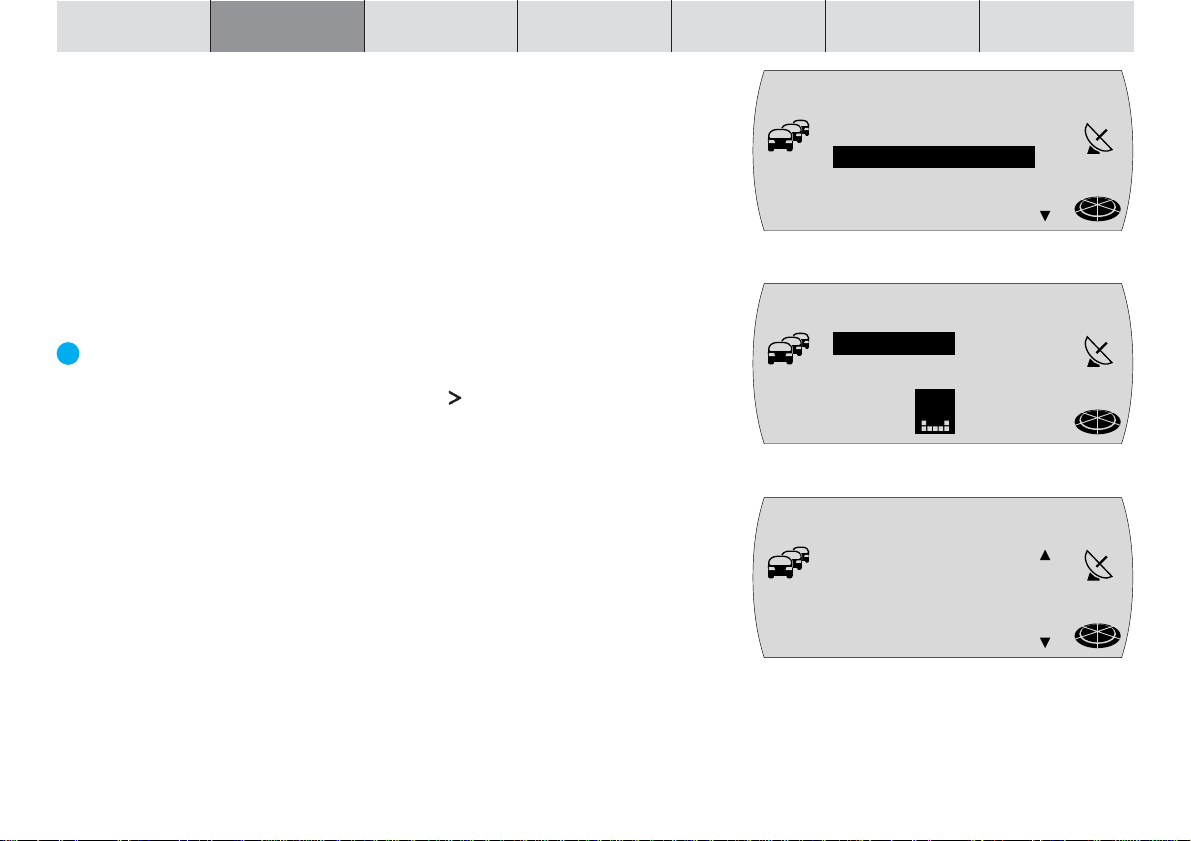
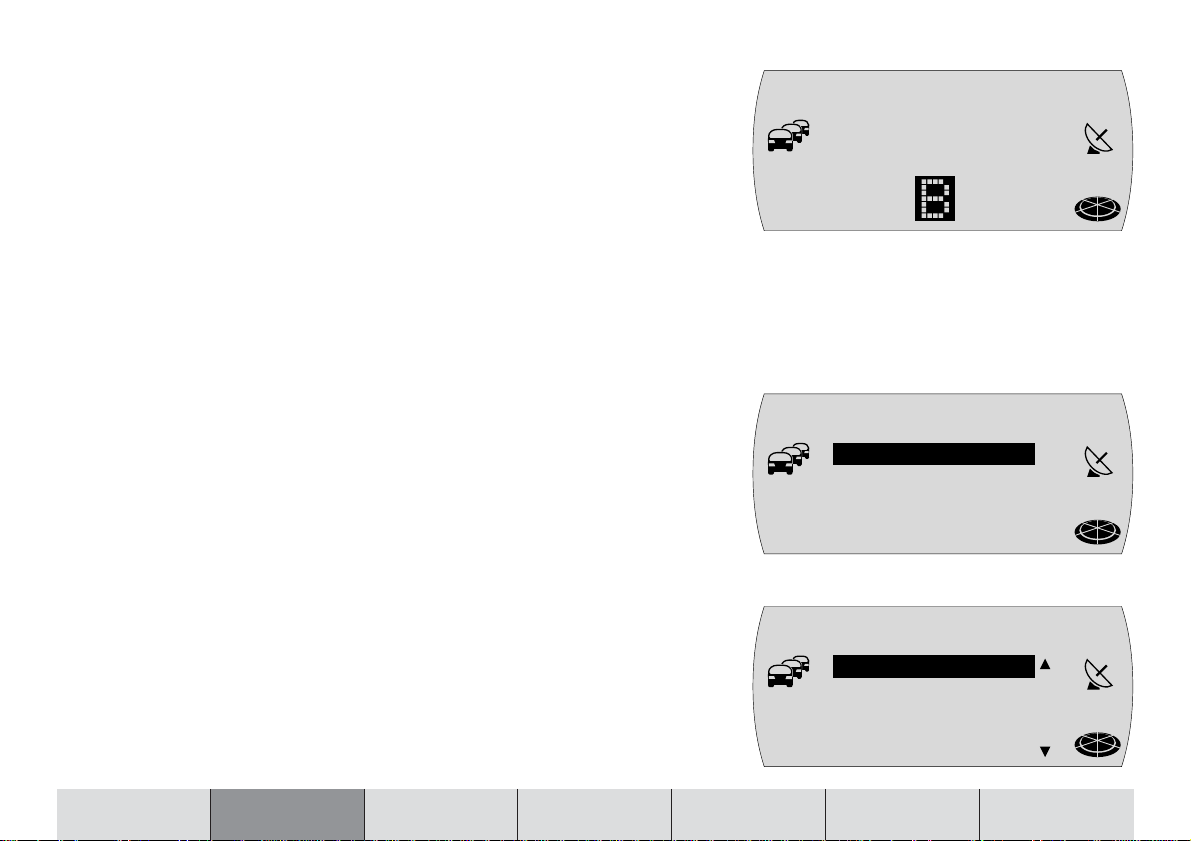
Selecting characters
The first possible character is displayed as soon as the text input line is displayed. Now proceed as follows:
1 Mark the first character.
Plus Point: The system magnifies and displays the marked character against
a dark background to show that it is marked.
2 Confirm your selection by pressing the OK button ;.
3 Select the next character and confirm your selection again by pressing the
OK button ;.
=OWN
Y ACH [D]
MC
T
A
=OWN
YORCKGEBIE
MC
T [D]
T
=OWN
BERL AGE [D
T
]
MC
E SA
NAV
NAV
NAV
INTRODUCTION NAVIGATION RADIO CD / MP3 CD CHANGER SETUP APPENDIX
25
INTRODUCTION NAVIGATION RADIO CD / MP3 CD CHANGER SETUP APPENDIX
✔ If the characters you have entered so far allow the system to find a name
match, it will automatically complete the name for you.
4 Repeat steps 1 - 3 as many times as are necessary until the name that you
want is displayed in the text input line.
5 If you want the system to use this name, press and hold down the OK but-
ton ; for a longer period or press the
✔ The entered name is displayed in the list of place names (if entering a place)
or street names (if entering a street).
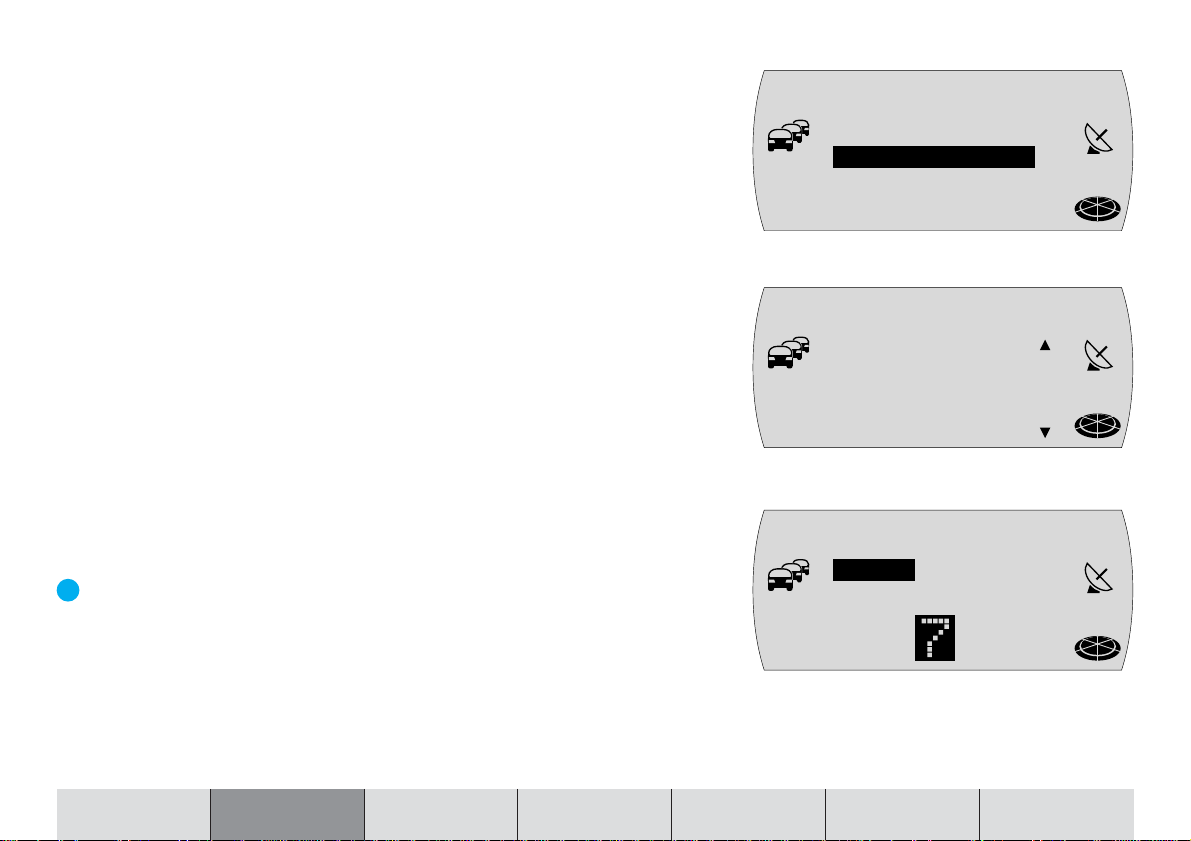
Deleting entered characters
To delete an incorrect character that you entered accidentally,
1 press the
✔ The input cursor moves one position to the left. Any text that was automati-
cally entered by the system to complete the name will be deleted.
Notes: You can delete all the characters by pressing and holding
down the
navigation menu by pressing and holding down the ESC button =
for a longer period.
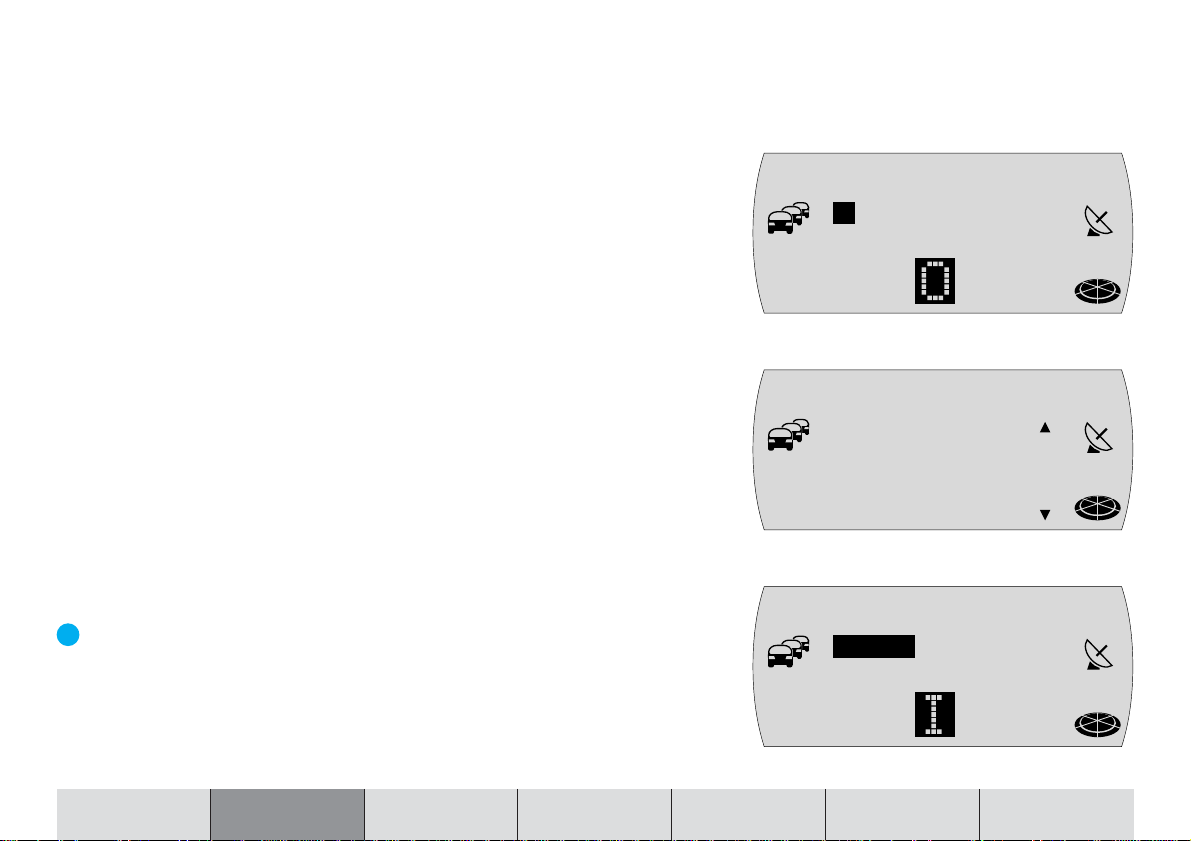
Browsing through lists and using entries
Since the number of available lines on the display is limited, lists are spread
over several pages. Lists are indicated by
only the arrow is visible you can only scroll downwards. If only the arrow is
visible you can only scroll upwards.
1 To browse through a list, turn the menu knob : clockwise or anticlockwise.
✔ The next or previous entry in the list is then displayed.
2 To select and use an entry from a list (e.g. to use it as the destination place
name), press the OK button ;.
button 7 or the ESC button =.
button 7 for a longer period. You can go to the main
button 8.
arrows on the right-hand side. If
=OWN
BERLIN [D]
MC
T
EG ,C
=OWN
BERLIN [D]
T
MC
=OWN
BERLIN [D]
T
MC
26
NAV
NAV
NAV
Entering a destination – Country
The navigation CD currently contains the entire road data for a country as well
as the interconnecting road network (Major Roads) for Europe. When you enter
a destination for the first time, the system will ask you to select a country. Generally this will be the country in which you are currently staying.
1 Mark and confirm the DESTination INPut menu item in the main navigation
menu and then mark and confirm the COUNTRY menu item.
✔ A list appears from which you can then select the country.
2 Turn the menu knob : until the country that you want is displayed and then
press the OK button ;.
✔ The destination input menu appears.
Note: The system remembers the destination country that was selected until you select another country or insert a new CD or until
the TravelPilot E1/E2 automatically shuts down fully approx. 72 hours
after you switch off the device.
Entering a destination – Town
If you want to drive to a destination located in a particular place, you must first
specify a place name. You can do so either by entering the name of the place or
its postcode.
Plus Point: Entering the postcode has the advantage that the destination
place can be identified clearly.
Note: Postcodes that are assigned to PO boxes cannot be used when
entering a destination.
N1 NAVi
LAST 1O
T
DEST INP.
MC
COUN=RX
DEUTSCHLAN
MC
D (D)
T
=OWN
1O11 5 BERL
T
IN [D]
MC
5 9
NAV
NAV
NAV
INTRODUCTION NAVIGATION RADIO CD / MP3 CD CHANGER SETUP APPENDIX
27
INTRODUCTION NAVIGATION RADIO CD / MP3 CD CHANGER SETUP APPENDIX
In smaller municipalities, it is possible that a postcode will cover several small
towns and villages. In this case you must select the appropriate place name
after entering the postcode. In general, entering the first letter of the place name
that you want will be sufficient. This will then appear next to the postcode in the
display.
Note: You can only enter destinations by way of the postcode if the
appropriate data are available on the navigation CD-ROM.
1 Mark and confirm the DESTination INPut menu item in the main navigation
menu and then mark and confirm the TOWN menu item.
✔ The text input line for entering the town name appears and the town name
that was entered last is displayed.
Plus Point: The system automatically proposes the last entered town name
for the new destination. You can accept this proposal by pressing and holding down the OK button ; or by pressing the
are stored by the TravelPilot E2. If you enter the first letters of a destination
and they match the first letters of one of the last 20 towns, the system will
display the corresponding town name. If there is no match, the first suitable
entry from the town list will be displayed.
2 Enter the place name using the text input line. (For further information, read
the section entitled “Entering destinations using the text input line”).
3 Switch to the list.
✔ The name is displayed in the list of destination places.
4 Select the town that you want and press the OK button ; to accept the town
as your destination.
✔ The system then accepts the town as the destination.
button 8. The last 20 towns
SELEC=
SUPRAREG.D
T
TOWN
MC
POS. AREA
DESTN AREA
=OWN
BERLIN [D]
MC
T
EG ,C
=OWN
BERLIN [D]
T
MC
28
NAV
NAV
NAV
Note: If there are several instances of the place name that you selected, the system will display another menu containing the text input line so that you can define the county. Enter some more letters
in order to define the place more precisely. The system displays the
distance as the crow flies and the destination direction in order to
assist you. This, however, does not apply if you selected the town
by entering the postcode.
Once you have selected the town, you will be taken to the next step for entering
your destination. Now choose between:
●
POI: You can directly select special destinations from a list of categories for
the selected town (e.g. train station, shopping centre, etc.). For information
on entering other special destinations, read the section entitled “Entering a
destination - special destinations”.
●
STREET: For entering the destination street. Whether a street can be entered as a destination depends on the data stored on your navigation CD.
●
TOWN CENTRe: For selecting the centre of a place or the centre of a town
district as your destination.
Note: If data are not available for certain items, they will not be displayed.
COUN=X
BERLIN
MC
T
S
SELEC=
POI
T
STREET
MC
TOWN CENTR
Entering a destination – Special destination at your final
destination
You can directly select special destinations (e.g. restaurants, car parks, hotels,
etc.) that are located at your final destination. You must, however, have entered
a destination place before you can do so.
1 Mark and confirm the POI menu item.
✔ A list of special destinations categories is displayed.
2 Select and confirm the category that you want.
✔ The text input line for entering the special destination is displayed.
INTRODUCTION NAVIGATION RADIO CD / MP3 CD CHANGER SETUP APPENDIX
SELEC=
HOSPITAL
T
HOTEL/MOTE
MC
LANDMARK
PARKING
NAV
NAV
NAV
29
 Loading...