

Bang & Olufsen BeoSound 4 User Manual

BeoSound 4
Guide
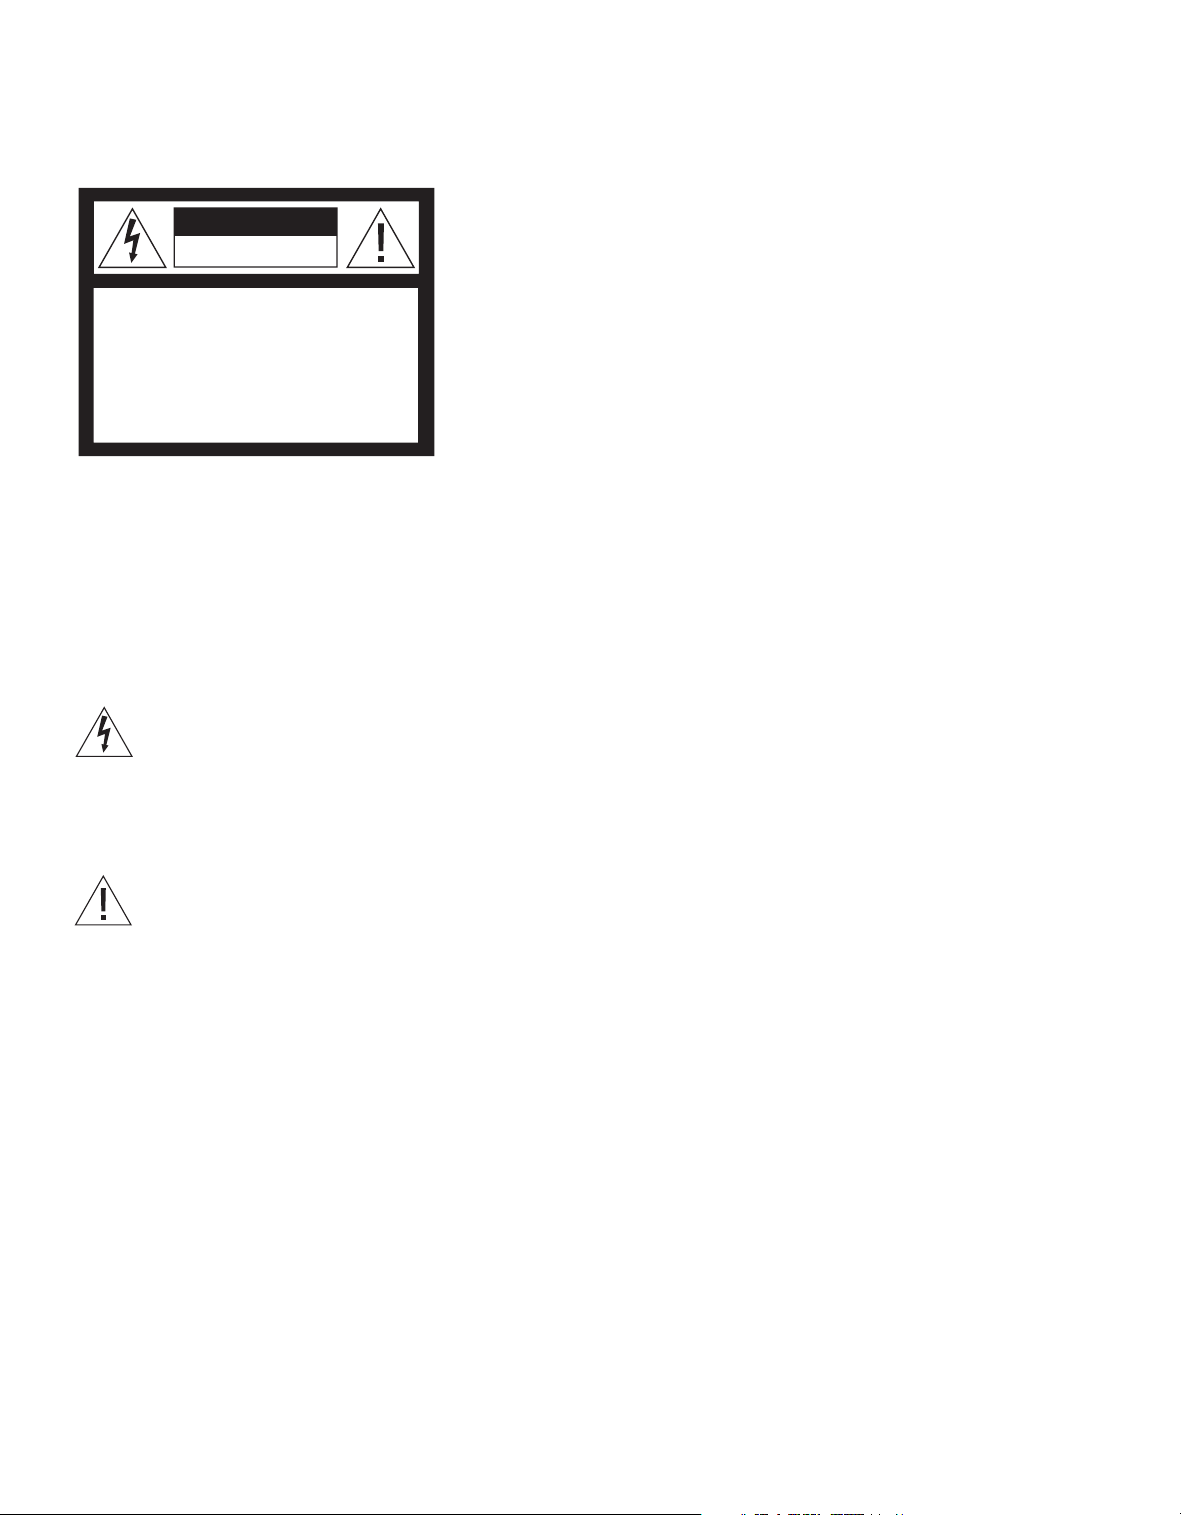
CAUTION
RISK OF ELECTRIC SHOCK
DO NOT OPEN
CAUTION: To reduce the risk of
electric shock, do not remove
cover (or back).
No User-serviceable parts inside.
Refer servicing to qualified service
personnel.
WARNING: To reduce the risk of fire or
electric shock, do not expose this appliance
to rain or moisture. Do not expose this equipment to dripping or splashing and ensure
that no objects filled with liquids, such as
vases, are placed on the equipment.
To completely disconnect this equipment
from the AC Mains, disconnect the power
supply cord plug from the AC receptacle.
The lightning flash with arrowhead symbol
within an equilateral triangle, is intended
to alert the user to the presence of un-
insulated “dangerous voltage” within the
product’s enclosure that may be of sufficient
magnitude to constitute a risk of electric
shock to persons.
The exclamation point within an equilateral
triangle is intended to alert the user to the
presence of important operating and maintenance (servicing) instructions in the
literature accompanying the product.
Contents
Introducing your music system, 4
Menu system, 5
How to use your music system, 6
Find out how to switch on and operate sources,
such as CD, radio or A.MEM via the close-up
operation panel
How to read the menu symbols, 8
Get an explanation to the symbols which appear
in the menus
How to use the menus, 9
Find out how to move around in menus and how
to make settings in fi ll-in menus
Naming procedure, 10
Find out how to name your radio stations, CDs,
folders or Timers
First-time setup, 11
Find out about the fi rst-time setup procedure
Call up additional sources, functions and
menus, 12
See which functions, features and menus can be
activated via the close-up operation panel
A.MEM and memory card, 13
Find out how to use the source A.MEM
Tune in and edit radio stations, 14
Find out how to tune in, move, name and delete
radio stations
Audio CD settings, 16
Find out how to activate special CD playback
functions, how to name CDs
Make sound settings, 17
Find out how to set your own preferences for
volume, bass, treble, balance and loudness
Make option settings, 18
Find out how to change the basic settings of your
music system
Make your music system start and stop
automatically, 19
Find out how to name and activate Timers
How to use the pincode system, 20
Find out how to activate and use the pincode
system
Use the Beo4 remote control, 21
Find out how to use the Beo4 remote control and
operate your music system from a distance
Setting-up and assembly, 22
Find out how to set up your music system and
mount the glass door
Connect the cables, 24
Find out how to connect speakers and auxiliary
equipment
Audio/Video setup, 26
Find out how to connect your music system to
your video system
Maintenance, 27
Find out how to clean your music system
Index, 28
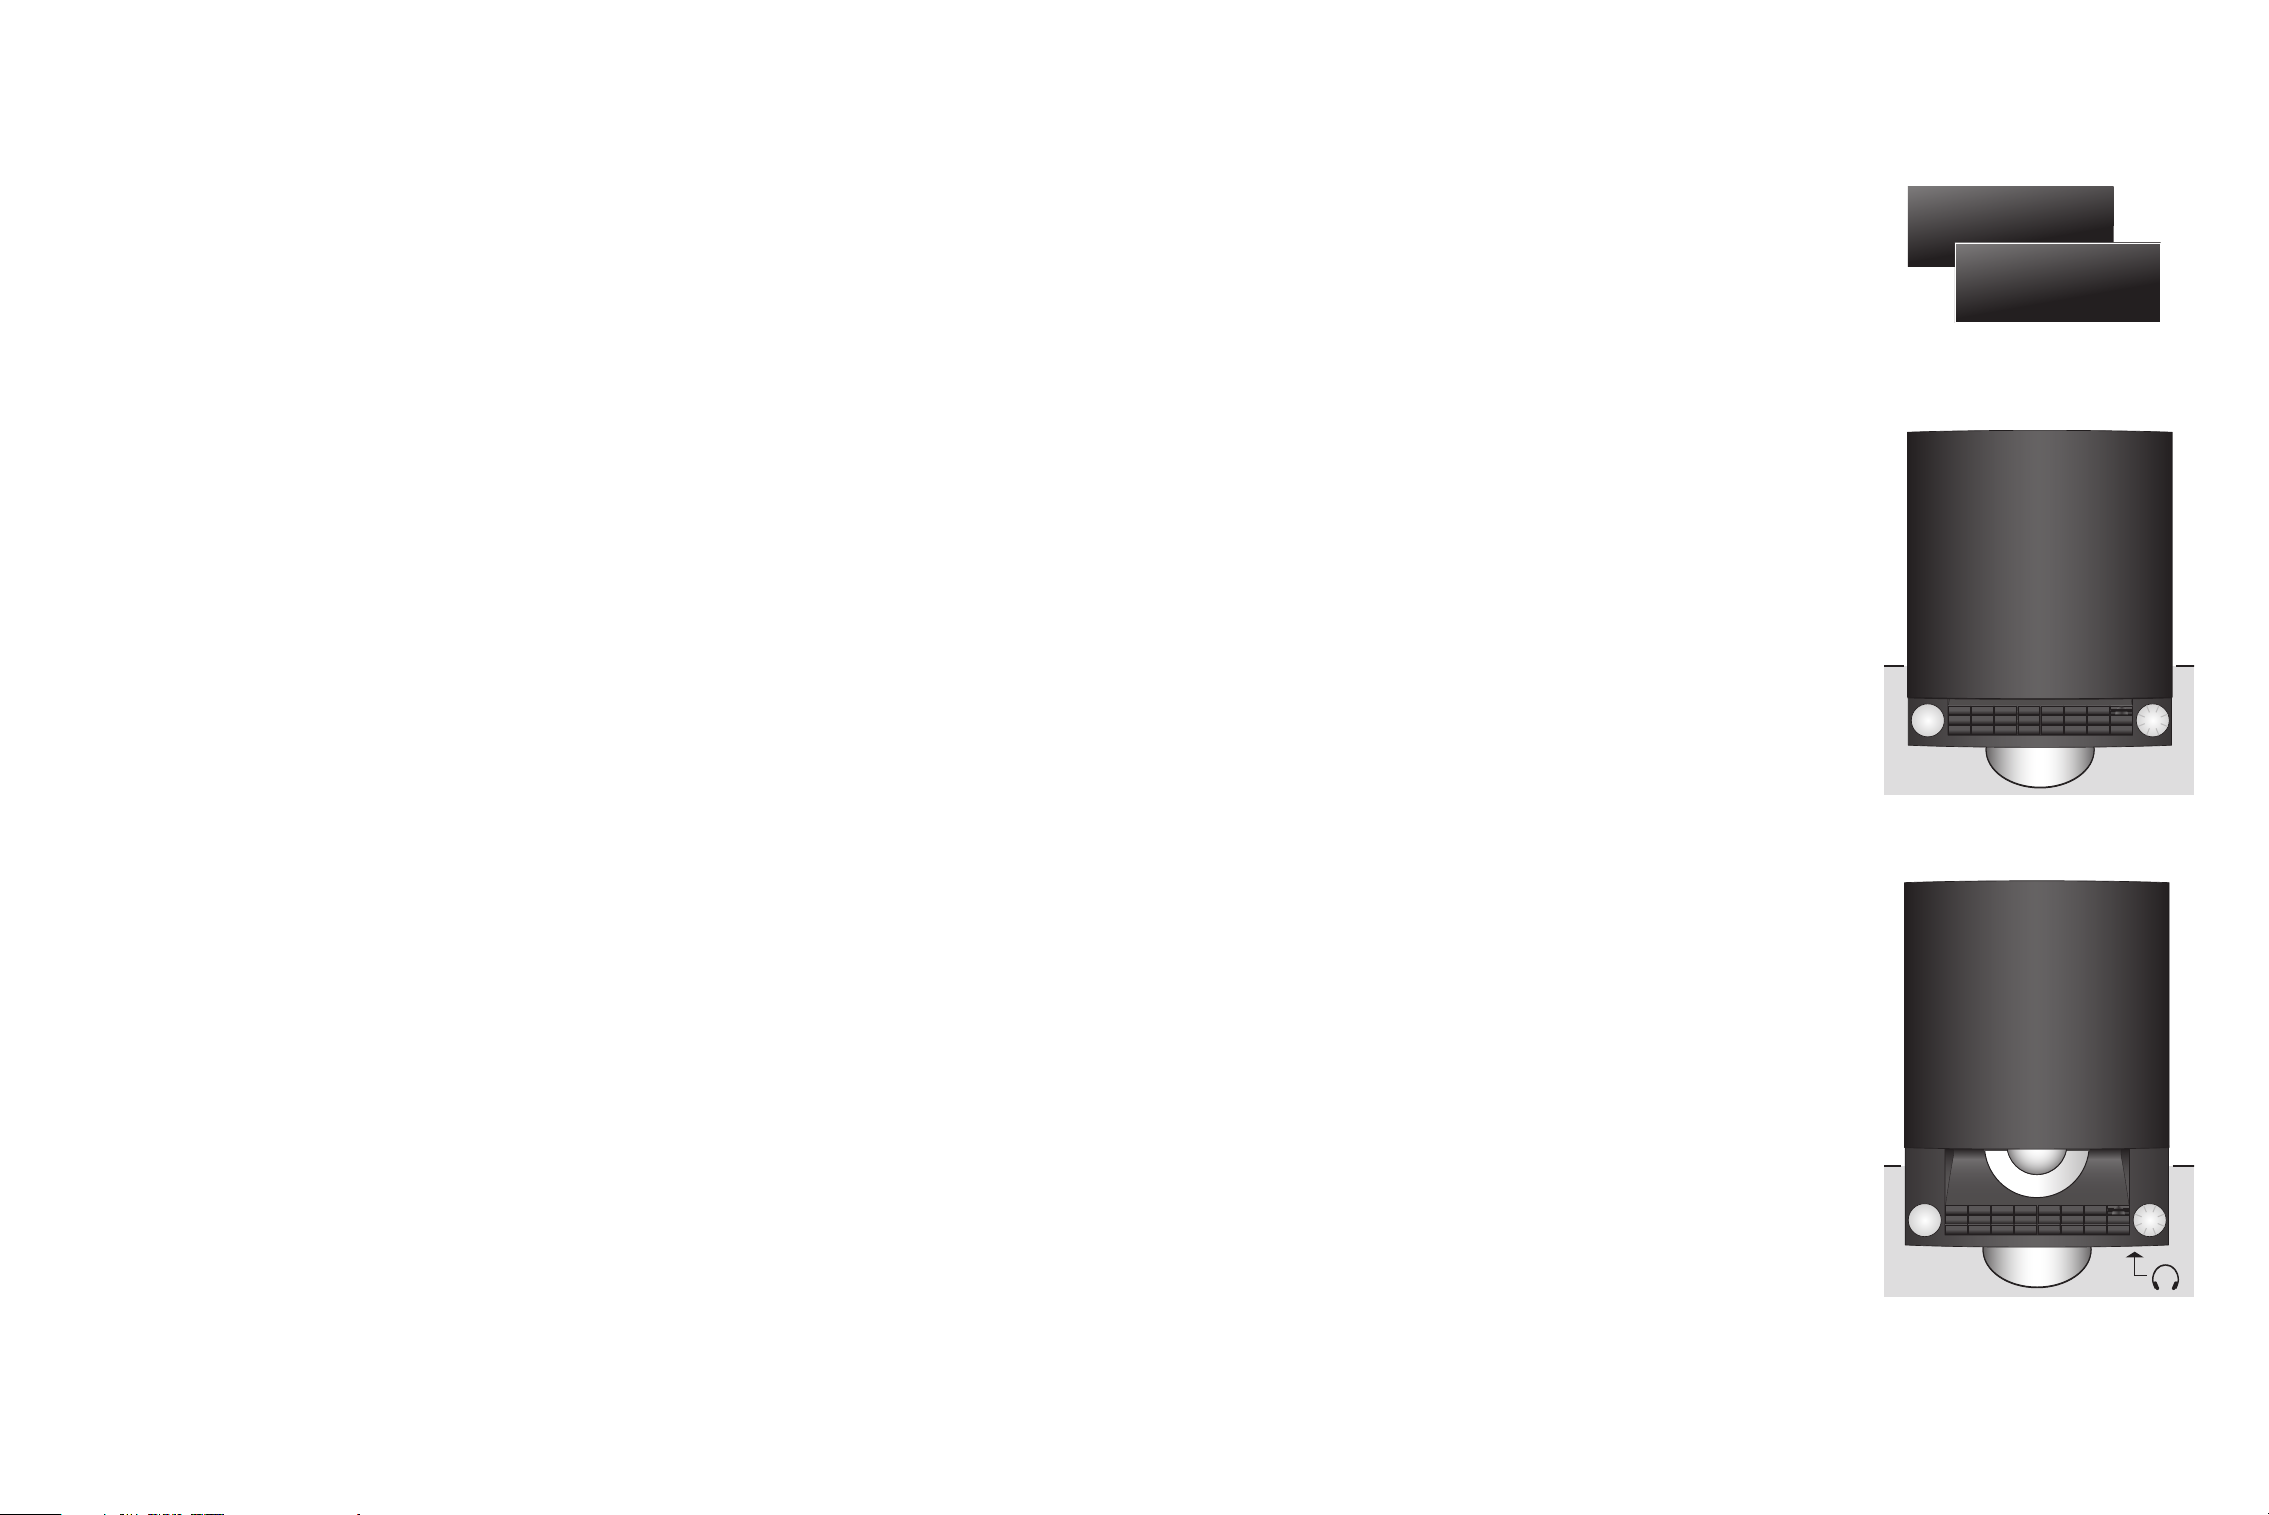
Move your hand from side to side
under the operation panel and the
glass door opens automatically,
revealing the operation panel
behind the door. Press the LOAD
button and the glass door slides
completely open, enabling you to
load a CD.
Use your music system to listen to
A.MEM or radio, to play a single
CD or to record onto the memory
card.
Introducing your music system
Display
The extended status display is not switched on
permanently. Only the fi rst line is displayed all
the time. When you operate the music system,
the display shows additional information, such
as track time and CD name briefl y. If you
change the display setting to EXTENDED, the
display always shows current status and
additional information. For further information,
see page 18.
Indicator light …
The indicator light below the display shines
continuously when the music system is in
standby. The light fl ashes when pincode
protection is active and you must enter a
pincode to activate the system.
Load a CD …
Press the LOAD button to raise the clamp
which holds the CD in place.
You can now remove a CD or load one you
want to play. Always load a CD with the label
facing up.
Press LOAD again to lower the clamp. If you
press CD, the clamp lowers automatically and
playback begin.
Socket for headphones
When head phones are plugged in, the speakers,
connected to your music system, are muted.
LOAD CD
RADIO 1
Headphones socket
CD 11 / 12
CD 11 / 12
2:18
GLENN MILLER
REPEAT RANDOM
How to use your music system Menu system overview
RADIO
STOP
A.MEM
RECORD
LOAD
CD
7
4
1
8
5
2
9
6
30
DELETE
STORE
MENU
EXIT
CD 1
RADIO
STOP
A.MEM
RECORD
LOAD
CD
7
4
1
8
5
2
9
6
30
DELETE
STORE
MENU
EXIT
Volume adjustment
Slide your finger around the volume ‘wheel’ to
adjust volume. Press to mute sound, press again
to recall sound.
Memory card
Insert the memory card with the label facing up.
Push it in until it ‘clicks’ into place. To remove the
card, push in to release, then pull out.
Navigation wheel
Turn the ‘navigation wheel’
to move the cursor
etc., press the wheel for GO - refer to the next
page for further instructions.
1 N.MUSIC
2 N.RADIO
3 A.AUX
4 RANDOM ON/OFF
5 REPEAT ON /OFF
6 TIMER ON/OFF
7 EDIT A.MEM
1 ARRANGE
REARRANGE
DELETE TRACK
DELETE FOLDER
2 RENAME
8 PLAY TIMER
1 TIMER 1 PROGRAMMING
ON/OFF
SOURCE (SOURCE, PROGRAM)
START/STOP
DAYS
NAME
2 TIMER 2
3 TIMER 3 …
9 SHOW CLOCK
PIN CODE SETUP
1 NEW PINCODE
2 DELETE PINCODE
FIRST TIME SETUP
10 SETUP
1 A.MEM
1 EDIT A .MEM
2 FORMAT MEMORY CARD
3 COPY PROTECTION
2 RADIO
1 AUTO TUNING
2 DAB ONLY AUTO TUNING
3 ARR ANGE PROGRAMS
DELETE ALL PROGRAMS
REARRANGE
4 ADD PROGRAM
TUNE ( BAND, FM …)
NAME PROGRAM
5 EDIT PROGRAM
TUNE ( BAND, FM …)
NAME PROGRAM
6 DAB AERIAL ADJUSTMENT
7 DAB DRC
3 NAME CD
4 SOUND
5 OPTIONS
1 SET CLOCK
2 TIMER ON/OFF
3 SELEC T LANGUAGE
4 DISPLAY SETUP
5 MENU OPTIONS

7
A.MEM
Activates A.MEM and star ts playback of an
inserted memory card.
CD
Starts playback of a loaded CD.
STOP
Pauses playback. To stop recording, press A.MEM
then STOP.
LOAD
Opens and closes the disc compartment.
RADIO
Switches on the radio.
RECORD
When pressed twice, records the playing source
(radio, CD or A.AUX) onto the inserted memory
card.
0 – 9
Selects radio program numbers, tracks on a CD,
folders, or N.MUSIC* tracks, or numbered menus.
Enters numbers in menus. Press GO then a
number button to select a track in an A.MEM
folder.
Searches backwards through a CD, steps backwards
between folders in A.MEM or N.MUSIC* mode,
and moves the cursor to the left in menus. Steps
back one level in the menu system.
Searches forward through a CD, steps forward
between folders in A.MEM or N.MUSIC* mode,
and moves the cursor to the right in menus.
MENU
Brings up extra sources, functions and menus in
the display.
STORE
Stores settings, names, etc. in menus.
EXIT
Exits all menus.
DELETE
Deletes tracks, folders or radio programs.
Highlight what you want to delete, then press
DELETE twice.
Deletes the last character in the naming menus,
press and hold to delete the entire name.
•
Switches your music system to standby.
Symbol of the navigation wheel – turn the wheel
clockwise or counter-clockwise to step between
tracks or stations, to move the cursor vertically
between menus, and to adjust settings. Moves
horisontally between characters in the naming
menus.
Press to enter submenus and to accept settings
and choices in menus.
When listening to radio, press and hold the wheel
to bring up a list of stations in the display. Turn
the wheel to move to the station you want, and
press the wheel to listen to the chosen station.
When listening to A.MEM, press and hold the
wheel to bring up a list of folders in the display.
Turn the wheel to move to the folder you want,
and press the wheel to see the tracks in the
chosen folder.
Close-up operation panel
All functions of your music system can easily
be operated via the close-up operation panel.
An explanation to the buttons is found here.
BeoSound 4 can also be operated with the
Beo4 remote control. For further information,
refer to page 21.
*NOTE! If your Music system is set up in a Master
Link system and a computer with BeoLink PC 2 or
BeoPort is connected, you can listen to N.Music or
N.Radio via the music system. For further
information refer to the BeoLink PC 2 or BeoPort
Guide.
.
..
...
...
8
How to read the menu symbols
The menus of your music system
gives you several options. Choose
extra functions and features via the
menus or make your own setup
preferences.
The current settings for the functions
are shown in the menu, for example
‘RANDOM – ON or OFF’.
The symbols explained to the right
help you find your way around the
menus. Use the ‘wheel’ and arrow
buttons to move around the menu
system. To enter a fill-in menu, you
must press the ‘wheel’ or the right
arrow button.
If your system is set up in a Audio/ Video
system, some settings must be made on
the connected television or a connected
radio.
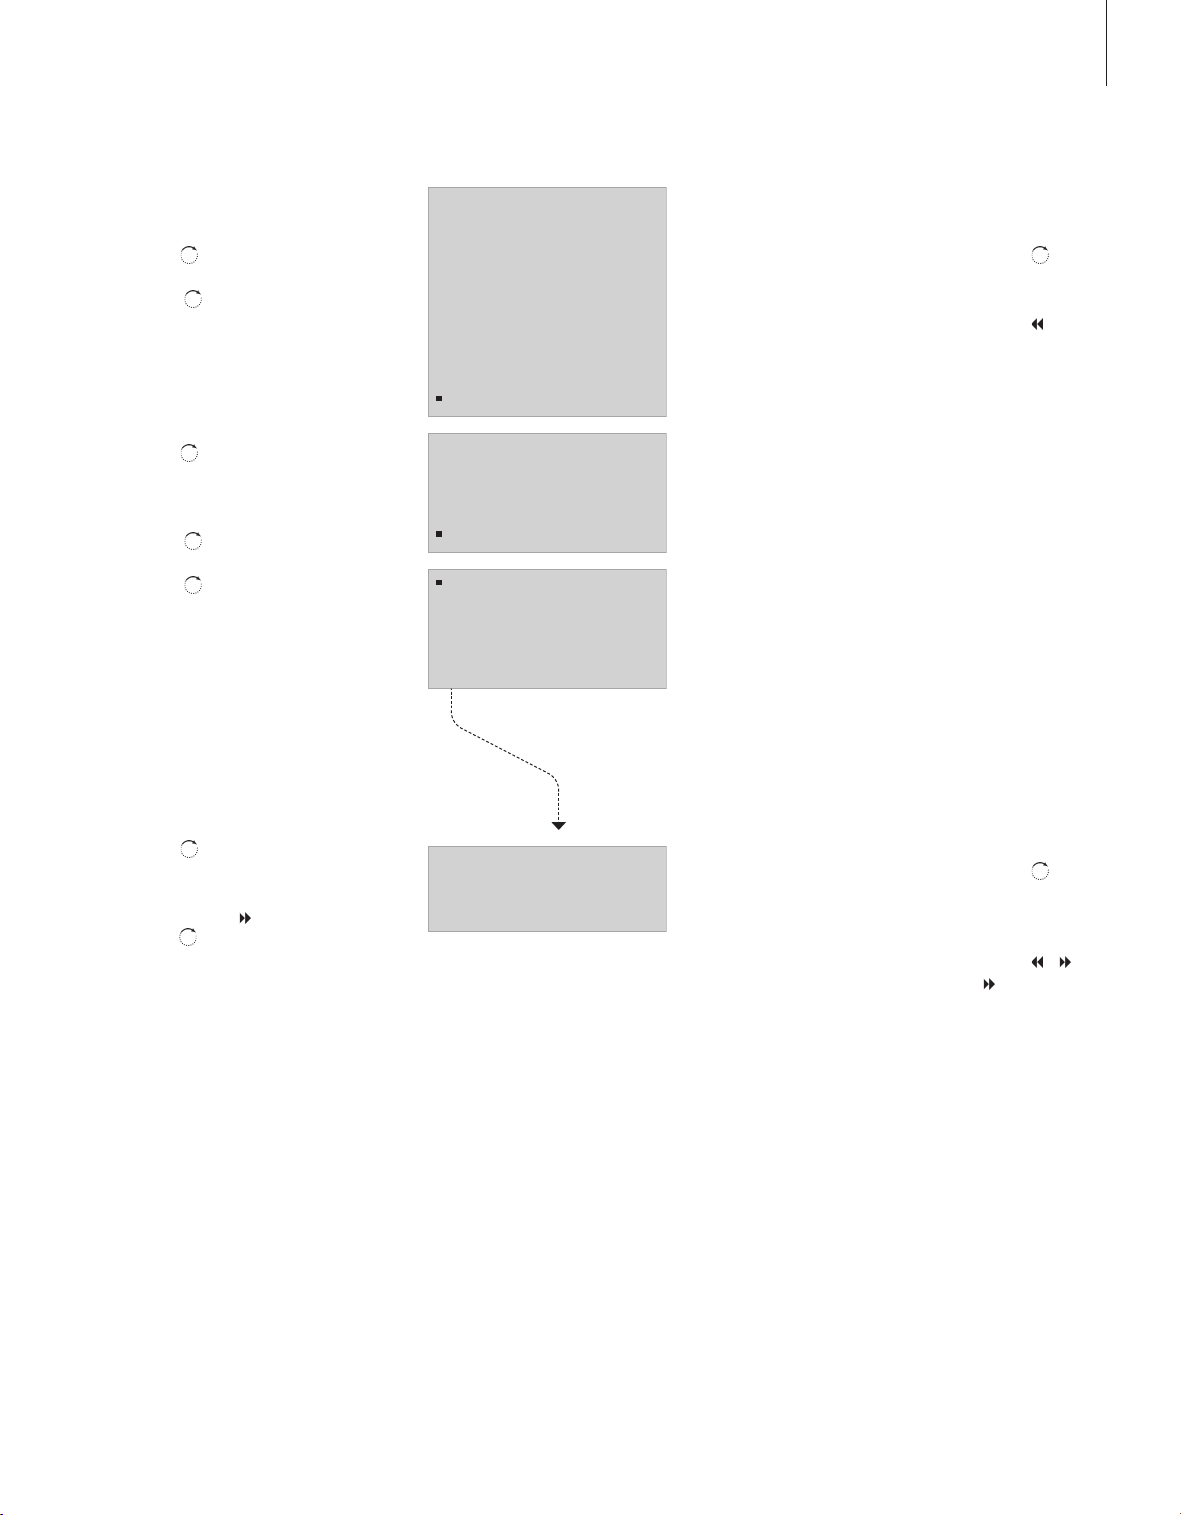
Menu level symbols …
One dot in front of a menu indicates that you
have moved down one level in the menu system.
Two dots in front of a menu indicates that you
have moved down two levels in the menu system.
Three dots in front of a menu indicates that
you have moved down three or more levels in the
menu system.
. . OPTIONS
1 SET CLOCK
2 TIMER ON/OFF
3 SELECT LANGUAGE
4 DISPL AY SETUP
5 MENU OPTIONS …
The square cursor …
A square in front of a menu indicates the
position of your cursor, to enter the menu or
switch a function, such as ‘RANDOM’, on or off,
press the wheel
or press the button.
Three dots after a menu name indicate that
further submenus are available, to move to the
next level, you must press the wheel
button.
or the
Two white lines indicate that these particular
menus are not available at the moment. You
may have to activate a specifi c source before
entering the menus.
How to use the menus
9
How to change a setting …
Press MENU to bring up the menu system
Turn the wheel
Press the wheel
Turn the wheel
Press the wheel
Press the wheel
to move to SETUP
to enter the SETUP menu
to move to OPTIONS
to enter the OPTIONS menu
to enter the SET CLOCK menu
1 N.MUSIC
2 N.RADIO
3 A.AUX
4 RANDOM ON
5 REPEAT OFF
6 TIMER ON
7 EDIT A.MEM
8 PLAY TIMER
9 SHOW CLOCK
10 SETUP …
1 A.MEM …
2 RADIO …
3 CD …
4 SOUND …
5 OPTIONS …
1 SET CLOCK
2 TIMER ON/OFF
3 SELECT LANGUAGE
4 DISPL AY SETUP
5 MENU OPTIONS …
Main menus …
Enters the menu system
Moves cursor up or down. Press to
enter a menu
Backs up through menus
Exits the menus
MENU
EXIT
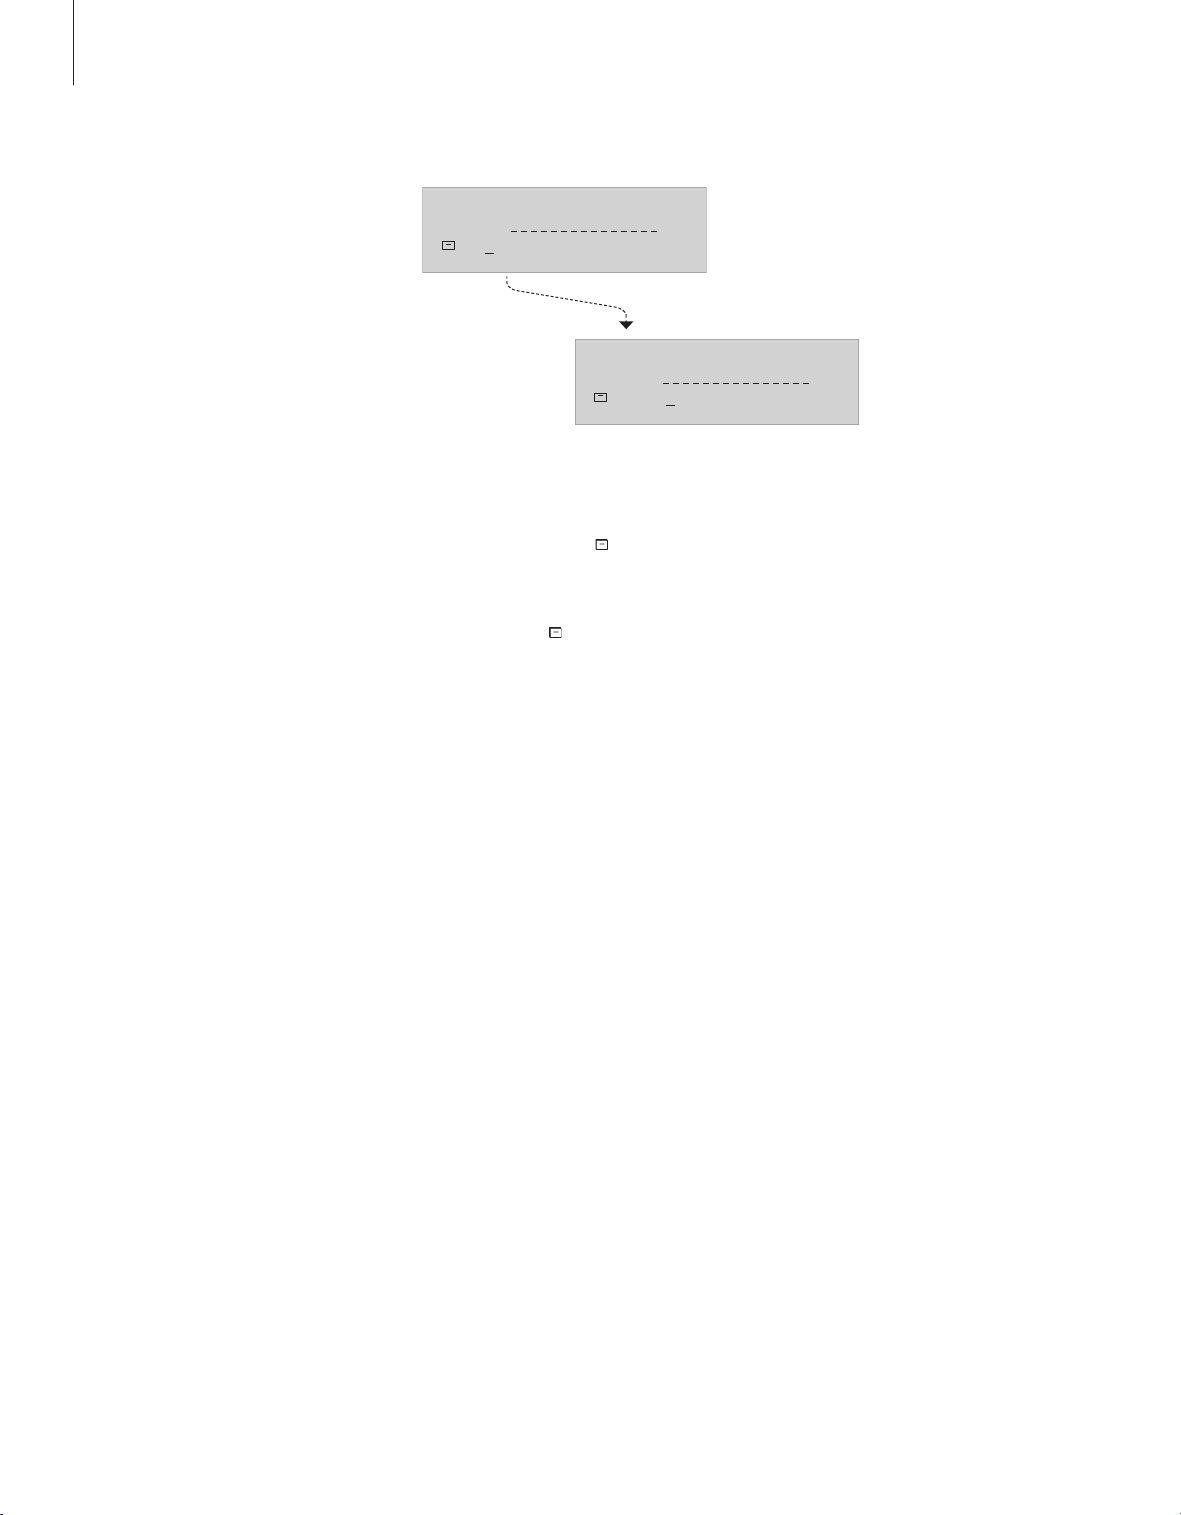
Turn the wheel
to set the correct time (or use
the number buttons to do so)
Press the wheel or press to move to ‘YEAR’ and
turn the wheel
to set the correct year
Proceed to MONTH and DAY
Press STORE to store your settings directly, then
STORED appears in the display
Press EXIT to leave the menu
... SET CLOCK
TIME YE AR MONTH DAY
12:0 0 2005 SEP 12
– – – –
Fill-in menus …
Adjusts up or down, selects or
deselects, and changes settings in
menus. Press to accept settings
Moves between settings or moves
the cursor in the menus – press
bring up additional information in
the display
Stores settings and leaves the fi ll-in
menu
Exits menus
to
STORE
EXIT
10
Naming procedure
Use the naming function, for
example, to name your Timers for
easy recognition, or your CDs. The
naming procedure is the same no
matter what you are naming.
Each name may contain up to 17
characters, including numbers,
however, Timer names can only
contain up to 12 characters.
A
… NAME CD
D
NAME:
Aa ABCDEF GHIJKL MNOPQR …
) .
symbol and press the wheel
… NAME CD
NAME:
Aa ABCDEF GHIJKL MNOPQR …
How to use naming menus …
Navigate … When you enter a naming menu, a
name is suggested and the cursor is placed
under the store symbol (
Turn the wheel to move between characters and
press the wheel to select a character.
Store … Press STORE to store a name, or move
the cursor to the
to store.
Special characters … To use special characters
move the cursor to the ¶ symbol and press the
wheel. To return to ordinary characters, move
the cursor to the ¶ symbol and press the wheel.
Large or small letters … To switch between
large and small letters, move the cursor to the
Aa symbol and press the wheel.
Delete … Press DELETE to delete the last
character. Press and hold DELETE to delete the
entire name.
Numbers … To enter a number, press a number
button.

First-time setup
11
Once your music system is installed
and switched on for the first time,
you are guided through the first-time
setup procedure. The first time setup
consists of:
– Menu language selection
– DAB aerial adjustment*
– Auto tuning of radio stations
– Setting your sound preferences
– Setting the time and date
– Adding to the list of sources and
functions which appear in the
display when you press MENU
– Setting display preferences
1 SELECT LANGUAGE
2 DAB AERIAL ADJUSTMENT
3 AUTO T UNING
4 SOUND
5 SET CLOCK
6 MENU OPTIONS
7 DISPLAY SET UP
What’s on the FIRST-TIME SETUP menus …
(ENTER PINCODE) … If your retailer has not
disabled the factory pincode, you must enter
the pincode, you have received from the retailer.
SELECT LANGUAGE … Select your preferred
language for the menus in the display from the
list of available languages.
DAB AERIAL ADJUSTMENT* … Use the
indicator to determine the best position for your
DAB aerial, refer to page 15 for further
instructions.
AUTO TUNING … Let the music system tune in
all available FM and DAB* radio stations for you.
SOUND … Adjust the sound parameters to your
liking.
SET CLOCK … Set the built-in clock to the correct
time and date.
MENU OPTIONS … Add sources, functions and
menus to the list which appears in the display
when you press the MENU button.
DISPL AY SETUP … Select the display reading,
you prefer for radio, CD, A.MEM and status
respectively.
The FIRST-TIME SETUP menus appears auto-
matically when you switch the system on for the
first time.
Useful hints
To store your settings in a menu and move on to
the next menu in the sequence, press STORE.
All the settings you make during first-time setup,
can be changed via the menus at any time. For
further information on the OPTIONS menu, refer
to page 18.
For information on how to change the pincode or
disable the pincode system, refer to page 20.
If your music system is connected to other Bang &
Olufsen equipment, you may have to set the clock
via the connected equipment.
…
*NOTE! DAB (Digital Audio Broadcast) radio stations
are only available if they are broadcast in your area
and your music system is equipped with the built-in
DAB module. For further information about tuning
DAB stations, refer to the chapter ‘Tune in and edit
radio stations’ on page 14.

12
Call up additional sources, functions and menus
The options, which appear when you
press MENU, are additional sources,
functions or menus.
From the factory, the only menu
entry available when you press the
MENU button is SETUP. To switch on
additional sources or create shortcuts to frequently used functions,
such as EDIT A.MEM or TIMER, add
these sources or functions to the list.
This is done via the OPTIONS menu,
for further information, refer to page
18.
1 N.MUSIC
2 N.RADIO
3 A.AUX
4 RANDOM [ON/OFF]
5 REPEAT [ON/OFF]
6 TIMER [ON/OFF]
7 EDIT A.MEM
8 PLAY TIMER
9 SHOW CLOCK
10 SETUP
1 A.MEM
2 RADIO
3 CD
4 SOUND
5 OPTIONS
N.MUSIC … Select to listen to N.Music*.
N.RADIO … Select to listen to N.Radio*.
A.AUX … Select to access equipment connected
to the AUX socket. This only activates the AUX
socket.
RANDOM (ON/OFF) … Select to activate or
deactivate the random playback function for CD
and A.MEM.
REPEAT (ON/OFF) … Select to activate or
deactivate the repeated playback function for
CD and A.MEM.
TIMER (ON/OFF) … Select to activate or
deactivate the Timer function.
EDIT A.MEM … Select to be able to edit the
inserted memory card.
PLAY TIMER … Select to enter or edit timer
programmings.
SHOW CLOCK … Select to bring up the time in
the display.
SETUP … Select to call up the setup menu, for
details on the contents of the setup menu, refer
to the following pages.
Press the MENU button to call up additional
sources, functions and menus. The contents of
the list depends on what you have added to it.
Useful hints …
You can select a menu by its number, or toggle a
function on or off by pressing the appropriate
number. If for example the function RANDOM
ON/OFF is number 4 in the menu system, press 4
to toggle the function on or off.
If you want RANDOM to be available, add it to
the menu options. For further information, refer
to page 18.
For further information about special CD playback
functions, refer to page 16.
*NOTE! If your BeoSound 4 is set up in a Master
Link system and a computer with BeoLink PC 2 or
BeoPort connected, you can listen to N.Music or
N.Radio via BeoSound 4. For further information
refer to the BeoLink PC 2 or BeoPort Guide.
 Loading...