


C41029G
C41029V
Range Cooker
User Instructions
Thank you for choosing our product. From now on, cooking will always be pleasantly creative with your new cooker.
We recommend carefully reading all the instructions in this manual, which includes detailed information about the most suitable conditions for using the cooker correctly and safely. These instructions also help you to become familiar with each component. Useful advice is given for using recipients, utensils, positions of guides and control settings.
The correct cleaning operations contained in this manual allow you to maintain the cooker's performance unchanged over time.
The individual sections are set out in order to allow you to become familiar with all the functions in the cooker. The text is easy to comprehend and is accompanied with detailed images and simple pictograms.
Reading this manual thoroughly will provide you with the answer to any question that may arise regarding the correct use of your new cooker.
INSTRUCTIONS FOR THE USER: include suggestions, the description of the controls and the correct cleaning and maintenance operations for the appliance.
INSTRUCTIONS FOR THE INSTALLER: for the qualified technician who is in charge of adequately checking the gas system, installing, commissioning and testing the appliance.

Contents
1.Warnings for safety and use ________________________________ 5
2.General information ______________________________________ 6
2.1Technical service __________________________________________________________ 6
3.Description of controls_____________________________________ 7
3.1The front panel____________________________________________________________ 7
4.Using the cooking hob ___________________________________ 12
4.1Switching on the burners ___________________________________________________ 12
4.2Switching off the burners ___________________________________________________ 12
5.Using the ceramic hob ___________________________________ 13
5.1General warnings_________________________________________________________ 13
5.2Switching on_____________________________________________________________ 13
5.3Switching off_____________________________________________________________ 13
6.Using the electric oven ___________________________________ 14
6.1General warnings_________________________________________________________ 14
6.2Switching on the oven for the first time ________________________________________ 14
6.3Traditional cooking________________________________________________________ 14
6.4Convection cooking _______________________________________________________ 14
6.5Cooking with the ventilated grill ______________________________________________ 14
6.6Cooking with the grill + spit _________________________________________________ 15
6.7Cooking with the spit ______________________________________________________ 15
6.8Defrosting_______________________________________________________________ 15
6.9Switching off the oven _____________________________________________________ 15
6.10Storage Drawer __________________________________________________________ 15
7.Cooking suggestions_____________________________________ 16
7.1Suggestions for using the hob burners correctly _________________________________ 16
7.2Suggestions for using the ceramic hob correctly _________________________________ 16
7.3Suggestions for using the oven correctly_______________________________________ 16
8.Cleaning and maintenance ________________________________ 19
8.1Cleaning stainless steel surfaces_____________________________________________ 19
8.2Cleaning enamelled surfaces________________________________________________ 19
8.3Cleaning the knobs and the control panel ______________________________________ 19
8.4Cleaning the grids and burners ______________________________________________ 19
8.5Cleaning the igniter plugs and thermocouples___________________________________ 20
8.6Cleaning the ceramic hob __________________________________________________ 20
8.7Cleaning the oven ________________________________________________________ 20
8.8Replacing the oven light bulb________________________________________________ 21
9.Special maintenance_____________________________________ 22
9.1Removing the oven door ___________________________________________________ 22
9.2Cleaning the inside oven fan ________________________________________________ 22
3
Contents
10.Installation ____________________________________________ 23
10.1General warnings_________________________________________________________ 23
10.2Electric connection________________________________________________________ 23
10.3Power consumption of the ceramic hob________________________________________ 25
10.4Ventilation requirements ___________________________________________________ 25
10.5Gas connection __________________________________________________________ 26
10.6Stability chain ____________________________________________________________ 27
10.7Gas regulations __________________________________________________________ 28
10.8Connecting to LPG________________________________________________________ 28
11.Final operations________________________________________ 29
11.1Positioning and levelling the cooker __________________________________________ 29
CLASSES OF APPLIANCES
The cooking appliances described in this operating manual belong to the following installation classes:
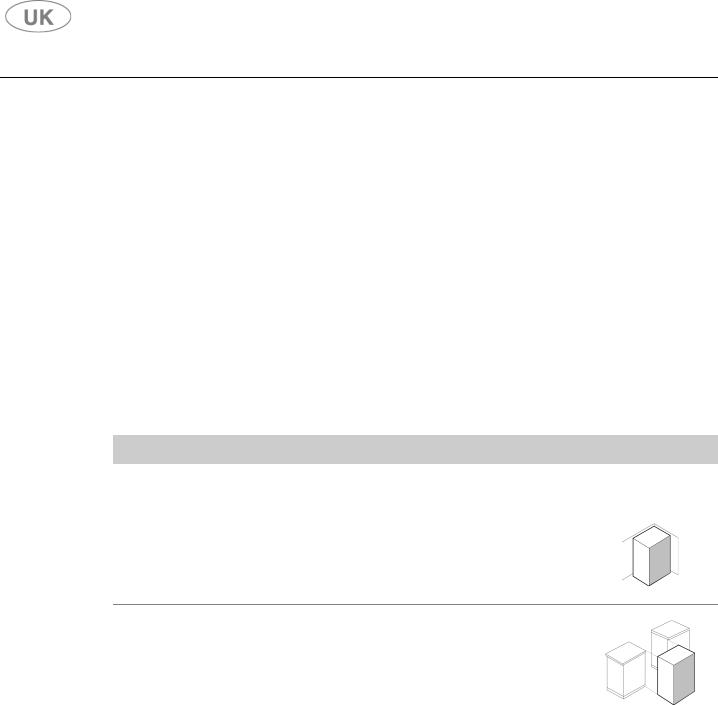
•Class 1: non-flush-mounted cooking appliance;
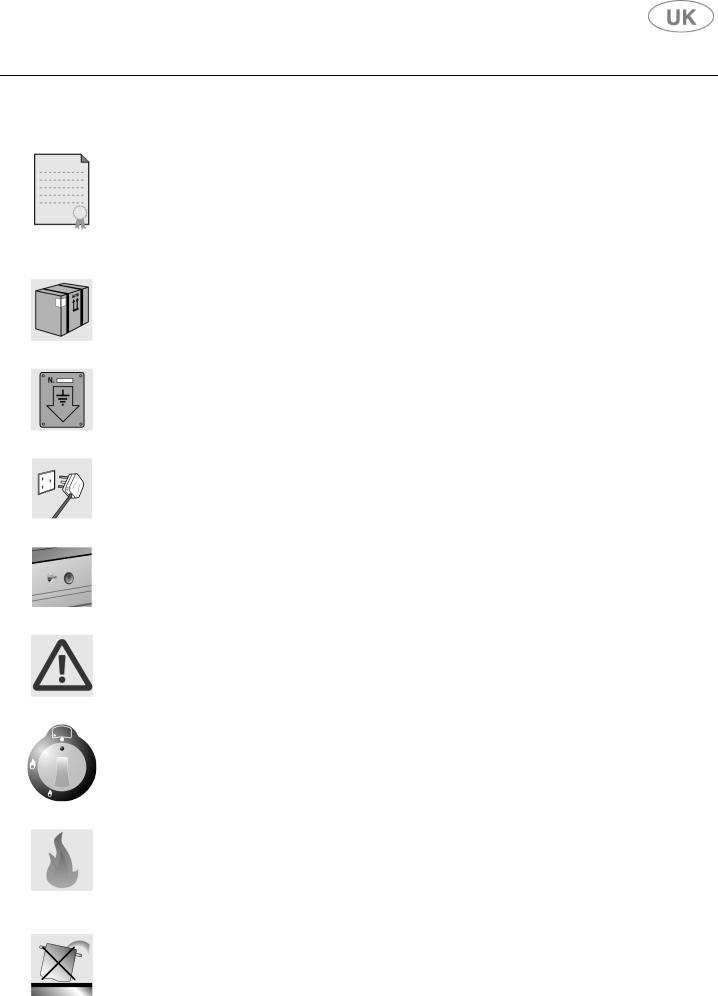
•Class 2 – subclass 1: cooking appliance flush-mounted between two units, made up of a single unit, but which can also be installed so that the side walls are accessible.
4
Warnings
1. Warnings for safety and use
THIS MANUAL IS AN INTEGRAL PART OF THE APPLIANCE. IT SHOULD BE KEPT IN GOOD CONDITION AND CLOSE TO THE APPLIANCE FOR THE WHOLE LIFECYCLE OF THE COOKER. WE RECOMMEND READING THIS MANUAL VERY CAREFULLY BEFORE USING THE COOKER. ALSO KEEP THE SET OF NOZZLES PROVIDED. THE
INSTALLATION MUST BE CARRIED OUT BY QUALIFIED PERSONNEL AND IN COMPLIANCE WITH CURRENT STANDARDS. THIS APPLIANCE IS FOR DOMESTIC USE AND CONFORMS TO THE EEC DIRECTIVES CURRENTLY IN FORCE. THE APPLIANCE IS BUILT FOR CARRYING OUT THE FOLLOWING FUNCTION: COOKING AND HEATING FOOD; ANY OTHER USE IS TO BE CONSIDERED IMPROPER. THE MANUFACTURER DECLINES ANY
RESPONSIBILITY SHOULD THE APPLIANCE BE USED FOR PURPOSES OTHER THAN THOSE INDICATED.
DO NOT LEAVE ANY PIECES OF THE PACKING UNATTENDED IN THE HOME. SEPARATE THE VARIOUS PACKING MATERIALS AND DELIVER THEM TO THE NEAREST RECYCLING CENTRE.
THE EARTH CONNECTION MUST CONFORM WITH THE RELEVANT IEE REGULATIONS IN FORCE.
THE PLUG TO BE CONNECTED TO THE POWER SUPPLY CABLE AND THE RELATIVE SOCKET MUST BE THE SAME TYPE AND MUST COMPLY WITH CURRENT STANDARDS. AFTER INSTALLING THE APPLIANCE MAKE SURE THAT THE PLUG IS ACCESSIBLE TO ALLOW THE PERIODICAL CHECK-UP.
DO NOT PULL OUT THE PLUG BY PULLING THE CABLE.
SHOULD THE GAS TAPS BE DIFFICULT TO ROTATE, CONTACT YOUR LOCAL SERVICE FORCE CENTRE.
IMMEDIATELY AFTER INSTALLATION, TEST THE APPLIANCE BRIEFLY BY FOLLOWING THE INSTRUCTIONS SHOWN BELOW. IN THE EVENT OF A MALFUNCTION, DISCONNECT THE APPLIANCE FROM THE MAINS AND CONTACT YOUR NEAREST SERVICE FORCE CENTRE.
DO NOT ATTEMPT TO REPAIR THE APPLIANCE.
EACH TIME YOU FINISH USING THE COOKING HOB, ALWAYS CHECK THAT THE CONTROL KNOBS ARE IN "ZERO" POSITION (OFF).
NEVER PUT INFLAMMABLE OBJECTS INTO THE OVEN: SHOULD IT BE ACCIDENTALLY SWITCHED ON, A FIRE MAY BREAK OUT. IN THE EVENT OF A FIRE: TURN OFF THE MAIN GAS SUPPLY AND DISCONNECT FROM THE MAINS SUPPLY. DO NOT THROW WATER ON BURNING OR FRYING OIL. DO NOT STORE INFLAMMABLE OBJECTS OR AEROSOL CANS NEAR THE APPLIANCE AND DO NOT SPRAY NEAR THE BURNERS WHEN SWITCHED ON.
DO NOT USE SAUCEPANS THAT DO NOT HAVE A PERFECTLY SMOOTH, EVEN BASE ON THE HOB.
5
Warnings
DO NOT USE ANY PAN OR ACCESSORY THAT EXCEEDS THE OUTER PERIMETER OF THE HOB.
THE RATING PLATE WITH THE TECHNICAL DATA, SERIAL NUMBER AND THE BRAND IS CLEARLY VISIBLE ON THE BACK OF THE APPLIANCE.
THE PLATE MUST NEVER BE REMOVED.
THE APPLIANCE SHOULD ONLY BE USED BY ADULTS. DO NOT ALLOW CHILDREN TO APPROACH OR PLAY WITH THE APPLIANCE. DO NOT KEEP OBJECTS ON THE APPLIANCE THAT MAY ATTRACT CHILDREN'S ATTENTION. KEEP CHILDREN AWAY FROM THE APPLIANCE; DO NOT FORGET THAT SOME PARTS OF THE APPLIANCE OR THE PANS USED BECOME VERY HOT AND DANGEROUS DURING USE AND, AFTER SWITCHING OFF, WHILE THE APPLIANCE IS COOLING. BE CAREFUL WITH PAN HANDLES: KEEP THEM TURNED INWARDS SO THAT CHILDREN CANNOT OVERTURN THE PANS.
WHEN THE APPLIANCE IS DECOMMISSIONED, IT MUST BE DISPOSED OF IN A SUITABLE RECYCLING CENTRE.
The manufacturer declines any responsibility for damage incurred by persons or objects that is caused by not following the above guidelines or by tampering with any part of the appliance or by using non-original spare parts.
2. General information
This product conforms to the requirements of the following European directives:
•73/23/EEC for "Low Voltage".
•89/336/EEC for "Electromagnetic Disturbance".
•90/396/EEC for "Gas Appliances".
•89/109/EEC for "Material in contact with Food".
The above mentioned directives also conform to Machine directive 98/37/EC.
2.1Technical service
Before leaving the factory, this appliance has been tested and set up by qualified, specialist personnel, so as to guarantee the best operating results. Each repair or adjustment that may subsequently be necessary must be carried out with the utmost care and attention. We therefore recommend always contacting the Dealer where the appliance was purchased or your nearest Service Centre, specifying the type of problem and the appliance model.
6
Instructions for the use
3. Description of controls
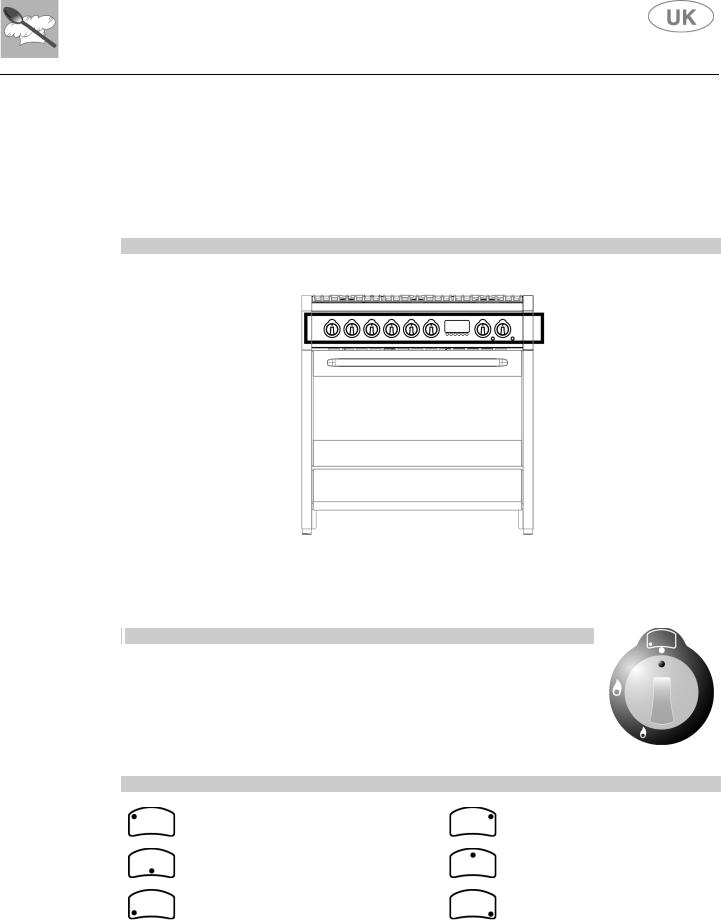
3.1The front panel
All the commands and controls for the cooking hob and oven are on the front panel.
THE CONTROL PANEL
DESCRIPTION OF HOB CONTROL KNOB
The flame is ignited by simultaneously pressing and turning the knob anticlockwise to the low flame symbol  .
.
To regulate the size of the flame, turn the knob to between the maximum  and minimum
  settings. Turn off the burner by returning the knob to position
  .
.
LAYOUT OF BURNERS – Description of symbols
REAR LEFT |
REAR RIGHT |
CENTRE FRONT |
CENTRE REAR |
FRONT LEFT |
FRONT RIGHT |
|
|
7

Instructions for the user
DESCRIPTION OF CERAMIC HOB CONTROL KNOBS
Besides the normal knobs that regulate the energy, the ceramic hob is equipped with knobs for differentiated heating. Settings from 1 to 11 control the heating of the internal element, setting the knob to the symbol  the outer element also operates.
LAYOUT OF CERAMIC HEATING ELEMENTS - Description of symbols
REAR LEFT |
REAR RIGHT |
FRONT LEFT |
FRONT RIGHT |
CENTRAL |
|
|
|
DESCRIPTION OF ELECTRIC OVEN KNOBS
The electric oven is controlled by two knobs: function switch knob and thermostat knob. They allow you to choose the most suitable type of heating for different cooking requirements, by switching on the heating elements appropriately and setting the required temperature from 50°C to MAX (250°C).
The V setting on the thermostat knob operates the oven fan.
Below the oven knobs there are two warning lights: the red light signals the oven is working; the orange light indicates that the preset temperature has been reached. The orange light switches on and off to indicate when the thermostat switches on to maintain the temperature inside the oven at the level set on the thermostat knob.
The oven has an internal light. The light is always on while the oven is working: it can be switched on while the oven is off, for cleaning purposes, by turning the function switch knob to the symbol 
DESCRIPTION OF SYMBOLS ON THE FUNCTION SWITCH KNOB
SWITCHES ON THE OVEN LIGHT |
GRILL-FAN ELEMENT |
|
UPPER AND LOWER |
UPPER AND LOWER |
|
HEATING ELEMENTS |
HEATING ELEMENTS – FAN |
|
UPPER HEATING ELEMENT |
HEATING ELEMENT-CONVECTION |
|
LOWER HEATING ELEMENT |
DEFROST |
|
GRILL ELEMENT |
|
|
|
|
8

Instructions for the use
THE ELECTRONIC TIMER
KEY |
|
A |
COOK TIME |
B |
END TIME |
C |
COUNTDOWN |
D |
TIME |
E |
DECREASE CONTROL |
F |
SELECTOR CONTROL |
G |
INCREASE CONTROL |
The time of day must be set before the main oven will operate manually.
SET THE TIME OF DAY
The oven has a 24 hour clock.
When the electricity supply is first switched ON, the display will show 12.00 and the 'Time' ( ) indicator neon will flash as Fig. 1.
To set the correct time press the increase control button (+) and if necessary, the decrease control button (-) until the correct time on the 24 hour clock is reached, e.g. 10.00 a.m. as Fig. 2. The 'Time' indicator ( ) neon will flash for 5 seconds and then go out.
The increase and decrease control buttons operate slowly at first, and then more rapidly. They should be pressed separately.
HOW TO SET THE COUNTDOWN
The 'Countdown' gives an audible reminder at the end of any period of cooking. This cooking period may be up to 2 hrs 30 mins. It is not part of the automatic control.
To set, press the Selector Control button ( ) until the 'Countdown' indicator is illuminated (
 ) the display reads 0.00 as Fig. 3.
To set the correct time duration depress the increase control (+) until the display indicates the interval to be timed, e.g. 1hr 45 mins as Fig. 4. If necessary depress the decrease control (-) to achieve the correct time interval.
This must be completed within 5 seconds of first pressing the Selector Control button.
During the operation of the 'Countdown', the remaining time period will be shown in the display. The 'Countdown' will sound intermittently for up to 2 minutes at the end of the timed period. The sound can be stopped by pressing any button.
9
Instructions for the user
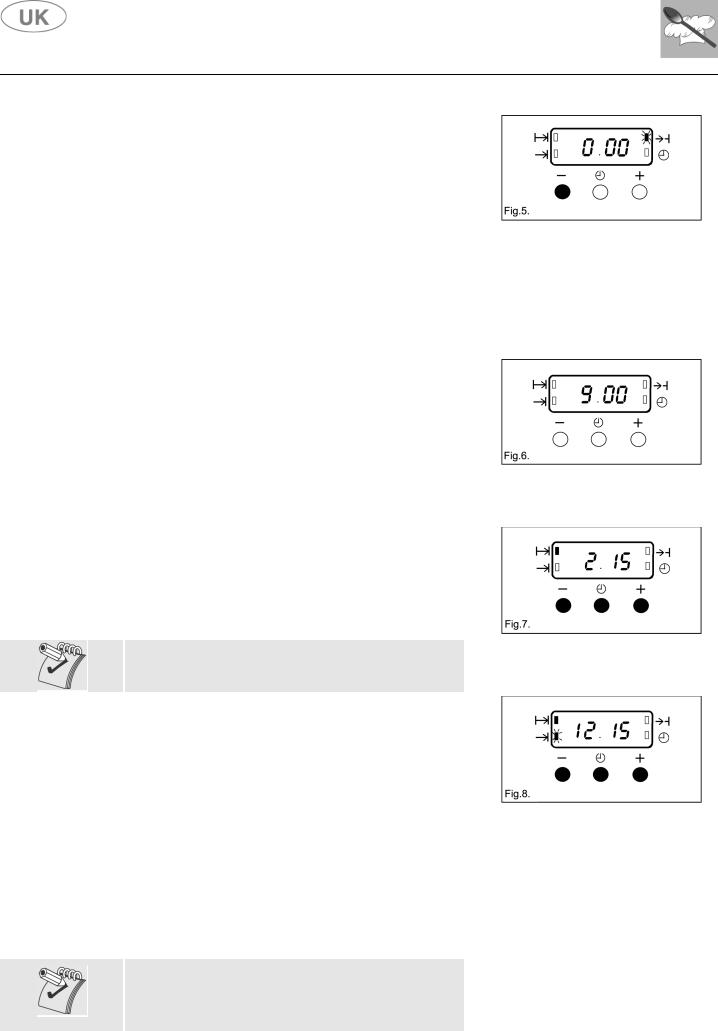
TO CANCEL THE COUNTDOWN
If you change your mind and want to cancel the 'Countdown', press the Selector Control button until the 'Countdown' indicator ( ) flashes and then the decrease control (-) until 0.00 shows in the display as Fig. 5. The 'Countdown' indicator (
 ) will continue to flash for a few seconds and then return to the time of day.
SETTING THE OVEN TIMER CONTROL
The main oven can be automatically timed.
When using the timer control for the very first time, it is advisable to let it operate while you are at home. The displays can be checked to show that it is operating correctly and you will feel confident to leave a meal to cook automatically in the future.
A)TO SET THE TIMER TO SWITCH ON AND OFF AUTOMATICALLY
i)Ensure the electricity supply is switched ON and that the correct time of day is displayed, e.g. 9 a.m. as Fig. 6.
ii)Place food in oven.
iii)To set the length of cooking time, press the Selector control button ( ) until the 'Cook Time' indicator is illuminated (
 ). Press the increase control (+) until the required length of cooking time is displayed, e.g. 2 hrs 15 mins as Fig. 7. If necessary depress the decrease control (-) until the correct time interval is achieved.
The maximum cooking time is 10 hours.
iv)Release the buttons. The 'Cook Time' indicator ( ) will be illuminated.
Remember, this must be completed within 5 seconds of first pressing the Selector Control button.
v)To set the 'End Time'. Press the Selector Control button until the 'End Time' ( ) flashes. Press the increase control (+) until the required stop time is displayed, e.g. 12.15 p.m. as Fig. 8. If necessary depress the decrease control (-) until the correct time interval is achieved.
vi)Release the buttons. The time of day will be displayed after 5 seconds. The 'Cook Time' ( ) and 'End Time' (
 ) indicators will be illuminated.
The 'End Time' must not be more than 23 hours 59 minutes from the time of day. For example, if the time of day is 09.00 a.m., the latest 'End Time' would be 08.59 a.m. the next day.
vii)Set the main oven control to the required temperature. The oven indicator neon should be OFF.
When the automatic timed period starts, the oven indicator neon will turn ON and OFF periodically during cooking, showing that the temperature is being maintained.
10
 Loading...