

Installing & Setting up the Epson D88 printer
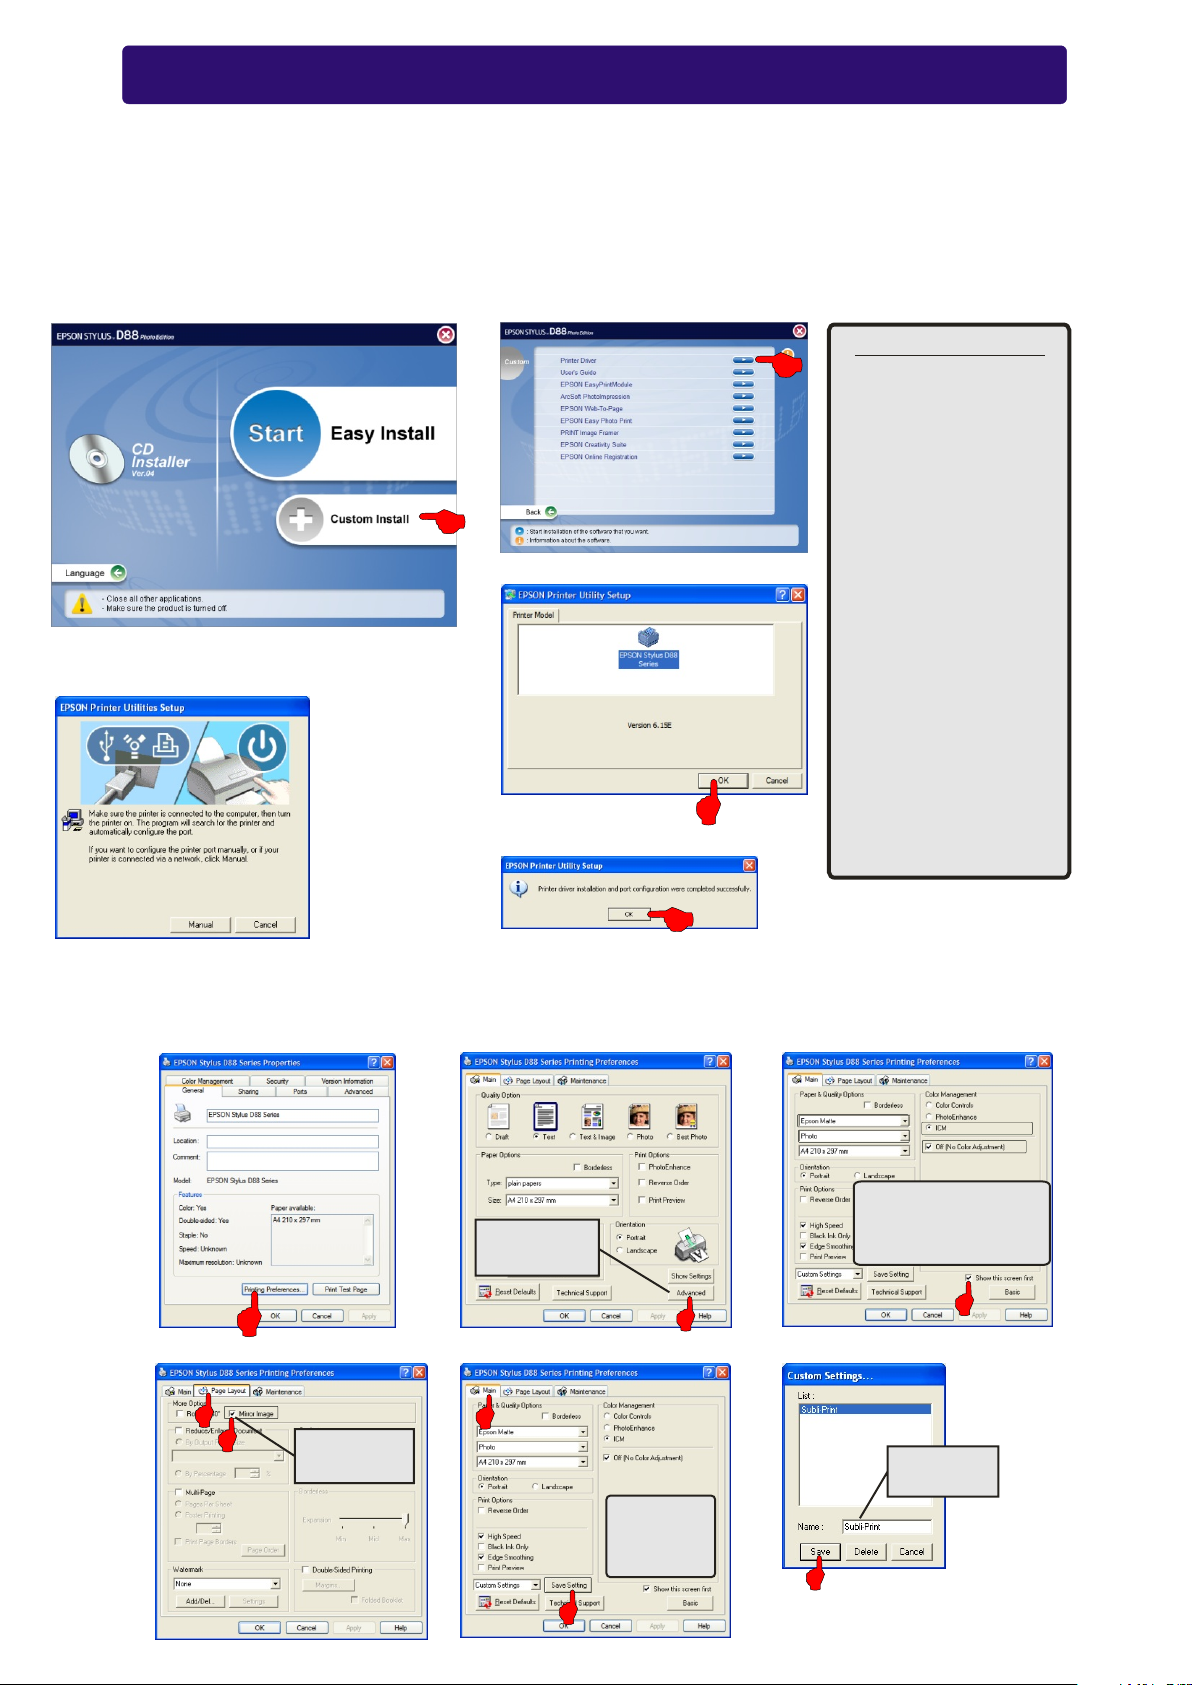
Insert the Epson Stylus D88 software CD-ROM into your CD-ROM drive. The CD will auto run. Select 'Custom
Install' from the menu, as in diagram 1 below. When Diagram 2 appears click 'Printer Driver'. It will display diagram
3, click OK and it will copy files to your computer. Make sure the USB cable is connected to the PC and printer, then
turn on the printer as instructed in diagram 4. After the utility has found your printer it will confirm this as in diagram 5.
The Epson D88 has now been successfully installed. Click OK.
Now follow the Epson D88 driver setup below.
Diagram 1
Diagram 4
Diagram 2
Diagram 3
Diagram 5
After installation
The Epson Status Monitor
needs disabling before
use. Follow the below
steps.
1. Go to the printers and
faxes folder.
2. Right click on the D88
and select properties.
3. Click printing
preferences.
4. Click the Maintenance
tab.
5. Click on the 'Speed &
Progress' button.
6. Un-tick 'Show Progress
Meter'.
7. Un-tick 'Disable EPSON
status monitor 3'.
8. Click OK three times
to close the driver boxes
down.
Browse to the Printers and Faxes folder. Right click on the Epson D88 printer and click on 'Properties'. Click on
'Printing preferences as in diagram 6, then follow the diagrams below.
Diagram 6
Diagram 9
1
2
Diagram 7
Click
Advanced
Diagram 10
1
Click
Mirror Image
Click
Save Setting
Diagram 8
1
2
Diagram 11
3
4
. Epson Matte
1
. Photo
2
. ICM
3
. Off (No Color Adjustment)
4
Name it
Subli-print
2
Click 'Save' then click
OK until all open boxes
are closed.
1
Setting up CorelDRAW 10 onwards
Before you start this section you will need to download the Xpres Subli-Print colour profile from the Xpres website.
The address is www.xpres.co.uk/technical.php You can also find the profile on the Subli-Print CD supplied with the bulk
feed system. This disk can also be sent out upon request.
Close CorelDRAW. When you have downloaded the 'Subli_Print_D88_V1.icm' colour profile, right click on it and
choose 'Install Profile' from the top of the menu. Note: The profile will install automatically and will not give any feedback.
Also on some systems you will not be able to see the 'Install Profile' option. If this is the case change the .ICM extension
to .ICC then re-try.
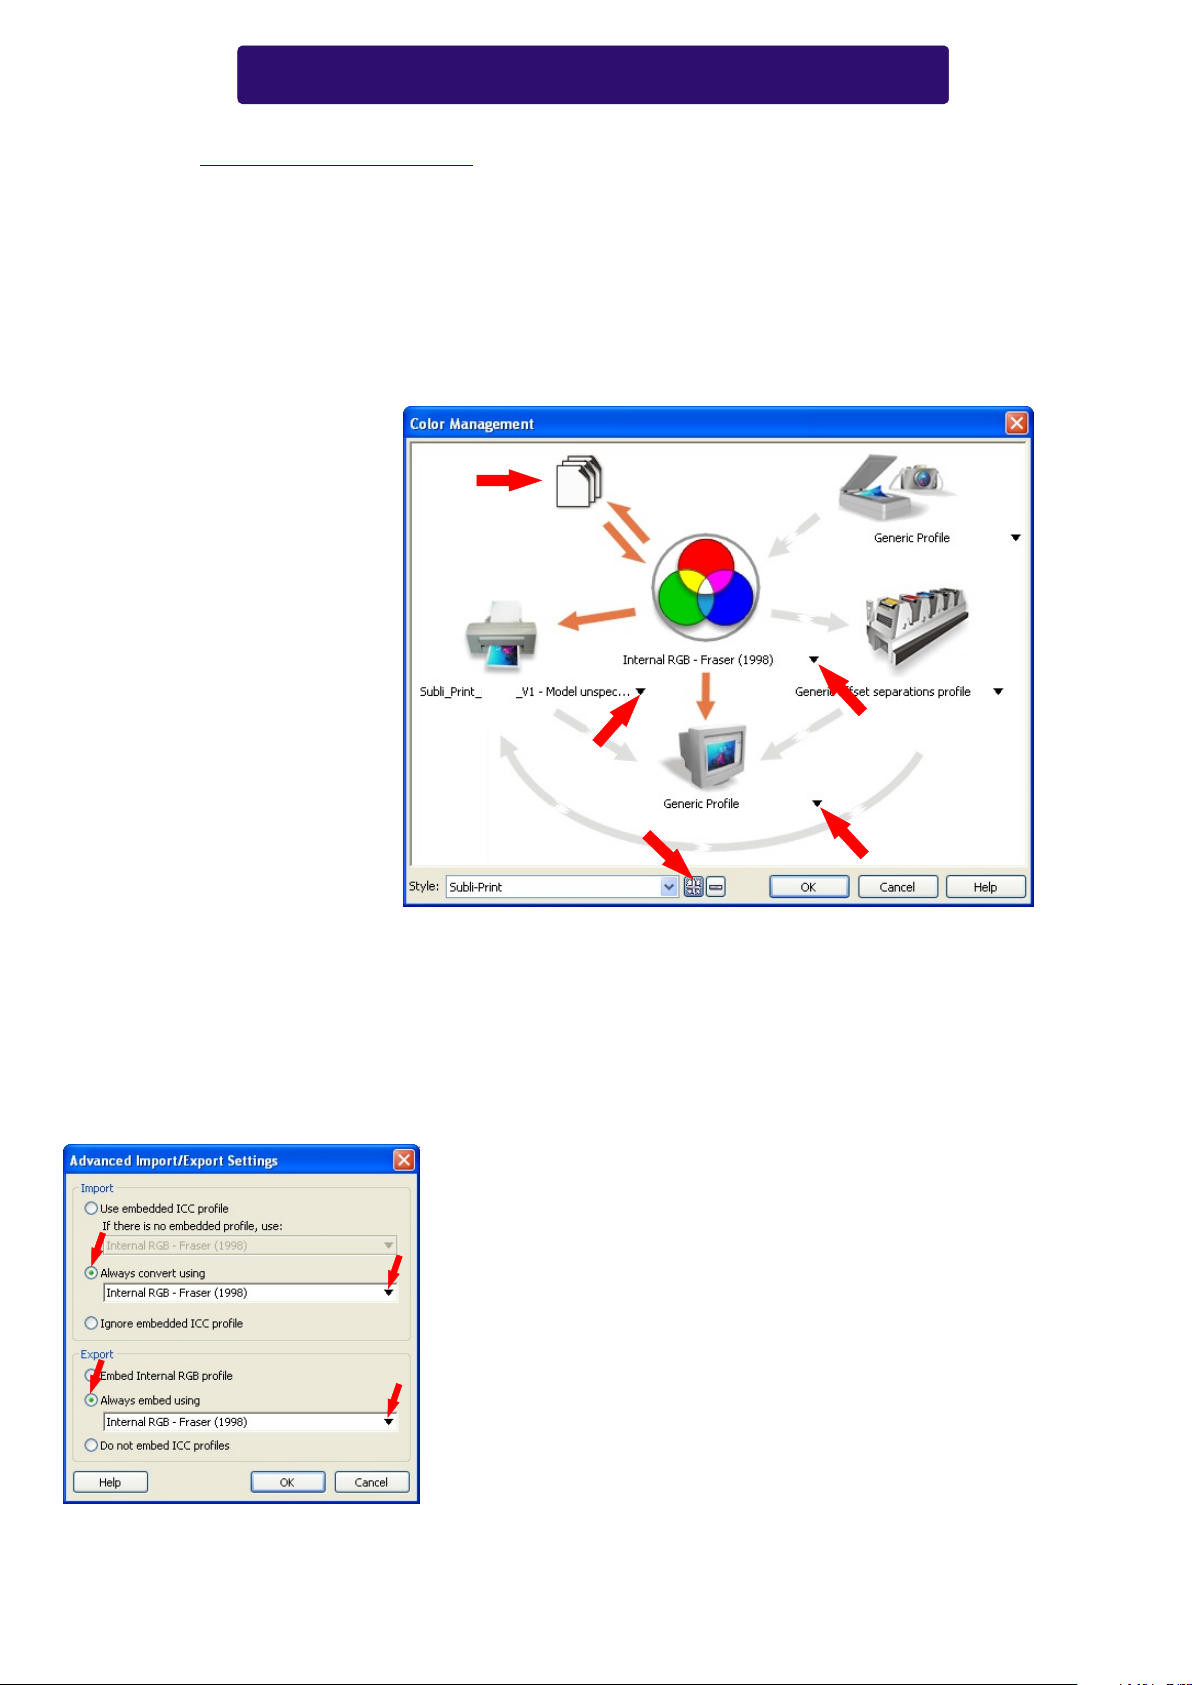
Start CorelDRAW and click on Window > Colour Palettes. Tick the 'Default RGB palette'. Repeat the process then
un-tick 'Default CMYK palette'. Now click on Tools > Colour Management. You will now see the colour management
dialogue box appear as in diagram 1 below.
Diagram 1
1
Note: For CorelDRAW X3 users
click on 'RGB (used in versions
previous to CorelDRAW X3', under
the 'Colour mode used for effects'
section at the bottom.
D88
2
4
5
3
First, all the (Orange/Grey) arrows need to be set as shown above. To change the colour of the
arrows (Orange colour switched on, Gray colour switched off). To turn the arrows on or off just click
on the arrow itself.
Configure Import-Export Settings: Click on the image of the paper to bring up the window shown
1.
below (diagram 2). This window configures how CorelDRAW handles files that are imported to a
document.
Diagram 2
Click Import: Always covert Using- Select Internal RGB Fraser
(1998) from the drop down menu.
Click Export: Always embed using- Select Internal RGB Fraser
(1998) from the drop down menu.
Click OK.
Composite Printer: Select the Subli_Print_D88_V1 printer profile. Note: if you cant choose the
2.
Subli_Print_D88_V1 from the drop down menu means the ICC profile is not yet installed on your
pc or you may not have restarted Corel since the ICC installation. Close and re-launch Corel.
2

3.
Monitor: Select the ICC profile for your monitor (If you also have Adobe Photoshop on your system
you can select the profile you created in Adobe Gamma). You may also check out the website of your
monitor manufacturer for ICC profiles for your particular monitor. If you do not have an ICC colour
profile use the 'Generic Profile' instead.
Internal RGB Space: Select Internal RGB Fraser (1998)
4.
Save your settings: Click the + button and name your settings Subli-Print then Click OK.
5.
CorelDRAW's colour management is now setup. You can now work with your images as normal.
Printing with the Subli-Print ICC profile
When you have your image ready on screen, click file > print. You will now see the print dialogue
box below (diagram 1).
Diagram 1
D88
D88
The Epson D88 properties will now show (diagram 2). Ensure the Subli-Print setting is highlighted.
If it is not click on 'Subli-Print' from the drop down list. Then click OK.
Now click on the Misc tab (diagram 3) and ensure the Subli_Print_D88_V1 is ticked.
Note: Ensure the 'Apply ICC profile' is un-ticked when using other printers.
Now click the print button.
Diagram 2
Diagram 3
D88
3
 Loading...