

Epson Stylus Pro 7700
Setup and Print Guide: Photoshop CS5
IMPORTANT: Before proceeding, please be sure you have the correct Epson (OEM) printer driver and
PowerDriver installed. For assistance with driver installation, refer to the Installation Guide.
NOTE: Your screens and menus may differ depending on the version of software and operating system
you are using. However, the settings will be the same.
Photoshop CS5 Workspace Setup
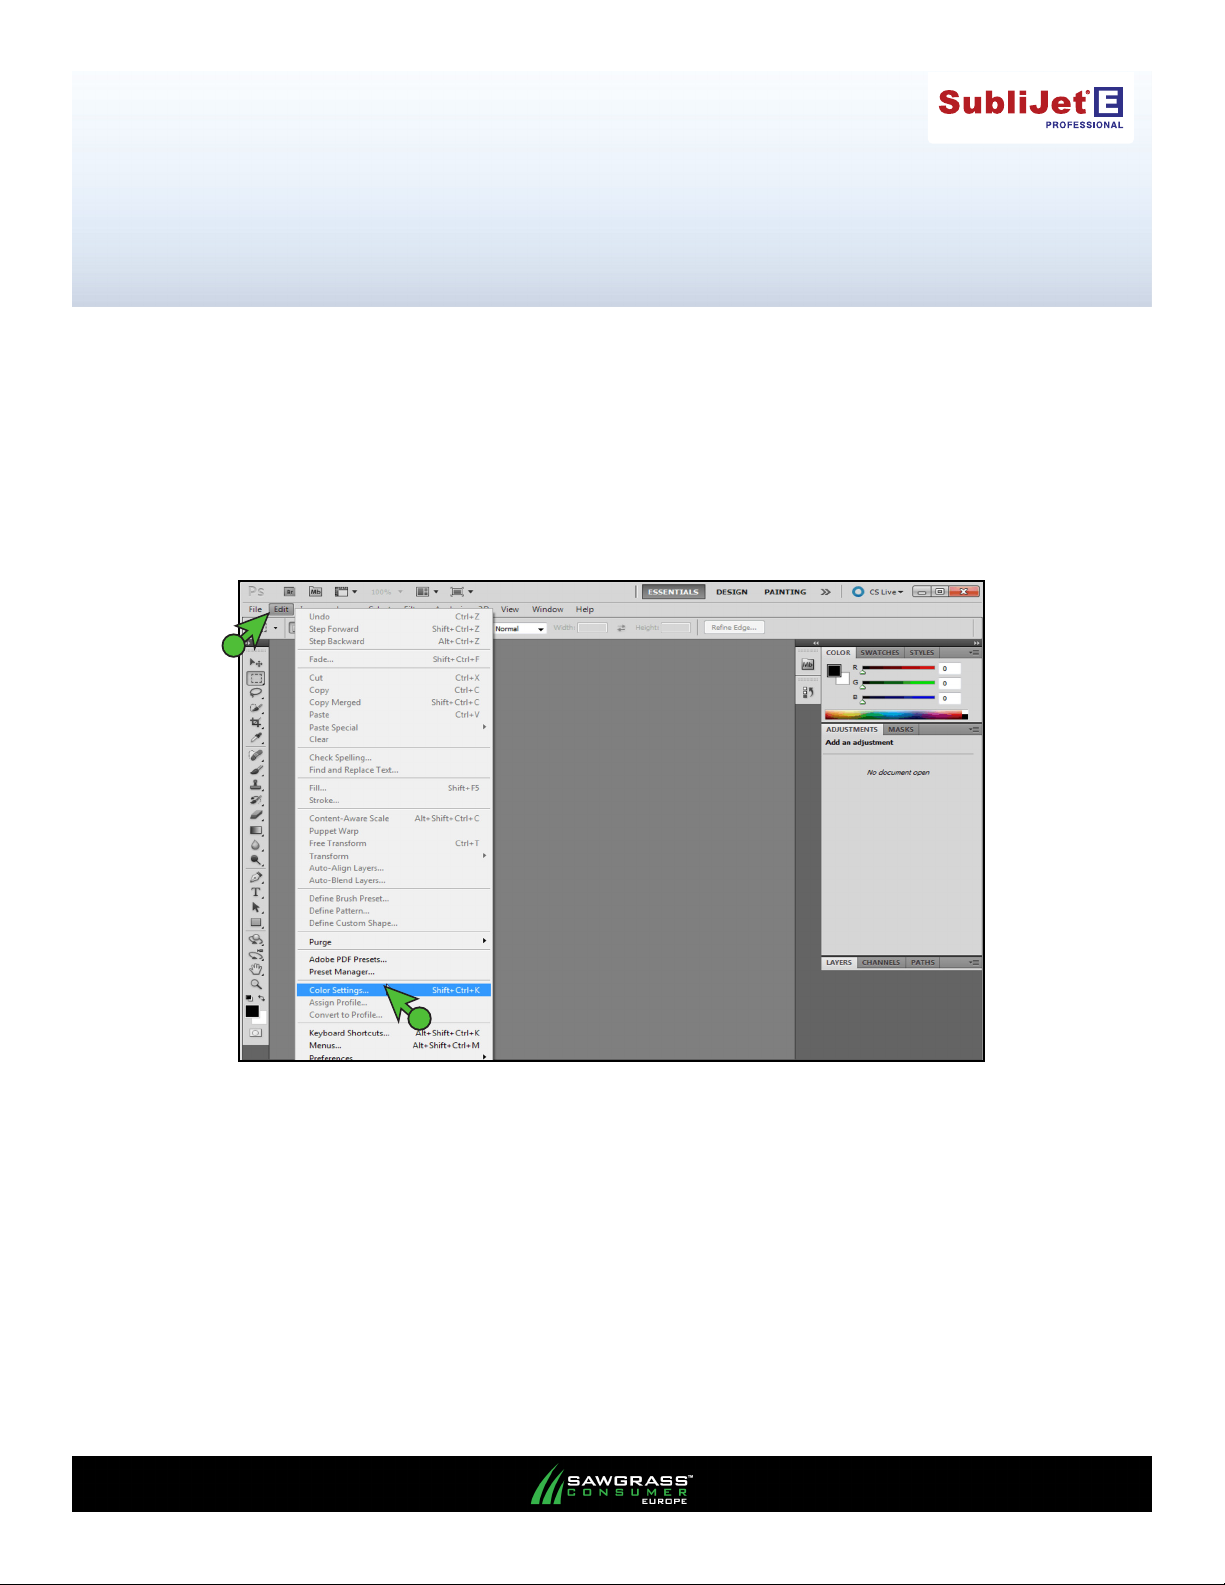
1.) Begin by opening Photoshop. In the menu bar, click Edit > Color Settings (see FIGURE 1).
1
2
FIGURE 1
PAGE 1 of 6 >>
v20120426
Epson Stylus Pro 7700
Setup and Print Guide: Photoshop CS5
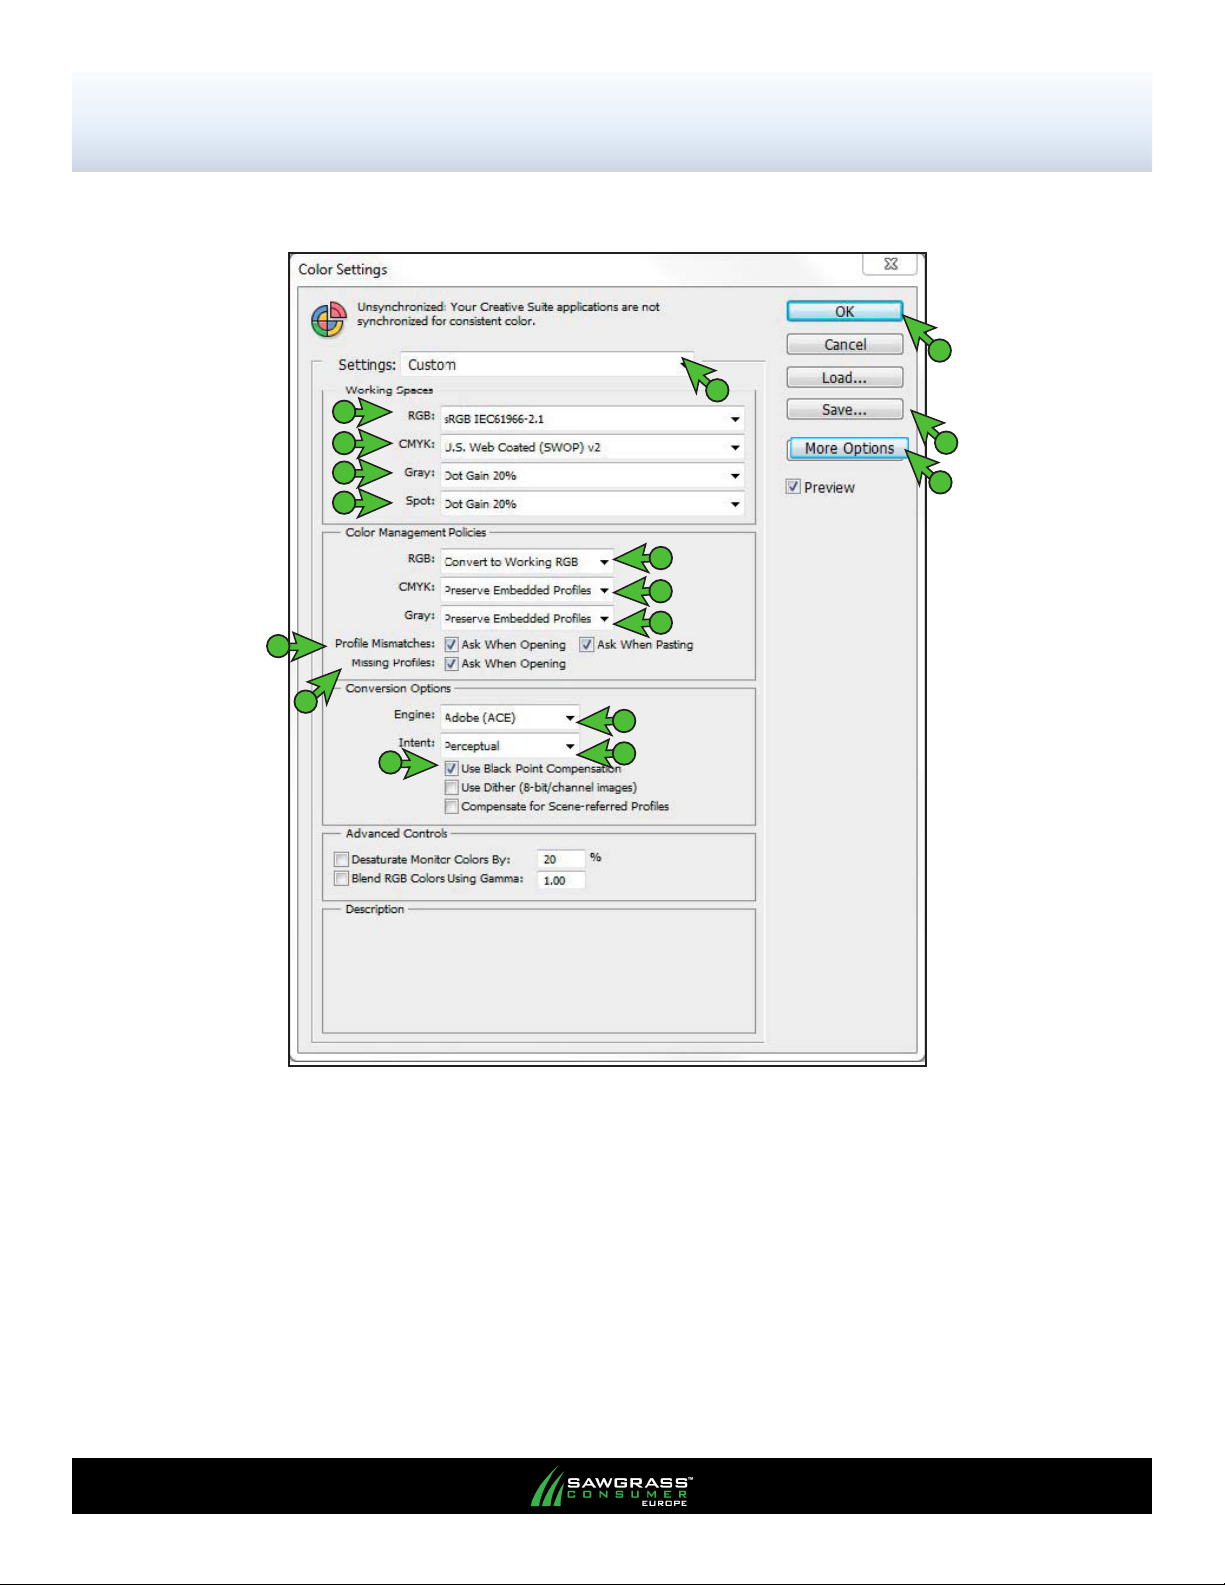
2.) The Color Settings window should now be open. Match your settings to those shown below (see
FIGURE 2).
P
A
B
C
D
E
F
G
H
I
O
K
J
N
FIGURE 2
A. Settings: Custom
B. RGB: sRGB IEC61966-2.1
C. CMYK: U.S. Web Coated (SWOP) v2
D. Gray: Dot Gain 20%
E. Spot: Dot Gain 20%
F. RGB: Convert to Working RGB
G. CMYK: Preserve Embedded Proles
H. Gray: Preserve Embedded Proles
L
M
PAGE 2 of 6 >>

Epson Stylus Pro 7700
Setup and Print Guide: Photoshop CS5
I. Prole Mismatches: Check Ask When Opening and also check Ask When Pasting
J. Missing Proles: Check Ask When Opening
K. If Conversion Options are not visible, click More Options
L. Engine: Adobe (ACE)
M. Intent: Perceptual
N. Check Use Black Point Compensation
O. Once your settings match, click Save. This will open the Save window (see FIGURE 3).
NAME your new preset in the File Name eld and click Save when complete.
P. Click OK to complete setup (see FIGURE 2)
The Photoshop RGB Working Space is now set.
1
2
FIGURE 3
PAGE 3 of 6 >>

Epson Stylus Pro 7700
Setup and Print Guide: Photoshop CS5
3. At the top of the application click File > New… (Ctrl+N). This will open the New Document window.
Match your settings to the ones show below: (see FIGURE 4)
D
A
B
C
FIGURE 4
A. Color Mode: RGB Color
B. Click the down arrows next to Advanced to view Color Prole:
C. Color Prole: sRGB IEC61966-2 .1
D. Click OK to save your changes and continue
4. When opening or importing images in Photoshop, you may encounter an Embedded Prole
Mismatch warning. In this instance, select the radio button for Convert document’s colors to
the working space. Click OK to continue (see FIGURE 5).
1
FIGURE 5
2
NOTE: Always choose to use or convert to sRGB IEC61966-2.1.
PAGE 4 of 6 >>

Epson Stylus Pro 7700
Setup and Print Guide: Photoshop CS5
5. Once an image has been opened or imported in Photoshop, you will need to ensure that RGB color
mode has been selected. In the menu bar, click Image > Mode > RGB Color. A check
mark should now be visible beside RGB Color (see FIGURE 6).
1
2
3
FIGURE 6
Printing from Photoshop CS5 with PowerDriver E 7700
6.) With the correct Color settings entered, you are now ready to print. In the Menu Bar, click File > Print.
This will open the Print window. Match your settings to those shown below: (see FIGURE 7)
PowerDriver E 7700
A
C
B
FIGURE 7
A. Printer: PowerDriver E 7700
B. Click the drop-down arrow and select Color Management
C. Select the radio button for Document
D
E
F
PAGE 5 of 6 >>

Epson Stylus Pro 7700
Setup and Print Guide: Photoshop CS5
D. Color Handling: Printer Manages Colors
E. Rendering Intent: Perceptual
F. Click Print when you are ready to print your image (see FIGURE 7). This will open the Print
window (see FIGURE 8).
6.) In the Print window, select the PowerDriver E 7700 and click Print (see FIGURE 8).
PowerDr iver E 7700
1
2
FIGURE 8
Congratulations! Photoshop CS5 setup is now complete. Remember to select PowerDriver E 7700 each
time you are ready to print.
PAGE 6 of 6 >>
 Loading...