

Page 1
Epson Stylus Pro 7890 / 9890 - Mac OS X
Setup and Print Guide - Photoshop CS, CS2, CS3, CS4
The colour space within Photoshop should be set to the same working space in which the ICC prole was created. This
action allows a more accurate screen display of your images. The accuracy of images displayed on your screen will depend
on several factors, including the quality of your screen and how it is calibrated.
Setup Guide - Photoshop CS, CS2, CS3, CS4
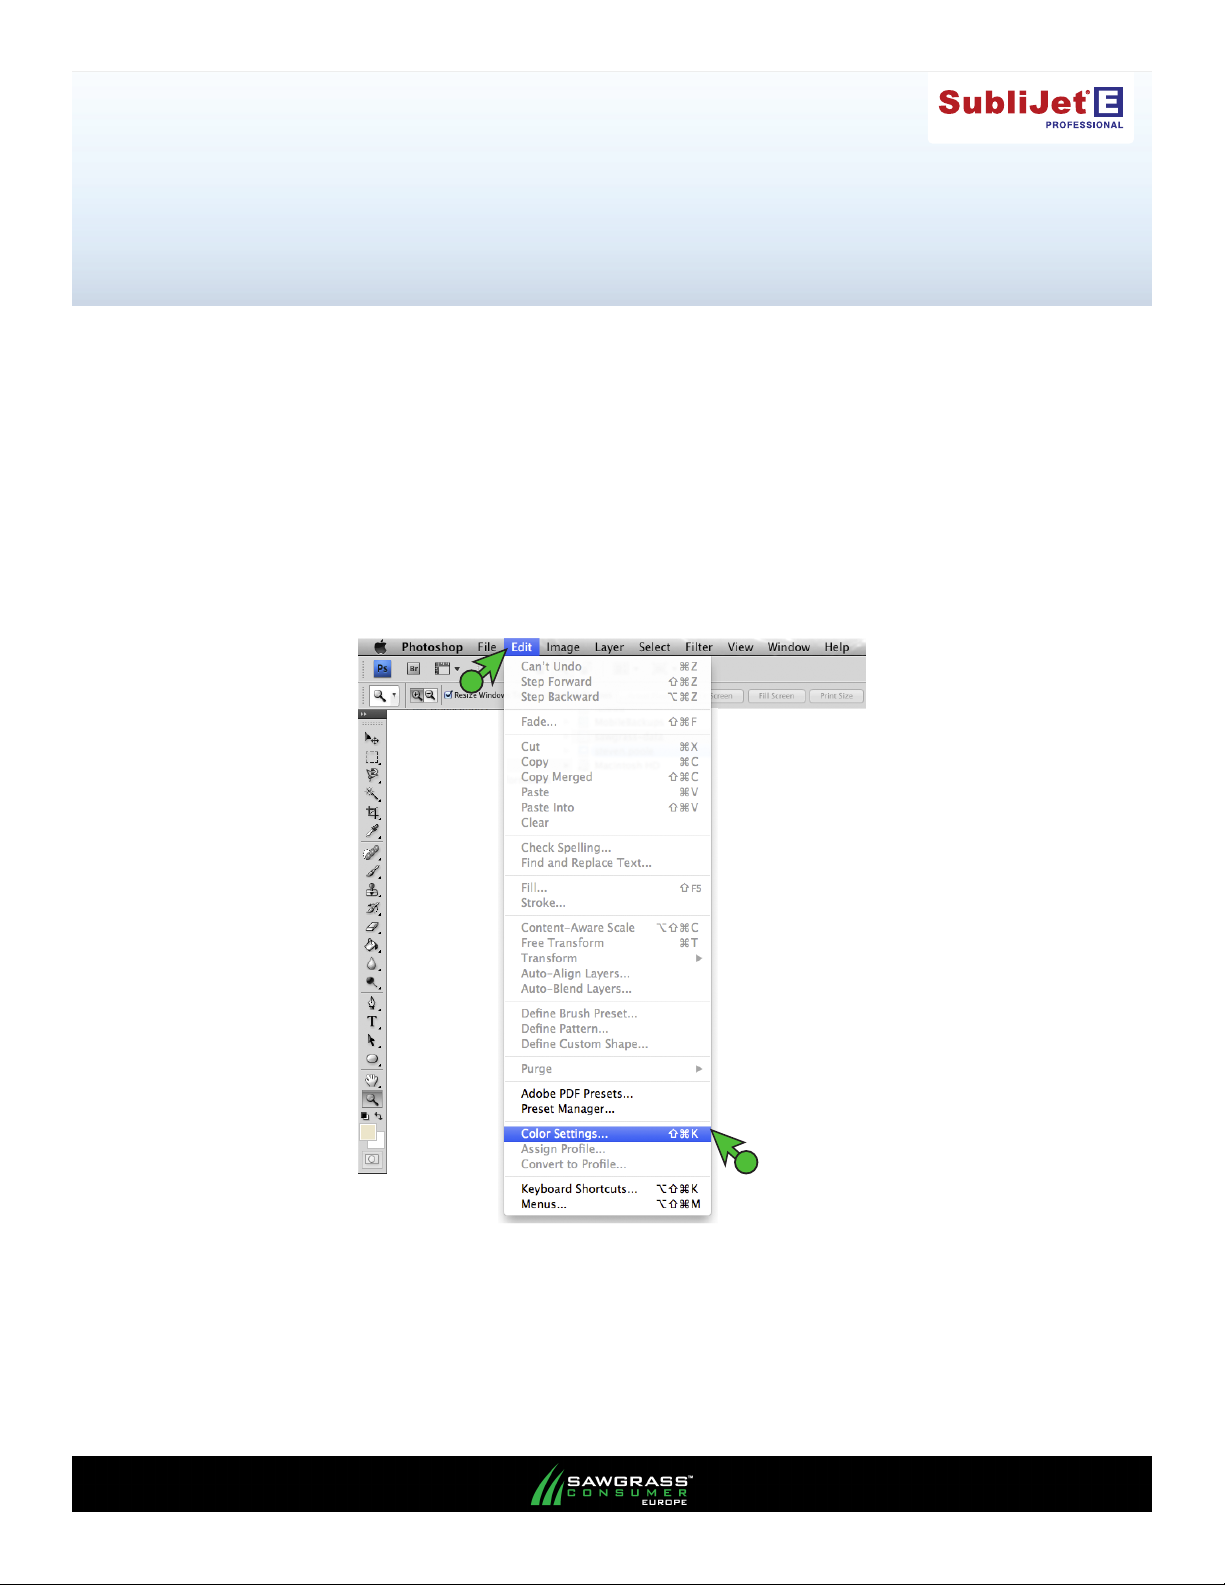
1.) Begin by opening Photoshop. Then, in the menu bar, click Edit > Color Settings (see FIGURE 1).
1
FIGURE 1
2
PAGE 1 of 7 >>
Page 2
Epson Stylus Pro 7890 / 9890 - Mac OS X
Setup and Print Guide - Photoshop CS, CS2, CS3, CS4
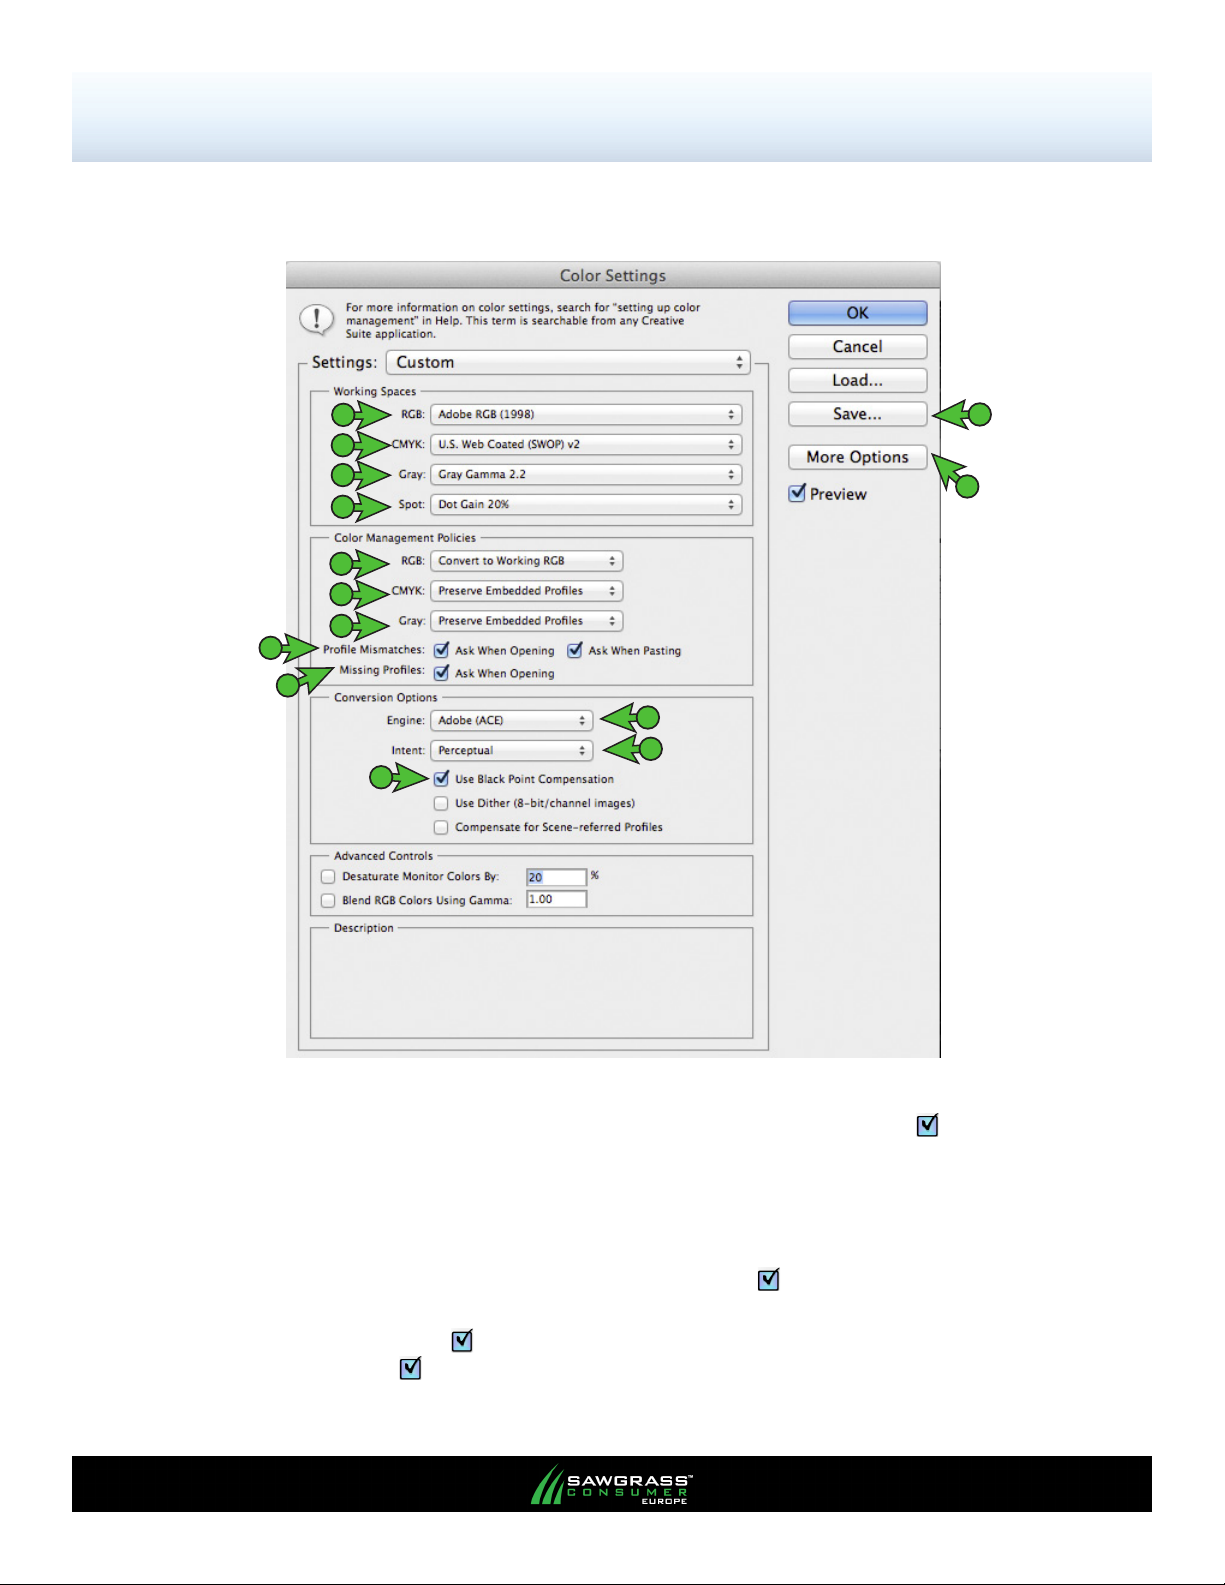
2.) The Color Settings window should now be open (see FIGURE 2). Match your settings to the ones
shown below:
A
B
C
D
E
F
G
H
I
K
L
M
N
J
FIGURE 2
A. RGB: Adobe RGB (1998)
B. CMYK: U.S. Web Coated (SWOP) v2
C. Gray: Gray Gamma 2.2
D. Spot: Dot Gain 20%
E. RGB: Convert to Working RGB
F. CMYK: Preserve Embedded Proles
G. Gray: Preserve Embedded Proles
H. Prole Mismatches: Check Ask When
Opening and Check Ask When Pasting
I. Missing Proles: Check Ask When Opening
J. If Conversion Options are not visible, click More
Options
K. Engine: Adobe (ACE)
L. Intent: Perceptual
M. Check Use Black Point Compensation
N. Once your settings match, click Save. This
will open the Save window (see FIGURE 3)
PAGE 2 of 7 >>
Page 3
Epson Stylus Pro 7890 / 9890 - Mac OS X
Setup and Print Guide - Photoshop CS, CS2, CS3, CS4
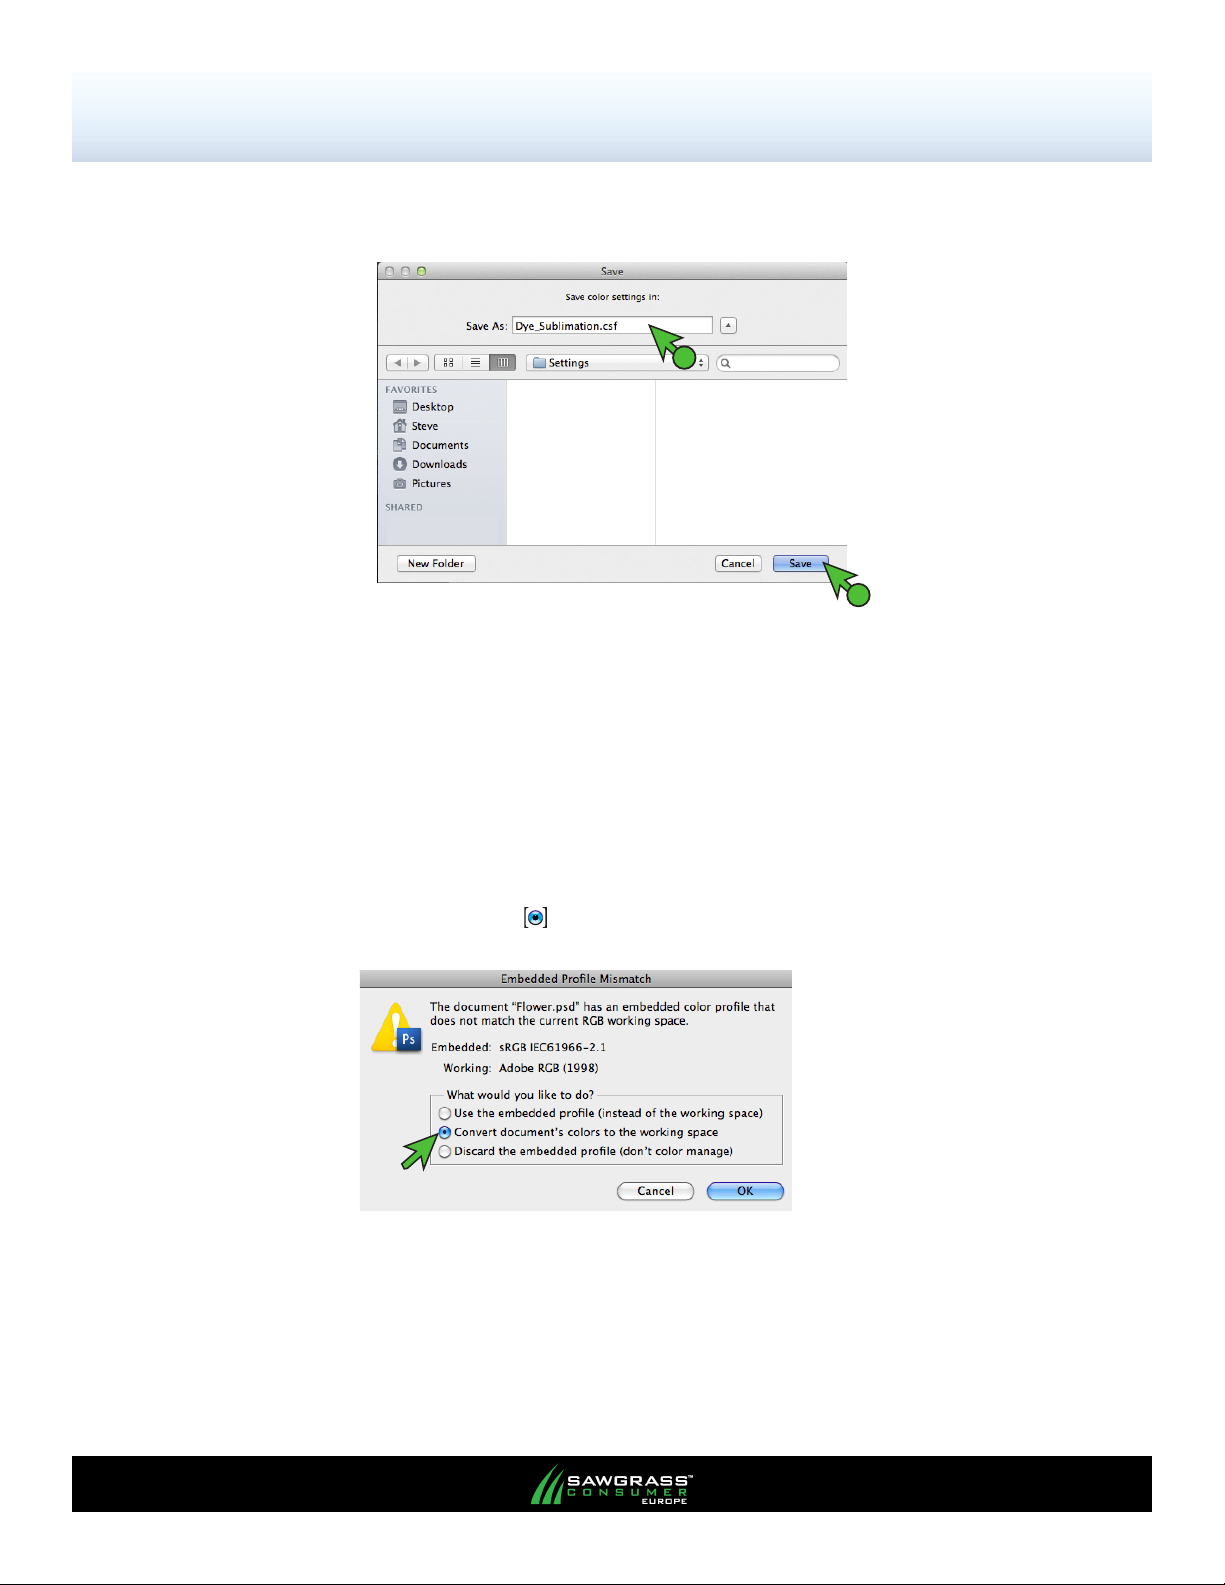
Name your new preset in the Save As eld and click Save when complete (see FIGURE 3).
1
FIGURE 3
Congratulations! The Photoshop RGB Working Space setup is now complete.
Print Guide - Photoshop CS, CS2, CS3, CS4
Begin by opening an image in Photoshop.
1.) When opening images you may encounter an Embedded Prole Mismatch warning. In this
instance, select the radio button Convert document’s colors to the working space and click
OK to continue (see FIGURE 4).
2
FIGURE 4
NOTE: Always choose to Convert document’s colors to the working space
PAGE 3 of 7 >>
Page 4

Epson Stylus Pro 7890 / 9890 - Mac OS X
Setup and Print Guide - Photoshop CS, CS2, CS3, CS4
2.) Once your image is ready to print, in the menu bar, click File > Print. This will open the Print
window (see FIGURE 5). Match your settings to the ones shown below:
NOTE: For older versions of Photoshop you will instead select File > Print with Preview.
A
H
FIGURE 5
C
sg_SJeProEpson7890-9890_RGB720-1440_v3.0
G
B
D
E
F
I
A. Click the drop-down arrow and select Printer: Epson Stylus Pro 7890 / 9890
B. Click the drop-down arrow and select Color Management
C. Select the radio button Document
D. Click the drop-down arrow and select Color Handling: Photoshop Manages Colors
E. Click the drop-down arrow and select the appropriate ICC prole for your printer
F. Click the drop-down arrow and select Rendering Intent: Perceptual
G. Check Black Point Compensation
PAGE 4 of 7 >>
Page 5

Epson Stylus Pro 7890 / 9890 - Mac OS X
Setup and Print Guide - Photoshop CS, CS2, CS3, CS4
H. When the correct settings have been entered, click Page Setup (see FIGURE 5). This will open
the Page Setup window (see FIGURE 6).
a
b
c
FIGURE 6
a. Click the drop-down arrow and select Format For: Epson Stylus Pro 7890 / 9890
b. Click the drop-down arrow at Paper Size: Choose the appropriate paper size
for the image that you are printing
c. Click OK to continue. This will return you to the Print window (see Figure 5).
I. Click Print to Continue (see FIGURE 5)
PAGE 5 of 7 >>
Page 6

Epson Stylus Pro 7890 / 9890 - Mac OS X
Setup and Print Guide - Photoshop CS, CS2, CS3, CS4
3.) Once Print has been selected, the following Print window will appear (see FIGURE 7).
FIGURE 7
4.) Click the drop-down arrow and select Print Settings (see FIGURE 8).
1
1
FIGURE 8
FIGURE 10
PAGE 6 of 7 >>
Page 7

Epson Stylus Pro 7890 / 9890 Mac OS X
Setup and Print Guide - Photoshop CS, CS2, CS3, CS4
6.) Match your settings to those shown below: (see FIGURE 9)
C
D
E
F
A
B
G
FIGURE 9
A. Click the drop-down arrow and select Media Type: Photo Quality Ink Jet Paper
B. Click the drop-down arrow and select Print Quality: SuperFine - 1440dpi
C. Check Super MicroWeave
D. Check High Speed
E. Check Mirror Image
F. Check Finest Detail
G. Click Print and Photoshop will print your image using the high quality driver settings combined
with the sublimation ICC prole.
PAGE 7 of 7 >>
 Loading...