


FILE NO. 810-200410
SERVICE MANUAL
DVD PLAYER & VIDEO CASSETTE RECORDER
SD-24VESE
SD-24VBSB
SD-24VLSL
AV3
MARCH, 2004

CONTENTS
SECTION 1 . . . . SUMMARY
SECTION 2 . . . . CABINET & MAIN CHASSIS SECTION 3 . . . . ELECTRICAL
SECTION 4 . . . . MECHANISM OF VCR PART SECTION 5 . . . . MECHANISM OF DVD PART SECTION 6 . . . . REPLACEMENT PARTS LIST
1-1
SECTION 1
SUMMARY
CONTENTS
PRODUCT SAFETY SERVICING GUIDELINES FOR VIDEO PRODUCTS ......... |
1-3 |
SERVICING PRECAUTIONS .................................................................................. |
1-4 |
SERVICE INFORMATION FOR EEPROM IC SETTING ........................................ |
1-5 |
OWNER’S MANUAL(SD-24VBSB) ....................................................................................... |
1-6 |
1-2
PRODUCT SAFETY SERVICING GUIDELINES FOR VIDEO PRODUCTS
CAUTION : DO NOT ATTEMPT TO MODIFY THIS PRODUCT IN ANY WAY, NEVER PERFORM CUSTOMIZED INSTALLATIONS WITHOUT MANUFACTURER’S APPROVAL. UNAUTHORIZED MODIFICATIONS WILL NOT ONLY VOID THE WARRANTY, BUT MAY LEAD TO YOUR BEING LIABLE FOR ANY RESULTING PROPERTY DAMAGE OR USER INJURY.
SERVICE WORK SHOULD BE PERFORMED ONLY AFTER YOU ARE THOROUGHLY FAMILIAR WITH ALL OF THE FOLLOWING SAFETY CHECKS AND SERVICING GUIDELINES. TO DO OTHERWISE, INCREASES THE RISK OF POTENTIAL HAZARDS AND INJURY TO THE USER.
WHILE SERVICING, USE AN ISOLATION TRANSFORMER FOR PROTECTION FROM A.C. LINE SHOCK.
SAFETY CHECKS
AFTER THE ORIGINAL SERVICE PROBLEM HAS BEEN CORRECTED. A CHECK SHOULD BE MADE OF THE FOLLOWING.
SUBJECT : FIRE & SHOCK HAZARD
1.BE SURE THAT ALL COMPONENTS ARE POSITIONED IN SUCH A WAY AS TO AVOID POSSIBILITY OF ADJACENT COMPONENT SHORTS. THIS IS ESPECIALLY IMPORTANT ON THOSE MODULES WHICH ARE TRANSPORTED TO AND FROM THE REPAIR SHOP.
2.NEVER RELEASE A REPAIR UNLESS ALL PROTECTIVE DEVICES SUCH AS INSULATORS, BARRIERS, COVERS, SHIELDS, STRAIN RELIEFS, POWER SUPPLY CORDS, AND OTHER HARDWARE HAVE BEEN REINSTALLED PER ORIGINAL DESIGN. BE SURE THAT THE SAFETY PURPOSE OF THE POLARIZED LINE PLUG HAS NOT BEEN DEFEATED.
3.SOLDERING MUST BE INSPECTED TO DISCOVER POSSIBLE COLD SOLDER JOINTS, SOLDER SPLASHES OR SHARP SOLDER POINTS. BE CERTAIN TO REMOVE ALL LOOSE FOREIGN PARTICLES.
4.CHECK FOR PHYSICAL EVIDENCE OF DAMAGE OR DETERIORATION TO PARTS AND COMPONENTS. FOR FRAYED LEADS, DAMAGED INSULATION (INCLUDING A.C. CORD). AND REPLACE IF NECESSARY FOLLOW ORIGINAL LAYOUT, LEAD LENGTH AND DRESS.
5.NO LEAD OR COMPONENT SHOULD TOUCH A RECIVING TUBE OR A RESISTOR RATED AT 1 WATT OR MORE. LEAD TENSION AROUND PROTRUNING METAL SURFACES MUST BE AVOIDED.
6.ALL CRITICAL COMPONENTS SUCH AS FUSES, FLAMEPROOF RESISTORS, CAPACITORS, ETC. MUST BE REPLACED WITH EXACT FACTORY TYPES, DO NOT USE REPLACEMENT COMPONENTS OTHER THAN THOSE SPECIFIED OR MAKE UNRECOMMENDED CIRCUIT MODIFICATIONS.
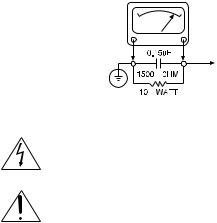
7.AFTER RE-ASSEMBLY OF THE SET ALWAYS PERFORM AN A.C. LEAKAGE TEST ON ALL EXPOSED METALLIC PARTS OF THE CABINET, (THE CHANNEL SELECTOR KNOB, ANTENNA TERMINALS. HANDLE AND SCREWS) TO BE SURE THE SET IS SAFE TO OPERATE WITHOUT DANGER OF ELECTRICAL SHOCK. DO NOT USE A LINE ISOLATION TRANSFORMER DURING THIS TEST USE AN A.C. VOLTMETER, HAVING 5000 OHMS PER VOLT OR MORE SENSITIVITY, IN THE FOLLOWING MANNER; CONNECT A 1500 OHM 10 WATT RESISTOR, PARALLELED BY A .15 MFD. 150.V A.C TYPE CAPACITOR BETWEEN A KNOWN GOOD EARTH GROUND (WATER PIPE, CONDUIT, ETC.) AND THE EXPOSED METALLIC PARTS, ONE AT A TIME. MEASURE THE A.C. VOLTAGE ACROSS THE COMBINATION OF 1500 OHM RESISTOR AND .15 MFD CAPACITOR. REVERSE THE A.C. PLUG AND REPEAT A.C. VOLTAGE MEASUREMENTS FOR EACH EXPOSED METALLIC PART. VOLTAGE MEASURED MUST NOT EXCEED 75 VOLTS R.M.S. THIS CORRESPONDS TO 0.5 MILLIAMP A.C ANY VALUE EXCEEDING THIS LIMIT CONSTITUTES A POTENTIAL SHOCK HAZARD AND MUST BE CORRECTED IMMEDIATELY.
A.C. VOLTMETER
GOOD EARTH GROUND |
PLACE THIS PROBE |
SUCH AS THE WATER |
ON EACH EXPOSED |
PIPE. CONDUIT. ETC |
METAL PART |
SUBJECT: GRAPHIC SYMBOLS
THE LIGHTNING FLASH WITH APROWHEAD SYMBOL. WITHIN AN EQUILATERAL TRIANGLE, IS INTENDED TO ALERT THE SERVICE PERSONNEL TO THE PRESENCE OF UNINSULATED “DANGEROUS VOLTAGE” THAT MAY BE OF SUFFICIENT MAGNITUDE TO CONSTITUTE A RISK OF ELECTRIC SHOCK.
THE EXCLAMATION POINT WITHIN AN EQUILATERAL TRIANGLE IS INTENDED TO ALERT THE SERVICE PERSONNEL TO THE PRESENCE OF IMPORTANT SAFETY INFORMATION IN SERVICE LITERATURE.
SUBJECT : X-RADIATION
1.BE SURE PROCEDURES AND INSTRUCTIONS TO ALL SERVICE PERSONNEL COVER THE SUBJECT OF X-RADIATION. THE ONLY POTENTIAL SOURCE OF X-RAYS IN CURRENT T.V. RECEIVERS IS THE PICTURE TUBE. HOWEVER, THIS TUBE DOES NOT EMIT X-RAYS WHEN THE HIGH VOLTAGE IS AT THE FACTORY SPECIFIED LEVEL. THE PROPER VALUE IS GIVEN IN THE APPLICABLE SCHEMATIC. OPERATION AT HIGHER VOLTAGES MAY CAUSE A FAILURE OF THE PICTURE TUBE OR HIGH VOLTAGE SUPPLY AND, UNDER CERTAIN CIRCUMSTANCES, MAY PRODUCE RADIATION IN EXCESS OF DESIRABLE LEVELS.
2.ONLY FACTORY SPECIFIED C.R.T. ANODE CONNECTORS MUST BE USED. DEGAUSSING SHIELDS ALSO SERVE AS X-RAY SHIELD IN COLOR SETS, ALWAYS RE-INSTALL THEM.
3.IT IS ESSNTIAL THAT SERVICE PERSONNEL HAVE AVAILABLE AN ACCURATE AND RELIABLE HIGH VOLTAGE METER. THE CALIBRA TION OF THE METER SHOULD BE CHECKED PERIODICALLY AGAINST A REFERENCE STANDARD, SUCH AS THE ONE AVAILABLE AT YOUR DISTRIBUTOR.
4.WHEN THE HIGH VOLTAGE CIRCUITRY IS OPERATING PROPERLY THERE IS NO POSSIBILITY OF AN X-RADIATION PROBLEM. EVERY TIME A COLOR CHASSIS IS SERVICED. THE BRIGHTNESS SHOULD BE RUN UP AND DOWN WHILE MONITORING THE HIGH VOLTAGE WITH A METER TO BE CERTAIN THAT THE HIGH VOLTAGE DOES NOT EXCEED THE SPECIFIED VALUE AND THAT IT IS REGULATING CORRECTLY, WE SUGGEST THAT YOU AND YOUR SERVICE ORGANIZATION REVIEW TEST PROCEDURES SO THAT VOLTAGE REGULATION IS ALWAYS CHECKED AS A STANDARD SERVICING PROCEDURE. AND THAT THE HIGH VOLTAGE READING BE RECORDER ON EACH CUSTOMER’S INVOICE.
5.WHEN TROUBLESHOOTING AND MAKING TEST MEASUREMENTS IN A PRODUCT WITH A PROBLEM OF EXCESSIVE HIGH VOLTAGE, AVOID BEING UNNECESSARILY CLOSE TO THE PICTURE TUBE AND THE HIGH VOLTAGE SUPPLY. DO NOT OPERATE THE PRODUCT LONGER THAN IS NECESSARY TO LOCATE THE CAUSE OF EXCES SIVE VOLTAGE.
6.REFER TO HV. B+ AND SHUTDOWN ADJUSTMENT PROCEDURES DESCRIBED IN THE APPROPRIATE SCHEMATIC AND DIAGRAMS (WHERE USED).
SUBJECT: IMPLOSION
1.ALL DIRECT VIEWED PICTURE TUBES ARE EQUIPPED WITH AN INTE GRAL IMPLOSION PROTECTION SYSTEM, BUT CARE SHOULD BE TAKEN TO AVOID DAMAGE DURING INSTALLATION, AVOID SCRATCHING THE TUBE. IF SCRATCHED REPLACE IT.
2.USE ONLY RECOMMENDED FACTORY REPLACEMENT TUBES. SUBJECT : TIPS ON PROPER INSTALLATION
1.NEVER INSTALL ANY PRODUCT IN A CLOSED-IN RECESS, CUBBYHOLE OR CLOSELY FITTING SHELF SPACE. OVER OR CLOSE TO HEAT DUCT, OR IN THE PATH OF HEATED AIR FLOW.
2.AVOID CONDITIONS OF HIGH HUMIDITY SUCH AS: OUTDOOR PATIO INSTALLATIONS WHERE DEW IS A FACTOR, NEAR STEAM RADIATORS WHERE STEAM LEAKAGE IS A FACTOR, ETC.
3.AVOID PALCEMENT WHERE DRAPERIES MAY OBSTRUCT REAR VENTING. THE CUSTOMER SHOULD ALSO AVOID THE USE OF DECORATIVE SCARVES OR OTHER COVERINGS WHICH MIGHT OBSTRUCT VENTILATION.
4.WALL AND SHELF MOUNTED INSTALLATIONS USING A COMMERCIAL MOUNTING KIT. MUST FOLLOW THE FACTORY APPROVED MOUNTING INSTRUCTIONS A PRODUCT MOUNTED TO A SHELF OR PLATFORM MUST RETAIN ITS ORIGINAL FEET (OR THE EQUIVALENT THICKNESS IN SPACERS) TO PROVIDE ADEQUATE AIR FLOW ACROSS THE BOTTOM, BOLTS OR SCREWS USED FOR FASTENERS MUST NOT TOUCH ANY PARTS OR WIRING. PERFORM LEAKAGE TEST ON CUSTOMIZED INSTALLATIONS.
5.CAUTION CUSTOMERS AGAINST THE MOUNTING OF A PRODUCT ON SLOPING SHELF OR A TILTED POSITION, UNLESS THE PRODUCT IS PROPERLY SECURED.
6.A PRODUCT ON A ROLL-ABOUT CART SHOULD BE STABLE ON ITS MOUNTING TO THE CART. CAUTION THE CUSTOMER ON THE HAZARDS OF TRYING TO ROLL A CART WITH SMALL CASTERS ACROSS THRESHOLDS OR DEEP PILE CARPETS.
7.CAUTION CUSTOMERS AGAINST THE USE OF A CART OR STAND WHICH HAS NOT BEEN LISTED BY UNDERWRITERS LABORATORIES, INC. FOR USE WITH THEIR SPECIFIC MODEL OF TELEVISION RECEIVER OR GENERICALLY APPROVED FOR USE WITH T.V.’S OF THE SAME OR LARGER SCREEN SIZE.
8.CAUTION CUSTOMERS AGAINST THE USE OF EXTENSION CORDS, EXPLAIN THAT A FOREST OF EXTENSIONS SPROUTING FROM A SINGLE OUTLET CAN LEAD TO DISASTROUS CONSEQUENCES TO HOME AND FAMILY.
1-3
SERVICING PRECAUTIONS
CAUTION : Before servicing the VCR+DVD covered by this service data and its supplements and addends, read and follow the SAFETY PRECAUTIONS. NOTE : if unforeseen circumstances create conflict between the following servicing precautions and any of the safety precautions in this publications, always follow the safety precautions.
Remembers Safety First:
General Servicing Precautions
1.Always unplug the VCR+DVD AC power cord from the AC power source before:
(1)Removing or reinstalling any component, circuit board, module, or any other assembly.
(2)Disconnection or reconnecting any internal electrical plug or other electrical connection.
(3)Connecting a test substitute in parallel with an electrolytic capacitor.
Caution : A wrong part substitution or incorrect polarity installation of electrolytic capacitors may result in an explosion hazard.
2.Do not spray chemicals on or near this VCR+DVD or any of its assemblies.
3.Unless specified otherwise in this service data, clean electrical contacts by applying an appropriate contact cleaning solution to the contacts with a pipe cleaner, cotton-tipped swab, or comparable soft applicator.
Unless specified otherwise in this service data, lubrication of contacts is not required.
4.Do not defeat any plug/socket B+ voltage interlocks with whitch instruments covered by this service manual might be equipped.
5.Do not apply AC power to this VCR+DVD and/or any of its electrical assemblies unless all solid-state device heat sinks are cerrectly installed.
6.Always connect test instrument ground lead to the appropriate ground before connection the test instrument positive lead. Always remove the test instrument ground lead last.
Insulation Checking Procedure
Disconnect the attachment plug from the AC outlet and turn the power on. Connect an insulation resistance meter(500V) to the blades of the attachment plug. The insulation resistance between each blade of the attachment plug and accessible conductive parts (Note 1) should be more than 1Mohm.
Note 1 : Accessible Conductive Parts including Metal panels, Input terminals, Earphone jacks, etc.
Electrostatically Sensitive (ES) Devices
Some semiconductor (solid state) devices can be damaged easily by static electricity. Such components commonly are called Electrostatically Sensitive (ES) Devices. Examples of typical ES devices are integrated circuits and some field effect transistors and semiconductor chip components.
The following techniques should be used to help reduce the incidence of component damage caused by static electricity.
1.Immediately before handling any semiconductor component or semiconductor-equipped assembly, drain off any electrostatic charge on your body by touching a known earth ground. Alternatively, obtain and wear a commercially available discharging wrist strap device, which should be removed for potential shock reasons prior to applying power to the unit under test.
2.After removing an electrical assembly equipped with ES devices, place the assembly on a conductive surface such as aluminum foil, to prevent electrostatic charge buildup or exposure of the assembly.
3.Use only a grouned-tip soldering iron to solder or unsolder ES devices.
4.Use only an anti-static solder removal device. Some solder removal devices not classified a “anti-static” can generate electrical charges sufficient to damage ES devices.
5.Do not use freon-propelled chemicals. These can generate electrical charge sufficient to damage ES devices.
6.Do not remove a replacement ES device from its protec tive package until immediately before you are ready to install it. (Most replacement ES devices are packaged with leads electrically shorted together by conductive foam, aluminum foil, or comparable conductive material).
7.Immediately before removing the protective material from the leads of a replacement ES device, touch the protective material to the chassis or circuit assembly into which the device will be installed.
Caution : Be sure no power is applied to the chassis or circuit, and observe all other safety precautions.
8.Minimize bodily motions when handling unpackaged replacement ES devices. (Normally harmless motion such as the brushing together of your clothes fabric or the lifting of your foot from a carpeted floor can generate static electricity sufficient to damage an ES device.)
1-4

SERVICE INFORMATION FOR EEPROM IC SETTING
EEPROM option code No. setting
NAME |
HEX |
BINARY |
|
OPT1 |
00 |
00000000 |
|
OPT2 |
00 |
00000000 |
|
OPT3 |
00 |
00000000 |
|
OPT4 |
00 |
00000000 |
|
OPT5 |
00 |
00000000 |
|
OPT6 |
00 |
00000000 |
|
WR : OK |
I : EXIT MOVE : F G |
||
EDIT : DE |
|
|
|
MASKROM : R00 |
|
|
|
EEPROM : R00 |
LG CODE |
||
|
|
|
|
MODEL |
NAME |
HEX |
BINARY |
SD-24VL |
F8 |
00 |
00000000 |
|
C3 |
00 |
00000000 |
|
5A |
00 |
00000000 |
|
21 |
00 |
00000000 |
SD-24VB |
F8 |
00 |
00000000 |
|
CD |
00 |
00000000 |
|
4A |
00 |
00000000 |
|
02 |
00 |
00000000 |
SD-24VE |
F8 |
00 |
00000000 |
|
D6 |
00 |
00000000 |
|
7A |
00 |
00000000 |
|
00 |
00 |
00000000 |
WR : OK |
I : EXIT MOVE : F G |
||
EDIT : DE |
|
|
|
|
|
|
|
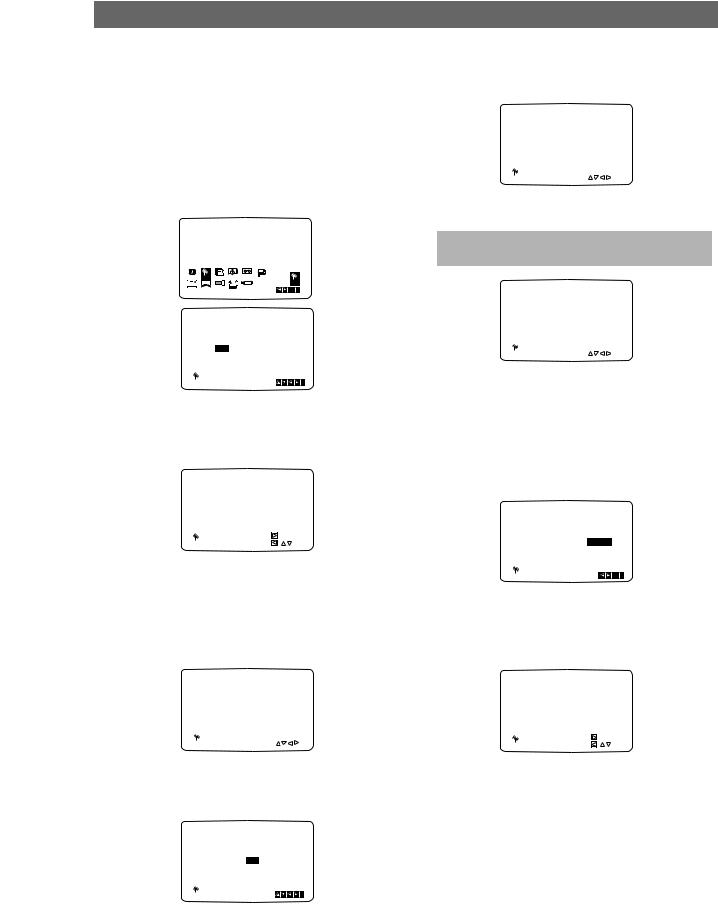
EEPROM option code No. setting procedure
1.DETECT NEW EEPROM (OPTION EDIT SCREEN)
-Eeprom EDIT screen automatically appears if replacing Eeprom.
-Setup option data using the cursor Up/Down key of a remote control.
(Setup upon BOM depending on OPT1~OPT4 model)
•Since an initial remote control is set to LG for LG model, appropriately set optiona data using the cursor Up/Down key.
•For TOSHIBA model, change a remocon key by using following JIG key.
TOSHIBA MODEL : EJECTKEY (2ND) (LG/TOSHIBA CODE)
2.EEPROM WRITED COMPLETE SCREEN
-Writes data on EEPROM by using REMOCON "OK".
-If completing the option data screen with a menu key, Powering Off is automatically done and the option edit screen is arranged.
3.PG ADJUST
-Plays PAL SP TAPE for adjusting the AUTO PG.
-A 0:00:00 is played in the field if pressing the front play with Remocon number "1" key played during PAL SP.
-The 0:00:00 in the field represents position of the TRACKING PRESET.
-"OFF" is displayed in the field if pressing the front play key with the remocon number "1" in the status of the tracking preset pressed, and "ON" is displayed in the field if AUTO PG operation is automatically performed and completed.
-DECK STOP > plays if above operation is completed. Set operation is performed depending on changed PG values. These values are stored in the EEPROM area.
4.EEPROM INITIAL
-SETUP is displayed in the field if pressing the FRONT REC KEY with the remocon number "CLEAR" key pressed in the status of powering Off.
-AUTO SEARCH is done since the initial screen of ACMS is serviced if powering On.
-Check basic operation (PLAY/RECORD...)
1-5
DVD PLAYER &
VIDEO CASSETTE RECORDER
SD-24VBSB
OWNER’S MANUAL
Before connecting, operating or adjusting this product, please read this instruction booklet carefully and completely.
©2004 Toshiba Corporation
This device does not tape-record copy protected DVD Video Discs.
1-6

Safety Precautions
CAUTION
RISK OF ELECTRIC SHOCK
DO NOT OPEN
CAUTION: TO REDUCE THE RISK
OF ELECTRIC SHOCK
DO NOT REMOVE COVER (OR BACK)
NO USER-SERVICEABLE PARTS INSIDE
REFER SERVICING TO QUALIFIED SERVICE
PERSONNEL.
This lightning flash with arrowhead symbol within an equilateral triangle is intended to alert the user to the presence of uninsulated dangerous voltage within the product’s enclosure that may be of sufficient magnitude to constitute a risk of electric shock to persons.
The exclamation mark within an equilateral triangle is intended to alert the user to the presence of important operating and maintenance (servicing)
instructions in the literature accompanying the product.
WARNING: Do not install this equipment in a confined space such as a book case or similar unit.
WARNING: TO REDUCE THE RISK OF FIRE OR ELECTRIC SHOCK, DO NOT EXPOSE THIS PRODUCT TO RAIN OR MOISTURE.
CAUTION:
This Digital Video Disc Player employs a Laser System.
To ensure proper use of this product, please read this owner’s manual carefully and retain for future reference, should the unit require maintenance, contact an authorized service locationsee service procedure.
Use of controls, adjustments or the performance of procedures other than those specified herein may result in hazardous radiation exposure.
To prevent direct exposure to laser beam, do not try to open the enclosure. Visible laser radiation when open. DO NOT STARE INTO BEAM.
CAUTION: The apparatus shall not be exposed to water, dripping or splashing and that no objects filled with liquids, such as vases, shall be placed on the apparatus.
This product is manufactured to comply with the radio interference requirements of EEC DIRECTIVE
89/336/EEC, 93/68/EEC and 73/23/EEC.
 Notes on copyrights:
It is forbidden by law to copy, broadcast, show, broadcast via cable, play in public, or rent copyright material without permission.
This product features the copy protection function developed by Macrovision. Copy protection signals are recorded on some discs.
This product incorporates copyright protection technology that is protected by method claims of certain U.S. patents and other intellectual property rights owned by Macrovision Corporation and other rights owners. Use of this copyright protection technology must be authorized by Macrovision Corporation, and is intended for home and other limited viewing uses only unless otherwise authorized by Macrovision Corporation. Reverse engineering or disassembly is prohibited.
CONSUMERS SHOULD NOTE THAT NOT ALL HIGH DEFINITION TELEVISION SETS ARE FULLY COMPATIBLE WITH
THIS PRODUCT AND MAY CAUSE ARTIFACTS TO BE DIS-
PLAYED IN THE PICTURE. IN CASE OF 625 PROGRESSIVE SCAN PICTURE PROBLEMS, IT IS RECOMMENDED THAT THE USER SWITCH THE CONNECTION TO THE ‘STANDARD DEFINITION’ OUTPUT. IF THERE ARE QUESTIONS
REGARDING OUR TV SET COMPATIBILITY WITH THIS
MODEL 625p DVD PLAYER, PLEASE CONTACT OUR CUSTOMER SERVICE CENTER.
Features:
•Complete versatility to play DVD, VCDs, audio CDs or VHS Tapes.
•Watch a DVD while recording a TV show to the VCR.
•Remote controls DVD and VCR decks.
•Records from DVD to VHS (unless DVD is copy protected with Macrovision).
•Hi-Fi Stereo VCR.
SERIAL NUMBER: The serial number is found on the back of this unit. This number is unique to this unit and not available to others. You should record requested information here and retain this guide as a permanent record of your purchase.
Model No. ___________________________________
Serial No. ___________________________________
POWER: This unit operates on a mains supply of 200-240V, 50Hz.
WIRING: This unit is supplied with a BSI 1363 approved 13 amp mains plug, fused at 5 amp. When replacing the fuse always use a 5 amp BS 1362, BSI or ASTA approved type. Never use this plug with the fuse cover omitted. To obtain a replacement fuse cover contact your dealer. If the type of plug supplied is not suitable for the mains sockets in your home, then the plug should be removed and a suitable type fitted. Please refer to the wiring instructions below:
WARNING: A mains plug removed from the mains lead of this DVD player must be destroyed. A mains plug with bared wires is hazardous if inserted in a mains socket.
Do not connect either wire to the earth pin, marked with the letter E or with the earth symbol  or coloured green or green and yellow.
If any other plug is fitted, use a 5 amp fuse, either in the plug, or at the distribution board.
IMPORTANT: The wires in this mains lead are coloured in accordance with the following codes:
- BLUE: NEUTRAL, BROWN: LIVE - As the colours of the wires in the mains lead of this unit may not correspond with the coloured marking identifying the terminals in your plug, proceed as follows: The wire which is coloured blue must be connected to the terminal which is marked with the letter N or coloured black. The wire which is coloured brown must be connected to the terminal which is marked with the letter L or coloured red.
1-7

Safety Precautions(Continued)
SOME DOS AND DON'TS ON THE SAFE USE OF EQUIPMENT
This equipment has been designed and manufactured to meet international safety standards but, like any electrical equipment, care must be taken if you are to obtain the best results and safety is to be assured. So, please read the points below for your own safety. They are of a general nature, intended to help you with all your electronic consumer products and some points may not apply to the goods you have just purchased.
**************
DO read the operating instructions before you attempt to use the equipment.
DO ensure that all electrical connections (including the mains plug, extension leads and interconnections between the pieces of equipment) are properly made and in accordance with the manufacturer's instructions. Switch off and withdraw the mains plug before making or changing connections.
DO consult your dealer if you are ever in doubt about the installation, operation or safety of your equipment.
DO be careful with glass panels or doors on equipment
**************
DON'T remove any fixed cover as this may expose dangerous voltages.
DON'T obstruct the ventilation openings of the equipment with items such as newspapers, tablecloths, curtains, etc. Overheating will cause damage and shorten the life of the equipment.
DON'T allow electrical equipment to be exposed to dripping or splashing, or objects filled with liquids, such as vases, to be placed on the equipment.
DON'T place hot objects or naked flame sources such as lighted candles or nightlights on, or close to equipment. High temperatures can melt plastic and lead to fires.
DON'T use makeshift stands and NEVER fix legs with wood screws - to ensure complete safety always fit the manufacturer's approved stand or legs with the fixings provided according to the instructions.
DON'T use equipment such as personal stereos or radios so that you are distracted from the requirements of traffic safety. It is illegal to watch television whilst driving.
DON'T listen to headphones at high volume, as such use can permanently damage your hearing.
DON'T leave equipment switched on when it is unattended unless it is specifically stated that it is designed for unattended operation or has a stand-by mode. Switch off using the switch on the equipment and make sure that your family know how to do this. Special arrangements may need to be made for infirm or handicapped people.
DON'T continue to operate the equipment if you are in any doubt about it working normally, or if it is damaged in any way -switch off, withdraw the mains plug and consult your dealer.
ABOVE ALL
---NEVER let anyone especially children push anything into holes, slots or any other opening in the case - this could result in a fatal electrical shock;
---NEVER guess or take chances with electrical equipment of any kind
---it is better to be safe than sorry!
*************
INTRODUCTION
1-8

Table of Contents
Introduction
Safety Precautions . . . . . . . . . . . . . . . . . . . . . . . . 2-3 Table of Contents . . . . . . . . . . . . . . . . . . . . . . . . . . 4
About the symbols for instructions . . . . . . . . . . . . 4
Before Use . . . . . . . . . . . . . . . . . . . . . . . . . . . . . . 5-6
Playable Discs . . . . . . . . . . . . . . . . . . . . . . . . . . . 5 Moisture Condensation . . . . . . . . . . . . . . . . . . . . 5 Remote Control Operation Range . . . . . . . . . . . . 5 Precautions . . . . . . . . . . . . . . . . . . . . . . . . . . . . . 6 Notes on Discs . . . . . . . . . . . . . . . . . . . . . . . . . . 6 About Symbols . . . . . . . . . . . . . . . . . . . . . . . . . . 6 Selecting the Viewing Source. . . . . . . . . . . . . . . . 6
Front Panel . . . . . . . . . . . . . . . . . . . . . . . . . . . . . . . 7 Display Window. . . . . . . . . . . . . . . . . . . . . . . . . . . . 8 Remote Control . . . . . . . . . . . . . . . . . . . . . . . . . . . . 9 Rear Panel . . . . . . . . . . . . . . . . . . . . . . . . . . . . . . . 10
Preparation
Connections . . . . . . . . . . . . . . . . . . . . . . . . . . . 11-12
Connecting to a TV . . . . . . . . . . . . . . . . . . . . . . 11 Connecting to Optional Equipment . . . . . . . . . . . 12
Before Operation - VCR part . . . . . . . . . . . . . . 13-17
Tuning in a video channel on your TV . . . . . . . . 13 Initial preset . . . . . . . . . . . . . . . . . . . . . . . . . . . . 13 Setting the clock Manually . . . . . . . . . . . . . . . . . 14 To set the colour system . . . . . . . . . . . . . . . . . . 14 To set the RF OUT sound system. . . . . . . . . . . . 14 How to use the main menu . . . . . . . . . . . . . . . . 15 Tuning in TV stations Automatically . . . . . . . . . . 15 Tuning in TV stations Manually. . . . . . . . . . . . . . 16 Changing the other of TV stations . . . . . . . . . . . 17 Deleting TV stations . . . . . . . . . . . . . . . . . . . . . . 17
Before Operation - DVD part . . . . . . . . . . . . . . 18-21
General Explanation. . . . . . . . . . . . . . . . . . . . . . 18 On-Screen Display. . . . . . . . . . . . . . . . . . . . . . . 18 Initial Settings . . . . . . . . . . . . . . . . . . . . . . . . 19-21 z General Operation . . . . . . . . . . . . . . . . . . . . 19 z Language . . . . . . . . . . . . . . . . . . . . . . . . . . 19 z Picture. . . . . . . . . . . . . . . . . . . . . . . . . . . . . 19 z Sound . . . . . . . . . . . . . . . . . . . . . . . . . . . . . 20 z Others . . . . . . . . . . . . . . . . . . . . . . . . . . . . . 20 z Parental Control. . . . . . . . . . . . . . . . . . . . . . 21
Operation
Operation with tape . . . . . . . . . . . . . . . . . . . . . 22-25
Playing a tape . . . . . . . . . . . . . . . . . . . . . . . . . . 22 z CM (Commercial Message) Skip . . . . . . . . . . . 22 z OPR (Optimum Picture Response) . . . . . . . . . 22 One-touch Timer Recording (OTR). . . . . . . . . . . 23 Timer recording using On Screen Display . . . 24-25
Operation with DVD and Video CD . . . . . . . . . . 26-28
Playing a DVD and Video CD. . . . . . . . . . . . . . . 26 General Features . . . . . . . . . . . . . . . . . . . . . . . . 26 z Moving to another TITLE . . . . . . . . . . . . . . . 26 z Moving to another CHAPTER/TRACK . . . . . 26 z Search. . . . . . . . . . . . . . . . . . . . . . . . . . . . . 26 z Still Picture and Frame-by-Frame Playback . . . . 26 z Slow Motion. . . . . . . . . . . . . . . . . . . . . . . . . 27 z Random . . . . . . . . . . . . . . . . . . . . . . . . . . . 27 z Repeat . . . . . . . . . . . . . . . . . . . . . . . . . . . . 27 z Repeat A-B . . . . . . . . . . . . . . . . . . . . . . . . . 27 z Time Search . . . . . . . . . . . . . . . . . . . . . . . . 27 z 3D Surround . . . . . . . . . . . . . . . . . . . . . . . . 27
z Screen Saver. . . . . . . . . . . . . . . . . . . . . . . . 27 z Zoom. . . . . . . . . . . . . . . . . . . . . . . . . . . . . . 28 z Marker Search. . . . . . . . . . . . . . . . . . . . . . . 28 z One Touch Replay . . . . . . . . . . . . . . . . . . . . 28 Special DVD Features . . . . . . . . . . . . . . . . . . . . 28 z Title Menu . . . . . . . . . . . . . . . . . . . . . . . . . . 28 z Disc Menu . . . . . . . . . . . . . . . . . . . . . . . . . . 28 z Camera Angle . . . . . . . . . . . . . . . . . . . . . . . 28 z Changing the Audio Language . . . . . . . . . . . 28 z Changing the Audio Channel . . . . . . . . . . . . 28 z Subtitles . . . . . . . . . . . . . . . . . . . . . . . . . . . 28
Operation with Audio CD and MP3 Disc . . . . . . . . 29-30
Playing an Audio CD and MP3 Disc . . . . . . . . . . 29 z Notes on MP3 Recordings . . . . . . . . . . . . . . 29 z Pause . . . . . . . . . . . . . . . . . . . . . . . . . . . . . 30 z Moving to another Track . . . . . . . . . . . . . . . 30 z Repeat Track/All/Off. . . . . . . . . . . . . . . . . . . 30 z Search. . . . . . . . . . . . . . . . . . . . . . . . . . . . . 30 z Random . . . . . . . . . . . . . . . . . . . . . . . . . . . 30 z Repeat A-B . . . . . . . . . . . . . . . . . . . . . . . . . 30 z 3D Surround . . . . . . . . . . . . . . . . . . . . . . . . 30 z Changing the Audio Channel . . . . . . . . . . . . 30
Operation with JPEG Disc. . . . . . . . . . . . . . . . . . . 31
Viewing a JPEG disc . . . . . . . . . . . . . . . . . . . . . 31 z Moving to another File . . . . . . . . . . . . . . . . . 31 z Still Picture . . . . . . . . . . . . . . . . . . . . . . . . . 31 z To flip the picture . . . . . . . . . . . . . . . . . . . . . 31 z To rotate Picture . . . . . . . . . . . . . . . . . . . . . 31 z Notes on JPEG Recordings . . . . . . . . . . . . . 31
Programmed Playback . . . . . . . . . . . . . . . . . . . . .32
Programmed Playback with Audio CD
and MP3 Discs . . . . . . . . . . . . . . . . . . . . . . . . . 32 Programmed Playback with Video CD . . . . . . . . 32 z Repeat Programmed Tracks . . . . . . . . . . . . 32 z Erasing a Track from Program list . . . . . . . . 32 z Erasing the Complete Program list. . . . . . . . 32
Additional Operation with tape . . . . . . . . . . . . 33-35
Hi-Fi Stereo Sound System (NIC). . . . . . . . . . . . 33 Blank Search . . . . . . . . . . . . . . . . . . . . . . . . . . . 33 On Screen Display(F.OSD). . . . . . . . . . . . . . . . . 33 Tape Counter Memory Stop . . . . . . . . . . . . . . . . 33 Video Doctor (Self-Diagnosis) . . . . . . . . . . . . . . 34 To set the decoder . . . . . . . . . . . . . . . . . . . . . . . 34 Wide Screen Compatibility 16:9 . . . . . . . . . . . . . 34 Copying from DVD to VCR. . . . . . . . . . . . . . . . . 35 Recording from another video recorder . . . . . . . 35
Reference
Troubleshooting . . . . . . . . . . . . . . . . . . . . . . . . 36-37 Language Code List . . . . . . . . . . . . . . . . . . . . . . . 38 Country/Area Code list . . . . . . . . . . . . . . . . . . . . . 39 Specification . . . . . . . . . . . . . . . . . . . . . . . . . . . . . 40
About the symbols for instructions
Indicates hazards likely to cause harm to the unit itself or other material damage.
 Indicates special operating features of this unit.
  Indicates tips and hints for making the task easier.
1-9
Before Use
Playable Discs
DVD
(8 cm / 12 cm disc)
Video CD (VCD) (8 cm / 12 cm disc)
Audio CD
(8 cm / 12 cm disc)
In addition, this unit can play SVCD, DVD±R/RW and CD-R/RW that contains audio titles, MP3 or JPEG files.
 Notes
Notes
zDepending on the conditions of the recording equipment or the CD-R/RW (or DVD±R/RW) disc itself, some CD-R/RW (or DVD±R/RW) discs cannot be played on the unit.
zDo not attach any seal or label to either side (the labeled side or the recorded side) of a disc.
zDo not use irregular shaped CDs (e.g., heart-shaped or octagonal). It may result in malfunctions.
 Notes on DVDs and Video CDs
Some playback operations of DVDs and Video CDs may be intentionally fixed by software manufacturers. As this unit plays DVDs and Video CDs according to disc content designed by the software manufacturer, some playback features of the unit may not be available, or other functions may be added.
Refer also to the instructions applied with the DVDs and Video CDs. Some DVDs made for business purposes may not be played on the unit.
Regional code of the DVD player and DVDs
This DVD player is designed and manufactured for playback of region “2” encoded DVD software. The
region code on the labels of some DVD discs indicates which type of player can play those 2 discs. This unit can play only DVD discs
labeled “2” or “ALL”. If you try to play any other discs, the message “Check Regional Code” will appear on the TV screen. Some DVD discs may not have a region code label even though their playback is prohibited by area limits.
Disc-related terms
Title (DVD only)
The main film content or accompanying feature content or additional feature content, or music album. Each title is assigned a title reference number enabling you to locate it easily.
Chapter (DVD only)
Sections of a picture or a musical piece that are smaller than titles. A title is composed of one or several chapters. Each chapter is assigned a chapter number, enable you to locate the chapter you want. Depending on the disc, chapters may not be recorded.
Track (Video CD and audio CD only) |
|
|
Sections of a picture or a musical piece on a video CD |
|
|
or an audio CD. Each track is assigned a track number, |
|
|
enabling you to locate the track you want. |
INTRODUCTION |
|
Scene |
||
|
||
On a video CD with PBC (Playback control) functions, |
|
|
moving pictures and still pictures are divided into |
|
|
sections called “Scenes”. Each scene is displayed in the |
|
|
menu screen and assigned a scene number, enabling |
|
|
you to locate the scene you want. |
|
|
A scene is composed of one or several tracks. |
|
Types of video CDs
There are two types of video CDs:
Video CDs equipped with PBC (Version 2.0)
PBC (Playback control) functions allow you to interact with the system via menus, search functions, or other typical computer-like operations. Moreover, still pictures of high resolution can be played if they are included in the disc.
Video CDs not equipped with PBC (Version 1.1)
Operated in the same way as audio CDs, these discs allow playback of video pictures as well as sound, but they are not equipped with PBC.
Moisture Condensation
Never operate the DVD+VCR immediately after moving it from a cold location to a warm location. Leave it for two or three hours without operating it. If you use the DVD+VCR in such a situation, it may damage discs/tapes and internal parts.
Remote Control Operation Range
Point the remote control at the remote sensor and press the buttons.
zDistance: About 23 ft (7 m) from the front of the remote sensor
zAngle: About 30° in each direction of the front of the remote sensor
Remote control battery installation
|
Detach the battery cover on the rear of |
|
|
the remote control, and insert two |
|
|
(R03/AAA) size batteries with |
|
AAA |
and |
aligned correctly. |
AAA |
|
|
 Caution
Do not mix old and new batteries. Never mix different types of batteries (standard, alkaline, etc.).
1-10

Before Use (Continued)
Precautions
Handling the unit
When shipping the unit
The original shipping carton and packing materials come in handy. For maximum protection, re-pack the unit as it was originally packed at the factory.
When setting the unit
The picture and sound of a nearby TV or radio may be distorted during playback. In this case, position the unit away from the TV or radio, or turn off the unit after removing the disc.
To keep the surface clean
Do not use volatile liquids, such as insecticide spray, near the unit. Do not leave rubber of plastic products in contact with the unit for a long period of time. They will leave marks on the surface.
Cleaning the unit
To clean the cabinet
Use a soft, dry cloth. If the surfaces are extremely dirty, use a soft cloth lightly moistened with a mild detergent solution. Do not use strong solvents, such as alcohol, benzine, or thinner, as these might damage the surface of the unit.
To obtain a clear picture
The DVD player is a high-tech, precision device. If the optical pick-up lens and disc drive parts are dirty or worn down, the picture quality will be poor.
Regular inspection and maintenance are recommended after every 1,000 hours of use. (This depends on the operating environment.)
For details, please contact your nearest dealer.
Notes on Discs
Handling discs
Do not touch the playback side of the disc.
Hold the disc by the edges so that fingerprints will not get on the surface.
Do not stick paper or tape on the disc.
Storing discs
After playing, store the disc in its case.
Do not expose the disc to direct sunlight or sources of heat, or leave it in a parked car exposed to direct sunlight, as there may be a considerable temperature increase inside the car.
Cleaning discs
Fingerprints and dust on the disc can cause poor picture quality and sound distortion. Before playing, clean the disc with a clean cloth. Wipe the disc from the center out.
Do not use strong solvents such as alcohol, benzine, thinner, commercially available cleaners, or anti-static spray intended for older vinyl records.
About Symbols
About the  symbol display
“  ” may appear on the TV screen during operation. This icon means the function explained in this owner’s manual is not permitted by the DVD+VCR or is not available on that specific DVD video disc.
About the disc symbols for instructions
A section whose title has one of the following symbol is applicable only to the disc represented by the symbol.
DVD DVD
VCD2.0 Video CDs with the PBC (playback control) function.
VCD1.1 Video CDs without the PBC (playback control) function.
CD Audio CDs.
MP3 MP3 disc.
JPEG JPEG disc.
Selecting the Viewing Source
You must select one of your output sources (DVD or VCR) to view on the TV screen.
• If you want to view DVD deck output source:
Press DVD until DVD indicator in the display window lights and output source of DVD deck is viewed on the TV screen.
• If you want to view VCR deck output source:
Press VCR until VCR indicator in the display window lights and output source of VCR deck is viewed on the TV screen.
 Notes
Notes
•If you insert a disc while the DVD+VCR is in the VCR mode, the DVD+VCR will switch to DVD mode automatically.
•If you insert a cassette tape without prevention tab while the DVD+VCR is in the DVD mode, the DVD+VCR will switch to VCR mode automatically.
1-11
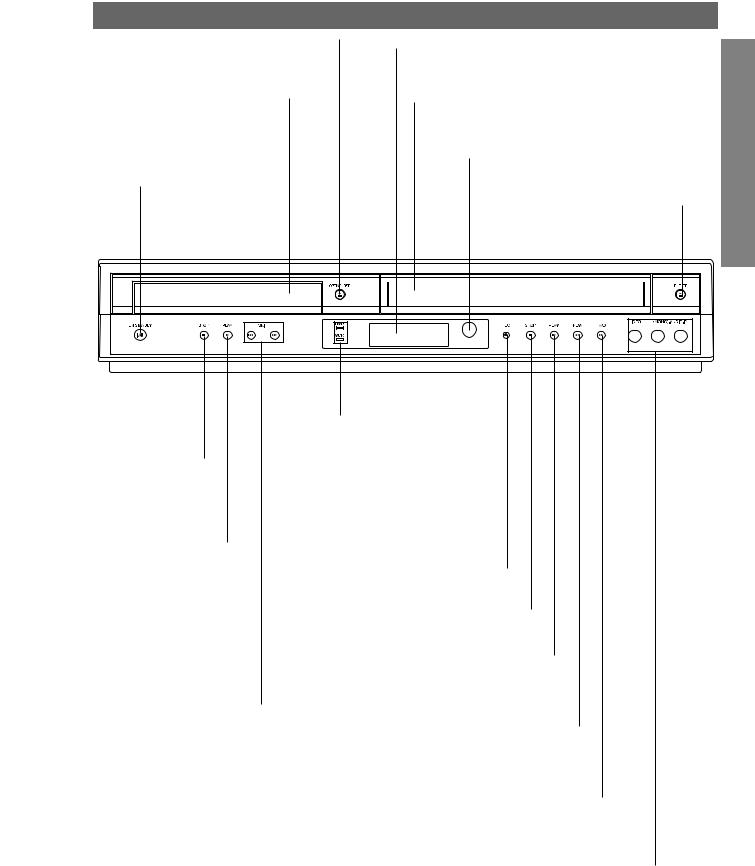
Front Panel
OPEN/CLOSE
Opens or closes the disc tray.
Disc Tray (DVD deck)
Insert a disc here.
ON/STANBY
Switches the DVD+VCR
ON and OFF.
Display window
Shows the current status of the DVD+VCR.
Cassette Compartment (VCR deck)
Insert a video cassette here.
Remote Sensor
Point the DVD+VCR remote control here.
EJECT
Ejects the tape in the VCR deck.
INTRODUCTION
STOP (x)
Stops playback of disc.
PLAY (B)
Starts playback of a disc in the DVD deck.
SKIP (./> )
- Skip to beginning of current chapter or track, press twice in quick successions to go to previous chapter or track.
- Skip to next chapter or track.
Press and hold button for about two seconds to search backward or forward.
AV3
DVD/VCR indicator
Indicates the active deck.
REC
To record normally or to activate One-touch Timer Recording by repeated presses.
STOP (x)
Stops playback of tape.
PLAY (B)
Starts playback of a tape in the VCR deck.
REW
Rewinds the tape during the STOP mode or for fast reverse picture search.
FWD
Advances the tape during the STOP mode or for fast forward picture search.
AV3 (VIDEO IN/AUDIO IN (Left/Right))
Connect to the audio/video output of an external source (Audio system, TV/Monitor, Another VCR).
1-12
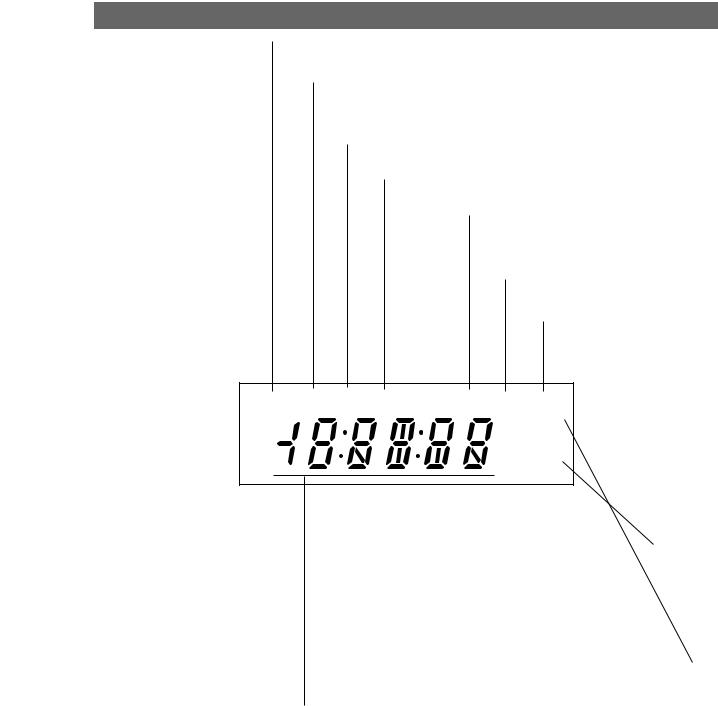
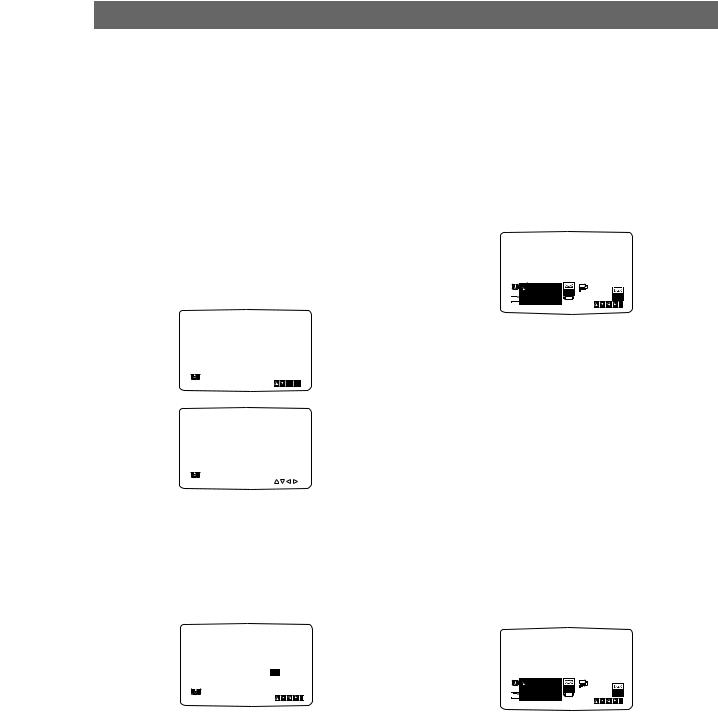
Display Window
The DVD deck is selected.
A disc is in the DVD deck.
(Lights when a disc is in the DVD deck and Flashes when no disc.)
Indicates when the Progressive scan is active.
Indicates repeat mode.
DVD+VCR is in timer recording or a timer recording is programmed.(VCR part only)
A cassette is in the VCR deck.
The VCR deck is selected.
DVD  [P]
[P] 
 VCR
VCR
REC
TV
Lights when TV mode is active.
DVD+VCR is Recording. (VCR part only)
Indicates total playing time, elapsed time, remaining time or current deck status (Playback, Pause, etc).
1-13

Remote Control
DVD/VCR select button
Select the output source (DVD or VCR) to view on the TV screen.
0-9 numerical buttons
Selects numbered options in a menu.
INPUT SELECT
To select the VCR deck’s source (Tuner, AV1, AV2 or AV3).
ANGLE z
Selects a DVD camera angle if available.
SUBTITLE z
Selects a subtitle language (DVD).
AUDIO z
Selects an audio language (DVD) or an audio channel (CD).
INSTANT REPLAY z
Replays through 10 seconds of playback.
PLAY z
Starts playback.
REW z
Rewinds the tape during the STOP mode or for fast reverse picture search.
Press and hold button for about two seconds to search backward. (For DVD only)
FWD z
Advances the tape during the STOP mode or for fast forward picture search. Press and hold button for about two seconds to search forward.(For DVD only)
SLOW z
Forward slow playback.
STOP z
Stops playback.
PAUSE/STILL, PAUSE/STEP z
Pause playback or recording.
Press repeatedly for frame-by-frame playback during pause.
SKIP .z
Skip to beginning of current chapter or track, press twice in quick successions to go to previous chapter or track.
SKIP > z
Skip to next chapter or track.
SET UP, VCR MENU
Accesses or removes DVD setup menu and VCR menu.
SEARCH
Displays MARKER SEARCH menu.
b/B/v/V (left/right/up/down) z
-Selects an option in the menu
-PR/TRK (+/-): Selects channel of VCR.
Adjusts manually the tape’s picture
onscreen.
ENTER/OK z
-Acknowledges menu selection.
-Displays functions on the TV screen.
+/1 (POWER)
Switches DVD+VCR ON and OFF.
EJECT, OPEN/CLOSE
-Opens and closes the disc tray.
-Ejects the tape in the VCR deck.
TV/VCR
To view channels selected by the VCR tuner or by the TV tuner.
COUNTER RESET, CLEAR
- Resets tape counter to M 0:00:00
- Removes a track number on the program menu or a mark on the MARKER SEARCH menu.
CLK/CNT, DISPLAY
Accesses On-Screen display. Switches among the clock, tape counter
and tape remaining modes on the display.
BLANK SEARCH
Finds end points of recording.
z TOP MENU
Displays the disc’s Title menu, if available.
z MENU
Accesses menu on a DVD disc.
z RETURN
Removes the setup menu.
z ZOOM
Enlarges video image.
z REPEAT
Repeat chapter, track, title, all.
z A-B RPT (REPEAT), SP/LP
- Repeats sequence.
- Selects recording speed of the tape.
z MARKER
Marks any point during playback.
zRANDOM, INSTANT SKIP
-Plays tracks in random order.
- Fast forwards picture search through 30 seconds of recording.
z REC/OTR
Records normally or activates Onetouch Timer Recording with repeated presses.
z AUTO TRK
Adjusts automatically the tape’s picture onscreen.
z PROGRAM
Accesses or removes Program menu.
 Note
Note
This remote control uses the same buttons for VCR and DVD functions (ex. PLAY).
When using a VCR, first press the VCR button. When using a DVD, first press the DVD button.
INTRODUCTION
1-14
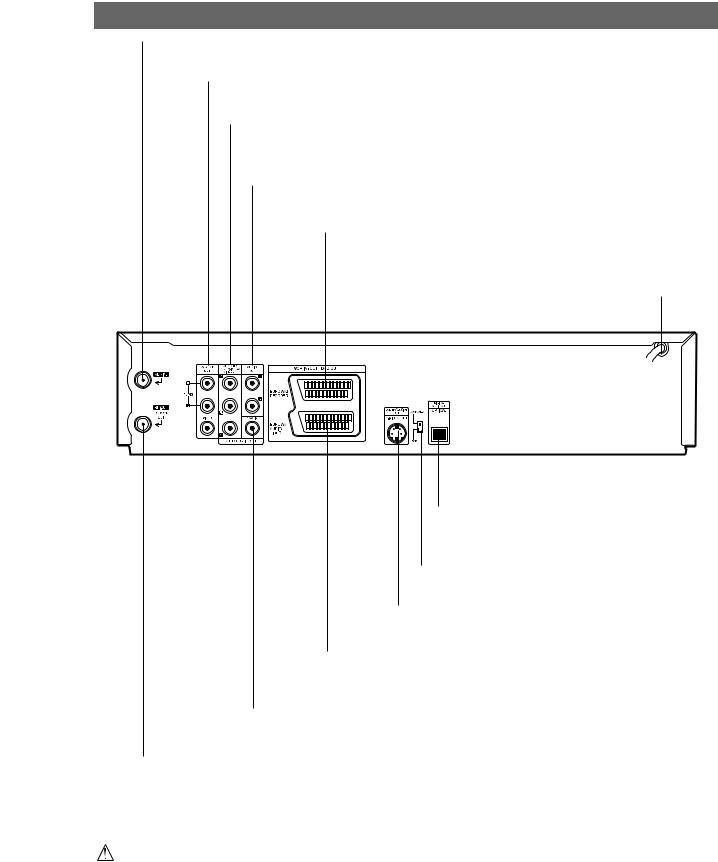
Rear Panel
AERIAL
Connect the aerial using this jack.
DVD/VCR OUT (VIDEO/AUDIO (Left/Right))
Connect to a TV with video and audio inputs.
COMPONENT/PROGRESSIVE SCAN VIDEO OUT (Y Pb Pr) (DVD EXCLUSIVE OUT)
Connect to a TV With Y Pb Pr inputs.
AUDIO OUT (Left/Right) (DVD EXCLUSIVE OUT)
Connect to an amplifier, receiver or stereo system.
EURO AV2 DECODER
Connect to pay-TV decoder, Set Top Box or another video recorder.
AC Power Cord
Connect to a power source.
OPTICAL (DVD EXCLUSIVE OUT) (Digital audio out jack)
Connect to digital (optical) audio equipment.
VIDEO OUTPUT Switch
Select either COMPONENT or RGB depending on how you connect this unit to the TV.
S-VIDEO OUT (DVD EXCLUSIVE OUT)
Connect to a TV With S-Video input.
EURO AV1 AUDIO/VIDEO (VCR IN+OUT/DVD OUT)
Connect to your TV set or another video recorder.
COAXIAL (DVD EXCLUSIVE OUT) (Digital audio out jack)
Connect to digital (coaxial) audio equipment.
RF.OUT (DVD/VCR OUT)
Connect to your TV using this jack.
Do not touch the inner pins of the jacks on the rear panel.
Electrostatic discharge may cause permanent damage to the unit.
1-15
Connections
 Tips
Tips
zDepending on your TV and other equipment you wish to connect, there are various ways you could connect the unit.
zPlease refer to the manuals of your TV, Stereo System or other devices as necessary to make the best connections.
zFor better sound reproduction, connect this unit’s AUDIO OUT jacks to the audio in jacks of your amplifier, receiver, stereo or audio/video equipment. See “Connecting to Optional Equipment” on page 12.
 Caution
–Make sure this unit is connected directly to the TV. Set the TV to the correct video input channel.
–Do not connect this unit’s AUDIO OUT jack to the phono in jack (record deck) of your audio system.
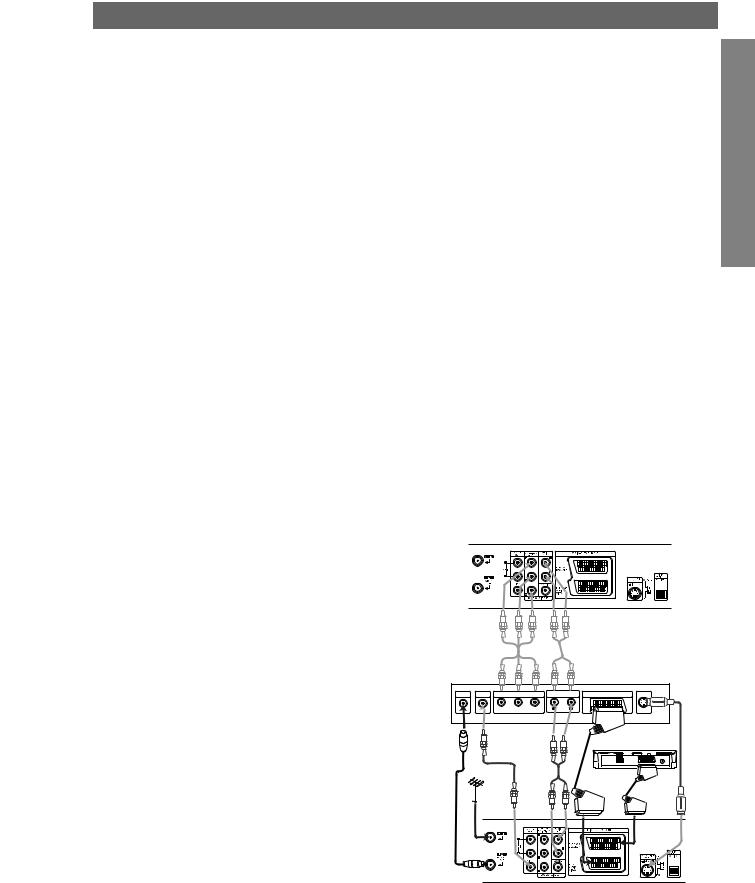
Connecting to a TV
zMake one of the following connections, depending on the capabilities of your existing equipment.
zWhen using the SCART’s RGB signal, set the video output switch to RGB. When using the COMPONENT/PROGRESSIVE SCAN VIDEO OUT jacks, set the video output switch to COMPONENT.
zRGB signal is only exclusive for DVD playback.
Basic connection (AV)
1 |
Connect the EURO AV1 AUDIO/VIDEO on the rear |
panel of this unit to the SCART input socket on the |
TV using a SCART lead.
For TV without SCART, connect the yellow VIDEO OUT jack and DVD/VCR AUDIO OUT jacks of this unit to the TV.
2 Some TV broadcasters transmit encoded television signals which you can only see with a purchased or rented decoder. You can connect such a decoder (descrambler) to this unit.
Basic connection (RF)
1 |
Connect the RF antenna cable from your indoor/ |
outdoor antenna to AERIAL jack on the rear panel |
|
|
of this unit. |
2 |
Connect the supplied RF antenna cable from the |
RF.OUT (DVD/VCR OUT) jack on the rear panel of |
this unit to your television’s Antenna Input.
S-Video connection
1 |
Connect the S-VIDEO OUT jack on this unit to the |
S-Video in jack on the TV using the S-Video cable |
|
|
(not supplied). |
2 |
Connect the Left and Right AUDIO OUT (DVD |
EXCLUSIVE OUT) jacks of this unit to the audio |
left/right in jacks on the TV using the audio cables.
Component (Color Stream®) / Progressive Scan (ColorStream® pro) Video connection
(DVD EXCLUSIVE OUT)
1 |
Connect the COMPONENT/PROGRESSIVE SCAN |
PREPARATION |
cables. |
||
VIDEO OUT/(DVD EXCLUSIVE OUT) jacks on the |
|
|
|
DVD+VCR to the corresponding in jacks on the TV |
|
|
using an Y Pb Pr cable (not supplied). |
|
2 |
Connect the Left and Right AUDIO OUT (DVD |
|
EXCLUSIVE OUT) jacks of the DVD+VCR to the |
|
audio left/right in jacks on the TV using the audio
 Notes
Notes
zIf your television is a high-definition or “digital ready” television, you may take advantage of the DVD+VCR’s progressive scan output for the highest video resolution possible.
zSet the Progressive Scan to “On” on the setup menu for progressive scan signal, see page 19.
zWhen you use Component Video signal (interlace mode), set the Progressive Scan to “Off” on the setup menu.
zIf you set Progressive Scan to ON in error, you must reset the DVD+VCR. First, remove the disc in the DVD+VCR. Next, press STOP (x) and hold it for five seconds before releasing it. The video output will be restored to the standard setting, and a picture will once again be visible on a conventional analog TV or monitor.
zProgressive scan on does not work with the analog video connections (yellow VIDEO OUT jack or S-VIDEO OUT jack).
zIf the TV has an S-video input, connect the DVD player with the S-video cable. When using an S-video cable, do not connect the yellow video cable.
Rear of this unit (Component/Progressive scan Video connection)
Rear of TV
AERIAL |
VIDEO IN |
COMPONENT/PROGRESSIVE SCAN VIDEO INPUT |
AUDIO INPUT |
SCART INPUT |
|||
|
|
Pr |
Pb |
Y |
L |
R |
S-VIDEOOUT |
|
|
|
|
||||
Satellite or Set Top Box
Rear of this unit (Basic connection)
1-16
Connections (Continued)
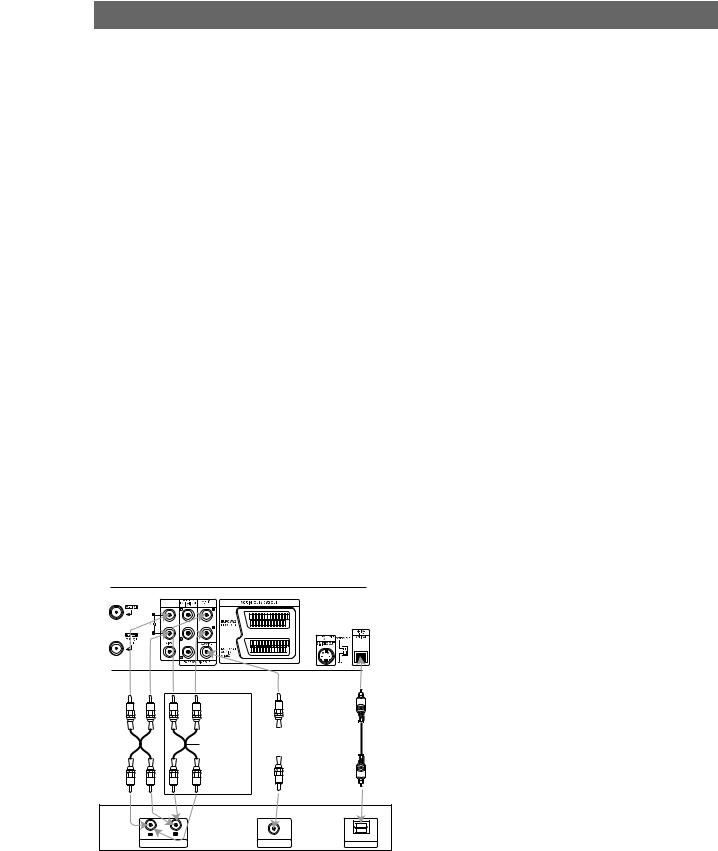
Connecting to Optional Equipment
Connecting to an amplifier equipped with two channel analog stereo or Dolby Surround.
Connect the Left and Right DVD/VCR AUDIO OUT or
AUDIO OUT (DVD EXCLUSIVE OUT) jacks on this unit to the audio left and right in jacks on your amplifier, receiver or stereo system, using the audio cables.
Connecting to an amplifier equipped with two channel digital stereo (PCM) or to an Audio/ Video receiver equipped with a multi-channel decoder (Dolby Digital™, MPEG 2 or DTS)
1 |
Connect one of this unit’s DIGITAL AUDIO OUT |
jack (COAXIAL or OPTICAL) to the corresponding |
|
|
in jack on your amplifier. Use an optional digital |
|
(optical or coaxial) audio cable. |
2 |
You will need to activate this unit’s digital output. |
(See “Digital Audio Output” on page 20). |
Digital Multi-channel sound
A digital multi-channel connection provides the best sound quality. For this you need a multi-channel Audio/Video receiver that supports one or more of the audio formats supported by your unit (MPEG 2, Dolby Digital and DTS). Check the receiver manual and the logos on the front of the receiver.
Warning:
Due to the DTS Licensing agreement, the digital output will be in DTS digital out when DTS audio stream is selected.
Rear of this unit
 Notes
Notes
zIf the audio format of the digital output does not match the capabilities of your receiver, the receiver will produce a strong, distorted sound or no sound at all.
zSix Channel Digital Surround Sound via digital connection can only be obtained if your receiver is equipped with a Digital Multi-channel decoder.
zTo see the audio format of the current DVD in the On-Screen Display, press AUDIO.
2 channel analog stereo or Dolby Surround connection.
DVD exclusive out |
|
Digital multi-channel |
|
||
|
connection |
|
|
|
|
|
|
|
L |
R |
COAXIAL |
OPTICAL |
|
|
||
AUDIO INPUT |
DIGITAL INPUT |
DIGITAL INPUT |
|
Amplifier (Receiver)
1-17

Before Operation - VCR part
Tuning in a video channel on your TV
 Notes
Notes
zThe output frequency of this video recorder (VCR) is set at UHF channel 36. If channel 36 is already used by another TV station, or if the picture is distorted, you can change the transmitter channel of your VCR. Stages 5 ~ 8 will show you how to change the output frequency of your DVD+VCR.
zYour TV receives signals from the video recorder (VCR) like another TV station. You have to select a channel number on your TV and tune it in so that you may watch video tapes. If you have used a SCART then your TV should already have a dedicated video channel built into it, usually called AV.
1Make sure that you have correctly installed your VCR as described earlier in this book.
Press +/1 to turn on your DVD+VCR. Turn on your TV.
2Insert a pre-recorded video tape into your VCR and press PLAY N on the remote control.
Select a TV channel number on which you wish to watch video’s.
Don’t worry if you don’t have a video-tape to play at this stage! If you switch your DVD+VCR on and continue stages 3 ~ 4, instead of seeing video playback tune your TV until you see a bright blue screen.
3Tune this channel until the video picture is sharp and the sound is clear.
If you have used a SCART or AUDIO and VIDEO cables you will not have to tune your TV, simply select the AV channel. The AV channel is already pre-tuned for optimum video playback on your TV.
4Store this channel on your TV.
You will need to look at the TV instruction book if you do not know how to do this.
5Only carry out stages 5 ~ 8 if you cannot obtain clear video playback as described in stages 1 ~ 4.
Select a TV channel number on which you wish to watch video’s.
Make sure that your DVD+VCR is in standby pressing +/1 on the remote control (only the clock will be displayed).
6Press REW m or FWD M on the front of your DVD+VCR for more than 4 seconds.
RF36 will appear in the display window.
The following picture will be displayed on the TV screen.
7 |
Use REW m or FWD M to select another video |
|
channel. You may select any channel number |
|
|
|
between 22 and 68. |
|
|
You can also set it to “OFF” if there is any |
|
|
interference when your TV is connected to the VCR |
PREPARATION |
|
Store this channel on your TV. |
|
|
with a SCART lead. |
|
8 Select a TV channel number on which you wish to watch video’s.
Press ON/STANDBY +/1 on the front of your DVD+VCR when you have finished.
Tune this channel so that a bright blue screen appears.
 Notes
Notes
Make sure that you have correctly installed your DVD+VCR and successfully tuned in a dedicated video channel on your TV. If you do not tune in a dedicated video channel on your TV you will be unable to view and record video tapes!
Initial preset
For the following steps we do assume that you have just connected your video recorder for the very first time. In this case the video recorder is on after mains connection. You should not touch any buttons yet. On the connected TV you will now see.
 Note
Note
If this menu does not appear, your video recorder was programmed already.
1 |
If you have a satellite receiver make sure that it is |
connected to your vcr, switched on and Sky News |
has been selected.
2 Press ENTER/OK to start the automatic storing of the channels of the TV stations in your area.
S |
|
E |
|
|
i |
RF CHANNEL 36
P |
i |
RSET |
3 The TV STATION TABLE will appear when tuning is completed.
Press VCR MENU to save your settings.
1-18
Before Operation - VCR part (Continued)
Setting the clock Manually
The clock in your DVD+VCR controls time and date settings for your DVD+VCR.
The clock is set automatically during ACMS (Automatic Channel Memory System) when your DVD+VCR detects a channel that broadcasts a Teletext signal. If the broadcast signal is weak the clock will not be set and will require setting manually.
1 Press VCR MENU.
Press b or B to select TIME DATE. Press ENTER/OK.
The auto adjust mode can be set to “OFF” by pressing
v or V if you want to set the time manually. Press ENTER/OK.
|
AUTO |
ADJUST : ON |
|
- - |
|
1 |
2 |
|
TIME |
OK i |
|
DATE |
||
|
|
HH MM |
DD MM YY |
||
|
|
- - |
: - - |
- - . - - . - - - - - |
|
1 |
2 |
|
|
|
|
TIME |
|
|
|||
|
i |
||||
DATE |
|
||||
2 Use the numbered buttons on the remote control to alter the HOURS, MINUTES, DAY, MONTH and YEAR.
Please note your DVD+VCR uses a 24 hour clock. e.g. 1pm will be displayed as 13:00.
The day of the week will appear automatically when you enter the year.
|
HH |
MM |
DD |
MM |
YY |
|
8 : |
00 |
1 |
. 01 . |
04 THU |
1 |
2 |
|
|
|
|
TIME |
|
|
|
i |
|
DATE |
|
|
|
||
3 If you make a mistake press b or B and enter the correct details.
4 Press VCR MENU to return to a TV picture.
To set the colour system
1 Press VCR MENU.
2 The main menu will appear on the TV screen.
3 Press 1 or 2 to select the SYSTEM and press
ENTER/OK.
4 Press 3 or 4 to select according to the COLOUR system used.
|
P AUTO |
1 2 |
SYS- |
VCR |
|
|
|
TIME |
|
|
|||
REC |
RSET |
Pr-12 |
|
|
|
|
ACMS |
DATE |
TEM |
Dr. |
SYS- |
||
|
PAL |
|
NIC |
|
||
f OSD |
|
+ - |
|
|
TEM |
|
MESECAM |
|
|
|
|||
ON |
16:9 |
DECO- |
OPR |
|
|
i |
OFF |
4:3 |
DER |
|
|
||
5 Press VCR MENU to remove the menus from the TV screen.
To set the RF OUT sound system
1 Press VCR MENU.
2 The main menu will appear on the TV screen.
3 Press 1 or 2 to select the SYSTEM and press
ENTER/OK.
4 Press 3 or 4 to select according to the COLOUR system used.
5 Press 2 to select the RF Out sound system compatible to your TV.
REC |
RF |
IPr-12/ I |
1 2 |
SYS- |
VCR |
|
PSET |
ACMS |
TIME |
Dr. |
SYS- |
||
f OSD |
R RF B/GDATE |
TEM |
||||
RF |
D/K |
|
NIC |
|
TEM |
|
|
|
+ - |
|
|
||
ON |
16:9 |
DECO- |
OPR |
|
|
i |
OFF |
4:3 |
DER |
|
|
||
6 Press VCR MENU to remove the menus from the TV screen.
1-19
Before Operation - VCR part (Continued)
How to use the main menu
This DVD+VCR can easily be programmed by using the menus displayed on screen.
The menus are controlled from the Remote Control Handset.
1 |
Switch on your TV set and video recorder by pressing |
the +/1 button. |
|
2 |
Press VCR MENU button. |
The main menu will appear on the TV screen. |
Tuning in TV Stations Automatically
If the TV broadcast signal is weak your DVD+VCR may not detect the necessary information and will not be able to store them correctly. To overcome this problem please turn to the MANUAL TUNING section on page 16.
1 |
Press +/1 to turn on your DVD+VCR. |
2 |
Press VCR MENU button. |
The main menu will appear on the TV screen. |
Press 1 or 2 to select the ACMS.
Press ENTER/OK.
PREPARATION
|
|
|
|
1 2 |
|
VCR |
|
REC |
PSET |
|
Pr-12 |
TIME |
SYS- |
Dr. |
|
ACMS |
|||||||
R |
DATE |
TEM |
|||||
f OSD |
|
+ |
- |
|
NIC |
REC |
|
ON |
16:9 |
DECO- |
OPR |
OK i |
OFF |
4:3 |
DER |
zREC - Timer recording setting (see p. 24).
zPR SET - Manual tuning setting (see p. 16).
zACMS - ACMS (Automatic Channel Memory System) (see p. 15).
zTIME DATE - Date & clock setting (see p. 14). O SYSTEM - To set the Colour TV System
(see p. 14).
O Dr. - To check a problem with your VCR
(see p. 34).
O F.OSD ON/OFF - To display the operational mode of your VCR (see p. 33).
O 16:9/4:3 - To select the aspect ratio of your TV (see p. 34).
O DECODER - To use a pay-TV decoder (or Satellite) with your VCR (see p. 34).
O OPR - To improve the playback picture (see p. 22).
O NIC - To activate or deactivate the NICAM digital sound (see p. 33).
3 Press 1 and 2 to select the desired menu. Press ENTER/OK and use 3 or 4 to select.
4 Press VCR MENU to return to a TV picture.
|
|
|
1 2 |
|
VCR |
|
REC |
PSET |
Pr-12 |
TIME |
SYS- |
Dr. |
|
ACMS |
||||||
R |
DATE |
TEM |
||||
f OSD |
|
|
NIC |
|
Pr-12 |
|
|
|
|
ACMS |
ON |
16:9 |
OPR |
OK i |
OFF |
4:3 |
3 Press ENTER/OK again to start the automatic tuning process.
4 The TV STATION TABLE will appear when tuning is completed.
Press VCR MENU to save your settings.
01 |
C26 |
00 |
BBC1 |
|
|
|
||
02 |
C33 |
00 |
BBC2 |
|
|
|
||
03 |
C23 |
00 |
ITV |
|
|
|
||
04 |
C30 |
00 |
CH4 |
|
|
|
||
05 |
C37 |
00 |
CH5 |
|
|
|
||
06 |
- - |
- - |
- - - - - |
|
|
|
||
07 |
- - |
- - |
- - - - - |
|
|
|
||
08 |
- - |
- - |
- - - - - |
|
|
|
||
P |
|
MOVE : |
|
|
|
|
|
|
|
|
|
|
|
|
|
||
|
DELETE : |
|
, |
|
|
|
|
|
RSET |
|
|
|
|
OK |
i |
||
|
|
|
|
|
|
|
|
|
 Notes
Notes
OThe DVD+VCR’s clock will be set automatically when automatic tuning has finished. If the clock is wrong please see “Setting the clock Manually” on page 14.
OPlease note currently only a limited number of TV companies transmit the Programme Delivery Control (PDC) signal which enables your DVD+VCR to successfully identify and store them. If your DVD+VCR has difficulty in identifying a TV station please turn the page to find out how to manually tune in and name a TV station. While automatic tuning is taking place the time and date will set automatically. If - - :- - appears in the DVD+VCR display it means that the broadcast signal is weak and the clock was not set. Please turn to CLOCK SET section of this book on page 14.
1-20
Before Operation - VCR part (Continued)
Tuning in TV Stations Manually
In certain areas of the country broadcast signals may be too weak for your VCR’s automatic tuning process to find or assign TV stations correctly. You must tune in these weaker broadcast stations manually in order for your VCR to store them.
1 Press VCR MENU.
The main menu will appear on the TV screen. Press 1 or 2 to select the PR SET.
Press ENTER/OK.
|
|
Pr-12 |
1 2 |
|
VCR |
|
REC |
PSET |
TIME |
SYS- |
|
|
|
ACMS |
Dr. |
|
||||
R |
DATE |
TEM |
PSET |
|||
f OSD |
|
+ - |
|
NIC |
|
|
|
DECO- |
|
|
|
R |
|
ON |
16:9 |
OPR |
|
|
OK i |
|
OFF |
4:3 |
DER |
|
|
PR |
CH |
MFT |
STATION |
01 |
C 02 |
00 |
PR-01 |
|
|
CHANNEL/CABLE : AV |
|
P |
|
|
i |
RSET |
|
|
|
4 Searching will stop when it locates a stations. Press 2 to select MFT.
Control the fine tuning of the station by using 3 or 4.
|
|
|
BBC1 |
|
|
|
BBC2 |
|
|
|
ITV |
|
|
|
ANGLI |
PR |
CH |
MFT |
BORDE |
09 |
C10 |
00 |
CH TV |
|
|
|
WEST |
|
|
|
GRANA |
P |
|
|
|
RSET |
|
|
OK i |
|
|
|
5 Press 2 to select STATION so that you may name your TV station.
If your station name isn’t on the list do not press ENTER/OK, but go to stage 7.
|
|
|
BBC1 |
|
|
|
BBC2 |
|
|
|
ITV |
|
|
|
ANGLI |
PR |
CH |
MFT |
BORDE |
09 |
C10 |
00 |
CH TV |
|
|
|
WEST |
|
|
|
GRANA |
P |
|
|
|
RSET |
|
|
OK i |
|
|
|
Press ENTER/OK.
The TV station name list will appear.
2 |
Press VCR MENU. |
|
|
|
|
|
|
|
|
||
The station table will appear. |
|
|
|
|
|
|
|
||||
|
Press 3 or 4 to select the programme number that |
||||||||||
|
|
|
|
|
|
|
|||||
|
01 |
C02 |
00 |
PR-01 |
|||||||
|
02 |
C03 |
00 |
PR-02 |
|||||||
|
03 |
C04 |
00 |
PR-03 |
|||||||
|
04 |
C05 |
00 |
PR-04 |
|||||||
|
05 |
C06 |
00 |
PR-05 |
|||||||
|
06 |
C07 |
00 |
PR-06 |
|||||||
|
07 |
C08 |
00 |
PR-07 |
|||||||
|
08 |
C09 |
00 |
PR-08 |
|||||||
|
P |
|
MOVE : |
|
|
|
|
|
|
|
|
|
|
|
|
|
|
|
|
|
|||
|
|
DELETE : |
|
, |
|
|
|
|
|
||
|
RSET |
|
|
|
|
OK |
i |
|
|||
|
|
|
|
|
|
|
|
|
|
|
|
you want to tune (for example, PR 09).
Press ENTER/OK. |
|
|
|
|
||
3 Press INPUT SELECT to select C (Standard |
||||||
stations) or S (Cable stations): |
||||||
C02 - C69, S01 - S41. |
|
|
|
|
||
PR |
CH |
MFT |
STATION |
|||
09 |
C - - |
|
- - |
- - - - |
|
|
|
|
|
CHANNEL/CABLE : AV |
|||
P |
|
|
|
|
|
|
|
|
|
|
i |
|
|
RSET |
|
|
|
|
|
|
|
|
|
|
|
|
|
Enter the channel number of station that you want to tune with the numbered buttons or use 3 or 4 to find the required station.
PR |
CH |
MFT |
STATION |
09 |
C10 |
00 |
- - - - |
|
|
CHANNEL/CABLE : AV |
|
PSET |
|
|
ii |
R |
|
|
|
6 Use D or E to select a station name from the list. Press ENTER/OK to select it.
7 You can change a TV station name manually rather than using the “standard” names.
PR CH MFT STATION
09 |
C10 |
00 |
ANGLI |
P |
|
|
OK i |
RSET |
|
|
Press G.
Use 3 or 4 to select letters and numbers for the new station name.
Use 1 or 2 to move back and forth between
09 |
C10 |
00 |
ANGLI |
|
|||
10 |
- - |
- - |
- - - - - |
|
|||
11 |
- - |
- - |
- - - - - |
|
|||
12 |
- - |
- - |
- - - - - |
|
|||
13 |
- - |
- - |
- - - - - |
|
|||
14 |
- - |
- - |
- - - - - |
|
|||
15 |
- - |
- - |
- - - - - |
|
|||
16 |
- - |
- - |
- - - - - |
|
|||
|
|
|
MOVE : |
|
|
|
|
|
|
|
|
|
|||
|
|
DELETE : |
|
, |
|
|
|
PSET |
|
|
|
OK i |
|||
R |
|
|
|
|
|
|
|
characters.
Press ENTER/OK.
8 Press VCR MENU, confirm the station placement. Press VCR MENU again.
Your new TV station has now been tuned into your VCR. If you wish to manually tune other stations repeat stages 1 - 8.
1-21
Before Operation - VCR part (Continued)
Changing the order of TV Stations
After tuning TV stations into your VCR you may wish to change the order in which they are stored without having to retune them again. The instructions given on this page will show you how you can simply move them into your desired order.
1 Press VCR MENU.
The main menu will appear on the TV screen. Press 1 or 2 to select the PR SET.
Press ENTER/OK.
Deleting TV Stations
After tuning TV stations into your VCR you may wish to delete a station.
The instructions given on this page will show you how you can easily delete any unwanted TV stations.
1 Press VCR MENU.
The main menu will appear on the TV screen. Use 1 or 2 to select the PR SET.
Press ENTER/OK.
|
|
|
1 2 |
|
VCR |
|
|
|
|
1 2 |
|
VCR |
|
REC |
RPSET |
Pr-12 |
TIME |
SYS- |
Dr. |
|
|
PSET |
Pr-12 |
TIME |
SYS- |
|
|
ACMS |
PSET |
REC |
ACMS |
Dr. |
P |
||||||||
f OSD |
|
+ - |
DATE |
TEM |
|
R |
|
DATE |
TEM |
||||
|
DECO- |
|
NIC |
|
R |
f OSD |
|
+ - |
|
NIC |
|
RSET |
|
ON |
16:9 |
OPR |
|
|
OK i |
ON |
16:9 |
DECO- |
OPR |
|
|
OK i |
|
OFF |
4:3 |
DER |
|
|
|
OFF |
4:3 |
DER |
|
|
PREPARATION
|
|
PR |
|
CH |
MFT |
STATION |
||||||
|
01 |
C 02 |
|
00 |
|
PR-01 |
||||||
|
|
|
|
|
|
CHANNEL/CABLE : AV |
||||||
|
P |
|
|
|
|
|
|
|
|
|
|
|
|
RSET |
|
|
|
|
|
|
|
|
i |
|
|
2 |
Press VCR MENU. |
|
|
|
|
|
|
|
||||
Press 3 or 4 to select the programme number |
||||||||||||
|
you want to move (for example, PR-03). |
|||||||||||
|
Press 2. |
|
|
|
|
|
|
|
|
|
|
|
|
01 |
|
C02 |
00 |
PR-01 |
|
|
|
||||
|
02 |
|
C03 |
00 |
PR-02 |
|
|
|
||||
|
|
03 |
|
C04 |
00 |
PR-03 |
|
|
|
|||
|
04 |
|
C05 |
00 |
PR-04 |
|
|
|
||||
|
05 |
|
C06 |
00 |
PR-05 |
|
|
|
||||
|
06 |
|
C07 |
00 |
PR-06 |
|
|
|
||||
|
07 |
|
C08 |
00 |
PR-07 |
|
|
|
||||
|
08 |
|
C09 |
00 |
PR-08 |
|
|
|
||||
|
P |
|
|
|
MOVE : |
|
|
|
|
|
|
|
|
|
|
|
|
|
|
|
|
|
|||
|
|
|
|
DELETE : |
|
, |
|
|
|
|
||
|
RSET |
|
|
|
|
|
OK |
i |
|
|||
|
01 |
|
C02 |
00 |
PR-01 |
|
|
|
||||
|
02 |
|
C03 |
00 |
PR-02 |
|
|
|
||||
|
03 |
|
C04 |
00 |
PR-03 |
|
|
|
||||
|
04 |
|
C05 |
00 |
PR-04 |
|
|
|
||||
|
05 |
|
C06 |
00 |
PR-05 |
|
|
|
||||
|
06 |
|
C07 |
00 |
PR-06 |
|
|
|
||||
|
07 |
|
C08 |
00 |
PR-07 |
|
|
|
||||
|
08 |
|
C09 |
00 |
PR-08 |
|
|
|
||||
|
P |
|
|
|
MOVE : |
|
|
|
|
|
|
|
|
|
|
|
|
|
|
|
|
|
|||
|
RSET |
|
|
|
DELETE : |
|
, |
|
OK |
i |
|
|
|
Press 3 or 4 to select the programme number |
|||||||||||
3 you want to move to (for example, PR-05). |
||||||||||||
|
01 |
|
C02 |
00 |
PR-01 |
|
|
|
||||
|
02 |
|
C03 |
00 |
PR-02 |
|
|
|
||||
|
03 |
|
C05 |
00 |
PR-04 |
|
|
|
||||
|
04 |
|
C06 |
00 |
PR-05 |
|
|
|
||||
|
05 |
|
C04 |
00 |
PR-03 |
|
|
|
||||
|
06 |
|
C07 |
00 |
PR-06 |
|
|
|
||||
|
07 |
|
C08 |
00 |
PR-07 |
|
|
|
||||
|
08 |
|
C09 |
00 |
PR-08 |
|
|
|
||||
|
P |
|
|
|
MOVE : |
|
|
|
|
|
|
|
|
|
|
|
|
|
|
|
|
|
|||
|
RSET |
|
|
|
DELETE : |
|
, |
|
OK |
i |
|
|
4 |
Press ENTER/OK. |
|
|
|
|
|
|
|
||||
The selected programme will be moved to the new |
||||||||||||
|
programme number. |
|
|
|
|
|
|
|
||||
|
If you wish to move other TV stations repeat stages 1 - 4. |
|||||||||||
|
Press VCR MENU to remove the menus from the |
|||||||||||
|
TV screen. |
|
|
|
|
|
|
|
|
|
|
|
|
01 |
|
C02 |
00 |
PR-01 |
|
|
|
||||
|
02 |
|
C03 |
00 |
PR-02 |
|
|
|
||||
|
03 |
|
C05 |
00 |
PR-03 |
|
|
|
||||
|
04 |
|
C06 |
00 |
PR-04 |
|
|
|
||||
|
|
05 |
|
C04 |
00 |
PR-05 |
|
|
|
|||
|
06 |
|
C07 |
00 |
PR-06 |
|
|
|
||||
|
07 |
|
C08 |
00 |
PR-07 |
|
|
|
||||
|
08 |
|
C09 |
00 |
PR-08 |
|
|
|
||||
|
P |
|
|
|
MOVE : |
|
|
|
|
|
|
|
|
|
|
|
|
|
|
|
|
|
|||
|
RSET |
|
|
|
DELETE : |
|
, |
|
OK |
i |
|
|
|
|
|
|
|
|
|
|
|
|
|
|
|
|
|
|
PR |
CH |
MFT |
STATION |
||||||||||||
|
|
01 |
C 02 |
|
00 |
|
PR-01 |
|||||||||||
|
|
|
|
|
|
|
CHANNEL/CABLE : AV |
|||||||||||
|
|
P |
|
|
|
|
|
|
|
|
|
|
|
|
|
|
||
|
|
RSET |
|
|
|
|
|
|
|
|
|
|
|
i |
|
|||
|
|
|
|
|
|
|
|
|
|
|
|
|
|
|
|
|
|
|
2 Press VCR MENU. |
|
|
|
|
|
|
|
|
|
|
|
|
||||||
|
|
Press 3 or 4 to select the programme number |
||||||||||||||||
3 you want to delete. (for example, PR-01) |
||||||||||||||||||
|
|
|
|
|
|
|
|
|
|
|
|
|
|
|
|
|||
|
|
01 |
C02 |
00 |
|
PR-01 |
||||||||||||
|
|
02 |
C03 |
00 |
|
PR-02 |
||||||||||||
|
|
03 |
C04 |
00 |
|
PR-03 |
||||||||||||
|
|
04 |
C05 |
00 |
|
PR-04 |
||||||||||||
|
|
05 |
C06 |
00 |
|
PR-05 |
||||||||||||
|
|
06 |
C07 |
00 |
|
PR-06 |
||||||||||||
|
|
07 |
C08 |
00 |
|
PR-07 |
||||||||||||
|
|
08 |
C09 |
00 |
|
PR-08 |
||||||||||||
|
|
|
P |
|
|
MOVE : |
|
|
|
|
|
|
|
|
|
|||
|
|
|
|
|
|
|
|
|
|
|
|
|
||||||
|
|
|
|
|
DELETE : |
|
, |
|
|
|
|
OK |
i |
|
||||
|
|
|
RSET |
|
|
|
|
|
|
|
|
|||||||
4 |
Press 1. |
|
|
|
|
|
|
|
|
|
|
|
|
|
|
|||
After a short while, the selected station will be |
||||||||||||||||||
|
|
deleted. |
|
|
|
|
|
|
|
|
|
|
|
|
|
|
||
|
|
If you wish to delete other TV stations repeat |
||||||||||||||||
|
|
|
|
|
|
|
|
|
|
|
|
|
|
|
||||
|
|
01 |
C03 |
00 |
PR-01 |
|
|
|
|
|
|
|
||||||
|
|
02 |
C04 |
00 |
PR-02 |
|
|
|
|
|
|
|
||||||
|
|
03 |
C05 |
00 |
PR-03 |
|
|
|
|
|
|
|
||||||
|
|
04 |
C06 |
00 |
PR-04 |
|
|
|
|
|
|
|
||||||
|
|
05 |
C07 |
00 |
PR-05 |
|
|
|
|
|
|
|
||||||
|
|
06 |
C08 |
00 |
PR-06 |
|
|
|
|
|
|
|
||||||
|
|
07 |
C09 |
00 |
PR-07 |
|
|
|
|
|
|
|
||||||
|
|
08 |
- - |
|
- - |
- - - - - |
|
|
|
|
|
|
|
|||||
|
|
P |
|
|
MOVE : |
|
|
|
|
|
|
|
|
|
|
|
||
|
|
|
|
|
|
|
|
|
|
|
|
|
|
|
||||
|
|
RSET |
|
|
DELETE : |
|
, |
|
|
|
OK |
i |
|
|||||
|
|
|
|
|
|
|
|
|
|
|
|
|
|
|
|
|
|
|
stages 3 - 4.
5 Press VCR MENU to remove the menus from the TV screen.
How to select Stored TV stations:
Stored TV stations can be selected in either of two ways. Use PR/TRK + or - to select different stations that are tuned into your DVD+VCR.
You may also directly select stations using the numbered buttons on the remote control.
1-22

Before Operation - DVD part
 Caution:
Before using the remote control, press the DVD button to select the device to be operated.
General Explanation
This manual gives the basic instructions for operating the DVD+VCR Player. Some DVDs require specific operation or allow only limited operation during playback. When this occurs, the symbol  appears on the TV screen, indicating that the operation is not permitted by the DVD+VCR Player or is not available on the disc.
3 Use b/B to change the setting of an item.
The number buttons can also be used for setting numbers (e.g., title number). For some functions, press ENTER/OK to execute the setting.
Temporary Feedback Field Icons
|
TITLE |
Repeat Title |
|
|
Repeat Chapter |
|
CHAPT |
|
|
|
Repeat Track (non-PBC Video CDs |
|
TRACK |
|
|
|
and Audio CD only) |
|
|
Repeat Disc (non-PBC Video CDs |
|
ALL |
|
|
|
and Audio CD only) |
On-Screen Display
The general playback status can be displayed on the TV screen. Some options can be changed on the menu.
On-screen display operation
1 Press DISPLAY during playback.
2 Use v/V to select an item.
The selected option will be highlighted.
DVD
A B |
Repeat A-B |
OFF |
Repeat Off |
|
Resume play from this point |
|
Action prohibited or not available |
 Notes
Notes
zSome discs may not provide all of the features on the on-screen display example shown below.
zIf no button is pressed for 10 seconds, the on-screen display disappears.
|
|
|
|
|
|
|
Function (Use v/V to select desired option) |
Selection Method |
|
|
|
|
|
|
|
|
|
|
|
|
|
|
|
|
|
|
Shows the current title number and total number of |
b/B, or |
|
|
|
|
1/3 |
||||||
|
|
|
titles, and skips to the desired title number. |
Numeric, ENTER/OK |
|||||
|
|
|
|||||||
|
|
|
|
|
|
|
|
|
|
Number |
|
1/12 |
Shows the current chapter number and total number of |
b/B, or |
|||||
|
|
|
chapters, and skips to the desired chapter number. |
Numeric, ENTER/OK |
|||||
|
|
|
|
|
|
|
|||
|
|
|
|
|
|
|
|
|
|
|
|
|
-:--:-- |
Shows the elapsed playing time, and |
Numeric, ENTER/OK |
||||
|
|
|
|||||||
|
|
|
searches the point by the elapsed time directly. |
||||||
|
|
|
|
|
|
|
|
|
|
|
1 |
|
ENG |
Shows the current audio soundtrack language, |
|
|
|||
Audio |
|
|
|
|
|
D |
encoding method, and channel number, and |
b/B, or AUDIO |
|
|
|
5.1 CH |
changes the setting. |
|
|
||||
language |
|
OFF |
Shows the current subtitles language, and |
b/B, or SUBTITLE |
|||||
|
|
|
changes the setting. |
||||||
|
|
|
|
|
|
|
|
|
|
|
|
|
|
|
|
|
|
|
|
|
|
|
1/1 |
Shows the current angle number and total number of |
b/B, or ANGLE |
||||
|
|
|
angles, and changes the angle number. |
||||||
|
|
|
|
|
|
|
|
|
|
|
|
|
|
|
|
|
|
|
|
|
|
NORM. |
Shows the current sound mode, and |
b/B |
|||||
|
|
changes the setting. |
|||||||
|
|
|
|
|
|
|
|
|
|
|
|
|
|
|
|
|
|
|
|
VCD2. VCD1.1
|
|
|
Function (Use v/V to select desired item) |
Selection Method |
|
|
|
|
|
|
|
|
|
|
Shows the current track number, total number of tracks |
b / B, or |
|
|
|
1/4 |
|||
|
|
and PBC On mode, and skips to the desired track number. |
Numbers, ENTER/OK |
||
|
|
||||
|
|
|
|||
|
|
|
|
|
|
|
0:16:57 |
Shows the elapsed playing time (Display only) |
– |
||
|
|||||
|
|
||||
|
|
|
|
|
|
|
|
STER. |
Shows the audio channel, and |
b / B, or AUDIO |
|
|
|
changes the audio channel. |
|||
|
|
|
|
|
|
|
|
|
|
|
|
|
|
NORM. |
Shows the current sound mode, and |
b / B |
|
|
|
||||
|
|
any changes to the setting. |
|||
|
|
|
|
|
|
|
|
|
|
|
|
1-23
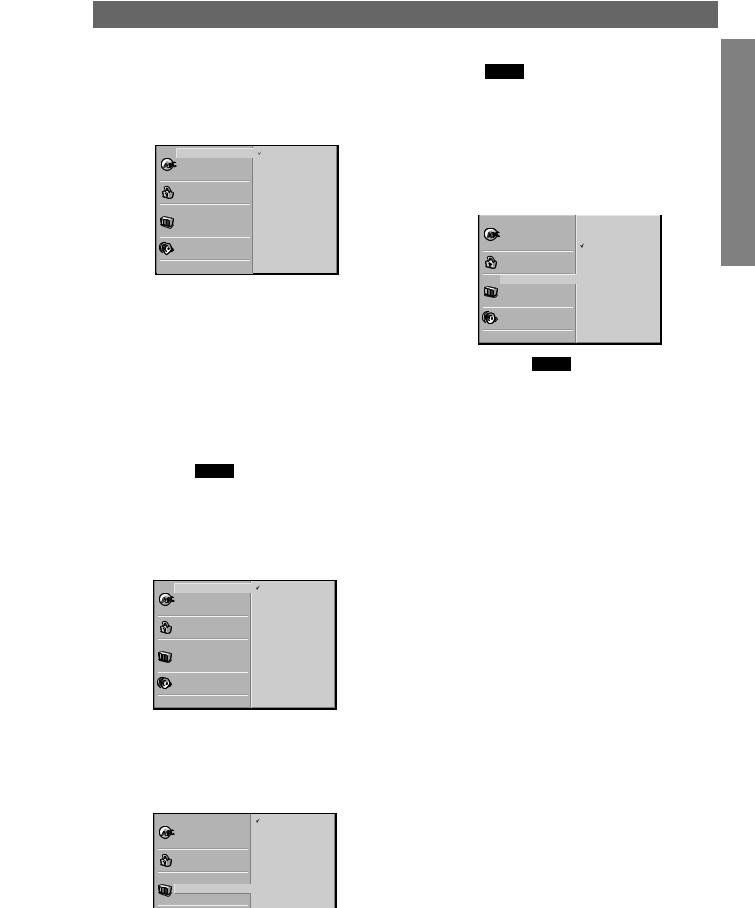
Before Operation - DVD part (Continued)
Initial Settings
You can set your own Personal Preferences on the player.
General Operation
1 |
Press SETUP. |
|
The setup menu appears. |
|
|
|
Disc Audio |
Original |
|
Disc Subtitle |
English |
|
Disc Menu |
Spanish |
|
Rating |
German |
|
Area Code |
Italian |
|
TV Aspect |
Portuguese |
|
Menu Language |
Greek |
|
Progressive Scan |
French |
|
Digital Audio Output |
Chinese |
|
|
Other – – – – |
|
Others |
|
2 |
Use v/V to select the desired item. |
|
The screen will show the current setting for the |
||
selected option, as well as alternate setting(s).
3 While the desired option is selected, press B, then v/V to select the desired setting.
4 Press ENTER/OK to confirm your selection.
Some items require additional steps.
5 Press SETUP, RETURN, or PLAY N to exit the setup menu.
Language
Disc Language DVD
Select a language for the disc’s Menu, Audio, and Subtitle.
Original : The original language set for the disc is selected.
Other : To select another language, press number buttons to enter the corresponding 4-digit number according to the language code list on page 38. If you enter the wrong language code, press CLEAR.
Disc Audio |
Original |
Disc Subtitle |
English |
Disc Menu |
Spanish |
Rating |
German |
Area Code |
Italian |
TV Aspect |
Portuguese |
Menu Language |
Greek |
Progressive Scan |
French |
Digital Audio Output |
Chinese |
|
Other – – – – |
Others |
|
 Note
Note
Disc Language selection may not work for some DVDs.
Menu Language
Select a language for the setup menu. This is the menu you see when you press SETUP.
Disc Audio |
English |
Disc Subtitle |
Spanish |
Disc Menu |
German |
Rating |
Italian |
Area Code |
Portuguese |
TV Aspect |
Greek |
|
|
Menu Language |
|
Progressive Scan |
|
Picture
TV Aspect DVD
4:3 Letterbox: Select when a standard 4:3 TV is connected. Displays theatrical images with masking bars above and below the picture.
4:3 Panscan: Select when a conventional TV set is connected. The video material formatted in the Pan & Scan style is played back in that style (Both sides of the picture are cut off.)
16:9 Wide: Select when a 16:9 wide TV is connected.
Disc Audio |
4:3 Letterbox |
Disc Subtitle |
4:3 Panscan |
Disc Menu |
16:9 Wide |
Rating |
|
Area Code |
|
TV Aspect |
|
Menu Language |
|
Progressive Scan |
|
Digital Audio Output |
|
Others |
|
Progressive Scan DVD
Progressive Scan Video provides the highest quality pictures with less flickering.
If you are using the COMPONENT/PROGRESSIVE SCAN VIDEO OUT jacks, but are connecting the DVD+VCR to a standard (analog) television, set Progressive Scan to Off.
If you are using the Component Video jacks for connection to a TV or monitor that is compatible with a progressive scan signal, set Progressive Scan to On.
This unit can only output 625p progressive scan picture.
 Note
Note
Progressive Scan will not be displayed in the setup menu when the rear switch is set at RGB position.
 Caution
Once the setting for progressive scan output is entered, an image will only be visible on a progressive scan compatible TV or monitor. If you set Progressive Scan to On in error, you must reset the unit.
1)Remove any disc from the unit and close the disc tray. See that “dISC” is displayed on the display window.
2)Press STOP (9) and hold it for five seconds before releasing it. The video output will be restored to the standard setting and a picture will once again be visible on a conventional analog TV or monitor.
PREPARATION
1-24
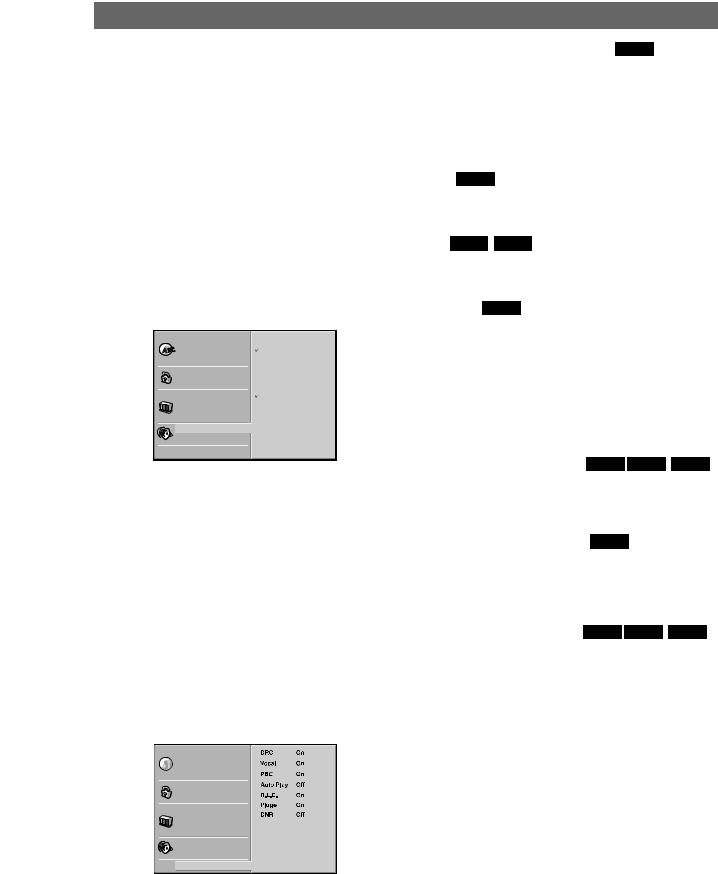
Before Operation - DVD part (Continued)
Sound
Digital Audio Output
Each DVD disc has a variety of audio output options. Set the player’s Digital Audio Output according to the type of audio system you use.
DOLBY DIGITAL/PCM: Select “DOLBY DIGITAL/PCM” if you connected the DVD+VCR’s DIGITAL AUDIO OUT jack to a Dolby Digital decoder (or an amplifier or other equipment with a Dolby Digital decoder).
Stream/PCM: Select “Stream/PCM” if you connected the DVD+VCR’s DIGITAL AUDIO OUT jack to an amplifier or other equipment with a DTS decoder, Dolby Digital decoder or MPEG decoder.
PCM: Select when connected to a 2-channel digital stereo amplifier. The DVD+VCR outputs sounds in the PCM 2ch format when you play a DVD video disc recorded on the Dolby Digital, MPEG1, or MPEG2 recording system.
Disc Audio |
DIGITALDOLBY /PCM |
Disc Subtitle |
Stream/PCM |
Disc Menu |
PCM |
Rating |
|
Area Code |
Sample Freq. |
TV Aspect |
48 KHz |
Menu Language |
96KHz |
Progressive Scan |
|
Digital Audio Output |
|
Others |
|
Sample Frequency
To change the Sample Frequency setting, first select the desired Digital Audio Output as indicated as above. If your receiver or amplifier is NOT capable of handling 96KHz signals, select 48KHz. When this choice is made, this unit will automatically convert any 96KHz signals to 48KHz so your system can decode them.
If your receiver or amplifier is capable of handling 96KHz signals, select 96KHz. When this choice is made, this unit will pass each type of signal through without any further processing.
Others
The DRC, Vocal, PBC, Auto Play, B.L.E., Pluge and DNR settings can be changed.
zPress v/V to select the desired item and press ENTER/OK. The setting of the selected item is changed between On and Off.
Disc Audio
 Disc Subtitle
Disc Menu
Rating
Area Code
TV Aspect
Menu Language
Progressive Scan
Digital Audio Output
 Others
Dynamic Range Control (DRC) DVD
With the DVD format, you can hear a program’s soundtrack in the most accurate and realistic presentation possible, thanks to digital audio technology. However, you may wish to compress the dynamic range of the audio output (the difference between the loudest sounds and the quietest ones). Then, you may listen to a movie at a lower volume without losing clarity of sound. Set DRC to On for this effect.
Vocal DVD
Set Vocal to On only when a multi-channel karaoke DVD is playing. The karaoke channels on the disc will mix into normal stereo sound.
PBC VCD2.0 VCD1.1
Set Playback Control (PBC) to On or Off.
On: Video CDs with PBC are played according to the PBC.
Off: Video CDs with PBC are played the same way as Audio CDs.
Auto Play DVD
You can set up the DVD Player so a DVD disc automatically starts playing whenever the DVD is inserted.
If Auto Play mode is set to On, this DVD player will search a title where playback time is longest and then play back the title automatically.
On: Auto Play function is activated. Off: Auto Play function is not activated.
 Note
Note
The Auto Play function may not work for some DVDs.
B.L.E. (Black Level Expansion) DVD VCD2.0 VCD1.1
To select the black level of playback pictures. Set your preference and monitor’s ability.
On: Expanded grey scale. (0 IRE cut off) Off: Standard grey scale. (7.5 IRE cut off)
Pluge (Blacker than Black) DVD
For proper adjustment of your television brightness settings utilizing a commercially available test disc.
On: Select when you adjust the level of your TV using a commercially available test disc that contains pluge signals.
Off: For normal use.
DNR (Digital Noise Reduction) DVD VCD2.0 VCD1.1
You can reduce ambient noise in the picture.
DNR1: Normal level DNR2: Expanded level.
Off: Off.
 Notes
Notes
OActual picture enhancement may vary depending on the quality of the disc.
OWhile the DNR2 (expanded level) can provide additional improvement in the reduction of noise in the video signal, it
may produce undesirable picture artifacts on some discs.
Should this occur, select a more appropriate DNR level (normal or off).
ODepending on the disc, some picture detail may be lost by the picture enhancement.
OA DVD audio disc with Dolby Digital or DTS soundtrack may be played, some DVD audio discs include moving pictures which may be modified by the above processes.
1-25

Before Operation - DVD part (Continued)
Parental Control
Rating DVD
Movies on DVDs may contain scenes not suitable for children. Therefore, discs may contain Parental Control information that applies to the complete disc or to certain scenes on the disc. These scenes are rated from 1 to 8, and alternatively, more suitable scenes are available for selection on some discs. Ratings are country dependent. The Parental Control feature allows you to prevent discs from being played by your children or to have certain discs played with alternative scenes.
1 Select “Rating” on the Setup menu using the v/V buttons.
|
Disc Audio |
8 |
|
Disc Subtitle |
7 |
|
Disc Menu |
6 |
|
Rating |
5 |
|
Area Code |
4 |
|
TV Aspect |
3 |
|
Menu Language |
2 |
|
Progressive Scan |
1 |
|
Digital Audio Output |
Unlock |
|
|
Change |
|
Others |
|
|
|
|
2 While “Rating” is selected, press B.
3 When you have not entered a password yet;
Enter a 4-digit password using the numbered buttons to create a personal 4-digit security password, then press ENTER/OK. Enter the 4-digit password again and press ENTER/OK to verify.
When you have already entered a password;
Enter a 4-digit password using the numbered buttons to confirm the personal 4-digit security password, then press ENTER/OK.
If you make a mistake before pressing ENTER/OK, press
CLEAR and enter 4-digit security password again.
4 Select a rating from 1 to 8 using v/V buttons. Level 1 : DVD software for adults cannot be played back.
Level 8 : All DVD software can be played back.
The limitation will be more severe as the level number is lower.
Unlock: If you select Unlock, Parental Control is not active. The disc will play in full.
Ratings 1 to 8: Some discs contain scenes not suitable for children. If you set a rating for the player, all disc scenes with the same rating or lower will be played. Higher rated scenes will not be played unless an alternative scene is available on the disc. The alternative must have the same rating or a lower one. If no suitable alternative is found, playback will stop. You must enter the 4-digit password or change the rating level in order to play the disc.
5 Press ENTER/OK to confirm your rating selection, then press SETUP to exit the menu.
Area Code DVD
Enter the code of a country/area whose standards were used to rate the DVD video disc, referring to the list (See “Country/Area Code List”, page 39).
1 Select Area Code using the v/V buttons on the setup menu.
Disc Audio |
Code Set |
Disc Subtitle |
G B |
Disc Menu |
|
Rating |
|
Area Code |
|
TV Aspect |
|
Menu Language |
|
Progressive Scan |
|
Digital Audio Output |
|
Others
2 While Area Code is selected, press B.
3 Follow step 3 of “Rating” on left.
4 Select the first character using the v/V buttons.
5 Shift the cursor using 2 button and select the second character using v/V buttons.
6 Press ENTER/OK to confirm your Area code selection, then press SETUP to exit the menu.
 Note
Note
Confirmation of the 4-digit password is necessary when the password is changed (see “Changing the 4-digit Code” below ).
Changing the 4-digit Code
1Follow Steps 1-2 as shown above to the left (Rating).
2Enter the old password, then press ENTER/OK.
3Select Change using v/V buttons then press ENTER/OK.
4Enter the new 4-digit password, then press ENTER/OK.
5Enter exactly the same password a second time and verify by pressing ENTER/OK.
6Press SETUP to exit the menu.
If you forget your 4-digit Code
If you forget your password, clear the current password by following the procedure below.
1Press SETUP to display the setup menu.
2Use the Number buttons to enter the 6-digit number “210499”.
The 4-digit password is cleared.
3Enter a new password as shown above to the left (Rating).
PREPARATION
1-26

Operation with tape
Playing a tape
You will only be able to load and eject video cassettes when your DVD+VCR is plugged into the mains. Your VCR may also playback recordings from NTSC tapes (on PAL TV).
Getting a better picture
When a cassette is inserted and playback started, the automatic tracking function works to get the best possible picture automatically. If the quality of the recording is poor, repeatedly press 3 or 4 on the remote control to manually adjust the tracking until any distortions have been removed.
1 |
Make sure that you have correctly connected your |
DVD+VCR as described earlier in this book. |
|
|
Turn on your TV. |
|
Press +/1 to turn on your DVD+VCR. |
|
Insert the video cassette into your DVD+VCR. |
|
The video cassette should have the window side |
|
facing up and the arrow facing away from you. |
2 |
Press PLAY N to start playing your tape. |
If you load a video cassette which has had its |
|
|
record protection tab removed, playback of the |
|
cassette will start automatically. |
|
AUTO TRACKING |
|
Your DVD+VCR will automatically adjust the |
|
tracking to give the best picture quality. |
|
If noise bars appear during playback, adjust the |
|
tracking manually by pressing PR/TRK+/-. |
|
To resume automatic tracking, press AUTO TRK. |
3 Press PAUSE/STILL X/C to still a picture. Press PAUSE/STILL X/C repeatedly to advance the tape frame by frame.
If you press FWD M or SLOW T, the picture will be slowed down at about 1/19 times the normal playback.
Tapes can be paused for up to 5 minutes. After 5 minutes your DVD+VCR will stop the tape to prevent damaging the tape or your DVD+VCR . Still picture quality can be improved slightly by using v or V.
4 Press PLAY N to continue playing your tape.
Picture search:
During playing back press either REW m or FWD M to this will enable you to rapidly wind the tape (7 times normal playback) see where you are on the tape.
Logic search:
During fast forwarding or rewinding press and hold REW m or FWD M the picture will be played back at 7 times normal playback speed.
5 Slow motion playback, Shuttle :
During playing back or still picture press F or G. You can reach the following playback speeds. (-7xplay, -3xplay, -play, still, 1/19 slow, play, 2xplay, 7xplay)
To switch off the slow motion and shuttle, press the desired function.
During slow motion and shuttle, the noise bars may appear on the picture according to the status of tape.
If distortions can be seen in the picture, reduce them with v or V.
6 Press STOP 9 to end playback. Press EJECT Z.
If the end of the tape is reached, your DVD+VCR will stop playback automatically, rewind, stop, eject the tape.
CM (Commercial Message) Skip:
This feature enables you during playback of a tape to skip a commercial break in a few seconds, then resume normal playback.
While tape is playing press INSTANT SKIP on the remote control to skip commercial (or another programme material).
Repeatedly press INSTANT SKIP to skip: 1 Press 30 seconds
2 Press 60 seconds
3 Press 90 seconds
4 Press 120 seconds
5 Press 150 seconds
6 Press 180 seconds
OPR (Optimum Picture Response)
This feature automatically improves playback picture quality by adjusting your DVD+VCR to the condition of the tape.
1 Press VCR MENU.
2 Press b or B to select OPR.
3 Press ENTER/OK.
4 Press 3 or 4 repeatedly to select: OFF, SOFT or
SHARP.
Please note that you can only set OPR when playing a tape.
OFF |
|
Pr-12 |
1 2 |
|
VCR |
|
|
SYS- |
|
||
PSET |
ACMS |
TIME |
Dr. |
||
RECSOFTR |
DATE |
TEM |
|||
f OSDSHARP |
|
|
NIC |
OPR |
|
|
+ |
- |
|
|
|
ON |
16:9 |
DECO- |
OPR |
i |
OFF |
4:3 |
DER |
5 Press VCR MENU return to screen.
1-27

Operation with tape (Continued)
One-touch Timer Recording (OTR)
Your VCR allows you to make recordings using a variety of simple methods:
One-touch Timer Recording (OTR) start recording immediately for a set period of time or until the video cassette runs out.
Your DVD+VCR incorporates Long Play (LP) which enables you to record up to twice the amount of time on a video cassette. For example an E-180 will record up to 180 minutes using Standard Play (SP); using LP you will be able to record up to 360 minutes. Please note there will be a slight loss in picture and sound quality when using LP.
1 |
Make sure that you have correctly connected your |
VCR as described earlier in this book. |
|
|
Press +/1 to turn on your VCR. |
2 |
Insert a video cassette with protection tab into your |
VCR. |
|
|
The video cassette should have the window side |
|
facing up and the arrow facing away from you. |
3 Press PR/TRK + or - to select the programme number you wish to record.
You may also directly select programme number using the numbered buttons on the remote control.
4 If you wish to record directly from the SCART or RCA sockets repeatedly press INPUT SELECT until the socket you wish to record from is displayed.
AV 1 for recording from EURO AV1 SCART socket on the rear of your unit.
AV 2 for recording from EURO AV2 SCART socket on the rear of your unit.
AV 3 for recording from VIDEO IN and AUDIO IN (Left & Right) sockets on the front of your unit.
5 Press SP/LP if you wish to record in Long Play or Standard Play.
SP will produce improved picture and sound quality, however LP will provide twice as much recording time as SP.
6 Press REC/OTR on the remote to start recording. RECORD will appear on the TV screen.
Press REC on your unit or press REC/OTR on the remote several times. Each successive press will increase the record time by 30 minutes until you reach a maximum of 9 hours.
7 |
Press PAUSE/STILL X/C to avoid recording |
unwanted scenes. |
Press PAUSE/STILL X/C to continue recording.
Tapes can be paused for up to 5 minutes; RECP will be displayed when a tape is paused. After 5 minutes your DVD+VCR will stop recording to prevent damaging the tape or your DVD+VCR.
8 Press STOP x to end recording. Press EJECT Z.
EJECT will appear on the TV screen for a few seconds.
 Notes
Notes
zIf you do not wish to record on a tape (this can happen quite easily by accident!) remove the protection tab on the back edge of the video cassette.
zIt is possible to record on a video cassette with the record protection tab removed by covering the hole with self adhesive tape.
zRemember you can record one programme while watching another by starting your instant recording, press TV/VCR to select TV mode and then selecting a different channel on your TV.
OPERATION
1-28
Operation with tape (Continued)
Timer recording using
On Screen Display
You may set up to seven timer record events within one month of the current date.
 Note
Note
Before setting the timer make sure that you have set the DVD+VCR clock correctly and you know which stations you have tuned TV stations on your DVD+VCR.
1 |
Insert a video cassette with protection tab into your |
DVD+VCR. |
|
|
The video cassette should have the window side |
|
facing up and the arrow facing away from you. |
2 |
Press VCR MENU. |
Press 1 or 2 to select REC. |
|
|
Press ENTER/OK. |
|
Press ENTER/OK to start setting the timer record |
3 event. |
|
|
If all timer record events are full press v or V to |
|
select the event that you wish to remove and |
|
replace. |
|
Press b to delete the event. |
PR |
DATE |
T I M E |
|
|
PR-01 |
- - |
- - : - -~ - -: - - |
SP |
|
- - |
- - |
- - : - -~ - -: - - |
SP |
|
- - |
- - |
- - : - -~- - : - - |
SP |
|
- - |
- - |
- - : - -~- - : - - |
SP |
|
- - |
- - |
- - : - -~- - : - - |
SP |
|
- - |
- - |
- - : - -~- - : - - |
SP |
|
- - |
- - |
- - : - -~- - : - - |
SP |
|
|
|
|
|
|
|
|
|
|
i |
4 Press the numbered buttons to enter the station that you wish to record.
When selecting stations 1 - 9, press 0 first, then the channel number; for example Stations 3 - 03. You may also select Channels by pressing v or V. Once selected press B.
If you wish to record from AUDIO IN (L/R) and VIDEO IN on the front or from the EURO SCART sockets on the back of your unit, press INPUT SELECT to select for correct display (AV1, AV2 or AV3).
PR |
DATE |
T I M E |
|
||
PR-01 |
- - |
- - - - - -- - : ~ : |
SP |
||
- - |
- - |
- - : - - |
~ - - |
: - - |
SP |
- - |
- - |
- - : - - |
~- - |
: - - |
SP |
- - |
- - |
- - : - - |
~- - |
: - - |
SP |
- - |
- - |
- - : - - |
~- - |
: - - |
SP |
- - |
- - |
- - : - - |
~- - |
: - - |
SP |
- - |
- - |
- - : - - |
~- - |
: - - |
SP |


 i
i
5 Press the numbered buttons to enter the date of the programme.
If you press ENTER/OK before entering the date you may select one of the following automated recording features. Press 1 or 2 to select, then press ENTER/OK to confirm.
DLY To record every day (except Saturday and Sunday) at the same time.
SU~SA To record at the same time every week.
PR |
DATE |
T I M E |
|
||||
PR-01 |
|
16 |
|
- -- - : |
- -~ |
- -: |
SP |
- - |
- - |
|
- - : - - |
~ - - |
: - - |
SP |
|
- - |
- - |
|
- - : - - |
~- - |
: - - |
SP |
|
- - |
- - |
|
- - : - - |
~- - |
: - - |
SP |
|
- - |
- - |
|
- - : - - |
~- - |
: - - |
SP |
|
- - |
- - |
|
- - : - - |
~- - |
: - - |
SP |
|
- - |
- - |
|
- - : - -~- - : - - |
SP |
|||
DLY |
SU MO TU WE TH FR |
SA |
|||||


 OK i
OK i
6 Press the numbered buttons to enter the recording start and end times of the programme that you wish to record.
Please note your DVD+VCR uses a 24 hour clock. e.g. 1pm will be displayed as 13:00.
You may also select the start and end times by using v or V.
PR |
DATE |
T I M E |
|
|||
PR-01 |
16 |
19:00~ 20: |
00 |
SP |
||
- - |
- - |
- - : - - |
~ - - |
: - - |
SP |
|
- - |
- - |
- - : - - |
~- - |
: - - |
SP |
|
- - |
- - |
- - : - - |
~- - |
: - - |
SP |
|
- - |
- - |
- - : - - |
~- - |
: - - |
SP |
|
- - |
- - |
- - : - - |
~- - |
: - - |
SP |
|
- - |
- - |
- - : - - |
~- - |
: - - |
SP |
|


 i
i
7 Press B and press v or V to switch VPS/PDC on or off.
Press B to select the recording speed.
Press v or V to select the desired tape speed (SP, IP, or LP).
IP mode determines how much tape is left and switches speed from SP to LP, if necessary, to complete recording the program. IP mode is not selected when VPS/PDC is ON.
PR |
DATE |
T I M E |
|
||
PR-01 |
16 |
19:00~ 20:00 |
SP |
||
- - |
- - |
- -- - : |
- -~ |
- -: |
SP |
- - |
- - |
- - : - - |
~- - |
: - - |
SP |
- - |
- - |
- - : - - |
~- - |
: - - |
SP |
- - |
- - |
- - : - - |
~- - |
: - - |
SP |
- - |
- - |
- - : - - |
~- - |
: - - |
SP |
- - |
- - |
- - : - - |
~- - |
: - - |
SP |


 i
i
1-29
 Loading...