


Bed_anl_.qxd 20.02.04 16:28 Seite 1
Operating Manual
DigiCorder S1 |
Integrated |
video recor- |
|
der |
|
P V R |
|
Digital receiver |
||
|
||
with |
|
|
integrated hard disk drive |
|
|
with integrated |
|
|
Premiere decoding system |
|
|
and PCMCIA interface for |
|
|
a CI Module. |
|
Operating Manual
With integrated Premiere decoding system and
PCMCIA interface for installing a CI module.
For the reception of free-to-air and encrypted programmes broadcast via satellite, (e.g.. VIACCESS, IRDETO, SECA ,etc. )
DiS qC 1.2

Bed_anl_.qxd 20.02.04 16:28 Seite 2
1 Contents
1 |
Contents . . . . . . . . . . . . . . . . . . . |
. .2 |
2 |
Illustrations . . . . . . . . . . . . . . . . . |
. .5 |
3 |
Please read this first . . . . . . . . . |
. .8 |
|
Safety notes . . . . . . . . . . . . . . . . . . . . . . . |
. .9 |
4 |
Connections . . . . . . . . . . . . . . . . . |
11 |
4.1 |
Mains power connection . . . . . . . . . . . . . |
.11 |
4.2 |
External unit . . . . . . . . . . . . . . . . . . . . . . . |
.11 |
4.3 |
Connecting to a television set . . . . . . . . . . |
11 |
4.4 |
Video cassette recorder (VCR) . . . . . . . . . |
12 |
4.5 |
HiFi amplifier . . . . . . . . . . . . . . . . . . . . . . . |
13 |
4.6 |
Unit with S-Video input (Hosiden) . . . . . . . |
13 |
4.7 |
Serial interface (RS 232) . . . . . . . . . . . . . . |
13 |
5 |
Initial installation . . . . . . . . . . . . . |
13 |
6 |
Settings . . . . . . . . . . . . . . . . . . . . . |
17 |
6.1 |
Language for display . . . . . . . . . . . . . . . . . |
17 |
6.2 |
Basic settings . . . . . . . . . . . . . . . . . . . . . . . |
17 |
6.2.1 |
Time difference to GMT (hours) . . . . . . . . . |
18 |
6.2.2 |
Country . . . . . . . . . . . . . . . . . . . . . . . . . . . |
18 |
6.2.3 |
Remote control code . . . . . . . . . . . . . . . . . |
18 |
6.2.4 |
Standby clock . . . . . . . . . . . . . . . . . . . . . . . |
18 |
6.3 |
Audio/Video settings . . . . . . . . . . . . . . . . . |
18 |
6.3.1 |
Picture format TV set . . . . . . . . . . . . . . . . . |
19 |
6.3.2 |
Language (Audio signal) . . . . . . . . . . . . . . |
19 |
6.3.3 |
Language (Sub-titles) . . . . . . . . . . . . . . . . . |
19 |
6.3.4 |
TV SCART mode . . . . . . . . . . . . . . . . . . . . |
19 |
6.3.5 |
Video system . . . . . . . . . . . . . . . . . . . . . . . |
19 |
6.3.6 |
Dolby Digital (AC3) . . . . . . . . . . . . . . . . . . |
19 |
6.3.7 |
UHF output channel . . . . . . . . . . . . . . . . . . |
20 |
6.4 |
Antenna setting . . . . . . . . . . . . . . . . . . . . . |
20 |
6.4.4 |
Rotating antenna . . . . . . . . . . . . . . . . . . . . |
23 |
7 |
Operation . . . . . . . . . . . . . . . . . . . . |
24 |
7.1 |
Switching on and off . . . . . . . . . . . . . . . . . |
24 |
7.2 |
Programme selection . . . . . . . . . . . . . . . . . |
24 |
7.3 |
Receiving encrypted programmes . . . . . . . |
26 |
7.3.1 |
Multifeed options . . . . . . . . . . . . . . . . . . . . |
27 |
7.3.2 |
Selecting a starting time . . . . . . . . . . . . . . |
27 |
7.4 |
Volume adjustment . . . . . . . . . . . . . . . . . . |
27 |
7.5 |
Selecting a different language . . . . . . . . . . |
28 |
7.5.1 |
Dolby Digital (AC3 mode) . . . . . . . . . . . . . |
28 |
7.6 |
TV/Radio selection/switching . . . . . . . . . . . |
28 |
7.7Return to last programme selected. . . . . .29
7.8 Display time and programme info . . . . . . .29 7.9 Additional programme information . . . . . . .29 7.10 Transponder information . . . . . . . . . . . . . .29
2
Bed_anl_.qxd 20.02.04 16:28 Seite 3
7.11 Freeze frame . . . . . . . . . . . . . . . . . . . . . . .30 7.12 Video text . . . . . . . . . . . . . . . . . . . . . . . . . .30 7.13 Sub-titles . . . . . . . . . . . . . . . . . . . . . . . . . .31 7.14 Electronic Programme Guide SFI . . . . . . .31 7.14.1 Downloading SFI data . . . . . . . . . . . . . . . .32 7.14.2 Interrupting the download procedure . . . . .32
7.14.3Display Electronic Programme Guide . . . .32
7.14.4Now (Table with current programme contents) 33
7.14.5 Next . . . . . . . . . . . . . . . . . . . . . . . . . . . . . .33 7.14.6 More . . . . . . . . . . . . . . . . . . . . . . . . . . . . . .33 7.14.7 SFI functions . . . . . . . . . . . . . . . . . . . . . . .34 7.14.7.1 SFI information . . . . . . . . . . . . . . . . . . . . .34 7.14.7.2 SFI timer programming . . . . . . . . . . . . . . .34 7.14.7.3 SFI programme overview . . . . . . . . . . . . . .35 7.14.7.4 SFI overview by programme type . . . . . . .36 7.14.8 End SFI . . . . . . . . . . . . . . . . . . . . . . . . . . .36
7.15 Hard drive operation . . . . . . . . . . .37
7.15.1 Record . . . . . . . . . . . . . . . . . . . . . . . . . . . .37 7.15.1.1 Instant Record . . . . . . . . . . . . . . . . . . . . . .37 7.15.1.2 Timer recordings . . . . . . . . . . . . . . . . . . . .39 Timeshift function . . . . . . . . . . . . . . . . . . . .42
7.15.2 Playback . . . . . . . . . . . . . . . . . . . .43
7.15.2.1 Play back hard drive recordings . . . . . . . .43 7.15.2.2 Pause/freeze frame . . . . . . . . . . . . . . . . . .44 7.15.2.3 Fast forward and revers . . . . . . . . . . . . . . . .44 7.15.2.4 End Playback . . . . . . . . . . . . . . . . . . . . . . .44
7.15.3 |
Managing the hard drive . . . . . . . . |
44 |
7.15.3.1 |
Managing recordings . . . . . . . . . . . . . . . . . |
45 |
7.15.3.2 |
Hard drive information . . . . . . . . . . . . . . . . |
46 |
7.15.3.3 |
Hard drive maintenance . . . . . . . . . . . . . . . |
46 |
7.16 |
Sleep timer . . . . . . . . . . . . . . . . . . . . . . . . . |
46 |
8 |
Changing basic programming . . . . |
47 |
8.1 |
Configure a Favourites list . . . . . . . . . . . . . |
47 |
8.1.1 |
Call up programme list administration . . . . |
47 |
8.1.2 |
Add programmes to Favourites list . . . . . . |
48 |
8.1.3 |
Delete programmes . . . . . . . . . . . . . . . . . . |
49 |
8.1.4 |
Sort programmes . . . . . . . . . . . . . . . . . . . . |
50 |
8.2Programming the electronic programme guide 50
8.3 Parental control function . . . . . . . . . . . . . .53
8.4 Programme Search/Scan . . . . . . .55
8.5 Service settings . . . . . . . . . . . . . . . . . . . . .59 8.5.1 Activating default setting . . . . . . . . . . . . . .59
5
Bed_anl_.qxd 20.02.04 16:28 Seite 4
8.5.2 Delete all programmes . . . . . . . . . . . . . . . .59 8.5.3 Updating software . . . . . . . . . . . . . . . . . . .60 8.5.4 Copying settings . . . . . . . . . . . . . . . . . . . .61 8.6 System configuration . . . . . . . . . . . . . . . . .61 8.7 Encryption system . . . . . . . . . . . . . . . . . . .61
9 Operating a rotating antenna (DiSEqC 1.2) . . . . . . . . . . . . . . . . . .62
9.1 Eastern and Western limits . . . . . . . . . . . .62 9.1.1 Delete existing limit settings . . . . . . . . . . .62 9.1.2 Setting Eastern limit . . . . . . . . . . . . . . . . . .63 9.1.3 Setting Western limit . . . . . . . . . . . . . . . . .63 9.2 Geo-positioning . . . . . . . . . . . . . . . . . . . . .63 9.3 Setting satellite position . . . . . . . . . . . . . .64 9.3.1 Selecting satellite position . . . . . . . . . . . . .65 9.3.2 Adjusting the satellite antenna . . . . . . . . . .66 9.3.3 Saving a satellite position . . . . . . . . . . . . .67 9.4 Current satellite liste . . . . . . . . . . . . . . . . .67 9.4.1 Go to satellite position . . . . . . . . . . . . . . . .68 9.5 Delete satellite position . . . . . . . . . . . . . . .68 9.6 Reference position . . . . . . . . . . . . . . . . . . .68
10 Technical terms . . . . . . . . . . . . . .69 11 Technical data . . . . . . . . . . . . . . . .71 12 Trouble-shooting guide . . . . . . . . .75 13 Annexure . . . . . . . . . . . . . . . . . . . .77
Your unit carries the CE logo, and complies with all relevant EU standards. Subject to change without notice, not responsible for printing errors. Correct as at 11/03
TechniSat and DigiCorder S1 are registered trade-marks of TechniSat Digital GmbH
P.O. Box 560
D-54541 Daun
Germany www.technisat.de
Technische Hotline (in Germany) 0180/5005-911*
*Cost 0,12 EUR/Min. via the Deutsche Telekom AG network
Note !
If it should become necessary to return your unit to the manufacturer, please use only the address below:
TechniSat Teledigital AG
Service-Center
Löderburger Str. 94
D-39418 Staßfurt
Germany
6

Bed_anl_.qxd 20.02.04 16:28 Seite 5
2 Illustrations
Remote control unit
Sound on/off(mute)
Numeric keys
0/AV
Record
Multi-function keys
Arrow key up
Arrow key left
Arrow key down
SFI
Programme +
Programme -
TV/Radio mode
Sleep Timer
Video text
On/Standby
Option
 red Rewind
green PVR-Navi- gator, Stop
yellow:Pause, Play
blue Fast forward
OK
Programme list on/off
Arrow key right
Back
Info
Volume +
Volume -
Menu on/off
Language select
Freeze frame
Remote control option:
In order to operate 2 TechniSat receivers with identical coding, television sets as well as an additional future option, (e.g. VCR).
Use these keys to select the remote control option Sat 1 and use this to operate your digital receiver, if you have not set this differently as described in Point 6.2.3:
> Press the SAT1 and OK keys simultaneously!
3
Bed_anl_.qxd 20.02.04 16:28 Seite 6
Index . . . . . . . . . . . . . . . . . . . . . . .79
On/Standby |
Ein/Standby |
Programme select |
up/down |
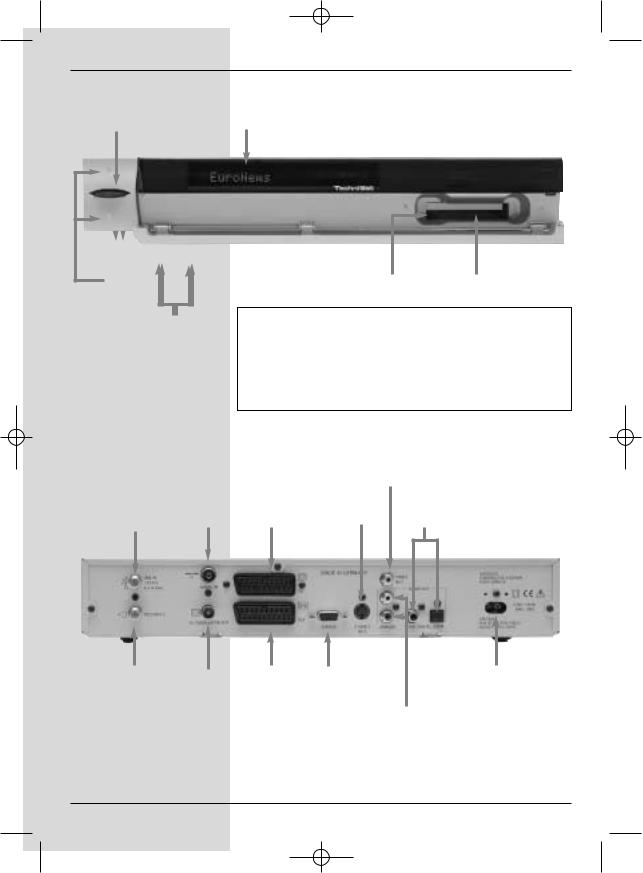
Alpha-numeric display
LED display
Eject button for CI Slot for CI module module
Inserting the CI module:
>Please note the manufacturer’s instructions for both the CI module and card.
>Insert the appropriate smart card into the corresponding CI module.
>Now insert the CI module carefully in the slot provided.
Video output
LNC |
Input terrestrial |
SCART socket |
S-Video |
Audio outputs |
input |
antenna |
TV |
output |
digital |
|
|
LNC out- |
HF |
SCART socket |
RS 232 |
Power socket |
put |
output |
VCR |
interface |
|
Audio outputs analogue
4
Bed_anl_.qxd 20.02.04 16:28 Seite 7
3 Please read this first
>Before operating your unit for the first time, please check that you have received all the components. The package should contain:
1 digital receiver, 1 mains power cable, 1 remote control, 1 operating manual, 1 guarantee card, 2 batteries (1,5V microcell).
>Insert the batteries supplied in the battery compartment of the remote control unit, taking care to observe the correct polarity.
>Before connecting you digital receiver, please first read the safety notes in Chapter 3.
>Chapters 4, 5 and 6 describe how you should connect and adjust the digital receiver to the external unit (antenna dish, LNC, ...), to the television set, VCR, etc. These settings need only be made once, and would only have to be updated if there is any change in your external unit, or if additional pieces of equipment are to be connected.
>Chapter 7 describes all the functions important in everyday use, e.g. programme selection or operating the hard drive.
>In Chapter 8 you will find information on how to set new programmes, or how to change the order of programmes in the list.
>Chapter 9 describes the settings to be made when operating a rotating antenna.
>Technical terms used in the operating manual are explained in Chapter 10.
>Technical data is set out in Chapter 11.
>A brief troubleshooting guide can be found in Chapter 12.
Important notes on operating the unit
The implementation of an "On Screen Display" (text shown on screen) helps to simplify thed operation of the digital receiver, and also helps to reduce the number of kews required on the remote control unit. All functions are indicated on the screen, and can be implemented with a few keys. Related functions are combined in a "MENU". The function selected will be marked and highlighted in a different colour. The bottom line of the display shows colour bars in green, red, yellow and blue, corrresponding to the function keys in these colours. In the various menus these colour bars represent different functions which can be accessed by pressing the multi-function key of the appropriate colour on the remote control unit. The function keys are only active if a brief description appears in the appropriate field.
Key descriptions and other terms appearing in the OSD menu
Sehr geehrte Kundin, sehr geehrter Kunde,7
Bed_anl_.qxd 20.02.04 16:28 Seite 8
are shown in emphasized letters in this operating manual.
Help:
Where available, press the blue function key to display help texts, press again to disable the text display.
Disposal information
The packaging of this product consists entirely of recyclable materials. Please separate the components accordingly, and dispose of them via the “Dual System” or other local recycling programmes.
Please ensure that discarded batteries from the remote control, as well as any other discarded electronic components, are not disposed of in your regular household waste, but are dsiposed of through the appropriate channels, either trough your specialist retailer, or via the appropriate system of your local authority).
Safety notes
For your own protection you should read the safety notes carefully before operating your new unit for the first time. The manufacturer accepts no responsibility for damage caused by inappropriate handling, or by ignoring the safety precautions in this manual.
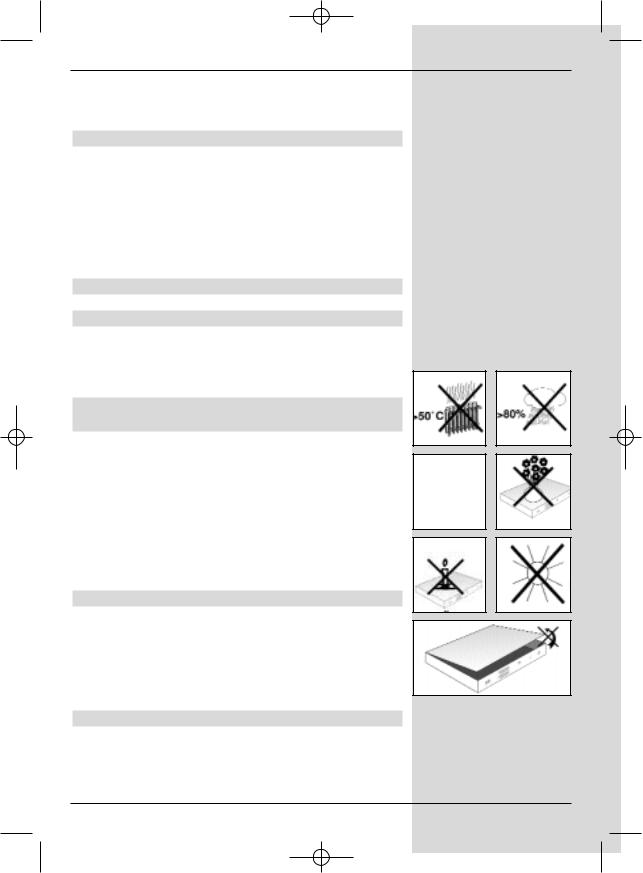
>To ensure adequate ventilation, place the unit on a smooth, even surface, and do not place any objects on top of the unit. Ventilation slots located in the housing are essential to conduct heat from the interior of the unit.
>Do not place any burning objects, such as burning candles, on the unit.
>Do not expose the unit to water (spray, drops), and do not place any objects filled with liquid, e.g. vases, on top of the unit.
>The unit should be operated only in a temperate climate.
>Do not open the unit! You are in danger of experiencing an electrical shock. If it becomes necessary to
open the unit, this should be done only by trained personnel.
Disconnect the unit from the mains power supply and call an authorised repair specialist if:
>the mains plug or the mains power cable are damaged
>the unit has been exposed to humidity, or liquid has entered the unit
>in case of significant malfunction
>in case of signficant external damage
Temporary disconnection
In case of an electrical storm, or when you are away for an extended period of time,e.g. while on holiday, you should disconnect the unit from the mains power supply.
8
Bed_anl_.qxd 20.02.04 16:28 Seite 9
4 Connections
The items a b c etc. mentioned below refer to the illustration on page 10.
4.1 Mains power connection
The digital receiver should be connected to the mains power supply only once all the other connections with other items of equipment have been made. This will prevent damage to the digital receiver or to other components.
aWhen you have made all the other connections. use the mains power cable supplied to connect the receiver to a mains power supply providing 230 V/50-60 Hz.
4.2 External unit
4.2.1 Single unit operation
bUsing a suitable co-axial cable, connect the LNC input of the digital receiver with the LNC of your external unit. Please also note Point 6 under “Settings”.
4.2.2Operating an additional receiver in a singlereceiver installation
cIf you wish to operate an additional unit in a singlereceiver installation (e.g. an analogue receiver or an
ADR receiver), you can connect the LNC input of the additional receiver with the LNC output of the DVB receiver by means of a suitable co-axial cable. In order for the satellite signal to be provided to the additional receiver, your DVB receiver must be operated in Standby mode. If your DVB receiver is switched on, it will take over priority in controlling the LNC.
4.3 Connection to a television set
When you have connected your digital receiver with
the television set as described in this chapter, it may be necessary to adjust the digital receiver to the television stan-
dard of your television set.
To do this, please note Point 6.3.5 (Video system).
4.3.1 Via SCART cable
To ensure the best possible picture quality, use a SCART cable to connect the digital receiver with the television set.
Proceed as follows:
d Connect the receiver (SCART socket TV) and the
9
Bed_anl_.qxd 20.02.04 16:28 Seite 10
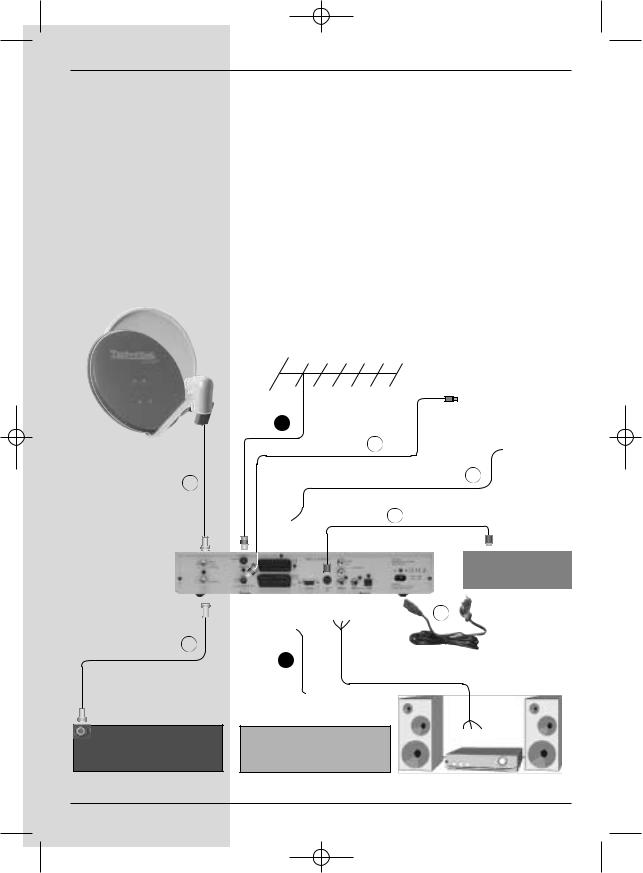
Connecting the DVB receiver to a satellite installation
a.Mains power connection
b.Connection from the LNC to the LNC input(LNB IN) of
the DVB receiver.
c.Connection from the LNC output to the LNC input of an analogue receiver.
d.Scart connection of the DVB receiver with the television set.
e.Connection from the HF output mto the antenna input
socket of the television set.
f.Connection from a terrestrial antenna to the Terrest. antenna input of the DVB receiver.
g.Scart connection from a video recorder to the VCR Scart socket of the DVB receiver.
h.Connection from the S-Video output to the S-Video
input of another unit (e.g. beamer).
|
f |
|
e |
b |
d |
|
|
|
h |
e.g. Beamer
c
g
Analogue Receiver |
VCR |
television set (SCART socket) by means of a SCART 10
Bed_anl_.qxd 20.02.04 16:28 Seite 11
cable. If your television set is appropriately equipped, it will switch automatically to AV when the digital receiver is switched on, and will provide satelliote reception.
4.3.2 Via HF cable
If your television set is not equipped with a SCART socket, the digital receiver will have to be connected to the antenna input socket of the television set. If this connection is used, only mono sound reproduction is possible.
To make the connection, proceed as follows:
eUse a suitable TV connection cable to connect the receiver (HF output) to the antenna input socket of the television set.
fConnect the cable coming from the terrestrial antenna to the Terrestrial antenna input of the digital
receiver.
You must now set your television set to the transmission (output) channel of the digital receiver. Select a free programme slot on your television set, and tune it to Channel 38 (if necessary, consult the operating manual of your television set).
If you do not receive a clear picture on Channel 38, either this channel or a neighbouring channel may already be tuned to a programme being received via the antenna. You can
check on this by temporarily removing the antenna cable from the Input terrestrial antenna socket of the digital
receiver. If you then temporarily receive a clear picture, you should select a different channel on the digital receiver, in the range 21 to 69.
Setting the UHF output channel
To set an optimum UHF output channel, please proceed as described in 6.3, and go to the menu Audio/Video Settings and mark the field UHF output channel. Then
proceed as described in 6.3.7.
4.4 Video cassette recorder (VCR)
gConnect the video recorder to the SCART socket marked VCR. In Playback mode, the video recorder will supply a switching signal to the digital receiver. The video recorder signal will be sent automatically to the
TV set.
If your video recorder does not supply the required switching current, use the 0/AV key to switch your digital receiver to the external input AV. Press this key again to return to normal operation.
4.5 HiFi Amplifier
4.5.1 Analogue
11
Bed_anl_.qxd 20.02.04 16:28 Seite 12
To achieve the best possible sound quality, you may connect
the digital receiver to a HiFi amplifier. To do this, use a suitable cable to connect the cinch sockets Audio R and Audio
L of the digital receiver with an input on your HiFi amplifier (e.g. CD or AUX; please note that the Phono input is not suitable!).
4.5.2 Digital
Should your amplifier be equipped with an appropriate electrical or optical input, you may connect the sockets AUDIO OUT DIGITAL elektrical resp.. AUDIO OUT DIGITAL optical with the electrical resp. the optical input of your
amplifier.
Depending on the channel selected, sampling rates of 32, 44,1 and 48 kHz are available.
Where broadcast, the Dolby Digital-Signal (AC3) is also available at this output.
4.6 Unit with S-Video input (Hosiden)
hTo connect the S-Video output with a unit equipped with an S-Video input (e.g. beamer etc.).
4.7 Serial Interface (RS 232)
The RS 232 interface serves to carry out pre-programming via a PC, and to update the operating software.
5 Initial installation
Once you have read the safety notes, and have connected the unit as described in Chapter 4, you may switch on the unit as described in Chapter 7. When the unit is switched on for
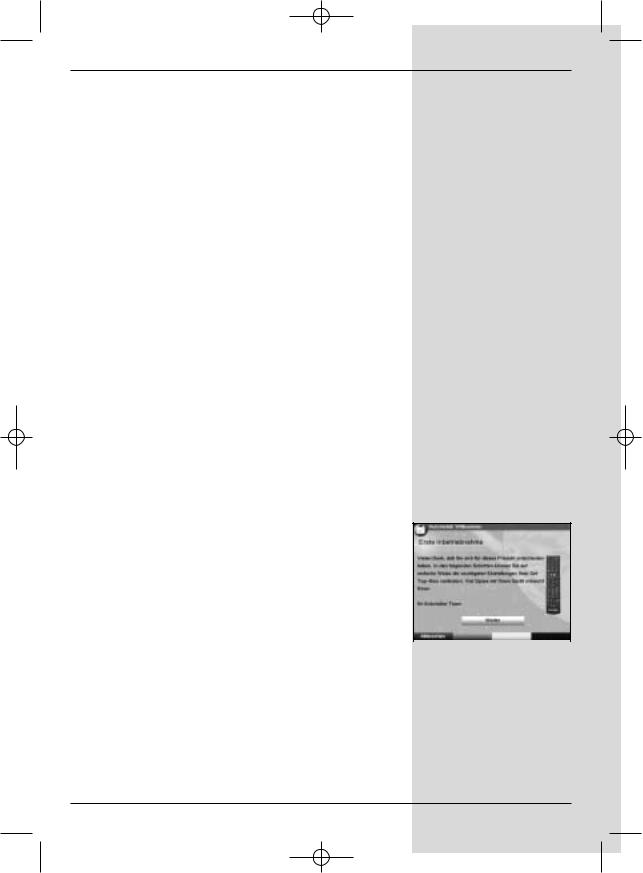
the first time, the start window of the installation assistant is displayed: AutoInstall. (Fig. 5-1) The installation assistant
will help you to make the most important settings on your digital receivers quickly and simply.
To make the adjustments in each step of the installation, the remote control keys required are indicated.
You can exit from the initial installation procedure at any time by pressing the red function key. Press the green function
key to return to the previous step of the installation. You can thus correct any mistakes made at any time.
If the initial installation is not carried out, or is aborted before completion, the unit will commence operation with a standard pre-programmed configuration.
The initial installation described here serves only as an example. The exact procedure of the intial installation will depend on the settings you choose to make.
Please follow closely the instructions given on the screen.
12
Bed_anl_.qxd 20.02.04 16:28 Seite 13
Operating language:
>Press OK to move to the selection window for the operating (menu) language (Fig. 5-2)
>Use the up/down arrow keys to select the desired operating language.
>Confirm by pressing OK.
Audio language
>Use the up/down arrow keys to select the preferred audio language. (Fig. 5-3)
When the installation assistant has been completed, the programmes in the Favourites list will be sorted accordingly.
>Confirm by pressing OK, to accept this selection into memory.
Country setting
>Use the up/down arrow keys to select the time zone corresponding to your location. (Fig. 5-4)
The automatic clock setting will be made in accordance with your selection.
>Confirm by pressing OK, to accept the setting into memory, and to move on to the antenna configuration.
Antenna configuration
This step of the installation procedure serves to adjust the setting of your digital receiver to the configuration of your antenna.
>If you wish to accept the standard antenna setting, use the up/down arrow keys to mark the entry Standard and confirm by pressing OK. (Fig. 5-5) In this case you can proceed to the Point “Software Updates”.
>If the configuration of your reception installation does
not correspond to the standard setting, mark the entry Manual and confirm by pressing OK.
DiSEqC
> |
If your reception installation is equipped with DiSEqC |
|
|
components, mark the field Activate and confirm by |
|
|
(Fig. 5-1) |
|
|
pressing OK |
|
(Fig. 5-6). (Additional information on DiSEqC can be found in Chapter10, Technical Terms.)
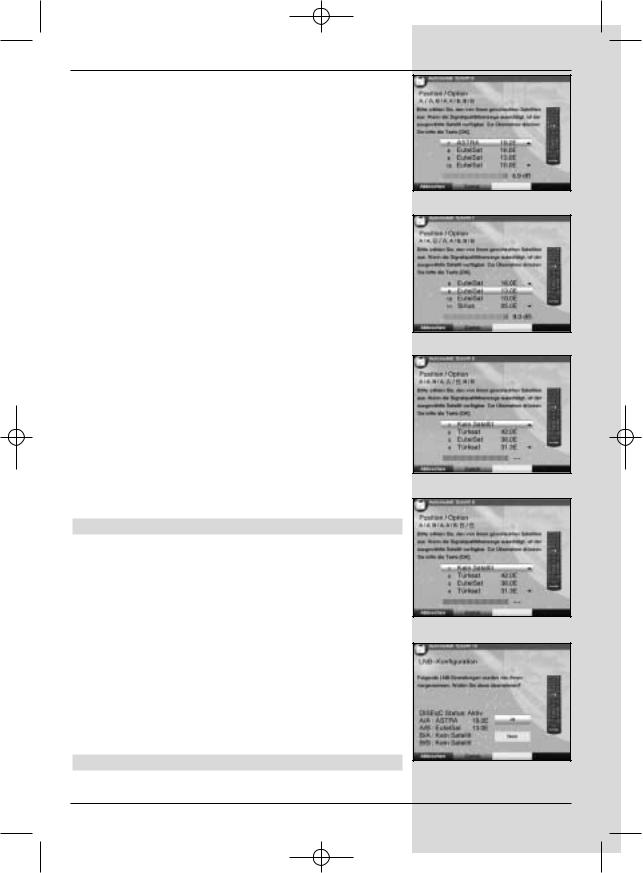
Position A/Option A
>Use the arrow up/down keys to mark the satellite
you wish to receive at the DiSEqC setting Position A/Option A, and confirm by pressing OK. (Fig. 5-7)
Position B/Option A
> Use the arrow up/down keys to mark the satellite
13

Bed_anl_.qxd 20.02.04 16:28 Seite 14
(Fig. 5-2)
(Fig. 5-3)
(Fig. 5-4)
(Fig. 5-5)
(Fig. 5-6)
you wish to receive at the DiSEqC setting Position B/Option A, and confirm by pressing OK. (Fig. 5-8)
Position A/Option B
>Use the arrow up/down keys to mark the satellite
you wish to receive at the DiSEqC setting Position A/Option B, and confirm by pressing OK. (Fig. 5-9)
Position B/Option B
>Use the arrow up/down keys to mark the satellite
you wish to receive at the DiSEqC setting Position B/Option B, and confirm by pressing OK. (Fig. 5-10)
As your next step, check again on the configuration of your antenna.
>If you wish to accept this setting, use the arrow up/down keys to mark the field Yes, and confirm by pressing OK. (Fig. 5-11)
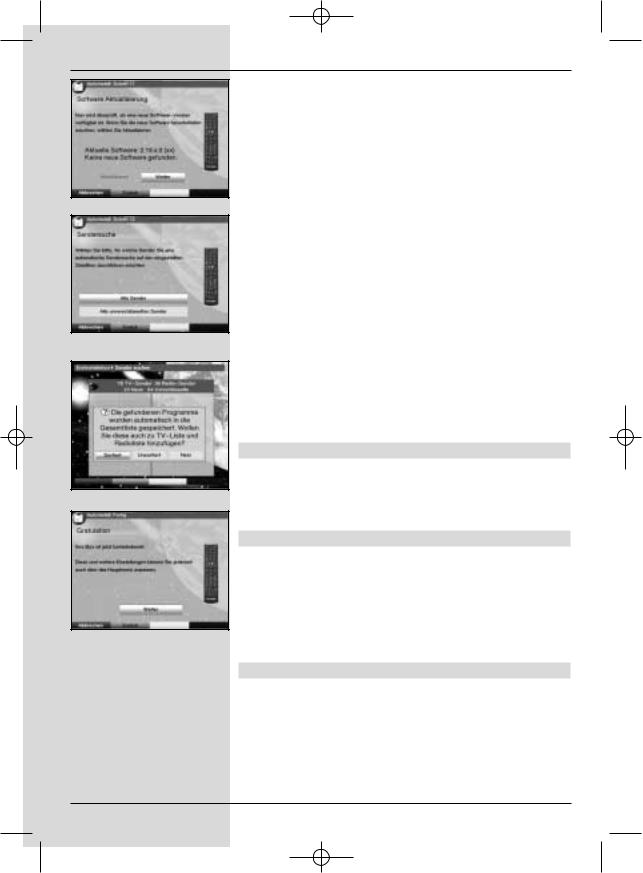
Updating software
When you have confirmed the antenna settings, the digital receiver will automatically check whether a more up-to-date version of the software for your unit is available via satellite. If a new version of the software is available, you can perform an automatic software update.
>Use the right/left arrow keys to select the field Update, and confirm by pressing OK. (Fig. 5-12) The new software for your unit will now be downloaded. This procedure may take several minutes.
Scanning for programmes
Once you have checked on the software version, and possibly downloaded an updated version, you can proceed to searching for programmes.
>Use the up/down arrow keys to mark the field All Channels, if you wish to scan for both encrypted and free-to-air programmes, or select All Free-to-air Channels if you wish to scan for only this type of programme. (Fig. 5-13)
>Confirm your selection by pressing OK, the unit will perform an automatic programme search. All the satellites selected during the antenna configuration provedure will be scanned for programmes. This procedure may take several minutes. Please note any messages displayed on screen.
When the scan is completed
When the scan has been completed, the number of transponders found, the number of programmes as well as the number of new programmes found will be displayed. In addition,
14
Bed_anl_.qxd 20.02.04 16:28 Seite 15
you will be prompted (Fig. 5-14) to decide whether you want to automatically include the programmes found in the TV or Radio lists. If you decide to include the programmes automa-
tically, you can then decide whether they should be included in the Favourites list in sorted or unsorted form.
If the programmes found are accepted in sorted form,these are sorted into the Favourites list in accordance with a preprogrammed system. This means that the order in which the programmes are included is primarily based on the audio
language, as selected in the installation step Audio language. If German has been selected as the audio
language, the sorting order can be further differentiated in terms of the country seleced in the installation step Country
(Germany, Austria or Switzerland).
If the new programmes are accepted in unsorted form, then the newly found programmes are simply added in unsorted order at the end of the Favourites list.
>Use the right/left arrow to select the type of sorting you prefer, and confirm by pressing OK.
Exiting from the installation assistant
>The installation assistant will display a final message (Fig. 5-15) Confirm this by pressing OK, to return to normal operation.
6 Settings
You have now connected your digital receiver, and commenced operating it. You can, if you wish, still optimize the settings of the digital receiver in accordance with your preferences.
6.1 Operating language
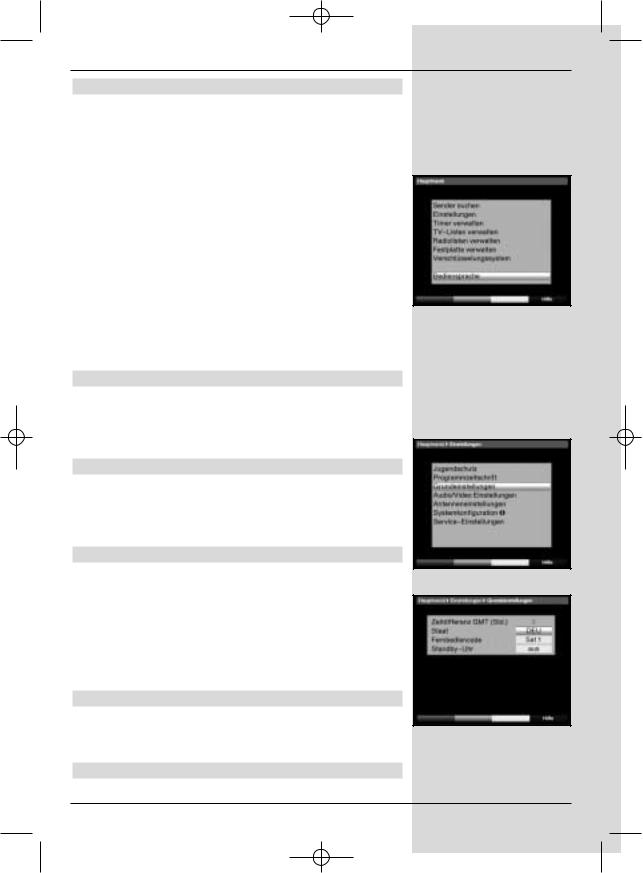
This menu item allows you to set the menu language in accordance with your preferences.
To change the operating language, proceed as follows:
>Press the Menu key to display the Main Menu.
(Fig. 6-1)
>Now use the up/down arrow keys to mark the menu line Operating language.
>Confirm by pressing OK.
The sub-menu Operating language will be displayed.
>Use the up/down arrow keys to mark the preferred language.
>Press OK to store this selection in memory.
>Press Back to return to the Main Menu.
6.2 Basic settings
To gain optimum enjoyment from your DVB receiver, you
(Fig. 5-7)
(Fig. 5-8)
(Fig. 5-9)
(Fig. 5-10)
(Fig. 5-11)
15
Bed_anl_.qxd 20.02.04 16:28 Seite 16
(Fig. 5-12)
(Fig. 5-13)
(Fig. 5-14)
(Fig. 5-15)
should still make some settings related to your individual preferences.
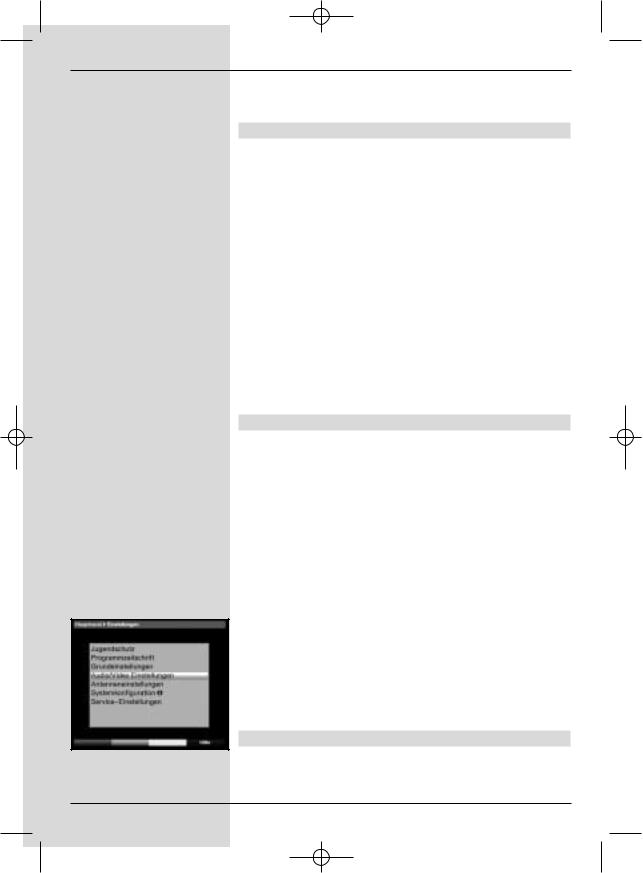
>Press the Menu key to call up the Main Menu.
>Use the up/down arrow keys to mark the entry
Settings.
>Confirm by pressing OK. The sub-menu Settings will be displayed. (Fig. 6-2)
>Now use the up/down arrow keys to mark the entry
Basic Settings.
>Confrim by pressing OK. The menu Basic Settings will be displayed. (Fig. 6-3)
>Use the up/down arrow keys to move the marker around within the menu, and to change any of the individual positions. When selecting a menu item, please note any additional messages displayed on screen. The following settings may be made:
6.2.1 Time difference GMT (hours)
Your unit is equipped with a clock. This is synchronized via satellite with Greenwich Mean Time.
If you have selected the entry None under the heading Country (Point 6.2.3), you can simply set the unit clock to the correct local time by means of the right/left arrow
keys. For Germany, this difference is +1 hour on standard time, and +2 hours during daylight savings time.
6.2.2 Country
This function provides for an automatic switch-over from standard to daylight savings time.
>Go to the entry Country and use the left/right arrow keys to select you country of residence.
6.2.3 Remote control code
In this line you must decide whether your receiver should be allocated the remote control option SAT1 or SAT2.
>To make the selection, press the SAT1 resp. SAT2 key and the OK key simultaneously.
Press the Back key to return to the menu Settings, or press Menu to return to normal operation. The settings will be automatically stored in memory.
6.2.4 Standby clock
In this line you must decide whether the clock time should be displayed when the unit is in standby mode.
>In this line, you can use the left/right arrow keys to set the standby clock mode to on or off einstellen.
>Press Back to return to the menu Settings, or press Menu to return to normal operation. The settings will be automatically stored in memory.
16
Bed_anl_.qxd 20.02.04 16:28 Seite 17
6.3 Audio/Video settings
To optimize your digital receiver in conjunction with your television set, you can make further settings in the menu Audio /Video settings.
>Press the Menu key to display the Main Menu.
>Use the up/down arrow keys to mark the line
Settings.
>Confirm by pressing OK. The sub-menu Settings will be displayed. (Fig. 6-4)
>Now use the up/down arrow settings to mark the line
Audio/Video settings .
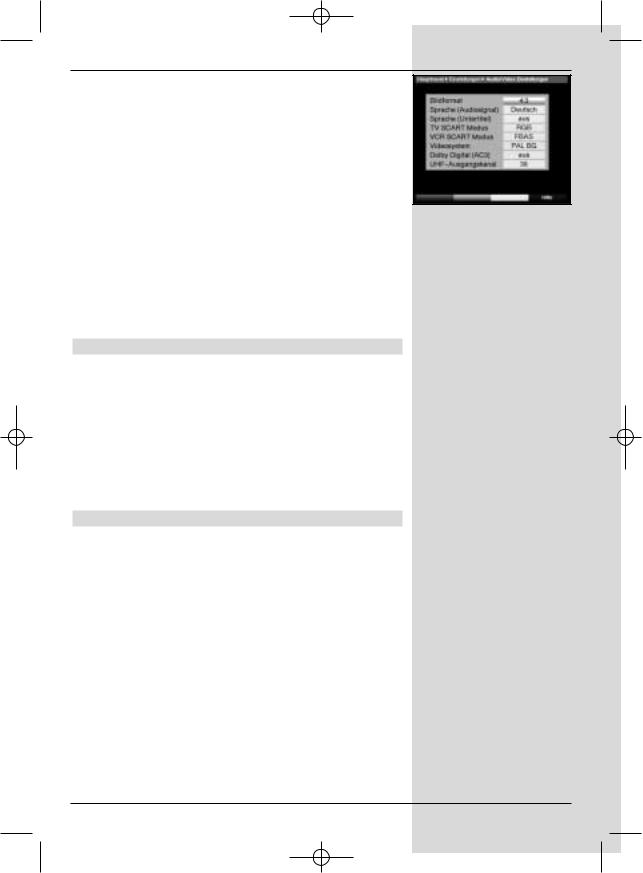
>Confirm by pressing OK. The menu Audio/Video settings will be displayed. (Fig. 6-5)
>Use the up/down arrow keys to move the marker around within the menu, in order to change the settings as indicated. Please also note the messages displayed on screen in some cases.
The following adjustments may be made:
6.3.1 Picture format TV set
>Use the left/right arrow keys to select the picture format appropriate for your TV set, 4:3 or 16:9. This function automatically adjusts the picture format for your television set.
6.3.2 Language (Audio signal)
>In this line, use the left/right arrow keys to select your preferred language. This function will automatically select the preferred language, where available, after a programme scan.
6.3.3 Language (Sub-titles)
The DVB receiver is equipped to display sub-titles on screen. These will be displayed automatically if the function Sub-titles has been activated, and if the sub-titles are being broadcast in the language selected.
If the function has not been activated, sub-titles can be activated manually. Sub-titles are indicated by the symbol  in the information box. Please also note Point 7.13 of the operating manual.
6.3.4 TV SCART mode
In this line, use the left/right arrow keys to select the appropriate mode for your TV set, either FBAS or RGB. The setting for standard sets is FBAS.
6.3.5 Video system
In this line you must set the appropriate television broadcast
(Fig. 6-1)
(Fig. 6-2)
(Fig. 6-3)
17
Bed_anl_.qxd 20.02.04 16:28 Seite 18
standard for your television set. Use the left/right arrow keys to select PAL BG, PAL I, PAL DK, SECAM BG or SECAM DK.
6.3.6 Dolby Digital (AC3)
A number of movie films are broadcast in the Dolby Digital
format. This will be indicated by the dolby symbol ( ) in the information window once you have saelected the programme.
If you have a Dolby Digital 5.1 channel amplifier, you can enjoy the appropriate films in 5.1 channel Dolby-Digital sound, where broadcast. The only pre-requisite is that the Audio Out Digital output of your DVB receiver (see Point 4.5.2) must be connected to the digital input of your Dolby Digital 5.1 channel amplifier.
Where a programme is being broadcast in Dolby Digital sound, the Dolby logo will appear in the information window when the programme is selected. If the function Dolby Digital (AC3) has been activated (on), therse broadcasts will automatically be presented in Dolby Digital format.
If the function has not been activated (off), Dolby Digital sound can also be selected manually. Please also note Point 7.5.1 of the operating manual.
6.3.7 UHF output channel
To set a suitable UHF channel, proceed as follows:
>On your television set, select a free (unallocated) UHF channel in the range of 21 to 69.
>Now use the left/right arrow keys to set the new output channel of your digital receiver. The digital receiver is now sending data on the UHF channel shown in the display. Should reception not be satisfactory on this channel, repeat the procedure until you find a satisfactory channel.
>When you have found an optimal UHF channel, please remember to store this in the memory of your television set.
>If your television set is equipped only with an automatic scan function, simply set any UHF channel on your digital receiver, then start the automatic scan of your television set. You may have to repeat this procedure until you find a suitable output channel, which you should then store in the memory of your television set.
>It may then be necessary to perform fine tuning on your television set.
6.4 Antenna settings
(Fig. 6-4)
When you have completed adjusting the settings of your digital receiver to your individual preferences, you can then, if you like, adjust the antenna settings of your digital receiver.
18
Bed_anl_.qxd 20.02.04 16:28 Seite 19
The satellites selected by means of the installation assistant will be displayed in the menu Antenna settings. If the
installation assistant was prematurely aborted, the satellite positions ASTRA and EUTELSAT are pre-programmed ex factory.
If you would also like to receive other satellites, or if you are using a different type of LNC, you can make the appropriate settings on your digital receiver as follows:
>Press Menu to call up the Main Menu. (Fig. 6-6)
> |
Use the up/down arrow keys to mark the item |
(Fig. 6-5) |
|
Settings. |
|
>Confirm by pressing OK.
The menu Settings will be displayed. (Fig. 6-7)
>Now use the up/down arrow keys to mark the item
Antenna settings.
>Confirm by pressing OK. The menu Antenna settings will be displayed. (Fig. 6-8)
The following settings may be made in this sub-menu:
6.4.1 Switching DiSEqC on and off
DiSEqC (Digital Satelliten Equipment Control) is a digital switching system used to control DiSEqC-compatible components via the antenna connection. If your external unit is equipped with DiSEqC components, you must activate the DiSEqC control function:
>In this line, use the OK key to switch DiSEqC on or off.
As only a single LNC can be controlled when the DiSEqC control function is switched off, the menu is limited to the configuration of a single LNC.
6.4.2 Setting the switching matrix
The menu lists the four switching criteria of the DiSEqC control function. Your unit has been pre-programmed at the factory to receive ASTRA at the switching position A/A and Eutelsat at the position B/A of a multi-switch. If the switching matrix of your reception installation be set up differently, or if it is set up to receive other satellites, you can adjust the settings of your digital receiver in accordance with the requirements of your reception installation as follows.
>Use the arrow keys to select the DiSEqC switch
position (1-4) to which you wish to allocate a satellite (e.g.. A/B 3 No Satellite), by marking this line.
>Confirm by pressing OK.
A table showing a number of different satellites will be displayed.
>Use the up/down arrow keys to mark the satellite
required.
Use the up/down arrow keys to move the marker up or down one line at a time. Use the left/right
19
Bed_anl_.qxd 20.02.04 16:28 Seite 20
arrow keys to move forward or back one page at a time.
If the satellite you are looking for is not shown in the
list, please select one of the reserve slots, marked
User 1 to User 14.
>Confirm by pressing OK. The selected satellite will
now be inserted at the previously selected position in the menu Antenna settings.
Continue to work in the menu Antenna settings in this manner until the settings in this menu correspond fully with
those of your reception installation. Select the option No Satellite for any switching criteria not required.
6.4.3 Additional settings/LNC characteristics
When you have completed adjsuting the switching matrix of your DVB receiver to match the reception installation, you should check the additional settings for your reception installation, and adjust them where necessary.
>Use the left/right arrow keys to move the marker to the column Configuration.
>Now use the up/down arrow keys in the line in
which you want to check or adjust the settings, and press Next.
>Confirm by pressing OK.
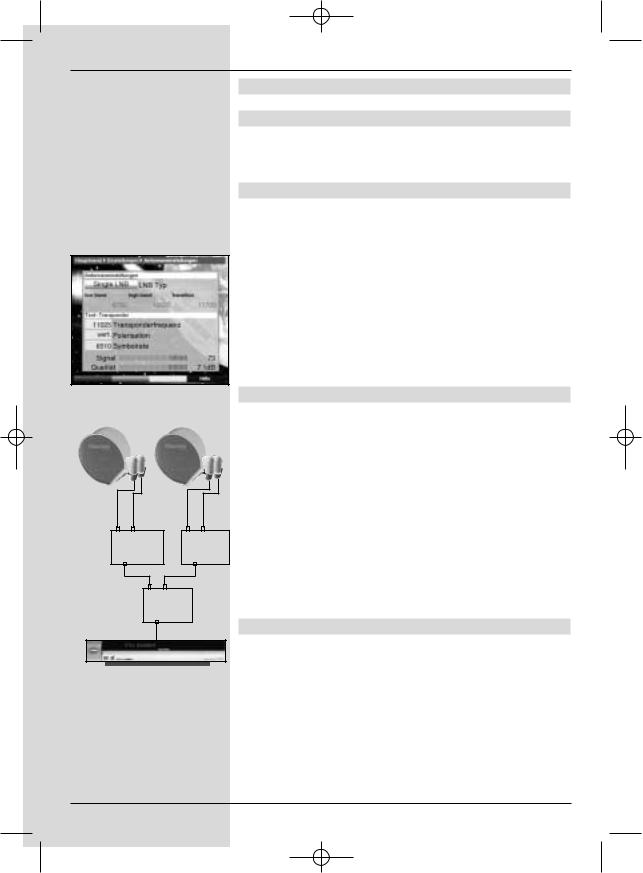
A sub-menu will be displayed in which you can adjust LNC settings, and set up a test transpon der. (Fig. 6-9)
The following adjustments may be made:
LNC type
>In this line use the left/right arrow keys to enter the
type of LNC you are using. You can choose from
Single LNC, Quatro LNC, DisiCon 1 LNC, DisiCon 2 LNC, DisiCon 4 LNC, C-Band LNC and a User LNC for manual entry of LNC data.
>Press OK to accept the setting into memory.
Test Transponder
The following points of this menu need only be entered if you wish to check the satellite signal of a particular satellite.
Transponder frequency
In this line, use the numeric keys to enter a frequency on which digital programmes are broadcast.
Polarisation
Use the up/down arrow keys to select the appropriate
polarisation plane (horizontal or vertical).
Symbol rate
The symbol rate indicates the volume of data transmitted per
second. This could be, for instance, 27500 (27500 symbols per second). Use the numeric keys to enter the appropriate
symbol rate.
20
Bed_anl_.qxd 20.02.04 16:28 Seite 21
User LNC
If you have entered User LNC as the DiSEqC type, you can make additional settings:
LOF low band
LOF (Local oscillator frequency) is the frequency at which the LNC converts the frequency received into the so-called 1. interim frequency, which can then be received by the digital receiver. So-called Universal LNCs employ 2 LOFs to cover the entire reception range from 10,7 to 11,8 GHz (low-band) and 11,7 to 12,75 GHz (high-band).
>In this line, use the numeric keys to enter the LOF of the low band of your LNC.
LOF high band
>In this line, use the numeric keys to enter the LOF of the high band of your LNC.
Transition LOF low/high
>In this line, use the numeric keys to enter the frequency at which your LNC switches from the low band to the high band.
>Press OK to accept the settings into memory.
Signal/Quality
If you have entered the parameters of the test transponder correctly, you will see in these lines indicators showing signal strength and signal quality.
6.4.4 Rotary antenna
When operating the digital receiver in conjunction with a
rotary antenna equipped with a DiSEqC compatible motor (Level 1.2), activate the DiSEqC control (Point 6.4.1) by setting it to on and please note Point 9 of the operating
manual.
7 Operation
7.1 Switching on and off
>Switch the digital receiver on by pressing the On/Standby key either on the unit or on the remote control.
>Press the same key again, either on the unit or on the remote control, to switch the receiver off.
>The receiver is now in standby mode. If this feature has been activated (as described in Point 6.2.4) the current time will be shown in the display.
If the current time is not shown, this must still be downloaded to the receiver. To do this, switch the unit on and switch to reception of a major channel, such as ZDF, that broadcasts a time signal, for about 30 seconds, to acquire the current time automatically.
(Fig. 6-6)
(Fig. 6-7)
(Fig. 6-8)
21
Bed_anl_.qxd 20.02.04 16:28 Seite 22
(Fig. 6-9)
Example:
B |
A |
B |
Position |
Position |
|
Output |
Output |
|
A |
B |
|
Option |
|
|
Output |
|
|
7.2 Programme selection
7.2.1 Using the programme up/down keys
>Use the programme up/down keys either on the unit or on the remote control to move up or down by one programme slot at a time.
7.2.2 Using the numeric keys
>Use the numeric keys to enter the desired program-
|
me number. |
|
For example: |
|
|
1 |
|
for programme slot 1 |
1, |
then 4 |
for programme slot 14 |
2, |
then 3, |
then 4 for programme slot 234 |
When entering programme numbers of more than one digit, you have approx. 3 seconds time after pressing a key to complete the entry.
If you wish to enter a number consisting of only one or two digits, you can speed up the switching procedure by holding down the key a little longer on the last digit.
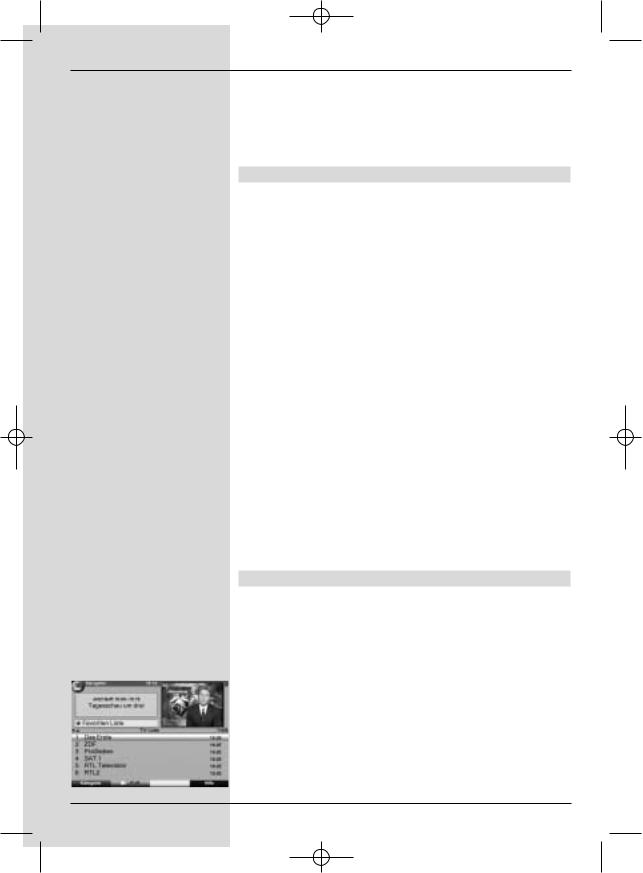
7.2.3 Using the Navigator (Programme list)
>Press OK.
The programme list navigator will be displayed. In TV mode, only TV programmes will be shown, while only radio programmes will be shown while in Radio mode. The currently selected programme will be highlighted.
(Fig. 7-1)
>Now, use the up/down arrow keys to mark the selected programme.
>Press OK to switch reception to the desired programme.
>Use the up/down arrow keys to move around the list one programme slot at a time.
>Use the left/right arrow keys to move around the list one page at a time.
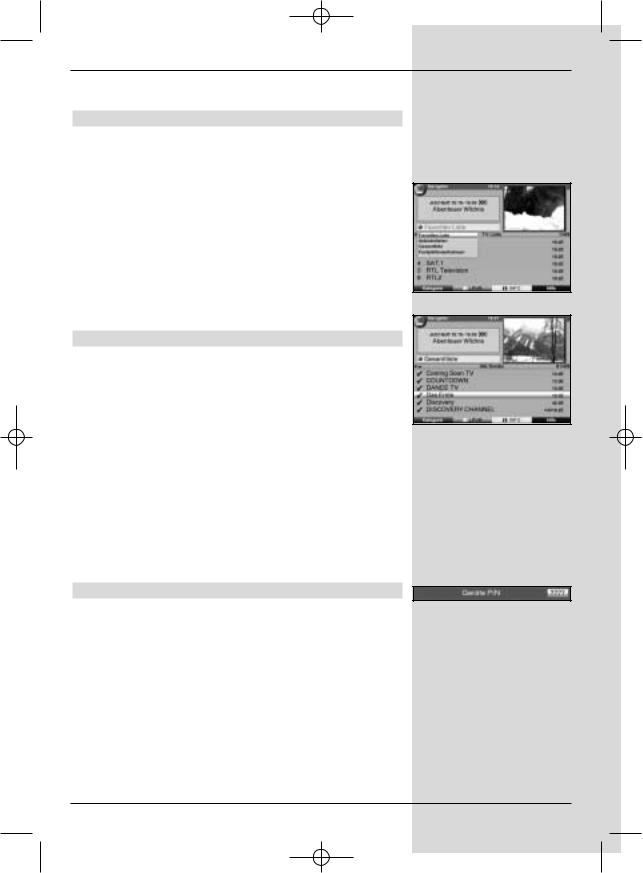
7.2.3.1 Selecting a list
To facilitate the finding of programmes, your receiver is equip-
ped with several programme lists. You have the choice of selecting your Favourites list (see Point 8.1), or you can use the alphabetically sorted Total list, or you can view a list sorted by Providers.
>Press OK. The active programme list will be displayed.
>Now use the red function key Category to open a
window displaying the programme list types
(Favourites list, Providers list and Total list). The active type of programme list will be highlighted.
22
Bed_anl_.qxd 20.02.04 16:28 Seite 23
(Fig. 7-2)
In addition, the entry Hard drive recordings will be shown, allowing you to access the hard drive navigator (Point 7.15.2).
>Use the up/down arrow keys to select a programme list type, e.g. Total list.
>Confirm by pressing OK.
The alphabetically sorted total list will be displayed, containing all programmes. (Fig. 7-3)
>Use the up/down arrow keys to select the programme you wish to view or listen to.
>Confirm by pressing OK.
or
>Press the green function key PVR to go directly to the hard drive navigator.
7.2.4 Accessing blocked programmes
If a programme is selected that is blocked by the parental control function, the message Unit PIN will be displayed on screen. (Fig. 7-4)
>Use the numeric keys to enter your PIN code. The
selected programme can now be viewed.
or
> Switch to a programme whose access is not blocked. If you have selected the option on under Point 8.3.2, you will always be prompted to enter the PIN code when switching to a blocked programme. However, in order to make matters more convenient for you, you need enter the PIN code only once in each operating phase.
7.2.5 Information box
Each time you switch programmes, an information box (Fig. 7-5) will be displayed briefly, showing the programme number and name of the selected programme. In addition, some programme characteristics will be indicated, for example  for Video text,
  for a 16/9 broadcast,
  for sub-titles,
for encrypted programmes. Also, where provided, the EPG category and the FSK age restriction in Germany (Freiwillige Selbstkontrolle der Filmwirtschaft) will be indicated.
7.3 Reception of encrypted programmes
Your receiver is equipped with a “Common Interface”. This enables you to receive encrypted programmes. To do this, you must first insert a CI module together with a valid smart card into the slot provided:
>Insert the CI module into the slot.
>Insert the smart card into the card slot of the CI module. Note that the gold-coloured chip of the smart card should be on the upper surface of the card, and poin-
23
Bed_anl_.qxd 20.02.04 16:28 Seite 24
ting in the direction of insertion.
>If an encrypted programme is now selected, your digital receiver will automatically check the card slot, and will display the programme in unencrypted form, provided a corresponding CI module and a valid smart card for this programme have been inserted.
Special functions
Some programme slots, e.g. Premiere (can only be viewed with a valid subscription!) offer certain special functions. For instance, multifeed channels allow you to view sports events transmitted from various locations (e.g. National League soccer), or you can select various sound channels (stadium/commentary), or you can select different camera perspectives at a particular event (e.g. Formula 1 racing).
Also, some channels allow you to select a starting time for particular films you may wish to view.
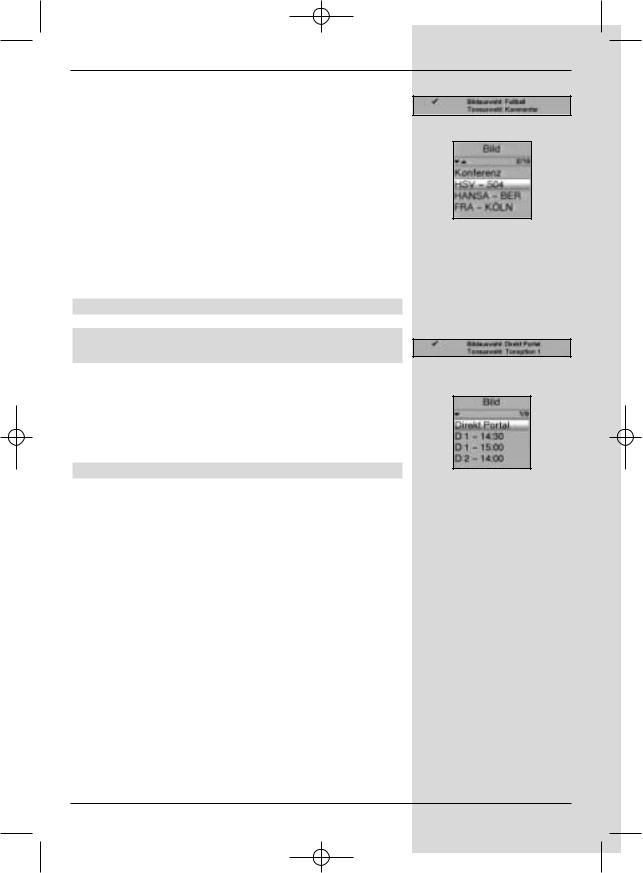
7.3.1 Multifeed options
Some programmes provide a multifeed option . This function allows you to select from among several camera viewpoints in the case of sports coverage (e.g. Formula 1), or of choosing one of several sports locations (e.g. National League soccer). Where a programme provides multifeed options, this is indicated on screen (Fig. 7-6).
>To select one of the options available, press the key
Option.
A window will be displayed, indicating the options available. (Fig. 7-7)
>Use the up/down arrow keys to select the preferred option.
>Confirm by pressing OK.
Your digital receiver will now display the selected option.
7.3.2 Selecting a starting time
Some channels provide the option of viewing movies at different starting times. These movies can thus be viewed around the clock at different starting times, according to your preference.
Where a channel provides a choice of starting times, this will be indicated on screen (Fig. 7-8).
|
> |
To select one of the starting times available, press the |
|
|
|
key Option. |
|
|
|
A window will be displayed, indicating the starting |
|
|
|
times available (Fig. 7-9) |
|
|
> |
Use the up/down arrow keys to select the preferred |
|
|
|
starting time. |
|
|
> |
Confirm by pressing OK. |
|
|
|
Provided the movie has been authorised for the selec- |
|
(Fig. 7-1) |
|||
|
|||
24
Bed_anl_.qxd 20.02.04 16:28 Seite 25
ted starting time, you can enjoy the programme at the desired time.
7.4 Volume control
You have the option of adjusting the volume of your digital receiver. This makes using your receiver even more convenient, since all important functions are combined on the receiver remote control, and you will only rarely need to use the remote control of your television set. When you switch on the digital receiver, the volume will be set to the level last selected.
>Adjust the volume of your receiver by using the keys Volume + to increase the volume and Volume - to reduce the volume.
>Press the key Sound on/off to switch off the sound (mute), press the same key again to switch the sound on again.
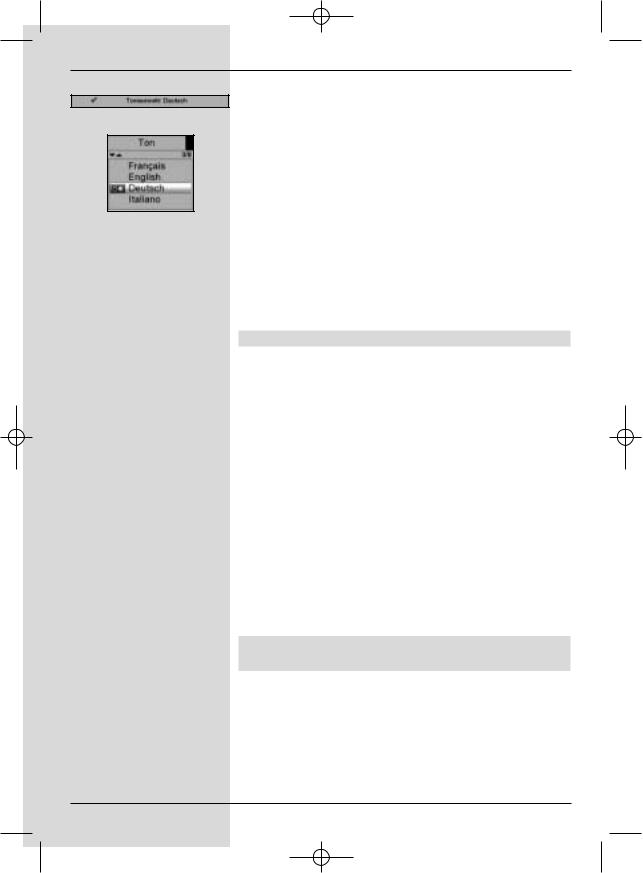
7.5 Selecting another language
Where a programme is broadcast in several languages, or with several sound channels, this will be indicated on screen (Fig. 7-10). You can then proceed as follows to select another language or another sound channel:
>Press the key Language select. A list of the languages currently being broadcast will be displayed on screen (Fig. 7-11).
>Use the up/down arrow keys to select the prefer-
red language, and confirm by pressing OK.
You can now listen to the programme in the desired language. Your digital receiver is also equipped to receive mono broadcasts.
>Use the left/right arrow keys to select from Mono channel 1 (  ), Mono channel 2 (
  ) and Stereo
(  ).
).
7.5.1 Dolby Digital (AC3 mode)
Where a programme is broadcast in Dolby Digital sound, this will be indicated by the Dolby logo in the information box when you switch to the appropriate programme. If the function Dolby Digital (AC3) has been activated in accordance with Point 6.3.6, the programme will automatically be pres-
ented in this format.
If you have not activated the function Dolby Digital (AC3), you can set the unit to AC3 mode manually as follows:
>Press the Language Select key. Where available,
a list will now appear on screen showing the currently available languages as well as Dolby Digital (AC 3).
>Use the up/down arrow keys to select the line
(Fig. 7-2)
(Fig. 7-3)
(Fig. 7-4)
25

Bed_anl_.qxd 20.02.04 16:28 Seite 26
Dolby Digital.
>Confirm by pressing OK.
You can now enjoy the programme in Dolby Digital sound. If you would like your receiver to present programmes in Dolby (Fig. 7-5) Digital automatically, set the unit to automatic AC3 reproduc-
tion as described in Point 6.3.6.
7.6 TV/Radio switching
The pre-programming includes radio as well as TV programmes.
>Use the TV/Radio key to switch the digital receiver to Radio mode. The receiver will switch to the radio programme last selected.
>Press the TV/Radio key again to revert to the TV programme last selected.
7.7 Revert to last programme selected
>Press the Back key on the remote control to view the last programme viewed previously.
>Press the key again to revert to the programme selected b efore that, i.e. originally selected.
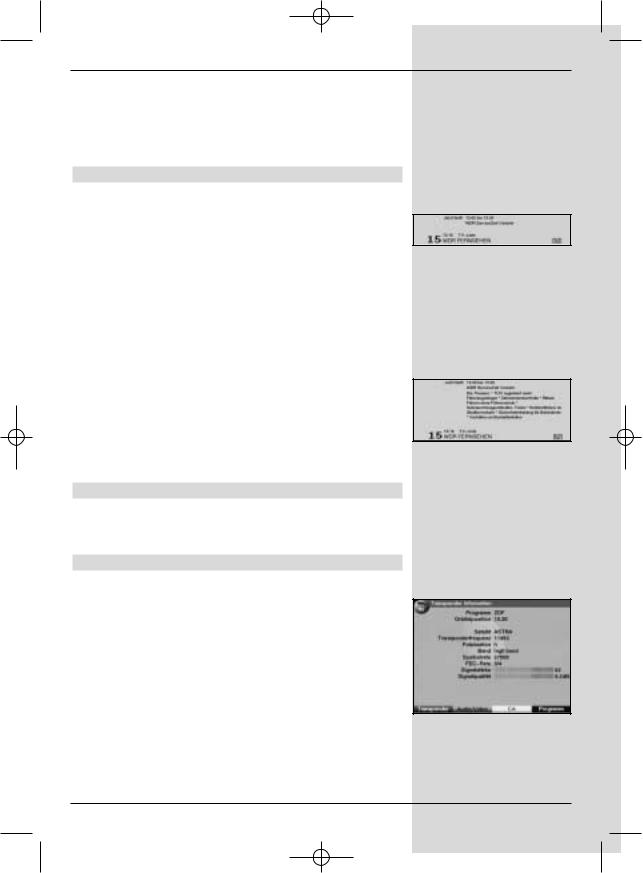
7.8 Display time and programme information
This function allows you to view programme information related to the programme currently being viewed.
>Press the Info key to display information related to
the current programme (Fig. 7-12).
The lower half of the screen will now show the current time, the name of the channel selected, the name of the current programme including the starting and ending time, where provided by the programme provider.
7.9 Additional programme information
Where broadcast, the function Programme Information allows you to receive additional information related to the programme selected.
>Press the Info key twice to open an additional information window (Fig. 7-13). More detailed information related to the current programme will be displayed.
>You can scroll through lengthy texts by using the left/right arrow keys to move the text one line at a time.
>Where provided, pressing the Info key again will display information related to the following programme.
>Press the Info key again to close the additional window.
7.10 Transponder information
>Press OK to call up the navigator.
26
Bed_anl_.qxd 20.02.04 16:28 Seite 27
>Use the arrow keys to mark the programme for which you wish to view the data.
>Press the Option key to display the data of the transponder selected (Fig. 7-14).
>Use the coloured function keys to also display Audio/Video information, Programme information, and, where appropriate, information on the encryption system used (CA).
>Press Menu to exit from this display.
7.11 Freeze frame
>Press the Freeze frame key to freeze the current television picture.
>Press the same key again to revert to normal operation.
7.12 Video text
7.12.1 Using the video text decoder of your televi-
sion set
Where broadcast, the video text is transmitted to your television set. To operate video text functions, use the remote control of your television set. If you experience problems on your television set, e.g. an overlay of video text over the picture
content, you should change the setting of your digital receiver to FBAS mode (Point 6.3.4).
7.12.2 Using the internal video text decoder
Alternatively, you may use the integrated TOP video text decoder to display the information. The TOP video text system groups all text pages thematically in groups and blocks, making use of the function more easy and convenient.
>Switch to the programme on which you wish to view video text information.
>Display the video text by pressing the Videotext key
(Fig. 7-15).
>Use the numeric keys to enter the desired video text page. Your selection will be displayed in the upper lefthand corner of the screen. When you have entered the desired video text page number, your receiver will search for this page.
As not all video text pages can be transmitted simultaneously, it may take a few seconds for the receiver to find the page and display it on the screen.
All video text providers use page 100 to show their index of contents.
>Use the red and green function keys respectively to page forward or back one page at a time.
(Fig. 7-6)
(Fig. 7-7)
(Fig. 7-8)
(Fig. 7-9)
Bed_anl_.qxd 20.02.04 16:28 Seite 28
(Fig. 7-10)
(Fig. 7-11)
>Press the yellow function key to display the video text group indicated in the yellow field.
>Press the blue function key to display the video text
group indicated in the blue field.
Mixed mode
>Press the Videotext key again to switch to mixed mode (simultaneous display of video text information and TV picture).
>Press this key again to revert to normal operation.
Stop mode
>Press the Freeze frame key, and the message “Stop” will appear in the upper left-hand corner of the video text window. This stops the automatic paging
function of the video text sub-pages. Press ther Freeze frame key again to remove the stop function.
>Press Back to revert to normal operation.
7.13 Sub-titles
Where sub-titles are broadcast, this will be indicated by the
symbol  in the information window. If you have activated the function Sub-titles (in accordance with Point 6.3), and if
they are being broadcast in the language selected, the subtitles will be displayed automatically.
If sub-titles are only being broadcast in other languages, or if they are being broadcast only via video text, you can activate the function manually as follows.
>Press the Option key (this may require repeated pressing), until the heading Sub-titles shows a table with the sub-title languages broadcast, and/or the video text pages carrying sub-titles.
>Use the up/down arrow keys to mark the desired language/video text page.
>Confirm by pressing OK. The sub-titles will now be
displayed.
Please note that these functions are only available when subtitles are actually being broadcast. This setting is not stored in memory when programmes are switched.
7.14Electronic Programme Guide SFI (SiehFern Info)
Your digital receiver is equipped with an electronic programme guide. This allows you to access the programme information of one or more programmes and view them on screen. You can very quickly obtain an overview of the programmes currently available, the programmes of the day, or the programmes of the following days.
The SFI functions allow you to:
-display information on porogramme contents on
28
Bed_anl_.qxd 20.02.04 16:28 Seite 29
screen
-mark selected programmes which will be switched on automatically at the starting time
-programme timers
-search for programmes according to type (genre), and to select them for viewing.
7.14.1 Downloading SFI data
The programme information is updated at the time set on your receiver in accordance with Point 8.2 (SFI channel. This can only take place when your unit is in standby mode.
The downloading procedure is indicated by the message Load SFI in the display. If your receiver is in operating mode at this time, the download function will not be carried out.
You may also start the download procedure manually. First switch off the receiver (display shows “Standby), then press
the SFI key. During the download procedure, the display will show Load SFI, followed by an indicator of the SFI data
downloaded so far (e.g. 38%).
The duration of the download procedure depends on the number of programmes available. Programmes can be shown for up to seven days in advance. However, because of the volume of data, this period is reduced the more porgrammes are included in the electronic programme guide.
You can decide for yourself, which programmes should be included in the electronic programme guide. These can be included as described under Point 8.1.5.
7.14.2 Interrupting download procedure
You can interrupt the download procedure by switching on the digital receiver (On/Standby key). The data from the
previous SFI update will continue to be available.
7.14.3 Accessing electronic programme guide
>Switch on both the digital receiver and your television set.
>Press the SFI key on the remote control of the digital receiver.
The electronic programme guide will be displayed on screen (Fig. 7-16). The display will show either the current programmes of the channels selected by you,
or those included in the ex factory pre-programming (see also Point 8.2). You can now use the SFI function to obtain information on the contents of various programmes.
You can also use the SFI functions to select a programme for viewing, to mark a programme for later viewing, or to include it in timer programming.
(Fig. 7-12)
(Fig. 7-13)
(Fig. 7-14)
29

Bed_anl_.qxd 20.02.04 16:28 Seite 30
7.14.4 Now (table with current programme contents)
Initially, the SFI table “Now” (Fig. 7-16) will be displayed, showing programmes currently being broadcast. The yellow bar to the right of the programme name indicates the elapsed broadcast time of the current programme. The programme currently selected is highlighted.
>Use the up/down arrow keys to move the marker one line at a time. Use the left/right arrow keys to move the marker one page at a time (paging).
>You can now utilise the SFI functions (Point 7.14.3).
>Press the yellow function key to move to the SFI table “Next” (See Point 7.14.5)
or
>press the TV/Radio key to revert to normal operation.
7.14.5 Next
>Use the yellow function key to display the table "Next" (following programmes) (Fig. 7-17).
>All the SFI functions are available (Point 7.14.3).
>Press the yellow function key to move to the SFI
table “More” (Point 7.14.6)
or
>Press either the green function key or the Back key
to revert to the previous SFI table “Now”
|
|
|
|
|
or |
Press the TV/Radio key to revert to normal opera- |
|
|
|
|
|
|
> |
||
|
|
|
|
|
|
|
tion. |
|
|
|
|
|
|
|
|
|
|
|
|
|
7.14.6 More |
||
(Fig. 7-15) |
|
||||||
|
|
|
|
|
> |
By pressing the yellow function key again while the |
|
|
|
|
|
|
|||
|
|
|
|
|
|
|
SFI table “Next” is displayed you can move to the SFI |
|
|
|
|
|
|
|
table “More”. (Fig. 7-18) |
|
|
|
|
|
|
|
This table displays an additional time window in the |
|
|
|
|
|
|
|
title line. This time window shows the current time of |
|
|
|
|
|
|
|
the SFI table displayed. |
|
|
|
|
|
> |
Press the yellow function key to page further through |
|
|
|
|
|
|
|
|
the programme in the time steps indicated in the yel- |
|
|
|
|
|
|
|
low colour bar. |
|
|
|
|
|
> |
Keep the yellow function key pressed down to conti- |
|
|
|
|
|
|
|
|
nue paging. A clock will be displayed to facilitate the |
|
|
|
|
|
|
|
search. |
|
|
|
|
|
|
|
Press the green function key to page backwards |
|
|
|
|
|
|
|
through the tables. |
|
|
|
|
|
|
|
The individual days of the week are shown along the |
|
|
|
|
|
|
|
bottom of the screen. If information relating to the follo- |
|
|
|
|
|
|
|
wing days is available, the appropriate fields will be |
|
|
|
|
|
|
|
highlighted. |
|
|
|
|
|
> |
To display a preview for a particular day, press the |
|
|
|
|
|
|
|
|
appropriate numeric key. |
30
 Loading...