


DIGIT S1
CONAX Embedded
DIGIT S2
CONAX Embedded
CryptoWorks Embedded
DigitSim S1
CONAX Embedded
DigitSim S2
CONAX Embedded
CryptoWorks Embedded
DIGITAL Satellite receiver
Operating Manual
With integrated Encription System decoding system. For the reception of Encription System
encoded as well as free satellite programmes.
With integrated Encription System decoding system and PCMCIA interface for accommodating a CA module.
For the reception of free and encoded (e.g. CONAX, VIACCESS, IRDETO, SECA etc.) satellite programmes.
With motor controller and software update via satellite.
EN
1)
DiSEqC 1.2
1) only Digit S1/S2

1 Table of contents
1 |
Table of contents . . . . . . . . . . . . . . . . . . . . 2 |
|||||
2 |
Illustrations . . . . . . . . . . . . . . . . . . . . . . .5 |
|||||
3 |
Please read first . . . . . . . . . . . . . . . . . . . . .7 |
|||||
4 |
Connecting to a DVB receiver . . . . . . |
. . . . . . . . . 9 |
||||
4.1 |
External unit . . . . . . . . . . . . . . . . . . . . . . . . . . . . 10 |
|||||
4.2 |
Connecting to a TV set . . . . . . . . . . . . . |
. . . . . |
. . . . . 10 |
|||
4.3 |
Video cassette recorder (VCR) 1) . . . . . . . . . |
. . . . . . . . . . 10 |
||||
4.4 |
HiFi amplifier 1) . . . . . . . . . . . . . . . . . . . . . . . . . . 10 |
|||||
4.4.1 |
Analogue 1) . . . . . . . . . . . . . . . . . |
. . . . . |
. . . . . |
. 10 |
||
4.4.2 |
Digital 1) . . . . . . . . . . . . . . . . . . . |
. . . . . |
. . . . . 10 |
|||
4.5 |
Serial interface (RS 232) |
1) . . . . . . . . . . . |
. . . . . . . . . . . 10 |
|||
4.6 |
Mains connection . . . . . . . . . . . . . . . . . . . . . . . . . . 11 |
|||||
5 |
Initial installation . . . . . . . . . . . . . . . . . . . .11 |
|||||
6 |
Settings . . . . . . . . . . . . . . . . . . . . . . . .14 |
|||||
6.1 |
Operating language . . . . . . . . . . . . . . . . . . . . . . . . . 14 |
|||||
6.2 |
Basic settings . . . . . . . . . . . . . . . . . |
. . . . . . . . . . 14 |
||||
6.2.1 |
Time difference GMT (h) . . . . . . . . . . . . . . . . . . . . . . . 14 |
|||||
6.2.2 |
Country . . . . . . . . . . . . . . . . . . . . . . . . . . . . . 14 |
|||||
6.2.3 |
Remote control code . . . . . . . . . . . . . . . . . . . . . . . . 15 |
|||||
6.2.4 |
Standby clock 1) . . . . . . . . . . . . . . . |
. . . . . . . . . . . 15 |
||||
6.2.5 |
Exit basic settings . . . . . . . . . . . . . . . . . . . . . . . . . 15 |
|||||
6.3 |
Audio/Video settings . . . . . . . . . . . . . . . . . . . . . . . . 15 |
|||||
6.3.1 |
Picture size . . . . . . . . . . . . . . . . . . . . . . . . . . . . 16 |
|||||
6.3.2 |
Language (Audio signal) . . . . . . . . . . . . . . . . . . . . . . . 16 |
|||||
6.3.3 |
Language (Subtitles) . . . . . . . . . . . . . . |
. . . . . |
. . . . . 16 |
|||
6.3.4 |
TV SCART mode . . . . . . . . . . . . . . . |
. . . . . . . . . . . 16 |
||||
6.3.5 |
VCR SCART mode |
1) . |
. . . . . . . . . . . . . . . . . . . . . . . 16 |
|||
6.3.6 |
Dolby Digital (AC3) |
1) . . . . . . . . . . . . . |
. . . . . . . . . . . 16 |
|||
6.3.7 |
Exit Audio/Video settings . . . . . . . . . . . . . . . . . . . . . . . 17 |
|||||
6.4 |
Antenna settings . . . . . . . . . . . . . . . |
. . . . . |
. . . . . |
. 17 |
||
6.4.1Multytenne . . . . . . . . . . . . . . . . . . . . . . . . . . . . 17
6.4.2Turning the DiSEqC on/off . . . . . . . . . . . . . . . . . . . . . . 18
6.4.3 Setting the array . . . . . . . . . . . . . . . . . . . . . . . . . . 18
6.4.4Further settings/LNB characteristics . . . . . . . . . . . . . . . . . . 18
6.4.5 |
Rotating Unit . . . . . . . . . . . . . . . . . . |
. . . . . |
. . |
. |
. |
20 |
6.4.6 |
Exiting the antenna settings . . . . . . . . . . . . |
. . . . . |
. . |
. |
. |
20 |
7 Operation . . . . . . . . . . . . . . . . . . . . . . . 20
7.1Turning on and off . . . . . . . . . . . . . . . . . . . . . . . . . 20
7.2Programme selection . . . . . . . . . . . . . . . . . . . . . . . . 20
7.2.1By means of the programme up/down keys . . . . . . . . . . . . . . . 20
7.2.2By means of the numeric keyboard . . . . . . . . . . . . . . . . . . . 20
7.2.3By means of the navigator (Programme list) . . . . . . . . . . . . . . . 21
7.2.3.1 Select list . . . . . . . . . . . . . . . . . . . . . . . . . . . . . 21
7.2.4Calling locked programmes . . . . . . . . . . . . . . . . . . . . . . 21
7.2.5 Infobox . . . . . . . . . . . . . . . . . . . . . . . . . . . . . . 21
7.3Reception of encoded programmes . . . . . . . . . . . . . . . . . . 22
7.3.1Special functions . . . . . . . . . . . . . . . . . . . . . . . . . . 22
7.3.1.1Multifeed options . . . . . . . . . . . . . . . . . . . . . . . . . . 22
7.3.1.2Starting time selection/Picture selection . . . . . . . . . . . . . . . . . 22
7.3.2 Encription System pin code . . . . . . . . . . . . . . . . . . . . . . 23
1) only Digit S1/S2

7.4 |
Volume adjustment . . . . . . . . . . . . . . . . . . . |
. . . . . |
. 23 |
7.5 |
Switching TV/Radio 1) . . . . . . . . . . . . . . . . . . |
. . . . . |
. 23 |
7.6Selecting a different language (TV operation) or station (Radio operation) . . . 23
7.6.1 |
Dolby Digital (AC3 operation) 1) . . . . . . . . . . . . . . . . . |
. |
. |
. 24 |
EN |
|
7.7 |
Return to last set programme . . . . . . . . . . . . . . . . . . |
. |
. |
. 24 |
||
|
7.8Display clock and programme information . . . . . . . . . . . . . . . . 24
7.9Further programme information . . . . . . . . . . . . . . . . . . . . 24
7.10 |
Transponder information . . . . . . . . . . . . . . . . . . . . . . |
. 24 |
||||||||||
7.11 |
Freeze image . |
. . . |
. . . . . . . |
. . . . |
. |
. . . |
. |
. . . . |
. . |
|
. |
25 |
7.12 |
Sleep timer . . |
. . . |
. . . . . . . |
. . . . |
. |
. . . |
. |
. . . . |
. . |
|
. |
25 |
7.13 |
Video text . . |
. . . |
. . . . . . . |
. . . . |
. |
. . . |
. |
. . . . |
. . |
. |
|
. 25 |
7.13.1Using the video text decoder of your TV set . . . . . . . . . . . . . . . 25
7.13.2Using the internal video text decoder 1) . . . . . . . . . . . . . . . . . 25
7.14Subtitles . . . . . . . . . . . . . . . . . . . . . . . . . . . . . 26
7.15Electronic programme guide SFI (SiehFern Info) . . . . . . . . . . . . . 26
7.15.1Importing the SFI data . . . . . . . . . . . . . . . . . . . . . . . . 26
7.15.2Interrupting the import procedure . . . . . . . . . . . . . . . . . . . 26
7.15.3Calling the electronic programme guide . . . . . . . . . . . . . . . . . 27
7.15.4Now (Table with current programme contents) . . . . . . . . . . . . . . 27
7.15.5 Later . . . . . . . . . . . . . . . . . . . . . . . . . . . . . . . 27 7.15.6 More . . . . . . . . . . . . . . . . . . . . . . . . . . . . . . . 27 7.15.7 SFI functions . . . . . . . . . . . . . . . . . . . . . . . . . . . 28
7.15.7.1SFI-Info . . . . . . . . . . . . . . . . . . . . . . . . . . . . . 28
7.15.7.2SFI timer programming . . . . . . . . . . . . . . . . . . . . . . . 28
7.15.7.3SFI programme overview . . . . . . . . . . . . . . . . . . . . . . . . . . . . . . . . . . . . . . . . . . . . . 29
7.15.7.4SFI overview according to programme types (Genre) . . . . . . . . . . . . . . . . . . . . . . . 30
7.15.8Terminating SFI . . . . . . . . . . . . . . . . . . . . . . . . . . 30
7.16Timer recordings . . . . . . . . . . . . . . . . . . . . . . . . . . 30
7.16.1Manually programming the timer . . . . . . . . . . . . . . . . . . . . 31
7.16.2Timer overview . . . . . . . . . . . . . . . . . . . . . . . . . . . 32
7.16.3Changing the timer programming . . . . . . . . . . . . . . . . . . . 32
7.16.4Deleteing the timer programming . . . . . . . . . . . . . . . . . . . 32
7.16.5Programming a new timer event . . . . . . . . . . . . . . . . . . . . 33
7.16.6 Exiting timer administration . . . . . . . . . . . . . . . . . . . . . . 33
8 Changing the basic programming . . . . . . . . . . . . . .33
8.1Configuring the favourites list . . . . . . . . . . . . . . . . . . . . . 33
8.1.1Calling the programme list administration . . . . . . . . . . . . . . . . 34
8.1.2Adding programmes to the favourites list . . . . . . . . . . . . . . . . 35
8.1.3Deleting programmes . . . . . . . . . . . . . . . . . . . . . . . . 35 8.1.3.1 Removing (deleting) from the favourites list . . . . . . . . . . . . . . . 35
8.1.3.2 |
Deleting from the complete list . . . . . . . . |
. . . . . . . . . . |
. |
. |
36 |
8.1.4 |
Sorting programmes . . . . . . . . . . . . |
. . . . . . . . . . |
. |
. |
36 |
8.1.5Exiting the programme list administration . . . . . . . . . . . . . . . . 36
8.2Programming the electronic programme guide . . . . . . . . . . . . . . 37
8.2.1 |
Selecting stations . . . . . . . . . . . . |
. . . . . . . . . . . . . . 37 |
8.2.2 |
Start category . . . . . . . . . . . . . . . . . . . . . . . . . . . 38 |
|
8.2.3 |
Update time . . . . . . . . . . . . . . . . . . . . . . . . . . . . 38 |
|
8.2.4 |
Update . . . . . . . . . . . . . . . . |
. . . . . . . . . . . . . . 38 |
8.2.5 |
SFI channel . . . . . . . . . . . . . . . . . . . . . . . . . . . . 38 |
|
8.3 |
Protection of minors . . . . . . . . . . . . . . . . . . . . . . . . . 39 |
|
8.3.1 |
Selecting stations . . . . . . . . . . . . . . . . . . . . . . . . . . 39 |
|
8.3.2 |
Changing the device pin . . . . . . . . . . . . . . . . . . . . . . . 40 |
|
8.3.3 |
Mode . . . . . . . . . . . . . . . . . . . . . . . . . . . . . . 40 |
|
8.3.4 |
Exiting the protection of minors mode . . . . |
. . . . . . . . . . . . . . 40 |
1) only Digit S1/S2

8.4 |
Programme search . . . . . . . . . . . . . . . . . . . . . . . . . 40 |
8.4.1 |
Automatic search . . . . . . . . . . . . . . . . . . . . . . . . . . 41 |
8.4.2 |
Satellite search . . . . . . . . . . . . . . . . . . . . . . . . . . 41 |
8.4.3Transponder search . . . . . . . . . . . . . . . . . . . . . . . . . 41
8.4.4 |
Manual search . |
. . . . |
. . . . . . |
. . . . . . . . . . . . . . |
. . 42 |
|||
8.4.5 |
After the search run . . . . . . . . . . . . . . . . . . . . . . . |
. . 43 |
||||||
8.4.6 |
Exiting programme search . . . . . . . . . . . . . . . . . |
. . . . |
. |
43 |
||||
8.5 |
Service settings . |
. . . . |
. . . . . . |
. . . . . . . . . . |
. . . . |
. |
43 |
|
8.5.1Activate factory settings . . . . . . . . . . . . . . . . . . . . . . . 44
8.5.2 Deleting all programmes . . . . . . . . . . . . . . . . . . . . . . . 44
8.5.3Updating the programme list (ISIPRO) . . . . . . . . . . . . . . . . . 44
8.5.3.1Manually starting the programme list download 1) . . . . . . . . . . . . . 44
8.5.3.2Rejecting a programme list . . . . . . . . . . . . . . . . . . . . . . 45
8.5.3.3Download programme list later . . . . . . . . . . . . . . . . . . . . 45
8.5.3.4Starting the programme list download . . . . . . . . . . . . . . . . . . 45
8.5.4 |
Software update . . . . . . . . . . . . . . . . . . . . . . . . . . 46 |
||
8.5.5 |
Copying the settings . . . . . . . . . . . . . . . . . . . . . . . . 47 |
||
8.6 |
System configuration . . . . . . . . . . . . . . . . . . . . . . . . 47 |
||
8.7 |
Encoding system 1) . . . . . . . . . . . . . . . . . . . . . . . . . 47 |
||
9 |
Operation on a rotating unit (DiSEqC 1.2) . . |
. . . . |
. . . . 48 |
9.1 |
East and West boundaries . . . . . . . . . . . . |
. . . . . |
. . . . . 48 |
9.1.1Deleting defined boundaries . . . . . . . . . . . . . . . . . . . . . 48
9.1.2Setting the Eastern boundary . . . . . . . . . . . . . . . . . . . . . 49
9.1.3 |
Setting the Western boundary . . . |
. . . . . |
. |
. . . . |
. . . . . |
. |
. |
. 49 |
9.2 |
Geo positioning . . . . . . . . |
. . . . . |
. |
. . . . |
. . . . . |
. |
. |
. 49 |
9.3Setting the satellite position . . . . . . . . . . . . . . . . . . . . . . 50
9.3.1Selecting the satellite position . . . . . . . . . . . . . . . . . . . . . 50 9.3.1.1 Selecting a pre-selected satellite position . . . . . . . . . . . . . . . . 50 9.3.1.2 Setting user-defined satellite positions (User Satellite) . . . . . . . . . . . 51
9.3.2Aligning the satellite antenna . . . . . . . . . . . . . . . . . . . . . 51 9.3.2.1 Test transponder/LNB configuration . . . . . . . . . . . . . . . . . . 51 9.3.2.2 Manually aligning the antenna . . . . . . . . . . . . . . . . . . . . . 52 9.3.2.3 Automatic fine alignment (Autofocus) . . . . . . . . . . . . . . . . . . 52
9.3.3 |
Storing the satellite position . . . . . . . . . . . . . . . . . . . . . . 52 |
|
9.4 |
Current satellite list . . . . . . . . . . . . . . . . . . . . . . . . . 52 |
|
9.4.1 |
Selecting the satellite position . . . . . . . . |
. . . . . . . . . . . . . 53 |
9.5 |
Deleting the satellite position . . . . . . . . . . . . . . . . . . . . . 53 |
|
9.6 |
Reference position . . . . . . . . . . . . . . . . . . . . . . . . . 53 |
|
10 |
Technical data . . . . . . . . . . . . . . . . . . . . . 54 |
|
11 |
Troubleshooting aids . . . . . . . . |
. . . . . . . . . . .56 |
Your device carries the CE symbol and fulfils all of the necessary EU standards. Subject to alterations and printing errors. Issued 08/06
TechniSat and DIGIT S2 are registered trademarks belonging to TechniSat Digital GmbH
Postbox 560
54541 Daun www.technisat.de
Technical hotline 0180/5005-910*
*0,12 EUR/Min. in the telephone network of the Deutsche Telekom AG
Your device carries the CE symbol and fulfils all of the necessary EU standards.
Subject to alterations and printing errors. Issued 06/05
1) only Digit S1/S2

2 Illustrations
Sound on/off
Numeric keyboard
Option*
during TV operation: Sound/Subtitle selection, special functions
during radio operation: Station selection by changing the audio subcarrier Multifunction key n
Arrow key up
Programme +
Arrow key left
Volume -
Arrow key down
Programme -
SFI
Programme +/-
Sleep timer
Video text *
On/Mix/Off
Remote control
On/Standby EN
OPT
Multifunction key
OK
Programme list on/off
Arrow key right
Volume +
Back
Info
TV/Radio
Volume +/-
Menu on/off
EXTERNAL
Stop/Freeze image
Remote control options:
Remote control options:
It is possible to operate two TechniSat receivers, one TechniSat TV set as well as a It is possible to operate two receivers, one TV set as well as a further device with the further device
same encoding with this remote control by switching the remote control option.
with the same encoding with this remote control by switching the remote control option. > To change the remote control option press the required (SAT1, SAT2, VCR or > To change the remote control option press the required (SAT1, SAT2, VCR
TV)key and OK simultaneously!!!
or TV) key and OK simultaneously!!!
Please note:
Please note:
To controlthis receiver, the appropriately selected remote control option and the remote To control this receiver, the appropriately selected remote control option and the remote control code must comply according to Section 6.2.3.
control code must comply according to Section 6.2.3.
*This function is only available, if the appropriate data are broadcast on the set programme position.
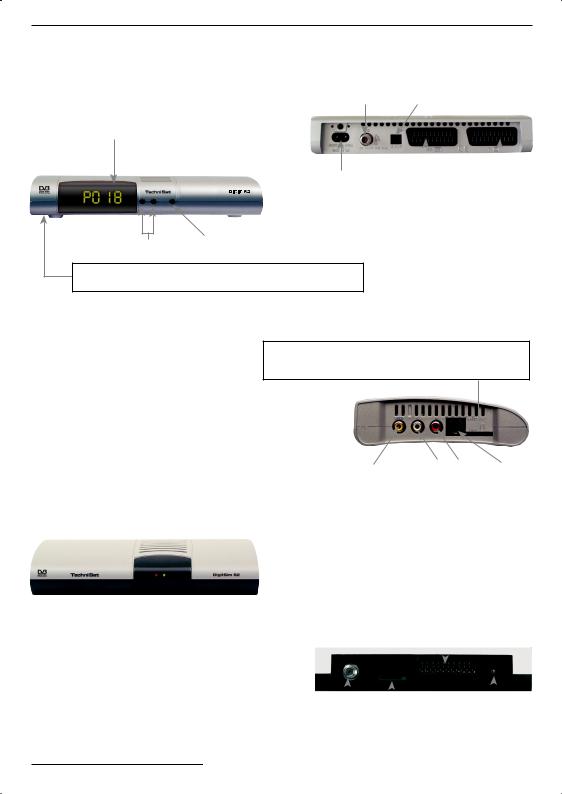
DIGIT S1 / S2
LNB input
LED display
Mains connector
Programme selection On/Standby up/down
Card reader for smart card Encription System:
>Insert the Encription System smart card (golden chip downwards and towards the direction of insertion) into the card reader carefully up to the stop.
Audio output digital (optical)
|
|
|
|
|
|
|
|
SCART |
SCART |
||
connector VCR |
connector TV |
||
|
|
|
|
Card reader for Encription System SIM card:
> Insert the Encription System SIM card carefully as far as possible
into the card reader. Make sure that the gold chip is pointed downwards and the cut corner of the SIM card is pointed towards the device.
DigitSim S1 / S2
Audio output |
|
|
|
|
|
Audio |
|
outputs RS 232 interface |
|||
digital (electrical) |
analogue |
||||
LED-display |
|
SCART |
|
green: |
receiver on (operating) |
connector TV |
|
red: |
stand-by |
|
|
|
|
||
|
|
|
|
|
|
|
|
|
|
|
|
|
|
|
|
LNB input |
SIM-Card Reader |
DC connector |
|||
|
|
|
|
|
|

3 Please read first
> |
Before using the device for the first time |
|
|
|
check the supply for completeness. The scope of supply contains: |
|
|
|
EN |
||
|
1 |
Digital receiver, 1 Mains connection cable, |
|
|
|
||
|
1 |
Remote control, 1 Operating manual, |
|
|
|
||
|
1 |
Guarantee card, 2 Batteries (1.5V Micro cell) |
|
|
1 |
SCART cable |
|
1 easy-sim-card
>Insert the enclosed batteries while observing the embossed polarity into the battery compartment of the remote control.
Important notes on the operation
The use of a so-called "On Screen Display" (Display inserts) simplifies the digital receiver operation and reduces the number of remote control keys. All functions are displayed on the screen and can be controlled with only few keys. Related functions are summarised as "MENU". The selected function is highlighted in colour. The "function keys" are represented by red, yellow, green and blue coloured bars in the bottom line. These colour bars represent
different functions in the individual menus, which can be initiated by pressing the accordingly coloured key ("Multi-function key") on the remote control. The „Function keys" are only activated if an abbreviated name is indicated in the corresponding field.
Key designations and terms, which appear in the OSD menu, are printed bold in this operating manual.
Help:
If available, a help text can be displayed or exited in the menus by pressing the blue function key.
Disposal notes
The packing of your equipment is completely made up of recyclable materials. Please dispose of these sorted accordingly by means of the “Dual System”.
This product may not be disposed via normal household waste at the end of its service life, but must be delivered to a collection point for the recycling of electrical and electronic devices. This is pointed out by the symbol on the product, the instruction manual or the packing.
The materials are recyclable according to their designation.
You help to protect the environment, if you enable recycling, reuse of material or other types of utilisation of end-of-life equipment.
Please ask your municipal administration, where the next waste disposal is located.
Ensure that the drained batteries of the remote control are not put into the household waste, but are properly disposed (given to the specialised trade, hazardous waste).
Safety notes
For your own protection, please read the safety precautions carefully, before putting your new device in operation.
The manufacturer does not assume responsibility for damages caused by inappropriate handling and by noncompliance with the safety precautions.
>In order to ensure sufficient ventilation, put the device on a flat, level underground and do not place any items on the cover of the device. The louvres are located there, to enable the interior heat to disseminate.
>Never place burning items, e.g. burning candles, on the device.
>Never expose the device to dripping or splash-water and do not place any items filled with liquid, e.g. vases, on it.
>Only operate the device in a moderate climate.
>Never open the device! There is the danger of an electric shock. A possibly necessary intervention may only be accomplished by training
personnel.
Disconnect the device from the mains in the following cases and request help from an expert:
>The electric cable or the power supply plug is damaged
>The device was exposed to humidity or liquid has penetrated
>In the case of substantial malfunctions
>In the case of considerable exterior damages
Operational interruptions
The device should be disconnected from the mains during a thunderstorm or during longer operational interruptions (e.g. vacation).
4 Connecting to a DVB receiver
a |
Connecting the LNB to the LNB input (LNB IN) of the DVB receiver. |
|
b |
Scart connection of the DVB receiver to the TV set. |
EN |
cScart connection of the video cassette device to the VCR-Scart socket of the DVB receiver.
dConnecting the audio outputs to HiFi equipment.1)
ePower supply connection
b
a
e
c
d
VCR
1) only Digit S1/S2

The following references a b c etc., refer to the drawing on page 10.
4.1 External unit
a Connect the LNB input of the digital receiver by means of a suitable coax cable to the LNB of your external unit. Also observe Section 6 "Settings".
4.2 Connecting to a TV set
b Connect the receiver (SCART socket TV) and TV set (SCART socket) using the enclosed SCART cable. Your television set will automatically switch to AV and therefore to satellite operation when the digital receiver is turned on, if appropriately equipped.
4.3 Video cassette recorder (VCR)
c Connect the video cassette recorder to the SCART VCR socket. The videocassette recorder provides a switching signal to the digital receiver during playback. This enables the video cassette recorder signal to be supplied to the TV set automatically. If your video cassette recorder does not supply a switching voltage, switch your digital receiver on by means of the EXTERN key to the external input AV. Return to normal operation by pressing this key again.
4.4 HiFi amplifier 1)
4.4.1 Analogue 1)
d To achieve the best possible sound quality, you can connect the digital receiver to a HiFi amplifier. For this, connect the cinch socket Audio R and Audio L of the digital receiver by means of a suitable cable to an input of your HiFi amplifier (e.g. CD or AUX; Careful, the phono-input is not suitable!).
4.4.2 Digital 1)
dIf your amplifier is equipped with an appropriate electrical or optical input,
connect the socket AUDIO OUT DIGITAL electrical or AUDIO OUT DIGITAL optical to the electrical or optical input of your amplifier.
The sampling rates 32, 44.1 and 48 kHz are available depending on the respective station. The Dolby digital signal (AC3) is also available at this output, if broadcast.
4.5 Serial interface (RS 232) 1)
The RS 232 interface enables updating the system software and preprogramming via the PC.
1) only Digit S1/S2
10
4.6 Mains connection
The digital receiver should only be connected |
|
to the mains, when the device has being connected to all appropriate components. This |
EN |
prevents the digital receiver or other components destroyed. |
eAfter making all connections, connect the receiver with the enclosed power cable to a power socket 230 V/50-60 Hz.
5 Initial installation
After reading the safety notes and having connected the device as described in Chapter 4, turn the device on as described in Chapter 7. The installation assistant appears during the initial start-up AutoInstall.
The installation assistant helps you to easily carry out the most important settings on the digital receiver.
The required remote control keys are marked,
in order to accomplish the settings during the respective installation step.
You can exit the initial installation at any time by pressing the red function key. You can return to the previous installation step by means of the green function key. This enables you to correct incorrect inputs at any time.
Your equipment starts with the standard pre-programming, if the initial installation is not carried out or aborted.
The initial installation demonstrated here is only exemplary. The precise initial installation procedure depends on the settings you have accomplished. Therefore, please follow the instructions on the screen carefully.
Operating language
The AutoInstall installation assistant starts automatically during the initial start-up of the device. First, a selection window appears for the operating language.
>Highlight the required operating language with the arrow keys up/down.
>Acknowledge with OK.
Audio language
>Select the preferred audio language with the arrow keys up/down.
The required audio language is set according to this selection after the search run, if this is broadcast by the appropriate station.
>Acknowledge with OK, to accept the selection.
11

Setting the country
>Select the time zone with the arrow keys up/down corresponding to your country.
The time as well as sorting of the favourites list is accomplished automatically according to your selection.
>Acknowledge with OK, to accept the selection and to continue to the station search function.
Antenna configuration
You can adjust the digital receiver to your antenna configuration during this installation step.
>If you would like to take over the standard antenna setting select the Standard field with the Arrow keys up/down and acknowledge with OK.
or
>Select the Multytenne field with the arrow keys up/down and acknowledge with OK, if you are operating the receiver on a Multytenne.
Continue in both these cases with the Section “Software update”.
>If the configuration of your receiving installation does not correspond to the Standard or Multytenne settings, select the Manual field and acknowledge with OK.
DiSEqC
>If your receiving installation uses DiSEqC components, select the Activate field with the arrow keys and acknowledge with the OK key (You can find further information on DiSEqC in Chapter 10, Technical terms).
Position A/Option A
>Select the satellites, which you receive with the DiSEqC setting Position A/Option A with the arrow keys up/down and acknowledge with the OK key.
Position B/Option A
>Select the satellites, which you receive with the DiSEqC setting Position B/Option A with the arrow keys up/down and acknowledge with the OK key.
Position A/Option B
>Select the satellites, which you receive with the DiSEqC setting Position A/Option B with the arrow keys up/down and acknowledge with the OK key.
12

In the next step check the configuration of your antenna again. |
EN |
|
Position B/Option B |
|
|
> |
Select the satellites, which you receive with the DiSEqC setting Position B/Option B |
|
with the arrow keys up/down and acknowledge with the OK key.
>If you would like to accept this setting, select the yes field with the arrow keys up/ down and acknowledge with the OK key.
Software update
The digital receiver checks, whether new software is available for the equipment via satellite, after you have made the antenna settings. If new software is available, you can automatically carry out a software update.
>Select the field Update with the arrow keys right/left and acknowledge with
OK.
The new software is now downloaded to your device. This procedure can take some minutes.
Station search function / ISIPRO
While investigating, if new software is available to download to the receiver, it is also checked, whether a new ISIPRO programme list is available. An available new programme list can be installed with the ISIPRO function.
>Select the ISIPRO Programme list update line with the Arrow keys up/ down.
>Acknowledge with OK.
The up-to-date programme list is now downloaded from the satellite.
If no new ISIPRO programme list is available, or you do not want to download this list, carry out a station search run in order to look for new programmes.
>Select the All Stations field with the arrow keys up/down, if you want to search for free and encoded programmes, or All unencoded Stations, if you only want to look for free programmes.
>An automatic station search is started by pressing the OK key. All satellites set in the antenna configuration are thereby scanned for programmes. This procedure can take some minutes. Please observe further screen inserts.
Terminate the installation assistant
>Acknowledge the final message of the installation assistant with OK, in order to return to normal operation.
13

6 Settings
After you have now connected and started up your new digital receiver, you can, if necessary, optimise the digital receiver for your application.
6.1 Operating language
This menu item enables you to set the menu language according to your requirements. To change the operating language proceed as follows:
>Call the Main menu with the Menu key.
>Now select the menu line Operating language, by highlighting this with the arrow keys up/down.
>Acknowledge with OK.
The Operating language submenu is displayed.
>Select the required language with the arrow keys up/down.
>Store the input by pressing the OK key.
>Pressing the TV/Radio key returns you to normal operation.
6.2 Basic settings
Order to use your DVB receiver optimally, you can also set it to your individual applications.
>Call the Main menu by pressing the Menu key.
>Select the Settings line with the Arrow keys up/down.
>Acknowledge by pressing the OK key. The Settings submenu is displayed.
>Select the Basic settings line with the arrow keys up/down.
>Acknowledge with OK.
The Basic settings menu is displayed.
>You can move through the menu with the marker using the Arrow keys up/down and modify the individual positions as indicated.
Pay attention to the screen inserts when selecting a menu option, if applicable. The following settings can be carried out:
6.2.1 Time difference GMT (h)
Your device is equipped with a clock. This is synchronised by means of the satellite reception to Greenwich Mean Time.
If the setting None has been set under Country (Section 6.2.2), you must only correct the time according to your local time with the arrow keys right/left. This difference is for Germany +1 hour, in the summer time +2 hours.
6.2.2 Country
This function automatically changes summer to winter time and also automatically sets the time difference in relation to GMT.
>Indicate in the line Country using the arrow keys left/right the country, in which the device is operated.
14

6.2.3 Remote control code
Up to four different devices, using the same remote control code, can be operated with the remote control of your receiver. Unintentional operating errors can occur, if two satellite
receivers are used in the same room. To avoid these operating errors, set different remote EN control options for each receiver.
>For this purpose, actuate the SAT1 or SAT2 key in this line and simultaneously the OK key.
6.2.4 Standby clock 1)
This line enables you to select, whether the time is displayed during standby operation.
>In this line you can set the standby clock mode to on or off with the Arrow keys right/left.
6.2.5 Exit basic settings
The accomplished settings are stored automatically when exiting the basic settings submenu.
>Pressing the Return key, returns you to the settings menu
or
>Pressing the Menu key, returns you to normal operation.
6.3 Audio/Video settings
In order to optimise your digital receiver to your TV set, it is possible to accomplish further settings in the Audio/video settings menu.
>Call the Main menu with the Menu key.
>Select the Settings line with the Arrow keys up/down.
>Acknowledge by pressing the OK key. The Settings submenu is displayed.
>Now select the line Audio/video settings with the arrow keys up/down.
>Acknowledge with OK.
The menu Audio/video settings is displayed.
>You can move the marker through the menu with the arrow keys up/down and change the individual items as indicated. Pay attention to the screen inserts when selecting a menu option, if applicable. The following settings can be carried out:
1) only Digit S1/S2
15

6.3.1 Picture size
> Using the arrow keys left/right set the picture size appropriate for your TV set
4:3 or 16:9.
This function automatically adapts the picture size to your TV-set.
6.3.2 Language (Audio signal)
> Set your preferred language in this line with the arrow keys left/right.
This language is automatically set after a search run, if the language is broadcast.
6.3.3 Language (Subtitles)
You can display subtitles with your DVB receiver. These are automatically displayed, if the subtitle function is turned on and the specified language is broadcast.
The subtitles can be turned on manually, if this function is not activated. Available subtitles are indicated by the Subtitle selection indication. Please also note Section 7.14 of the operating manual. Select language with arrow buttons left/right.
6.3.4 TV SCART mode
> Set FBAS, RGB or S-Video1) in this line with the arrow keys left/right corresponding to your TV set.
Set FBAS for standard TV sets.
6.3.5 VCR SCART mode 1)
> Set FBAS or S-Video in this line with the arrow keys left/right corresponding to your video unit.
Set FBAS for standard TV sets.
6.3.6 Dolby Digital (AC3) 1)
Various films are broadcast in Dolby Digital format. This is indicated by the Dolby sign  in the info window after setting a programme.
You can hear these films in 5.1 channel Dolby Digital sound, if you have a einen Dolby Digital 5.1 channel amplifier. For this, is only necessary to connect the digital output Audio Out Digital (see Section 4.4.2) of your DVB receiver to the digital input of your Dolby Digital 5.1 channel amplifier. These broadcasts are automatically played in Dolby Digital format, if the Dolby Digital (AC3) function is turned (on).
The Dolby Digital Sound can be turned on manually, if the function is not turned on (on). Please also note Section 7.6.1 of the operating manual.
>Turn the Dolby Digital (AC3) on or off with the arrow keys right/left.
1) only Digit S1/S2
16
6.3.7 Exit Audio/Video settings
When exiting the Audio/Video Settings submenu the accomplished settings are automatically stored.
>Pressing the Back key returns you to the
Settings menu
or
>to normal operation by pressing the Menu key.
6.4 Antenna settings
Example:
EN
|
|
|
|
|
|
|
|
|
|
|
|
|
|
|
|
|
|
|
|
|
|
|
|
|
|
|
|
|
|
|
|
|
|
|
|
|
A B |
|
|
|
|
|
|
|
|
|
A B |
|
|||||
Position |
|
|
|
|
|
|
|
Position |
|
||||||||
|
Output |
|
|
|
|
|
|
|
Output A |
|
|||||||
|
|
|
|
|
|
|
|
|
|
|
|
|
|
|
|
|
|
|
|
|
|
|
|
|
|
|
|
|
|
|
|
|
|
|
|
|
|
|
|
|
|
|
|
|
|
|
|
|
|
|
|
|
|
|
|
|
|
|
A |
B |
|
|
|||||||||
|
|
|
|
|
Option |
|
|
||||||||||
|
|
|
|
|
Output |
|
|
||||||||||
|
|
|
|
|
|
|
|
|
|
|
|
|
|
|
|
|
|
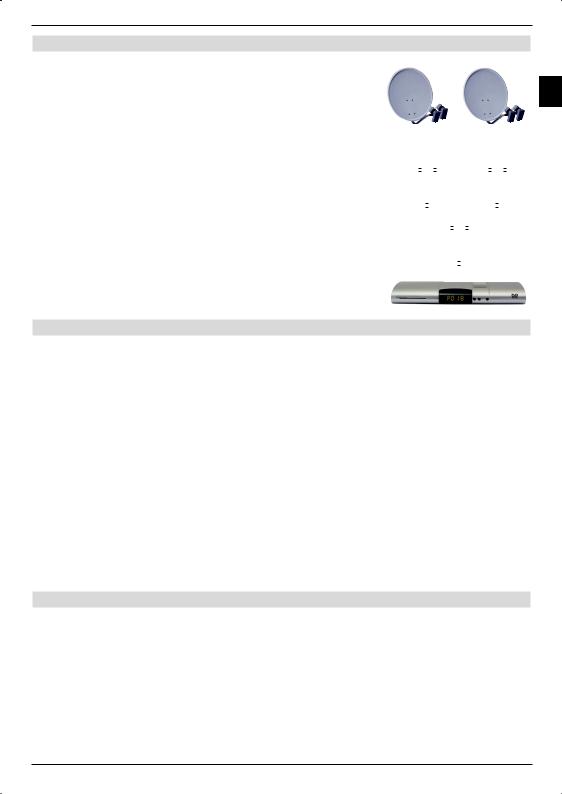
After adjusted your digital receiver to your individual requirements, it is possible, if necessary, to adjust the digital receiver to your antenna. The satellites set in the installation assistant are available in the Antenna settings menu. The satellite positions ASTRA 19,2° East and EUTELSAT 13,0° East are pre-programmed if the installation assistant was terminated prematurely.
You can set your digital receiver as follows to the required data, if you would also like to receive other satellites or use a different LNB.
>Call the Main menu with the Menu key.
>Select the Settings line with the arrow keys up/down.
>Acknowledge by pressing the OK key. The Settings menu is displayed.
>Now select the line Antenna settings with the arrow keys up/down.
>Acknowledge with OK.
The Antenna settings menu is displayed.
The following settings can now be carried out in this submenu:
6.4.1 Multytenne
If the receiver is operated on a Multytenne LNB, you can automatically adjust the switch positions to the Multytenne LNB in this menu item.
>Select on in this line with the OK key to automatically set the switch positions.
17

6.4.2 Turning the DiSEqC on/off
DiSEqC (Digital Satellite Equipment Control) is a digital control signal to control DiSEqC compatible components via the antenna line. You must activate the DiSEqC controller, if your external unit contains DiSEqC components:
>Turn the DiSEqC on or off in this line with the OK key.
Since only one LNB can be addressed when the DiSEqC controller is deactivated, the menu is limited to the configuration of one LNB in this case.
6.4.3 Setting the array
The menu contains the four switching criteria for the DiSEqC controller. Your equipment
is pre-programmed in such a way, that ASTRA 19,2° East is |
Example: |
|
received on the switch position A/A and Eutelsat 13,0° East |
|
|
on the position B/A of a multi-switch. You can adjust your |
|
|
digital receiver to your receiving installation, if the array of your |
|
|
receiving installation is designed differently or can receive other |
|
|
|
|
|
satellites. |
|
|
|
|
|
>Select the DiSEqC switch position (1-4) with the arrow keys, which you would like to assign to a satellite
(e.g. A/B 3 No Satellite), by selecting this line.
>Press the OK key.
A selection table containing the available satellites is now displayed.
>Now select the required satellite with the arrow keys. The marker is moved upwards or downwards line by line with the arrow keys up/down, the arrow keys left/right are used to display the following or previous page.
Please select a reserve position, designated as User 1 to User 14, if the required satellite is not contained in the list.
|
|
|
|
|
|
|
|
|
|
|
|
|
|
|
|
|
|
|
|
|
A B |
|
|
|
|
|
|
|
A B |
||||||||||
Position |
|
|
|
|
|
|
Position |
||||||||||||
|
Output |
|
|
|
|
|
|
|
Output |
||||||||||
|
|
|
|
|
|
|
|
|
|
|
|
|
|||||||
|
|
|
|
|
|
|
|
|
|
|
|
|
|
|
|
|
|
|
|
|
|
|
|
|
|
|
|
|
|
|
|
|
|
|
|
|
|
|
|
|
|
|
|
|
|
|
|
|
|
|
|
|
|
|
|
|
|
|
|
|
|
|
|
|
|
|
|
A |
B |
|
|
|
|
|
|
|
|
|
|
|
|
|
|
|
|
|
|
Option |
|
|
|||||||||
|
|
|
|
|
|
|
|
Output |
|
|
|||||||||
|
|
|
|
|
|
|
|
|
|
|
|
|
|
|
|
|
|
|
|
>Acknowledge with OK.
The select satellite is now inserted into the previously selected position in the
Antenna settings menu.
Work on the Antenna settings menu as described, until the menu specifications correspond to those of your receiving equipment. For all switch criteria, which you do not require set No Satellite .
6.4.4 Further settings/LNB characteristics
After having set the array of your DVB receiver to your receiving installation, you can also check and if necessary correct the further settings for your reception unit.
>Move the marker to the Configuration column with the arrow keys left/right.
>Now select the line, which you want a check or amend with the arrow keys up/ down, the Continue field.
>Acknowledge with OK.
A submenu is now displayed, in which you can set the LNB adjustments and transponder test.
18
 Loading...