


9101420600
788

OWNER’S MANUAL
ÜREMOVE COVER (OR BACK). NO USER-SERVICEABLE PARTS INSIDE. REFER SERVICING TO QUALIFIED SERVICE PERSONNEL.CAUTION: TO REDUCE THE RISK OF ELECTRIC SHOCK, DO NOT
ÿthe user to the presence of uninsulated “dangerous voltage” within the product’s enclosure that may be of sufficient magnitude to constitute a risk of electric shock to persons.The lightning flash with arrowhead symbol, within an equilateral triangle, is intended to alert
Ÿence of important operating and maintenance (servicing) instructions in the literature accompanying the appliance.The exclamation point within an equilateral triangle is intended to alert the user to the pres-
This appliance has a serial number located on the rear panel. Please record the model number and serial number and retain them for your records.
Model number Serial number
WARNING: TO PREVENT FIRE OR SHOCK HAZARD, DO NOT EXPOSE THIS APPLIANCE TO RAIN OR MOISTURE.

Important Safety Precautions
IMPORTANT (for U.K. Customers)
DO NOT cut off the mains plug from this equipment.
If the plug fitted is not suitable for the power points in your home or the cable is too short to reach a power point, then obtain an appropriate safety approved extension lead or consult your dealer.
If nonetheless the mains plug is cut off, remove the fuse and dispose of the plug immediately, to avoid a possible shock hazard by inadvertent connection to the mains supply.
If this product is not provided with a mains plug, or one has to be fitted, then follow the instructions given below:
IMPORTANT: DO NOT make any connection to the larger terminal which is marked with the letter E or by the safety earth symbol ç or coloured GREEN or GREEN-and-YELLOW.
The wires in the mains lead on this product are coloured in accordance with the following code:
BLUE |
: |
NEUTRAL |
BROWN |
: |
LIVE |
As these colours may not correspond with the coloured markings identifying the terminals in your plug proceed as follows:
The wire which is coloured BLUE must be connected to the terminal which is marked with the letter N or coloured BLACK.
The wire which is coloured BROWN must be connected to the terminal which is marked with the letter L or coloured RED.
When replacing the fuse only a correctly rated approved type should be used and be sure to re-fit the fuse cover.
IF IN DOUBT — CONSULT A COMPETENT ELECTRICIAN.
For U.S.A
TO THE USER
This equipment has been tested and found to comply with the limits for a Class B digital device, pursuant to Part 15 of the FCC Rules. These limits are designed to provide reasonable protection against harmful interference in a residential installation. This equipment generates, uses, and can radiate radio frequency energy and, if not installed and used in accordance with the instruction manual, may cause harmful interference to radio communications. However, there is no guarantee that interference will not occur in a particular installation. If this equipment does cause harmful interference to radio or television reception, which can be determined by turning the equipment off and on, the user is encouraged to try to correct the interference by one or more of the following measures.
a)Reorient or relocate the receiving antenna.
b)Increase the separation between the equipment and receiver.
c)Connect the equipment into an outlet on a circuit different from that to which the receiver is connected.
d)Consult the dealer or an experienced radio/ TV technician for help.
CAUTION
Changes or modifications to this equipment not expressly approved by TEAC CORPORATION for compliance could void the user’s authority to operate this equipment.
2 TASCAM 788 Digital Portastudio

IMPORTANT SAFETY INSTRUCTIONS
CAUTION:
…Read all of these Instructions.
…Save these Instructions for later use.
…Follow all Warnings and Instructions marked on the audio equipment.
1)Read Instructions — All the safety and operating instructions should be read before the product is operated.
2)Retain Instructions — The safety and operating instructions should be retained for future reference.
3)Heed Warnings — All warnings on the product and in the operating instructions should be adhered to.
4)Follow Instructions — All operating and use instructions should be followed.
5)Cleaning — Unplug this product from the wall outlet before cleaning. Do not use liquid cleaners or aerosol cleaners. Use a damp cloth for cleaning.
6)Attachments — Do not use attachments not recommended by the product manufacturer as they may cause hazards.
7)Water and Moisture — Do not use this product near water — for example, near a bath tub, wash bowl, kitchen sink, or laundry tub; in a wet basement; or near a swimming pool; and the like.
8)Accessories — Do not place this product on an unstable cart, stand, tripod, bracket, or table. The product may fall, causing serious injury to a child or adult, and serious damage to the product. Use only with a cart, stand, tripod, bracket, or table recommended by the manufacturer, or sold with the product. Any mounting of the product should follow the manufacturer’s instructions, and should use a mounting accessory recommended by the manufacturer.
9)A product and cart combination should be moved with care. Quick stops, excessive force, and uneven surfaces may cause the product and cart combination to overturn.
10)Ventilation — Slots and openings in the cabinet are provided for ventilation and to ensure reliable operation of the product and to protect it from overheating, and these openings must not be blocked or covered. The openings should never be blocked by placing the product on a bed, sofa, rug, or other similar surface. This product should not be placed in a built-in installation such as a bookcase or rack unless proper ventilation is provided or the manufacturer’s instructions have been adhered to.
11)Power Sources — This product should be operated only from the type of power source indicated on the marking label. If you are not sure of the type of power supply to your home, consult your product dealer or local power company. For products intended to operate from battery power, or other sources, refer to the operating instructions.
12)Grounding or Polarization — This product may be equipped with a polarized alternating-current line plug (a plug having one blade wider than the other). This plug will fit into the power outlet only one way. This is a safety feature. If you are unable to insert the plug fully into the outlet, try reversing the plug. If the plug should still fail to fit, contact your electrician to replace your obsolete outlet. Do not defeat the safety purpose of the polarized plug.
13)Power-Cord Protection — Power-supply cords should be routed so that they are not likely to be walked on or pinched by items placed upon or against them, paying particular attention to cords at plugs, convenience receptacles, and the point where they exit from the product.
14)Outdoor Antenna Grounding — If an outside antenna or cable system is connected to the product, be sure the antenna or cable system is grounded so as to provide some protection against voltage surges and builtup static charges. Article 810 of the National Electrical Code, ANSI/NFPA 70, provides information with regard to proper grounding of the mast and supporting structure, grounding of the lead-in wire to an antenna discharge unit, size of grounding conductors, location of antenna-discharge unit, connection to grounding electrodes, and requirements for the grounding electrode.
"Note to CATV system installer:
This reminder is provided to call the CATV system installer’s attention to Section 820-40 of the NEC which provides guidelines for proper grounding and, in particular, specifies that the cable ground shall be connected to the grounding system of the building, as close to the point of cable entry as practical.
Example of Antenna Grounding as per
National Electrical Code, ANSI/NFPA 70
|
ANTENNA |
|
LEAD IN |
|
WIRE |
|
GROUND |
|
CLAMP |
|
ANTENNA |
|
DISCHARGE UNIT |
|
(NEC SECTION 810-20) |
ELECTRIC |
|
SERVICE |
GROUNDING CONDUCTORS |
EQUIPMENT |
|
|
(NEC SECTION 810-21) |
|
GROUND CLAMPS |
|
POWER SERVICE GROUNDING |
|
ELECTRODE SYSTEM |
NEC - NATIONAL ELECTRICAL CODE |
(NEC ART 250. PART H) |
|
15)Lightning — For added protection for this product during a lightning storm, or when it is left unattended and unused for long periods of time, unplug it from the wall outlet and disconnect the antenna or cable system. This will prevent damage to the product due to lightning and power-line surges.
16)Power Lines — An outside antenna system should not be located in the vicinity of overhead power lines or other electric light or power circuits, or where it can fall into such power lines or circuits. When installing an outside antenna system, extreme care should be taken to keep from touching such power lines or circuits as contact with them might be fatal.
17)Overloading — Do not overload wall outlets, extension cords, or integral convenience receptacles as this can result in risk of fire or electric shock.
18)Object and Liquid Entry — Never push objects of any kind into this product through openings as they may touch dangerous voltage points or short-out parts that could result in a fire or electric shock. Never spill liquid of any kind on the product.
19)Servicing — Do not attempt to service this product yourself as opening or removing covers may expose you to dangerous voltage or other hazards. Refer all servicing to qualified service personnel.
20)Damage Requiring Service — Unplug this product from the wall outlet and refer servicing to qualified service personnel under the following conditions:
a) when the power-supply cord or plug is damaged.
b) if liquid has been spilled, or objects have fallen into the product. c) if the product has been exposed to rain or water.
d) if the product does not operate normally by following the operating instructions. Adjust only those controls that are covered by the operating instructions as an improper adjustment of other controls may result in damage and will often require extensive work by a qualified technician to restore the product to its normal operation.
e) if the product has been dropped or damaged in any way.
f ) when the product exhibits a distinct change in performance – this indicates a need for service.
21)Replacement Parts — When replacement parts are required, be sure the service technician has used replacement parts specified by the manufacturer or have the same characteristics as the original part.
Unauthorized substitutions may result in fire, electric shock, or other hazards.
22)Safety Check — Upon completion of any service or repairs to this product, ask the service technician to perform safety checks to determine that the product is in proper operating condition.
23)Wall or Ceiling Mounting — The product should be mounted to a wall or ceiling only as recommended by the manufacturer.
24)Heat — The product should be situated away from heat sources such as radiators, heat registers, stoves, or other products (including amplifiers) that produce heat.
TASCAM 788 Digital Portastudio 3

Table of Contents |
|
1 – Introductory concepts |
|
Multitrack recording (general)........................... |
8 |
Tracking .......................................................... |
8 |
Overdubbing ................................................... |
8 |
Punching ......................................................... |
8 |
Mixdown .......................................................... |
8 |
Mastering ........................................................ |
8 |
Disk vs. tape recording ...................................... |
9 |
Multitrack tapes....................................................... |
9 |
Multitrack disks....................................................... |
9 |
The “song”............................................................... |
10 |
What do “16-bit” and “24-bit” mean? ............... |
10 |
Real and virtual tracks on the 788..................... |
11 |
Editing...................................................................... |
12 |
Nondestructive editing on the 788 ................ |
12 |
788 editing ...................................................... |
12 |
Undo and redo ................................................ |
12 |
Multi-take punch-ins on the 788 ............................ |
13 |
Instant location on the 788..................................... |
13 |
Recording technique .............................................. |
13 |
Assignment ......................................................... |
13 |
The 788 internal patchbay...................................... |
13 |
Track bouncing ....................................................... |
14 |
Quick setup and the assign screen....................... |
15 |
Synchronization and the 788............................. |
15 |
Timecode synchronization..................................... |
15 |
Tempo map synchronization ................................. |
16 |
Sync track recording .............................................. |
16 |
MIDI external control (MMC, etc.)...................... |
16 |
MIDI remote control ................................................ |
17 |
SCSI issues ......................................................... |
17 |
SCSI connections.................................................... |
17 |
SCSI IDs ................................................................... |
17 |
SCSI termination ..................................................... |
17 |
SCSI devices and backing up ................................ |
18 |
Further reading ................................................... |
18 |
2 – Getting started |
|
Precautions, etc.................................................. |
19 |
Shutting down the 788 ....................................... |
19 |
Power-on ............................................................. |
20 |
About the demonstration song.............................. |
20 |
A few notes about this manual.......................... |
20 |
“Roadmap” to this manual..................................... |
21 |
1 “Introductory concepts” (page 8) .............. |
21 |
2 “Getting started” (page 19) ........................ |
21 |
3 “Before recording” (page 34) ..................... |
21 |
4 “Mixer” (page 41) ........................................ |
21 |
5 “Recorder operations” (page 49) ............... |
21 |
6 “Location operations” (page 60) ................ |
21 |
7 “Track editing” (page 65) ........................... |
21 |
8 “Mastering and backup (CD-R)” (page 72) 21 |
|
9 “Effects” (page 81) ...................................... |
21 |
10 “Routing and scene libraries” (page 91) .21 |
|
11 “Synchronization” (page 94) .................... |
21 |
12 “MMC and MIDI functions” (page 101) .... |
21 |
13 “Specifications, etc.” (page 119) ............. |
21 |
Connecting other equipment to your 788 ........ |
22 |
Additional connection notes.................................. |
22 |
About the menus ................................................ |
24 |
Selecting multiple entries....................................... |
24 |
The MENU key ......................................................... |
24 |
Other control screens............................................. |
25 |
Selecting parameters.............................................. |
25 |
Setting values.......................................................... |
25 |
The “home” display............................................ |
26 |
The time display...................................................... |
26 |
Entering and editing titles ................................. |
26 |
CAPITAL .......................................................... |
27 |
small ................................................................ |
27 |
Numbers .......................................................... |
27 |
Preset words and phrases. ............................ |
27 |
Setting and editing preset words .......................... |
27 |
The SONG menu................................................. |
28 |
Creating a new song............................................... |
28 |
Saving a song.......................................................... |
28 |
Reverting to the previous saved version of a |
|
song...................................................................... |
28 |
Loading a song........................................................ |
29 |
Erasing a song ........................................................ |
29 |
Copying songs ........................................................ |
29 |
Deleting unused space from a song ..................... |
30 |
Protecting a song.................................................... |
30 |
DISK menu .......................................................... |
31 |
Formatting a disk .................................................... |
31 |
Selecting a disk....................................................... |
32 |
Ejecting a disk......................................................... |
32 |
Checking disks........................................................ |
32 |
The OPTION menu.............................................. |
33 |
Global options......................................................... |
33 |
Key sense time ............................................... |
33 |
Meter peak hold time ...................................... |
33 |
Meter release time .......................................... |
33 |
Mixer settings.......................................................... |
33 |
Fader settings ................................................. |
33 |
Recorder settings.................................................... |
33 |
USER WORD............................................................ |
33 |
3 – Before recording |
|
Quick Setup......................................................... |
34 |
RECORDING ............................................................ |
34 |
MIX DOWN ............................................................... |
35 |
BOUNCE 7/8............................................................. |
35 |
Assignment on the 788 ...................................... |
36 |
Assigning sources to mixer channels. ................. |
36 |
Removing assignments.......................................... |
36 |
Viewing assignments.............................................. |
37 |
Channel-to-track assignments............................... |
37 |
Track-to-channel assignments .............................. |
37 |
Assigning inputs to the sub-mixer........................ |
37 |
Assigning the sub-mixer to stereo........................ |
37 |
Monitoring ........................................................... |
38 |
If you don’t hear anything ...................................... |
38 |
How to monitor tracks ............................................ |
38 |
4 TASCAM 788 Digital PortaStudio

Monitoring the recorded sounds (TRACK CUE)... |
39 |
Arming tracks and monitoring............................... |
39 |
More monitoring options........................................ |
40 |
Monitoring in mono................................................. |
40 |
4 – Mixer |
|
Mixer features..................................................... |
41 |
Linking channels................................................ |
41 |
To link two channels............................................... |
41 |
Unlinking a pair of channels .................................. |
41 |
Notes on linked channels....................................... |
42 |
Basic operations ................................................ |
42 |
About the screens................................................... |
42 |
Adjusting EQ....................................................... |
43 |
EQ and linked channels.......................................... |
43 |
Channel digital pad and gain ................................. |
44 |
Send levels.......................................................... |
44 |
Fader and pan..................................................... |
45 |
Internal and physical faders.............................. |
45 |
Soloing ................................................................ |
46 |
Turning off soloing ................................................. |
46 |
Stereo output ...................................................... |
47 |
Stereo output selection .......................................... |
47 |
Sub-mixer............................................................ |
48 |
5 – Recorder operations |
|
Basic transport controls......................................... |
49 |
Playback.............................................................. |
49 |
Setting the playback position ........................... |
50 |
Return to zero (RTZ) ............................................... |
50 |
Last Recording Position (LRP) .............................. |
50 |
Jog positioning ....................................................... |
50 |
Fast forward and rewind......................................... |
51 |
During playback ............................................. |
51 |
From the stop position .................................. |
51 |
Repeat playback................................................. |
51 |
Setting the IN and OUT points ............................... |
52 |
Editing the IN and OUT points ...................... |
52 |
Setting the time between repeats .......................... |
52 |
Recording............................................................ |
53 |
Recording (ii) ........................................................... |
53 |
Hands-free recording.............................................. |
53 |
Dropping out of record mode ................................ |
53 |
Rehearsing recording ............................................. |
54 |
Assigning virtual tracks..................................... |
54 |
Overdub recording ............................................. |
55 |
Auto punch operations ...................................... |
55 |
Setting the punch points ........................................ |
56 |
LAST REC ....................................................... |
56 |
IN -> OUT ........................................................ |
56 |
LAST TAKE LOAD ......................................... |
56 |
Checking the punch points .................................... |
56 |
Rehearsing the punch ............................................ |
57 |
Recording the punch .............................................. |
57 |
Checking the take ................................................... |
57 |
After finishing the punch........................................ |
58 |
Table of Contents |
|
If you change your mind......................................... |
58 |
Varispeed operations (pitch and SSA).............. |
58 |
Pitch ......................................................................... |
59 |
To use the set pitch ....................................... |
59 |
SSA (Slow Speed Audition).................................... |
59 |
To use the SSA .............................................. |
59 |
6 – Location operations |
|
Direct location ..................................................... |
60 |
Direct location (i)..................................................... |
60 |
Direct location (ii).................................................... |
61 |
Location marks.................................................... |
62 |
Entering location marks ......................................... |
62 |
Active location marks............................................. |
62 |
Giving a title to the active location mark .............. |
62 |
Deleting the active location mark.......................... |
62 |
Editing the active mark........................................... |
63 |
Using the location mark list ............................... |
63 |
Locating using the list............................................ |
64 |
Using the IN OUT and TO marks............................ |
64 |
Titling using the list ................................................ |
64 |
7 – Track editing |
|
About track editing ............................................. |
65 |
IN, OUT and TO ....................................................... |
65 |
Entering the edit mode ........................................... |
65 |
Track editing functions....................................... |
65 |
Remember! .............................................................. |
65 |
COPY -> PASTE................................................... |
66 |
COPY -> INSERT ................................................. |
66 |
MOVE -> PASTE .................................................. |
67 |
MOVE -> INSERT ................................................. |
67 |
OPEN .................................................................... |
68 |
CUT....................................................................... |
68 |
SILENCE............................................................... |
68 |
CLONE TRACK.................................................... |
69 |
CLEAN OUT ......................................................... |
69 |
UNDO and REDO................................................. |
69 |
Undoing and redoing actions ................................ |
70 |
An undo/redo example ........................................... |
70 |
8 – Mastering and backup (CD-R) |
|
Connection .............................................................. |
72 |
Notes regarding the handling of CD-R discs........ |
72 |
Mixdown............................................................... |
73 |
Pre-mastering.......................................................... |
73 |
Recording the pre-master ............................. |
73 |
Exiting mastering .......................................... |
74 |
Checking the master............................................... |
74 |
Exiting master checking ............................... |
74 |
Trimming the master .............................................. |
75 |
Recording to CD-R .............................................. |
75 |
Recording to CD-R (track recording) .................... |
75 |
Finalizing the disc................................................... |
76 |
Recording to CD-R (multiple tracks) ..................... |
77 |
TASCAM 788 Digital PortaStudio 5

Table of Contents |
|
Playing back CDs using the 788 ............................ |
78 |
Backup using CD-R ............................................ |
79 |
Backing up a song .................................................. |
79 |
Restoring data from CD-R ...................................... |
80 |
9 – Effects |
|
EFFECT 1 ........................................................ |
81 |
EFFECT 2 ........................................................ |
81 |
Setting up EFFECT 1 .......................................... |
81 |
Using EFFECT 1 as a multi-effect processor........ |
81 |
Using EFFECT 1 as a single stereo effect |
|
processor in the effect loop ............................... |
82 |
Setting up EFFECT 2 .......................................... |
82 |
Using EFFECT 2 as a multi-channel dynamics |
|
processor ............................................................. |
82 |
Using EFFECT 2 as a stereo dynamics |
|
processor ............................................................. |
82 |
Using EFFECT 2 as a single stereo effect |
|
processor in the AUX effect loop....................... |
83 |
Send levels, etc................................................... |
83 |
Preand post-fader sends explained .................... |
84 |
Changing between pre-fader and post-fader |
|
settings................................................................. |
84 |
Selecting the type of effect ................................ |
84 |
Multi-effect processor preset settings .................. |
85 |
Single stereo effect processor settings................ |
85 |
Dynamics processor............................................... |
85 |
Making settings................................................... |
86 |
Using the user libraries...................................... |
86 |
Storing an effect in the library ............................... |
86 |
Recalling a user setting from the library .............. |
86 |
Parameter details................................................ |
87 |
Multi-effect processor settings.............................. |
87 |
Compressor .................................................... |
87 |
Distortion ........................................................ |
87 |
Noise gate ....................................................... |
87 |
Flanger ............................................................ |
87 |
Exciter ............................................................. |
88 |
Pitch shifter .................................................... |
88 |
Chorus ............................................................. |
88 |
Reverberation ................................................. |
88 |
Delay ................................................................ |
88 |
Parametric EQ ................................................ |
88 |
De-esser .......................................................... |
89 |
Single stereo effect settings .................................. |
89 |
REVERB .......................................................... |
89 |
DELAY ............................................................. |
89 |
CHORUS .......................................................... |
89 |
PITCH SHIFTER .............................................. |
90 |
FLANGER ........................................................ |
90 |
PHASER .......................................................... |
90 |
REVERB + GATE ............................................ |
90 |
Dynamics processor............................................... |
90 |
10 – Routing and scene libraries |
|
Routing libraries ................................................. |
91 |
Saving the current routing settings to the library91 |
|
Loading routing settings from the library............. |
92 |
Scene libraries .................................................... |
92 |
Saving a scene to the library ................................. |
92 |
Loading scenes from the library............................ |
93 |
Other matters concerning scenes......................... |
93 |
11 – Synchronization |
|
Master or slave?...................................................... |
94 |
How to measure time?............................................ |
94 |
Synchronization methods.................................. |
95 |
MIDI Time Code (MTC) ................................... |
95 |
MIDI clock ........................................................ |
95 |
MIDI Song Position Pointer (SPP): ............... |
95 |
Synchronization settings on the 788..................... |
95 |
MTC .................................................................. |
95 |
syncTrk (sync track) ...................................... |
95 |
Tempo Map ..................................................... |
95 |
Making synchronization settings...................... |
96 |
Synchronization master/slave setting on the 788 96 |
|
Selecting the master synchronization type.......... |
96 |
OFF .................................................................. |
96 |
MTC .................................................................. |
96 |
CLOCK ............................................................. |
96 |
SycTRK ............................................................ |
96 |
MIDI Timecode frame rate ...................................... |
96 |
MIDI Timecode offset (788 as slave only) ............. |
97 |
Sync track ........................................................... |
97 |
Recording the sync track ....................................... |
97 |
Using the sync track............................................... |
98 |
Tempo map ......................................................... |
98 |
Entering and editing the tempo map..................... |
98 |
BAR .................................................................. |
99 |
SIG ................................................................... |
99 |
Tempo .............................................................. |
99 |
Using the tempo map.............................................. |
99 |
Using MTC to control a sequencer ................... |
100 |
Metronome .......................................................... |
100 |
OUTPUT ........................................................... |
100 |
MODE ............................................................... |
100 |
INT LEVEL ....................................................... |
100 |
CH .................................................................... |
100 |
ACC. NOTE ...................................................... |
100 |
(ACC.) VELO ................................................... |
100 |
NORM. NOTE .................................................. |
100 |
(NORM.) VELO ................................................ |
100 |
12 – MMC and MIDI functions |
|
MIDI Machine Control......................................... |
101 |
788 MMC slave/master setting............................... |
102 |
MMC ID..................................................................... |
102 |
Bit-map array of MMC commands......................... |
103 |
Bit-map array of Response/Information fields ..... |
104 |
Program Change messages .............................. |
105 |
Enabling/disabling Program Change .................... |
105 |
Control Change messages ................................ |
106 |
Enabling/disabling Control Change messages.... |
106 |
Mixer Control Change............................................. |
106 |
Effect Control Change messages.......................... |
107 |
6 TASCAM 788 Digital PortaStudio

Table of Contents
NRPN values for multi-channel and stereo dynamics |
|
processors ........................................................... |
107 |
NRPN values for single stereo effects .................. |
108 |
NRPN values for distortion multi-effect processor |
|
settings (1) ........................................................... |
109 |
NRPN values for clean multi-effect processors (2)113 |
|
NRPN values for multi-effect processor (3).......... |
118 |
13 – Specifications, etc. |
|
Dimensional drawing ......................................... |
119 |
Specifications..................................................... |
119 |
Physical and electrical specifications................... |
119 |
Digital recorder specifications............................... |
119 |
Mass storage ........................................................... |
120 |
Analog audio I/O ..................................................... |
120 |
Audio specifications ............................................... |
120 |
Error messages, etc........................................... |
120 |
MIDI Implementation Chart................................ |
124 |
TASCAM 788 Digital PortaStudio 7

1 – Introductory concepts
If you are new to disk-based recording or to multitrack recording generally, there may be some ideas with which you are slightly unfamiliar. This section briefly introduces you to some of the concepts
regarding the 788 and its operation. Even if you are familiar with the idea of multitrack recording and disk-based recording, you may find this to be a useful introduction.
Multitrack recording (general)
Multitrack recording allows you to make recordings of many different signals separately, allowing a high degree of control over the finished sound.
Tracking The signals of the first tracks to be recorded as part of the song are fed through a mixing console, and recorded on many different tracks on a multitrack recorder (“tracking”)
Overdubbing New material can be recorded on a track while listening to previously-recorded tracks— this is known as “overdubbing”. For instance, the vocal parts of a song can be recorded after all the backing instruments have been recorded, allowing the singer to concentrate on getting the best vocal performance. While tracking or overdubbing, effects can be added to enhance the recorded sound.
Punching Most recorders have silent “punch-in” and “punch-out” facilities, i.e. if you make a mistake in only a short passage, you don’t have to re-record
the whole piece—you can re-record only the part where the mistake occurred.
Mixdown These recorded tracks are then “mixed down”—this means that the volumes, tonal balance (the amount of bass and treble, etc.) of the different recorded tracks are adjusted and fed to a stereo recorder (a DAT recorder can be used for this purpose). At this stage, additional effects such as echo, reverb, etc. may be added to individual tracks, to help produce a “feel” to the piece.
Alternatively, with the 788 it is possible to mix to CD. First the song is mixed to a special stereo mastering track and then written to CD, using a CD-R or CD-RW drive connected to the SCSI port of the 788.
Mastering If the mixdown has not already been done to CD, then an audio CD (or an analog cassette) may be then mastered and duplicated from the master stereo recording.
Recording ("tracking") and overdubbing
Mixdown
8 TASCAM 788 Digital PortaStudio

1 – Introductory concepts–Disk vs. tape recording
Multitrack recorders can be analog (for example, the TASCAM PORTASTUDIO cassette series) or digital (for example, the TASCAM series of DTRS recorders), and likewise mixing consoles can be analog or digital. The 788 is digital, that is, after the signals enter the 788, the mix, recording process, the internal effect processors and mixdown are all digital. This
avoids any possible loss of quality caused by repeated conversion between analog and digital.
This also allows a consistent frequency response (i.e. there is no loss of the very high or very low frequencies) and dynamic range (from quiet to loud), since all the components in the integrated 788 system are designed to work with each other.
Disk vs. tape recording
The 788 uses a disk for recording, but traditionally, multitrack recording has been done on tape. The
methods of recording with tape and disk recording systems differ in a number of ways.
Multitrack tapes
A tape is divided into a number of different “tracks”; usually either 4, 8, 16 or 24.
A typical arrangement of tracks used during a tapebased recording session is shown below:
Track 1 |
Bass (kick) drum |
|
|
|
|
|
|
|
Track |
2 |
Snare drum |
|
|
|
|
|
|
Track |
3 |
Drum Kit (left) |
|
|
|
|
|
|
Track 4 |
Drum Kit (right) |
|
|
|
|
|
|
|
Track |
5 |
Bass Guitar |
|
|
|
|
|
|
Track 6 |
Guitar |
|
|
|
|
|
|
|
Track |
7 |
Vocals (backing) |
|
|
|
|
|
|
Track 8 |
Lead vocals |
|
|
|
|
If more tracks are required in the course of a session, there are a number of alternatives:
•It is possible to record on unused parts of a track (for instance, if there is a saxophone part which is never played at the same time as the backing vocals, you can use the spare portions of track 7 for recording the saxophone).
•By sacrificing a track of audio, special synchronizing timecode can be recorded on the “sacrificed” track, allowing sequenced MIDI instruments to play along with the audio tracks.
•If there are more instruments than tracks, it is possible to do a “mini-mixdown” from some existing tracks to a spare track or tracks. This is known as “track bouncing” or “ping-pong”.
Track 1 |
Bass (kick) drum |
|
Track |
2 |
Snare drum |
Track |
3 |
Drum Kit (left) |
Track 4 |
Drum Kit (right) |
|
Track |
5 |
Bass guitar |
Track 6 |
Rhythm guitar |
|
Track |
7 |
Click track (disposable) |
Track 8 |
Guide vocals (disposable) |
|
•In the example above, the four recorded tracks incorporating the drum parts will be bounced and combined onto tracks 7 and 8. Tracks 1 through 4 may now be reused for other purposes.
Track 1 Was bass (kick) drum - now reusable
Track 2 Was snare drum - now reusable
Track 3 Was drum kit (left) - now reusable
Track 4 Was drum kit (right) - now reusable
Track 5 |
Bass guitar |
Track 6 Rhythm guitar
Track 7 New mixed drums (left)
Track 8 New mixed drums (right)
Multitrack disks
On an analog tape deck, the number of tracks available is determined (mainly) by the width of the tape. By contrast, in a disk system, the power of the processor determines how many tracks can be recorded and played back at one time. On the 788, eight tracks can be recorded and played back at one time.
While a tape’s tracks are recorded side-by-side along the length of the tape, a disk track may be placed anywhere on the disk.
If you could see the magnetic patterns that are recorded on a hard disk, you might find that the
TASCAM 788 Digital PortaStudio 9

1 – Introductory concepts–What do “16-bit” and “24-bit” mean?
tracks recorded in a session would look something like:
Track 2
Track 3
Track 6
Track 5
Track 7
Track 1
Track 4
Actually, the arrangement of tracks on a disk is more complicated than this, but the diagram above gives you an idea of how tracks don’t need to live side by side as they do on tape.
Another thing to notice is that the tracks are of different lengths. Unlike a multitrack tape, where the length of the track has to be equal to the length of the tape, a disk recorder can be “smart” enough to recognize when nothing is recorded, and use that space for other tracks, if necessary. This means that it’s difficult to say that you can record a song of a certain length on a disk of a given size (unlike a cassette, say, which is clearly labelled with the length of material that can be recorded on it).
When recording or playing back material, the processor (“brain”) of the 788 must collect all the tracks together and play them simultaneously, so that you hear them playing together in perfect timing with each other.
This is what we meant when we talked earlier about the number of tracks that can be replayed at one time. If we asked the 788 to play back hundreds of tracks together, it would end up having to do too much work, and the tracks would be out of time with each other.
The “song”
On the 788, as on many MIDI sequencers, etc., a piece of music is referred to as a song (whether or not it has a vocal part). Because on a multitrack tape system, a piece of music takes up a fixed length of all tracks of the tape—no more, no less, there is no need to pre-divide a tape into songs.
On a disk-based system, however, before you start recording a piece, you must “tell” the recorder that you are recording a new song.
To the 788, a song is all the audio data you record, together with the playlist which allows you to select parts of the song for playback, until you start working on another song.
You can copy songs to other songs (or to another disk), erase them, protect them against further changes, and so on.
Since the song is a collection of digital data, there is no loss of quality when a song is stored or copied to another disk.
What do “16-bit” and “24-bit” mean?
The 788 is capable of recording at 16-bit and 24-bit resolution. Basically speaking, in digital audio, the more bits, the better. This is because in a digital audio device like the 788, incoming sound is digitized, that is, converted into numbers, which in the case of the 788 are stored on the disk.
When it is time to replay the sound, the 788 reads the numbers from hard disk and converts them back into sound.
In each second, the 788 takes a “snapshot” of the incoming sound 44,100 times. By playing back these snapshots one after the other at the same speed (44.1 kHz, in technical terms), the 788 provides you
with an accurate reproduction of the sound, in much the same way as a movie camera takes a series of still pictures (frames) 24 times a second, which are replayed by the movie projector to give you the feeling of a continuously moving picture.
However, the speed at which the sampling is carried out is only half the story. The depth at which the sampling is carried out is also important.
To illustrate this, let’s think of a black and white photograph. In such a photograph, there can be an infinite number of grays, all the way from complete white to total blackness.
10 TASCAM 788 Digital PortaStudio
1 – Introductory concepts–Real and virtual tracks on the 788
If we sample this photograph, which originally contains pure white, pure white and almost every shade of gray in between, we must convert it to a fixed number of gray levels. Here, we can see that the more grays we use to represent the picture, the more realistic the photo appears.
|
|
|
|
|
|
|
|
|
|
|
|
|
|
|
|
|
|
|
|
|
|
|
|
|
|
2-bit resolution |
|
|
3-bit resolution |
|||||||||
(4 gray levels) |
|
|
(8 gray levels) |
|||||||||
8-bit resolution
(256 gray levels)
Note that we use the number of bits (a bit is either “on” or “off”) to show how many grays are used to
make up the picture. The number of grays can be given as 2n, where n = the number of bits.
So: 2 bits give us 22 = 4 grays, 3 bits give us 23 = 8 grays, and 8 bits give us 28 = 256 grays,
For our eyes, 256 grays is just about enough, but our ears need a little more quality. If you listen to sound recorded at 8-bit resolution, you’ll notice that it sounds somewhat rough, especially in the quieter passages.
CDs are therefore produced at 16 bits (216 = 65,536 “grays”) and this is fine for playback. For recording, though, when sound is being manipulated and processed, it’s a good idea to have more bits available. The 788 therefore gives you 24 bits of resolution (224 = 16,777,216) which allows complete precision and sonic quality at all stages of the production process.
At the final stages, when the mix is transferred to CD or to any other digital medium, the 24 bits are reduced to 16 for compatibility with other audio equipment.
Note, though, that when you record using 24 bits rather than 16, more space is used on the hard disk (50% more, as you might well expect). In practice, given the size of the hard disk in the 788, this should make little or no difference to the way you work with your recordings.
Real and virtual tracks on the 788
When you use the 788, you can record “spare” tracks; for instance, different versions of the lead vocals, and pick and choose between the different versions to find the one which works best.
These “spare tracks” are known as virtual tracks. With the 788, you can record up to 250 tracks per song. From those 250 tracks, you pick the eight that you want to fit together to make your finished mixed song. This can be re-takes of the same material (for instance, many attempts by a singer to capture the perfect vocal line), or alternative tracks (different guitar lines or effect settings, etc.). This allows you
much more freedom to experiment than a tape recorder can provide.
Different harmony arrangements for backing vocals
Lead vocal attempts
|
|
|
|
|
|
|
|
|
|
|
|
|
|
|
|
|
|
|
|
|
|
|
|
|
|
|
|
|
|
|
|
|
|
|
|
|
|
|
|
Bass line played on different instruments |
|||||||||||||||||||
|
|
|
|
|
|
|
|
|
|
|
|
|
|
|
|
|
|
|
|
|
|
|
|
|
|
|
|
|
|
|
|
|
|
|
|
|
|
|
|
|
|
Saxophone takes |
|
||||||||||||||||
|
|
|
|
|
|
|
|
|
|
|
|
|
|
|
|
|
|
|
|
|
|
|
|
|
|
|
|||
|
|
|
|
|
|
|
|
|
|
|
|
|
|
|
|
Rhythm guitar experiments with |
|||||||||||||
|
|
|
|
|
|
|
|
|
|
|
|
|
|
|
|
different effect settings |
|
||||||||||||
|
|
|
|
|
|
|
|
|
|
|
|
|
|
|
|
|
|
|
|
|
|
|
|
|
|
|
|
|
|
|
|
|
|
|
|
|
|
|
|
|
|
|
|
|
|
|
|
|
|
|
Different takes of lead guitar line |
||||||||
|
|
|
|
|
|
|
|
|
|
Virtual |
|
|
|
|
|
|
|
|
|
|
Here, we pick the best |
||||||||
|
|
|
|
|
|
|
|
|
|
|
|
|
|
|
|
|
|
|
|
|
|
|
|
|
|
takes from the virtual |
|||
|
|
|
|
|
|
|
|
|
|
tracks |
|
|
|
|
|
|
|
|
|
|
tracks and assign them to |
||||||||
|
|
|
|
|
|
|
|
|
|
|
|
|
|
|
|
|
|
|
|
|
|
|
|
|
|
||||
|
|
|
|
|
|
|
|
|
|
|
|
|
|
|
|
|
|
|
|
|
|
|
|
|
|
||||
|
|
|
|
|
|
|
|
|
|
|
|
|
|
|
|
|
|
|
|
|
|
|
|
|
|
the eight assigned play- |
|||
|
|
|
|
|
|
|
|
|
|
|
|
|
|
|
|
|
|
|
|
|
|
|
|
|
|
|
|
|
back tracks. |
|
|
|
|
|
|
|
|
|
|
|
|
|
|
|
|
|
|
|
|
|
|
|
|
|
|
|
|
|
|
|
|
|
|
|
|
|
|
|
|
|
|
|
|
|
|
|
|
|
|
|
|
|
|
|
|
|
|
|
|
|
|
|
|
|
|
|
|
|
|
|
|
|
|
|
|
|
|
|
|
|
|
|
|
|
|
|
|
|
|
|
|
|
|
|
|
|
|
|
|
|
|
Track 1: |
|
|
Drums Left |
|
|||||||||||||
|
|
|
|
|
|
|
|
|
|
|
|
Track 2: |
|
|
Drums Right |
Assigned |
|||||||||||||
|
|
|
|
|
|
|
|
|
|
|
|
|
|
||||||||||||||||
|
|
|
|
|
|
|
|
|
|
|
|
Track 3: |
|
|
Lead Guitar |
||||||||||||||
|
|
|
|
|
|
|
|
|
|
|
|
|
|
|
|
|
|
|
|
|
|
|
|
|
|
|
|
|
playback |
|
|
|
|
|
|
|
|
|
|
|
|
Track 4: |
|
|
Rhythm Guitar |
tracks |
|||||||||||||
|
|
|
|
|
|
|
|
|
|
|
|
Track 5: |
|
|
Saxophone |
|
|||||||||||||
|
|
|
|
|
|
|
|
|
|
|
|
|
|
|
|
|
|
|
|
|
|
|
|
|
|
|
|
|
|
Track 6: Bass line
Track 7: Lead vocals
Track 8: Backing vocals
TASCAM 788 Digital PortaStudio 11

1 – Introductory concepts–Real and virtual tracks on the 788
Editing
One of the most useful features of a disk-based recorder such as the 788 is the ability to edit material. When working with a stereo tape recorder, the usual way of editing was with a white pencil, a razor blade and sticky splicing tape. In this way, unwanted parts of tape could be removed, and parts of a song (e.g. verses, choruses, intros) could be moved from one part of the song to another. However, there were many disadvantages to this (and it didn’t work with multitrack recorders).
The other way of tape editing is assembly from one recorder to another—you need two recorders, and some very precise (and often expensive!) synchronization equipment to do this.
Nondestructive editing on the 788 By contrast, the 788 allows you to use a wide variety of sophisticated editing techniques with no additional equipment.
If you have ever used a computer for word-process- ing, you will know that you can cut and copy parts of a document, and paste them into other locations in the document, saving you a lot of boring, repetitive work.
Since the 788 stores its information as digital data, just as a word-processor stores your documents as digital data, parts of a song can be cut, copied and pasted to other locations in the song. You can cut, copy and paste all the tracks which have been recorded to make a song, or just one or a few tracks.
As a practical example, let’s suppose that you’re recording a song that has three chorus sections, with an identical, rather complex, guitar hook at the end of each of them. If you were recording to tape, you would record the hook for these three sections three times, each one in the appropriate place. Because this is a slightly tricky passage to play, you might only get it right once or twice. You’d have to go through the process of punching in and out at the places where you made the mistake, until you got it right three times.
With the 788, this becomes easier. You can copy and paste the part which was recorded properly, and replace the bad versions. This makes life a lot simpler and quicker, as you only have to get the hook
right once—the other times are simply “clones” of the perfect recording.
Bad take |
Good |
Bad take |
|
take |
|||
|
|
Good |
Good |
take |
take |
Bad take |
Good |
Bad take |
|
take |
|||
|
|
Copy the good version and overwrite the bad takes
Good |
Good |
Good |
take |
take |
take |
There are other ways you could use this feature— used with care, it could be used to correct timing problems with an out-of-time player, or signals from microphones which are widely separated.
788 editing On the 788, you can copy, move, paste, add silence, close up gaps, wipe whole tracks, etc. in very simple operations. See “Track editing” on page 65 for details of the track editing operations available with the 788.
Undo and redo Furthermore, compared with a tape recording system, disk offers one very big plus—the ability to undo changes. For instance, if you make a mistake and copy a bad take of the chorus over a good copy, you can undo it and restore what you originally recorded. You can’t do this with tape. This is why we call editing with disk “non- destructive”—you don’t actually destroy the data immediately when you write over it, cut it or delete it, but you have a “safety net” to catch your mistakes.
However, the undo function is not available for every operation, though. For instance, there is no way to undo formatting a disk (and destroying all data on it). This is an operation from which there is no escape, once it has started (there are a few other non-undo- able operations, such as erasing a song—these functions are explained as being non-undoable when they are described in this manual).
12 TASCAM 788 Digital PortaStudio

1 – Introductory concepts–Assignment
Multi-take punch-ins on the 788
Similar to the concept of “virtual tracks”, and also to the editing procedure above, is the idea of multi-take punches.
The 788 allows you to repeat a punch-in section, playing or singing the same phrase many times until
you stop the punch procedure. All the successive takes of this phrase are stored on disk, and you can audition them all, and pick the best one to insert into the track.
Instant location on the 788
With a tape recorder, you must always wait a certain amount of time before moving from one part of a song to another. This is because it takes time for tape to be wound or rewound (even with the fast DTRS or DAT systems, moving between the start and end of a repeated section takes a definite amount of time).
However, a disk-based system like the 788 does not need to rewind, and therefore if a section is being
looped, the start can follow immediately after the end section. This can be a little unnerving for musicians brought up on tape systems, and so the 788 allows you to set the period between the end and the start, simulating a tape rewind time.
You can set many location marks throughout a 788 song, allowing you to jump instantly around even the longest pieces of music.
Recording technique
Remember, the 788 is a tool which helps you create recordings. Although it has many features which will assist you in making high quality recordings easily, the use of a 788 (or indeed, of any piece of equipment) does not in and of itself guarantee a perfect recording.
Above all else, we encourage you to learn to listen critically to your recordings—this will enable you to make the most from your equipment and add to your ultimate enjoyment.
Assignment
When recording signals on a multitrack system, the outputs of the signal sources (microphones, instruments, effect returns or previously-recorded multitrack tape tracks) must be plugged into the appropriate channels of the mixing console and assigned or routed to the appropriate destination.
When recording the first tracks, the destination will usually be the track or tracks of the multitrack recorder on which the signal will be recorded.
In the mixdown phase of a project, the destination will usually be the stereo pair to which the tracks will be mixed (usually on another recorder).
In a conventional system, to change (say) a microphone signal from input channel 1 of the mixer to input channel 4, it is either (in a small setup) necessary to unplug the microphone from the mixer and reconnect or (in larger setups) to use a patchbay, where all the inputs and outputs are permanently connected at the rear of a “patch panel” and links are made using patch cords on the front. Digital patchbays are also available for the connection of digital signals.
The 788 internal patchbay
With the 788, no external patchbay is necessary. The unit incorporates its own digital patchbay with many advanced features. The techniques of actually making the assignments in this internal patchbay are explained in more detail in “Assignment on the 788” on page 36. This section provides a brief overview of
the facilities available when using the assignment patchbay of the 788.
The illustration here tries to show that although the sound sources may be connected to the same inputs of the 788 throughout a session, the signals from
TASCAM 788 Digital PortaStudio 13

1 – Introductory concepts–Assignment
these inputs may be assigned to different mixer channels as required during the recording process.
AUX
A B C D L R
INPUTS
feeds recording track 1, mixer channel 3 always feeds track 3, etc. This cannot be changed.
However, when mixing down or track bouncing, the tracks themselves, which are usually the destination of the signals, become signal sources. In this case, tracks are assigned to channels, becoming the signal source. Again, track 1 is always assigned to channel 1, track 2 is always assigned to channel 2, etc. In this case, however, there are 250 virtual tracks per song (see “Real and virtual tracks on the 788” on page 11) to choose from, and the virtual track that is currently assigned to a real track will be sent through the mixer channel to the STEREO outputs.
1
2
3
4
5
6
7
8
Although only a few dashed lines are shown here for simplicity, it is possible to connect any of the shown inputs to any of the eight mixer channels.
Every mixer channel is tied directly to the associated recording track on disk. This means that when recording, the output of mixer channel 1 always
1
2
3
4
5
6
7
8
Track bouncing
As a further refinement, it is also possible to send the stereo output signal to a track or pair of tracks, allowing track bouncing to take place, as described in “Multitrack tapes” on page 9.
In this illustration tracks 7 and 8 are used to receive the mixed stereo tracks, which are fed by tracks 1 through 6:
1
2
3
4
5
6
7
8
Note that the stereo fader does not actually affect the volume of the mixed tracks—it is placed in this diagram for illustrative purposes only.
14 TASCAM 788 Digital PortaStudio
1 – Introductory concepts–Synchronization and the 788
Quick setup and the assign screen
The 788 allows you to see your current assignments easily in two ways (as explained in more detail in “Assignment on the 788” on page 36):
Firstly, when you press a mixer channel’s SELECT key, it flashes, along with the inputs that have been assigned to it.
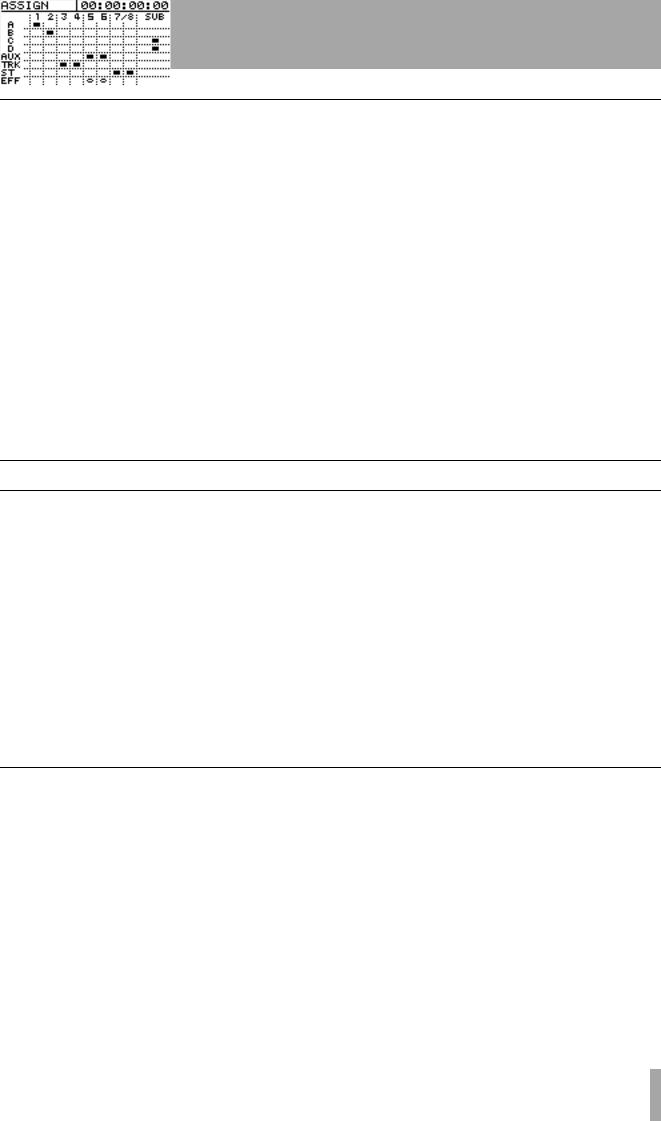
Secondly, to see the whole map of the current assignments, press and hold down the SHIFT key while pressing the ASSIGN MAP key:
Inputs are listed down the left side of the screen, and destinations along the top. A black mark at the inter-
section of the input and destination means an assignment of the input to the destination.
As well as this map, the 788 also allows you to set up different commonly-used assignment maps using the
QUICK SETUP key.
The assignment maps that you can set up in this way are: RECORDING (where the inputs are assigned to the mixer channels (and hence to the tracks on a one-to-one basis), MIXDOWN, where the recorded tracks are routed to the stereo output bus, and BOUNCE 7/8 where tracks 1 through 6 are routed to the stereo bus, which in its turn is routed to channels 7 and 8.
There is also a special library, as described elsewhere in this manual, where custom routing patterns can be stored and retrieved (as well as a library for storing the whole of the mixer’s settings).
Synchronization and the 788
One of the other key features of the 788 is its ability to synchronize with other equipment. This is especially useful when working with MIDI equipment, as the MIDI instruments do not actually need to be recorded until the final mixdown stage.
Instead, one way of working is to record the basic MIDI tracks (say a bass and drums sequence) on a sequencer, and play it back as a guide “click” or backing track while recording guitars, vocals, etc.
Alternatively, the acoustic tracks may be recorded first, and MIDI tracks added later as atmosphere.
In either case, at mixdown, the 788 provides you with a sub mix facility, that allows the inputs to be routed
through to the master stereo mix in addition to the tracks recorded on disk.
There is no “right” or “wrong” way of working—you should choose the method that works best for you and your material.
Note that in either case, the MIDI must be accurately synchronized to the acoustic recorded material at all times.
There are three basic methods of synchronization between the 788 and a MIDI system, briefly explained below. Full details of how to use these synchronization facilities are provided in “Synchronization” on page 94.
Timecode synchronization
Timecode is a way of specifying an absolute position in a recording. It is expressed in hours, minutes, seconds, frames and bits. The number of frames in a second depends on the timecode type—these are related to the audio-visual industry where timecode (sometimes known as “SMPTE” or “SMPTE/EBU” timecode originated. There are five major “flavors” of timecode supported by the 788:
Frames/ |
Timecode type |
||
second (fps) |
|||
|
|
||
|
|
|
|
24 |
Movie |
|
|
|
|
|
|
25 |
PAL/SECAM TV |
||
|
|
|
|
29.97 drop |
NTSC color for broadcast |
||
|
|
|
|
29.97 non-drop |
NTSC color TV |
||
|
|
|
|
30 non-drop |
NTSC mono TV |
||
|
|
|
|
The 788 converts internal timecode so that it can be transmitted over MIDI (MIDI Time Code or MTC) and this is the way in which the 788 transmits and receives timecode.
TASCAM 788 Digital PortaStudio 15

1 – Introductory concepts–MIDI external control (MMC, etc.)
When synchronizing acoustic recordings to MIDI instruments using MTC, the 788 can act as a timecode master or a slave with respect to your MIDI system. Of course, your sequencer must be able to use MTC in order to do this.
In other words, when the 788 acts as a timecode master, the sequencer determines its playback/record position from timecode received from the 788.
When the 788 acts as a timecode slave, the sequencer sends out MTC to locate the 788 playback/record position. Note that many computer sequencers are not very accurate timecode masters, though—using the 788 as a timecode slave is probably best if you are going to use a stable MTC source, such as another 788.
Tempo map synchronization
As well as timecode, there is another way in which the 788 can be synchronized to MIDI sequencers, which depends on the position in bars (measures) and beats of a song .
The 788 is provided with a “tempo map”, which allows it to recognize that bar 1 starts at timecode
time 00:00:00.00, and bar 2 starts 2 seconds later (for example).
To use this method of synchronization, it is first necessary to set up this tempo map, so that musical positions can be mapped to timecode times.
Sync track recording
In this method of synchronization, the 788 records a MIDI timing clock data from the sequencer, and can
later use this information for synchronization and song positioning.
MIDI external control (MMC, etc.)
As well as synchronization, the transport controls of a sequencer can be used to control transport, etc. functions on the 788.
Or, if you want to work the other way, MIDI commands sent from the 788 can be used to control the sequencer.
These commands are known as MIDI Machine Control commands (MMC). Any machine capable of transmitting or responding to MMC may be provided with a unique ID, from 0 to 127.
Note that it is possible for a machine such as the 788 to be a timecode slave at the same time that it is a MMC master (i.e. MTC timing information is obtained from an external source, but the transport controls of the 788 are used to control other devices, including possibly the timecode source) or vice versa.
In the illustration below, the MIDI interface of the computer is fitted with two outputs, one of which provides the slaved 788 with the MMC transport commands, and the other driving the synthesizer
bank, etc. The sequencer takes its timing from the MTC output by the 788.
Carries MMC commands to control 788 transport, etc.
MIDI OUT (1) |
MIDI IN |
MIDI OUT (2)
MIDI IN Carries MTC to
synchronize MIDI OUT sequencer
Carries MIDI musical data to
 synths, etc.
MIDI IN
When starting synchronized playback, the sequence of events is therefore that the sequencer first sends an MMC Play command to the 788, which then locates to that position and starts playback. Meanwhile, the sequencer is waiting for MTC so that it can “lock in” and start playback. When the 788 starts playing, this MTC is received by the sequencer which then finally starts playback to the synthesizer.
16 TASCAM 788 Digital PortaStudio

1 – Introductory concepts–SCSI issues
MIDI remote control
In addition to the transport control described above, the 788 is able to accept MIDI Program Change messages to change mixer scenes, and routing tables, etc. as well as previously-set effector settings.
It can also accept Control Change messages, which allow a sequencer, for example, to control mixer parameters as well as individual effector parameters, so that remote control of the sound can be carried out in real time for the final mix.
SCSI issues
SCSI (usually pronounced “scuzzy”) stands for Small Computer Systems Interface, and is a way of connecting computers and peripheral devices (e.g. hard disks, removable disk drives, scanners, tape drives, etc.).
The 788 uses SCSI to communicate with its hard disk, since SCSI is a reliable, efficient way of sending data between devices.
You can connect different types of SCSI device to the 788, for example external hard disks, magneto-opti- cal disks or other types of removable media, as well as SCSI-equipped CD-R and CD-RW drives.
SCSI connections
The 788 uses the SCSI-2 protocol, which is used by most modern hard disk drives, and storage devices. You can connect almost any SCSI storage device to the 788, and use it for data storage.
Any CD-R or CD-RW drive that you use with the 788 must be a SCSI drive. Contact your TASCAM
dealer or consult the TASCAM Web site for details of which drives are known to work well with the 788.
NOTE
You should never plug or unplug SCSI devices from the chain with the power to any of them switched on. If you do, there is a real risk that you will damage the devices beyond repair.
SCSI IDs
SCSI devices are connected together in a “daisychain” arrangement. The total length of the chain should be less than 3 m (about 10 ft.).
Within each chain, each device must have its own unique identifier, known as a “SCSI ID”.
There may be up to eight devices within a SCSI chain, including the main SCSI controller (the 788 is a SCSI controller). Numbering of devices typically starts at 0 (zero) and goes up to 7.
The internal disk in the 788 has SCSI ID 0, and the 788 itself has SCSI ID 7.
Make sure that every device in your SCSI chain, including the controller (788) has a different ID. If you create a SCSI chain with more than one device using the same ID, you will find that you have problems with the setup.
Consult the documentation for your other devices to find out how to set the ID (it may be a set of switches or a rotary switch).
SCSI termination
At each end of a SCSI chain, there must be a terminator. This may either be a separate plug, or may be built into the SCSI device.
Consult the documentation for your other devices to find out how to set the termination for them.
The 788 is always at the end of its SCSI chain, and is always terminated.
TASCAM 788 Digital PortaStudio 17

1 – Introductory concepts–Further reading
SCSI devices and backing up
The 788 contains a large, fast hard disk, which allows the recording of many songs on the same disk.
However, if you keep all your material, eventually this disk will fill up, and you must do some “housecleaning” to sweep away the unwanted material.
The 788 incorporates a very useful feature which allows you to back up a song to CD-R or CD-RW media. These discs can hold a lot of data. In the case of a song being too big to fit on a single disc, the 788 will automatically create multi-disc archives on which you can store your work. This, of course, is in addition to you being able to use a CD-R/RW disc as
the final mastering device (mixdown of the final mastered stereo tracks to CD-R/RW via SCSI).
In case you do not have a CD-R/RW drive, we suggest the use of an external SCSI device which uses removable disks: the Iomega® zip® and jaz® drives can hold large amounts of data, as can magneto-opti- cal (MO) disk drives. The songs on the internal hard disk can be copied to the external media for archival.
Note that you should not attempt to install an internal disk drive (either hard disk or removable) in your 788. This is an operation that should be performed only by authorized TASCAM service agents.
Further reading
This section does not pretend to be a comprehensive listing or explanation of all these issues. If you have the time and interest, reading about these subjects is a very good way to add to your practical experience with the 788.
If you have Internet access, the Web is an excellent source of information. The following books are also useful reference sources, if you wish to explore these subjects in more depth.
Sound & Recording, 2nd edition 1994, Francis Rumsey & Tim McCormick, Focal Press, Oxford, is a good general introduction to recording theory and practice, starting from basic principles. However, the section on hard disk recording is not very long.
For detailed information on digital audio, including disk recording theory, The Art of Digital Audio, 2nd
Edition 1994, John Watkinson, Focal Press, Oxford, is invaluable, but is somewhat technical in places.
MIDI Systems and Control, 2nd Edition 1994, Francis Rumsey, Focal Press, Oxford, has an excellent section on synchronization and machine control (chapter 6).
There are also many resources regarding SCSI. It’s not a subject that you usually need to know in enormous detail, but an Internet search for “SCSI primer” will probably give you all the information you need.
If you are using your 788 with a sequencer, make sure that you read and understand the relevant sections of the sequencer manual, as well as the 788 manual. This will probably avoid many problems with regard to synchronization.
18 TASCAM 788 Digital PortaStudio

2 – Getting started
This section explains some of the principles of using your 788. It is not a “tutorial”—there are so many different ways in which the 788 can be used that it would probably not be useful for us to give you step-
by-step instructions here covering every possibility. Instead, we have provided you with general instructions that will work in most cases.
Precautions, etc.
Treat the 788 with the same care and respect that you would treat a notebook or laptop computer, and it will last for a long time, and act as a useful creative tool to help you in your music-making.
However, there are a few precautions you should take with the 788:
•always operate the 788 on a firm level surface. Do not locate it where it can be knocked or shaken— hard disks are more sensitive than tapes.
•always take note of any special instructions regarding the care and maintenance of removable media, if you are using such media with the 788.
•never eat or drink over the 788. Spilled liquid or food crumbs will not improve its performance! Also, smoke particles are the enemy of studio equipment. If possible, we suggest that you make your 788 work area a no-smoking area.
•always allow the 788 to adjust to room temperature if you are bringing it from a cold to a warm place. This may take between 1 and 2 hours.
•never connect or disconnect audio equipment with the monitoring levels turned up. This can cause damage to speakers (and ears!). Always turn down levels before making or breaking such connections.
•always shut down the 788 before turning it off (see the following section).
•never move the 788 while it is powered on. Take special care never to move it while recording or playback is taking place, in order to avoid any possible damage to the disk. Shut down and power off the unit before moving it.
•never make external SCSI connections with the power to the 788 or the external SCSI device turned on. Making SCSI connections with the power turned on can cause damage to the units, including the 788, which is expensive to repair! Shut down the unit and turn it off before making or breaking these connections.
Shutting down the 788
It may seem strange that the first thing we explain is how to turn off the 788. This is important, though, and you should get into the habit of always turning off the 788 in this way, as this will avoid any possible loss of data.
2 |
|
4 |
|
3
1
1Stop playback or recording (you cannot shut down the 788 while playback or recording is taking place).
2Turn down the level of the monitoring amplifier (to avoid speaker “thumps”).
3Press the EJECT/SHUT key.
4The indicator lights, and a message appears on screen asking if you are sure. Press ENTER/ YES to shut down the 788.
5As the 788 “tidies up” before closing down, appropriate messages appear on screen. At the end of the shutdown process, the message:
is shown and the indicator flashes. Turn off the 788 with the power switch on the rear panel.
TASCAM 788 Digital PortaStudio 19

2 – Getting started–Power-on
Power-on
When the power is turned on, the display shows the power-up screen. All the front panel indicators light briefly.
When the “home” screen (“The “home” display” on page 26) is shown, you can start to use the 788.
NOTE
The disks are then scanned, and the 788 performs internal self checks.
You will probably be able to hear the sound of the disks as the startup progresses. Depending on the number of disks connected to the 788, this may take a little time.
After the check is complete, the 788 loads the song you were last working on.
NOTE
When you first purchase the 788, a demonstration song (“Liquor Store”) is already recorded on it. See the “Brief Guide” for details of how to load this song.
The song is recorded in 24-bit resolution and is protected. If you want to edit this song, or change parts of it, you must unprotect it, or make an unprotected copy of it first.
There may be some noise output through the monitoring system while the 788 is turned on. For this reason, we strongly suggest that you follow the power-on order described previously (i.e. turn on the 788 before the monitoring system. If the monitoring system is already turned on when you need to turn on the 788, make sure the monitoring system volume is turned down before you turn on the 788.
Remember that you must always turn off the 788 “properly”, that is, using the method described in “Shutting down the 788” on page 19.
Do not simply press the power switch to turn off the 788— there is a risk of possible loss of your recording if you do this.
About the demonstration song
We suggest that you use this song “Liquor Store” to experiment with some of the features of the 788.
However, before you start editing and experimenting with the song, you may want to make a copy (if only
for comparison purposes), even though the 788 includes a sophisticated undo function. Use the song copy function described in “Copying songs” on page 29.
A few notes about this manual
When we refer to a control or a connector on the 788, the name of the control, as printed on the front panel, is written like this: the RECORD key (front panel controls are called “keys”). We refer to the cursor keys as §, ¶, Óand Á or sometimes as UP,
DOWN, LEFT or RIGHT.
When we refer to a control or connector on another unit, it is written like this: the sequencer’s MIDI OUT connector.
On-screen messages are written like this: Go.
Always take note of the notes and tips if things aren’t working quite the way you might expect—they may
contain information that you need to make things work properly.
Do take note of warnings and cautions—these contain information which advises you of possible damage to you and the equipment!
NOTE
Notes like this are useful additional information which explain features and other matters, etc. that affect the working of the 788.
TIP
Tips like this provide additional information to help you use the 788 to its best advantage.
20 TASCAM 788 Digital PortaStudio
2 – Getting started–A few notes about this manual
“Roadmap” to this manual
Each section of this manual deals with a different topic:
1 “Introductory concepts” (page 8) This section provides an introduction to some of the theory behind the 788.
Read this section to: familiarize yourself with the ideas behind multitrack recording and disk recording.
2 “Getting started” (page 19) This section provides you with basic information regarding the first use of the 788, and the basic principles regarding menu operations, etc.
Read this section to: become familiar with the basic principles of operating the 788’s menu system, etc.
3 “Before recording” (page 34) This section helps you get started before actually recording using the 788.
Read this section to: understand how to assign inputs to mixer channels, and to listen to your work.
4 “Mixer” (page 41) The digital mixer which is part of the 788 allows you to control equalization, level, pan, etc.
Read this section to: understand the mixer functions of the 788.
5 “Recorder operations” (page 49) The other major component of the 788 apart from the mixer is the disk recorder, which allows you to record, punch in and out, play back, perform repeat playback, etc.
Read this section to: understand the recorder functions of the 788.
6 “Location operations” (page 60) The 788 allows you to set and move to location marks throughout your song, for convenience.
Read this section to: find out how to use these location functions effectively.
7 “Track editing” (page 65) The 788 provides you with a wide range of editing tools to help you in your work.
Read this section to: find out how to select, copy, move and paste sections of recorded material, as well as other editing features.
8 “Mastering and backup (CD-R)” (page 72) You can use a CD-R or CD-RW drive connected to the 788 to create master stereo recordings on disc, as well as backing up and restoring song data for future use.
Read this section to: understand how to use recordable CDs with your 788.
9 “Effects” (page 81) The effectors in the 788 can be used for many different purposes: as multieffect processors, dynamics processors, and single stereo effect processors. You can make your own settings for these effectors, and can store them on the 788 disk.
Read this section to: make the most of the effectors built into the 788, and for reference to the parameters you can set.
10 “Routing and scene libraries” (page 91) The 788 allows you to store mixer settings and routing settings into libraries.
Read this section to: learn how to store and recall commonly-used scenes, etc.
11 “Synchronization” (page 94) You can synchronize the 788 with other equipment, allowing you to play along with MIDI instruments, etc.
Read this section to: learn how to synchronize the 788 with other equipment.
12 “MMC and MIDI functions” (page 101)
Various parameters of the 788 can be controlled by MIDI messages. In addition, the 788 transport can be controlled by MIDI Machine Control commands.
Read this section to: learn how to control the 788 using MIDI.
13 “Specifications, etc.” (page 119) As well as the specifications of the 788, this section also contains a lost of error messages.
Read this section to: understand what to do if an error message appears, or for hard facts and figures about the 788.
TASCAM 788 Digital PortaStudio 21

2 – Getting started–Connecting other equipment to your 788
Connecting other equipment to your 788
For a typical recording session, you will need:
•the 788 itself
•some sound sources (instruments and/or microphones)
•a stereo mastering recorder (cassette, DAT, MD). Alternatively, you can use a CD-R or CD-RW drive which will allow you to master the song, and also to back up and restore your working material.
•an external effects unit (optional)
•a monitoring system (this is a grand name for a good amplifier and a pair of good speakers which you will use to listen to your recorded material— this can be your stereo system)
•if you are using microphones in the same room as the 788, you should use headphones (headphones are also sometimes useful for general monitoring purposes as well)
•cables to connect everything together, with the appropriate connectors
•if you are using MIDI instruments, you will almost certainly be using a sequencer (either as a standalone unit, as a computer program, or built into a workstation instrument)
1Find a stable level surface on which to put your 788 and place the 788 on it.
2Make sure that all equipment is switched off.
3Connect the MONITOR OUTPUTs of the 788 to a pair of inputs of the monitoring system.
4Connect the STEREO OUTPUTs of the 788 to the inputs of the mastering recorder (if it is an analog-connected recorder). Connect the out-
puts of the mastering recorder to another pair of inputs on the monitoring system (if they are available).
Alternatively, if you are using a DAT, CD recorder or MD recorder with a digital (coaxial) audio input, connect the 788’s DIGITAL OUTPUT to the COAXIAL IN of the recording device. Set the input selector of the recording device appropriately.
As yet another alternative, you can make a SCSI connection (see “SCSI issues” on
page 17) to a suitable CD-R or CD-RW drive. Even though no audio connection is made, the drive will be able to accept audio data through the SCSI cable, and to transfer it back to the 788 for replay.
5If you are using an external effects unit, connect the AUX OUTPUTs of the 788 to the inputs of the effects unit, and the outputs of the effects unit to the AUX INPUTs of the 788.
6Connect the MIDI OUT of the sequencer to the MIDI IN of the 788 and the MIDI IN of the sequencer to the MIDI OUT of the 788.
7Connect the audio outputs of your instruments to the inputs of the 788.
8Connect the PS-P788 AC adaptor supplied with your 788 to the 788.
9Turn on the power, starting with the instruments, and finishing with the monitoring system.
Additional connection notes
•Make sure that you have enough space to plug and unplug cables, etc. and that you can reach the controls, read the display, etc. comfortably.
•If you are using a home stereo amplifier, do not connect the 788 to any PHONO inputs on the amplifier. These are the wrong kind of inputs for this kind of equipment. Use inputs labeled AUX,
CD, VIDEO, etc.
•Always use the TASCAM PS-P788 AC adaptor designed for use with the 788, making sure that the input voltage marked on the adaptor matches the power supply in your area. Never use any other adaptor with the 788. If you are unsure, consult an
electrician. If you move to an area with a different voltage, contact your TASCAM distributor regarding the supply of a new adaptor.
•When switching on equipment, a general rule is to work from the signal source through to the final end result. In this case, assuming a synthesizer is plugged into the 788, the switch-on order would
be:
Synthesizer → 788 → Mastering recorder → Monitor amplifier
Switch off in the reverse order (end result through to signal source).
22 TASCAM 788 Digital PortaStudio

2 – Getting started–Connecting other equipment to your 788
•If your external effects unit can only accept a mono input, connect the L AUX OUTPUT of the 788 to the input.
•The MIDI connections described here do not have to be direct connections—your sequencer will need to accept data from the instrument chain and to pass data to them. However, you should make sure that MTC (MIDI Timecode) can be sent from the 788 to the sequencer, and MIDI Machine Control
commands can be received by the 788 from the sequencer, even if this means routing the MIDI signals through some MIDI THRU ports.
•If you are connecting an electric guitar (or bass guitar) directly into the 788, use INPUT D and set the switch to GUITAR—this allows the matching of the input impedance to the high impedance of an electric guitar.
MIDI |
|
|
|
|
|
REC IN |
|
AUDIO |
|
PLAY |
|
OUTs |
|
||
|
OUT |
||
|
|
||
|
|
TAPE IN |
|
INPUTs A thru C |
|
MONITOR |
|
STEREO |
OUTPUT |
||
|
|||
INPUT D |
|
||
OUTPUT |
AUX OUTPUT |
||
|
|
AUX INPUTS
TASCAM 788 Digital PortaStudio 23

2 – Getting started–About the menus
About the menus
The 788 uses a menu interface to display and select operations that you cannot carry out using the front panel keys.
The JOG/DATA dial is often used to scroll through a list. When the dial can be used, the screen will usually show a small icon representing the dial (as shown at on the left of the screen).
Generally, the transport must be stopped (not playing back or recording) when using the menus.
When scrolling through a list, when the option you want is highlighted, you should select the option by pressing the ENTER/YES key.
The EXIT/NO key allows you to move up a level without selecting an option.
Selecting multiple entries
Sometimes multiple entries can be selected from a list (for instance, when copying songs). In this case, the selected entries in the list are shown by a check mark ( ) beside the list entry.
To set a check mark by a list entry, press the INSERT/ MOVE key.
To clear a check mark from a list entry, press the
DELETE/SILENCE key.
The MENU key
The MENU key allows you to make settings with the “system” menus.
These menus provide access to system-level settings that you will probably not use very often (for instance, you will only create a song once in the lifetime of a song).
SONG menus |
CREATE |
(see “The SONG menu” on |
SAVE |
page 28 |
REVERT |
|
LOAD |
|
ERASE |
|
COPY |
|
DELETE UNUSED |
|
PROTECT |
|
|
DISK menus |
SELECT |
(see “DISK menu” on page 31) |
EJECT |
|
FORMAT |
|
CHECK |
|
|
CD-R menus |
PRE MASTERING |
(see the section “Mastering |
CHECK MASTER |
and backup (CD-R)” on |
CD WRITER |
page 72) |
CD FINALIZE |
|
CD PLAYER |
|
DATA BACKUP |
|
DATA RESTORE |
|
|
SYNC/MIDI menus |
SYNC |
(see the section “Synchroniza- |
SYNC TRACK |
tion” on page 94) |
TEMPO MAP |
|
METRONOME |
|
CONTROL |
|
|
OPTION menus (see |
GLOBAL |
“The OPTION menu” on |
MIXER |
page 33) |
RECORDER |
|
USER WORD |
|
|
24 TASCAM 788 Digital PortaStudio

2 – Getting started–About the menus
Other control screens
There are a number of dedicated menus and screens available, which are accessed with the following keys. These are all described in the appropriate sections of this manual:
EQ |
Channel equalization |
SEND |
Channel Aux and Effect send |
|
|
FADER/PAN |
Channel fader and pan settings |
|
|
TRACK CUE |
Off-disk level and pan positioning for cue mix |
|
|
QUICK |
Preset routing options, scene read and write, |
SETUP |
routing assignment read and write |
|
|
EFFECT 1 |
Effect selection and parameters |
|
|
EFFECT 2 |
Effect selection and parameters |
|
|
LOCATE |
Location recall, naming and time viewing |
|
|
TRACK EDIT |
“Copy and paste”, etc. of recorded material |
|
|
UNDO/REDO |
Menu to undo or redo editing operations |
|
|
STEREO |
Stereo section settings |
|
|
SUB MIX |
Sub-mixer settings |
|
|
TRACK |
Virtual track assignment |
|
|
Selecting parameters
If there are many parameters on a screen, use the cursor keys to highlight the parameter you want to change before setting the value with the dial.
Here, the two PAN values can be highlighted, and changed with the dial. In the example above, the pan value of channel 1 is highlighted for editing.
Sometimes there are “tabs” at the top of the screen. Use the Óand Ácursor keys to select the tab where you will be making the change.
Here, the left and right keys are used to select the tab from 1 through 8 at the top of the screen (tab 1 is selected in this screen).
The virtual tracks are then selected with the dial.
Setting values
When a value is to be changed, use the JOG/DATA dial to change the value.
The ENTER key is often used as a “yes” key to answer questions like Are you sure? which may sometimes be shown on screen (for example, the screen below).
If you change your mind about carrying out an operation, use the EXIT key.
The EXIT key can also be used as a “no” key to answer on-screen questions.
TASCAM 788 Digital PortaStudio 25
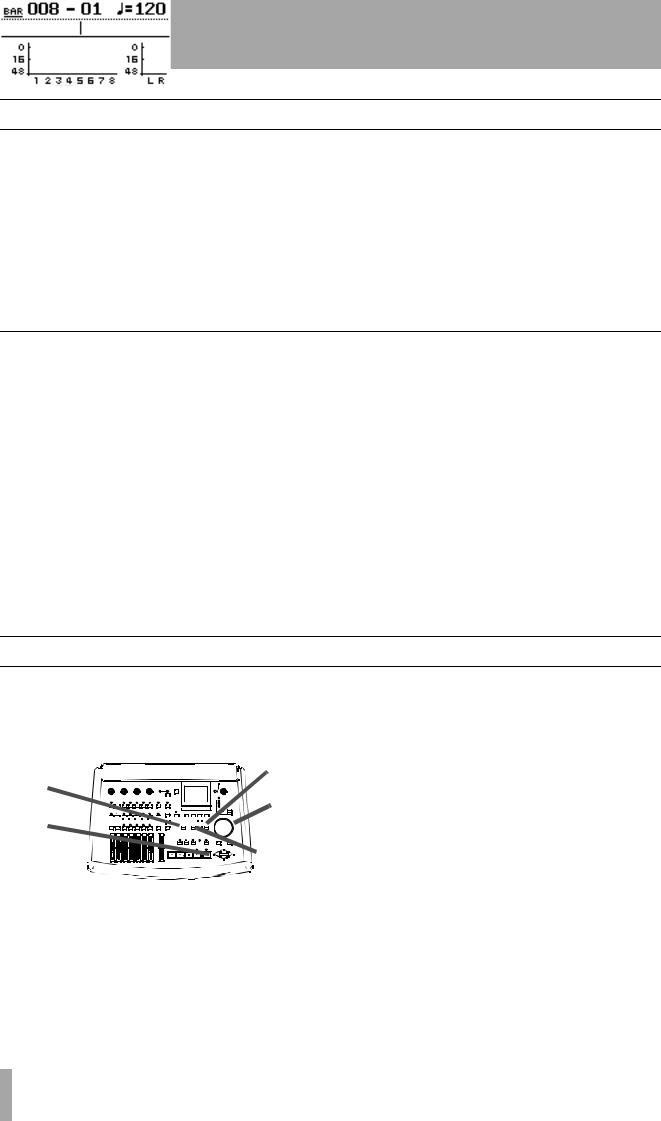
2 – Getting started–The “home” display
The “home” display
There is one special display which is always available with the touch of one key—the HOME/ESC key. This “home” display provides the following information:
•A large display of the time counter (see below)
•Track/monitor meters and the recording source
•The title of the currently active location mark
•A space for messages
•The record ready status of the tracks (in this example tracks 3 and 4 are ready for recording)
The time display
When the home display is shown, moving the cursor to the left field on the top line of the display allows you to use the dial to change the time mode shown in the top line of the home (and other screens) between the following options:
• Absolute time
• MIDI Timecode
•Bars and beats and the current tempo (when working with a tempo map)
Entering and editing titles
The 788 allows you to use titles up to 12 characters in length that you choose to identify songs, virtual tracks, location marks, library settings, etc. (the titles of location marks can be up to 10 characters long).
5
1


 3 2
3 2 


 4
4
It is probably much easier for you to remember a virtual track title such as Good solo than
V.TRACK |
97, or a real song title rather than |
SONG 12 |
(of course, if you prefer to use titles |
like V. TRACK 97, or Mark 006 to
Bass hook, you’re always free to leave things that way!).
You can set and edit a title for the following items in almost every screen where you select or store them:
•Location marks (except the IN, OUT and TO points, which are a special case)
•Songs
•Virtual tracks
•Mixer scenes
•Mixer routing tables
•Effect settings
The way in which you enter titles, and edit existing titles is as follows:
26 TASCAM 788 Digital PortaStudio

2 – Getting started–Entering and editing titles
1From any of the screens listed above, press the
SHIFT + MENU (TITLE) key:
The screen above shows the titling of a virtual track.
2Use the LEFT and RIGHT cursor keys to move the cursor (the reversed character).
3Use the dial to change the cursor character.
4Press ENTER when you have finished editing a title (EXIT to leave the title unchanged).
Use the DELETE key to delete the character at the cursor—(i) below, and the INSERT key to insert a space at the cursor—(ii) below.
Use the §and ¶keys to change between the following character modes as shown at the bottom right of the title area:
CAPITAL (uppercase) letters (A through Z). This mode is shown on the screen by CAPS
small (lowercase) letters (a through z). This mode is shown on the screen by small
Numbers (0 through 9). This mode is shown on the screen by NUM
Preset words and phrases. This mode is shown on the screen by WORD
NOTE
In the first three of these modes, common punctuation characters are also available.
In the preset word mode, words such as COUNT IN, VERSE, INTRO, CHORUS are available. Consult the section below for a full list of these words, and details of how to edit them to suit the way in which you work.
(i) |
(ii) |
Setting and editing preset words
The 788 provides a number of useful preset words, but you may want to add your own (up to a total of 100) preset words and phrases of up to 12 characters in length to include your own names and titles.
1Press the MENU key.
2Use the dial to scroll down to OPTION, and press ENTER.
3Use the dial to scroll down to USER WORD, and press ENTER.
4Use the dial to scroll down to the place where you want to enter your own word (this can be an existing word) and press SHIFT+MENU
(TITLE).
5Enter your word or phrase in the way described above (“Entering and editing titles” on page 26).
6Press ENTER when you’re finished, and you can then select another word to enter.
TIP
Use this to enter musical section names (some are provided, but if you’re recording classical pieces, phrases like Allegro might be useful).
You can also add the names of special instruments that you record a lot (for some people, the user word Bagpipes might be more useful than Bass).
You might even want to add the names of the musicians you record a lot so you can use these names to make titles like Joe solo.
TASCAM 788 Digital PortaStudio 27

2 – Getting started–The SONG menu
The SONG menu
The SONG menu, as the name suggests, is concerned with the management of songs on the 788.
You can load, save, copy and protect songs, as well as deleting the data which is currently on disk but unused in the song.
Creating a new song
Before you start recording, you must create a song on the disk. This means that any audio data you record on the 788 will be associated with that song until you select a new song. Any currently-loaded song will be saved when the new song is created.
1Press the MENU key.
2Use the dial to scroll down until SONG is highlighted, and press ENTER:
3Move the cursor to CREATE and press
ENTER:
4Press the SHIFT + TITLE (MENU) key to enter a title for the new song (as described in “Entering and editing titles” on page 26).
5Use the dial to select between 16-bit and 24-bit resolution. As you might expect, 24-bit songs take up more space on disk than 16-bit songs of the same length, but the audio quality is higher (there is more subtlety in the dynamic range).
6Press ENTER/YES to close the current song, and create the new song.
If you entered the song creation process by accident, or you change your mind about creating a new song, press the EXIT/NO key.
TIP
If you need to name or rename a song later on, you can reload the song, and press the SHIFT + MENU (TITLE) key to enter a title for the song when the 788 is displaying the title.
Saving a song
Typically, there is no need to perform a special operation to save songs on the 788, as the 788 automatically saves the song. The function described here is provided as a manual method of saving the song, to which you can return (“Reverting to the previous saved version of a song” on page 28):
1 Press the MENU key.
2If SONG is not highlighted, turn the dial until it is, and press ENTER.
3Turn the dial until SAVE is highlighted and press ENTER.
As the song is saved, appropriate messages are displayed. The current song will be reloaded after it has been saved, and you can resume work on it.
Reverting to the previous saved version of a song
If you have saved a song, or the song has been automatically saved by the 788 (e.g. when it was last shut down), and you want to return to the version of the song at the time it was last saved:
4The 788 asks if you are sure. Press YES if you want to throw away all changes since the last save operation, otherwise press NO.
NOTE
1Press the MENU key.
2If SONG is not highlighted, turn the dial until it is, and press ENTER.
3Turn the dial until REVERT is highlighted and press ENTER.
You will lose all recordings and edits made since the last save, and they will disappear from the undo list (“Undoing and redoing actions” on page 70). This revert operation is not undoable. Be sure that the work you have done since the last save operation is really work that you do not want to keep before reverting to a previous version.
28 TASCAM 788 Digital PortaStudio

2 – Getting started–The SONG menu
Loading a song
To load a previously-saved song from disk (the current song will be written to disk automatically when the song is loaded):
1Press the MENU key.
2If SONG is not highlighted, turn the dial until it is, and press ENTER.
3Turn the dial until LOAD is highlighted and press ENTER.
4Select the song to be loaded (from the currently selected disk).
The current song is saved, and the selected song is loaded from disk.
NOTE
This menu reads the songs stored on the currentlyselected disk or partition. If you are loading a song from another disk or partition, you must select it first (“Selecting a disk” on page 32).
Erasing a song
To free up space on a disk partition, and delete a song or songs, you should perform the following operations:
1Press the MENU key.
2If SONG is not highlighted, turn the dial until it is, and press ENTER.
3Turn the dial until ERASE is highlighted and press ENTER.
4Select the song or songs to be erased using the dial to highlight the songs and the INSERT/ MOVE key to place a check mark ( )beside them.
If you select a song for erasure by acident, use the DELETE/SILENCE key to deselect it.
5Press YES to erase the selected song(s).
6The 788 asks you if you are sure. Press YES if you really are sure that you want to erase these songs.
NOTE
This operation cannot be undone. Erasing songs is a permanent operation. Always think carefully before you erase a song or songs.
This menu can erase only the songs stored on the cur- rently-selected disk or partition. If you want to erase a song or songs from another disk or partition, you must select it first (“Selecting a disk” on page 32).
If you have selected all the songs on a disk or partition for erasure, a new song will automatically be created (at 16-bit resolution) after all the existing songs have been erased.
Copying songs
As well as copying songs, so that you can work on another version of them, you can also use this menu item as a tool to back up songs to removable media (you can also back up to CD-R, but this is a separate process and is described in “Mastering and backup (CD-R)” on page 72).
1Press the MENU key.
2Use the dial to scroll down until SONG is highlighted, and press ENTER.
3Turn the dial until COPY is highlighted, and press ENTER.
4Select the song or songs to be copied using the dial to highlight the songs and the INSERT/ MOVE key to place a check mark ( ) beside them.
If you select a song for copying by accident, use the DELETE/SILENCE key to deselect it.
5When all the songs to be copied have been marked, press the ENTER key. A list of all the currently-available drives and partitions is shown.
6Use the dial to select the drive or partition to which the selection will be copied and press
ENTER.
7The 788 asks you if you are sure that you want to make the copy. Press YES to continue with the operation, and NO to cancel.
NOTE
Copying a song may take some time. Be patient while the song is being copied, and take care not to power down the 788 in the middle of a copy operation.
If you copy a song to the disk or partition where it was originally stored, it will be copied with the same title as originally, so the list will contain two songs with the same title. If you want two copies of the same song on one disk or parti-
TASCAM 788 Digital PortaStudio 29
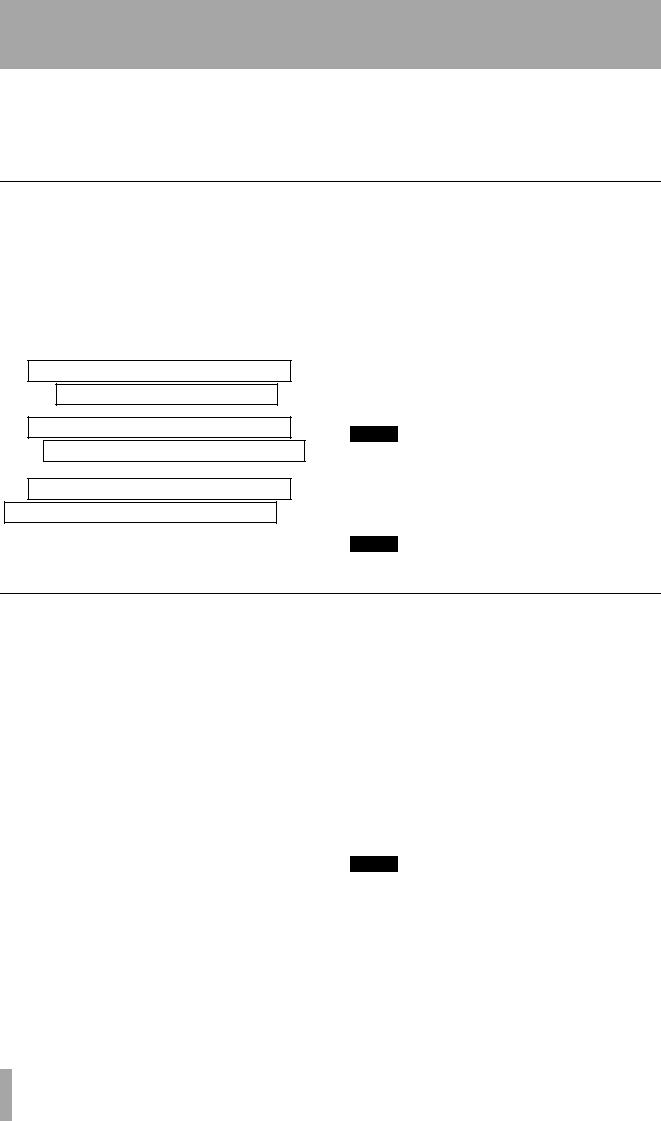
2 – Getting started–The SONG menu
tion, you should rename one of the copies immediately after the copy operation has been carried out.
When you make the selection for copying, only those songs in the currently-selected disk or partition are listed. If you
need to back up from many different disks or partitions, you must select each partition in turn (“Selecting a disk” on page 32) and then select the songs on the selected disk or partition.
Deleting unused space from a song
As we explained earlier, a song does not consist of just the recorded audio, but also of the “playlist” and the recorded but unused parts of the song.
By “unused”, we mean parts of a song which have been completely overwritten by other parts. If the start or end or both of a new part extends beyond the start or end of a new part, it will not be deleted in this operation.
New guitar solo over the old
Old guitar solo (will be deleted)
New guitar solo over the old
Old guitar solo (will not be deleted)
New guitar solo over the old
Old guitar solo (will not be deleted)
A virtual track which is not currently assigned as an active track does not count as “unused” here.
To free up this disk space, once you’ve made all your edit decisions (there’s no undo on this):
1Press the MENU key.
2Use the dial to scroll down until SONG is highlighted, and press ENTER.
3Turn the dial until DELETE UNUSED is highlighted, and press ENTER.
4The 788 asks you if you are sure. If you want to delete all the unused portions of the song, press YES. If you have second thoughts, press NO.
TIP
Although there is no undo operation here, and you lose all the unused parts of the song permanently, you can back up the song, to removable SCSI media, or to CD-R , before performing this “cleanup” operation. If you change your mind later on, you can restore this backed up version.
NOTE
Remember that you cannot undo this operation.
Protecting a song
When a song is protected, recording is not possible (the REC READY keys are disabled), it cannot be edited using the track editing functions (“Track editing” on page 65), and it cannot be erased, etc. using the SONG menu.
It is also impossible to set or edit location marks (“Location operations” on page 60) except the IN and OUT points for repeat operations, or to permanently reassign virtual tracks as in “Assigning virtual tracks” on page 54. Virtual tracks can be assigned for audition purposes, but not permanently saved.
In operations which show a list of available songs (for instance, loading a song), any protected songs have a small padlock icon beside the song title.
Only the currently-loaded song can be protected or unprotected at any one time (though, of course, songs stored on the disk can be stored as protected or unprotected).
1Press the MENU key.
2Use the dial to scroll down until SONG is highlighted, and press ENTER.
3Turn the dial until PROTECT is highlighted, and press ENTER.
4Use the dial to set the protection ON or OFF, and press ENTER to confirm the setting.
NOTE
You can retitle the song at this stage, before it is protected, by pressing the SHIFT + MENU (TITLE) key.
30 TASCAM 788 Digital PortaStudio
 Loading...