

Page 1
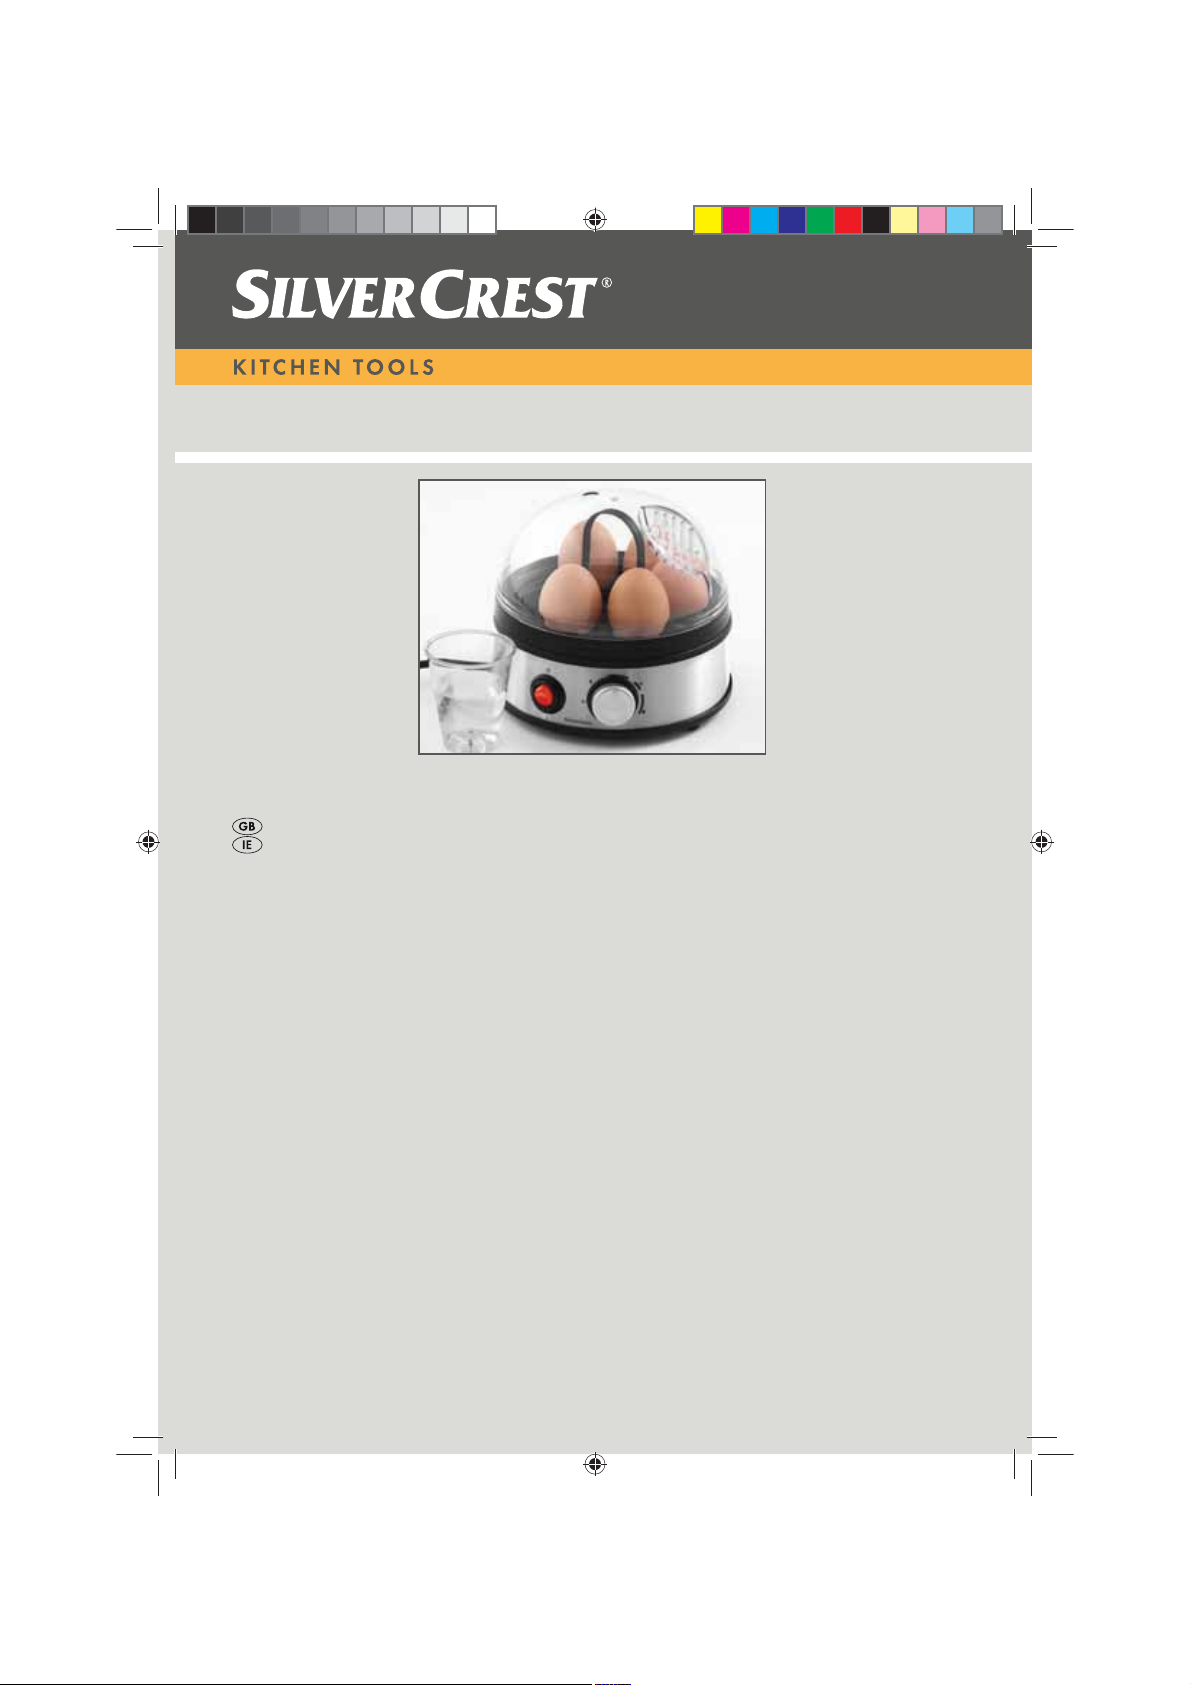
(JJ&RRNHU6(.($
(JJ&RRNHU
2SHUDWLQJLQVWUXFWLRQV
53(LHUNRFKHUB&RYHUB/%LQGG
Page 2
__RP61661_B6.book Seite 1 Montag, 29. November 2010 9:48 09
English .............................................................................................. 2
ID: SEKE 400 A1_11_V1.0
Page 3
910
__RP61661_B6.book Seite 2 Montag, 29. November 2010 9:48 09
Overview
1
2
3
4
78
65
Hardness Controller
Page 4
__RP61661_B6.book Seite 2 Montag, 29. November 2010 9:48 09
Contents
1. Safety information .................................................................................................3
2. Items supplied ........................................................................................................ 5
3. Preparing to use the appliance ............................................................................. 5
4. Operation ................................................................................................................5
5. Preparing eggs with various hardness levels at the same time ........................6
6. Cleaning ..................................................................................................................7
7. Storage ....................................................................................................................7
8. Disposal ..................................................................................................................7
9. Problem-solving .....................................................................................................7
10. Technical specifications .......................................................................................8
11. Warranty .................................................................................................................8
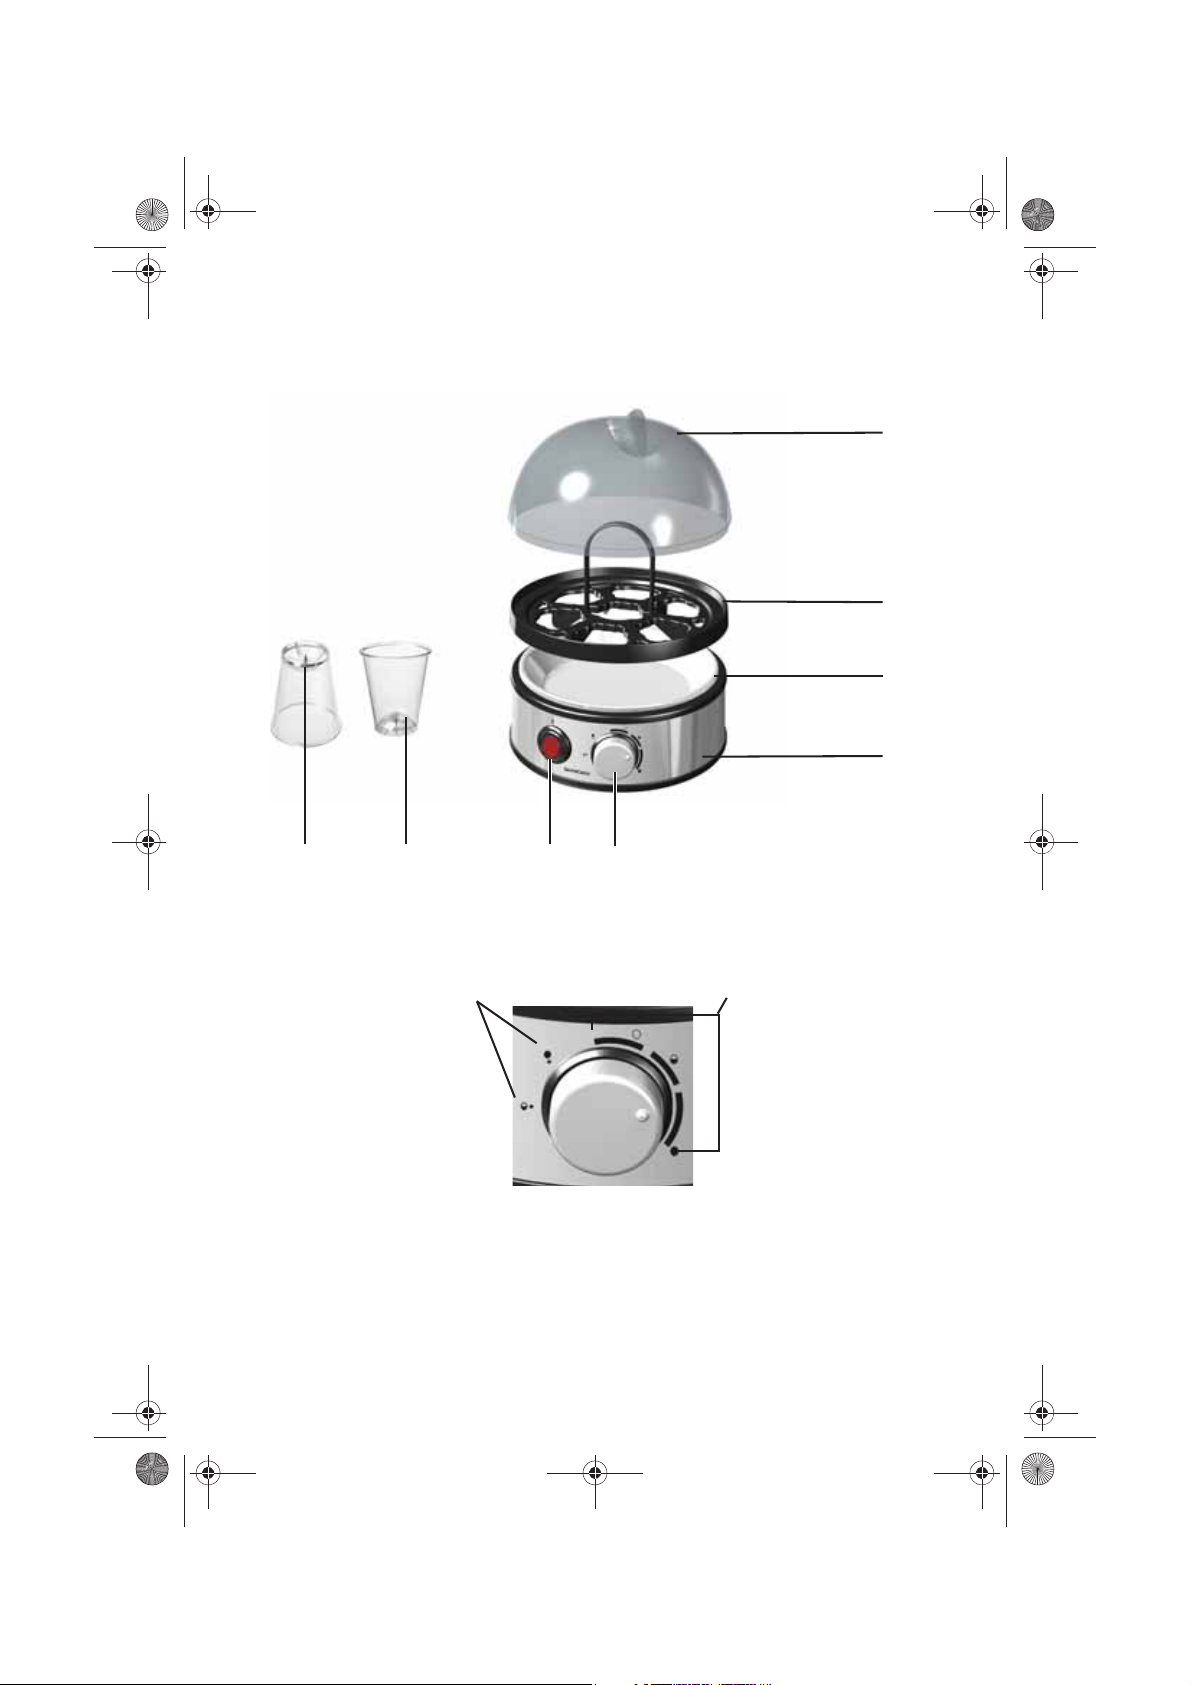
Overview
1 Lid
2 Egg Tray
3 Heating Bowl
4 Base Unit
5 Hardness Controller
6 On/Off switch / Pilot Lamp
7 Measuring Beaker
8 Egg Piercing Tool
9 The setting ranges with the big egg symbols correspond to the levels of hardness for
the normal boiling process
10 Small egg symbols for the subsequent boiling time when preparing eggs with diffe-
rent levels of hardness
2
GB
Page 5
__RP61661_B6.book Seite 3 Montag, 29. November 2010 9:48 09
1. Safety information
• Before using the appliance, carefully
read through these operating instructions and ensure you comply with the
safety instructions in all respects!
• This appliance should only be used for
its intended purpose as described in
these instructions.
• Do not discard these instructions.
• If you pass the appliance on to someone else, please include the instructions.
Intended purpose
The appliance has been designed solely for
boiling eggs and must not be used to warm
up other foodstuffs.
The appliance is intended for use in the
home environment. It must be used indoors
only.
This appliance must not be used for commercial purposes. Nor is its use permissible
in the following situations:
- in staff kitchens, shops, offices or other
working environments;
- in farm houses;
- by clients in hotels, motels or other residential type environments;
- in bed and breakfast type establishments.
Warnings
The following warnings are included in
these operating instructions:
DANGER! High risk: Failure to ob-
serve this warning may result in injury to life and limb.
WARNING! Moderate risk: Failure to observe this warning may result in injury or
serious material damage.
CAUTION: Low risk: Failure to observe
this warning may result in minor injury or
material damage.
TIP: Points and special considerations
which should be remembered when using
the appliance.
DANGER for children
• Packing materials are not children's
toys. Children should not be allowed to
play with the plastic bags: There is a
risk of suffocation.
• This appliance is not designed to be
used by people (including children)
with limited physical, sensory or mental
capabilities or people without adequate
experience and/or understanding
unless they are supervised by someone responsible for their safety or are
instructed by same how to use the
appliance.
• Children must be supervised to ensure
that they do not play with the appliance.
• Keep the egg boiler out of the reach of
children.
RISK of electrocution
• Do not use the appliance if there is visible damage to the housing or the connector cable. To avoid any risk, do not
make modifications to the product. The
connector cable cannot be replaced at
home. Repairs must be carried out by a
specialist workshop or the Service
Centre.
• The base unit, the power cord and the
power plug must not be immersed in
water or other liquids.
• If the appliance has fallen into water,
remove the power plug immediately
and only then remove the appliance. In
this case, do not use the appliance any
more, but have it checked by a specialist.
• Never touch the appliance with wet
hands.
• Make sure that the power cord cannot
be damaged by sharp edges or hot
surfaces (e.g. the hot appliance parts
of the egg boiler) and is not trapped,
bent or squashed.
• Do not wind the power cord around the
appliance because this can cause the
GB
3
Page 6

__RP61661_B6.book Seite 4 Montag, 29. November 2010 9:48 09
cord to break. There is a suitable cord
winding section under the appliance.
• Connect the power plug only to a correctly installed, easily accessible
socket with an earthing contact with
voltage corresponding to the rating
plate. The socket must still be easily
accessible after the appliance has
been connected.
• Never switch the appliance on without
water.
• When removing the power plug from
the socket, always pull the plug and
never the cord.
• Disconnect the power plug from the
wall socket, …
… if there is a fault,
… when you are not using the egg
boiler,
… before you clean the egg boiler and
… during thunder storms.
• This appliance is not designed to be
operated with an external timer or a
separate telecontrol system.
RISK of injury
• Never leave the appliance unsupervised during operation.
• Risk of burning! Make sure that children cannot pull the appliance off the
work surface by means of the power
cord. Wind the cord that is not needed
in the base of the unit.
• During and after the boiling process
there is a risk of scalding/burning
from hot water, steam and hot appliance surfaces!
Therefore remember the following:
- Do not move the appliance while it
contains hot water. It could splash out.
- Hot steam escapes from the opening on the top of the while the eggs
are boiling. Avoid this area.
- Do not touch the hot surfaces on the
appliance (e.g. the lid). Only hold
the hot lid and the egg tray by the
handles.
- Do not remove the lid while the eggs
are boiling. Open the lid with great
caution only after the signal sound
(if necessary, using a towel)
because hot steam will escape.
- Tell other people of these risks.
- Do not operate the appliance without the lid or the egg tray.
- The egg piercing tool on the base of
the measuring beaker is sharp. Use
it cautiously.
- Allow the appliance to cool down
completely before you clean it and
tidy it away.
WARNING about material damage
• Place the appliance in such a way that
hot steam that exits from the top of the
lid can escape unhindered while the
eggs are boiling and does not land on
any other surfaces.
• Only use genuine accessories.
• The appliance is fitted with non-slip silicone feet. As furniture is coated with
various varnishes and plastics and may
be treated with different cleaning products, it cannot be completely ruled out
that some of these substances contain
components which may attack and soften the silicone feet. If necessary, place
an anti-slip mat under the appliance.
• Do not use any astringent or abrasive
cleaning agents.
• Do not place an open flame, for example burning candles, on or directly next
to the appliance.
• Do not use the appliance in the open
air or near containers filled with water,
e.g. sinks.
• Make sure that the surface under the
appliance is dry.
• Never place the appliance on hot surfaces (e.g. oven rings) or near sources
of heat.
4
GB
Page 7

__RP61661_B6.book Seite 5 Montag, 29. November 2010 9:48 09
2. Items supplied
1 base unit 4
1 egg tray 2
1 lid 1
1 measuring beaker 7
1 operating instructions
3. Preparing to use the
appliance
1. Check whether all accessories are
present and undamaged.
2. Clean all accessories as described in
these instructions.
3. Place the egg boiler on a dry, heat-
resistance, level and anti-slip surface.
4. Operation
You can use this egg boiler to boil up to
7 eggs simply and while saving energy to
the desired hardness. This egg boiler has
an electronic boiling time monitor. The
hardness of the eggs is set using the hardness controller 5 – irrespective of the
amount of water added.
Set the hardness
TIP: Among other things, the boiling time of
eggs depends on their size, freshness and
temperature. Very large and very fresh
eggs need longer boiling times. Small eggs
and eggs that have reached room temperature need shorter boiling times.
• Set the stepless hardness controller 5
to the big egg symbol for the desired
egg hardness:
: Soft eggs
: Medium eggs
: Hard eggs
This setting is a guide value for 7 eggs.
• Select a setting to the left of the egg
symbol (= shorter boiling time),
- If you are boiling just a few eggs,
- If you are boiling very small eggs,
• Select a setting to the right of the egg
symbol (= longer boiling time),
- If you are boiling very large eggs,
- If you are boiling very fresh eggs,
TIP: Try out the various settings. After just
a very short time you will develop a feeling
for your perfect boiled egg.
Boiling Process
Preparation
1. Use the measuring beaker 7 to fill cold
water into the heating bowl 3 until the
marking (Max) is reached.
2. Place the egg tray 2 on the heating
bowl 3.
3. If possible, choose eggs of the same
size if you want to achieve the same
boiling results.
4. Use the piercing tool 8 (on the bottom
of the measuring beaker 7) to pierce
the desired number of eggs on the
blunt end so that they do not burst during boiling.
5. Place the eggs in the egg tray 2 with
the pierced side facing up.
6. Put the lid 1 on the egg tray 2.
DANGER! During and after the
boiling process there is a risk of
scalding / burning from hot water, steam and hot appliance surfaces! Therefore remember the
following:
- Do not move the appliance while it contains hot water.
- Avoid the area above the appliance.
Hot steam escapes from the opening in
the lid 1.
- Do not touch the hot surfaces on the
appliance (e.g. the lid). Only hold the
hot lid 1 and the egg tray 2 by the handles.
- Do not remove the lid 1 while the eggs
are boiling. Open the lid with great cau-
GB
5
Page 8

__RP61661_B6.book Seite 6 Montag, 29. November 2010 9:48 09
tion only after the signal sound (if necessary, using a towel) because hot
steam will escape.
- Since the handle of the egg tray 2 gets
hot, use a towel or oven gloves to
remove it.
1. Insert the power plug in an easily
accessible socket with earthing contacts.
2. Switch the appliance on by setting the
on/off switch 6 to I. The red pilot lamp 6
indicates that the appliance is heating
up.
3. The water is now boiling and the eggs
are boiled. The end of the boiling time
is indicated by a signal tone. Now
switch the appliance off by setting the
on/off switch 6 to 0.
4. Carefully remove the lid 1 from the
appliance using the handl. Place the lid
on a heat-resistant surface because it
is very hot.
5. Use the handl to remove the egg tray 2
and run the eggs under cold water to
cool them.
After boiling
DANGER! Disconnect the power
plug from the wall socket every
time you have boiled eggs.
• Leave the appliance to cool down,
before you ...
… pour away any water left,
… pour in new water,
… clean the appliance,
… tidy away the appliance.
5. Preparing eggs with
various hardness
levels at the same time
You can use this egg boiler to prepare eggs
with various levels of hardness at the same
time.
1. Prepare all eggs as usual.
2. First of all, prepare all eggs with the
hardness setting for the softest eggs.
3. When the signal indicates the end of
the boiling time, switch the appliance
off, carefully remove the lid 1, remove
the eggs that should not boil any further and cool them with cold water.
4. The rest of the eggs remain in the egg
boiler.
5. Put the lid 1 back on.
6. Use the hardness controller 5 to set the
desired subsequent boiling time for the
remaining eggs. The small egg
symbols roughly correspond to the following subsequent boiling times:
: Difference between soft and
medium or medium and hard
: Difference between soft and hard
TIP: Here, too, there are deviations
resulting from varying numbers and
sizes of eggs. Adjust the setting
accordingly.
7. Switch the appliance on again.
8. When the signal indicates the end of
the boiling time, switch the appliance
off, carefully remove the lid 1, remove
the remaining eggs and cool them with
cold water.
6
GB
Page 9

__RP61661_B6.book Seite 7 Montag, 29. November 2010 9:48 09
6. Cleaning
DANGER! Pull the power plug
from the wall socket before cleaning the egg boiler.
• Leave the appliance to cool down
before cleaning.
• The egg piercing tool 8 on the measuring beaker 7 is sharp. Use it cautiously.
CAUTION!
• To avoid damage to the appliance, the
base unit 4 of the egg boiler must not
be immersed in water or other liquids.
• Do not use any astringent or abrasive
cleaning agents.
Base unit
If necessary, wipe the base unit 4 and the
power cord with a slightly damp cloth.
Lid, egg tray and measuring beaker
• Wash the lid 1, egg tray 2 and measuring beaker 7 by hand.
• Leave all parts to dry completely before
you tidy them away.
Descaling the heating bowl
After some time, limescale will be deposited in the heating bowl 3 of the egg boiler as
a result of the boiling process. It should be
removed at regular intervals, otherwise the
power consumption of the appliance will increase.
1. Fill a measuring beaker 7 of household
vinegar (approx. 6 per cent) into the
heating bowl 3.
TIP: Do not heat the vinegar in the
heating bowl.
2. After leaving for half an hour, pour the
vinegar away and remove any remaining scale with a sponge.
3. If there is any stubborn remaining
limescale, repeat this process.
7. Storage
DANGER! Keep the egg boiler
and the measuring beaker 7 with
the sharp egg piercing tool 8 out of
the reach of children.
• Wind the cord in the base of the unit.
8. Disposal
The symbol showing a
wheelie bin crossed through
indicates that the product
requires separate refuse
collection in the European
Union. This applies to the
product and all accessories
marked with this symbol. Products identified with this symbol may not be discarded
with normal household waste, but must be
taken to a collection point for recycling
electric and electronic appliances. Recycling helps to reduce the consumption of
raw materials and protect the environment.
Packaging
When disposing of the packaging, make
sure you comply with the environmental
regulations applicable in your country.
9. Problem-solving
If your appliance fails to function as required, please try this checklist first. Perhaps there is only a minor problem, and
you can solve it yourself.
DANGER! Do not attempt to repair the appliance yourself under
any circumstances.
GB
7
Page 10

__RP61661_B6.book Seite 8 Montag, 29. November 2010 9:48 09
Fault Possible causes/Action
No function.
Pilot lamp 6
does not light
up.
Eggs are too
soft
Eggs are too
hard
The eggs
have burst
Eggs are
completely
raw
Is the power supply reliable?
Check the connection.
Were the eggs especially
large, especially cold or
very fresh? In this case,
set the hardness controller further to the right.
Were the eggs small?
Have you boiled just a few
eggs? Were the eggs at
room temperature? In this
case, set the hardness
controller further to the left.
Have you forgotten to
pierce the eggs?
Have you forgotten to fill
water in the appliance?
10. Technical
specifications
Model: SEKE 400 A1
Line voltage: 230 V ~ 50 Hz
Protection class: I
Power: 400 W
Subject to technical modifications.
11. Warranty
The warranty for your appliance is valid for
3 years from the date of purchase. The appliance has been manufactured in accordance with strict quality guidelines and
tested before delivery. Should operational
errors occur despite this, however, please
phone the service centre rst. Our customer consultants will gladly assist you, and arrange with you how to proceed. The
warranty will be invalidated if the appliance
is incorrectly connected, if parts from different manufacturers are used, in the case of
normal wear and tear, upon the use of
force, independent attempts at repairing
the appliance or improper use.
Contact details GB:
Service hotline:
00800/4212 4212
(Monday to Friday
between 9 a.m. and 5 p.m. CET)
E-mail: hoyer-gb@teknihall.com
Contact details CY:
Service hotline:
800/94400
(Monday to Friday
between 9 a.m. and 5 p.m. CET)
E-mail: hoyer-cy@teknihall.com
Contact details IE:
Service hotline:
00800/4212 4212
(Monday to Friday
between 9 a.m. and 5 p.m. CET)
E-mail: hoyer-ie@teknihall.com
8
GB
Page 11

__RP61661_B6.book Seite 9 Montag, 29. November 2010 9:48 09
GB
9
Page 12

__RP61661_B6.book Seite 10 Montag, 29. November 2010 9:48 09
Page 13

__RP61661_B6.book Seite 11 Montag, 29. November 2010 9:48 09
Page 14

+R\HU+DQGHO*PE+
.¾KQHK¸IH
6(.($BB9B Ɇ,$1B
53(LHUNRFKHUB&RYHUB/%LQGG
'+DPEXUJ
 Loading...