


 Loading...
Montageanleitung und Gebrauchsanleitung Installation and use instructions
Notice de montage et mode d’emploi Montagevoorschrift en het Gebruiksaanwijzing Istruzioni per il montaggio e l’uso Instrucciones de montaje y de servicio Instruções de Montagem e Serviçio Instruktioner för installation och användning Instruksjoner for installasjon og bruk
Asennus ja käyttö
Instruktioner til installation og brug Instrukcja instalacji i użytkowania Návod na montáž a používanie
LF259RB51
LF959RA51
LF959RA51B
LF959RB51
LF959RB51B
de
en
fr
nl
it
es
pt
sv
no
fi
da
pl
sk
de |
Seite |
3-11 |
en |
page |
12-20 |
fr |
page |
21-30 |
nl |
pagina |
31-39 |
it |
pagina |
40-48 |
es |
página |
49-59 |
pt |
página |
60-69 |
sv |
sid |
70-78 |
no |
side |
79-87 |
fi |
sivu |
88-96 |
da |
side |
97-105 |
pl |
strony |
106-114 |
sk |
Strana |
115 – 123 |
2
Vor dem Lesen, bitte die Seiten mit den Abbildungen ausklappen
Wichtige Hinweise
 Altgeräte sind kein wertloser Abfall. Durch umwelt-gerechte Entsorgung können wertvolle Rohstoffe wiedergewonnen werden.
Bevor Sie das Altgerät entsorgen, machen Sie es unbrauchbar.
 Ihr neues Gerät wurde auf dem Weg zu Ihnen durch die Verpackung geschützt. Alle eingesetzten Materialien sind umweltverträglich und wieder verwertbar. Bitte helfen Sie mit und entsorgen Sie die Verpackung umweltgerecht.
 Über aktuelle Entsorgungswege informieren Sie sich bitte bei Ihrem Fachhändler oder bei Ihrer Gemeindeverwaltung.
 Die Dunstabzugshaube ist für Abluftbetrieb verwendbar.
 Die Duntabzugshaube immer über die Mitte der Kochstelle anbringen
 Mindestabstand zwichen Elektrokochstellen und Unterkante der Dunstabzugshaube: 550mm. (siehe Abbildungen).
Empfohlen: 700 mm.
 Über einer Feuerstätte für feste Brennstoffe, von der eine Brandgefahr (z.b. Funkenflug) ausgehen kann, ist die Montage der Dunstabzugshaube nur dann zulässig, wenn die Feuerstätte eine geschlossene nicht abnehmbare Abdeckung hat und die länderspezifischen Vorschriften eingehalten werden. Diese Einschränkung gilt nicht für Gas-Herde und Gas-Mulden.
 Je kleiner der Abstand zwischen Dunstabzugshaube und Kochstelle desto größer ist die Möglichkeit, dass sich durch aufsteigenden Wasserdampf unten an der
Dunstabzugshaube Tropfen bilden können.
Zusätzliche Hinweise bei Gas Kochgeräten:
 Bei der Montage von Gaskochstellen sind die National einschlägigen gesetzlichen Bestimmungen (z.B. in Deutschland: technische Regeln Gasinstallation TRGI) zu beachten.
 Es müssen die jeweils gültigen Einbauvorschriften und die Einbauhinweise der Gas-Gerätehersteller beachtet werden.
 Die Dunstabzugshaube darf nur an einer Seite neben einem Hochschrank oder einer hohen Wand eingebaut werden. Abstand mind. 50mm
 Mindestabstand bei Gas-Kochstelle zwischen Oberkante Topfträger und Unterkante der Dunstabzugshaube: 650 mm, (Siehe Abbildungen).
Empfohlen: 700mm.
 Dieses Gerät ist entsprechend der europäischen Richtlinie 2002/96/EG über Elektro und Elektronikaltgeräte (waste electrical and electronic equipment WEEE) gekennzeichnet. Diese
Richtlinie gibt den Rahmen für eine EUWERT gültige Rücknahme und Verwertung der Altgeräte vor.
Vor der Montage
Optimale Leistung der
Dunstabzugshaube:
Kurzes, glattes Abluftrohr.
Möglichst wenig Rohrbögen.
Möglichst große Rohrdurchmesser und große Rohrbögen.
3

Der Einsatz von langen, rauen Abluftrohren, vielen Rohrbögen oder kleineren Rohrdurchmessern führt zu einer Abweichung von der optimalen Luftleistung und gleichzeitig zu einer Geräuscherhöhung.
Rundrohre: wir empfehlen Innendurchmesser 150 mm.
Flachkanäle müssen einem gleichwertigen Innenquerschnitt wie Rundrohre haben.
Sie sollten keine scharfen
Umlenkungen haben.
Ø 150 mm ca. 177cm2
Bei abweichenden Rohrdurchmessern: Dichtstreifen einsetzen.
Bei Abluftbetrieb für ausreichend Zuluft sorgen.
Anschluss Abluftrohr Ø 150 mm:
Abluftrohr direkt am Luftstutzen befestigen. Kleinere Abluftdurchmesser als 150 sind nicht zulässig.
Mit größer werdendem Abstand zur Kochstelle sinkt die Leistungsfähigkeit der Absaugung. Beachten Sie bei der Planung der Abhängungsmaße auch das trichterförmige Aufsteigen des Kochdunstes mit ca. 10 bis 15° Neigung.
Vorbereiten der Decke:
Die Decke muss eben und waagerecht sein.
Für festen Halt der Dübel ist zu sorgen.
Die beiliegenden Dübel sind für Beton und Naturstein geeignet.
Bei anderen Deckenmaterialien müssen dafür geeignete Befestigugnsmittel verwendet werden
4
 Achtung: Die Dunstabzugshaube wird mit Standardbefestigungselementen ausgeliefert. Der Monteur muss sicherstellen, dass die Befestigungselemente für die vorgefundene Decke geeignet sind. Für Schäden die auf unsachgemäße Installation und / oder die Verwendung von ungeeigneten Befestigungselementen zurückzuführen sind, wird keine Haftung übernommen.
Für das Gewicht, schauen Sie Bitte die M Abbildungen. Konstruktionsänderungen im Rahmen der technischen Entwicklung bleiben vorenthalten.
Elektrischer Anschluss
Die Dunstabzughaube darf nur an eine vorschriftmäßig installierte Schutzkontaktsteckdose angeschlossen werden.
Die Schutzkontaktsteckdose möglichst direkt hinter der Kaminverblendung anbrigen.
Elektrische Daten:
Sie sind auf dem Typenschild nach Abnahme der Filterrahmen – im Innenraum des Gerätes – zu finden.
 Bei Reparaturen die Dunstabzugshaube generell stromlos machen.
Länge der Anschlussleitung: 1,30 m.
Bei erforderlichem Festanschluss:
Die Dunstabzugshaube darf in jedem Fall nur durch einen beim zuständigen Elektrizitäts-Versorgungsunternehmen eingetragenen Elektro-Installateur angeschlossen werden.
Installationsseitig ist eine Trennvorrichtung vorzusehen. Als Trennvorrichtung gelten Schalter mit einer Kontaktöffnung von

mehr als 3 mm und allpoliger Abschaltung. Dazu gehören LS-Schalter und Schütze.
 Wenn die Anschlussleitung dieses Gerätes beschädigt wird, muss sie durch den Hersteller oder seinen Kundendienst oder eine ähnlich qualifizierte Person ersetzt werden, um Gefährdung zu vermeiden.
Diese Dunstabzugshaube entspricht den EG-Funkentstörbestimmungen.
Einbauen
Die Insel Dunstabzugshaube ist zur Montage an die Küchendecke oder eine stabile abgehängte Decke vorgesehen.
 Auf Mindestabstand KochstelleDunstabzugshaube von 550 mm bei Elektro-Kochstellen bzw. 650 mm bei Gas Kochstelle achten.
 Achtung: Die empfindlichen Edelstahloberflächen nicht beschädigen.
Die Haube einbauen, wie in der M Abbildungen gezeigt.
Vor dem ersten Benutzen
Wichtige Hinweise:
Diese Gebrauchsanleitung gilt für mehrere Geräte-Ausführungen. Es ist möglich, dass einzelne Ausstattungsmerkmale beschrieben sind, die nicht auf ihr Gerät zutreffen.
Diese Dunstabzugshaube entspricht den einschlägigen Sicherheitsbestimmungen. Reparaturen dürfen nur von Fachkräften durchgeführt werden.
Durch unsachgemäße Reparaturen können erhebliche Gefahren für den Benutzer entstehen.
Sicherheitshinweise:
 Unter der Dunstabzugshaube nicht flambieren. Brandgerfahr am Fettfilter durch aufsteigende Flammen.
 Die Kochstellen müssen immer mit Kochgeschirr abgedeckt sein.
 Über einer Feuerstätte für feste Brennstoffe (Kohle, Holz und dgl.) ist der Betrieb der Dunstabzugshaube nur bedingt gestattet (siehe Montageanleitungen).
 Ist das Gerät beschädigt, dürfen Sie es nicht in Betrieb nehmen.
 Anschluss und Inbetriebnahme dürfen nur von einem Fachmann durchgeführt werden.
 Diese Dunstabzugshaube ist nur für den Betrieb in Haushalten bestimmt.
 Dunstabzugshaube nur mit eingesetzten Lampen betrieben.
 Defekte Lampen sollten sofort ersetzt werden, um Überlastung der restlichen Lampen zu vermeiden.
 Dunstabzugshaube nie ohne Fettfilter betreiben.
 Überhitze Fette oder Öle können sich leicht entzünden. Darum Speisen mit Fetten oder Ölen, z.B Pommes frites, nur unter Aufsicht zubereiten.
 Dunstabzugshaube vor der ersten Inbetriebnahme sorgfältig reinigen.
 Keine Gegenstände auf der Dunstabzugshaube abstellen.
 Wenn die Anschlussleitung dieses Gerätes beschädigt wird, muss sie duch den Hersteller oder seinen Kundendienst oder eine ähnlich qualifizierte Person ersetzt werden, um Gefährdung zu vermeiden.
5

 Verpackungsmaterial ordnungsgemäß entsorgen.
 Kinder nicht mit dem Gerät spielen lassen.
Erwachsene und Kinder dürfen nie unbeaufsichtigt das Gerät betreiben:
-wenn sie körperlich oder geistig dazu nicht in der Lage sind.
-Oder wenn ihnen Wissen und Erfahrung fehlen, das Gerät richtig und sicher zu bedienen.
Gas-Kochmulden/Gas-Herde
 Betreiben Sie nicht alle GasKochstellen gleichzeitig über längere Zeit (max. 15 Minuten) bei höchster Wärmebelastung, sonst besteht Verbrennungsgefahr bei Berührung der Gehäuseoberfläche bzw. Gefahr der Beschädigung der Dunstabzugshaube. Bei Betreiben der Dunstabzugshaube über einem Gas-Kochfeld muss bei gleichzeitigem Betrieben von drei oder mehr Gas-Kochstellen die Haube in der Maximalstufe betrieben werden.
Beachten Sie, dass ein Großbrenner mit mehr als 5 Kw (wok) der Leistung von zwei Gasbrenner entspricht.
Betreiben Sie eine Gaskochstelle nie ohne aufgesetztes Kochgeschirr. Regeln Sie die Flamme so, dass sie nicht über das Kochgeschirr hinausragt.
Bevor Sie das neue Gerät benutzen, lesen Sie bitte sorgfältig die Gebrauchsanleitung. Sie enthält wichtige Informationen für Ihre Sicherheit sowie zum Gebrauch und zur Pflege des Gerätes.
Bewahren Sie die Gebrauchs-und Montageanleitung ggf. für einen Nachbesitzer gut auf.
6
Betriebsarten
Abluftbetrieb: M Abbildungen.
Der Lüfter der Dunstabzugshaube saugt den Küchendunst an und leitet ihn durch den Fettfilter ins Freie.
Der Fettfilter nimmt die fettigen Bestandteile des Küchendunstes auf.
Die Küche bleibt weitgehend frei von Fett und Geruch.
Die Abluft wird über einen Lüftungsschacht nach oben, oder direkt durch die Außenwand ins Freie geleitet.
) Die Abluft darf weder in einen in Betrieb befindlichen Rauch-oder Abgaskamin noch in einen Schlacht, welcher der Entlüftung von Aufstellungsräumen von Feuerstätten dient, abgegeben werden.
Bei der Ableitung von Abluft sind die behördlichen und gesetztlichen Vorschriften (z.B. Landesbauordnungen) zu beachten.
Bei Abführung der Luft in nicht in Betrieb befindliche Rauch-oder Abgaskamine ist die Zustimmung des zuständigen Schornsteinfegermeisters einzuholen.
) Bei Abluft der Dunstabzugshaube und gleichzeitigem Betrieb schornsteinabhängiger Feuerungen
(wie z. B. Gas-, Öloder Kohleheizgeräte, Durchlauferhitzer, Warmwassebereiter), muss für ausreichend Zuluft gesorgt werden, die von der Feuerstätte zur Verbrennung benötigt wird.
Ein gefahrloser Betrieb ist möglich, wenn der Unterdruck im Aufstellraum der Feuerstätte von 4 Pa (0,04mbar) nicht überschritten wird.
Dies kann erreicht werden, wenn durch nicht verschließbare Öffnungen, z.B. in Türen, Fenstern und in Verbindung mit Zuluft-/Abluftmauerkasten oder durch andere technischen Maßnahmen, wie gegenseitige Verriegelung o.ä., die Verbrennungsluft nachströmen kann.
Bei nicht ausreichender Zuluft besteht Vergiftungsgefahr durch zurückgesaugte Verbrennungsgase.
Ein Zuluft-/Abluftmauerkasten allein stellt die Einhaltung des Grenzwertes nicht sicher.
Anmerkung: Bei der Beurteilung muss immer der gesamte Lüftungsverbund der Wohnung beachtet werden. Bei Betrieb von Kochgeräten, z.B. Kochmulde und Gasherd wird diese Regel nicht angewendet.
Wird die Abluft durch die Außenwand geleitet, sollte ein Teleskop-Mauerkasten verwendet werden.
Bedienen der
Dunstabzugshaube
 Um die Funktionen zu aktivieren, genügt ein kurzes Antippen auf die Tasten. Wenn die Taste zu lange gedrückt werden, wird keine Funktion aktiviert.
 Der Küchendunst wird am wirkungsvollsten beseitigt durch:
Einschalten der Dunstabzugshaube bei Kochbeginn.
Ausschalten der Dunstabzugshaube erst einige Minuten nach Kochende.
|
|
|
|
|
|
|
|
|
|
|
|
|
|
|
|
Licht |
|
|
|
Anzeige |
|
Lüfternachlauf |
|||||||||
|
|
|
|
|
|
Lüfterstufen |
|
|
|
|
|
||||
|
|
|
|
|
|
|
|
|
|
|
|
|
|
|
|
Lüfter - Aus |
Lüfter zurück- |
Lüfter einund hoch- |
|||||||||||||
schalten |
|||||||||||||||
|
|
|
|
schalten |
|||||||||||
|
|
|
|
Intensivstufe |
|||||||||||
|
|
|
|
|
|
|
|
|
|
||||||
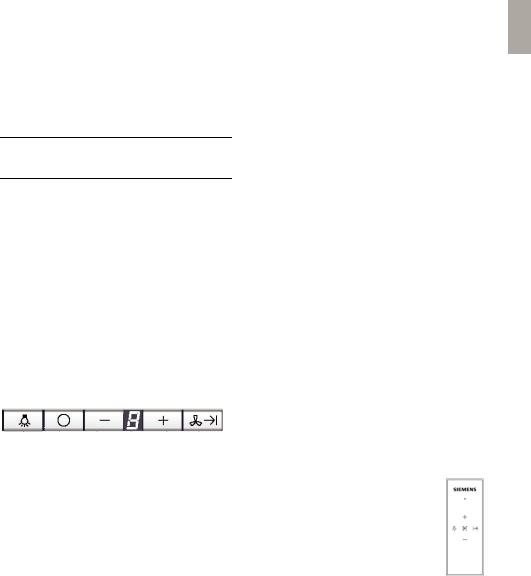
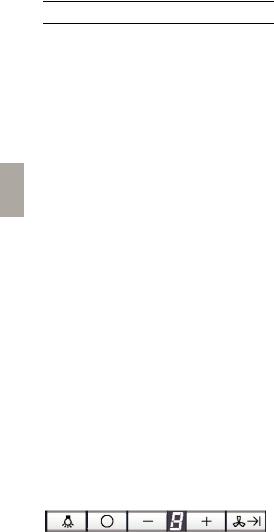
Signalton:
Beim Drücken einer Taste ertönt zur Bestätigung ein Signalton.
Einschalten des Lüfters:
Drücken Sie die Taste +.
Einstellen der gewünschten
Lüfterstufe:
Drücken Sie die Taste +.
Der Lüfter schaltet eine Stufe höher.
Drücken Sie die Taste -.
Der Lüfter schaltet eine Stufe zurück.
Ausschalten des Lüfters
Drücken Sie die Taste O.
Oder
Drücken Sie die Taste - so oft, bis der Lüfter ausschaltet.
Die Anzeige O erlischt nach kurzer Zeit.
Intensivstufe:
Durch die Intensivstufe wird die höchste Leistung erreicht. Sie wird kurzzeitig benötigt.
Drücken Sie die Taste + so oft, bis die P leuchtet.
Wird die Intensivstufe nicht von Hand ausgeschaltet, schaltet der Lüfter nach 10 Minuten auf Stufe 2.
Lüfternachlauf:
Drücken Sie die Taste  .
.
Der Lüfter läuft 10 Minuten in Stufe  dabei blinkt in der Anzeige ein Punkt. Danach schaltet der Lüfter selbsttätig aus.
Beleuchtung:
Die Beleuchtung kann zu jeder Zeit verwendet werden, auch wenn der Lüfter ausgeschaltet ist.
Fernbedienung
Der Hersteller programmiert die Fernbedienung.
Wenn sich in unmittelbarer Nähe der Haube diese nicht mit der Fernbedienung bedienen lässt, gehen Sie folgendermaßen vor.
7

Inbetriebnahme der Fernbedienung
Halten Sie die Taste “+” der Fernbedienung gedrückt und legen die Haube an die Netzspannung an (ggf. Netzsicherung einschalten). Zur Bestätigung der Kopplung der Fernbedienung an das Gerät, ertönt ein langes akustisches Signal. Wenn kein akustisches Signal innerhalb vor 30 Sekunden ertönt, wiederholen Sie das Verfahren.
Funktionen der Fernbedienung
Die Tasten +, -,  und Licht haben die gleiche Funktionen wie bei der direkten Bedienung.
Die Taste  : hat die gleiche Funktion wie die Taste
  .
.
Intervallschaltung
Diese Haube verfügt über eine Intervallschaltung.
Die Intervallschaltung aktiviert den Lüfter für 10 Minuten pro Stunde, in der angezeigten Lüfterstufe.
Diese Funktion kann man mit der direkten Bedienung oder mit der Fernbedienung aktivieren.
Aktivierung der Intervallschaltung mit Steuerung:
Gleichzeitig die Tasten O und + drücken, auf der Anzeige erscheint 1;
Drücken Sie die Taste +, die Anzeige zeigt folgende für die Lüfterstufen 2→3→1→2 …;
Gleichzeitig die Taste O und + drücken um die Laufstufe der Intervallschaltung zu bestätigen.
Aktivierung der Intervallschaltung mit Fernbedienung:
Drücken Sie die Taste  : auf der Anzeige erscheint 1;
Drücken Sie die Taste +, die Anzeige zeigt folgende Lüfterstufen 2→3→1→2 …;
8
Drücken Sie die Taste  um die Lüfterstufen zu bestätigen;
Wenn bei der Programmierung die angezeigte Funktion der Intervallschaltung nicht innerhalb einiger Sekunden bestätigt wird, dann wird der Modus der Programmierung der Intervallschaltung beendet.
Mit dem Drücken jeder Taste (Ausnahme Licht) ist die Intervallschaltung deaktiviert.
Die Fernbedienung ist batteriebetrieben. Falls die Batterie leer ist und deshalb ausgetauscht werden muss:
1.Lösen Sie hinten die zwei Schrauben und öffnen Sie den Deckel.
2.Nehmen Sie die Batterie heraus und ersetzten diese mit einer Batterie desselben Typs.
3.Schließen Sie den Deckel und schrauben Sie den Deckel fest.
Beachten Sie die nationalen Normen und Vorschriften für die Entsorgung der entleerten Batterien.
Filter und Wartung
Achtung:
Wie gezeigt in den Abbildungen Reihe M der Montageanleitung muss die Abdeckung mit beiden Händen entfernt und wieder angebracht werden, indem sie immer parallel bewegt wird.
Wenn die Abdeckung nur von einer Seite oder mit einer Hand geöffnet wird (wie gezeigt in den Abbildungen, die mit einem Kreuz durchgestrichen sind), kann das Schließsystem beschädigt werden.
Fettfilter:
Zur Aufnahme der fettigen Bestandteile des Küchendunstes sind Metall-Fettfilter eingesetzt.

Die Filtermatten bestehen aus unbrennbarem Metall.
Achtung:
Bei zunehmender Sättigung mit fetthaltigen Rückständen erhöht sich die Entflammbarkeit und die Funktion der Dunstabzugshaube kann beeinträchtig werden.
Wichtig:
Durch rechtzeitiges Reinigen der MetallFettfilter wird der Brandgefahr vorgebeugt, die durch Hitzestau beim Frittieren oder Braten entstehen kann.
Sättigunganzeige: 
Bei Sättigung der Fettfilter leuchtet die Anzeige  .
.
Mit dem Ausschalten des Lüfters wird auch das Signal ausgeschaltet.
Spätestens dann sollten die Fettfilter gereinigt werden.
Reinigen der Metall-Fettfilter:
Bei normalem Betrieb (täglich 1 bis 2 Stunden) müssen die Metall-Fettfilter 1x im Monat gereinigt werden.
Das Reinigen kann in der Geschirrspülmaschine erfolgen. Dabei ist eine leichte Verfärbung möglich. Der Filter muss locker in der Geschirrspülmaschine liegen. Er darf nicht eingeklemmt sein.
Wichtig:
Stark gesättigte Metall-Fettfilter nicht zusammen mit Geschirr reinigen.
Beim Reinigen von Hand, die Fettfilter in heißer Spüllauge einweichen. Danach abbürsten, gut ausspülen und abtropfen lassen.
Aus und Einbauen der Metall-Fettfilter: Achtung: Die Halogenlampen müssen ausgeschaltet und abgekühlt sein.
1.Befolgen Sie die Schritte, die in Abbildung M beschrieben sind.
2.Drücken Sie die Griffe an den Fettfiltern nach unten und klappen Sie die Fettfilter ab.
3.Reinigen Sie die Fettfilter
4.Setzen Sie die gereinigte Filter wieder ein.
5.Löschen Sie die Anzeige  .
.
Drücken Sie 2 x hintereinander die Taste O. Ein Signal ertönt und die Anzeige  erlischt.
Reinigen und Pflegen
Dunstabzugshaube durch Ziehen des Netzsteckers bzw. Ausschalten der Sicherung stromlos machen.
 Dunstabzugshaube nicht mit kratzenden Schwämmen und nicht mit sand-soda-säure oder chloridhaltigen Putzmitteln reinigen!
Zum Reinigen der Dunstabzugshaube heiße Spüllauge oder mildes Fensterputzmittel verwenden.
Kratzen Sie angetrocknete Verschmutzung nicht ab, sondern weichen Sie diese mit einem feuchten Tuch auf.
Beim Reinigen der Fettfilter die zugänglichen Gehäuseteile von abgelagertem Fett reinigen. Dadurch wird der Brangefahr vorgebeugt und die optimale Funktion bleibt erhalten
Hinweis: Alkohol (Spiritus) nicht auf Kunststofflächen anwenden, es könnten matte Stellen entstehen. Vorsicht! Küche ausreichend belüften, keine offene Flamme.
 Die Bedienstasten nur mit milder Spüllauge und einem weichen, feuchten
9

Tuch reinigen. Keinen Edelstahlreiniger für die Bedientasten verwenden.
Edelstahloberflächen:
Verwenden Sie einen milden nicht scheurnden Edelstahlreiniger.
Reinigen Sie nur in Schliffrichtung.
Aluminium, Lack und
Kunststoffoberflächen:
Keine trockenen Tücher verwenden.
Verwenden Sie ein mildes Fensterreinigungsmittel.
Keine aggressive, säureoder laugenhaltigen Reiniger verwenden.
Beachten Sie die Garantiebestimmungen im beiligenden Service-Heft.
Auswechseln der Lampen
Defekte LED-Leuchten dürfen nur durch den Hersteller, seinen Kundendienst oder einer konzessionierten Fachkraft (Elektroinstallateur) ausgetauscht werden.
Störungen
Wenn im Display  oder
oder  blinkt:
Sehen Sie Abschnitt Filter und Wartung”.
Wenn sich die Dunstabzugshaube nicht bedienen lässt:
Für ca 1 Minute die Dunstabzugshaube durch Ziehen des Netzsteckers ausschalten oder Sicherung stromlos machen. Danach neu einschalten.
Wenn die Halogenlampen nur schwach eingeschaltet sind, wenn die Haube in
10
stand by ist, bitte schalten Sie Stecker um (Phase mit Nulleiter umkehren).
Bei eventuelllen Rückfragen oder Störungen, Kundendienst anrufen. (Siehe Kundendienstverzeichniss).
Bei Anruf bitte angeben:
E-Nr. FD
Tragen Sie die Nummer in obige Felder ein.
Die Nummern sind auf dem Typenschild nach Abnahme der Fettfilter, im Innenraum der Dunstabzugshaube zu finden.
 Für Beanstandungen die auf Planung und Ausführung der Rohrstrecke zurückzuführen sind, übernimmt der Hersteller der Dunstabzugshaube keine Gewährleistung.
Umluftbetrieb
Hierzu muss ein Aktivkohlefilter CLEAN AIR MODUL eingebaut werden.
 Das komplette Montage-Set sowie die Ersatzfilter können Sie beim Fachhandel erwerben. VIB: LZ56700.
Der Lüfter der Dunstabzugshaube saugt den Küchendunst an und leitet ihn durch den Fettund Aktivkohlefilter gereinigt in die Küche zurück.
Der Fettfilter nimmt die fettigen Bestandteile des Küchendunstes auf.
Der Aktivkohlefilter bindet die Geruchsstoffe.
 Wird kein Aktivkohlefilter eingebaut, können keine Geruchsstoffe des Küchendunstes gebunden werden.
Umstellung der elektronischen Steuerung auf Umluftbetrieb:
Serienmäßige Einstellung ist Abluftbetrieb.
Die Dunstabzugshaube muss angeschlossen und ausgeschaltet sein.
Drücken Sie gleichzeitig die Tasten O und  bis die Anzeige
  leuchtet. Danach die Tasten loslassen.
Die Anzeige  erlischt nach kurzer Zeit. Die elektronische Steuerung ist auf Umluftbetrieb eingestellt.
Durch Wiederholen der Schritte 1 und 2 wird die elektronische Steuerung wieder auf Abluftbetrieb umgestellt (Anzeige  ).
).
Achtung:
Bei zunehmender Sättigung mit fetthaltigen Rückständen erhöht sich die Entflammbarkeit und die Funktion der Dunstabzugshaube kann beeinträchtigt werden.
Wichtig:
Durch rechtzeitigen Wechsel des Aktivekohlefilters wird der Brandgefahr vorgebeugt, die durch Hitzestau beim Frittieren oder Braten entstehen kann.
Sättigungsanzeige: 
Bei Sättigung des Aktivkohlefilters leuchtet die Anzeige  und ein Signal ertönt.Mit dem Ausschalten des Lüfters wird auchdas Signal ausgeschaltet. Spätestens dann sollte der Aktivkohlefiltergewechselt werden.
Wechsel des Aktivkohlefilters:
Bei normalem Betrieb (täglich 1 bis 2 Stunden) muss der Aktivkohlefilter ungefähr 1 x im Jahr ausgetauscht werden.
Der Aktivkohlefilter ist im Fachhandel erhältlich.
Nur Originalfilter verwenden.
Dadurch wird die optimale Funktion gewährleistet.
Entsorgung des alten Aktivkohlefilters:
Aktivkohlefilter enthalten keine Schadstoffe. Sie können z. B. als Restmüll entsorgt werden.
11
Before reading these instructions, please open out the folded page with the illustration.
Important information
 Old appliances are not worthless rubbish. Valuable raw materials can be reclaimed by recycling old appliances. Before disposing of your old appliance, render it unusable.
 Your received your new appliance in a protective shipping carton. All packaging materials are environmentally friendly and recyclable. Please contribute to a better environment by disposing packaging materials in an environmentally-friendly manner.
 Please ask your dealer or inquire at your local authority about current means of disposal.
 The exactractor hood can be used in exhaust air mode.
 Always mount the extractor over the centre of the hob.
 Minimum distance between electric hob and bottom edge of the extractor hood: 550mm. (See figures).
Advised: 700 mm
 The extractor hood must not be installed over a solid fuel cooker – a potential fire hazard (e.g. flying sparks)- unless the cooker features a closed non removable cover and all national regulations are observed.
This limitation is not valid if you use gas cooking top and gas cooker.
 The smaller the gap between the extractor hood and hotplates, the greater the likelihood that droplets will form on the underside of the extractor hood.
12
Additional information concerning gas cookers:
 When installing gas hotplates, comply with the relevant national statutory regulations (e.g. in Germany – Technische Regeln Gasinstallation TRGI).
 Always comply with the currently valid regulations and installation instructions supplied by gas appliance manufacturer.
 Only one side of the extractor hood may be installed next to a high-sided unit or high wall. Gap at least 50 mm.
 Minimum distance on gas hotplates between the upper edge of the trivet and the lower edge of the extractor hood: 650 mm. (see figures).
Advised: 700 mm
 This appliance is labelled in accordane with European Directive 2002/96/EG concerning used electrical ad electronic appliances (waste electrical and elettronic equipmentWEEE).
The guideline determines the framework for the return and recycling of used applainces as applicable throughout the EU.
Prior to installation
For optimum extractor hood efficiency:
Short, smooth air exhaust pipe.
As few bends in the pipes as possible
Diameter of pipe to be as large as possible and no tight bends in pipe.
If long rough exhaust-air pipes, many pipe bends or smaller pipe diameters are used, the air extraction rate will no longer be at
an optimum level and there will be an increase in noise.
Round pipes:
we recommend internal diameter: 150 mm.
Flat duct must have an internal cross section that equates to that of round pipes.
There should be no sharp bends. Ø 150 mm ca. 177cm2
If pipes have different diameters: insert sealing strip.
For exhaust-air mode, ensure that there is an adequate supply of fresh air.
Connecting a Ø 150 mm exhaust air pipe:
Mount the pipe directly onto the air outlet on the hood. Duct smaller than 150 mm are not reliable.
With higher distance from the cooking hob, the air delivery performances are reduced. During the design and layout of the mounting of the cooker hood, kindly consider also the funnelshape of the vapour rising with inclination of ca 10 – 15°.
Preparing the celing:
The ceiling must be flat and horizontal.
Ensure that the ceiling is capable of providing a firm hold for mounting screws and plugs.
The enclosed plugs are suitable for concrete and stonework. If the ceiling is made of any other material, use appropriate mounting components.
 Attention: The cooker hood is equipped with standard fixing material. The person who is mounting the hood should make sure that fixing elements are suitable for the ceiling that is found. The manufacturer declines any responsibility for damages caused by a wrong mounting
oder use of unsuitable fixing elements for the ceiling found.
For the weight kindly look at the M Figures. We reserve the right to construction changes within the context of technical development.
Electrical connection
WARNING: THIS APPLIANCE MUST BE EARTHED.
The appliance must be installed so that plug is accessible.
IMPORTANT: Fitting a different plug.
The wires in the mains leads are coloured in accordance with the following codes:
Green and Yellow – Earth Bleu – Neutral
Brown – Live
If you fit your own plug, the colours of these wires may not correspond with the identifying marks on the plug terminals. This is what you have to do.
1.Connect the green and yellow (Earth) wire to the terminal in the plug market “E “ or with the symbol (  ), or coloured green or green and yellow.
2.Connect the bleu (Neutral) wire to the terminal in the plug marked ‘N’ or coloured black.
3.Connect the brown (Live) wire to the terminal marked “L” or coloured red.
The extractor hood should only be connected to an earthed socket that has been installed according to relevant regulations.
If possible, site the earthed socket directly above the chimney panelling in the ceiling.
Electrical Data:
Are to be found on the name plate inside
13

the appliance after removal of the filter frame.
 Before undertaking any repairs, always disconnect the extractor hood from the electricity supply.
Length of the connecting cable: 1,3 m.
If it is necessary to wire the extractor hood directly into the mains:
The extractor hood should only be connected to the electricity supply by a properly qualified electrician.
A separator must be installed in the household circuit. A suitable separator is a switch that has a contact gap of more than 3 mm and interrupts all poles. Such devices include circuit breakers and contactors.
 If the connection cable for this appliance is damaged, the cable must be replaced by the manufacturer or his customer service or a similarly qualified person in order to prevent serious inury to the user.
This extractor corresponds to EC regulations concerning RF interference suppression.
Installation
The island extractor hood is designed to be fitted to the kitchen ceiling or a rigid suspended ceiling.
 Ensure that the minimum distance between hotplate and extractor hood is 550 mm for electric hotplates and 650 mm for gas hotplates.
 Ensure that the inox surface is not damaged.
Follow the mounting steps as shown in M Figures.
14
Before using for the first time
Important notes
The instructions for Use apply to several version of this appliance, Accordingly you may find description of individual features that do not apply to your specific appliance.
This extractor hood complies with all relevant safety regulation.
Repairs should be carried out by qualified technicians only.
Improper repairs may put the user at considerable risk.
 Do not flambé food directly under the extractor hood.
! Risk of grease filter catching fire due to flames.
 The hotplates must always be covered with a utensil.
 Restrictions apply to the use of the extractor hood over a solid-fuel burner (coal wood, etc.) (See “Installation” instructions).
 Do not use the appliance if damaged.
 The appliance must be connected to the mains by a qualified technician only.
 This extractor hood is designed for domestic use only.
 Light bulbs must always be fitted when the extractor hood is in use.
 Defective bulbs should be replaced immediately to prevent the remaining bulbs from overloading.
 Never operate the extractor without a grease filter.
 Overheated fat or oil can easily catch fire. If you are cooking with fat or oil, e.g. chips etc. never leave the cooker unattended.
 Carefully clean the extractor hood before switching on for the first time.
 Do not place any object on the extractor hood.
 If the connecting cable for this appliance is damaged, the cable must be replaced by the manufacturer or his customer service or a simiòaròu qualified person in order to prevent serious injury to the user.
 Dispose of packaging materials properly (see installation instruction).
 Never allow children to play with the appliance. Do not let adults or children operate the appliance unsupervised:
-If they are mentally or physically unable to use the appliance safely or correctly.
-If they don’t have the knowledge and experience to use the appliance safely and correctly.
Gas hobs/Gas cookers
 Do not use all the gas hotplates simultaneously for a prolonged period (max. 15 minutes) at maximum thermal load, otherwise there is a risk of burns if the housing surface are touched or a risk of damage to the extractor hood. If the extractor hood is situated over a gas hob, operate the hood at maximum setting if three or more gas hotplates are operated simultaneously.
Note that one large burner of more than 5 KW (Wok) is equivalent to the power of 2 gas burners.
Never operate a gas cooking area without a cooking utensil on it. Regulate the flame in such a way that it does not project over the cooking utensil.
Before using your appliance for the first time, please read these instructions for use carefully. They
contain important information concerning your personal safety as well as on use and care of your appliance
Please retain the operating and installation instructions for a subsequent owner.
Operating modes
Exhaust air mode. See M Figures.
The extractor-hood fan extracts the kitchen vapours and conveys them through the grease filters into the atmosphere.
The grease filter absorbs the solid particles in the kitchen vapours.
The kitchen ist kept almost free of grease and odours.
The exhaust air is discharged upwards through a ventilation shaft or directly through the outside wall into the open.
) Exhaust air should neither be directed into a smoke or exhaust flue that is currently used for other purposes, nor into a shaft that is used for ventilation rooms in which stoves or fireplaces are also located.
Exhaust air may be discharged in accordance with official and statutory regulations only (e.g. national builing regulations).
Local authority regulations must be observed when discharging air into smoke or exhaust air flues that are not otherwise in use.
) When the extractor hood is operated in exhaust-air mode simultaneously with a different burner (such as gas, oil or coal-fired heaters, continuous-flow heaters, hot-water boilers) care must be taken to ensure that there is an adequate supply of fresh air which will be needed by the burner for combustion.
15

Safe operaration is possible provided that the underpressure in the room where the burner is installed does not exceed 4 Pa (0,04 mbar).
This can be achieved if combustion air can flow through nonlockable openings, e.g. in doors, windows and via the airintake/exhaust air wall box, or by the other technical measures, such as reciprocal interlocking. Etc…
If the air intake is inadequate there is a risk of poisoning from combustion gases which are drawn back into the room.
An air-intake/exhaust air wall box by itself is no guarantee that the limiting value will not be exceeded.
Note: when assessing the overall requirement, the combined ventilation system for the entire household must be taken into considertion. This rule does not apply to the use of cooking appliances, such as hobs and ovens.
If the exhaust air is going to be discharged into the open, a telescopic wall box should be fitted into the outside wall.
Operating procedure
 To activate the functions simply tap the buttons. If the buttons are pressed for too long, no function is activated.
 The most effective method of removing vapours produced during cooking is to:
Switch the ventilator ON
as soon as you begin cooking.
Switch the ventilator OFF
a few minutes after you have finished cooking.
16
|
|
|
|
|
|
|
|
|
|
|
|
|
|
|
Light |
|
|
|
Speeds |
|
Timer |
||||||||
|
|
|
|
|
|
Indicator |
|
|
|
|
|
|||
|
|
|
|
|
|
|
|
|
|
|
|
|
|
|
It switches |
It decreases the |
It switches motor on |
||||||||||||
and increases the |
||||||||||||||
motor off |
speeds |
|||||||||||||
speeds |
||||||||||||||
|
|
|
|
|
|
|
|
|
||||||
Acoustic signal
When a push button is pressed, this is verified by an acoustic signal.
Switching the fan ON
Press the + Push button
Setting the required fan speed
Press the + Push button
The fan speed is increased by one step.
Press the - Push button
The fan speed is reduced by one step.
Switching the fan OFF
Press the O Push button
the displayed  goes out shortly afterwards.
Or
Keep pressed the – push button until the fan switches off.
The displayed  goes out shortly afterwards.
Intensive Setting:
Maximum power is obtained at the intensive setting. It is only required for short intervals.
Keep pressed the + button until a  appears in the display.
If the intensive setting is not cancelled by hand, the fan will automatically switch back to step  after 10 minutes.
Fan follow on:
Press the  . button
The fan continues to run at step  for 10 minutes and at the same time a
dot flashes in the display. After this period the fan switches off automatically.
Lighting:
The light can be switched on at any time, even though the fan is switched on.
Remote control:
The remote control is set up by the manufacturer. If the remote control is not controlling motor or light nearby the cooker hood, please do the following.
Set up of the remote control.
Keep pressing the “+” button of the remote control and then connect the cooker hood, to confirm that the remote control has been recognized a long beep is issued. If you do not hear the acoustic signal within 30 seconds, please repeat the steps as described.
Functions of the remote control.
The +, -,  and Light Push button have the same functions as on the controls of the hood.
The  : Push button has the same function as the
  .
.
Interval Function:
A specific function of this appliance is the Interval Function which consists in activating the motor in automatic way 10 minutes each hour at the speed flashing in the display.
This function can be activated on the control of the hood or by remote control.
Interval Function by controls:
Keep pressing at the same time the O and + push buttons, then release them: the display will show the 1;
Keep pressing at the same time the + push button, the display will show the following for the speeds of the motor 2→3→1→2 …;
Keep pressing at the same time the O and + push buttons to confirm the speed for the motor you wish for the interval function.
Interval Function by remote control:
Keep pressing the  : push button. The display will show 1;
Keep pressing the + push button, the display will show the following for the speeds of the motor 2→3→1→2 …;
Press the  push button to confirm the speed of the motor for the interval function.
When you are in the setting phase, if the interval function shown is not confirmed within some seconds, then you get out of the setting mode for the interval function.
By pressing any push button, light excluded, the interval function is excluded.
The remote control has a battery – When the battery is exhausted you need to:
1.loosen the 2 screws on the rear part and remove the cover.
2.take the battery out and replace it with one with the same characteristics.
3.Close the cover again and tighten the screws.
Follow National norms for waste disposal of exhausted batteries.
Filters and maintenance
Caution:
As shown in the M figures of the mounting manual the panel must be removed and remounted with 2 hands, keeping it parallel.
To open the panel just one side or with 1 hand (as shown on the crossed out figures) can compromise the integrity of the closing system.
17

Grease filters:
Metal filters are used to trap the greasy element of the vapours that develop during cooking.
The filter mats are made from noncombustible metal.
Caution:
As the filter becomes more and more saturated with grease, not only does the risk of catching fire increase, but the efficiency of the extractor hood can also be adversely affected.
Important:
By cleaning the metal grease filters at appropriate intervals, the possibility of them catching fire as a result of a build-up of heat such as occurs when deep-fat frying or roasting is taking place, is reduced.
Saturation indicator: 
When the grease filters are saturated  flashes. If you switch the hood off, then the acoustic signal is removed.
The grease filters should be cleaned straight away.
Cleaning the metal grease filters:
In normal operation (1-2 hours daily) the metal grease filter must be cleaned 1x a month.
The filters can be cleaned in a dish washer. It is however possible that they become slightly discoloured.
The filters must be placed loosely and NOT wedged in the dishwasher Important: Metal filters that are saturared with grease should not be washed together with other dishes.
When clearing the filters by hand, soak them in hot soapy water first of all. Do not use aggressive, acidic or caustic cleaners. Then brush the
18
filters clean, rinse them thoroughly and leave the water to drain off.
Removing and installing the metal grease filters:
Attention: the halogen bulbs must be switched off and must have cooled down.
1.Follow the steps shown in the M figures.
2.Depress the handles on the grease filters and fold down the grease filters.
3.Clean the grease filters.
4.Re-install the cleaned grease filters.
5.Clearing the  display.
Press 2x in succession the O push button. An acoustic signal is issued and the  display goes out.
Cleaning and care
Isolate the extractor hood by pulling out the mains plug or switching off the fuse.
 Do not clean the extractor hood with abrasive sponges or with cleaning agents which contain sand, soda, acid or chlorine.
Clean the extractor hood with a hot soap solution or a mild window cleaner.
Do not scrape off dried-on dirt but wipe off with a damp cloth.
When clearing the grease filters, remove grease deposits from accessibile parts of the housing. This prevents the risk of fire and ensures that the extractor hood continues operating at maximum efficiency.
Note: do not use alcohol (spirit) on plastic surfances, as dull marks may appear.

Caution! Ensure that kitchen is adequately ventilated. Avoid naked flames.
 Clean the operating buttons with a mild soapy solution and soft, damp cloth only.
Do not use stainless-steel cleaner to clean the operating buttons.
Stainless Steel surfances:
Use a mild non abrasive stainless steel cleaner.
Clean the surface in the same direction a sit has been ground and polished.
Aluminium and plastic surfaces:
Do not use dry cloths.
Use a mild window cleaning agent.
Do not use aggressive, acid or caustic cleaners.
Observe the warranty regulations in the enclosed service booklet.
Replacing the light bulbs
Defective LED lights must only be replaced by the manufacturer, their customer service department or a licensed technician (electrician).
If it is not possible to operate the extractor hood:
Disconnect the extractor hood from the mains electricity supply by pulling out the plug or switching it off at the main fuse box. Wait for approx. 1 Minute and then switch it on again.
If the lights of the lamps is weak when the hood is in stand-by, then invert the plug (invert phase with neutral).
If you have any questions or if a fault occurs, please call Customer Service. (see list of Customer Service representatives).
When you call please quote the following:
E-Nr. FD
Enter the relevant numbers into the box above. The E-Nr. (Product no.) and FD (Production date) are shown on the nameplace which can be seen inside the extractor hood after the filter frame has been detached.
 The manufacturer of the extractor hood accepts no liability for complaints which can be attributed to the design and layout of the pipework.
If you encounter a problem
If a  or
or  appears in the display:
See “Filters and Maintenance“ Section.
19
Circulating-air mode
An activated carbon filter CLEAN AIR MODULE must be fitted for this operating mode
 The complete installation set and replacement filters can be obtained from specialist outlets. VIB: LZ56700.
The extractor-hood fan extracts the kitchen vapours which are purified in the grease filter and activated carbon filter and then conveyed back into the kitchen.
The grease filter absorbs the grease particles in the kitchen vapours.
The activated carbon filter binds the odorous substances.
 If no activated carbon filter is installed, it is not possible to bind the odorous substances in the cooking vapours.
Changing the electronic control systemto recirculating mode:
The standard factory setting is foroperation in exhaust-air mode.
To change the mode, the extractor hoodmust have been connected up andshould be switched off.
Simultaneously press buttons O and  until
until  comes on. Then release thebuttons.
 goes out shortly afterwards.The electronic control system will thenhave been set to recirculating mode.
By repeating steps 1and 2, you canchange the electronic control
20
systemback to exhaust-air mode ( in display).
Caution:
As the filter becomes more and more saturated with grease, there is an increased risk of fire and the function of the extractor hood may be impaired.
Important:
Change the activated carbon filter promptly to prevent the risk of fire from the accumulation of heat when deep-fat frying or roasting.
Saturation indicator: 
When the activated carbon filter becomes saturated, the display symbol  lights up and a signal sounds. The signal is switched off when the fan is switched off. The activated carbon filter should be replaced straight away.
Replacing the activated carbon filter:
During normal operation (1 to 2 hours per day) the activated carbon filters should be replaced approximately 1 x year.
A replacement filter can be obtained from any authorized dealer.
Use original filters only.
By doing so you will obtain maximum performance from your extractor hood.
Disposing of the old activated carbon filter:
There are no pollutants in the activated carbon filters. They can therefore be disposed of as part of your normal domestic refuse.
Avant de lire ce qui suit, veuillez déplier les volets illustrés.
Remarques importantes
 Les anciens appareils ne sont pas des déchet sans valeur. Leur élimination respectueuse de l’ environnement permet de récupérer de précieuses matières premières. Avant de vous débarrasser de
l’appreil, rendez-le inutilisable.
 Pour vous parvenir en parfait état, votre nouvel appareil a été conditionné dans un emballage qui le protège efficacement. Tous les matériaux d’emballage utilisés sont compatibles avec l’environnement et recyclables. Aideznous à èliminer l’emballage en respectant l’environnement.
 Demandez à votre revendeur ou à votre mairie quelles sont les formes de recyclage actuellement possibles.
 Cette hotte peut vacue l’air à l’extérieur.
 Fixez toujours la hotte bien centrée au-dessus des foyers de la table de
cuisson.
 L’écart minimum entre les foyers électriques et le bord inférieur de la hotte doit être de 550 mm, voir figures Recommandation: 700mm.
 Au-dessus d’un foyer à combustible solide génératuer d’un risque d’incendie (par projection d’etincelles par ex.) le montage de la hotte ne sera admis que si ce foyer est équipé d’un couvercle fermé et inamovible et si le montage ne contrevient pas à la réglementation nationale. Cette restriction ne vaut pas pour les cuisinières à gaz et les foyers aux gaz.
 Plus l’ecart est faible entre la hotte aspirante et le foyer et plus il se pourra que la vapeur montant des casseroles se
condense et forme des gouttes sur la face inférieure de la hotte.
Remarques supplémentaires concernant le cuisinières à gaz:
 Lors du montage de foyers gaz, veuillez respecter les dispositions légales en vigueur dans votre pays (en Allemagne par example: les Règles techniques TRGI
régissant l‘installation du gaz).
 Respectez les prescriptions et consignes d’encastrement en leur version applicable, publiées par les fabricants
d’appareils au gaz.
 La hotte aspirante ne pourra cotoyer que sur un côté un meuble haut ou une paroi haute. Ecart minimum: 50 mm.
 Ecart minimum, en présence de foyers au gaz, entre le bord supérieur de la grille support et le bord inférieur de la hotte:
650 mm. (voir figures).
Recommandation: |
700 mm. |
 Cet appareil est marqué selon la directive européenne 2002/96/CE relative aux appareils électriques usagés (waste electrical and electronic equipment (WEEE).
La directive définit le
cadre pour une reprise et une récupération des appareils usagés applicables dans les pays de la CE.
Avant le montage
Pour que la hotte aspirante ait le meilleur rendement, veillez à ce que:
Le conduit d’évacuation soit court et lisse.
Il y ait le moins possible de coudes.
Il y ait le plus fort diamètre et que les coudes soient les plus arrondis
21

possibiles.
L’emploi de conduits d’air vicié longs, rugueux, formant de nombreux coudes ou d’un trop petit diamètre fait descendre le débit d’air en dessous du débit optimal, tout en accroissant le bruit d’aspiration.
Conduits de section ronde:
Nous recommandons des conduits au diamètre intérieur de 150 mm.
Les conduits plats doivent avoir une section intérieure équivalente au diamètre intérieur des conduits ronds.
Les conduits ne doivent comporter
aucun coude prononcé.
Ø 150 mm ca. 177 cm2 de section
Si les conduits ont des diamètres différents: utilisez du ruban adhésif à étancher.
Si la hotte évacue l’air à l’extérieur, veillez à ce que l’apport d’air soit suffisant.
Branchement du conduit d’èvacuation Ø 150 mm:
Fixez le conduit d’ évacuation directement sur l’ orifice. Des conduits plus pétits que 150 mm ne sont pas confiants.
Avec une distance plus grande du plan de cuisson, on a la reduction des performances du debit d’ air. Pendant la conception du montage et la pose, il faut aussi considerer la forme à entonnoir de la montée des buées de cuisson avec inclination de ca 10 °ou 15°.
Préparation du plafond:
Le plafond doit être plat et horizontal.
Veuillez à ce que les chevilles soient bien fixées.
Les chevilles ci-jointes conviennnent pour fixer la hotte dans un
22
mur/plafond en bèton ou en pierre naturelle.
Si le matériau constitutif du plafond est différent, veuillez utiliser des moyens de fixation appropriés.
 Attention: la hotte est equipée avec de materiaux standards pour le montage.
Le monteur doit verifier que les elements de fixage sont appropriés aux parois et aux plafonds trouvés.
La maison constructrice decline toute responsabilité pour des endommegements causés par de montage qui n’on pas eté faits de manière correcte et/ou pour l’utilisation de materiaux de montage pas appropriés au plafond trouvè.
Pour le poids, voir les figures de la Série M. Sous réserve de modification constructives dans l’ intérêt du progrès technique.
Branchement électrique
La fiche mâle de la hotte aspirante ne pourra être branchée que dans une prise secteur à contacts de terre réglementairement posée. Installer cette prise autant que possible directement derrière le capotage de la hotte de façon que la fiche soit accessible.
Caractéristiques électriques:
Vous les trouverez après avoir retiré le cadre pour filtre, sur la plaque signalétique, à l’interieur de l’appareil.
 Toujour mettre l’appareil hors tension avant d’effectuer des réparations.
Longueur du cordon de branchement: 1,3 m.
Si le cordon doit être raccordé definitivement au secteur:
Dans ce cas le branchement de la hotte ne pourra être effectué que par un

èlectricien-installateur agrée auprès de la compagnie locale/nationale distributrice d’ électricité.
Prevoir un dispositif de coupure côtè secteur. Valent comme tel les commutateurs dont l’ouverture entre contacts dépasse 3 mm et qui sectionnent tous les pôles. Figurent parmi eux également les disjoncteurs et contacteurs.
 Si le cordon d’alimentation de cet appareil est endomagé, il faut confier son replacement au fabricant ou à son service après-vente, ou encore à une personne possédant des qualifications identiques, pour éviter de créer des risques.
Cet hotte aspirante est conforme aux dispositions CEE sur l’antiparasitage des appareils électriques.
Encastrement
La hotte aspirante ilôt est prevue pour être installée au plafond de la cuisine ou à un faux plafond stable.
 L’ ècart minimum entre les foyer set la hotte aspirante doit être de 550 mm pour des foyers électriques et de 650 mm pour des foyers à gaz.
 Attention: veillez bien à ne pas endommager les surfaces delicates, en acier inoxydable.
Suivre les instructions de montage comme montré dans les figures de la Série M.
Avant la première utilisation
Remarques importantes:
La présente notice d’emploi vaut pour plusieurs versions de l’appareil. Elle peut contenir des descriptions
d’accessoires ne figurant pas dans votre appareil.
Cette hotte aspirante est conforme aux dispositions de sécurité applicables.
Les réparations ne doivent être effectuées que par un spécialiste.
Des réparations inexpertes s’assortissent de risques considérables pour l’utilisateur.
 Ne flambez aucun mets sous la hotte.
! Les flammes risqueraient d’atteindre le filtre à graisse et d’y mettre le feu.
 Lorsque les foyers sont allumés des ustensiles de cuisson doivent toujours se trouver dessus.
 L’utilisation d’une hotte aspirante audessus d’un foyer à combustibile solide (charbon, bois, etc.) n’est autorisée qu’ à certaines conditions (voir la notice de
montage).
 Si l‘appareil est endommagé, sa mise en service est proscrite.
 Le branchement et la mise en service ne doivent être effectués que par un spécialiste.
 Cette hotte aspirante n’est destinée à servir que pour couvrir les besoin d’un ménage.
 Ne faites marcher la hotte aspirante qu’ à ampoules montées sur leur douille.
 Remplacez immédiatement les ampoules défectueuses pour empêcher une surcharge des ampoules restantes.
 N’ utilisez jamais la hotte aspirante sans filtre à graisse.
 Les graisses ou huiles surchauffées peuvent s’enflammer facilement.
Par conséquent, surveillez toujours les plats (frites par ex.) qui se préparent à l’aide de matières grasses ou d’huiles.
23

 Avant la première mise en service nettoyez soigneusement la hotte aspirante.
 Si le cordon d’alimentation de cet appareil a eté endommagé. Il faut confier son remplacement au fabricant ou à son service après vente, ou encore à une personne possédant des qualifications identiques, pour éviter de créer des risques.
 Ne poser aucun object sur la hotte aspirante.
 Eliminez les matériaux d’emballage conformément à la réglementation (voir la notice de montage).
 Ne pas laisser des enfants jouer avec l’appareil.
Ne jamais laisser des adultes ou des enfants se servir de l’ appareil sans surveilance
-s’ils ne sont pas en mesure de le faire pour des raisons physiques, sensorielles ou mentales.
-Ou bien s’ils ne possèdent ni les connnaissances ni l’ expérience nécessaires pour utiliser l’appareil de manière correcte et sûre.
Tables de cuisson au gaz/Cuisinières à gaz.
 Ne faites jamais marcher tous les foyers au gaz en même temps et à pleine puissance pendant assez longtemps (15 minutes max.) sinon vous risquez de vous brûler en touchant la surface du corps de la hotte, ou d’endommager carrément cette dernière. Si la hotte doit marcher audessus d’ une table de cuisson au gaz , faites simultanément marcher la hotte à la puissance d’aspiration maximale si Vous avez allumé trois foyers ou plus.
Rappelez-vous que la puissance d’ un grand brûleur de plus de 5 KW
24
(Wok)représente celle de 2 brûleurs gaz normaux.
Ne faites jamais marcher un foyer gaz sans avoir posé d’ustensile de cuisson dessus. Ajustez la flamme de telle sorte qu’ elle ne dépasse pas le bord inférieur de l’ustensile de cuisson.
Lisez attentivement la présente notice d’emploi avant d’utiliser votre appareil pour la première fois. Elle contient des informations importantes non seulement pour votre sécurité mais aussi pour l’utilisation et l’entretien de l’appareil.
Rangez la présente notice d’ emploi soigneusement pour pouvoir la remettre à un futur propriétaire de l‘appareil.
Utilisation de la hotte aspirante
Evacuation de l’air à l’extérieur Figures de la Série M.
Le ventilateur de la hotte aspire les buées de cuisson qui traversent un filtre à graisse avant de regagner l’ atmosphère extérieure.
Ce filtre retient les particules grasses solides en suspension dans les buées de cuisson .
Les particules grasses ne se déposent plus dans la cuisine, les odeurs de cuisson disparaissent.
L’air vicié est évacué vers le haut par un conduit d’aération ou directement à l’air libre par traversée du mur extérieur.
) L’air vicié ne doit jamais être evacué vers une cheminée en service, rejetant des fumes ou des gaz de combustion, ni vers un conduit servant à l’aeration de locaux dans lesquels se trouvent des

foyers à combustibles solides, liquides et gazeux.
Le mode d’evacuation de l’air vicié devra être conforme aux arrêtés municipaux, préfectoraux, et aux presciptions légales (par. ex. aux ordonnances publiques applicables au bâtiment).
Si l’air vicié doit être évacué par de cheminées d’ evacuation des fumées et gaz de combustion qui ne sont pas en service, veuillez respecter la réglementation locale et nationale applicable.
) Si la hotte évacue l’air à l’exterieur et si le logement comporte des moyen de chauffage (tels par ex. des appareils de chauffage au gaz, au fuel ou au charbon, chauffe-eau instantanés ou à accumulation) raccordés à une cheminée, veiller impèrativement à ce que l’apport d’air soit suffisant pour assurer la marche du chauffage à combustion.
Un fonctionnement sans risque est possible si la depression dans le local où le foyer de chauffage est implanté ne depasse pas 4 Pascals (0,04mbar).
On y parvient en presence d’ouvertures non obturables ménagées par ex. dans les portes, fenêtres et en association avec des ventouses télescopiques d’admission/evacuation de l’air à travers la maçonnerie ou par d’ autre mesures techniques telles qu’ un verrouillage réciproque ou assimilé permettant à l’air d’affluer pour assurer la combustion.
En cas d’afflux d’air insuffisant, risque d’intoxication par réaspiration des gaz de combustion.
La présence d’ une ventouse télescopique d’ apport et d’évacuation d’air ne suffit pas à assurer le respect de la valeur limite.
Remarque: lors de l’evaluation de la situation, toujours tenir compte de l’ensemble des moyens d’aeration du logement. Cette règle ne vaut
généralement pas si vous utilisez des appareils de cuisson (table de cuisson et cuisinière à gaz).
Si l’air vicié traverse le mur extérieur, utilisez une ventouse tèlescopique.
Utilisation de la hotte aspirante
 Pour activer les fonctions, il suffit d’ effleurer brièvement les touches. Si vous appuyez trop longtemps sur les touches, aucune function ne s’ active.
 La méthode la plus efficace pour supprimer les buées de cuisson consiste à:
Enclencher la hotte aspirante en début de cuisson.
Eteindre la hotte aspirante quelques minutes seulement après la fin de la cuisson
|
|
|
|
|
|
|
|
|
|
|
|
|
|
|
|
Lumière |
|
|
|
Indication des |
Poursuite de |
||||||||||
|
|
|
|
|
|
|
vitesses |
|
marche du |
||||||
|
|
|
|
|
|
|
|
|
|
|
ventilateur |
||||
|
|
|
|
|
|
|
|
|
|
|
|
|
|
|
|
|
Hors du |
Il fait diminuer les |
Il enclenche le |
||||||||||||
|
ventilateur et augmente |
||||||||||||||
|
ventilateur |
vitesses |
|
|
|
||||||||||
|
|
|
|
les vitesses |
|||||||||||
|
|
|
|
|
|
|
|
|
|
||||||
Signale sonore
Lorsque vous appuyez sur une touche, un signal sonore retentit à titre de confirmation.
Enclenchement du ventilateur
Appuyez sur la touche +.
Réglage du ventilateur sur la vitesse désirée
Appuyer sur la touche +.
Le ventilateur passe au gradin de vitesse immédiatement supérieur.
25

Appuyer sur la touche -.
Le ventilateur passe au gradin de vitesse immédiatement inférieur.
Coupure du ventilateur
Appuyer sur la touche O.
Ou
Appuyer sur la touche – autant de fois que nécessaire à ce que le ventilateur s’eteigne.
La mention  s’ éteint au bout d’ un temps bref.
Ventilation intensive:
Au niveau intensif, le ventilateur développe sa plus grande puissance. Vous n’ en aurez que brièvement besoin.
Appuyez sur la touche + autant de fois que nécessaire à ce que la lettre  s’ affiche.
Si vous n’ éteignez pas manuellement la ventilation intensive, le ventilateur revient automatiquement à la vitesse  au bout de 10 minutes.
Poursuite de marche du ventilateur
Appuyez sur la touche  .
.
Le ventilateur tourne 10 minutes à la vitesse  , un point clignote à l’ affichage. Ensuite le ventilateur s’ eteint automatiquement.
Eclairage
Vous pouvez utiliser l ‘éclairage à tout moment, mème quand le ventilateur est éteint.
Télécommande
La programmation du télécommande est faite par le producteur. Si le télécommande ne controle pas le moteur et les lumières près de la hottes, prière de faire ce qui suit.
Programmation du télécommande
Continuer à appuyer sur la touche “+” du télécommande et ensuite brancher la
26
hotte. Pour confirmer que le télécommande a eté reconnu, un biep prolongé est emis. Si le signal sonore n’ est pas entendu dans les 30 secondes répétez à nouveau la procédure.
Fonctions du télécommande
Les touches +, -,  et la lumière ont les mème fonctions que dans les controles.
La touche  : a la mème fonction que la touche
  .
.
Fonction d’intervalle
Specifique dans cet appareil nous avons la fonction d’ interval qui consiste dans l’activation automatique du moteur 10 minutes chaque heure à la vitesse qui clignote dans le display.
Cette fonction peut être activée par les boutons ou par le télécommande.
Activation de la fonction intervalle par les controles:
Appuyez en mème temps sur les touche O et + et puis relâcher les boutons: le numero 1 s’ affiche dans le display;
En appuyant sur la touche +, le display va montrer la séquence suivante pour les vitesses du moteur 2→3→1→2 …;
Appuyer en mème temps sur les touches O et + pour confirmer la vitesse à laquelle le moteur doit fonctionner à la fonction intervalle.
Activation de la fonction intervalle par le télécommande:
Appuyez sur la touche  : Le numero 1 va s’ afficher sur le display
En appuyant sur la touche +, le display va montrer la séquence suivante pour les vitesses du moteurs 2→3→1→2 …;
Appuyer sur la touche  pour confirmer la vitesse à laquelle le
moteur doit fonctionner à la fonction intervalle.
Pendant la programmation, si l’on ne confirme pas la fonction intervalle montrée dans quelques seconde, l’on sort de la modalité de programmation de la fonction intervalle.
En appuyant sur toute touche, sauf la lumière, la fonction intervalle est exclue.
Le télecommande a une batterie. Quand la batterie est epuisée il faut:
1.Enlever les deux vis dans la partie posterieure et demonter le couvercle.
2.Extraire la batterie et la remplacer avec une nouvelle qui a les même characteristiques.
3.Remonter le couvercle et fermer les vis.
Suivre les normes nationales pour la mise à côtè des batteries epuisées.
Filtres et entretien
Attention:
Comme montré dans les figures M de la notice de montage, le filtre perimetral doit etre demonté et remonté avec 2 mains, avec un movement parallel.
Ouvrir le filtre seulement dì un côtè, ou avec une main (comme montré dans les figures barrées) peut mettre en danger l’intégrité du systeme de fermeture.
Filtres à graisse:
Vous pouvez utiliser des filtres métalliques pour retenir les particules grasses en suspension dans les buées de cuisson.
Ces nattes filtrantes sont en métal incombustible.
Attention:
Plus elles se saturent en particules grasses et plus elles risquent de s’enflammer.
D’autre part, leur saturation risque de gêner le bon fonctionnement de la hotte.
Important:
Prévenez tout risque d’ incendie en nettoyant à temps les filtres à graisse en métal.
Ce risque est dû à l’accumulation de chaleur pendant la friture ou le rôtissage.
Indicateur de saturation: 
Lorsque les filtres à graisse sont saturés, la mention  clignote . Pour arrêter le signal sonore, éteignez le ventilateur.
Vous deve nettoyer les filtres à graisse au plus tard à ce stade de saturation.
Nettoyage de filtres à graisse en mètal.
En service normale (1-2 heures par jour) il faudra nettoyer les filtres à graisse métalliques 1 fois par mois.
Ces filtres sont nettoyable au lavevaisselle – ils peuvent changer légèrement de couleur au lavage.
Le filtre doit reposer non serré dans le lave-vaisselle. Il ne doit pa être coincé.
Important:
Ne lavez pas en même temps la vaisselle et le filtres métalliques fortement saturés en matière grasse.
Si Vous les nettoyez à la main, mettez les filtres à tremper pendand plusieurs heures dans de l’ eau très chaude additionnée de produit à vaisselle.
N’utilisez pas de détergents aggressifs contentant un acide ou une base.
Ensuite, brossez les filtres, rincez-les bien puis laissez-les goutter.
27
Demontage et Montage des filtres métalliques à graisses:
Attention: les ampoules halogènes doivent être éteintes et avoir eu le temps de refroidir.
1.Suivres les phases des figures de la série M.
2.Enfoncez les poignées des filtres à graisses puis basculez les filtres vers le bas.
3.Nettoyer les filtres à graisses.
4.Une fois nettoyés, remettez les filtres à graisse en place.
5.Effacez le contenu de l’ affichage
 .
.
Appuyez 2 fois de suite sur la touche O. Un signal sonore retentit et le contenu de l’
affichage  s’ éteint.
Nettoyage et entretien
Avant tout nettoyage et entretien, mettez d’ abord la hotte hors tension en débranchant la fiche mâle de la prise de courant ou en coupant le disjoncteur/fusible.
 Ne nettoyez pas la hotte aspirante à l’aide d’éponges à dos récurant. N’utilisez pas non plus de produits de nettoyage contenant du sable, de la soude, de l’acide ou du chlrorure.
Pour la nettoyez, utilisez de l’eau chaude additionnée de produit à vaisselle ou non liquide non agressif à laver les fenêtres.
Ne tentes pas de gratter les salissures. Ramollissez-les avec un essuie-tout humite.
Lors du nettoyage des filtres à graisse, nettoyez la graisse qui‘ est déposée dans les endroits accessibile
28
du corps de la hotte. Vous prévenez ainsi les risques d’ incendie et garantissez ainsi un fonctionnement optimal de la hotte.
Remarque: ne nettoyez pas les surfaces en plastique avec de l’alcool (à brûler) car des taches mates pourraient apparaître.
Prudence! Ventilez suffisamment la cuisine, n’utilisez jamais de flamme nue.
 Ne nettoyez les touches de commande qu’ avec de l’eau additionnée d’un peu de produit à vaisselle. Utilisez un chiffon doux et humide.
N’utilisez jamais de détergent pour acier pour nettoyer les touches de commande.
Surface en acier inox:
Veuillez utiliser un produit pour l’ acier inox qui le nettoie sans le rayer.
Frotter toujours l’ acier inox dans le sens de son polissage.
Surface en aluminium et en plastique:
N’utilisez pas de chiffons secs.
Utilisez un produit pour vitres mais non aggressif.
N’utilisez pas de détergents aggressifs contenant un acide ou une base.
Respectez les conditions de garantie figurant dans le cahier de service joint.
Changer les ampoules halogènes
Le remplacement des LED défectueuses est exclusivement réservé au fabricant, à son service après-vente ou à un spécialiste agréé (installateur d'équipement électrique).
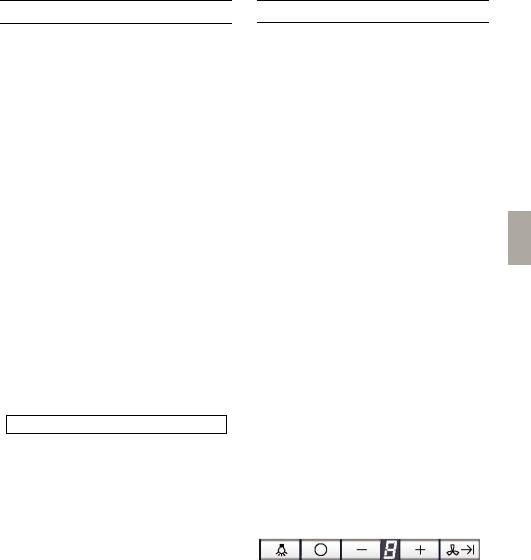
Dérangement
Si  ou
ou  apparaît à l’ indicateur:
Voir la section intitulée “Filtre et entretien”.
Si les touches de la hotte aspirante restent inopérantes:
Débranchez pendant une minute environ la fiche mâle de la hotte aspirante ou retirez le fusible pour la mettre hors tension. Ensuite, réenclenchez la hotte.
Se les lumières sont allumées de façon faible quand la hotte est en stand-by, intervertir la fiche (phase avec neutre).
Si Vous avez des questions à poser ou en cas de dèrangement, appeler s.v.p. le service apres vente (voir la liste des agences du service après vente).
Lors de Votre appel, veuillez mentionner les numeros suivants:
E-Nr. FD
Inscrivez les numéros correspondants de votre hotte dans le cadre ci-dessus. Ces numéros se trouvent à l’intérieur de l’appareil, sur la plaque signalétique accessible une fois la grille de filtre retirèe.
 Si des réclamations résultent de la conception et de la pose de la conduite,le fabricant de la hotte aspirante décline toute garantie.
Air recyclé
La hotte doit, dans ce cas, être équipée d'un filtre au charbon actif CLEAN AIR MODULE.
 Vous pouvez vous procurer le kit de montage complêt ainsi que les filtres de rechange auprès de votre revendeur spécialisé. VIB: LZ56700.
Le ventilateur de la hotte aspirante aspire les buées qui traversent le filtre à graisse et celui à charbon actif avant de revenir dans la cuisine.
Le filtre à graisse retient les particules solides en suspension dans les buées de cuisson.
Le filtre à charbon actif retient les substances odoriférantes.
 Si vous n'incorporez aucun filtre au charbon actif, il est impossible de retenir les odeurs présentes dans les buées de cuisson.
Conversion de la commandeélectronique au mode Air recyclé:
La hotte est livrée réglée en série sur lemode Air évacué.
Pour effectuer la conversion, il faut quela hotte aspirante soit raccordée électriquement mais hors tension.
Appuyez simultanément sur lestouches O et  jusqu'à ce que lamention
  s'allume. Ensuite, relâchezles touches.
La mention  s'éteint au bout d'untemps bref. La commande électroniqueest désormais réglée sur le mode Air recyclé.
29

Pour convertir à nouveau la commandeélectronique sur le mode Air évacué(affichage de la lettre  ), il suffit de répéter les opérations décrites auxpoints 1.et 2.ci-dessus.
Attention: Plus les filters charbon se saturent en particules grasses et plus ils risquent de s'enflammer. D'autre part, leur saturation risque de gêner le bon fonctionnement de la hotte.
Important: Un changement à temps des filtres à charbon actif prévient le risque d'incendie. Ce risque est dû à l'accumulation de gras qui se produit pendant une friture ou la cuisson d'un rôti.
Indicateur de saturation: 
Lorsque le filtre à charbon actif est saturé, l’indicateur  s'allume et un signal sonore se fait entendre. Pour arrêter le signal sonore, éteignez le ventilateur. Changez le filtre au plus tard lorsque le signal sonore retentit.
Changement du filtre à charbon actif:
Hotte fonctionnant normalement (1 à 2 heures par jour), il faudra changer les filtres à charbon actif environ 1 fois par an.
Vous pouvez vous procurer un filtre à charbon actif de rechange dans le commerce spécialisé.
N'utilisez qu'un filtre d'origine.
Vous garantirez ainsi un fonctionnement optimal de la hotte.
Mise au rebut du filtre à charbon actif usagé:
Les filtres à charbon actif ne contiennent aucune substance nocive. Vous pouvez les mettre à la poubelles de déchets résiduels.
30
Loading...