


RX-4508

RX-4508
AM/FM STEREO RECEIVER
OPERATING INSTRUCTIONS
Safety Information
READ THIS BEFORE OPERATING YOUR UNIT
CAUTION
CAUTION
RISK OF ELECTRIC SHOCK
DO NOT OPEN
This symbol indicates the presence of uninsulated “dangerous voltage” within
the product’s enclosure that may be of sufcient magnitude to constitute a risk of
electric shock.
This symbol indicates important operating and maintenance (servicing)
instructions in the literature accompanying the appliance.
TO REDUCE THE RISK OF ELECTRIC SHOCK,
DO NOT REMOVE FRONT OR BACK COVER.
NO USER-SERVICEABLE PARTS INSIDE.
REFER SERVICING TO QUALIFIED SERVICE
PERSONNEL.
WARNING
EXPOSE THIS APPLIANCE TO RAIN OR MOISTURE.
CAUTION
•
•
•
•
•
•
•
•
: TO REDUCE THE RISK OF FIRE OR ELECTRIC SHOCK, DO NOT
Do not let insecticides, benzene, or thinner
•
Leave space around the unit for sufcient
ventilation.
Avoid installation in extremely hot or cold
locations, or in an area that is exposed to
direct sunlight or heating equipment.
Keep the unit free from moisture, water, and
dust.
Do not let foreign objects in the unit.
Keep the ventilation openings clear of items,
such as newspapers, linens, or curtains.
Keep open ame from candles or other
sources away from the unit.
Observe the local regulations regarding
disposal of packaging materials, exhausted
batteries and old equipment.
Do not expose the unit to dripping or
splashing, or place objects lled with liquids
such as vases.
come in contact with the unit.
Never disassemble or modify the unit in any
•
way.
Notes on the AC power cord and the wall
outlet
The unit remains connected to AC power as
•
long as it is plugged into the wall outlet, even
if the unit has been turned off.
To completely disconnect this product from
•
AC power, disconnect the plug from the wall
socket outlet.
When setting up this product, make sure
•
that the AC outlet you are using is easily
accessible.
Disconnect the plug from the wall outlet when
•
not using the unit for long periods of time.
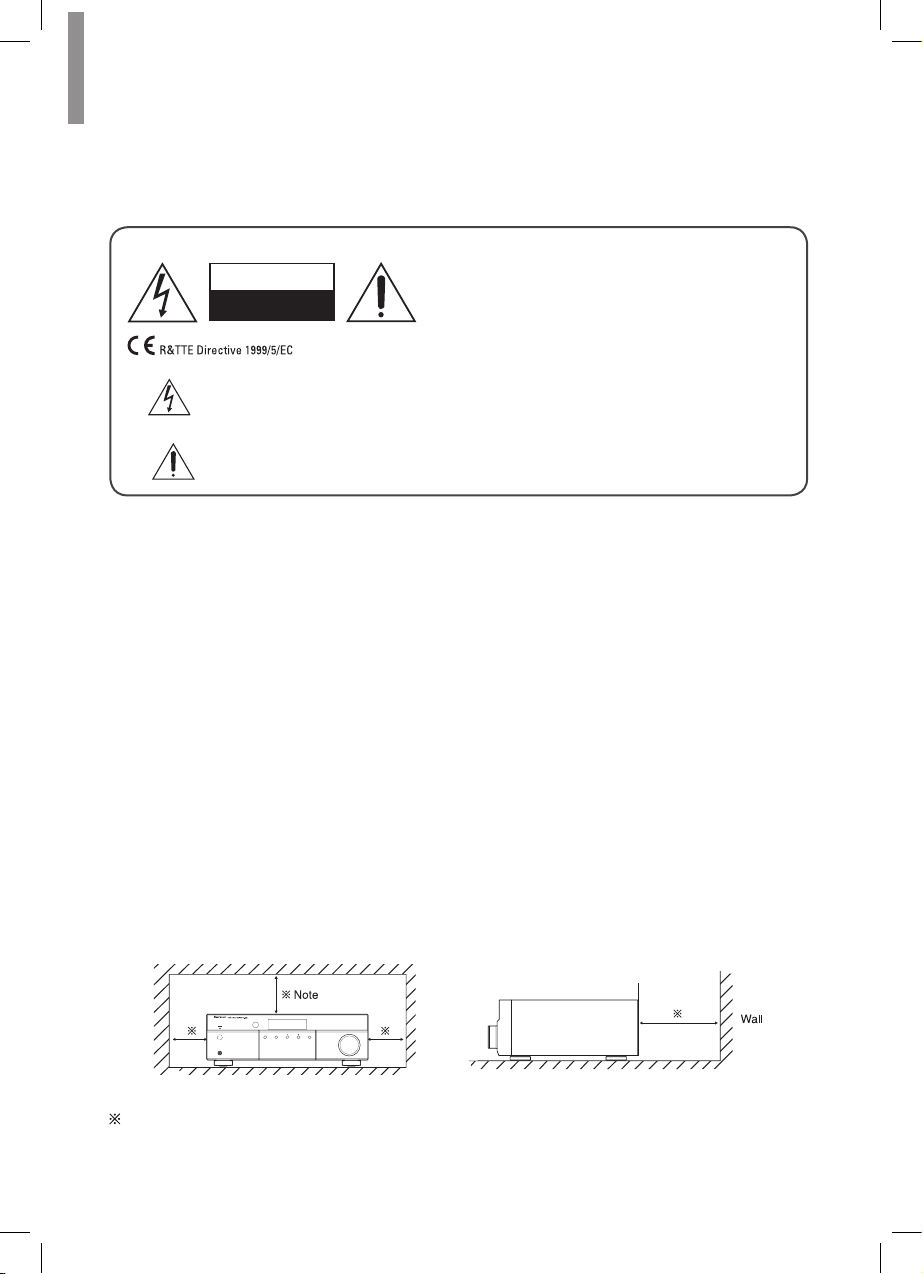
Caution regarding installation
Do not block ventilation openings or stack other equipment on the top.
Note:
For heat dispersal, do not install this unit in a conned space such as a bookcase or
similar enclosure.
2

Table of Contents
2 SAFETY INFORMATION
3 TABLE OF CONTENTS
4 GETTING STARTED
4 What's Included
5 Installing the Remote Control Battery
5 Operating the Range of the Remote
Control
6 PARTS DESCRIPTION
6 Front Panel
7 Front Display
7 Rear Panel
8 R
emote Control
9 MAKING CONNECTIONS
9 Connecting Speakers
9 Placing Speakers
9 Connecting Speakers
11 Connecting Playback Components
11 Connecting Audio Components
12 Connecting Recording Components
13 Connecting an Antenna
13 Connecting FM Antenna
14 Connecting AM Antenna
15 Connecting Power
16 OPERATING YOUR SYSTEM
16 Listening to Your System
16 Basic Operation
17 Mu ing the Sound
17 Adjusting he Sound Balance
(Left and Right)
17 Adjusting he Tone (Bass and Treble)
18 Listening to Radio
18 Selecting he Band
18 Manual Tuning
18 Auto Tuning
18 Manual Presetting
19 Auto Presetting
20 Tuning in to Preset Stations
20 Scanning Preset Stations in Sequence
20 Switching FM Stereo/Mono Mode
21 Bluetooth
21 Pairing with the Bluetooth Device
21 Listening to Music on Device
22 Recording
23 Using Other Functions
23 Setting he Sleep Timer
23 Setting he Auto Power Control
23 Adjusting he Brightness of the
Fluorescent Display
24 TROUBLESHOOTING
24 GENERAL
24 SOUND
25 ADDITIONAL INFORMATION
25 Specications
26 Trademarks and Licenses
3
Getting Started
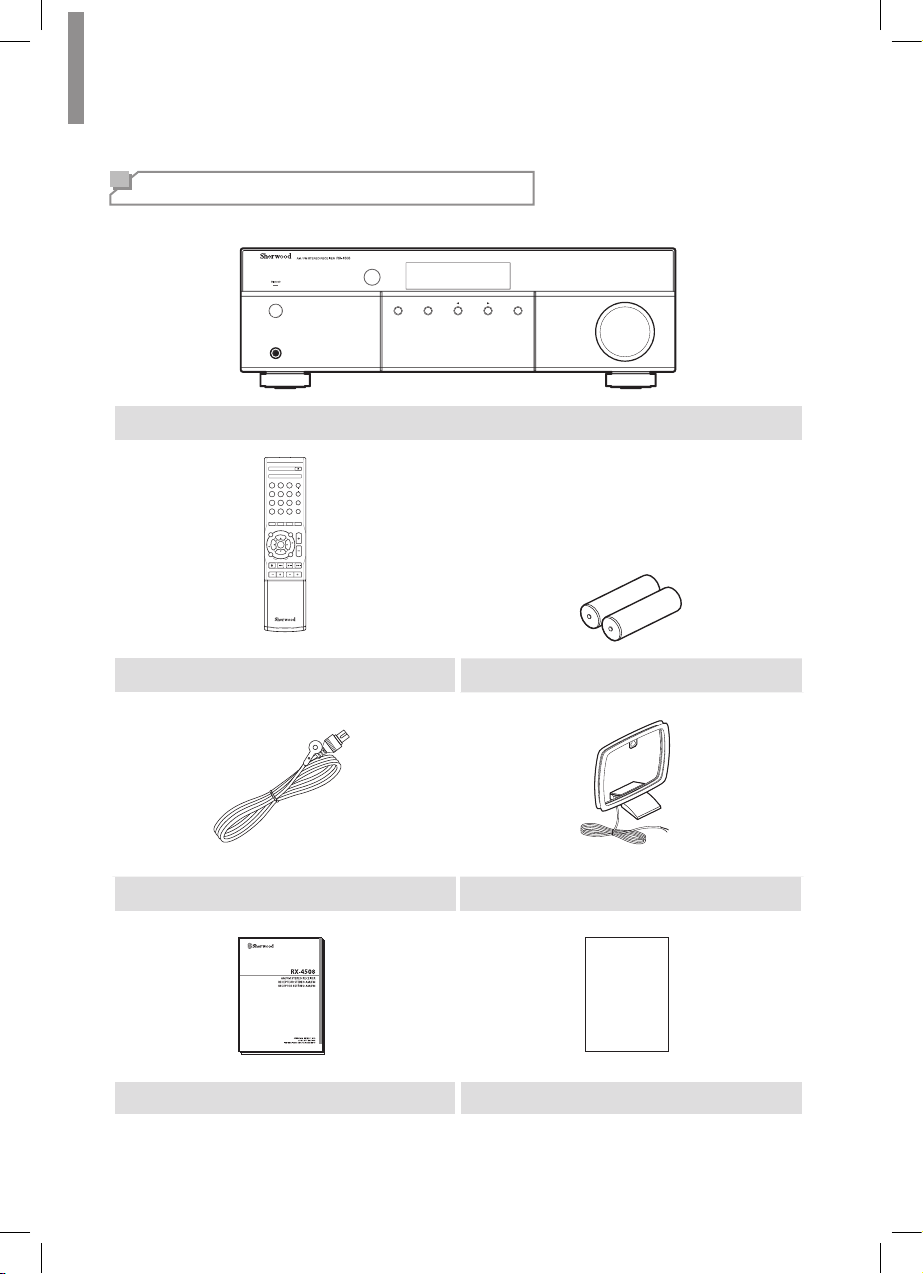
What's Included
ON STANDBY
MEMORY TUNE / P ESET NPUT
PHONES
VOL ME
Main unit
POW R
2
SE R
DMM R
89
PRS T MO STL EP
CD AUX
P ONO U ER
ONE
MUE
OUME
RE T
T
R
T
S
M
E
U
T
S
R
T
S
R
SAR H
L
C
N
L EO TH
D PAY
M DE
RC 57
Remote control (1 ea) Battery
4
FM Antenna (1 ea) AM Antenna (1 ea)
Warranty
User Manual (1 ea) Warranty (1 ea)

Installing the Remote Control Battery
Getting Started
Remove the battery cover.
1
•Always use a kaline batteries, and do not use the rechargeable batteries (Ni-Cd type).
•If the batteries run out, remove the old batteries and replace them with new ones within
several minutes.
•If the batteries are removed or have been exhausted for a longer period of time, memorized
contents will be cleared. In this case, you should memorize them again.
•If the battery is placed incorrectly, it can cause explosion.
•Remove the battery if the remote control is not used for a long period of time.
•Do not leave the product in a hot or humid place.
•Do not handle and store the battery with metallic tools.
Insert two AAA size batteries with the
2
polarity matched properly.
Operating the Range of the Remote Control
Use the remote control within a range of about 7 meters (23 feet) and angles of up to 30 degrees
aiming at the remote control sensor.
5
Parts Description
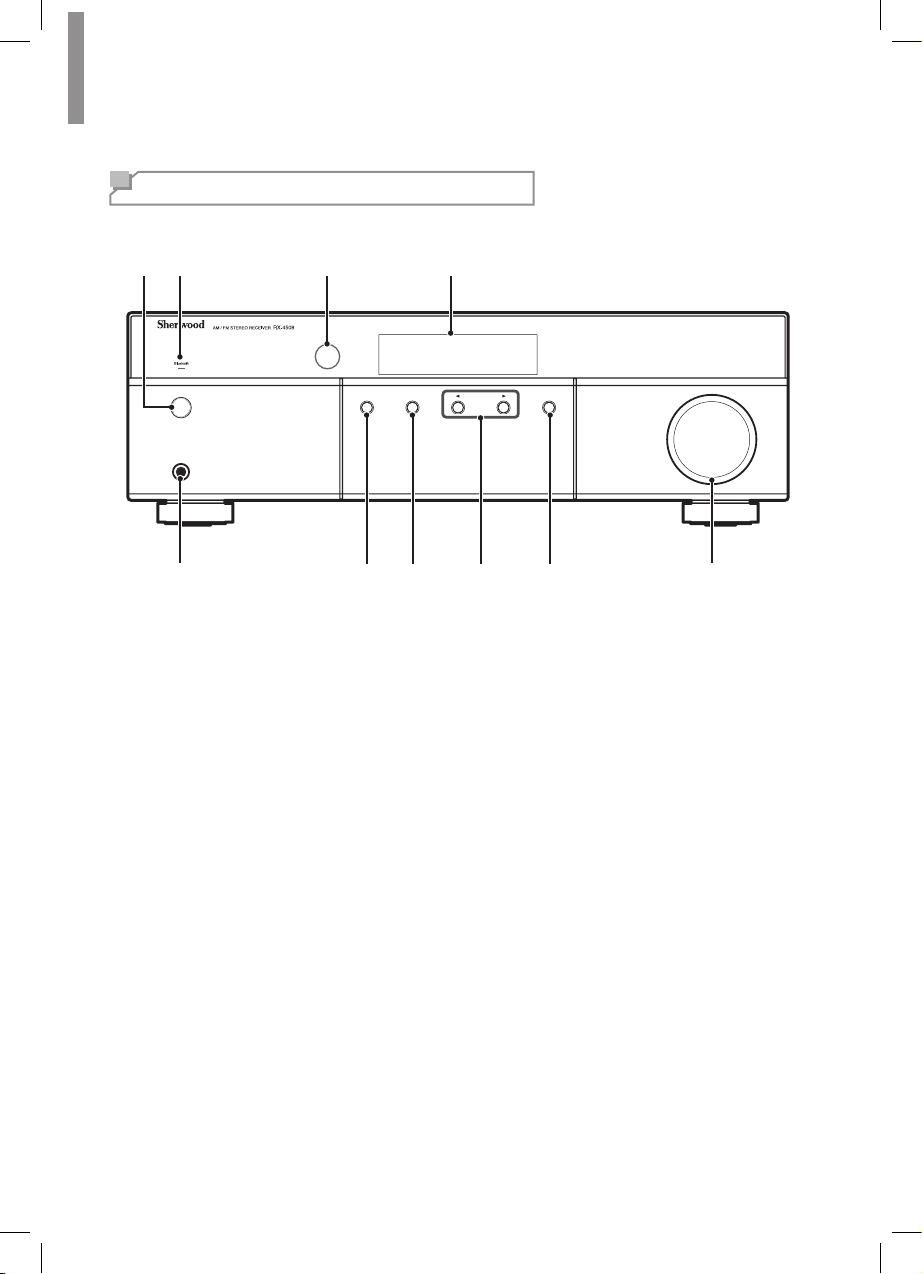
Front Panel
21 3 4
ON / STANDBY
PHONES
5 6 7 9 10
ON/STANDBY Button
1
Bluetooth Indicator
2
IR Sensor
3
Display
4
Headphone Connector
5
Memory Button
6
Tune/Preset Select Button
7
MEMORY TUNE / PRESET NPUT
8
Function Buttons
8
Tuning Up/Down - See page 18.
•
Preset Up/Down - See page 18.
•
Auto Tuning - See page 18.
•
Bluetoo h Playback Control - See page 21.
•
Input Selector
9
Volume Control
10
VOLUME
6

Front Display
Parts Description
21 87
Information Display
1
Headphone Indicator
2
Stereo Indicator
3
Tuned indicator
4
Sleep Timer Indicator
5
Rear Panel
3 4 5 6
Preset Indicator
6
Station Memory Indicator
7
Preset Station Indicator
8
Tone Direct Indicator
9
9
6
1 2 3 4 5
Radio Antenna Connectors
1
Phono Connectors
2
Audio Input Connectors
3
Audio Output Connectors
4
Speaker Connectors
5
AC Input Cord
6
7
RX-4508 AM/FM STEREO RECEIVER
R
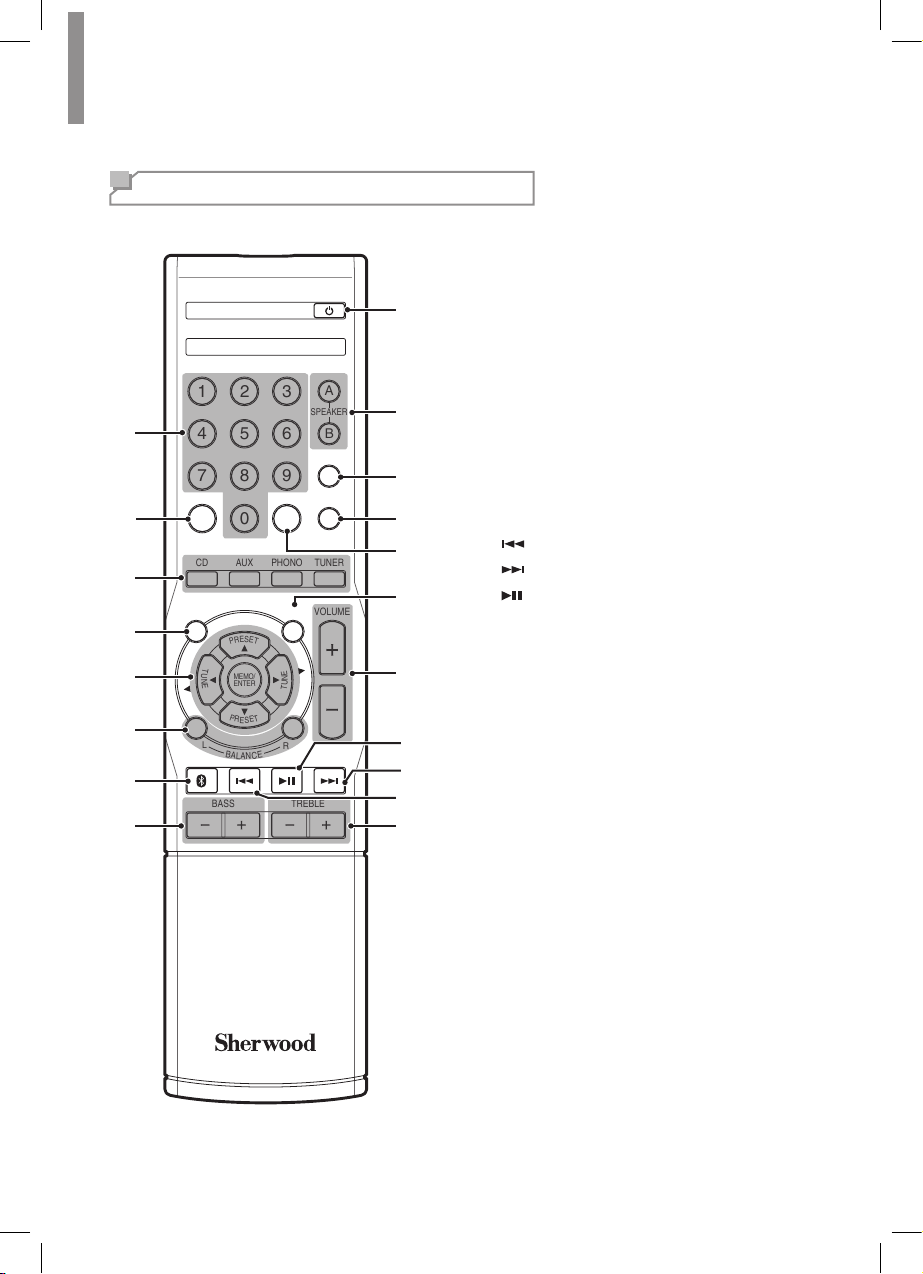
emote Control
POWER
123
1
456
A
SPEAKER
B
DIMMER
789
PRESET MO/STSLEEP
2
0
CD AUX
PHONO TUNER
3
TONE
DIRECT
4
S
E
5
L
6
BLUETOOTH
S
E
E
R
P
T
U
N
MEMO/
E
ENTER
P
R
E
E
S
L
B
A
L
N
A
VOLUME
MUTE
T
E
L
N
E
U
T
S
T
R
SEARCH
E
C
DISPLAY
MODE
7
BASS
TREBLE
8
19
18
17
16
15
14
13
12
11
10
9
Numeric Buttons
1
Preset Button
2
Source Select Buttons
3
Tone Control Button
4
▲/▼ Preset Up/Down Buttons
5
◄/► Tuning Up/Down Buttons
MEMO/ENTER
Balance Adjust Buttons
6
Bluetooth Button
7
Bass Up/Down Buttons
8
Treble Up/Down Buttons
9
Bluetooth Previous/Rewind Button
10
Bluetooth Next/Fast Forward Button
11
Bluetooth Play/Pause Button
12
Volume Up/Down Buttons
13
Mute Button
14
Mono/Stereo Select Button
15
Sleep Button
16
Dimmer Button
17
Speaker Select Button
18
Power Button
19
Memory/Enter Button
8
RC-157
Making Connections
Connecting Speakers
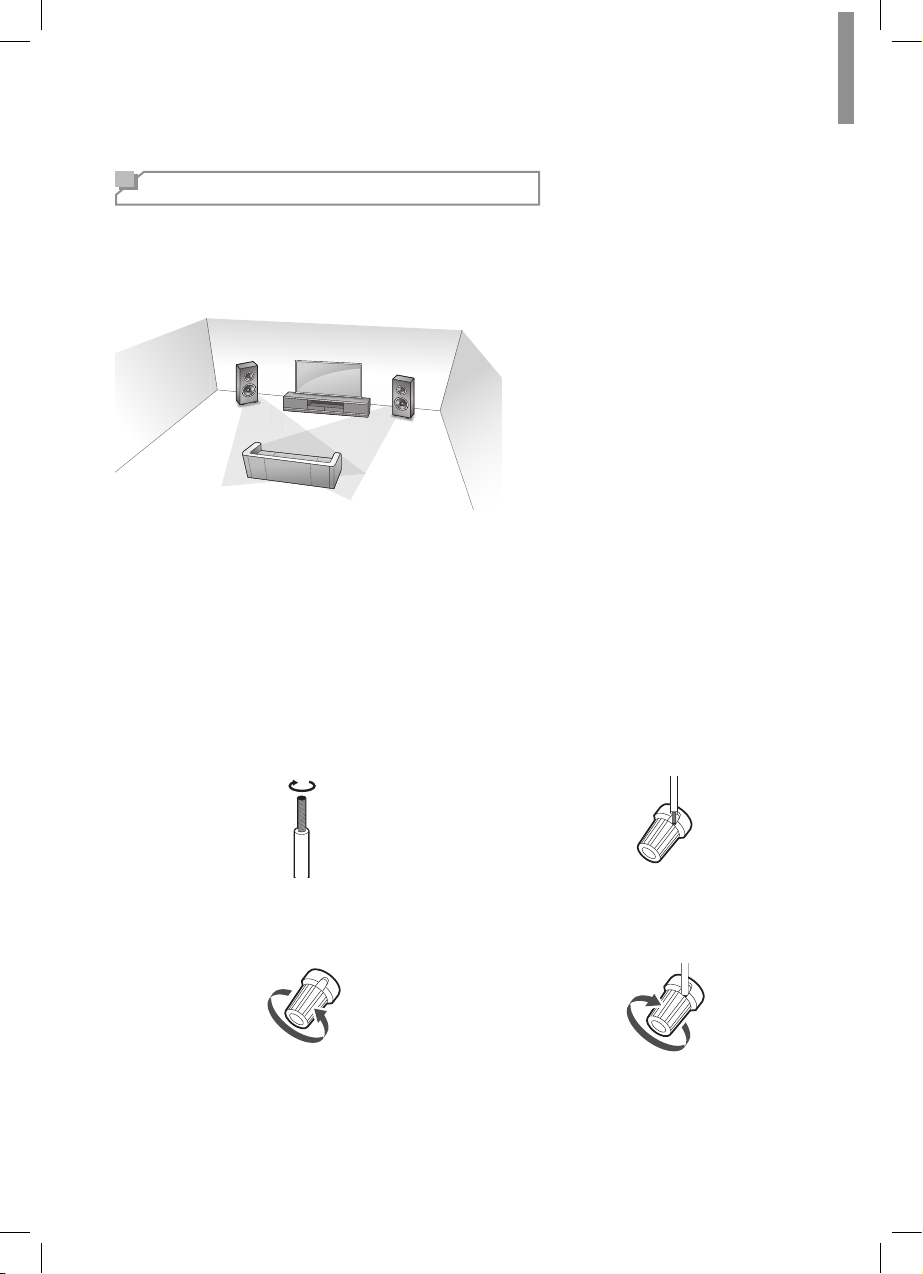
Placing Speakers
Determine the locations for your speaker placement according to their manufacturer’s directions
and the layout of your listening room.
Left and right speakers
•Place the speakers with their front
surfaces as ush to the TV or monitor
screen as possible.
•Place each speaker so that sound is
aimed at where listener's ears would
be in the main listening position.
Connecting Speakers
Carefully check the left (L) and right (R) channels and the polarities on the speakers being
connected to this receiver.
Connecting Speaker Wires
Strip away approx. 10 mm (3/8 inch) of
1
wire insulation, and then tightly twist the
wire ends.
Insert the bare part of the wire.
3
Loosen the speaker terminal by turning it
2
counter-clockwise.
Tighten the speaker terminal by turning it
4
clockwise.
9
 Loading...