


Display Management Utility Software
Display Manager
Version 1.0
For Windows®
Operation Manual
•Please read this operation manual carefully to ensure correct use of the software.
Introduction
Basics
and Adjustments
olsContr
Troubleshooting
Appendix

Display Manager
Sharp Display Management Utility Software, Display Manager (hereafter referred to as "the Software"), allows remote control and diagnostics of Sharp display devices* connected to a local area network (LAN) as well as the modification of settings. Basic operations for selected devices can also be carried out using the Software, such as powering on, switching into standby mode and switching input modes.
*In this operation manual, a display device is referred to as "a device". For more information about devices that can be managed by the Software, see page 26.
Hardware and Software Requirements
The following hardware and software are required to use the Software.
PC running on Microsoft Windows ® 98, Me, 2000 Professional, XP Home Edition or XP Professional (Japanese or English versions)
CPU Display
Memory
Free HDD space
Interface
■This operation manual is intended for users who know how to use the Windows ® operating systems and a mouse. For questions concerning Windows ® operating systems, please see the operation manual for each operating system of Microsoft Corp. Please also note that specifications for the Software are subject to change without notice.
■The screenshots used in this operation manual are taken from Windows ® XP Professional. Steps and screen displays may differ slightly depending on the Windows ® version used.
■Microsoft ® and Windows ® are registered trademarks or trademarks of Microsoft Corporation in the U.S.A. and other countries.
■Adobe ®, Adobe ® Reader ®, Acrobat ® and Acrobat ® Reader are registered trademarks or trademarks of Adobe Systems Incorporated.
■All other company and product names mentioned in this operation manual are the registered trademarks or trademarks of their respective companies or organizations.
■The information in this operation manual may not always be applicable to your PC environment. Please also note that depending on the operating environment and processing power of your PC, some operations may run slowly.
 Info
Info
•Please note that operations are not guaranteed for hand-made PCs with a modified motherboard.
•Before using the Software, be sure to configure the PC so that it does not get into system standby or hibernation.
2

Contents |
|
Introduction |
|
Display Manager .................................................................................................................................................. |
2 |
Hardware and Software Requirements .................................................................................................... |
2 |
Contents ............................................................................................................................................................... |
3 |
Installing Display Manager ................................................................................................................................... |
4 |
To Install the Software .............................................................................................................................. |
4 |
To Uninstall the Software .......................................................................................................................... |
5 |
Basics |
|
Starting up and Exiting from Display Manager .................................................................................................... |
6 |
To Start up and Exit from Display Manager .............................................................................................. |
6 |
Main Screen .............................................................................................................................................. |
6 |
Registering Devices ............................................................................................................................................. |
7 |
To Manually Register Devices .................................................................................................................. |
7 |
To Delete Devices ..................................................................................................................................... |
7 |
Checking the Device Status ................................................................................................................................. |
8 |
Controlling Devices .............................................................................................................................................. |
9 |
To Open the Controller Window ................................................................................................................ |
9 |
To Turn the Power ON ............................................................................................................................. |
11 |
To Switch the Device into Standby Mode ............................................................................................... |
11 |
To Switch between Input Modes ............................................................................................................. |
11 |
To Turn the AV Mute ON/OFF ................................................................................................................. |
11 |
To Turn the Black Screen ON/OFF ......................................................................................................... |
11 |
To Turn the Mute ON/OFF ...................................................................................................................... |
11 |
To Operate Devices via a Browser ......................................................................................................... |
11 |
Adjustments and Controls |
|
Specifying Mail Settings ..................................................................................................................................... |
12 |
To Specify Mail Settings ......................................................................................................................... |
12 |
To Set Contents ...................................................................................................................................... |
12 |
Specifying Alert Settings .................................................................................................................................... |
14 |
Creating Groups ................................................................................................................................................. |
15 |
To Create a New Group .......................................................................................................................... |
15 |
To Edit a Group ....................................................................................................................................... |
16 |
To Delete a Group ................................................................................................................................... |
16 |
Customizing the Device Information List ........................................................................................................... |
16 |
To Select Items for Display ..................................................................................................................... |
16 |
To Change the Order of Items Displayed ............................................................................................... |
17 |
To Sort Device Information ..................................................................................................................... |
18 |
To Register a User Name and Password ............................................................................................... |
18 |
To Refresh the Device Information List .................................................................................................. |
19 |
To Search Devices on the LAN ............................................................................................................... |
19 |
Advanced ............................................................................................................................................................ |
19 |
To Specify Auto Search Settings ............................................................................................................ |
19 |
To Specify Auto Refresh Settings for the Device Information List ......................................................... |
20 |
To Specify Settings for the Browser to Operate Devices ....................................................................... |
21 |
To Specify Power On Settings ................................................................................................................ |
21 |
List of Functions ................................................................................................................................................. |
22 |
List of Right Click Menu .......................................................................................................................... |
22 |
List of Menus ........................................................................................................................................... |
23 |
Troubleshooting |
|
Troubleshooting .................................................................................................................................................. |
24 |
Error Messages .................................................................................................................................................. |
26 |
Appendix |
|
Compatible Devices ........................................................................................................................................... |
26 |
Index ................................................................................................................................................................... |
27 |
Since simplified screen displays and illustrations are used for explanatory purposes, they may appear slightly different on the screen.
Introduction
3
Installing Display Manager
Check the instructions and cautions posted on the Web site before downloading and installing the Software.
To Install the Software
1Check that the PC on which the Software is to be installed is compatible with the Software.
For more information, see "Hardware and Software Requirements" (page 2).
2 Turn the PC power "ON".
•If you are using the Windows ® 2000 or Windows ® XP operating system, log into the system using an administrator or power user login name.
3
4Double-click the downloaded installer.
After a while, the "Choose Setup Language" dialog box appears.
5 Select "English" and click the "OK" button.
6
7
The "InstallShield Wizard" dialog box appears.
Click the "Next >" button.
The "Choose Destination Location" dialog box appears.
•Change the installation folder only if necessary. (Changing the folder is not normally required).
Click the "Next >" button.
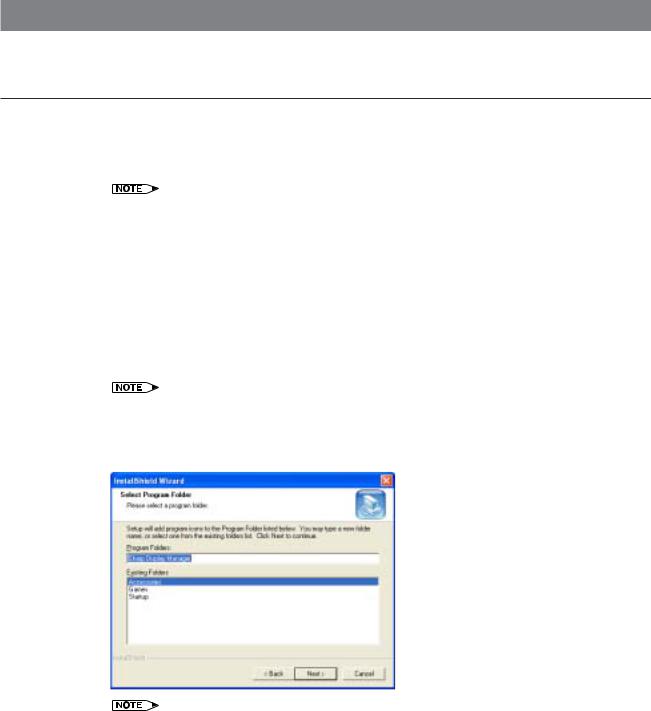
The "Select Program Folder" dialog box appears.
•Change the program folder only if necessary. (Changing the folder is not normally required.)
8Click the "Next >" button.
The installation starts.
Once the installation is complete, the "InstallShield Wizard Complete" dialog box appears.
9Click the "Finish" button.
The installation of the Software has been completed.
4

To Uninstall the Software
IMPORTANT
• If the Software is running, be sure to exit from the Software before uninstalling it.
1 Click the "start" button and select "Control Panel".
2 Double-click "Add or Remove Programs".
3Select "Sharp Display Manager" and click the "Change/Remove" button.
The "Choose Setup Language" dialog box appears.
4Click the "OK" button.
The "Confirm File Deletion" dialog box appears.
5Click the "OK" button.
The uninstallation starts.
Once uninstallation is complete, the "Maintenance Complete" dialog box appears.
6Click the "Finish" button.
The Software has now been uninstalled.
Introduction
5
Starting up and Exiting from Display Manager
Be sure to check that the PC and devices are connected before starting the Software. For more information about connections, see the operation manual for each device or the network converter.
To Start up and Exit from Display Manager
To Start up
1 Start the PC.
2Click the "start" button and select "All Programs", "Sharp Display Manager", and "Sharp Display Manager".
Once the Software has loaded, the main screen appears.
•If a user name and password have been set up for the devices or the network converter, the user name and password must be entered when connecting to the network. Enter the user name and password in the dialog box and click the "OK" button.
•When Windows ® XP Service Pack 2 has been installed, a warning may be displayed when a search for a device is performed. Please refer in this case to page 20.
To Exit
1Select "Exit (X)" from the "Device (D)" menu.
The Software is exited.
• The Software can also be exited by clicking the "×" button on the top right of the screen.
Main Screen
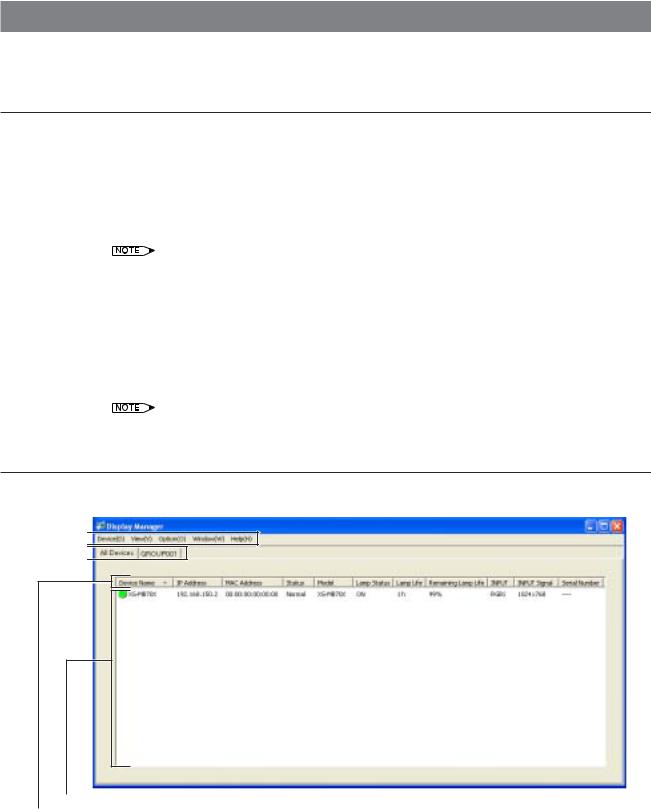
Once the Software has loaded, the main screen appears. Management operations are generally performed from this screen.
Menu 
Tab 
Device Information List
Row Title
Menu (page 23)
The menu is used to perform basic Software operations and edit the main screen.
Device (D), View (V), Option (O), Window (W) and Help (H)
Tab
The tab is used to switch between display modes for the device information list: "All Devices" or by group (any created groups).
All Devices (page 7) and Any Created Groups (page 15)
6
Row Title (page 17)
A "row title" is the title for items displayed in the device information list.
Device Information List (page 8)
The information on Sharp devices is automatically or manually obtained for display.
Device Name, IP Address, MAC Address, Status, Model, Lamp Status, Lamp Life, Remaining Lamp Life, INPUT, INPUT Signal and Serial Number*
*Items included in the device information list (row title) can be changed at "Customizing the Device Information List" (page 16).
Registering Devices
IP addresses can be manually entered to obtain device information and add it to the device information list. The new device information is displayed in "All Devices".
•By pre-specifying Auto Search (page 19) and Auto Refresh (page 20), Sharp devices on the LAN are automatically searched at the specified timing and their information is displayed.
To Manually Register Devices
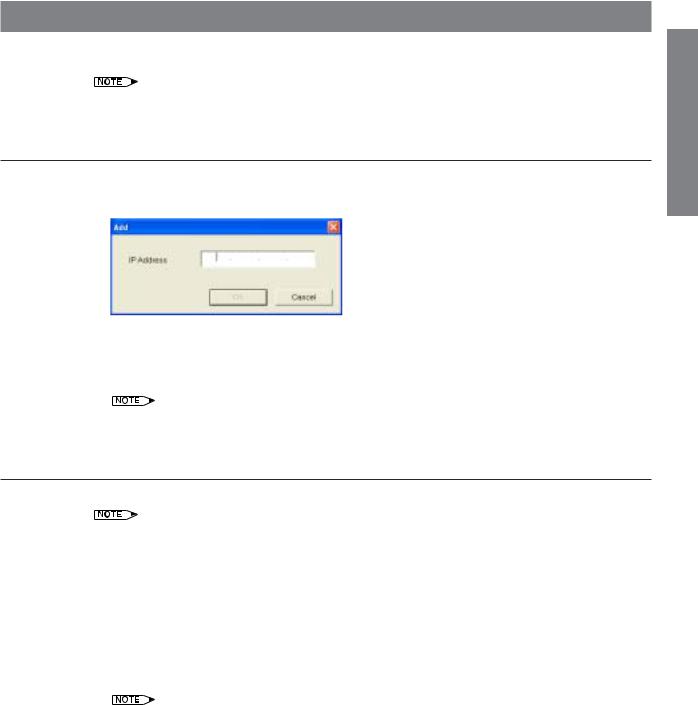
1Select "Add (A)" from the "Device (D)" menu.
The "Add" dialog box appears.
2Enter the IP address of a device and click the "OK" button.
•Information on the added device is displayed in "All Devices".
•After a short period of time, the latest device information is automatically displayed in the device information list.
•By right-clicking on the device information list and selecting "Add (A)" from the popup menu, the "Add" dialog box can also be displayed.
To Delete Devices
Registered device information can be deleted from the device information list, when "All Devices" is displayed.
•Only the information on devices whose "Status" is "Communication Error" or "Connection Error" can be deleted.
•Device information can not be deleted when a tab other than "All Devices" is displayed. To delete device information from a group, use "Group Setting" (To Edit a Group Α page 16).
•Any device information deleted from "All Devices" is deleted from all the groups.
1 Select the device information you wish to delete from "All Devices".
2Select "Delete (D)" from the "Device (D)" menu.
The "Confirmation" dialog box appears.
3 Click the "Yes" button.
Information on the selected device is deleted.
•By clicking on device information on the main screen and pressing the "Delete" key, the device can also be deleted.
•By right-clicking on device information and selecting "Delete (D)" from the popup menu, the device can also be deleted.
Basics
7

Checking the Device Status
The device status can be checked from the device information list.
(2) |
(3) |
(4) |
(5) |
(6) |
(7) |
(8) |
(9) |
(10) |
(11) |
(12) |
(1)
(1) Status Icon
The status icon indicates the device status.
 (Green) : The device was powered on normally.
(Red) |
: The device is in standby mode. |
(Gray) |
: The device is in communication mode. |
å: An error has occurred.
×: A connection error has occurred.
(2)Device Name, (3) IP Address, (4) MAC Address, and (6) Model
The device name, IP address, MAC address and model name are obtained for display.
•When the device is a projector, the projector name is displayed in "Device Name".
•The MAC Address cannot be displayed unless the device is found.
(5)Status
Displays detailed device status.
Normal |
: The device is operating normally. |
Temperature Error |
: The temperature inside the device is high. |
Cooling Fan Error |
: The cooling fan is broken. |
Filter Cover Error |
: The filter cover, air filter or lens cover are not installed correctly. |
Lamp Error |
: The lamp is burned out or malfunctioning. |
Communication Error : No response is received from the device. |
|
Connection Error |
: The device cannot be connected. |
•When the errors specified in "Alert Setting" occur, an error alert will be displayed (Alert Setting Α page 14).
•When the errors specified in "Error Mail" occur, a mail message will be sent to a specified address (Error Mail Α page 13).
•When an error occurs, refer to "Troubleshooting" on page 24.
(7)Lamp Status
The projector lamp status is displayed as follows.
ON |
: The lamp is ON. |
OFF |
: The lamp is OFF. |
Retry : Inspection of the lamp is requested. |
|
Wait |
: The projector is warming up or cooling. |
(8) Lamp Life and (9) Remaining Lamp Life
Information on the lamp life and remaining lamp life of the projector is obtained for display.
•If no information can be obtained, "----" appears.
(10)INPUT
The input terminal currently in use is displayed.
(11)INPUT Signal
•"NTSC", "PAL" or "SECAM" is displayed when a video signal is input.
•The resolution is displayed when a non-video signal is input.
(12)Serial Number
The device serial number is obtained for display.
•If no information can be obtained, "----" appears.
•Serial number data is not available for all devices.
8

Controlling Devices
A single device selected from the device information list or all the devices in a group can be controlled from the controller window on the PC.
The device/group controlled by the controller is shown in the window bar of the controller window.
Device/
Group
Controlled
To Open the Controller Window
Opening Controller Windows for individual devices
1 Controller windows can be opened using any of the following methods.
•Select a device from the device information list, then select the "Controller (C)" from the "Window (W)" menu.
The device selected is highlighted.
•Select a device from the device information list, and press the "ENTER" key.
The device selected is highlighted.
•Double-click a device in the device information list.
Double-click
•Right-click a device in the device information list, and select "Controller (C)" from the popup menu.
Right-click
Basics
9
 Loading...