


113
113/213
OWNERS MANUAL
®

SAFEGUARDS
FITNESS SAFEGUARDS AND
WARNINGS
Before starting any exercise program, consult with your physician or health
professional. He or she can help establish the correct exercise frequency, intensity
(target heart rate zone) and time appropriate for your particular age and condition.
The following 3 warnings listed below are also located on the computer console
mast of the exercise bike. Failure to follow any of these safeguards may result in
injury or serious health problems.
• Read and understand the Owner’s Manual and operation instructions prior
to use. If you do not have an Owner’s Manual, call 1-800-864-1270 to
obtain one.
• If you feel any unusual pain or tightness in your chest, shortness of breath
or dizziness, feel faint or have any discomfort while you exercise, STOP!
Consult your physician.
• Keep children and pets away.
OTHER IMPORTANT SAFEGUARDS
AND WARNINGS
• Do not exceed maximum user weight of 136 kg (300 lb.)
• It is the responsibility of the owner to ensure that all users of this equipment
are adequately informed of all precautions.
• Use this equipment only on a solid level surface. Cover the floor or carpet
beneath this equipment for protection.
• Read the Warning Label located on the computer console mast.
• Do not place fingers or any other objects into moving parts of the exercise
equipment.
• This equipment is designed for use by persons aged 13 years and older.
Teenagers should be supervised.
• Always wear athletic shoes for foot protection. Avoid wearing loose clothing
that may become entangled in the drive mechanism.
•Warn bystanders to keep a safe distance, especially from the moving pedals.
Do not allow anyone to touch the bike while it is in operation.
• This equipment is for home use only. Do not use in a commercial, institutional,
or rental setting.
• Care should be taken when mounting or dismounting the exercise bicycle.
• Do not operate in damp or wet conditions.
• Follow proper set-up and guidance as outlined in the Owner’s Manual and
Assembly Instructions. Only use the bike as outlined in usage instructions
of the Owner’s Manual.
• Prior to each use inspect the bike for loose, broken, or worn parts. Do not
use if found in this condition. The safety of the equipment can only be
ensured if it is regularly examined and maintained. (See Maintenance section of
the Owner’s Manual)
• Refer to the Maintenance section in the Owner’s Manual and disconnect
power supply before servicing the bike.
• Replace Warning Label if damaged, illegible, or removed.
•We recommend that a minimum distance of 1 meter (39 inches) surrounding
the bike is kept clear of all obstructions, including children, bystanders, and
pets. This is to ensure adequate clearance for easy access to the bike and
to avoid any possible contact with the moving pedals.
3

4
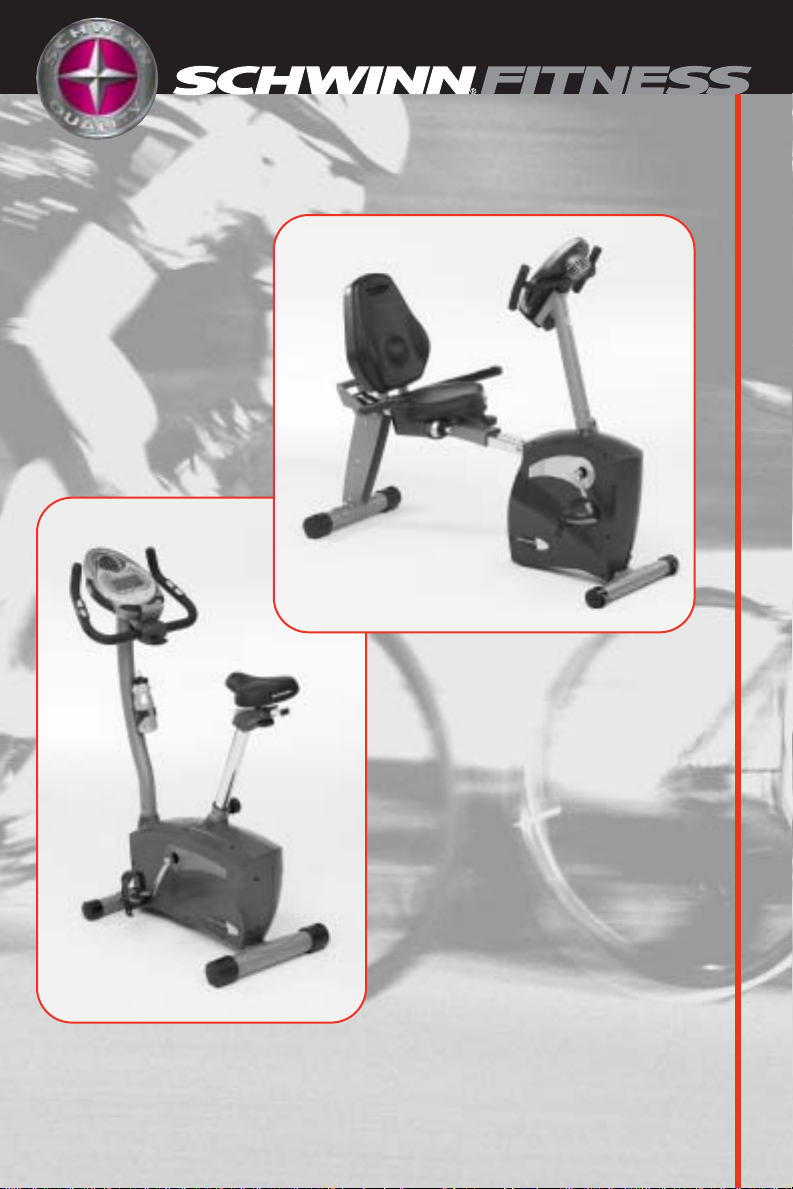
SCHWINN BIO-FIT
™
COMFORT SYSTEM
THE REVOLUTIONARY SCHWINN BIO-FIT
™
COMFORT SYSTEM
The unique and revolutionary Schwinn Bio-Fit
™
Comfort System is designed
specifically to ensure that each point of contact and user-interface with the
bike provides the user with proper ergonomic and bio-mechanical positioning,
superior comfort, the ultimate in functionality, and is fully customizable to fit
each user’s unique and specific needs.
5
FEATURES
Other features:
Schwinn Bio-Fit
™
handlebars adjust for a variety of
multiple comfortable hand positions (Offered on upright
models)
Schwinn Bio-Fit
™
wide seats offer stability, comfort, and
support
Schwinn Bio-Fit
™
pedals provide proper alignment for
efficient pedaling
Console slider mechanism contributes to an ideal user
interface position
Seat slider mechanism ensures optimum seat height
and fore/aft adjustment (Offered on upright models)
Lumbar support can be adjusted for improved lower
back support (Offered on recumbent models)
Multi-program and feature-packed computer with 16
levels of resistance will keep you motivated and help
you achieve your fitness goals
Grip heart rate for monitoring your workouts
High-quality, chrome-plated seat tube looks good in
any room in the house
Oversized rear stabilizer tube for rock-solid steadiness
Drive train features a strong and durable 3 piece crank, super
quiet 6 groove drive belt and oversized, perimeter weighted,
9kg flywheel provide the ultimate in true “road” feel
Transport wheels give you the versatility to move your
workouts to the family room while watching the kids or
the den while enjoying your favorite tv program
6
Convenient storage for your favorite workout reading
materials (Offered on recumbent models)

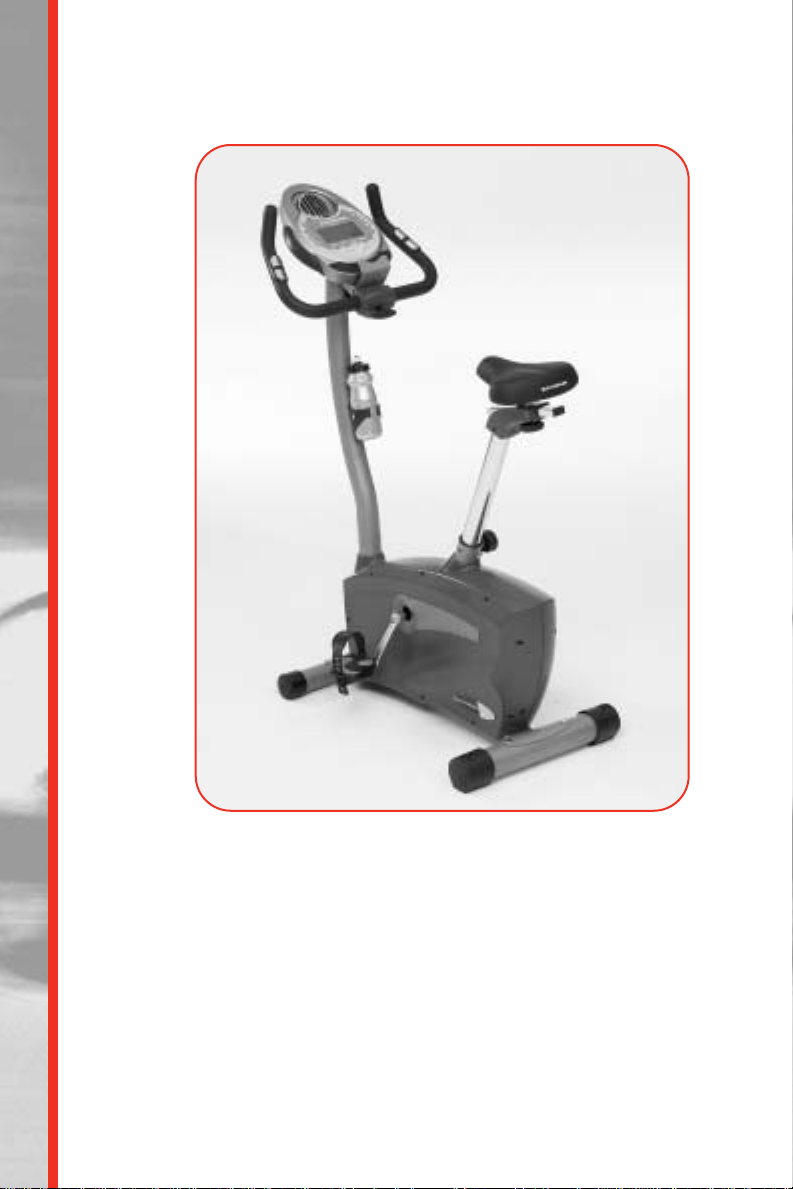
CONGRATULATIONS!
CONGRATULATIONS!
Thank you for making the Schwinn bike a part of your exercise and fitness
activities. For years to come, you’ll be able to rely on Schwinn craftsmanship
and durability as you pursue your personal fitness goals.
The Schwinn bike should enable you to shape and monitor your workouts to:
▲ Increase your energy level
▲ Increase cardiovascular and aerobic fitness
▲ Increase lower body muscle strength
▼ Decrease your overall percentage of body fat
Whether you are just getting started in an exercise program or are already
in good shape, the Schwinn bike is designed to be an efficient, easy and
fun way to achieve an enhanced level of fitness. You can pedal your way to
a slimmer and healthier body. The on-board digital computer enables you
to accurately monitor your progress by tracking time, speed, distance and
approximate Calories burned. This Owner’s Manual contains all the
information you need to operate and enjoy your Schwinn exercise bike.
Also included are general fitness guidelines. Please read this Owner’s
Manual in its entirety before getting onto the bike and working out. So let’s
get started.
Take your time and have fun!
7

FEATURES
TABLE OF CONTENTS
Operation........................................................................................... 9
How to use the Schwinn exercise bike........................ 9
How to use the Schwinn exercise bike computer ....... 11
Maintenance...................................................................................... 29
Moving your Schwinn exercise bike............................ 29
Leveling your Schwinn exercise bike .......................... 29
Maintenance ................................................................ 29
Fitness Guidelines…………………………………………………........ 30
Exercise and Health...................................................... 30
Your New Home Fitness Program................................ 30
Steps to Getting Started............................................... 31
Components of Fitness................................................. 32
Cardiovascular Fitness.................................................. 32
Muscular Strength......................................................... 32
Flexibility........................................................................ 33
Nutrition......................................................................... 34
Understand Caloric Balance......................................... 34
Eat a Variety of Foods................................................... 34
Drink Water.................................................................... 34
Eat More Often / Portions............................................. 34
Monitoring Your Intensity.............................................. 35
Training Zones.............................................................. 35
Beating the Dropout Odds........................................... 37
Suggested Readings.................................................... 38
Schwinn
®
Fitness Limited Warranty............................................... 39
Workout Log……………………………………………………………… 40
8
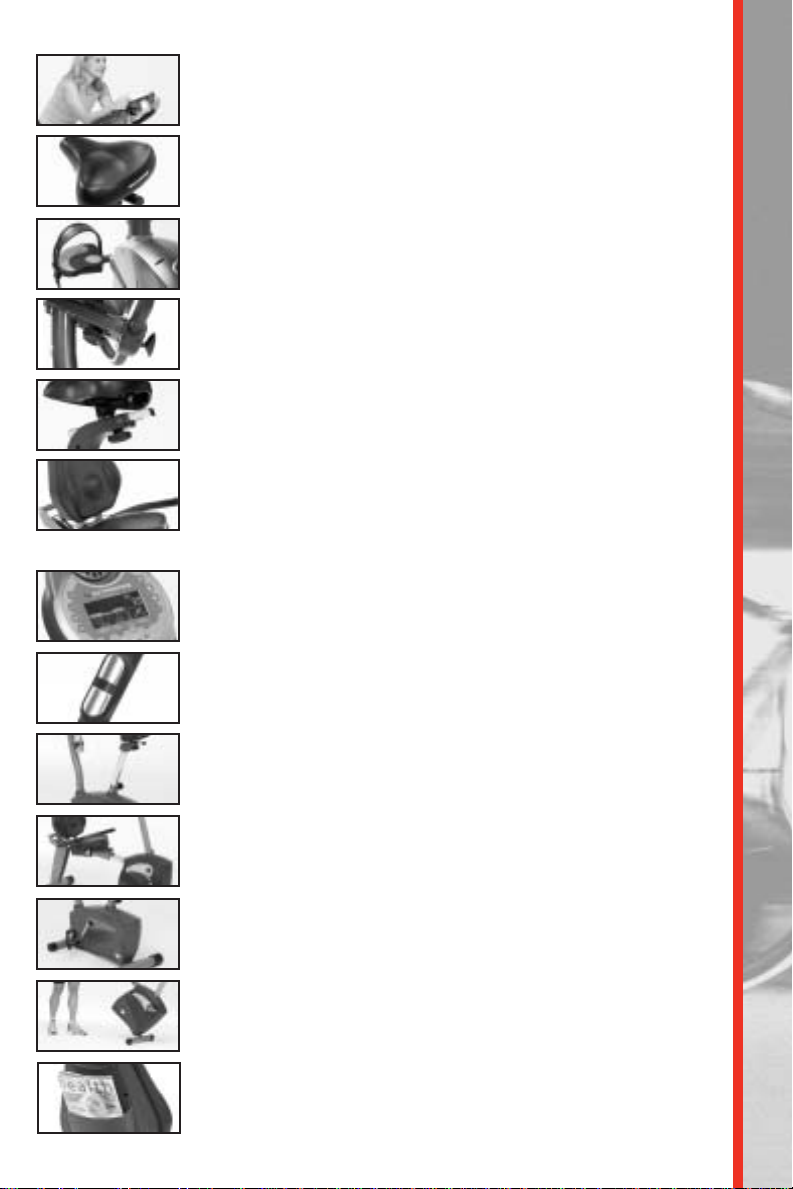
OPERATION
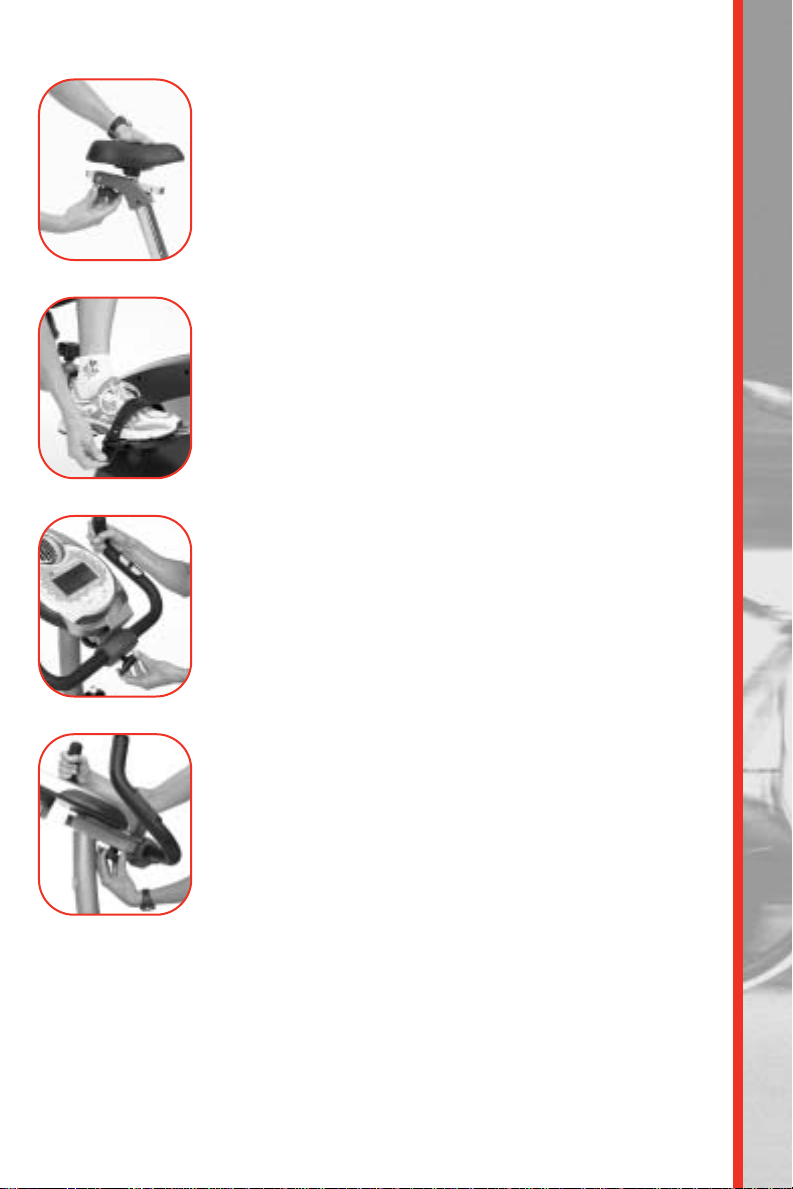
■ Seat adjustment
Proper seat adjustment helps ensure maximum exercise
efficiency and comfort, while reducing the risk of injury.
1. Place one pedal in the forward position and center the
ball of your foot over the center of the pedal. Your leg
should be slightly bent at Fig 2. the knee (Figs. 1 and 2).
2. If your leg is too straight or your foot cannot touch the
pedal, you will need to move the seat down on the
upright bike or forward on the recumbent bike. If your leg
is bent too much, you will need to move the seat up on
the upright bike or backward on the recumbent bike.
3. Adjust the upright seat height by first dismounting the
bike, then pulling out the adjustment knob on the seat
tube and releasing the locking pin (Fig. 3). Lower or raise
the seat to the desired height. Release the seat knob,
engaging the locking pin. Be sure that the pin is fully
secured in a seat post hole. To adjust the recumbent
seat, pull the seat knob up with your right hand to release
the seat. Slide the seat forward or backward to the
desired position. The knob will “pop” up into the next
hole; turn the knob to ensure a tight fit. (Fig.4)
4. The upright bike also features a combination fore / aft
and micro seat height adjustment slider. To move the seat
closer to, or away from the console, loosen the knob,
slide the seat forward or rearward to the desired position
and re-tighten (Fig. 5). Because of the unique angled
design of the slider it also functions as a micro seat
height adjustment. Using this feature in combination with
the pop-pin adjustment on the seat tube enables you to
fine tune the proper seat height for optimum comfort and
performance.
9
Fig. 1
Fig. 2
Fig. 3
Fig. 4
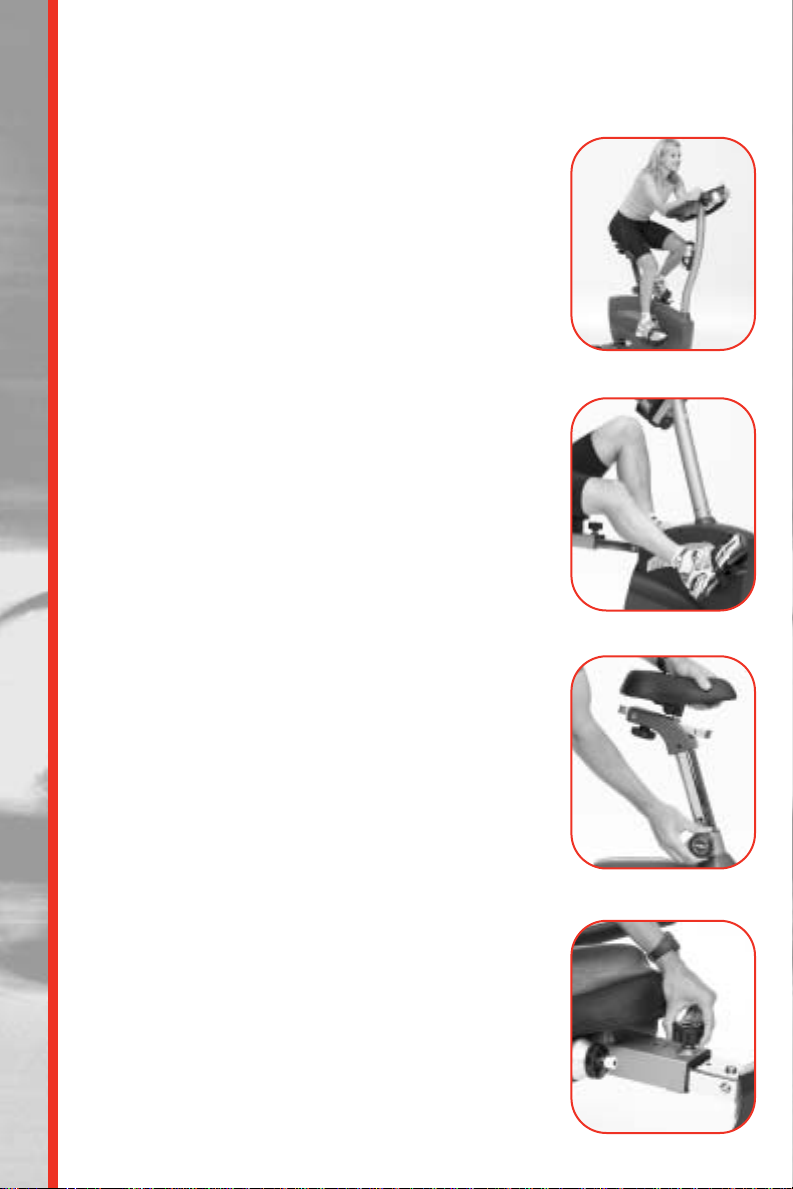
HOW TO USE THE SCHWINN EXERCISE BIKE
OPERATION
■ Foot positioning/pedal strap adjustment
Place the ball of each foot on the pedals. Rotate the pedals
until one foot is within arms reach. Then, reach down carefully
and fasten the rubber strap over your shoe and secure it to
the pedal by slipping the nub at the end of the pedal
through one of the slots in the strap. Pull down on the strap
until it snaps into place (Fig. 6). Repeat for the other foot.
Point your toes and knees directly forward to ensure maximum
pedal efficiency. Pedal straps can be left in place for
subsequent workouts.
■ Handlebar Adjustment
The upright bike offers an adjustable handlebar to ensure a
variety of comfortable hand positions. To adjust the angle
of the handlebars, loosen knob, adjust the handlebars to the
desired position and re-tighten (Fig. 7).
■
Console Adjustment
The upright and recumbent bike both feature a console position
adjustment that enables you to position the console closer or
farther away from your body to make the console buttons
easier to reach, the LCD screen easier to view, and your body
position more comfortable so you don’t feel too cramped or
too stretched out while exercising. To adjust the console
position, loosen the knob, adjust the console to the desired
position and re-tighten (Fig. 8). Experiment by moving the seat
and console sliders closer together or farther apart to totally
customize the most comfortable exercise position possible.
■ Resistance adjustment
Using the console, you have control over the levels of
resistance integrated into your workout. Typically, lower
resistance levels enable you to move at a faster pace, placing
increased demand on your cardiovascular system. Higher
resistance levels will typically deliver more of a muscle /
endurance workout at lower RPMs. But everyone is different!
So experiment and find the beginning of resistance that is
comfortable for you.
■ Lower body workout
Once you are in position and sitting comfortably, slowly
begin pedaling, with your arms relaxed and with your hands
resting on the hand grips. Pedal at an easy pace, at a low
resistance level until you feel comfortable and secure. As
you feel more comfortable, experiment with the range of
resistance levels available via the console.
10
Fig. 5
Fig. 6
Fig. 7
Fig. 8
OPERATION
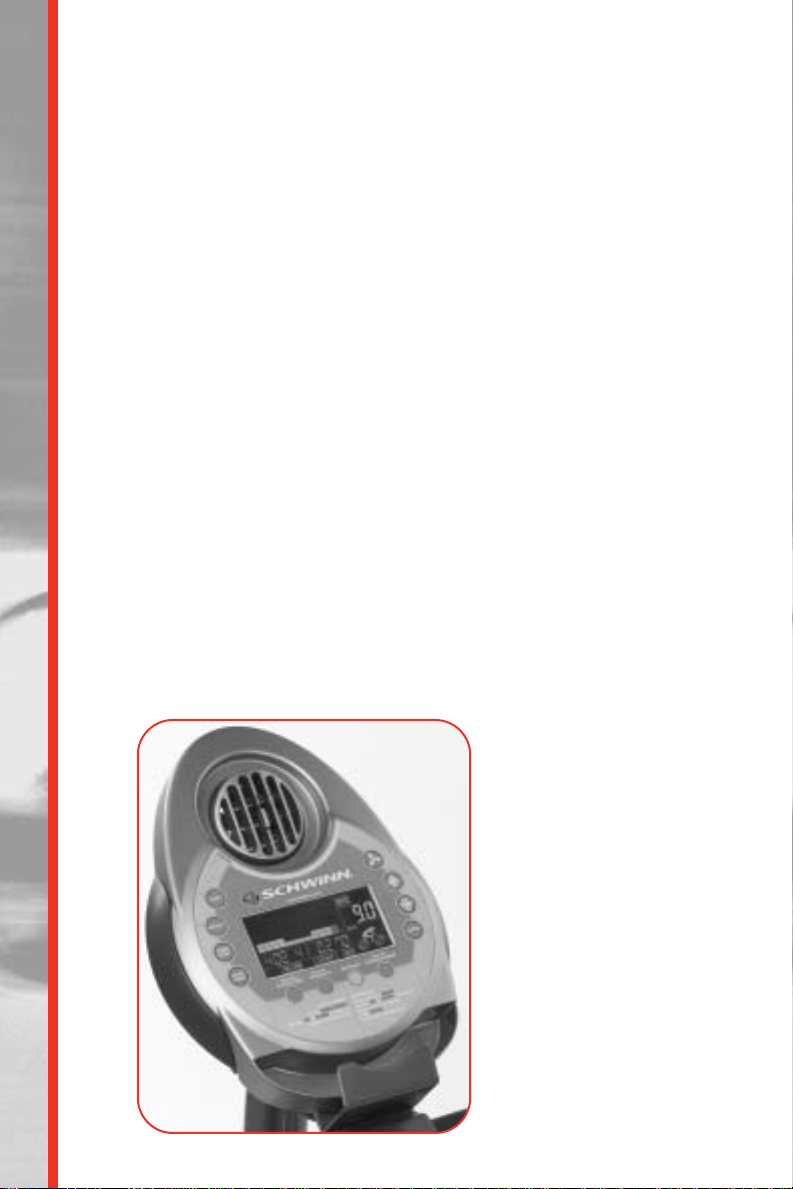
USING THE COMPUTER
Using the Computer
Your Schwinn bike is equipped with a versatile computer console which
includes:
•Quick Start
•1 Manual program
• 10 profile programs
•3 Heart Rate Control programs
•2 Custom user-defined programs
• Time Trial program
• Fitness Test
• Calorie Goal
• BMI (Body Mass Index)
• Recovery Mode
• Results Mode
This console provides you with important information about your workout
as well as controls the resistance levels. The following sections will
describe how to utilize the many functions provided by this computer. Keep
this manual accessible for future reference, as you will want to experiment
with the various functions while you become familiar with the bike.
Computer Console Design
Before we discuss using the specific functions of the computer, let’s get
familiar with the display, the different features, and various buttons located
on the console.
Computer Features
11

OPERATION
■ LCD Display
The large LCD (Liquid Crystal Display) screen located in the center of the
console is your information center. This display is divided into sections that
provide information about your workout and any preset information you
may have input into the computer. The display provides a large main window
that indicates the PROGRAM selection and RESISTANCE LEVEL. The
smaller windows across the bottom show INTERVAL TIME and TIME, RPM
and WATTS, DISTANCE, and HEART (PULSE) RATE. The next larger window
on the right side of the display shows SPEED and CALORIES, ENGLISH or
METRIC operating mode, and the CYCLIST ICON with spinning wheels
relative to your SPEED. The icon also indicates that the program is running.
The large main area of the display shows the program profile you are using.
Within this profile are “bricks”, or rectangles, that are stacked vertically and
indicate the relative resistance level and course profile. The computer is
capable of offering 16 different levels of resistance. One “brick” represents
the lowest level and eight “bricks” represent the highest level. You can view
the level you are exercising in by referencing the Level numbers displayed
on the left and right side of the “brick” display. Levels 1, 3, 5, 7, 9, 11, 13,
and 15 display on the left side and Levels 2, 4, 6, 8, 10, 12, 14, and 16 dis-
play on the right. The highest value displayed is the resistance level you
are working out in.
In addition, you will notice that there are 12 columns of these “bricks” lined
up horizontally across the bottom of the center of the display. Each Profile
Program is 50 columns or “intervals” long so each of these columns or
“intervals” represents one fiftieth of your workout time. For example, if you
enter a workout time of 25 minutes, each column or “interval” time will last
a duration of 30 seconds. Since the display shows the first 12 columns of
your workout program, as you progress through the workout, the program
will scroll to the left. The flashing “bricks” on the leftmost column let you
know where you are in your workout and other columns to the right show
the upcoming course profile.
The Manual, Heart Rate Control, Custom and Time Trial programs will dis-
play in the 12 interval columns as viewed on the LCD screen and do not
scroll as you advance through the workout.
■ Alphanumeric Display
Within the LCD display the computer features a “message center” that
prompts you to input specific data and values to make the bike easy to
operate and gets you to your workout quickly.
12

OPERATION
USING THE 113/213 COMPUTER
■ LCD Display Descriptions
TIME
Displays the workout TIME. The TIME will count down from the
TIME you entered when beginning the program and shows the TIME
remaining for your workout.
INTERVAL TIME Displays the INTERVAL TIME. The INTERVAL TIME will count down
showing the TIME remaining before the program moves to the
next column.
RPM Displays the current pedal RPM (revolutions per minute).
WATTS Displays the current power you are producing at a given resistance
level. A WATT is a measure of workload similar to horsepower (in
fact 1 horsepower is equal to 746 Watts).
DISTANCE Displays the estimated DISTANCE traveled (Miles or Kilometers).
PULSE Displays your current heart rate BPM (beats per minute). You must
grip each Heart Rate contact sensor pod to enable the computer to
detect your heart rate.
SPEED Displays the estimated SPEED (Miles or Kilometers / hour).
CALORIES Displays the estimated CALORIES you have burned during the exercise.
■ Console Buttons and Button Functions
START / PAUSE
Used to start and pause the workout. When in a program pressing
this button will pause the workout. Press this button again to restart
the clock and the program where you left off.
UP / DOWN Used to change resistance level or to adjust values such as program
time etc.
ENTER Confirms or enters your selection.
SCAN These 3 buttons enable the user to alternately view Interval Time or
Time, RPM or Watts, and Speed or Calories.
RESET Pressing RESET in the program mode will bring you back to the
“ENTER PROGRAM” screen. Holding the RESET button down
for 2 seconds will reset the console and perform the “Power Up” step.
QUICK START When the screen displays “ENTER PROGRAM”, pressing this
will start the Manual Program. This is a “one-touch” way of starting
the Manual Program.
RESULTS Press this button to end the program and see the summary results of
your workout: Total Time, Total Distance, Average Speed, Average
Watts, Average Pulse and Total Calories. Once you press this button
your workout will end. You cannot go back and resume your workout
where you left off. See START / PAUSE above for information
regarding pausing then resuming your workout.
RECOVERY Press this button to measure and obtain your heart rate recovery
score. See section “Recovery Test”.
FAN The console features a fan with adjustable louvers to direct airflow to
cool you off while working out. Pressing this button turns the fan on or off.
13
 Loading...