


15-1924.fm Page 1 Monday, July 19, 1999 12:50 PM
Cat. No. 15-1924
OWNER’S MANUAL
7-in-1 Remote Control
with Lighted Keypad
Plug ’n Powerâ Compatible
Please read before using this equipment.

15-1924.fm Page 2 Monday, July 19, 1999 12:50 PM
FEATURES
Your RadioShack 7-in-1 Remote Control can replace up to seven infrared remote controls. You can use it to control your TV, VCR, cable box, satellite receiver, and even lights and appliances with Plug ’n Power modules (not included).
The 7-in-1 is preprogrammed with the most commonly used commands. All you have to do is tell it which TV, VCR, or other components’ remote controls you want to replace (by entering 3-digit codes). The 7-in-1 remote also lets you teach it more specialized commands from other remotes and store them in its memory. This lets you operate most of the same functions as the original remotes.
This manual includes a list of many manufacturers’ 3-digit codes for TVs, VCRs, cable converters, CD players, satellite receivers, and other popular remote-controlled devices.
The 7-in-1 Remote Control’s features include:
Powerful Infrared Beam — so you can operate your remote-controlled devices from a greater distance than with many of the original remote controls.
Lighted Keypad — lights up so you can see the keys even in a dark or dimly lit room.
Timer — lets you set the 7-in-1 to turn off your TV after 60 minutes.
Plug ’n Power Functions — allow you to operate Plug ’n Power modules with your 7-in-1 remote and an optional IR command console (RadioShack Unlimited No. 10037703) or Plug ’n Power Wireless Remote Control System (RadioShack Cat. No. 61-2676).
© 1997, 1998 Tandy Corporation.
All Rights Reserved.
Plug ’n Power and RadioShack are registered trademarks used by Tandy Corporation.
X-10 is a registered trademark of X-10 (USA) Inc.
Need help? Call 1-800-989-4706
2

15-1924.fm Page 3 Monday, July 19, 1999 12:50 PM
Convenient Keypad Design — each key is positioned for easy operation.
Toll Free Support — you can get expert help for your 7-in-1 Remote Control by calling 1-800-989- 4706.
Note: You need four AAA batteries (not supplied) to power your 7-in-1 Remote Control.
Need help? Call 1-800-989-4706
3

15-1924.fm Page 4 Monday, July 19, 1999 12:50 PM
CONTENTS
How the 7-in-1 Works ..................................... |
5 |
Preparation ..................................................... |
7 |
Installing Batteries ...................................... |
7 |
Lighting the Keys ........................................ |
8 |
Device Types .............................................. |
8 |
Setting Up Your 7-in-1 ................................ |
9 |
Using Two or More Similar Devices .. |
10 |
Operation ...................................................... |
11 |
Punch-Through ......................................... |
11 |
Using the 7-in-1’s Timer ........................... |
12 |
Plug ’n Power Functions ........................... |
12 |
Entering a Plug ’n Power |
|
House Code ...................................... |
13 |
Controlling Lights and Appliances |
|
Using an IR Command Console ....... |
13 |
Controlling Lights and Appliances |
|
Using a Control Center Module ......... |
15 |
Setting a Plug ’n Power Timer .......... |
16 |
Teaching Commands to the 7-in-1 ........... |
17 |
Teaching a Command ....................... |
18 |
Clearing All Commands .................... |
19 |
If You Have Problems .................................. |
20 |
Manual Code Search ................................ |
20 |
Determining the 3-Digit Code ............ |
21 |
Troubleshooting ........................................ |
22 |
Manufacturers’ Codes ................................. |
23 |
Audio Amplifiers ....................................... |
23 |
Audio Receivers ....................................... |
23 |
Audio Systems ......................................... |
23 |
Cable Converters ..................................... |
23 |
Cassette Player ........................................ |
25 |
CD Players ............................................... |
25 |
Direct-to-Home Satellite Receivers .......... |
28 |
Home Automation ..................................... |
28 |
Laser Disc Players ................................... |
28 |
Satellite Receivers .................................... |
28 |
Televisions ................................................ |
29 |
TV/VCR Combinations ............................. |
36 |
VCRs ........................................................ |
36 |
Care and Maintenance ................................. |
43 |
Specifications ............................................... |
44 |
Need help? Call 1-800-989-4706
4
15-1924.fm Page 5 Monday, July 19, 1999 12:50 PM
HOW THE 7-IN-1 WORKS
Your RadioShack 7-in-1 Remote Control was designed to control the most commonly used functions on your TV, VCR, cable converter, CD player, satellite receiver, audio equipment, and Plug ’n Power devices.
When you set up the 7-in-1 Remote Control, its command keys work like the keys on your original remote controls. For example, the 7-in-1 Remote Control’s POWER (All Lts On) key works like a key on your original remote control which might be labeled POWER ON/OFF.
|
Key |
Function |
|
|
|
|
|
|
SET UP |
Used in setting up your |
|
|
|
devices. |
|
|
|
|
|
|
|
Lights your keypad for use in |
|
|
|
dark or dimly lit rooms. |
|
|
|
|
|
|
POWER (All Lts |
Operate the same as the cor- |
|
|
On), digit keys, |
responding keys on your origi- |
|
|
CHANNEL + (On), |
nal remote control. |
|
|
CHANNEL – (Off), |
|
|
|
VOLUME + (Brt), |
|
|
|
VOLUME – (Dim), |
|
|
|
LAST, MUTE (All |
|
|
|
Off), DISP |
|
|
|
|
|
|
|
LEARN |
Used when you teach the 7- |
|
|
|
in-1 infrared codes from your |
|
|
|
original remote controls. |
|
|
|
|
|
|
TV, VCR, CBL, CD, |
Used when you set up the 7- |
|
|
AUX1, AUX2, SAT, |
in-1 to replace your original |
|
|
Plug ’n Power |
remote controls. Also used |
|
|
|
during normal operation to tell |
|
|
|
the 7-in-1 which device you |
|
|
|
want to control. |
|
|
|
|
|
|
SHIFT |
Used to store and access |
|
|
|
additional learned device |
|
|
|
functions, or when you must |
|
|
|
enter a key shift to access a |
|
|
|
function. |
|
|
|
|
|
|
SELECT |
Used for menu selections on |
|
|
|
some direct-to-home satellite |
|
|
|
systems. |
|
|
|
|
|
|
|
|
|
|
Need help? Call 1-800-989-4706 |
||
|
|
5 |
|
15-1924.fm Page 6 Monday, July 19, 1999 12:50 PM
Key |
|
Function |
|||||
|
|
|
|
|
|
|
|
GUIDE |
|
Displays the main menu on |
|||||
|
|
|
|
|
|
|
direct-to-home satellite sys- |
|
|
|
|
|
|
|
tems. |
|
|
|
|
|
|
|
|
REC, |
|
|
|
|
|
PAUSE, |
Control VCR functions and |
|
|
|
|||||
PLAY, |
REW, |
are used to select options and |
|||||
FF, |
|
STOP |
navigate in your Surround |
||||
|
|||||||
|
|
|
|
|
|
|
Sound system, satellite sys- |
|
|
|
|
|
|
|
tem, or other similar device. |
|
|
|
|
|
|
|
|
TIMER |
|
Used to set the timer to auto- |
|||||
|
|
|
|
|
|
|
matically switch off the TV |
|
|
|
|
|
|
|
after 60 minutes. Or, to turn |
|
|
|
|
|
|
|
on or off a lamp/appliance |
|
|
|
|
|
|
|
module or turn off all modules |
|
|
|
|
|
|
|
after 1 to 99 minutes in the |
|
|
|
|
|
|
|
Plug ’n Power mode. |
|
|
|
|
|
|
|
|
L1, L2 |
|
Used with LEARN when you |
|||||
|
|
|
|
|
|
|
teach the 7-in-1 infrared com- |
|
|
|
|
|
|
|
mands from your original |
|
|
|
|
|
|
|
remote controls. You can also |
|
|
|
|
|
|
|
use L1 and L2 to add one or |
|
|
|
|
|
|
|
two extra original remote con- |
A.B |
|
trol functions. |
|||||
|
Switches between TV and AV |
||||||
|
|
|
|
|
|
|
in the TV mode, TV and VCR |
|
|
|
|
|
|
|
in the VCR mode, A and B in |
|
|
|
|
|
|
|
the CBL mode, TV and DSS |
|
|
|
|
|
|
|
in the DSS mode, and Deck A |
|
|
|
|
|
|
|
and Deck B in the audio |
|
|
|
|
|
|
|
mode. |
|
|
|
|
|
|
|
|
ENT |
|
Lets you enter information |
|||||
|
|
|
|
|
|
|
into the 7-in-1’s memory. |
|
|
|
|
|
|
|
|
Notes:
•Whenever you use REC on the remote control, you must press it twice. This safety feature helps you avoid accidentally recording over tapes.
•The 7-in-1 Remote Control might not be able to duplicate some of your original remote control’s seldom-used functions.
Need help? Call 1-800-989-4706
6
15-1924.fm Page 7 Monday, July 19, 1999 12:50 PM
PREPARATION
INSTALLING BATTERIES
You need four AAA batteries to power your remote control. We recommend alkaline batteries, such as RadioShack Cat. No. 23-558.
Cautions:
•Use only fresh batteries of the required size and recommended type.
•Do not mix old and new batteries, different types of batteries (standard, alkaline, or rechargeable), or rechargeable batteries of different capacities.
•Do not press any of the 7-in-1’s keys while installing batteries.
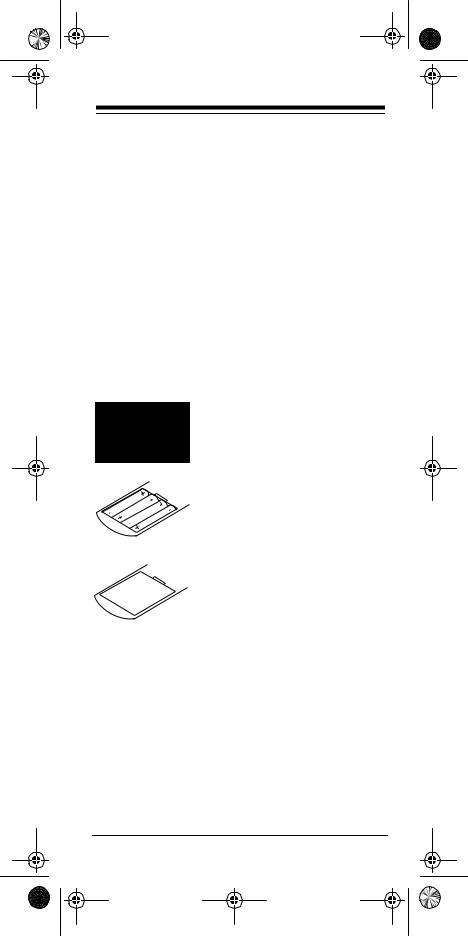
1.Press the battery compartment cover’s tab and lift off the cover.
2.Install four AAA alkaline bat-
teries as indicated by the polarity symbols (+ and –) marked inside the compartment.
3. Replace the cover.
Note: Do not place objects on top of the remote control after you have installed the batteries. This can press keys for an extended period of time and reduce battery life.
When the 7-in-1 Remote Control’s range decreases or it stops operating properly, replace the batteries.
Note: Although the 7-in-1 has a built-in memory backup, we recommend you have fresh batteries ready to install as soon as you remove the old ones.
Need help? Call 1-800-989-4706
7

15-1924.fm Page 8 Monday, July 19, 1999 12:50 PM
LIGHTING THE KEYS
Press 
 to light the keys on the remote for about 5 seconds. If you press a key when the keys are lit, the keys stay lit for about 5 more seconds.
To turn off the light before it automatically turns off, press 
 again.
DEVICE TYPES
You can use the 7-in-1 Remote Control’s device keys to control the following general types of devices:
TV — TVs
VCR — VCRs, TV/VCR combinations, laser disc players, cassette decks and digital audio tape decks
CBL — Cable converters, satellite receivers and video accessories
CD — CD players, amplifiers, tuners, receivers, and miscellaneous audio products
AUX1/AUX2 — TVs, VCRs, laser disc players, CD players, cassette decks, digital audio tape decks, cable converters, satellite receivers, Plug ’n Power devices, video accessories, amplifiers, tuners, receivers, and miscellaneous audio products
SAT — standard and direct-to-home satellite receivers
Plug ’n Power — Plug ’n Power or X-10 home automation devices
Note: You can also program AUX1 or AUX2 or an unused device key to control additional devices (see “Using Two or More Similar Devices” on Page 10).
Need help? Call 1-800-989-4706
8
15-1924.fm Page 9 Monday, July 19, 1999 12:50 PM
SETTING UP YOUR 7-IN-1
1.Refer to “Manufacturers’ Codes” on Page 23 and write down the codes for your original remote controls.
Notes:
•Some manufacturers have several possible codes listed. Try each until you find the right one. See “If You Have Problems” on Page 20 if you cannot find the correct code.
•If you want to set up your 7-in-1 to control a combination TV/VCR (such as Cat. No. 16-421 or 16-422), you must program the TV code for the TV functions and the VCR code for the VCR functions.
2.Hold down SET UP until the red light above

 turns on.
Note: To exit the set up routine at any time, press SET UP again. The red light flashes several times.
3.Press the device key for the type of remote you are replacing (TV, VCR, CBL, CD, Plug ’n Power, or SAT).
Note: If you do not press a device key within about 15 seconds, the red light flashes for about 3 seconds then turns off. Start again from Step 2.
4.Enter the 3-digit code.
For example, to replace a TV’s remote control (manufacturer’s code 185), press:
SET UP – TV – 1– 8 – 5
When the red light turns off, the 7-in-1 has accepted the code.
Note: If the code you entered is invalid, the red light flashes for about 3 seconds then turns off.
Need help? Call 1-800-989-4706
9
15-1924.fm Page 10 Monday, July 19, 1999 12:50 PM
5.Point the 7-in-1 Remote Control at your device and press POWER (All Lts On) (or CHANNEL + (On) for some cable boxes). Your device should turn off (or on, if it was off).
If the remote does not operate your device, try the other codes listed in “Manufacturers’ Codes” on Page 23 for your brand of TV, VCR, cable converter, or other device.
6.Repeat Steps 2–5 for additional devices.
Using Two or More Similar Devices
If you have two or more similar devices (two VCRs for example) and you have already programmed the 7-in-1 to control one of the devices using that device key, you can program the AUX1 and AUX2 device keys or an unused device key to control the additional device.
Follow these steps to program AUX1 or AUX2.
1.Repeat Step 1 and 2 under “Setting Up Your 7-in-1” on Page 9.
2.Press AUX1 or AUX2.
3.If you are replacing a CD’s remote control, skip to Step 4. Otherwise, press the device key for the type of remote you are replacing (VCR, CBL, TV, CD, Plug ’n Power, or SAT.
Note: If you do not press a device key within about 15 seconds, the red light flashes for about 3 seconds then turns off. Start again from Step 1.
4.Repeat Steps 4–6 under “Setting Up Your 7- in-1” on Page 9.
To program an unused device key to control an additional device, choose an unused device key that controls a similar type of device (see “Device Types” on Page 8), then program it using the steps in “Setting Up Your 7-in-1” on Page 9.
Need help? Call 1-800-989-4706
10
15-1924.fm Page 11 Monday, July 19, 1999 12:50 PM
OPERATION
1.Press the device key for the device you want to control, then point the 7-in-1 at the device and press POWER (All Lts On) (or CHANNEL + (On) for some cable converters) to turn the device on.
2.Repeat Step 1 for all other devices you want to operate.
3.Point the 7-in-1 toward the device you want to control, then press the appropriate device key and the desired command keys.
Note: The command keys on the 7-in-1 work the same as the keys on the original remote control; however, the labeling might differ slightly.
4.To turn off the last device you selected, press POWER (All Lts On). To turn off other devices, press the device key for the device you want to turn off, then press POWER (All Lts On).
PUNCH-THROUGH
The punch-through feature lets you alternately control two different devices without pressing the device keys for each one. Here’s how it works.
Not all of the 7-in-1 Remote Control’s keys are used by every device. For example, a TV is often the only device that uses the volume keys. After you press TV, then press VCR, you can still use the volume control to control the TV.
Punch-through does not work when you are using the 7-in-1 to control CD players and Plug ’n Power devices.
Notes:
•The punch-through feature might not work if the last two devices you selected have the same (or similar) features. For example, most TVs and some cable converters have channel select keys on their remote controls.
Need help? Call 1-800-989-4706
11

15-1924.fm Page 12 Monday, July 19, 1999 12:50 PM
In this case, you must press the desired device key before you use the remote control’s CHANNEL + (On) or CHANNEL – (Off) keys.
•If you selected AUX1 or AUX2, you can punch-through TV, VCR, or CBL if you have not programmed AUX1 or AUX2 as a TV, VCR, or CBL device.
USING THE 7-IN-1’S TIMER
This feature lets you set your 7-in-1 to turn off your TV after 60 minutes.
1.Press TIMER on the 7-in-1.
2.Within 15 seconds, press ENT on the 7-in-1. The red light blinks once.
Note: If you do not press ENT within 15 seconds, the red light does not blink. Start again from Step 1.
3.Leave the 7-in-1 pointing at the TV’s infrared sensor. Make sure there is nothing blocking the line of sight between the 7-in-1 and the TV.
To cancel the timer, hold down TIMER until the red light blinks once, or press TV then press POWER (All Lts On).
PLUG ’N POWER FUNCTIONS
The Plug ’n Power feature allows you to control lights and appliances with an optional IR command console (RadioShack Unlimited No. 10037703) or Plug ’n Power Wireless Remote Control System (Cat. No. 61-2676). You also need Plug ’n Power light modules and appliance modules (available through your local RadioShack store) to use this feature.
Need help? Call 1-800-989-4706
12
15-1924.fm Page 13 Monday, July 19, 1999 12:50 PM
Entering a Plug ’n Power House Code
Your IR Command Console or Plug ’n Power Wireless Remote Control System uses a master code called a house code (see your IR Command Console’s or Plug ‘n Power Wireless Remote Control System’s Owner’s Manual for more information).
1.Press Plug ’n Power on the 7-in-1 Remote Control.
2.Hold down SET UP on the 7-in-1 until the red light above 
 turns on.
3.Use the 7-in-1’s number keys to enter the numbers equivalent to the house code’s letters (1 for A, 2 for B, 3 for C, and so on).
For example, if the house code is C, press 3.
4.Press ENT on the 7-in-1.
When the red light turns off, the 7-in-1 has accepted the code.
Note: If the code you entered is invalid, the red light flashes for about 3 seconds then turns off. Start again from Step 1.
Controlling Lights and Appliances Using
an IR Command Console
Follow these steps to control Plug ’n Power modules with your 7-in-1 using an IR command console.
1.Position the IR command console within the 7-in-1’s line of sight.
2.Plug the IR command console’s power cord into any standard AC outlet.
3.Set the house code dial on top of the IR command console to the same letter as your Plug ’n Power modules.
4.Set the selector switch on the IR command console for the group of modules you want to control (1–4 or 5–8).
Need help? Call 1-800-989-4706
13

15-1924.fm Page 14 Monday, July 19, 1999 12:50 PM
5.Hold down SET UP on the 7-in-1 until the red light above 
 turns on.
6.Press Plug ’n Power, then enter 0 – 1 – 4 on the 7-in-1. The red light turns off.
7.Press Plug ’n Power on the 7-in-1.
8.To turn on all light and appliance modules set to the same house code as the IR command console, press POWER (All Lts On) on the 7- in-1, or ALL LIGHTS ON on the IR command console.
To turn off all light and appliance modules set to the same house code as the IR command console, press MUTE (All Off) on the 7-in-1, or ALL UNITS OFF on the IR command console.
9.To turn specific lights and appliances on or off using the 7-in-1 Remote Control, press the digit key (1, 2, 3, 4, 5, 6, 7, or 8) for the module you want to control. Then press On or Off (CHANNEL + (On) or CHANNEL – (Off)).
To control specific lights and appliances directly from the IR command console, set the console’s selector to the number of the module you want to control (1–4 or 5–8 ), press the button on the console that corresponds to the number of the module you want to control (1/5, 2/6, 3/7, 4/8), then press ON on the IR command console.
10.To brighten or dim lights connected to lamp and appliance modules, press the digit key for the module you want to control. Then hold down VOLUME + (Brt) or VOLUME – (Dim) on the 7-in-1. Release the key when the desired level of brightness is reached.
Note: You must select the individual light to brighten or dim even if you used POWER (All Lts On) on the 7-in-1 to turn on all the lights at the same time.
Need help? Call 1-800-989-4706
14
15-1924.fm Page 15 Monday, July 19, 1999 12:50 PM
Controlling Lights and Appliances Using
a Control Center Module
Follow these steps to control Plug ’n Power modules with your 7-in-1 using your Plug ’n Power Wireless Remote Control System’s control center module.
1.Plug the control center module’s power cord into any standard AC outlet.
2.Set the house code dial on top of the control center module to the same letter as your Plug ’n Power modules.
3.Set the unit selector switch on the control center module for the group of modules you want to control (1–8 or 9–16).
Note: If the 7-in-1’s Plug ’n Power code is already set to 0 – 1 – 3 (the default), skip Steps 4 and 5.
4.Hold down SET UP on the 7-in-1 until the red light above 
 turns on.
5. Press Plug ’n Power then enter 0 – 1 – 3 on the 7-in-1. The red light turns off.
6.On the 7-in-1, enter the house code that matches your control center module’s house code (see Step 3 under “Entering a Plug ’n Power House Code” on Page 13).
7.To turn on all light and appliance modules set to the same house code as the control center module, press POWER (All Lts On) on the 7- in-1.
To turn off all light and appliance modules set to the same house code as the control center module, press MUTE (All Off) on the 7-in-1.
8.To turn specific lights and appliances on or off, press the digit key (1–16) for the module you want to control. Then press On or Off
(CHANNEL + (On) or CHANNEL – (Off) ).
Need help? Call 1-800-989-4706
15
 Loading...