


IS-50
INSTRUCTIONS 2
MODE D'EMPLOI 29
BEDIENUNGSANLEITUNG 57
INSTRUCCIONES 85
113
Indicates circumstances under which
mishandling resulting from ignoring this symbol
could result in personal injury or property
damage.
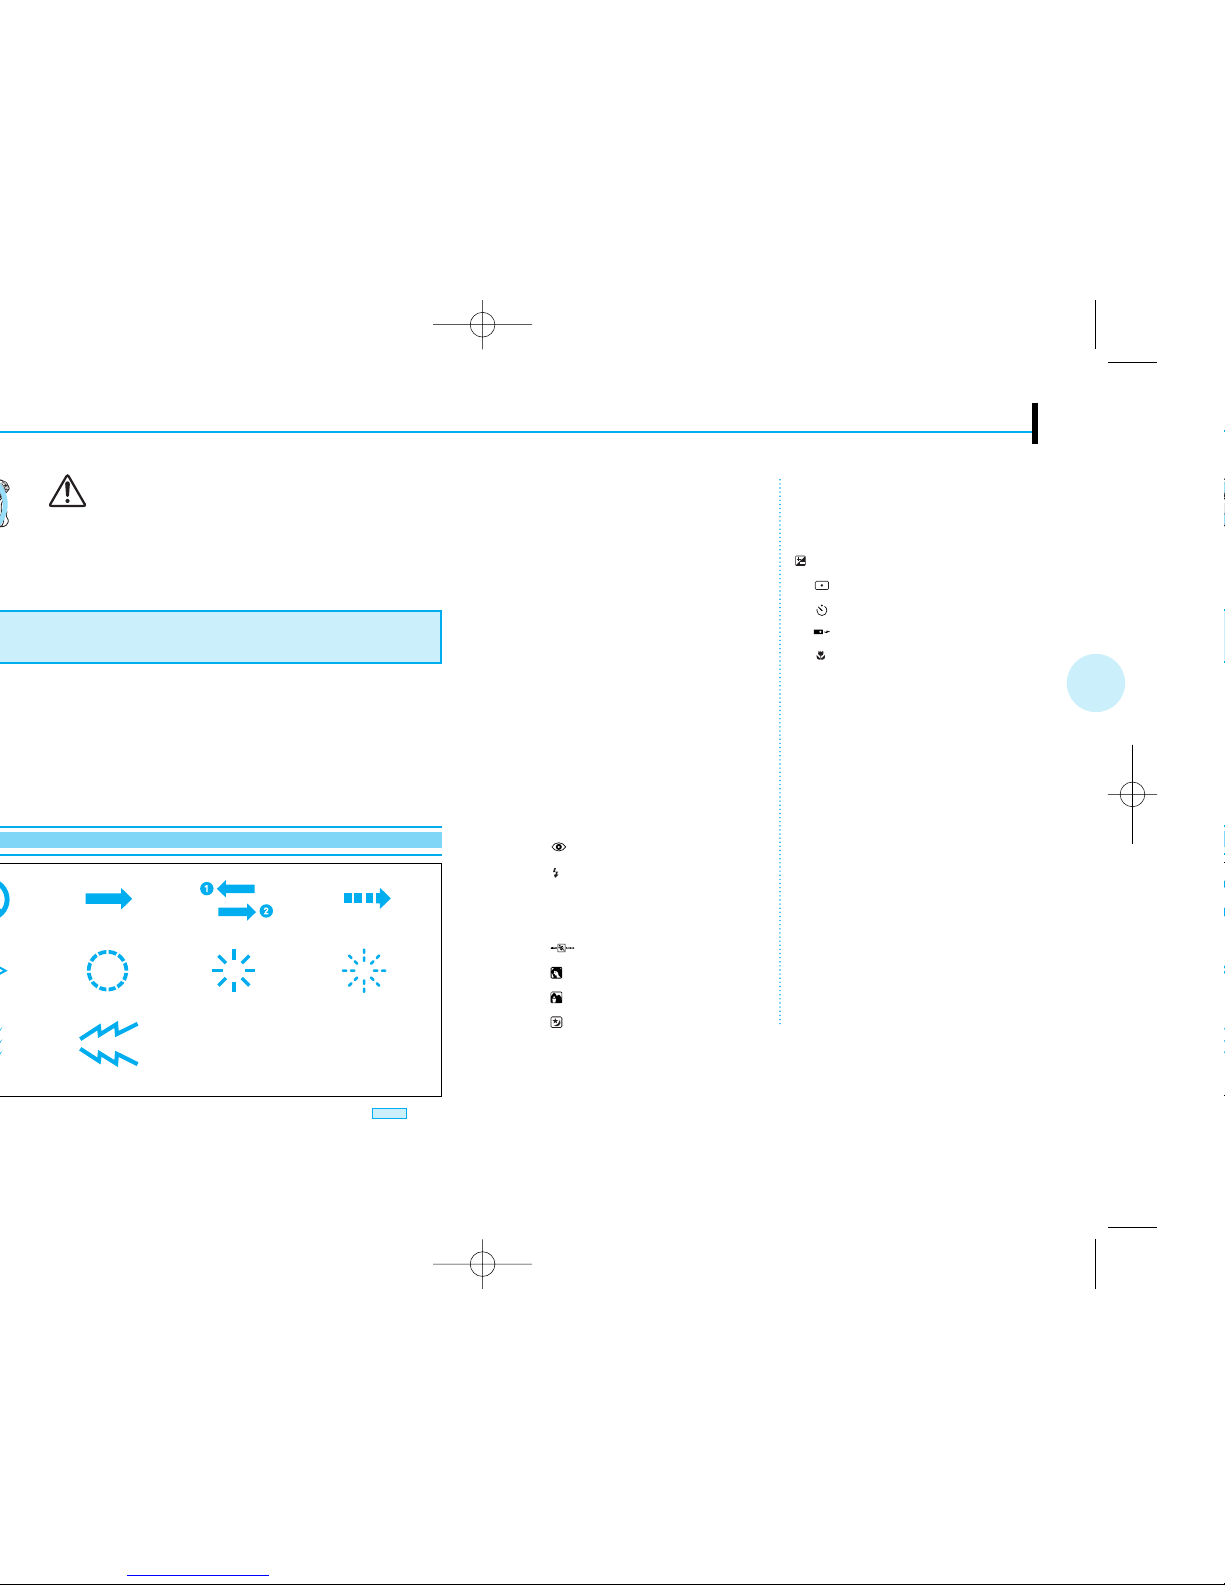
Manual operation Operation order Automatic operation
Beep
Attention
Indicator on Indicator blinking
Names of parts
Camera Body................................4
Camera Body/LCD Panel ..............5
Viewfinder Display........................6
Using the strap ................................6
Diopter adjustment ..........................7
Loading and checking the batteries ..7
Loading the film ..............................8
Taking pictures
Programmed Auto (FULL AUTO)..9
Focus Lock ................................10
Unloading the film ..........................10
Flash photography
Setting the flash mode ..............11
Auto Flash ..................................12
[ ] Red-Eye Reduction Flash..13
[ ] Fill-In Flash ........................13
Exposure modes
1. Direct Mode Select buttons ........14
[ ] Stop Action ....................14
[ ] Portrait ..............................15
[ ] Landscape..........................15
[ ] Night Scene ......................16
2. Exposure mode button ..............16
[ A ] Aperture Preferred Auto ....17
[ L.T. ] Long Time ....................18
[ ] Exposure Compensation ........19
[ ] Spot Metering ..................21
[ ] Selftimer/
[]
Remote Control(Optional)
....22
[ ] Macro Shooting ................23
Restoring the Programmed Auto
[FULL AUTO] mode ......................23
Correcting the date and time ..........24
(Quartzdate models only)
Printing the date/time ....................25
(Quartzdate models only)
Care and storage ............................26
Specifications ................................27
Accessories (optional)....................28
5
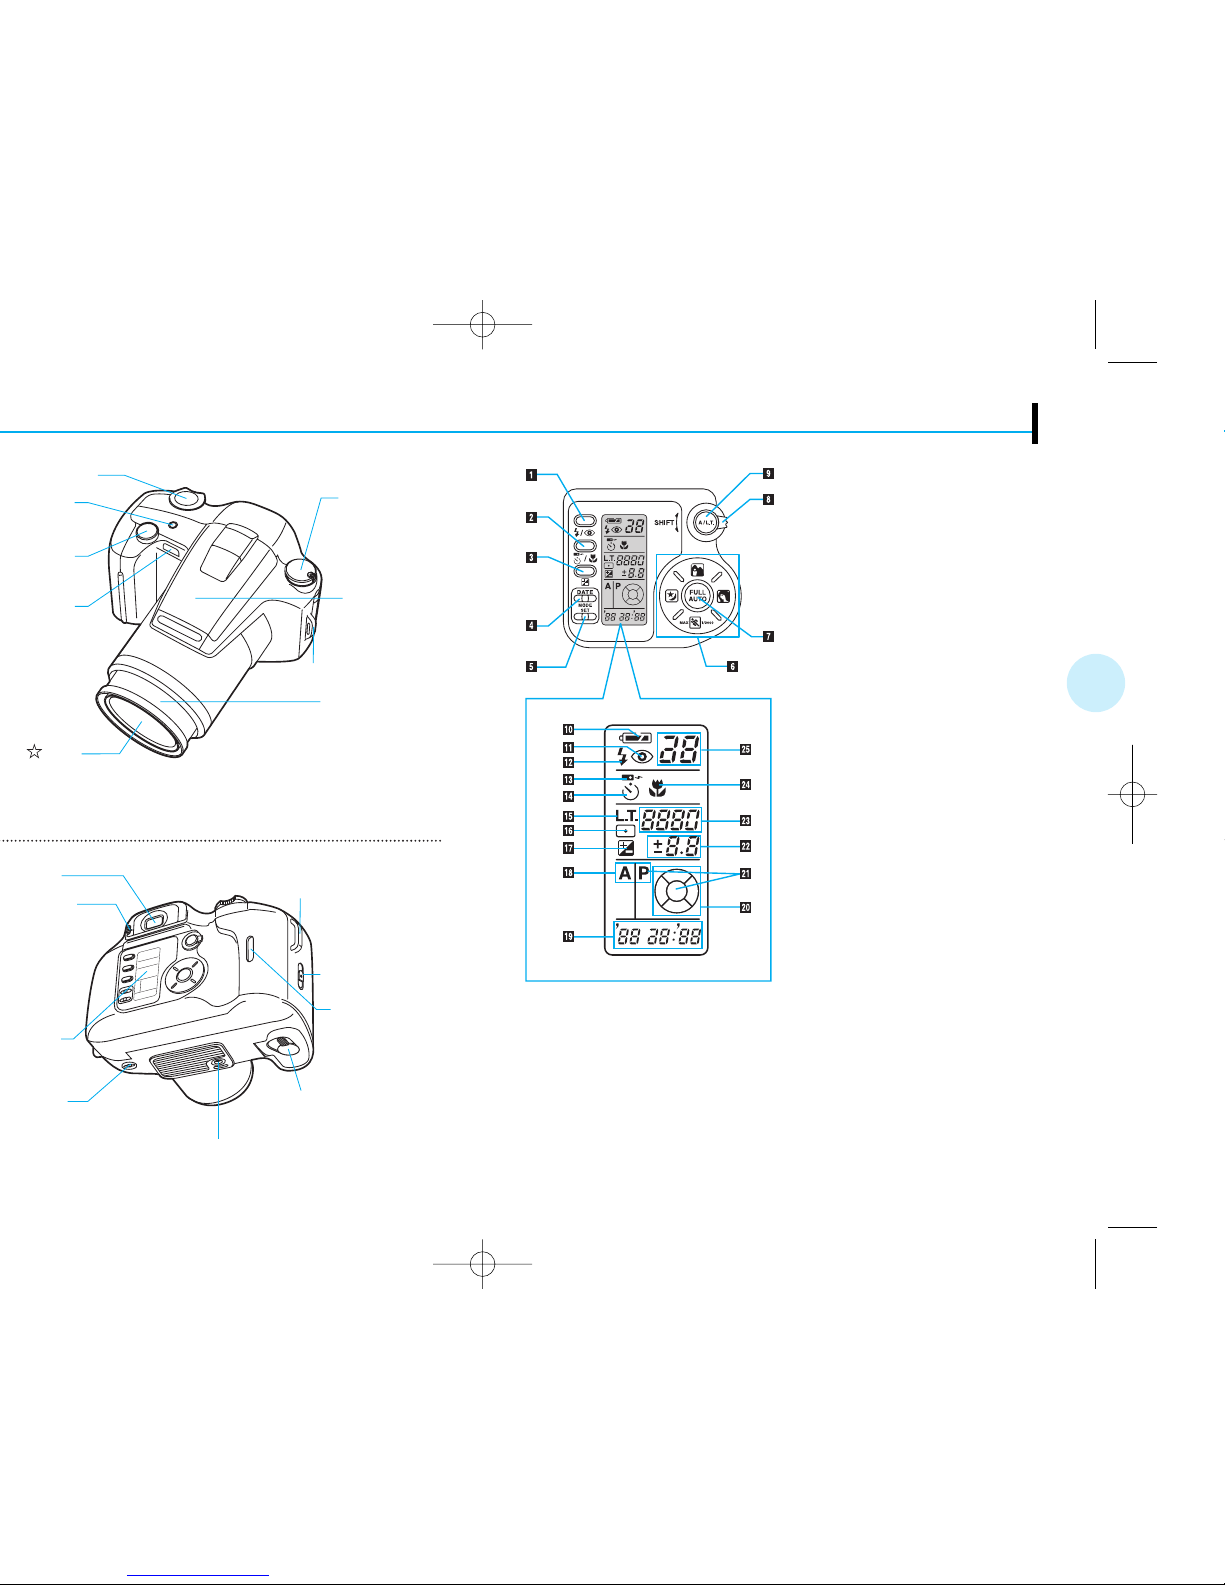
NAMES OF PARTS — Camera Body/LCD Panel
1 Flash mode button
2 Selftimer/ remote control/
macro button
3 Exposure compensation button
4 DATE MODE button*
5 DATE SET button*
6 Direct Mode Select buttons
7 FULL AUTO (programmed auto)
button
8 Shift lever
9 Exposure mode button
0 Battery check
! Red-Eye Reduction Flash
@ Fill-In Flash
# Remote Control
$ Selftimer
% Long Time
^ Spot Metering
& Exposure Compensation
* Exposure modes
( Date/time indicator*
) Mode status indicator
q Programmed Auto (FULL AUTO)
w Aperture setting/
exposure compensation value
e Shutter speed
r Macro Shooting
t Exposure counter
* Quartzdate models only
Zoom button
Lens barrel
Strap attachment stud
Flash
Power switch/
flash release
SPOT button
Lens
LCD panel
Tripod socket
Battery compartment cover
Film window
Back cover release
Strap attachment stud
Always try to keep this clean. Dirt and stains can
result in pictures that are unclear and out-of-focus.
Wipe off any dirt or stains with a soft cloth.
7
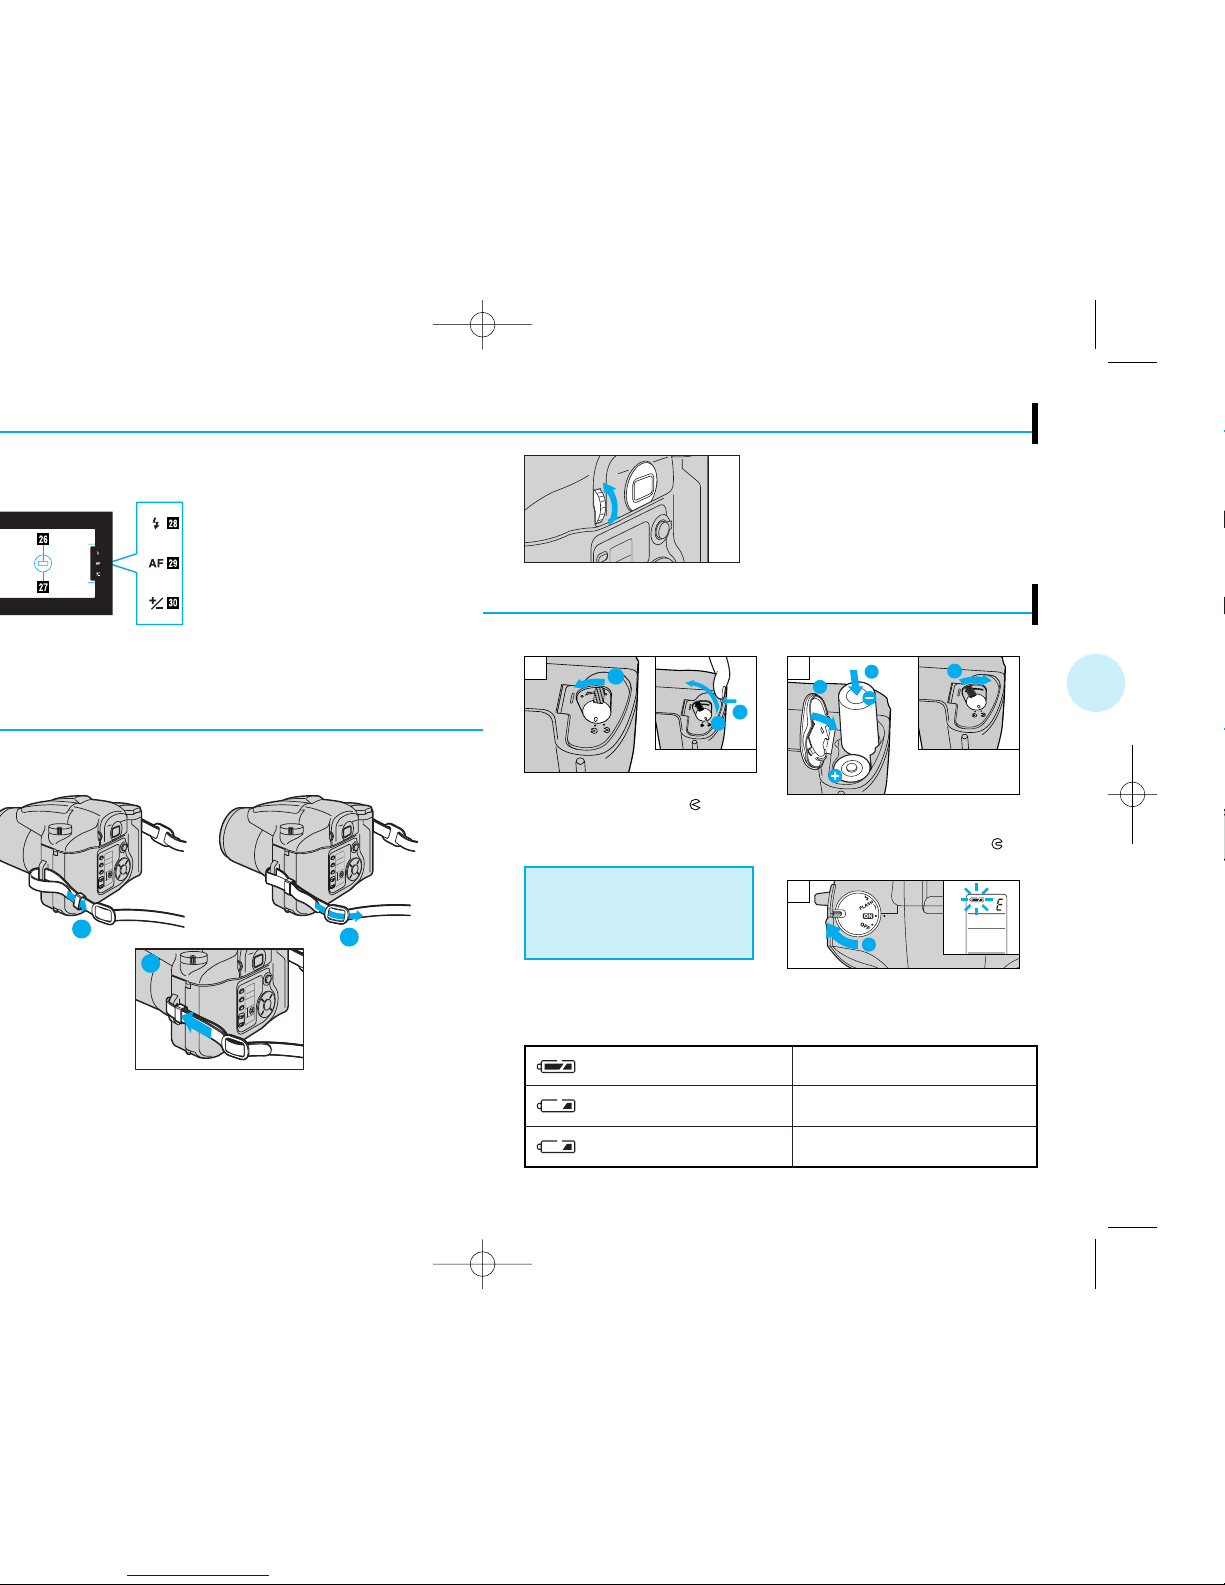
DIOPTER ADJUSTMENT
LOADING AND CHECKING THE BATTERIES
y Autofocus frame
u Spot frame
i Flash
o Autofocus indicator
p Exposure compensation
(overexposure/underexposure)
1
2
3
Secure the strap
with the clasp.
Turn the diopter adjustment dial until the
autofocus frame is clear.
Use two 3 V lithium batteries (CR123A or DL123A).
If you are nearsighted, turn the dial up.
If you are farsighted, turn it down.
Make sure the power switch
is set to OFF before opening
the battery compartment
cover.
1
2
3
1
4
5
6
2
7
3
Turn the dial 1 on the battery
compartment cover to . Hold
the notch 2 with your fingertip.
Open the cover 3 .
Insert the batteries 4 correctly.
Close the battery compartment
cover 5. Turn the dial 6 to
to lock the cover.
Set the power switch 7 to ON
to check the remaining battery
power.
Batteries are OK. You can shoot.
Batteries are low and should be
replaced with new ones.
Batteries are dead and should be
replaced with new ones immediately.
lights (turns off automatically).
blinks and other indicators are
displayed normally.
blinks and other indicators go out.
9
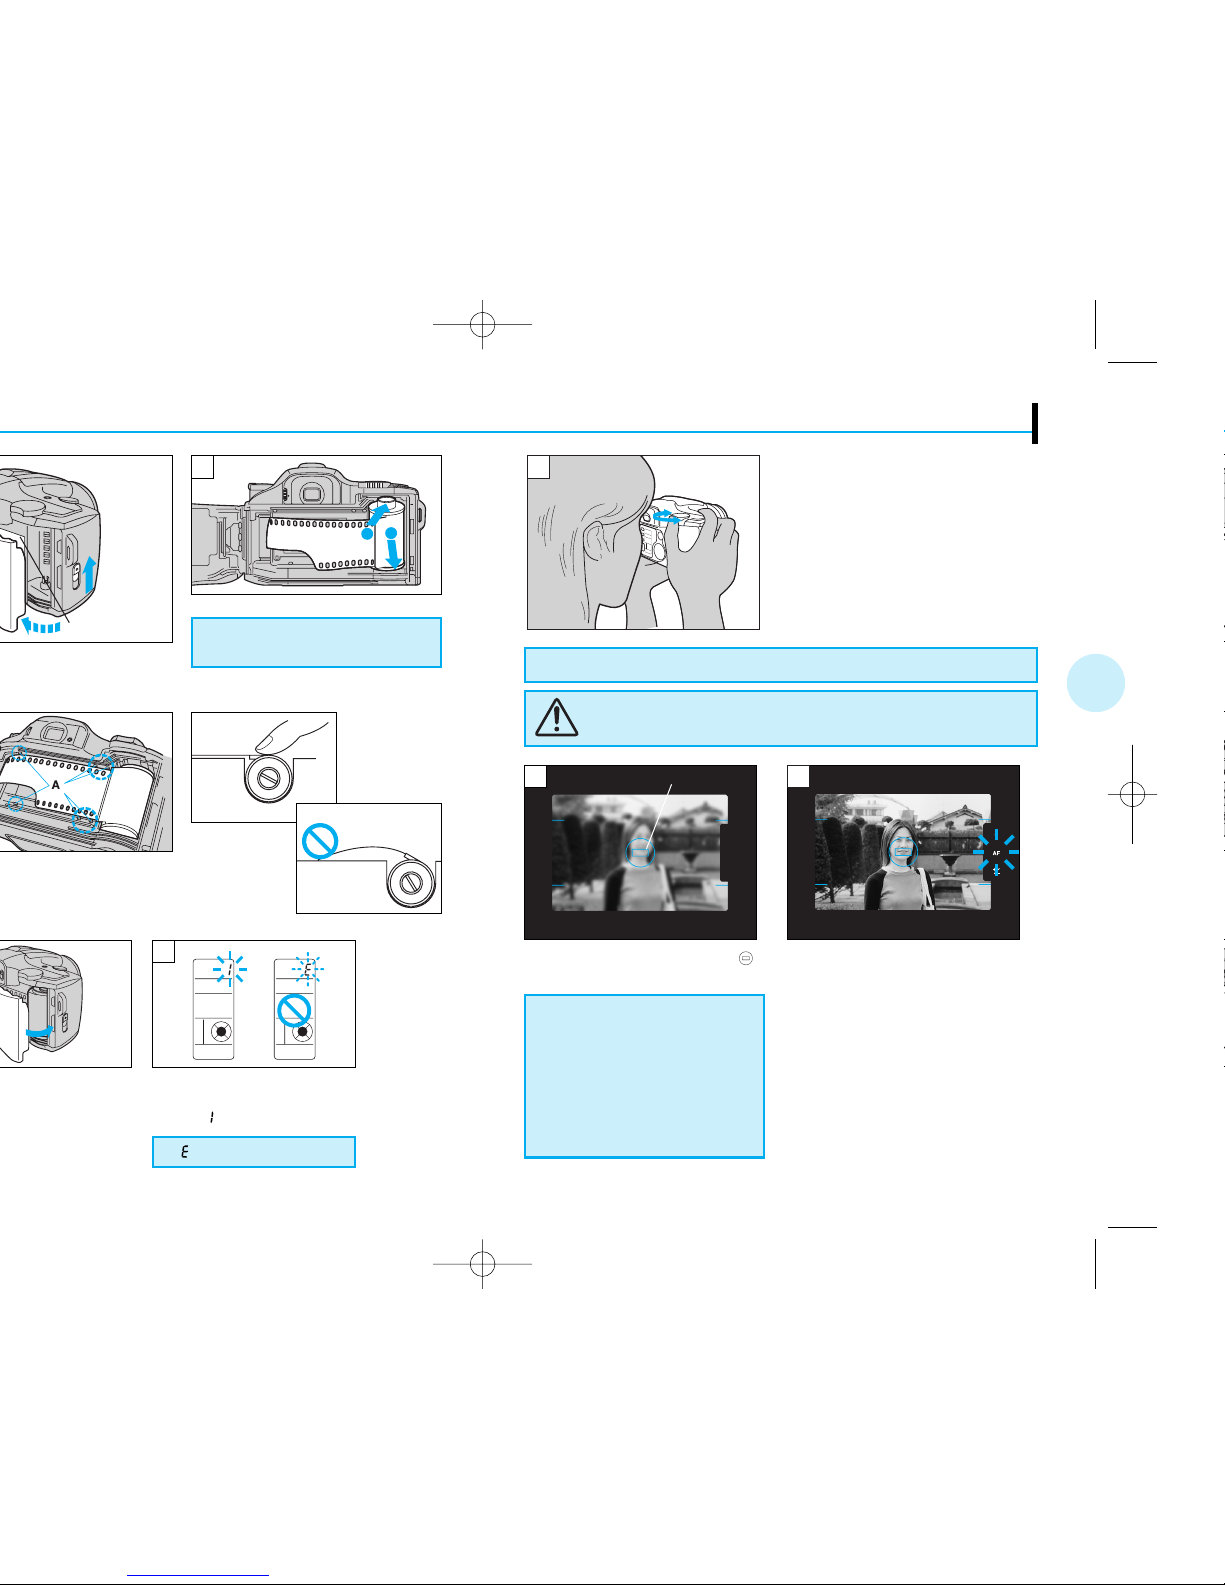
TAKING PICTURES — Programmed Auto (FULL AUTO)
Be careful not to touch the
shutter curtain.
If “ ” blinks, reload the film.
1
2
2
Insert the film cartridge.
5
Make sure the exposure
counter on the LCD panel
reads “ ”.
Correct
Incorrect
Shutter curtain
1
3
Set the power switch to ON. The
lens will extrude and the LCD panel
will turn on.
Compose your shot. Press the “T”
side of the zoom button for
telephoto (120 mm) or the “W” side
for wide angle (28 mm).
Position the autofocus frame
on your subject.
Press the shutter release button
halfway to focus on the subject.
After making sure that the
camera beeps and the autofocus
indicator lights in the
viewfinder, press the shutter
release button all the way to
take the picture. After the
shutter is released, the film
automatically advances to the
next frame.
After about 30 seconds of inactivity, the LCD panel goes out.
If the autofocus indicator
blinks, the shutter cannot be
released.
The distance to your subject
is 0.6 (2.0 ft) m to infinity at
the wide-angle side and 0.9
(3.0 ft) m to infinity at the
telephoto side.
Do not look at the sun or other strong light sources
through the viewfinder.
2
Autofocus frame
 Loading...