


M 1000
Basic
Manual
ENGLISH 2
FRANÇAIS 28
ESPAÑOL 54
DEUTSCH 80
/
DIGITAL CAMERA
РУССКИЙ 106

2
En
Table of Contents
Gather these items (box contents) ..................................................... 3
Prepare the battery .............................................................................. 4
Turn the camera on.............................................................................. 5
Set date and time ................................................................................. 6
Select a language................................................................................. 8
Take a picture....................................................................................... 9
Review your pictures ......................................................................... 10
Basic operation .................................................................................. 11
Shooting Mode Buttons ......................................................................... 11
s Modes (Scene mode) ................................................................... 12
Macro Mode........................................................................................... 12
Self-Timer .............................................................................................. 13
Flash Modes .......................................................................................... 13
Power Save Feature .............................................................................. 13
Menus and settings............................................................................ 14
Top Menu............................................................................................... 14
Erase All Pictures .................................................................................. 14
Connecting the camera ..................................................................... 15
Playback on a TV................................................................................... 15
Direct Printing (PictBridge) .................................................................... 16
Transfer images ................................................................................. 17
OLYMPUS Master Software............................................................... 19
Specifications..................................................................................... 20
Safety precautions............................................................................. 22
Before using your camera, read this manual carefully to ensure correct use.
We recommend that you take test shots to get accustomed to your camera
before taking important photographs.
Please observe the safety precautions at the end of this manual.
The screen and camera illustrations shown in this manual were produced
during the development stages and may differ from the actual product.
3
En
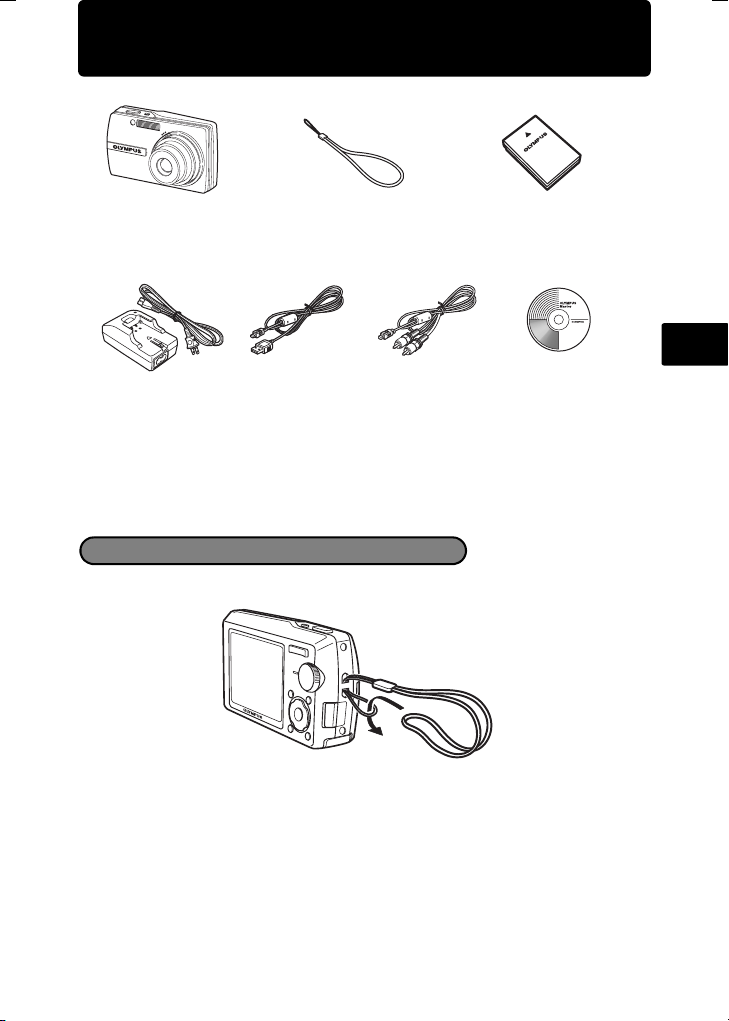
Gather these items (box contents)
Pull the strap tight so that it does not come loose.
Digital Camera Strap LI-12B
Lithium Ion Battery
LI-10C Battery Charger USB Cable AV Cable OLYMPUS Master
Software CD-ROM
Items not shown: Advanced Manual (CD-ROM), Basic Manual (this manual), and warranty
card. Contents may vary depending on purchase location.
Attach the strap
4
En
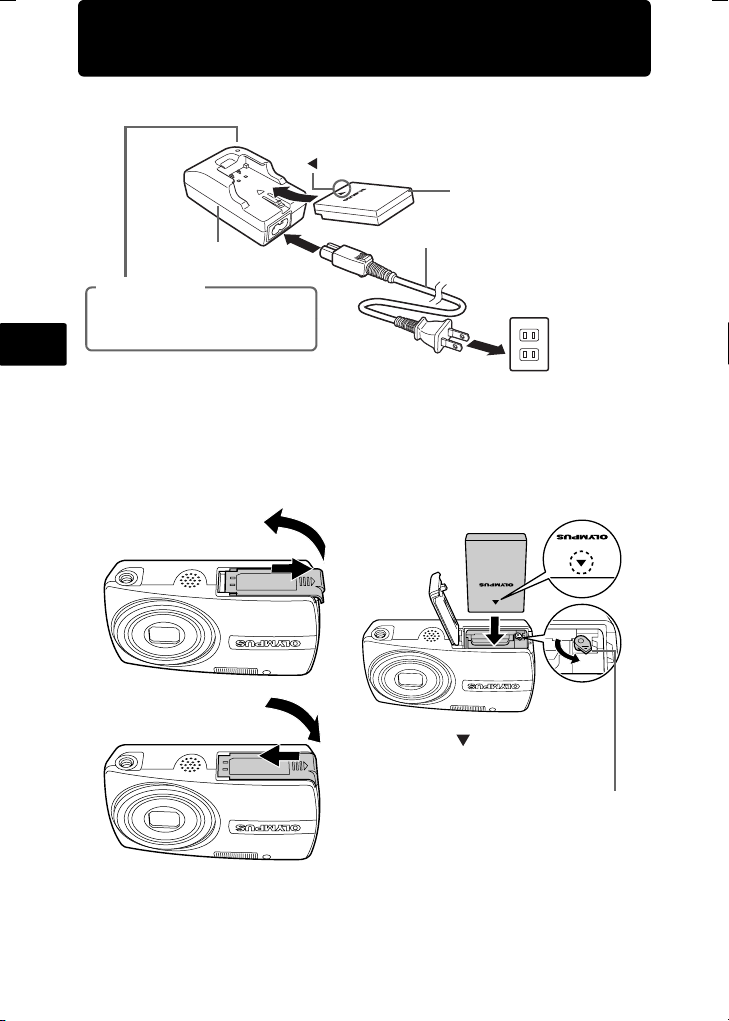
Prepare the battery
a. Charge the battery
Battery comes partially charged.
b. Insert the battery in the camera
For details on inserting an optional xD-Picture Card™, please refer to
the advanced manual.
Charging Indicator
Light On (Red): Charging
Light On (Green): Charging complete
(Charging time: Approx. 2 hours)
AC Wall Outlet
2
1
Power Cable
Battery Charger
Lithium Ion Battery
3
1
2
3
4
5
3
•
To remove the battery, slide the
battery lock knob in the direction
of the arrow.
Battery lock knob
•
Make sure to insert the battery in the
direction of the symbol until locked in
place.

5
En
Turn the camera on
This explains how to turn on the camera in shooting mode.
a. Set the mode dial to K.
Still picture shooting modes
b. Press the o button
To turn off the camera, press the o button once again.
K
This function allows you to shoot with the camera's automatic settings.
s
This function allows you to shoot pictures by selecting a scene according to the
shooting condition.
g
This function allows you to set the target items by following the shooting guide
displayed on the screen.
•
When the date and time have
not yet been set, this screen
will appear.
When viewing pictures
(playback mode)
When shooting movies
(shooting mode)
When shooting still pictures (shooting mode)
o Button
MENU
CANCEL
X
Y/M/D
Y /M /D
Y
Y
M D
D
TIME
T IM E
----.--.-- --:--
----.--.-- --:--
Hint
The directions of the arrow pad (1243) is indicated
with 1243 in this manual.
1
2
34
6
En
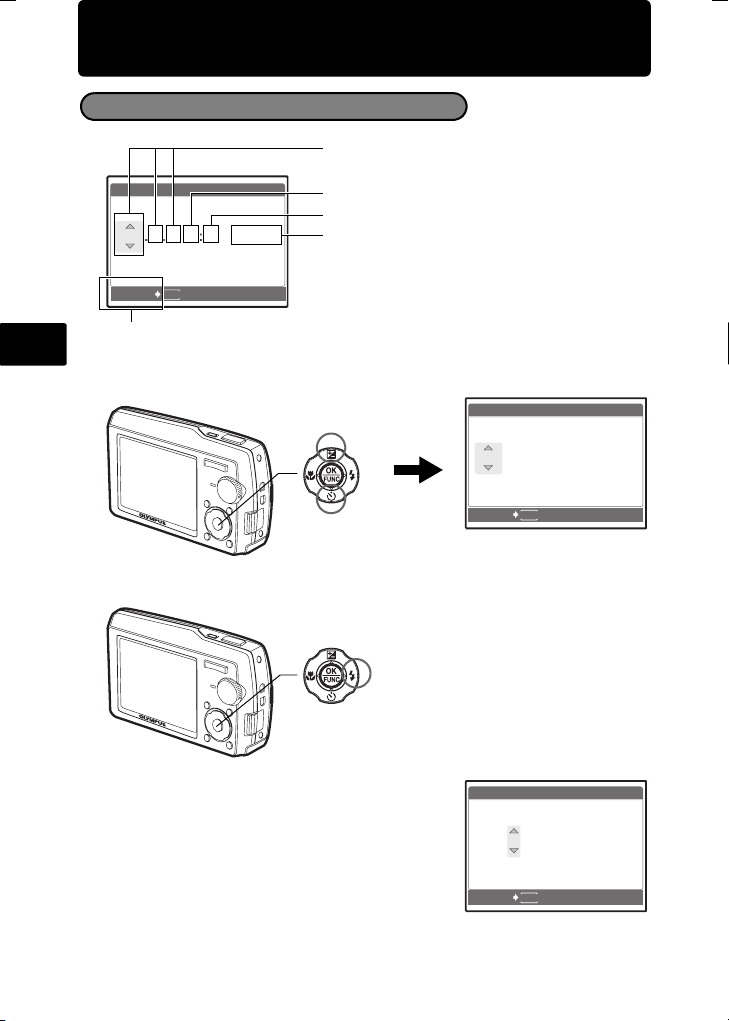
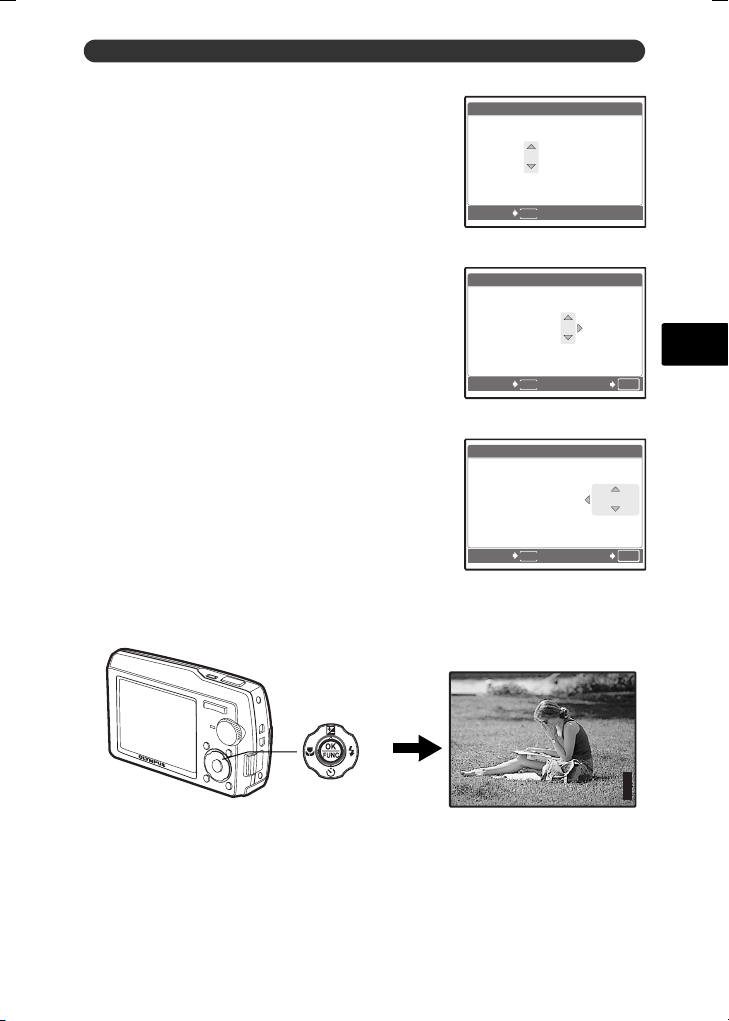
Set date and time
a. Press the 1F button and the 2Y button to select [Y].
•
The first two digits of the year are fixed.
b. Press the 3# button.
c. Press the 1F button and the 2Y but-
ton to select [M].
d. Press the 3# button.
About the date and time setting screen
MENU
CANCEL
X
Y/M/D
Y /M /D
Y
Y
M D
D
TIME
T IM E
----.--.-- --:--
----.--.-- --:--
Y-M-D (Year-Month-Day)
Exits a setting.
Minute
Date formats (Y-M-D,M-D-Y,D-M-Y)
Hour
2Y Button
1 F Button
CANCEL
MENU
2006
2006
.--.-- --:--
.--.-- --:--
X
Y
Y
M D
D
TIME
T IM E
Y/M/D
Y /M /D
3# Button
2006
2006
.
11
11
.-- --:--
.-- --:--
CANCEL
MENU
X
Y
Y
M D
D
TIME
T IM E
Y/M/D
Y /M /D
7
En
Set date and time
e. Press the 1F button and the 2Y but-
ton to select [D].
f. Press the 3# button.
g. Press the 1F button and the 2Y but-
ton to select “hour”, “minute”.
•
The time is displayed in the 24-hour format.
h. Press the 3# button.
i. Press the 1F button and the 2Y but-
ton to select [Y/M/D].
j. After all items have been set, press the o button.
•
For precise time setting, press the
o
button as the time signal strikes 00 seconds.
2006
2006
.
11
11
.
26
26
--:--
--:--
CANCEL
MENU
X
Y
Y
M D
D
TIME
T IM E
Y/M/D
Y /M /D
CANCEL
MENU
OK
SET
2006
2006
.
11
11
.
26
26
12
12
:
30
30
X
Y
Y
M D
D
TIME
T IM E
Y/M/D
Y /M /D
CANCEL
MENU
OK
SET
2006
2006
.
11
11
.
26
26
12
12
:
30
30
X
Y/M/D
Y /M /D
Y
Y
M D
D
TIME
T IM E
o Button
P
P
HQ
HQ
3648
3648
×
2736
2736
[
IN
IN
]
44
[ ]
8
En
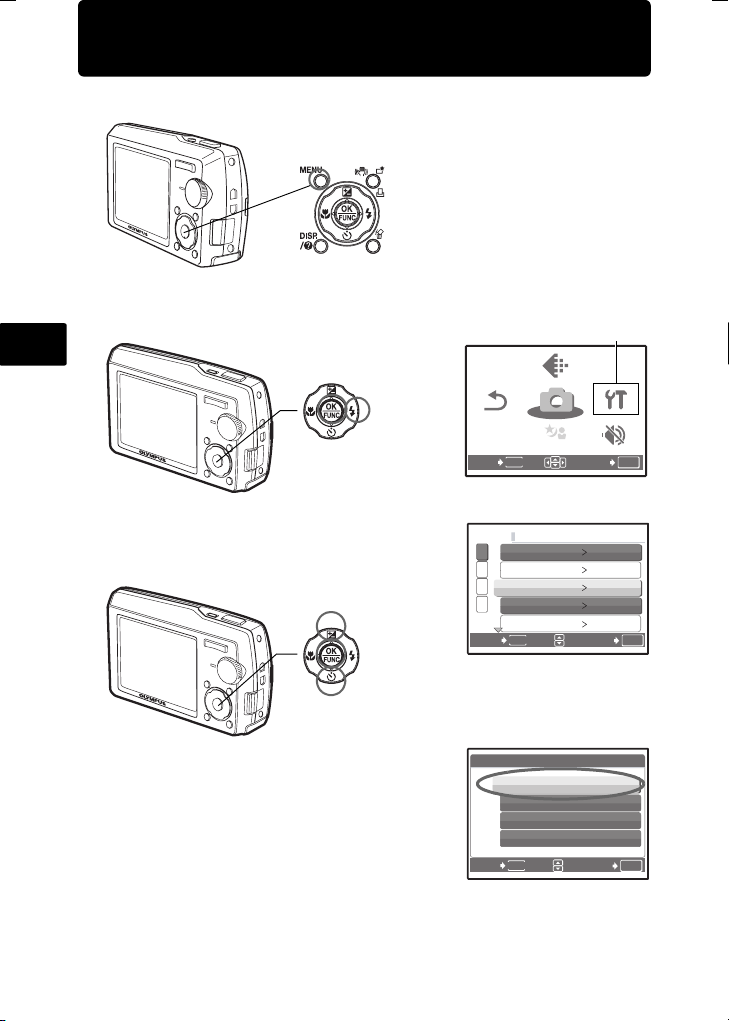
Select a language
a. Press the m button to display the top menu.
b. Press the 3# button to select [SETUP], and press the o
button.
c. Press the 1F button and the 2Y but-
ton to select [W], and press the o
button.
d. Press the 1F button and the 2Y
button to select a language, and
press the o button.
The selected language is set.
You can add other languages to your
camera with the provided OLYMPUS
Master software. Prease refer to the
Advanced Manual.
m Button
SCN
OK
MENU
SET
EXIT
SCN
SCN
SETUP
SETUP
SETUP
SILENT
SILENT
MODE
MODE
SILENT
MODE
RESET
RESET
IMAGE
IMAGE
QUALITY
QUALITY
IMAGE
QUALITY
RESET
SCN
CAMERA
CAMERA
MENU
MENU
SCN
CAMERA
MENU
[SETUP]
3# Button
OK
SET
MENU
BACK
3
2
1
4
SE TU P
MEMORY FORMAT
BACKUP
PW ON SETUP
SCREEN SETUP
W ENGLISH
2Y Button
1 F Button
OK
SET
MENU
BACK
W
ENGLISH
FRANCAIS
ESPAÑOL
PORTUGUES
9
En
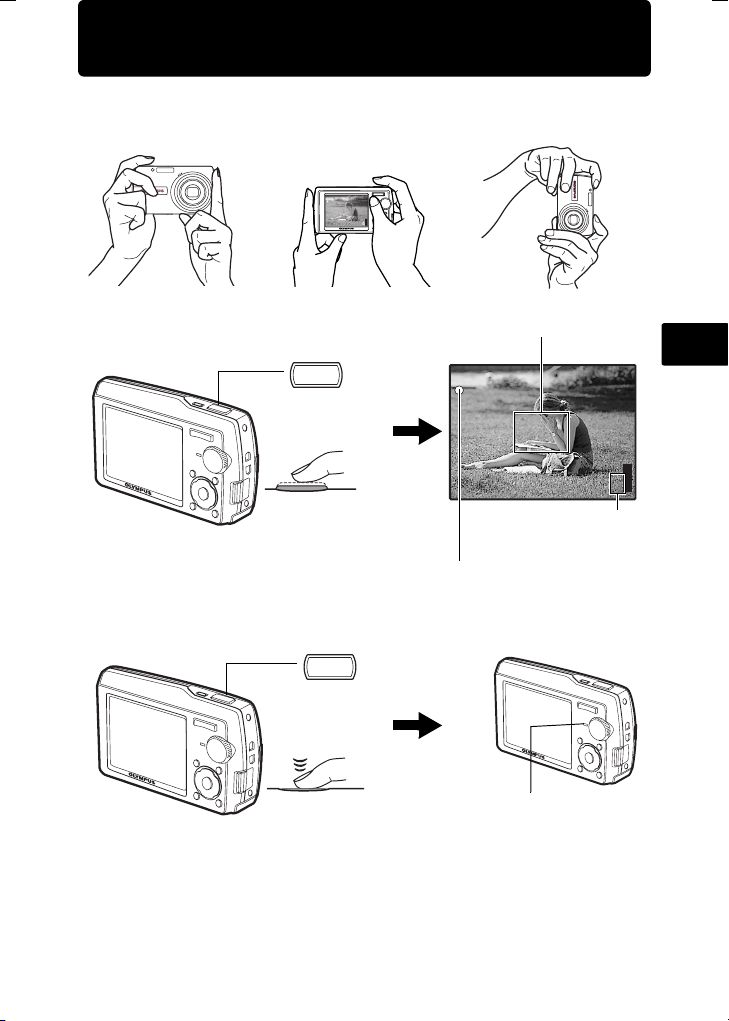
Take a picture
a. Hold the camera
c. Shoot
Horizontal grip Vertical grip
b. Focus
The card access lamp blinks.
Shutter Button
(Pressed
halfway)
P
P
HQ
HQ
3648
3648
×
2736
2736
[
IN
IN
]
44
[ ]
The green lamp indicates the focus and
exposure are locked.
Place this mark over your
subject.
The number of remaining
still pictures is displayed.
(Pressed
completely)
Shutter Button
 Loading...