


 Loading...
eMerge50P
eMerge5000P
User Guide
May 2014
Linear LLC
1950 Camino Vida Roble
Suite 150
Carlsbad, CA 92008
www.linearcorp.com
Document #233192
Copyright
© Linear LLC. All rights reserved.
This guide is protected by copyright and all rights are reserved by Linear LLC. It may not, in whole or in part, except insofar as herein directed, be copied, photocopied, reproduced, translated or reduced to any electronic medium or machine-readable form without prior written consent of Linear LLC.
eMerge® is a registered trademark of Linear LLC.
233192 AX4 Linear LLC |
ii |
May 2014 |

Contents |
|
|
Introduction........................................................................................................................................... |
|
1 |
Getting Started.................................................................................................................................. |
|
2 |
The Home Page ................................................................................................................................ |
|
3 |
Using Help........................................................................................................................................ |
|
5 |
How do I get to Help?................................................................................................................ |
|
5 |
Help Conventions ...................................................................................................................... |
|
5 |
Using Help ................................................................................................................................. |
|
5 |
Additional Information..................................................................................................................... |
|
6 |
Monitoring the System ......................................................................................................................... |
|
7 |
Accessing the eMerge Monitoring Functions ............................................................................ |
7 |
|
Monitoring the Activity Log ............................................................................................................ |
|
8 |
Filtering Activity Log Data ............................................................................................................ |
|
10 |
Navigating to a Person Record from the Activity Log ............................................................ |
11 |
|
About Activity Log Messages ................................................................................................. |
|
12 |
The Auto-Monitor Widget.............................................................................................................. |
|
13 |
Viewing Portal Status and Unlocking Portals ................................................................................ |
15 |
|
Using the Monitoring Desktop ....................................................................................................... |
|
19 |
Events Tab ............................................................................................................................... |
|
20 |
Activity Log Tab...................................................................................................................... |
|
20 |
Cameras Tab ............................................................................................................................ |
|
20 |
Camera Views Tab................................................................................................................... |
|
21 |
Camera Monitor Tab................................................................................................................ |
|
21 |
Portal Unlock Widget .............................................................................................................. |
|
22 |
Cameras Widget....................................................................................................................... |
|
22 |
Using the Widget Desktop.............................................................................................................. |
|
22 |
Summary of Available Widgets............................................................................................... |
|
25 |
The Clock Widget.................................................................................................................... |
|
25 |
The Explorer Widget................................................................................................................ |
|
26 |
The Intrusion Panel Widget ..................................................................................................... |
|
26 |
The Portal Status and Portal Unlock Widgets.......................................................................... |
28 |
|
The Statistics Block Widget..................................................................................................... |
|
29 |
The Status Widget.................................................................................................................... |
|
30 |
About Widget Properties.......................................................................................................... |
|
30 |
Moving, Sizing, Minimizing, and Closing Widgets ................................................................ |
31 |
|
Changing a Widget's Unique Properties .................................................................................. |
|
32 |
Changing a Widget's Filtering Properties ................................................................................ |
33 |
|
Summary of Available Filtering Properties ............................................................................. |
34 |
|
Monitor Menu Page........................................................................................................................ |
|
35 |
Monitoring Cameras ................................................................................................................ |
|
35 |
Monitoring Multi-Camera Views ............................................................................................ |
|
37 |
Administering the System .................................................................................................................. |
|
39 |
Administration Menu Page............................................................................................................. |
|
39 |
Arming and Disarming Alarm Panels ............................................................................................ |
|
40 |
Handling Lost Credentials.............................................................................................................. |
|
41 |
Handling Missing Credentials ........................................................................................................ |
|
42 |
233192 AX4 Linear LLC |
iii |
May 2014 |

Contents |
|
Adding People to the System ......................................................................................................... |
43 |
Changing Personal Information...................................................................................................... |
45 |
The Personal Information Page ...................................................................................................... |
47 |
Basic Information Section........................................................................................................ |
47 |
Personal Information Tabs....................................................................................................... |
48 |
Changing a Person's Access ........................................................................................................... |
50 |
Configuration Reports .................................................................................................................... |
54 |
As Built Report ........................................................................................................................ |
54 |
Cameras Report........................................................................................................................ |
54 |
Camera Presets Report............................................................................................................. |
54 |
Holidays Report ....................................................................................................................... |
54 |
Portals Report .......................................................................................................................... |
54 |
Portal Groups Report ............................................................................................................... |
54 |
Reader Groups Report.............................................................................................................. |
54 |
Resources Report ..................................................................................................................... |
55 |
Time Specs Report................................................................................................................... |
55 |
History Reports............................................................................................................................... |
55 |
Access History Reports............................................................................................................ |
55 |
General Event History Reports ................................................................................................ |
56 |
Portal Access Count Reports ................................................................................................... |
57 |
People Reports................................................................................................................................ |
58 |
Access Levels Report............................................................................................................... |
58 |
Current Users Report ............................................................................................................... |
59 |
Photo ID Gallery Report .......................................................................................................... |
59 |
Scheduling Actions for Inputs, Outputs, and Portals...................................................................... |
60 |
Backing Up the System Data.......................................................................................................... |
62 |
About Archive Files ....................................................................................................................... |
64 |
Index..................................................................................................................................................... |
65 |
233192 AX4 Linear LLC |
iv |
May 2014 |

Introduction
This guide is intended for users of the eMerge50P & eMerge5000P security management systems. It provides a printable version of the information that is found in the online help, featuring instruction for common monitoring and administration tasks.
eMerge is designed for non-security personnel to operate. The system is accessed through a web interface that supports common browsers (Internet Explorer versions 8 and 9, Mozilla Firefox versions 8 and 9, or Safari 5.0), and is even usable from mobile devices. eMerge integrates credential-based access control, intrusion detection, and video surveillance for a single facility, delivering a unified management and administration interface to your web browser.
The user-interface features a Home page that acts as a system dashboard. It includes User Tasks icons suitable for use with touch screens and mobile devices, so that everything you need to operate eMerge can start from that page.
Much of the system data is displayed in windows, referred to as widgets, which are in static formats on the Home page and Monitoring Desktop, and adjustable formats on the Widget Desktop.
There are three major user roles that can be assigned for eMerge users:
•Monitor – Users with this role can use all available monitoring functions.
•Administrator – Users with this role can use all available monitoring and administration functions.
•System Setup – Users with this role (typically your dealer or installer) can use all available monitoring, administration, and setup functions.
This user guide is divided into an introductory section for getting started with the system operation, followed by sections focused on the monitoring and administration tasks. The system setup tasks are covered in the eMerge online help.
If you view this guide as an online PDF file, you can click on a TOC entry, or a section reference (blue/underlined text) to go to the linked page. If you use this guide as a printed book, you can find the references by looking up the section titles, index entries, and page references.
This introductory section describes how to access information about using eMerge:
•Getting started
•Getting to the Home page
•Using the Help system
•Locating additional information and technical documentation
233192 AX4 Linear LLC |
1 |
May 2014 |

Introduction
Getting Started
The navigation bar that appears at the top of the application window is built dynamically for each user who logs in. It displays navigation buttons only for areas of the application you have permission to view or use. The buttons that are available if you have full System Setup access are:
Takes you to the Home page
-or-
Takes you to the Monitoring Desktop or Widget Desktop
Takes you to |
Takes you to |
the |
the Setup |
Administration |
menu page |
menu page |
|
Note: The live monitoring icon in the navigation bar can be selected using
System Setup : Site Configuration Wizard.
The following icons appear in the navigation menu below the navigation buttons:
•Back  takes you to the previous page in the navigation menu hierarchy.
Tip: Clicking the link for any page in the path shown to the right of the Back icon takes you back to that page.
•Info  takes you to the About page, where you can view backup and system information.
•Help  displays the online help in a separate window.
•Logout  logs you out of eMerge.
Note: When you are on a menu page (or any page that is not running a monitoring function), a period of inactivity (as defined by the Session Timeout setting under Setup : Site Settings : Network Controller) will cause your session to time out. You will need to log in again.
233192 AX4 Linear LLC |
2 |
May 2014 |

Introduction
The Home Page
The Home page is the first page you see after logging into eMerge. Click the Home page button in the navigation bar to return to this page from elsewhere in the application.
For users logged in with monitor level access, the Home page provides two navigation buttons in the navigation bar and one icon in the User Tasks widget.
For users logged in with administrator level access, the Home page provides three navigation buttons in the navigation bar and six icons in User Tasks widget.
233192 AX4 Linear LLC |
3 |
May 2014 |

Introduction
On the Home page you can:
•Use the Activity Log widget to view up to 1,000 of the most recent entries in the log of system activity.
For more information, see Monitoring the Activity Log on page 8.
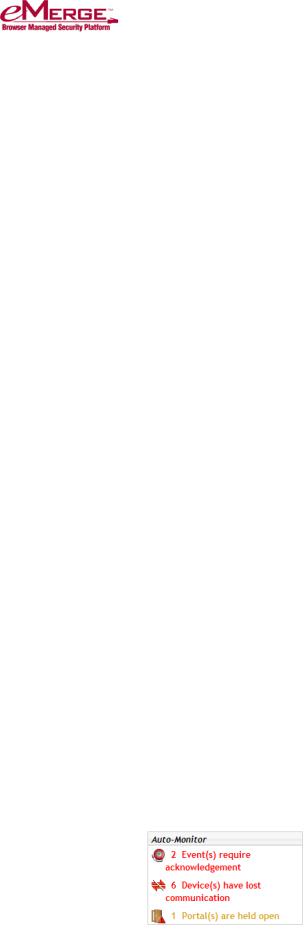
•Use the Auto-Monitor widget to view issues that might require attention.
This widget displays notifications of all currently active events of the following types: Unacknowledged Events, Node Communication Loss, Door Forced Open, and Door Held Open. It also displays all Access Denied events that have occurred within the last hour. Pointing to a notification displays an informational tooltip showing more detail about each event.
•Use the Video Stream widget to monitor a camera view.
The first camera in your system’s Camera Menu order will appear by default in this widget. If there are no camera definitions in the system, the Video Stream widget will not display a camera view.
Note: If the eMerge window is wide enough, the User Tasks widget moves to the upper right, providing room for a larger Video Stream widget.
•Use the User Tasks widget for direct access to common features (based on your login permissions).
Clicking the icon for a task takes you directly to the page for performing the task. For example, if you have Administrator access, clicking People Locator takes you to a page where you can run searches to find people in the system.
The User Tasks widget always includes either a Widget Desktop icon or
Monitoring Desktop icon.
Widget Desktop |
- or - |
Monitoring Desktop |
Note: The desktop icon you see in the User Tasks widget depends on whether the live monitoring button on the navigation bar is configured to display the Monitoring Desktop or the Widget Desktop. The User Tasks widget displays the icon for the other live monitoring desktop. This way, you always have direct access to both desktops through a single click on the Home page. The navigation bar live monitoring icon is configured in
System Setup : Site Configuration Wizard.
See also: Using the Monitoring Desktop on page 19
Using the Widget Desktop on page 22
The Auto-Monitor Widget on page 13
233192 AX4 Linear LLC |
4 |
May 2014 |

Introduction
Using Help
How do I get to Help?
Click the Help  icon in the upper right corner of the application window. The help system appears in a separate window.
The information displayed in the topic pane provides assistance with the task on which you are working.
Navigation Pane |
Topic Pane |
Help Conventions
The help system is context-sensitive. When you click Help from any page in the application:
•If a help topic is available for the current page, that topic appears in the help window.
•If no help topic is available for the current page, “The Home Page” topic appears in the help window.
To assist you in finding specific fields, buttons, and other elements in the eMerge Security Application, their names are displayed in bold blue within help topics.
Using Help
The help navigation pane appears on the left side of the help window.
•By clicking the Contents and Search buttons, you can switch between the help table of contents and the search feature:
• To hide the navigation pane, click the red close button |
. To show the pane |
again, click the Contents or Search button. |
|
•In the table of contents, click a book  to see its contents. Click an individual topic to display it in the topic pane.
233192 AX4 Linear LLC |
5 |
May 2014 |

Introduction
•To use the search feature, enter the word or words you want to find, and then
press ENTER or click  Go. To search for a phrase, enter it inside quotation marks.
If the Highlight search results check box is selected when you click a topic title in the search results, the words you entered will be highlighted in the topic pane.
You can also use the buttons displayed at the top of each help topic to navigate and print help topics:
•Back:  Brings you back to the previous topic.
•Index:  Displays the Index.
•Print:  Prints the current help topic.
Additional Information
The following technical information is available via links in the help topic
Release Notes and Additional Information, located in the “Getting Started” section of help:
Release Notes (PDF):
Release Notes, all builds
Top Questions for:
Installers
System Monitors and Administrators
Technical Guides and Notes (PDFs):
Installation, Setup, and Technical Documents
License Agreement:
End User License Agreement
233192 AX4 Linear LLC |
6 |
May 2014 |
Monitoring the System
This section describes how to access and use these monitoring functions:
•Using the Activity Log to monitor system activity
•Using the Auto-Monitor widget to view issues that require attention
•Viewing and managing portals
•Viewing system information using the Monitoring Desktop
•Viewing system information using the custom, real-time display on the Widget Desktop
•Viewing individual cameras and pre-defined groups of cameras
Accessing the eMerge Monitoring Functions
To open the Monitoring Desktop or the Widget Desktop from the Home page, click the icon in the User Tasks widget:
Widget Desktop - or - Monitoring Desktop
To access the live monitoring desktop not shown in the User Tasks widget, click the live monitoring button in the navigation bar:
Widget Desktop - or - Monitoring Desktop
Note: The desktop icon you see in the User Tasks widget depends on whether the live monitoring button on the navigation bar is configured to display the Monitoring Desktop or the Widget Desktop. The User Tasks widget displays the icon for the other live monitoring desktop. This way, you always have direct access to both desktops through a single click on the Home page. The navigation bar live monitoring icon is configured in
System Setup : Site Configuration Wizard.
233192 AX4 Linear LLC |
7 |
May 2014 |

Monitoring the System
Monitoring the Activity Log
There are four ways to view the Activity Log, described here.
To use the full page view:
•From the Monitoring Desktop, click the words Live Monitoring in the navigation menu, and then click the Activity Log link.
On this page you can monitor a full page view of the Activity Log, which displays up to 1,000 of the most recent entries in the log of system activity.
To use the Monitoring Desktop:
•On the Monitoring Desktop, click either of the Activity Log tabs.
233192 AX4 Linear LLC |
8 |
May 2014 |

Monitoring the System
To use the Widget Desktop:
•If the Activity Log widget is not already displayed, select it from the Desktop menu in the lower left corner of the page.
To use the Home page:
You can also view the Activity Log on the Home page.
The messages in the Activity Log are color coded: Red indicates a process failure or access control issue. Green indicates a successful process.
The color currently selected for Trace person log color on the Network Controller page indicates valid or invalid access attempts in the current partition by individuals whose activity is being traced.
Black is used for all other messages.
233192 AX4 Linear LLC |
9 |
May 2014 |

Monitoring the System
Filtering Activity Log Data
When viewing the Activity Log on the Home page, Monitoring Desktop, or Widget Desktop, you can filter the current list of log entries to narrow the data displayed.
Depending on how your Monitoring Desktop or Widget Desktop was configured, a Filter box may or may not be available on that Activity Log widget.
Note: Text filtering is not available on the full page view of the Activity Log.
There are two types of filters you can apply:
•Text filters: In Activity Log tabs and widgets (displayed on the Monitoring Desktop, Home page, and Widget Desktop), you can apply a text filter to view only entries from the original list that contain a specific text string.
•Category filters: In Activity Log tabs and widgets, and also in the full page view of the Activity Log, you can apply a category filter to view only entries from the original list that belong to a particular category.
You can also combine a text filter with a category filter. For example, suppose that after applying the text filter "Jean Gauthier," you apply the category filter Access Denied to the results. The new results will show only denied access requests for the cardholder Jean Gauthier.
Note: Your filter results will include only entries currently defined for the view of the Activity Log you are monitoring. For example, in an Activity Log widget that is configured to display only "Access denied" entries, applying the Access Granted category filter will return no results.
Applying Text Filters
To apply a text filter, enter the text you want in the Filter box that appears at the top of the Activity Log, as shown in the following figure. Filtering is not casesensitive; you can enter either uppercase or lowercase characters.
Filtering begins as you start to type. For the current monitoring session, the Activity Log will display only log entries containing the text you entered. For example, to see only entries containing the name “Jean Gauthier,” apply the filter shown below.
You can apply a different text filter by entering new text, and you can clear the text filter by clicking the Clear Filters  icon, entering a different text filter, or ending the current monitoring session
Applying Category Filters
To apply a category filter, you select an entry from the Category drop-down list in the upper right corner of the Activity Log. The results will include only entries
233192 AX4 Linear LLC |
10 |
May 2014 |

Monitoring the System
from the original list that belong to the selected category. The following categories are available:
•All (default): Select when you want to remove the currently applied category filter without applying a new one, and without removing the current text filter if one is applied. (Clicking the Clear Filters icon clears all category and text filters.)
•Access Control: Select to view only access control related entries, such as Access Denied, Access Granted, Forced Open, Relocked, Timed Unlock Expired, and Unlock entries.
•Alarms and Events: Select to view only alarm and event related entries, such as Alarm Acknowledged, Alarm Actions Cleared, Alarm Adopted, Alarm Panel Armed, Event Actions Cleared, Event Triggered, and Tamper Alarm entries.
•Threat Levels: Select to view only threat level related entries, such as Threat Level Set, Threat Level Set (ALM), and Threat Level Set (API) entries.
•System Administration: Select to view only system administration related entries, such as FTP Backup Complete, FTP Backup Failed, Log Archive Failed, Logged In, Logged Out, and System Backup Successful entries.
•Devices: Select to view only device related activity, such as Battery Failed, Blade Not Responding, Intrusion Panel Alarm, NAS Backup Complete, and Secondary System Restored events.
•Network Nodes: Select to view only Network Node related entries, such as Coproc Not Responding, NN Connected, NN Startup, and NN Timeout, entries.
•Access Granted: Select to view only entries for granted access requests.
•Access Denied: Select to view only entries for denied access requests.
Once you have applied a category filter, the filtered data will be displayed in the Activity Log until you click the Clear Filters  icon, select a different filter, or end the current monitoring session.
Navigating to a Person Record from the Activity Log
If you have the right to view a cardholder's person record, clicking that person's name within an Activity Log entry opens a window in which his or her person record is displayed. Any rights you have to view and edit information in a particular person record when accessed from the Administrator page will apply when you access the record from the Activity Log.
233192 AX4 Linear LLC |
11 |
May 2014 |

Monitoring the System
About Activity Log Messages
Activity Log entries contain message text and a number of variables, as described below.
Times
Each Activity Log message begins with the controller time—the time when the event was communicated to the Network Controller. Depending on how your system is configured, the controller time might be followed (in square brackets) by the time when the event actually occurred on the node.
Names
Specific names entered into the system during setup and configuration will be used in log entries in place of variables such as: <username>, <portalname>, <nodename>, <eventname>, and <alarmpanel>. This provides a strong reason for assigning names that are descriptive. The log will be much easier to understand.
Numbers
Specific numbers will be used in log entries in place of variables such as <ipaddress>, <slotnumber>, and <rev>.
Reset Types
Specific <reset_type> messages for the Network Node Ident log entry include:
•Power on reset - The node reset on power up.
•Watchdog timer reset – This occurs when the system takes too long to process an operation involving a node. It should restart and continue processing. If the problem persists, contact your dealer or installer.
•Normal reset - Physical reset by pushing the node reset button on the controller/node blade.
•Network loss - No reset has occurred. The node lost network connectivity but has now reconnected.
Reason Codes
Specific [<reasoncode>] messages for “Access denied” and “Access granted” log entries are listed below.
Note: In addition to “Access denied” and “Access granted” log entries, “Access not completed” entries will appear for access requests that are initiated but not completed. For example, if a user presents his or her credentials at a door but never opens the door, an “Access not completed” entry will appear in the Activity Log.
233192 AX4 Linear LLC |
12 |
May 2014 |
Monitoring the System
•[BIT MISMATCH] - The data format of this credential does not match any data format configured in the system. Clicking this message code opens the Card Decoder window.
•[DISABLED] - This credential has been disabled.
•[EXPIRED] - This credential has expired.
•[HOLIDAY] - A defined holiday does not allow access for this person at this time.
•[LOCATION] - This person's access level or the current threat level does not allow the use of this reader.
•[NO PIN] - No PIN was entered within the PIN entry timeout period set on the Network Controller page.
•[NOT IN NODE] - The node has no record of this credential and was unable to load it in time. The name of the person who owns the credential is displayed.
•[PIN] - The PIN entered is incorrect.
•[PASSBACK VIOLATION] - This credential was presented to enter a region where the cardholder is already known to be. (This is a subset of tailgate violations.)
•[TIME] - Time specs do not allow access for this person at this time.
•[UNKNOWN] - The data format of this credential is valid, but there is no record of the credential anywhere in the system. Clicking this message opens the Card Decoder window.
•[WRONG DAY] - Time specs or holiday definitions do not allow access for this person on this day.
Specific [<reasoncode>] messages for Access granted log entries include:
•[DURESS] – A cardholder presented his or her card and then entered a duress PIN (his or her assigned PIN, with the last digit incremented by 1) into the keypad. This resulted in an apparently normal access that was actually a duress access.
The Auto-Monitor Widget
The Auto-Monitor widget is displayed on the right side of the Home page. It may be displayed on the Widget Desktop, depending on how your current layout was configured. This widget provides a quick view of issues that might require attention, such as process failures or access control issues.
233192 AX4 Linear LLC |
13 |
May 2014 |

Monitoring the System
For each type of event that has occurred, the Auto-Monitor displays a notification indicating the number of such events that are currently active—or in the case of Recent Access Denied Activity notifications, the number that have occurred within a specific time period. Once an active event is resolved, the notification disappears.
You can point to a notification to display an informational tooltip. As shown in the example below, the tooltip shows details about each event, such as the date and time it occurred and the name of the affected device.
If the creator of the Widget Desktop layout has allowed the Auto-Monitor widget
to be configured, you can click this icon  in the widget's upper left corner to change its unique properties. You can then specify whether the tooltip is displayed to the left, right, above, or below the alert. The icon and font color displayed for a notification indicates the event type, as described in the following table.
|
Notification |
Color |
Meaning |
|
|
|
|
|
|
|
Unacknowledged Events |
Red |
One or more events requiring |
|
|
|
acknowledgement have not yet been |
|
|
|
|
|
|
|
|
|
|
acknowledged. |
|
|
|
|
|
|
|
Node Communication Loss |
Red |
One or more Network Nodes or MicroNodes |
|
|
|
have lost communication. |
|
|
|
|
|
|
|
|
|
|
|
|
|
Door Forced Open |
Red |
One or more portals are in the forced open |
|
|
|
state. |
|
|
|
|
|
|
|
|
|
|
|
|
|
Door Held Open |
Yellow |
One or more portals are in the held open |
|
|
|
state. |
|
|
|
|
|
|
|
|
|
|
|
|
233192 AX4 Linear LLC |
14 |
May 2014 |
|
|
Monitoring the System |
|
|
|
|
|
Notification |
Color |
Meaning |
|
|
|
|
|
Recent Access Denied Activity |
Yellow |
One or more Access Denied events have |
|
|
|
occurred. |
|
|
|
When the Auto-Monitor is viewed from the |
|
|
|
Home page, it displays all Access Denied |
|
|
|
activities that have occurred within the last |
|
|
|
hour. |
|
|
|
When the Auto-Monitor is viewed from the |
|
|
|
Widget Desktop, it displays all Invalid |
|
|
|
Access types configured for the Auto- |
|
|
|
Monitor widget that have occurred within the |
|
|
|
Invalid Access History time period |
|
|
|
configured for the widget. |
|
|
|
|
|
Viewing Portal Status and Unlocking Portals
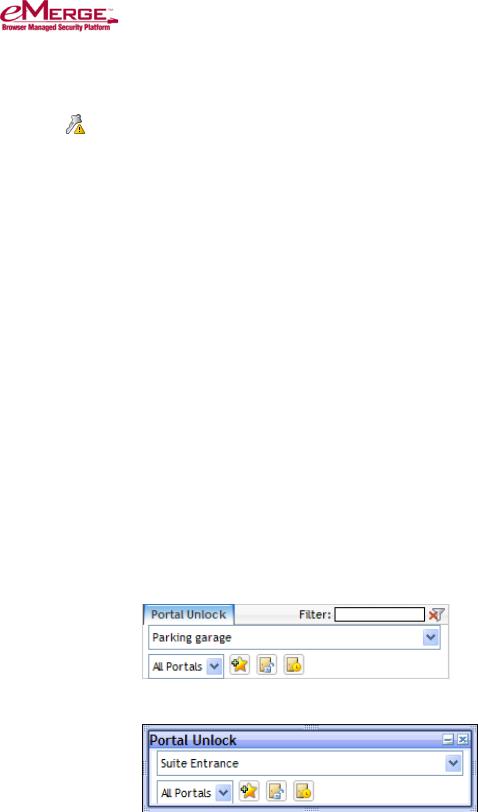
eMerge provides multiple ways to manage portals. You can use the Portal Unlock widget on the Monitoring Desktop, the Portal Unlock and/or Portal Status widgets on the Widget Desktop, or the Schedule Access link on the Administration menu page, to do the following:
•View the current status and unlock schedule of any portal.
•Perform a momentary or scheduled (or extended) unlock of any portal.
•Edit the unlock schedule of any portal.
•Secure a portal by switching it to a locked state, temporarily removing it from the automatic control of a portal group.
Figure 1. The Portal Unlock widget on the Monitoring Desktop
Figure 2. The Portal Unlock widget on the Widget Desktop
233192 AX4 Linear LLC |
15 |
May 2014 |

Monitoring the System
Figure 3. The Portal Status widget on the Widget Desktop
To momentarily unlock a portal:
1.Locate a portal:
o In the Portal Unlock widget, select one from the drop-down list.
Note: To make it easier to find portals, you can temporarily limit the number of portals that appear on the list by changing the All Portals setting to Favorites or Recent. For information on customizing the Portal
Unlock widget, see The Portal Status and Portal Unlock Widgets on page 28.
oIn the Portal Status widget or the table in Schedule Access, locate one in the Portal column.
2.Click the Unlock icon  or select Unlock from the drop-down. The portal will unlock for the duration configured for this portal.
To schedule an extended unlock of a portal:
1.Locate a portal:
o In the Portal Unlock widget, select one from the drop-down list.
Note: To make it easier to find portals, you can temporarily limit the
number of portals that appear on the list by changing the All Portals setting to Favorites or Recent. For information on customizing the Portal Unlock widget, see The Portal Status and Portal Unlock Widgets on page 28.
oIn the Portal Status widget or the table in Schedule Access, locate one in the Portal column.
2.Click the Schedule icon  to open the Schedule dialog box.
233192 AX4 Linear LLC |
16 |
May 2014 |
Monitoring the System
Note: You can also view scheduled events in the Portal Status widget.
3.To add a scheduled event, click the add button  to open the Scheduled Events dialog box.
4.Select Lock or Unlock from the Action drop-down list.
5.For the Uses Time setting:
o Select System Time for the time specifications to be based on the Network Controller time zone.
o Select Local Site Time for the time specifications to be based on local Network Node time zone.
6.To schedule the Start Time, select one of the following:
o Now: The action will start at the current date and time (filled in by default).
o At: (selected by default) The action will start at the date and time you enter.
233192 AX4 Linear LLC |
17 |
May 2014 |

Monitoring the System
oIn: The action will start once the number of specified hours and minutes have elapsed.
7.To schedule the End Time, select one of the following:
oAt: The action will end at the date and time you enter. Use the format shown for the Start Time.
oAfter: The action will end once the number of specified hours and minutes past the action’s start time have elapsed.
Note: Fields marked with an asterisk (*) are required.
8.In the Comment box, enter information you want to appear in the Scheduled Events table.
9.When you are finished, click OK to close the Scheduled Events dialog box.
For Example: Select Unlock and set the Start Time to Now. Set the End Time to After 1:30 (one hour and thirty minutes). Click OK. The portal will unlock immediately and stay unlocked for one hour and thirty minutes.
Note: You can use the delete button  to remove an event or the edit button
  to make changes.
To switch a portal to a locked or unlocked state:
1.Locate the portal:
o In the Portal Unlock widget, select one from the drop-down list.
Note: To make it easier to find portals, you can temporarily limit the number of portals that appear on the list by changing the All Portals setting to Favorites or Recent. For information on customizing the Portal Unlock widget, see The Portal Status and Portal Unlock
Widgets on page 28.
o In the Portal Status widget, locate one in the table.
2.To switch the portal to a locked state, click Lock Portal  . The portal locks immediately.
It will remain in a locked state until it is unlocked again – either manually via the Unlock Portal button or a double card read, or automatically when any new scheduled action for this portal becomes active or any portal group time spec change involving this portal occurs. Once the portal has been returned to automatic control by a time spec change, any suspended event action defined for the portal is resumed.
3.To switch the portal to an unlocked state, click Unlock Portal  . The portal unlocks immediately.
It will remain in an unlocked state until it is locked again – either manually via the Lock Portal button or a double card read, or automatically when any new scheduled action for this portal becomes active or any portal group time
233192 AX4 Linear LLC |
18 |
May 2014 |
Loading...