


KitchenAid KOSE900HSS00, KOSE900HBS00, KODE900HSS00, KODE900HBS00, KOCE900HSS02 Owner’s Manual
...BUILT-IN ELECTRIC OVENS
USER INSTRUCTIONS
THANK YOU for purchasing this high-quality product. Register your built-in oven at www.kitchenaid.com. In Canada, register your built-in oven at www.kitchenaid.ca.
For future reference, please make a note of your product model and serial numbers. They can be found on the label located on the bottom edge of the control panel, right hand side.
Model Number__________________________________________ |
Serial Number___________________________________________ |
Para una versión de estas instrucciones en español, visite www.kitchenaid.com.
Deberá tener a mano el número de modelo y de serie, que están ubicados en el marco del horno, detrás del lado derecho superior de la puerta del horno.
Table of Contents |
|
BUILT-IN OVEN SAFETY................................................................. |
2 |
PARTS AND FEATURES................................................................. |
3 |
Control Panel................................................................................ |
4 |
Welcome Guide............................................................................ |
5 |
Display Screens............................................................................ |
5 |
Cooking Modes............................................................................ |
7 |
Kitchen Timer................................................................................ |
8 |
Tones/Sounds............................................................................... |
8 |
Control Lock................................................................................. |
8 |
Settings......................................................................................... |
9 |
OVEN USE..................................................................................... |
10 |
Wi-Fi Connectivity....................................................................... |
10 |
Sabbath Bake............................................................................. |
10 |
Aluminum Foil............................................................................. |
11 |
Oven Racks................................................................................. |
11 |
Rack and Bakeware Positions.................................................... |
11 |
SatinGlide™ Roll-Out Extension Racks..................................... |
12 |
Bakeware.................................................................................... |
12 |
Oven Vent(s)................................................................................ |
13 |
Preheating and Oven Temperature............................................. |
13 |
Baking and Roasting.................................................................. |
13 |
Broiling........................................................................................ |
13 |
Cook’s Assistant Option............................................................. |
14 |
Convection.................................................................................. |
14 |
Proofing Bread............................................................................ |
14 |
Temperature Probe..................................................................... |
14 |
Recipe Guide Mode.................................................................... |
15 |
Smart Oven+ Powered Attachments......................................... |
15 |
Favorites..................................................................................... |
15 |
Cook Time................................................................................... |
15 |
OVEN CARE................................................................................... |
17 |
Self-Cleaning Cycle.................................................................... |
17 |
General Cleaning........................................................................ |
18 |
Oven Lights................................................................................. |
18 |
Oven Door................................................................................... |
19 |
TROUBLESHOOTING................................................................... |
21 |
ACCESSORIES.............................................................................. |
22 |
WARRANTY................................................................................... |
23 |
W10903389C
BUILT-IN OVEN SAFETY
Your safety and the safety of others are very important.
We have provided many important safety messages in this manual and on your appliance. Always read and obey all safety messages.
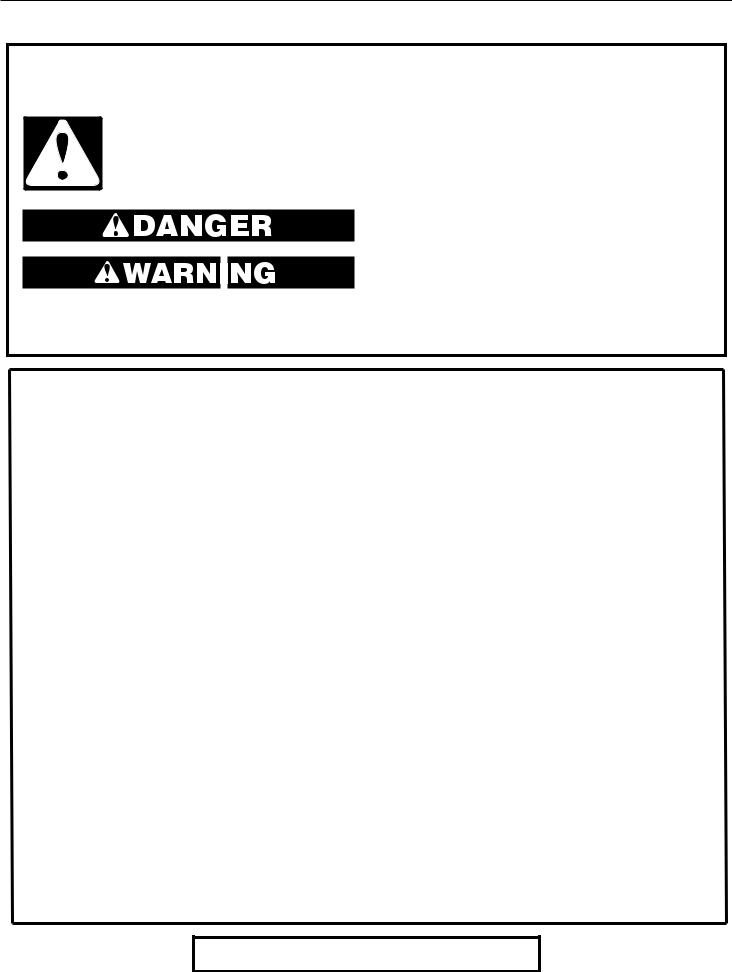
This is the safety alert symbol.
This symbol alerts you to potential hazards that can kill or hurt you and others.
All safety messages will follow the safety alert symbol and either the word “DANGER” or “WARNING.” These words mean:
You can be killed or seriously injured if you don't immediately follow instructions.
You can be killed or seriously injured if you don't follow instructions.
All safety messages will tell you what the potential hazard is, tell you how to reduce the chance of injury, and tell you what can happen if the instructions are not followed.
IMPORTANT SAFETY INSTRUCTIONS
WARNING: To reduce the risk of fire, electrical shock, injury to persons, or damage when using the oven, follow basic precautions, including the following:
■Proper Installation – Be sure the oven is properly installed and grounded by a qualified technician.
■Never Use the Oven for Warming or Heating the Room.
■Do Not Leave Children Alone – Children should not be left alone or unattended in area where oven is in use. They should never be allowed to sit or stand on any part of the oven.
■Wear Proper Apparel – Loose-fitting or hanging garments should never be worn while using the oven.
■User Servicing – Do not repair or replace any part of the oven unless specifically recommended in the manual. All other servicing should be referred to a qualified technician.
■Storage in Oven – Flammable materials should not be stored in an oven.
■Do Not Use Water on Grease Fires – Smother fire or flame or use dry chemical or foam-type extinguisher.
■Use Only Dry Potholders – Moist or damp potholders on hot surfaces may result in burns from steam. Do not let potholder touch hot heating elements. Do not use a towel or other bulky cloth.
■Use Care When Opening Door – Let hot air or steam escape before removing or replacing food.
■Do Not Heat Unopened Food Containers – Build-up of pressure may cause container to burst and result in injury.
■Keep Oven Vent Ducts Unobstructed.
■Placement of Oven Racks – Always place oven racks in desired location while oven is cool. If rack must be moved while oven is hot, do not let potholder contact hot heating element in oven.
■DO NOT TOUCH HEATING ELEMENTS OR INTERIOR SURFACES OF OVEN – Heating elements may be hot even though they are dark in color. Interior surfaces of an oven become hot enough to cause burns. During and after use, do not touch, or let clothing or other flammable materials contact heating elements or interior surfaces of oven until they have had sufficient time to cool. Other surfaces of the oven may become hot enough to cause burns – among these surfaces are oven vent openings and surfaces near these openings, oven doors, and windows of oven doors.
For self-cleaning ovens:
■Do Not Clean Gasket – The gasket is essential for a good seal. Care should be taken not to rub, damage, or move the gasket.
■Do Not Use Oven Cleaners – No commercial oven cleaner or oven liner protective coating of any kind should be used in or around any part of the oven.
■Clean Only Parts Listed in Manual.
■Before Self-Cleaning the Oven – Remove broiler pan and other utensils.
For smart enabled ovens:
■Remote Operation – This appliance is configurable to allow remote operation at any time. Do not store any flammable materials or temperature sensitive items inside of the appliance.
SAVE THESE INSTRUCTIONS
This device complies with Part 18 of the FCC Rules.
2

PARTS AND FEATURES
This manual covers different models. The oven you have purchased may have some or all of the items listed. The locations and appearances of the features shown here may not match those of your model.
A |
B,C |
|
D |
M |
E |
|
|
L |
F |
K |
|
|
G |
|
H |
J |
|
I
A.Electronic oven control
B.Automatic oven light switch
C.Oven door lock latch
D.Model and serial number plate (on bottom edge of control panel, right hand side)
E.Temperature probe jack (oven with convection element and fan only)
F.Oven lights
G.Gasket
H.Powered Attachment Hub
I.Lower oven (on double oven models)
J.Hidden bake element (hidden beneath floor panel)
K.Convection element and fan (in back panel)
L.Broil elements (not shown)
M.Oven vent
Parts and Features not shown
Temperature probe Condensation tray Oven racks
NOTE: The upper cavity of the double oven shown is the same for single oven models and the lower oven on combo oven models.
Racks and Accessories
|
|
|
|
|
|
|
|
|
|
|
|
|
|
|
|
|
|
|
|
|
|
|
|
|
|
|
|
|
|
|
|
|
|
|
|
|
|
|
|
|
|
|
|
|
|
|
|
|
|
|
|
|
|
|
|
|
|
|
|
|
|
|
|
|
|
|
|
SatinGlide™ Roll-out |
|
|
|
|
|
|
SatinGlide™ Roll-Out Extension |
||||
|
|
Standard Flat Rack |
|
|
|
|
|
|
|
Temperature Probe |
|
|
Rack for Smart Oven+ |
||||||
|
|
|
|
|
|
|
Extension Rack |
|
|
|
|
||||||||
|
|
|
|
|
|
|
|
|
|
|
|
|
|
|
|
Attachments |
|||
|
|
|
|
|
|
|
|
|
|
|
|
|
|
|
|
|
|||
|
|
|
|
|
|
|
|
|
|
|
|
|
|
|
|
|
|
|
|
|
|
|
|
|
|
|
|
|
|
|
|
|
|
|
|
|
|
|
|
|
|
|
|
|
|
|
|
|
|
|
|
|
|
|
|
|
|
|
|
|
|
|
|
|
|
|
|
|
|
|
|
|
|
|
|
|
|
|
|
|
|
|
|
|
|
|
|
|
|
|
|
|
|
|
|
|
|
|
|
|
|
|
|
|
|
|
|
|
|
|
|
|
|
|
|
|
|
|
|
|
|
|
|
|
|
|
|
|
|
|
|
|
|
|
|
|
|
|
|
|
|
|
|
|
|
|
|
|
|
|
|
|
|
|
|
|
|
|
|
|
|
|
|
|
|
|
|
|
|
|
|
|
|
|
|
|
|
|
|
|
|
|
|
|
|
|
|
|
|
|
|
|
|
|
|
|
|
|
|
|
|
|
|
|
|
|
|
|
|
|
|
|
|
|
|
|
|
|
|
+Powered Attachment Base Pan |
Smart Oven+ Powered Baking |
Smart Oven+ Powered Grill |
Smart Oven+ Powered Steamer |
and Heating Element |
Stone Attachment* |
Attachment |
Attachment* |
*NOTE: The +Steamer Attachment and the +Baking Stone Attachment are not shipped with the product. Please register your oven online at www.kitchenaid.com in the U.S.A. or www.kitchenaid.ca in Canada to receive your +Steamer Attachment and +Baking Stone Attachment included in your purchase.
3
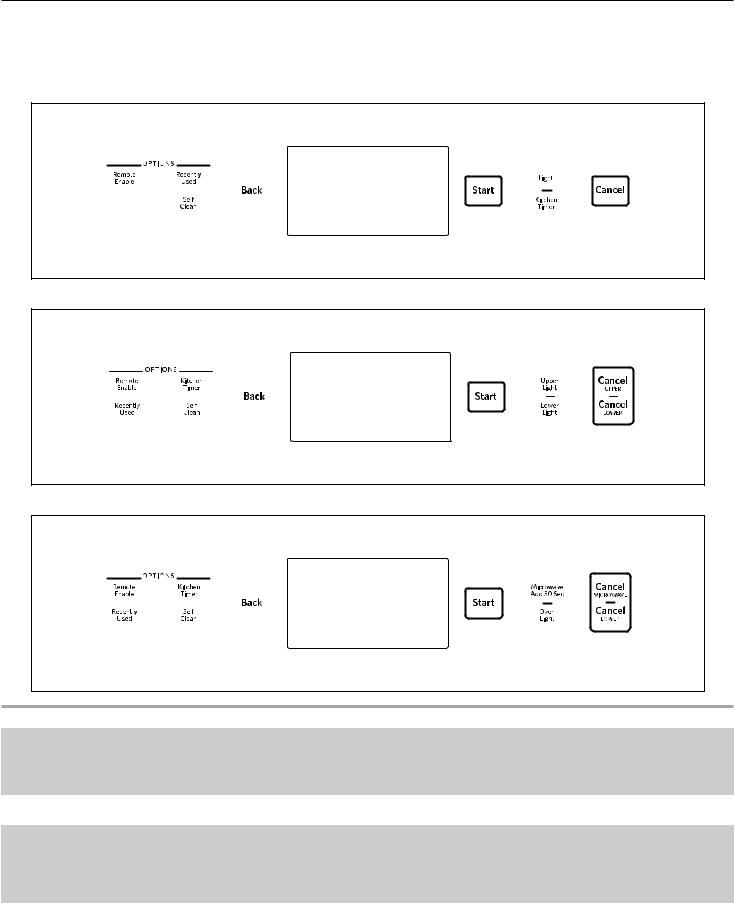
Control Panel
This manual covers several models. Your model may have some or all of the items listed. Refer to this manual or the Frequently Asked Questions (FAQs) section of our website at www.kitchenaid.com for more detailed instructions. In Canada, refer to the Service and Support section at www.kitchenaid.ca.
Single Oven
Double Oven
Combo Oven
Keypad |
Feature |
Instructions |
|
|
|
LIGHT |
Oven cavity light |
The Light keypads control their respective oven light. While the oven door is closed, touch |
UPPER LIGHT |
|
UPPER LIGHT or LOWER LIGHT to turn the desired light on and off. When the oven door |
|
is opened, the oven light will automatically come on. |
|
LOWER LIGHT |
|
|
|
|
|
OVEN LIGHT |
|
|
START |
Function start |
The Start keypad begins any oven function. If Start is not touched within 5 minutes after |
|
|
touching a keypad, the function is canceled and the time of day is displayed. |
CANCEL |
Function cancel |
The Cancel keypads stop any function for the appropriate oven except the Clock and |
CANCEL UPPER |
|
Timer. |
CANCEL LOWER |
|
|
CANCEL |
|
|
MICROWAVE |
|
|
BACK |
Go back a screen |
The Back keypad will cancel current changes and go back one screen every time it is |
|
|
pressed. |
4
Keypad |
Feature |
Instructions |
|||
|
|
|
|
|
|
KITCHEN TIMER |
Kitchen timer |
The Kitchen Timer keypad will set a timer that is independent of oven functions. The |
|||
|
|
kitchen timer can be set in hours, minutes, and seconds, up to 99 hours. |
|||
|
|
NOTE: The kitchen timer does not start or stop the oven. |
|||
RECENTLY |
Recall function |
The Recently Used keypad allows you to quickly select a recent cycle. |
|||
USED |
|
1. |
Touch RECENTLY USED. |
||
|
|
||||
|
|
2. |
Select the desired oven cavity. |
||
|
|
3. |
Select the desired recent cooking mode from the available list. |
||
|
|
|
NOTE: If no cooking modes have been used, there will not be any options. |
||
REMOTE |
Enable remote |
Press REMOTE ENABLE to enable the ability to use the KitchenAid® app. If Wi-Fi is not |
|||
ENABLE |
app control |
already enabled, the oven will attempt to connect to a local network. |
|||
SELF CLEAN |
Self-Cleaning |
Touch SELF CLEAN and follow the on-screen prompts to set the self-cleaning cycle. See |
|||
|
|
the “Self-Cleaning Cycle” section for more information. |
|||
|
|
|
|
|
|
Welcome Guide
The Welcome Guide allows you to set up your new oven. This appears on your display the first time the oven is powered up or after resetting the oven to factory defaults.
After every selection, a tone will sound. Touch BACK at any time to return to the previous screen.
1.Select your language and touch OK.
2.To connect the oven to the mobile app, touch YES
OR
touch NOT NOW to skip this step and complete setup. Go to Step 7.
3.Select CONNECT to automatically connect the oven to the mobile app. Download the KitchenAid app, signup and select “Add Appliance” in the app. Follow the instructions in the app to scan the QR code from the appliance screen.
4.To manually connect the oven to the KitchenAid app, select your home network from the list, touch ADD A NETWORK to manually enter your home network, or touch CONNECT WITH WPS to connect to your network via WPS.
If prompted, enter your Wi-Fi password.
5.A message will appear when the oven has successfully connected to the Wi-Fi network. Touch OK.
6.Touch OFF and then touch OK to set the time and date manually
OR
touch ON and then touch OK to set the clock automatically via the Wi-Fi network. Go to Step 9.
7.Touch the number keypads to set the time of day. Select AM, PM, or 24-HOUR. Touch OK.
8.Select if Daylight Savings Time is active. Touch OK.
9.Select the format for displaying the date. Touch OK.
10.Touch the number keypads to set the current date. Touch OK.
11.Select if you want to show the clock when the oven is idle.
12.Touch DONE.
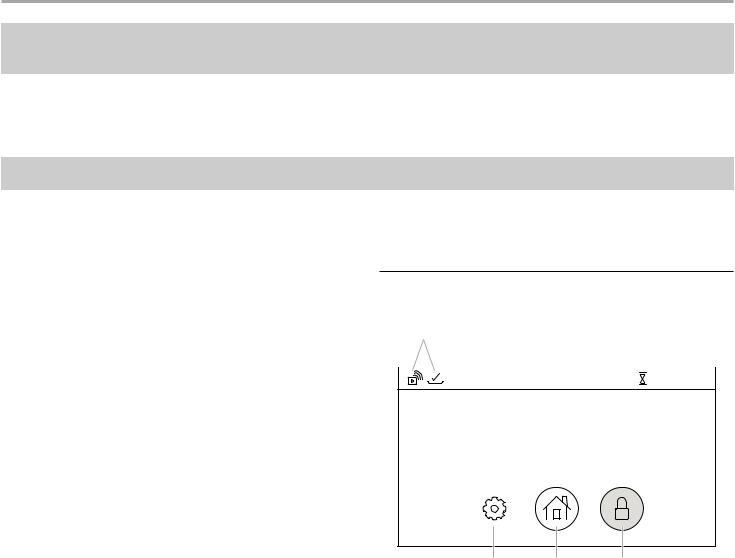
Display Screens
Clock Screen
The Clock screen displays the time and date when the oven is not in use.
A B C
|
|
|
|
|
|
|
|
Oven is cooling down... |
1 :3 0 :0 0 |
||
T U E S , AU G 2 8
12:00
F |
E |
D |
A. Status icons |
|
D. Control lock |
B. Status bar |
|
E. Home menu |
C. Kitchen timer |
|
F. Settings menu |
Control Lock
Touch and hold to lock the control. Only the Control Lock icon will respond when the control is locked.
Home Menu
Touch to set an oven function or access Recipe Guide mode.
Kitchen Timer
Shows the current kitchen timer. Touch to set or modify the kitchen timer.
Settings Menu
Touch to access oven settings and information.
Status Bar
Displays current oven status, such as Demo mode or Locked.
5
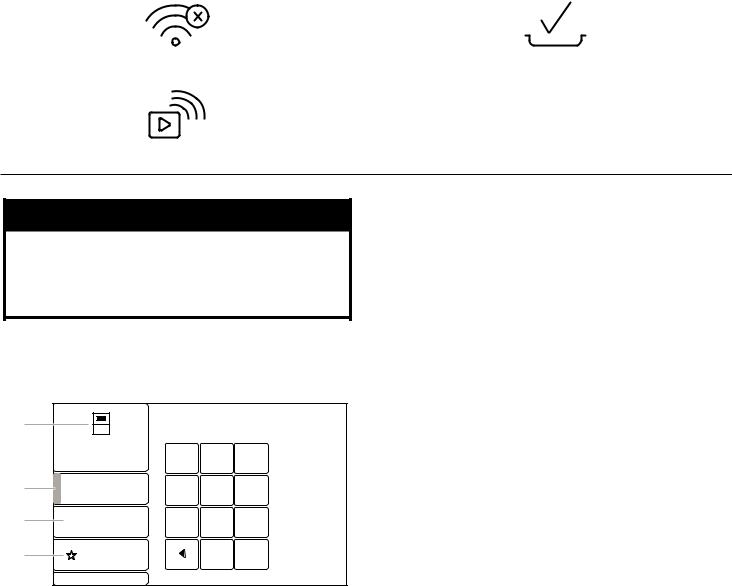
Status Icons
Indicates a problem with the wireless connection.
Indicates Remote Enable is active.
Indicates +Powered Attachments are connected to the oven.
Function Set Screen
 WARNING
Food Poisoning Hazard
Do not let food sit in oven more than one hour before or after cooking.
Doing so can result in food poisoning or sickness.
After selecting an oven function, the Function Set screens have a variety of options to customize the cycle. Not all options are available on all oven functions. Options may change with oven updates. Touch the option in the menu on the left to change the setting.
Rapid Preheat
Touch to select Rapid Preheat. This feature should be used only with one oven rack.
Target temperature set
For Temperature Probe cooking: Touch to set a target temperature for the temperature probe. The oven will turn off when the set temperature is reached.
Mode Selection
For Temperature Probe cooking: Touch to select which cooking method will be used.
Cook Time Set (optional)
Touch to set a length of time for the function to run.
A |
|
|
|
B A K E |
|
B |
350o |
|
TEMPERATURE |
||
|
||
C |
--:-- |
|
|
HR:MIN |
|
D |
E FAVORITE |
S E T R E C I P E T E M P
( 1 7 0o - 5 5 0o )
1 2 3
4 5 6
7 8 9
0 CLEAR
When Timer Ends (optional)
Available if a Cook Time is set. Touch to change what the oven does when the set cook time ends.
■■ Hold Temperature: The oven temperature stays at the set temperature after the cook time ends.
■■ Turn Off: The oven turns off when the set cook time ends.
■■ Keep Warm: The oven temperature is reduced to 170°F (77°C) after the set cook time ends.
Add Delay (optional)
Available if a Cook Time is set. Touch to set what time of day the oven begins to preheat. Requires the Clock to be set correctly.
A. Function |
Not shown: |
B. Oven temperature set |
Cook’s Assistant Mode |
C. Cook time set |
Doneness |
D. Favorite |
Flip Reminder |
|
When Timer Ends |
|
Add Delay |
|
Rapid Preheat |
|
Mode Selection |
|
Target temperature set |
|
Grill temperature set |
Function
Shows the current oven function and selected oven cavity.
Favorite (optional)
Touch to set the selected settings as a Favorite function. Touch again to unfavorite. Favorite oven settings can be accessed from the Home menu.
Doneness
Touch to set the desired doneness of the food type.
Flip Reminder
Touch to set the flip reminder on or off.
Grill Temperature Set
Cook’s Assistant Mode |
Touch to select the heat level of the grill. |
Set to Auto to use the Cook’s Assistant. Set to Manual to set the |
|
time and temperature manually. |
|
Oven temperature set |
|
Touch to set the oven temperature. The allowed range will be |
|
displayed. |
|
6
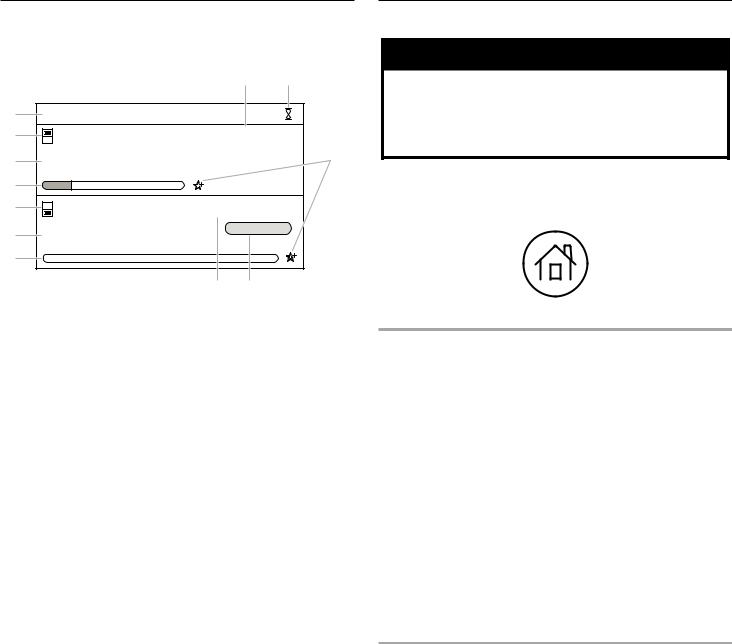
Status Screen
While the oven is in use, the display will show a timeline with information about the current oven function(s). If one of the cavities is not in use, a button to use that cavity will appear.
|
|
|
|
|
H |
I |
G |
1 1 :0 0 A M |
|
|
|
|
|
F |
350 |
O |
|
01:15:00 |
||
|
|
|||||
|
|
|
||||
E |
CO N V E C T R O A S T |
|
|
J |
||
Cooking |
|
|
|
|
||
|
|
E |
|
|
|
|
D |
|
|
Ready at 12:15 PM |
|||
C |
|
O |
O |
00:30:00 |
||
340 /350 |
|
|||||
|
|
|||||
B |
B A K E |
|
|
|
START TIMER |
|
Preheating |
|
|
|
|
||
|
|
|
|
E |
||
A |
|
|
|
|
|
|
|
|
|
|
|
|
|
|
|
|
|
L |
K |
|
A. Oven timeline - lower |
G. Time of day |
|
B. Oven function - lower |
H. Oven timer - upper |
|
C. Oven temperature - lower |
I. |
Kitchen timer |
D. Oven timeline - upper |
J. |
Favorite |
E. Oven function - upper |
K. |
Start timer - lower |
F. Oven temperature - upper |
L. |
Oven timer - lower |
Favorite
Tap the star to add the current cook settings as a favorite.
Kitchen timer
Touch to set a kitchen timer or modify an existing one.
Oven function
Shows the current oven function for the indicated cavity.
Oven temperature
Shows the current oven temperature for the indicated cavity.
Oven timeline
Shows where the oven is in the cooking process and when it will finish. If a cook time has not been set, Set Timer appears to set a cook time if desired.
Oven timer
Shows the remaining cook time (if set).
Start timer
If a delay has been set, this appears. Touch START TIMER to immediately begin the set cook time.
Time of day
Shows the current time of day.
Cooking Modes
 WARNING
Food Poisoning Hazard
Do not let food sit in oven more than one hour before or after cooking.
Doing so can result in food poisoning or sickness.
The oven has a variety of cooking modes to achieve the best results every time. The cooking modes can be accessed by touching the Home icon and then selecting the desired oven or a previously saved Favorite recipe.
All Ovens
Cooking Mode |
Best for |
|
|
Bake |
Foods that start out wet or not-solid (like |
|
batter), then firm up and gain structure or rise |
|
as they cook (like cakes or casseroles) |
|
|
Broil |
Thin or small cuts of meats or poultry |
|
|
Proof |
Dough that needs to rise |
|
|
Convect Bake |
Foods with flaky and dry crusts with moist |
|
interiors (like pastries, pies, or breads) |
|
|
Convect Roast |
Large foods that should be browned on the |
|
outside but moist inside (like whole poultry or |
|
roasts) |
|
|
Convect Broil |
Tender or uneven cuts of meats or poultry |
|
|
Probe Cook |
Foods that need to be cooked to a specific |
|
internal temperature (like meats, poultry, or |
|
casseroles with liquid) |
|
|
Keep Warm |
Allows hot cooked foods to stay at serving |
|
temperature. |
Powered Attachments Oven Only
Cooking Mode |
Best for |
|
|
Grill |
Foods that can be cooked on a grill (like |
|
hamburger patties or steaks) |
|
|
Stone Bake |
Foods that should have a crisp crust (like |
|
pizza or bread) |
Steam |
Concentrated steaming of food (like fish or |
|
vegetables) |
|
|
Steam Assist |
Whole-oven steaming for crustier breads |
|
|
Recipe Guide |
Specific cooking programs for best results. |
Mode |
See the “Recipe Guide Mode” section for |
|
more information. |
7

Kitchen Timer
The Kitchen Timer keypad will set a timer that is independent of oven functions. The Kitchen Timer can be set in hours, minutes, and seconds, up to 99 hours.
NOTE: The Kitchen Timer does not start or stop the oven.
1.Touch KITCHEN TIMER.
2.Touch HR:MIN or MIN:SEC.
3.Touch the number keypads to set the length of time.
NOTE: Touching HR:MIN or MIN:SEC after the time has been entered will clear the timer.
4.Touch the Start button on the display to start the kitchen timer.
5.To change the Kitchen Timer while it is running, touch KITCHEN TIMER or touch the timer countdown in the status bar, touch the number keypads to set the new length of time, and then touch UPDATE.
6.A sound will play when the set time ends, and a drop-down notification will appear. Touch OK to dismiss the notification.
7.Touch BACK while setting the kitchen timer to cancel the kitchen timer.
To cancel a running timer, touch KITCHEN TIMER and then the Cancel button on the display. If a Cancel keypad is touched, the respective oven will turn off.
Tones/Sounds
Tones are audible signals, indicating the following: ■■ Valid keypad touch
■■ Function has been entered. ■■ Oven is preheated.
■■ Invalid keypad touch ■■ End of a cooking cycle
■■ When timer reaches zero
Includes using the Kitchen Timer for functions other than cooking.
■■ +Powered attachments connected ■■ +Powered attachments disconnected ■■ Control is locked
■■ Control is unlocked
Control Lock
The Control Lock shuts down the control panel keypads to avoid unintended use of the oven(s). The Control Lock will remain set after a power failure if it was set before the power failure occurs. When the control is locked, only the Control Lock keypad will function.
The Control Lock is preset unlocked but can be locked.
To Activate the Control Lock:
1.Touch and hold the Control Lock icon.
2.A countdown will appear in the gray Status bar at the top of the screen. The Control Lock icon will turn red and the Status bar will display “LOCKED” when the control is locked.
To Deactivate the Control Lock:
1.Touch and hold the Control Lock icon.
2.A countdown will appear in the gray Status bar at the top of the screen. The Control Lock icon will no longer be red and the Status bar will be blank when the control is unlocked
8
 Loading...