


KDC-C510FM
CD AUTOCHANGER / CONTROLLER / FM MODULATOR SYSTEM
INSTRUCTION MANUAL
Take the time to read through this instruction manual. Familiarity with installation and operation procedures will help you obtain the best performance from your new compact disc auto changer.
For your records
Record the serial number, found on the back of the unit, in the spaces designated on the warranty card, and in the space provided below. Refer to the model and serial numbers whenever you call upon your KENWOOD dealer for information or service on the product.
Model KDC-C510FM Serial number
©PRINTED IN JAPAN |
B64-1098-00 (K,E)(MC) |
98/12 11 10 9 8 7 6 5 4 3 2 1 |
‘97/12 |
Contents |
|
Before use |
|
Warning ............................................................................................................ |
3 |
Safety precautions ........................................................................................... |
4 |
Handling compact discs .................................................................................. |
6 |
Features ............................................................................................................ |
7 |
Loading compact discs .................................................................................... |
8 |
Disc changer control features |
|
CD play with CD auto-changer...................................................................... |
10 |
Track/Disc search ........................................................................................... |
11 |
Direct track/disc search.................................................................................. |
12 |
Track repeat .................................................................................................... |
13 |
Disc repeat ...................................................................................................... |
14 |
Track scan ....................................................................................................... |
15 |
Disc scan ......................................................................................................... |
16 |
Disc random play ........................................................................................... |
17 |
Magazine random play .................................................................................. |
18 |
Installation |
|
Changing the transmission frequency ......................................................... |
19 |
Modulation level/Dynamic control ............................................................... |
20 |
Installation procedure.................................................................................... |
21 |
Connections.................................................................................................... |
22 |
Installation ...................................................................................................... |
23 |
Troubleshooting guide................................................................. |
27 |
Specifications ............................................................................... |
29 |
2
Warning
2CAUTION
Use of controls or adjustments or performance of procedures other than those specified herein may result in hazardous radiation exposure.
In compliance with Federal Regulations, following are reproductions of labels on, or inside the product relating to laser product safety.
KENWOOD CORPORATION 2967-3, ISHIKAWA-CHO, HACHIOJI-SHI
TOKYO, JAPAN
KENWOOD CORP. CERTIFIES THIS EQUIPMENT CONFORMS TO DHHS REGULATIONS N0.21 CFR 1040. 10, CHAPTER I, SUBCHAPTER J.
Location : Rear Panel
FCC WARNING
This equipment may generate or use radio frequency energy. Changes or modifications to this equipment may cause harmful interference unless the modifications are expressly approved in the instruction manual. The user could lose the authority to operate this equipment if an unauthorized change or modification is made.
NOTE |
|
|
This equipment has been tested and found |
Before |
|
|
||
to comply with the limits for a Class B |
|
|
digital device, pursuant to Part 15 of the |
|
|
FCC Rules. These limits are designed to |
use |
|
provide reasonable protection against |
||
harmful interference in a residential |
||
installation. This equipment may cause |
|
|
harmful interference to radio |
|
|
communications, if it is not installed and |
|
|
used in accordance with the instructions. |
|
|
However, there is no guarantee that |
|
|
interference will not occur in a particular |
|
|
installation. If this equipment does cause |
|
|
harmful interference to radio or television |
|
|
reception, which can be determined by |
|
|
turning the equipment off and on, the user |
|
|
is encouraged to try to correct the |
|
|
interference by one or more of the |
|
|
following measures: |
|
|
•Reorient or relocate the receiving antenna.
•Increase the separation between the equipment and receiver.
•Connect the equipment into an outlet on a circuit different from that to which the receiver is connected.
•Consult the dealer or an experienced radio/TV technician for help.
NOTE
This Class B digital apparatus meets all requirements of the Canadian interference-Causing Equipment Regulations.
3
Safety precautions
use |
2WARNING |
|
||
Take the following precautions to |
||||
|
||||
Before |
prevent fire and avoid personal injury : |
|||
• When extending the ignition cable, |
||||
|
||||
|
battery cable, or ground cable, use |
|||
|
0.75mm2 (AWG18) or larger automotive |
|||
|
grade cable to avoid cable deterioration |
|||
|
or damage to the covering. |
|||
|
• Check that no metal objects (coins, |
|||
|
tools, etc.) are left inside the unit to |
|||
|
avoid short circuits. |
|||
|
• If you smell or see smoke, turn the |
|||
|
power off immediately and consult your |
|||
|
Kenwood dealer. |
|||
|
• Do not touch the liquid crystal fluid if the |
|||
|
LCD is damaged or broken due to shock. |
|||
|
The liquid crystal fluid may be dangerous |
|||
|
to your health or even fatal. |
|||
|
If the liquid crystal fluid from the LCD |
|||
|
contacts your body or clothing, wash it |
|||
|
off with soap immediately. |
|||
|
|
|
|
|
|
2CAUTION |
|||
|
Take the following precautions to keep |
|||
|
the unit in proper working order. |
|||
|
• Be sure the unit is connected to a 12V |
|||
|
DC power supply with a negative ground |
|||
|
connection. |
|||
|
• Do not open the top or bottom cover. |
|||
|
• Do not install the unit in places it is |
|||
|
exposed to direct sunlight, high heat or |
|||
|
humidity, water may splash over it, or |
|||
|
dust exists. |
|||
|
• When replacing a fuse, only use a new |
|||
|
one with the prescribed rating. Using a |
|||
|
fuse with the wrong rating may cause |
|||
|
your unit to malfunction. on hot places |
|||
|
such as above the dashboard. |
|||
NOTE
•If you have difficulty in installing this unit in your vehicle, contact your Kenwood dealer.
•If it doesn’t seem to be working properly, first press the Reset button. If the malfunction persists, consult your Kenwood dealer.
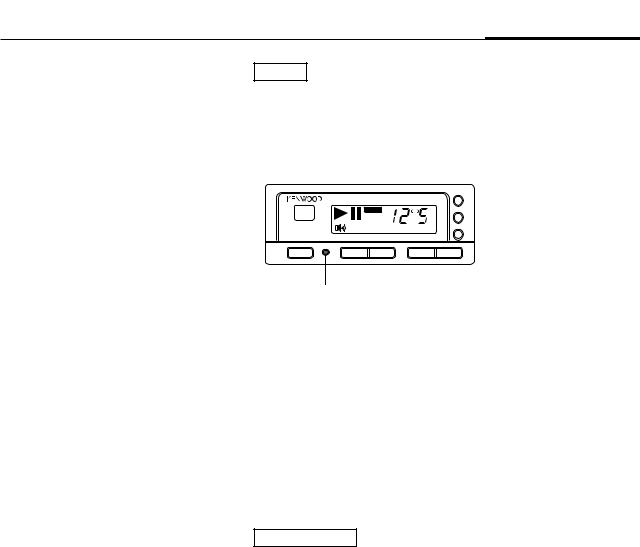
REP
C D A U T O C H A N G E R C O N T R O L L E R |
|
|
T R A C K |
DISC |
RDM |
' |
M . R D M |
D . R E P D . S C N |
M H z |
3 |
/ 8 |
|
T R A C K |
D I S C |
|
|
|
PWR |
4 |
¢ - |
|
+ |
|
Reset button
•Some car stereos cause the sound of the tuner to make for a moment when an engine is activated.
•The reception of the tuner may be reduced a little if the KDC-C510FM is used.
•If the sound is lower than the tuner sound, raise up the volume level of the CD with using the receiver.
Cleaning the unit
•If the front panel is dirty, wipe it clean with a silicon cloth or soft dry cloth with the power off.
2CAUTION
Do not use hard cloths or paint thinner, alcohol, or other volatile solvents. These may damage external surfaces or remove indicator characters.
4
Lens fogging
In cold climates, there may be a period after you turn on your vehicle’s heater when the lens that guides the laser beam used in your CD player fogs up. If this happens, you cannot play compact discs. Take out discs and the fogging will disappear. If it does not return to normal after several hours, contact your Kenwood dealer.
The marking of products using lasers (Except for some areas)
CLASS 1
LASER PRODUCT
The label is attached to the chassis/case and says that the component uses laser beams that have been classified as Class 1. It means that the unit is utilizing laser beams that are of a weaker class. There is no danger of hazardous radiation outside the unit.
2CAUTION
Do not set the remote on hot places |
Before |
such as above the dashboard. |
|
Replacing the Lithium Battery |
|
Use one lithium battery |
use |
(CR2025).Remove the case following |
|
the instructions as illustrated.Insert the |
|
battery with the + and - poles aligned |
|
properly, following the illustration inside |
|
the case. |
|
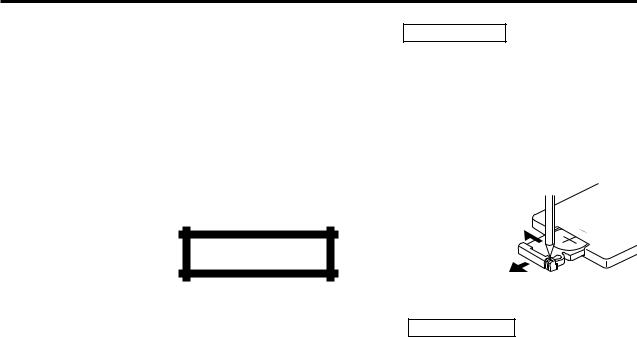
To open |
|
1 Keep on slide 1 |
|
2 Pull out. |
|
2
2WARNING
Store unused lithium batteries out of the reach of children. Contact a doctor immediately if the battery is accidentally swallowed.
5
Handling compact discs
Before use
Stains, scratches, or warping can cause skipping, malfunction, or low sound quality. Take the following precautions to avoid damage to the compact discs.
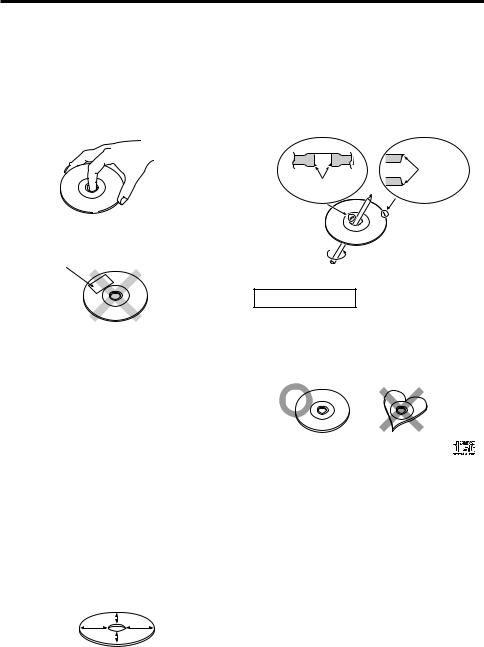
Holding a disc
•Avoid touching the recorded side (the side without the titles on) when you hold a compact disc.

 Burrs
Burrs
Burrs
•Do not stick paper tape, etc. on either side of the disc.
Paper tape
2CAUTION
Storing your discs
• Do not store discs where they will be exposed to direct sunlight (such as on the seat and dashboard) or high heat.
•If you do not use your unit for an extended time, remove the discs from the unit and put them in their cases. Do not leave them lying around without cases, piled up, or leaning on a wall and so on.
Cleaning your discs
If there are stains on a disc, wipe them off with a cleaning cloth or a soft cotton cloth, wiping from the center to the edge. Never use conventional record
cleaners, anti static agent, paint thinner, benzine, or other chemicals.
6

Features
•Frequency modulation system
Even if your car audio(car stereo) is not equipped with an AUX input jack, you can use the radio's builtin FM tuner to listen to music played by the CD autochanger using FM broadcast frequencies.
One of the twelve transmission frequencies can be set to avoid interference with an (actual) FM broadcast station.
•Disc changer control (Page 10)
This unit has a Disc changer control function.
•Track / Disc search (Page 11)
You can search for the track / disc you want by specifying the track / disc number.
•Direct track/disc search (Page 12)
This feature allows you to enter the number of the track or disc you wish to hear by pressing the appropriate numeric keys.
•Track repeat (Page 13)
When this function is turned on, the track you are listening to is played repeatedly.
•Disc repeat (Page 14)
When this function is turned on, the disc you are listening to is played repeatedly.
•Track scan (Page 15)
When this function is turned on, the first part of each track on the disc you are listening to is played automatically to help you find the one you want.
•Disc scan (Page 16)
When this function is turned on, the first part of each disc in the Disc changer is played automatically to help you find the one you want from the magazine loaded in the Disc changer.
•Disc random play (Page 17)
When this function is turned on, the tracks on the disc you are listening to are played in random order.
•Magazine random play (Page 18)
When this function is turned on, the tracks on the discs in your Disc changer are played in random order.
•Modulation level control (Page 20)
The modulation level can be changed in the range between 1 to 4 according to the recording level of the disc you are listening to.
•Dynamic control (Page 20)
The unit has a prevention of distortion function to reduce sound distortion.
use Before
7

Loading compact discs
Before use
1
"KENWOOD"
Projection
Make sure the disc magazine is the right way up with the Kenwood logo on the top.Pull the tray out by the projection.
3
2
'
 '
'
Place the disc on the tray with the label facing upwards. Insert the tray into the disc magazine until it locks. The discs are numbered from the bottom from 1 to 10.
2CAUTION
•Take care to insert the tray into the correct grooves in the disc magazine.
•8-cm discs cannot be used. If an 8-cm disc adapter is used, the disc cannot be ejected.
•Keep all the trays in the magazine even when empty.
4
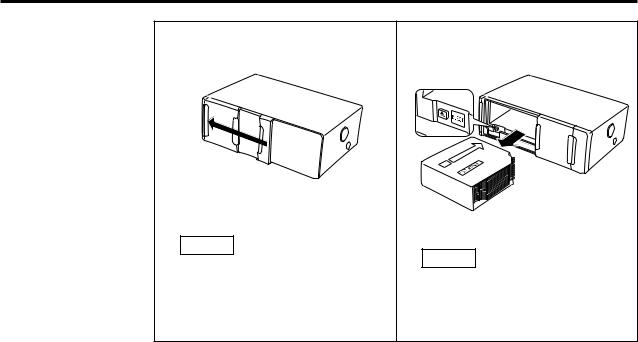
Open the CD changer door.
'
Insert the magazine into the CD changer until it clicks.
8
5
Close the CD changer door.
NOTE
Use the CD changer with its door closed to prevent the entry of dust into the changer.
6 Magazine ejection
'
Open the CD changer door, and press the "EJECT" button.
NOTE
Be sure to open the door completely before pressing the EJECT button. If the door is not completely open, the magazine may hit the door and cause damage of malfunction.
use Before
9
 Loading...