


hp scanjet 8200 series scanners
scanner hp scanjet série 8200
user's manual
guide de l'utilisateur

English
hp scanjet 8200 series scanner
user’s manual

copyright information
© Copyright Hewlett-Packard Company 2003
All rights reserved. Reproduction, adaptation, or translation without prior written permission is prohibited, except as allowed under copyright laws.
This product incorporates Adobe's PDF technology, which contains an implementation of Lempel-Ziv-Welch (LZW) data compression licensed under U.S. Patent 4,558,302.
trademark credits
Adobe and the Acrobat logo are registered trademarks or trademarks of Adobe Systems Incorporated in the United States and other countries and regions.
Energy Star is a U.S. registered service mark of the United States Environmental Protection Agency.
Microsoft and Windows are registered trademarks of Microsoft Corporation.
All other product names mentioned herein may be trademarks of their respective companies.
document warranty
The information contained in this document is subject to change without notice.
Hewlett-Packard makes no warranty of any kind with respect to this information. HEWLETT-PACKARD SPECIFICALLY DISCLAIMS ANY IMPLIED WARRANTY OF MERCHANTABILITY AND FITNESS FOR A PARTICULAR PURPOSE.
Hewlett-Packard shall not be liable for any direct, indirect, incidental, consequential, or other damage alleged in connection with the furnishing or use of this information.
The TWAIN Toolkit is distributed as is. The developers and distributors of the TWAIN Toolkit expressly disclaim all implied, express or statutory warranties including, without limitation, the implied warranties of merchantability, noninfringement of third party rights and fitness for a particular purpose. Neither the developers nor the distributors shall be liable for damages, whether direct, indirect, special, incidental, or consequential, as a result of the reproduction, modification, distribution, or other use of the TWAIN Toolkit.
NOTICE TO U.S. GOVERNMENT USERS: RESTRICTED RIGHTS COMMERCIAL COMPUTER SOFTWARE: Use, duplication, or disclosure by the Government is subject to restrictions as set forth in subparagraph (c) (1) (ii) of the Rights in Technical Data Clause at DFARS 52.227-7013.
Material scanned by this product may be protected by governmental laws and other regulations, such as copyright laws. The customer is solely responsible for complying with all such laws and regulations.
product restricted material
This HP product contains the following materials that might require special handling at end-of-life:
•mercury in the scanner fluorescent lamp and transparent materials adapter (< 5 mg)
•lead in solder
For recycling information, contact www.hp.com/go/recycle, your local authorities, or the Electronic Industries Alliance at www.eiae.org.
For information about HP’s environmental stewardship program, see environmental stewardship program on page 25. For product warranty information see hewlett-packard limited warranty statement on page 24.

contents
where do I find…? . . . . . . . . . . . . . . . . . . . . . . . . . . . . . . . . . 1
how to use the scanner. . . . . . . . . . . . . . . . . . . . . . . . . . . . . . 3 front panel overview . . . . . . . . . . . . . . . . . . . . . . . . . . . . . . . 3 install the software . . . . . . . . . . . . . . . . . . . . . . . . . . . . . . . . 4 scanning overview . . . . . . . . . . . . . . . . . . . . . . . . . . . . . . . . 4 scan documents . . . . . . . . . . . . . . . . . . . . . . . . . . . . . . . . . . 5 scan pictures . . . . . . . . . . . . . . . . . . . . . . . . . . . . . . . . . . . . 5 scan a document so text can be edited . . . . . . . . . . . . . . . . . . 6 save a document to disk or CD . . . . . . . . . . . . . . . . . . . . . . . . 6 e-mail a scanned document or picture . . . . . . . . . . . . . . . . . . . 7 copy documents or pictures . . . . . . . . . . . . . . . . . . . . . . . . . . 7 scan and preview multiple originals. . . . . . . . . . . . . . . . . . . . . 8 cancel a scan in progress . . . . . . . . . . . . . . . . . . . . . . . . . . . 8 change settings . . . . . . . . . . . . . . . . . . . . . . . . . . . . . . . . . . 9 select original types. . . . . . . . . . . . . . . . . . . . . . . . . . . . . . . 10 care and maintenance. . . . . . . . . . . . . . . . . . . . . . . . . . . . . 10 scanner installation problems . . . . . . . . . . . . . . . . . . . . . . . . 12 scanner initialization problems . . . . . . . . . . . . . . . . . . . . . . . 13 troubleshooting. . . . . . . . . . . . . . . . . . . . . . . . . . . . . . . . . . 13
scan from the ADF . . . . . . . . . . . . . . . . . . . . . . . . . . . . . . . . 14 choose acceptable media for the ADF . . . . . . . . . . . . . . . . . . 14 load originals in the ADF . . . . . . . . . . . . . . . . . . . . . . . . . . . 14
scan from the TMA . . . . . . . . . . . . . . . . . . . . . . . . . . . . . . . . 15 scan slides . . . . . . . . . . . . . . . . . . . . . . . . . . . . . . . . . . . . . 15 scan negatives . . . . . . . . . . . . . . . . . . . . . . . . . . . . . . . . . . 17
product support . . . . . . . . . . . . . . . . . . . . . . . . . . . . . . . . . . 19 accessibility website . . . . . . . . . . . . . . . . . . . . . . . . . . . . . . 19 hp scanjet website . . . . . . . . . . . . . . . . . . . . . . . . . . . . . . . 19 support process . . . . . . . . . . . . . . . . . . . . . . . . . . . . . . . . . 19
warranty . . . . . . . . . . . . . . . . . . . . . . . . . . . . . . . . . . . . . . . 24 hewlett-packard limited warranty statement. . . . . . . . . . . . . . . 24 regulatory information . . . . . . . . . . . . . . . . . . . . . . . . . . . . . 25 environmental stewardship program . . . . . . . . . . . . . . . . . . . 25
appendix A – SCSI setup and options . . . . . . . . . . . . . . . . . . 27 why use SCSI? . . . . . . . . . . . . . . . . . . . . . . . . . . . . . . . . . . 27 install the software . . . . . . . . . . . . . . . . . . . . . . . . . . . . . . . 27 install the scanner . . . . . . . . . . . . . . . . . . . . . . . . . . . . . . . . 27 compatible SCSI cards . . . . . . . . . . . . . . . . . . . . . . . . . . . . 29
English
iii

contents
appendix B – product specifications and options . . . . . . . . . . 30 scanner specifications . . . . . . . . . . . . . . . . . . . . . . . . . . . . . 30 automatic document feeder (ADF) specifications . . . . . . . . . . . 30 transparent materials adapter (TMA) specifications . . . . . . . . . 31 environmental specifications for the scanner, ADF, and TMA . . 31 purchase accessories . . . . . . . . . . . . . . . . . . . . . . . . . . . . . 31 purchase maintenance parts . . . . . . . . . . . . . . . . . . . . . . . . 31
iv |
hp scanjet 8200 series |

1 where do I find…?
This manual describes the HP Scanjet 8200 series scanner operation for a computer using a Microsoft® Windows® operating system. See the table below for information on Microsoft Windows NT® and Apple® Macintosh® systems.
Many resources are available to help you find the information you need. The following table provides information resources.
Subject |
Location |
|
Operating systems |
|
|
|
|
|
• |
Apple Macintosh |
Apple Help Center |
|
|
Setup Poster |
|
|
User’s Manual – Install the Software |
|
|
User’s Manual – Installation Problems |
|
|
|
• |
Windows NT |
Precisionscan Pro Help |
|
|
User’s Manual – Appendix A, SCSI Setup and Options |
|
|
Setup Poster |
|
|
|
Product overview |
User’s Manual – Front Panel Overview |
|
|
|
HP Scanjet 8200 Series Help – Front Panel Overview |
|
|
|
Product introduction |
HP Scanjet 8200 Series Help – Product Introduction |
|
|
|
|
Scanner setup |
Setup Poster – a single fold-out page that provides installation and |
|
|
|
setup instructions |
|
|
HP Scanjet 8200 Series Help – Install the Scanner |
|
|
User’s Manual – Appendix A, SCSI Setup and Options |
|
|
|
Software installation |
Setup Poster |
|
|
|
User’s Manual – Install the Software |
|
|
|
Uninstall the software |
HP Scanjet 8200 Series Help – Uninstall the Software |
|
|
|
|
Find help |
|
|
|
|
|
• |
Software |
HP Photo & Imaging Software Help – How to Use the Software |
|
|
|
• |
Third-party software |
Third-party software documentation |
|
|
|
• |
Product specific |
HP Scanjet 8200 Series Help |
|
|
|
• |
SCSI users |
User’s Manual – Appendix A, SCSI Setup and Options |
|
|
HP Precisionscan Pro Help |
|
|
|
Care and Maintenance |
User’s Manual – Care and Maintenance |
|
|
|
|
English
1

chapter 1
Subject |
Location |
|
Troubleshooting |
|
|
|
|
|
• |
Install and setup |
User’s Manual – Installation Problems |
|
|
User’s Manual – Initialization Problems |
|
|
|
• |
Scanner |
HP Scanjet 8200 Series Help – Troubleshooting, Scanner |
|
|
Problems |
|
|
|
• |
Accessories |
HP Scanjet 8200 Series Help – Troubleshooting, ADF Problems |
|
|
HP Scanjet 8200 Series Help – Troubleshooting, TMA Problems |
|
|
|
• |
Software |
HP Photo & Imaging Software Help – Troubleshooting |
|
|
|
• |
Cleaning the underside |
www.hp.com/support |
|
of the scanner glass |
|
Using |
|
|
|
|
|
• |
the scanner |
User’s Manual – How to Use the Scanner |
|
|
|
• |
the accessories |
User’s Manual – Scan from the TMA |
|
|
User’s Manual – Scan from the ADF |
|
|
|
• |
the software |
HP Photo & Imaging Software Help – How to Use the Software |
|
|
|
Support |
|
|
|
|
|
• |
General information |
User’s Manual – HP Support |
|
|
HP Scanjet 8200 Series Help – HP Support |
|
|
|
• |
Website |
www.hp.com/support |
|
|
|
• |
Phone numbers |
User’s Manual – HP Support |
|
|
HP Scanjet 8200 Series Help – HP Support |
|
|
|
Warranty |
User’s Manual – Hewlett-Packard Limited Warranty Statement |
|
|
|
|
Purchase accessories and |
User’s Manual – Appendix B, Purchase Accessories |
|
options |
www.hpshopping.com (USA only) – for other regions use |
|
|
|
www.hp.com and select your language |
|
|
|
Purchase maintenance |
User’s Manual – Appendix B, Purchase Maintenance Parts |
|
supplies |
www.hpshopping.com (USA only) – for other regions, use |
|
|
|
www.hp.com and select your language |
|
|
|
2 |
hp scanjet 8200 series |
2 how to use the scanner
This section presents an overview of the scanner front panel and also contains information about how to use and care for the scanner.
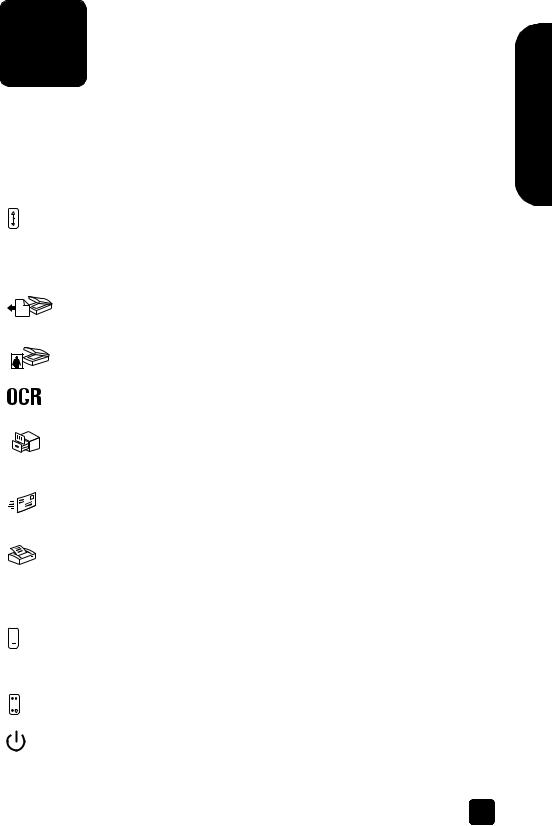
front panel overview
Feature |
Description |
||||
|
|
|
|
|
|
|
|
|
|
DESTINATION button |
Selects the destination (an application, such as a word |
|
|
|
|
|
processor) for a scanned document. The destination |
|
|
|
|
|
appears in the front panel display. |
|
|
|
|
|
Select the destination before pressing the SCAN |
|
|
|
|
|
DOCUMENT TO button. |
|
|
|
|
|
|
|
|
|
|
SCAN DOCUMENT TO |
Scans an original document into the selected destination |
|
|
|
|
button |
(an application, such as a word processor). Use the |
|
|
|
|
||
|
|
|
|
||
|
|
|
|
||
|
|
|
|
|
DESTINATION button to select the destination. |
|
|
|
|
|
|
|
|
|
|
SCAN PICTURE button |
Scans the picture into the HP Photo & Imaging Gallery. |
|
|
|
|
|
|
|
|
|
|
|
|
|
|
|
|
EDIT TEXT (OCR) button |
Scans the document text and pictures and displays |
|
|
|
|
|
editable text in the defined word processor application. |
|
|
|
|
|
|
|
|
|
|
FILE DOCUMENTS button |
Scans the original document or picture to a file |
|
|
|
|
|
destination that you enter. After scanning the original, a |
|
|
|
|
|
dialog box appears where you can enter the file name, |
|
|
|
|
|
file type, and location for the file. |
|
|
|
|
|
|
|
|
|
|
E-MAIL button |
Scans the original document or picture and sends the |
|
|
|
|
|
scanned image to your e-mail software as an |
|
|
|
|
|
attachment. |
|
|
|
|
|
|
|
|
|
|
COPY button |
Starts the copy software and scans the original. The |
|
|
|
|
|
scanned image is sent directly to the default printer. |
|
|
|
|
|
Select the number of copies and whether the item should |
|
|
|
|
|
be scanned in color or black and white before pressing |
|
|
|
|
|
the COPY button. |
|
|
|
|
|
|
|
|
|
|
NUMBER OF COPIES button |
Selects the number of copies to be printed with the |
|
|
|
|
|
COPY button. Select the number of copies before |
|
|
|
|
|
pressing the COPY button. The number of copies |
|
|
|
|
|
appears in the front panel display. |
|
|
|
|
|
|
|
|
|
|
COLOR/BLACK & WHITE |
Determines whether original items are scanned in color |
|
|
|
|
button |
or in black and white when copying. |
|
|
|
|
|
|
|
|
|
|
POWER SAVE button |
Turns off the scanner lamp, the panel lights, and the |
|
|
|
|
|
front panel display. |
|
|
|
|
|
|
English
3

chapter 2
Feature |
Description |
|||
|
|
|
CANCEL button |
Cancels a scan while the scanner is scanning, or |
|
|
|
||
|
|
|
|
cancels a series of scans when you use the Automatic |
|
|
|
|
Document Feeder (ADF). |
|
|
|
|
|
|
|
|
BUTTON SETTINGS button |
Opens the Button Settings dialog box. From this dialog |
|
|
|
|
box, you can change how the scanner buttons work. |
|
|
|
|
|
|
|
|
Front panel display |
Displays scanner information, such as destinations, |
|
|
|
|
number of copies, and error messages. |
|
|
|
|
|
install the software
1Close all applications on the computer.
2Locate the HP Photo & Imaging software CD that is appropriate for your language and operating system.
3Insert the CD into the computer.
Windows: Follow the instructions on the screen. If the installation application does not start automatically:
On the Start menu, click Run, and type: x:setup.exe (where x is the letter of the CD drive).
Macintosh: Double-click the installer icon on the CD and follow the instructions.
scanning overview
You can start scanning in one of three ways: from the front panel buttons, from the HP Director, or from other applications.
Note: The HP Scanning software can prompt you to scan additional items. This allows you to scan multiple items and send them to the final destination all at one time. When previewing, it also allows you to preview and scan multiple images before closing the preview window. For more information, see scan and preview multiple originals.
For Windows NT and Macintosh users, see where do I find…? on page 1 for scanning procedures.
scan from the front panel buttons
The front panel buttons provide shortcuts to often-used scanning functions, such as scanning pictures and documents. Descriptions for using all the front panel buttons are located in this manual.
scan from the hp director
Click the HP Director icon on the desktop to start the HP Photo & Imaging software. The HP Director window appears. From this window you can begin scanning, viewing, or printing images.
If the HP Director icon is not on the desktop, click Start, point to Programs, point to Hewlett-Packard, point to Cameras and Scanners, and click HP Photo & Imaging Director.
4 |
hp scanjet 8200 series |
how to use the scanner
scan from other applications
You can bring an image directly into an open file in one of your applications if the application is TWAIN compliant. Generally, the application is compliant if it has a command such as Acquire, Scan, or Import New Object. If you are unsure whether the application is compliant or what the command is, see the documentation for the application.
scan documents
Use the SCAN DOCUMENT TO button (
 ) to scan documents.
1Place the originals face down on the scanner glass or face up in the ADF. If you are scanning two-sided originals from an ADF, slide the DUPLEX switch to two-sided mode ( ).
).
2Select a destination by pressing the DESTINATION button (  ) until the desired destination appears in the front panel display.
3Press the SCAN DOCUMENT TO button ( 
 ).
).
Note: A preview image will not appear when scanning from the ADF. To change this preview setting, see the HP Photo & Imaging software Help.
4Select the final scan area (the area inside the dotted lines) in the preview image.
5Make adjustments to the preview image if needed.
6Click Accept.
The final scan area is scanned and appears in the specified destination.
scan pictures
Use the SCAN PICTURE button ( 

 ) to scan pictures.
1Place the original face down on the scanner glass and close the lid.
Note: You can also use the SCAN PICTURE button to scan slides or negatives from the TMA. For more information, see scan from the TMA on page 15.
2Press the SCAN PICTURE button ( 

 ).
).
A preview image of the scanned original appears.
3Select the final scan area (the area inside the dotted lines) in the preview image.
4Make adjustments to the preview image if needed.
5Click Accept.
The final scan area is scanned and appears in the HP Photo & Imaging
Gallery. The scan is saved in the location specified in the Scan Pictures
Settings in the HP Photo & Imaging software.
English
user’s manual |
5 |

chapter 2
scan a document so text can be edited
Use the EDIT TEXT button ( ) to scan documents to software that converts the image to text and graphics and then places the results in a supported wordprocessing application.
1Place the original face down on the scanner glass or face up in the ADF. If you are scanning two-sided originals from an ADF, slide the DUPLEX switch to two-sided mode (  ). If you are scanning multiple originals without an ADF, see scan and preview multiple originals on page 8.
2Press the EDIT TEXT button (
 ).
).
Note: A preview image will not appear when scanning from the ADF. To change this preview setting, see the HP Photo & Imaging software Help.
3Select the final scan area (the area inside the dotted lines) in the preview image.
4Make adjustments to the preview image if needed.
5Click Accept.
The final scan area is scanned and processed. The scanned items display in the selected application, such as a word processor.
Note: The application can be changed in the Scan Button Settings of the HP Photo & Imaging software.
save a document to disk or CD
Use the FILE DOCUMENTS button ( 
 ) to save scanned documents to disk, such as a hard disk or a CD.
1Place the original face down on the scanner glass or face up in the ADF. If you are scanning two-sided originals from an ADF, slide the DUPLEX switch to two-sided mode ( ). If you are scanning multiple originals without an ADF, see scan and preview multiple originals on page 8.
2Press the FILE DOCUMENTS button (
 ).
).
Note: A preview image will not appear when scanning from the ADF. To change this preview setting, see the HP Photo & Imaging software Help.
3Select the final scan area (the area inside the dotted lines) in the preview image.
4Make adjustments to the preview image if needed.
5Click Accept.
The final scan area is scanned.
6The Save As dialog box appears. Select a destination folder.
7Type a file name and choose a file type, and click OK. The document is saved in the specified folder.
6 |
hp scanjet 8200 series |

how to use the scanner
e-mail a scanned document or picture
Use the E-MAIL button ( 
 ) to scan documents or pictures and insert them in an e-mail message as an attachment. You must have an Internet connection and a supported e-mail application.
1Place the original face down on the scanner glass or face up in the ADF. If you are scanning two-sided originals from an ADF, slide the DUPLEX switch to two-sided mode ( ).
).
Note: You can also use the E-MAIL button to scan slides or negatives from the TMA. For more information, see scan from the TMA on page 15.
2Press the E-MAIL button (
 ).
).
A message appears asking if the original is a document or a picture.
3Select Document or Picture, and click OK.
Note: A preview image will not appear when scanning from the ADF. To change this preview setting, see the HP Photo & Imaging software Help.
4Select the final scan area (the area inside the dotted lines) in the preview image.
5Make adjustments to the preview image if needed.
6Click Accept.
The final scan area is scanned and your e-mail application is opened. The scanned image is added as an attachment to the e-mail message.
7The Save As dialog box appears. Type a file name and choose a file type, and click OK.
8Complete the e-mail as usual.
Note: To view the scanned image before you e-mail it, double-click the attachment in your e-mail application.
Note: You can change the e-mail application in the HP Photo & Imaging software. If your e-mail application does not appear in the list of supported applications, save the scanned images to a file, and attach the file to your e-mail.
copy documents or pictures
Use the COPY button ( ) to scan an original and send it to a printer.
1Place the original face down on the scanner glass or face up in the ADF. If you are scanning two-sided originals from an ADF, slide the DUPLEX switch to two-sided mode ( ).
).
2Select the copy options:
–Select the number of copies by pressing the NUMBER OF COPIES button (  ). The number of copies appears in the front panel display.
–Select how the original is scanned by pressing the COLOR/BLACK & WHITE button ( ).
).
3Press the COPY button ( ). The copies are printed on the default printer.
English
user’s manual |
7 |

chapter 2
Note: To change any copy settings, such as size, darkness, or the printer, click Cancel during processing. The HP Copying dialog box appears, where you can change settings.
scan and preview multiple originals
Multiple originals can be scanned from the ADF, the TMA, or the scanner glass. The ADF can scan one-sided or two-sided originals.
scan multiple originals from the scanner glass or TMA
If the original was scanned from the scanner glass or TMA, a dialog box appears asking if there are more originals to scan. If you have more originals to scan, click Yes, and then perform one of the following steps:
•Place another original on the glass or in the TMA, click New Scan, make adjustments, and then click Accept.
OR
•Select another image within the preview window, make adjustments, and then click Accept.
When you have finished scanning your items, click No when you receive the prompt for another scan.
scan multiple originals from an ADF
1Place the originals in the ADF face up, with the first page on top.
2Press a button on the front panel to start scanning, such as the SCAN
DOCUMENT TO button ( |
) or the E-MAIL button ( |
). The button you |
select determines the scan settings. |
|
|
When the ADF is empty, a dialog box appears asking if there are more pages to scan. If you want to scan more originals to the same destination, load the next set of pages, and then click Scan.
3When you have finished, click Done. The scans appear in the selected destination.
preview multiple originals from an ADF
If multiple originals are scanned, an image counter appears in the top-right of the preview window. The image counter shows the current preview image and the total number of preview images. Click on the arrows in the image counter to preview other pages.
image counter in the preview window
cancel a scan in progress
Use the CANCEL button ( ) to cancel a scan during processing, or to cancel a series of scans when the ADF is being used.
8 |
hp scanjet 8200 series |

how to use the scanner
change settings
You might want to change settings for the scanner to accommodate the type of work that you do. The HP Scanjet 8200 series scanners enable you to change button settings, scanning preferences, power usage, and whether the scanning takes place immediately or waits for the warm-up cycle to complete.
change button settings
You can change settings for the scanner buttons by pressing the BUTTON SETTINGS button ( ).
).
1 Press the BUTTON SETTINGS button ( ). The Button Settings dialog box appears.
2Click the appropriate tab, and change the settings.
3When finished with the changes, click OK.
change settings from the hp director
The Settings menu in the HP Photo & Imaging software provides a means of changing all scanning settings. It includes button settings, scanning preferences, and other settings that you can change. To change settings start the HP Director, and click Settings.
turn preview image on or off
You can change whether a preview image appears or does not appear. See the HP Photo & Imaging software help for instructions and locations.
use the Power Save button
Use the POWER SAVE button ( ) to turn off the lamp when not using the scanner. When the POWER SAVE button ( ) is pressed, the scanner lamp, the small indicator lights, and the front panel display turn off.
To use the scanner again, press any button on the front panel or start a scan from the HP Director. After a short warmup cycle, the scan begins.
enable instant scanning
Use the instant scanning feature to set the scanner to begin scanning immediately, without waiting for the lamp to warm up.
1Open the HP Director, click Settings, and click Scan Preferences.
2Click the Quality vs. Speed tab.
–To eliminate the lamp warm-up time and enable instant scanning, select the Instant lamp warm-up check box.
–To reduce power consumption, clear the Instant lamp warm-up check box.
English
user’s manual |
9 |

chapter 2
select original types
If the software prompts you for an original type, you have two choices: Picture or Document. The scanner optimizes settings based on your choice. Use the following guidelines to determine the best original type for your needs.
If your original consists of |
Select this original type |
|
|
Text, or both text and graphics |
Document |
|
|
A printed photograph or graphic |
Picture |
|
|
To change the original types, see change button settings on page 9.
care and maintenance
Occasional cleaning of your scanner helps ensure optimal performance. The amount of care necessary depends upon several factors, including the amount of use, the type of media that is fed through the ADF, and the environment. You should perform routine cleaning as necessary.
Routine cleaning should include cleaning the scanner glass, the TMA, and the ADF.
clean the scanner glass
1Disconnect the power cable from the scanner.
2Open the scanner lid.
3Clean the glass using a soft, lint-free cloth sprayed with a mild glass cleaner.
Caution! Use only glass cleaner. Avoid abrasives, acetone, benzene, and carbon tetrachloride, all of which can damage the scanner glass. Avoid isopropyl alcohol because it can leave streaks on the glass.
Do not spray the glass cleaner directly on the glass. If too much glass cleaner is applied, the cleaner could run to the edges and damage the scanner.
4Dry the scanner glass using a dry, soft, lint-free cloth.
5When finished, reconnect the power cable to the scanner.
clean the TMA
Clean the TMA using a dry, soft, lint-free cloth. If necessary, lightly spray the cloth with glass cleaner and wipe the TMA.
clean the ADF
The ADF requires periodic cleaning depending upon the amount of use and the type of media that is fed through the ADF. You can clean the ADF two ways: running the cleaning cloth through the ADF, or by manually cleaning the feed rollers. Set up a cleaning routine that is appropriate for your scanner.
10 |
hp scanjet 8200 series |

how to use the scanner
run the cleaning cloth through the ADF
1Open the sealed container, starting at the notch. Take care not to tear the cleaning cloth inside.
2Remove the cleaning cloth and unfold.
3Place the unfolded cloth into the paper input tray.
English
place the unfolded cloth into the paper input tray
4Press the SCAN DOCUMENT TO button.
The cleaning cloth will run through the ADF.
Wait two minutes to allow the components to dry before proceeding to the next step.
5Place up to five pages of printed paper in the paper input tray. Scan and view the results.
scan up to five pages
6If streaks still appear, repeat Steps 3 through 6.
The cleaning cloth can be cycled through the ADF up to five times.
clean the feed roll assembly manually
1Open the hatch and lift the green tab to the fully open position. The feed roller assembly should be in a nearly vertical position.
lift the green tab to expose the feed rollers
2With a Paper Path Cleaning Cloth (C9915-60056), clean each of the feed rollers and the small rubber pad located below the rollers.
Note: If you do not have the paper path cleaning cloth, use a lint-fee cloth slightly dampened with isopropyl alcohol.
3Wipe the area around the small rubber pad to remove any paper dust.
4Lower the green tab and feed roller assembly.
5Close the hatch.
user’s manual |
11 |

chapter 2
maintain the ADF
If an unusual number of misfeeds occur, follow these steps:
•Clean the ADF to help reduce misfeeds. See clean the ADF on page 10.
•See the HP Scanject 8200 series help – ADF problems.
•If that does not help, install the ADF Roller Replacement kit (C993768001). The ADF Roller Replacement kit contains a roller mechanism, a separation pad, and a wrench used to replace the separation pad. See purchase maintenance parts on page 31.
The ADF Roller Replacement kit contains instructions for replacing the parts.
ordering maintenance supplies
You can purchase maintenance parts online at www.hp.com. Use search to find the item, such as cleaning cloth, or ADF Roller Replacement kit.
scanner installation problems
If an “Error 04” in the front panel displays, it indicates that a Hi-Speed USB connection error has occurred. Ensure that the Hi-Speed USB cable is securely connected between the scanner and the computer.
•First, check your computer:
–Ensure that your computer meets the minimum system requirements that are listed on the scanner box.
–If you do not have enough hard-disk space, remove unnecessary files or install the software on a different disk drive.
•On a Microsoft® Windows computer, if you receive a message, such as “Destination Directory Is Invalid” or “Program Folder Is Invalid” during installation, do one of the following:
–Type a valid destination folder name. The destination folder cannot contain the following characters: /, \, :, ?, *, <, >, “, or |.
–Find a valid folder using the Browse button.
•Check the cables:
–Ensure that the power cable is securely connected between the scanner and a live electrical outlet or surge protector.
–If the power cable is connected to a surge protector, ensure that the surge protector is plugged into an outlet and turned on.
–Use the Hi-Speed USB cable that was included with the scanner. Other Hi-Speed USB cables might not be compatible with the scanner.
–Ensure that the Hi-Speed USB cable is securely connected between the scanner and the computer.
–Disconnect the power cable from the scanner and turn off the computer. After 30 seconds, reconnect the power cable to the scanner and then turn on the computer, in that order.
–On a Macintosh computer, use the Apple System Profiler to ensure that the scanner is connected to the computer correctly.
•Enter the scanner diagnostic mode:
12 |
hp scanjet 8200 series |

how to use the scanner
a.Disconnect the Hi-Speed USB cable (or SCSI cable) from the scanner. Ensure that the scanner power cable is still connected to the power source.
b.Press the EDIT TEXT (
 ) and E-MAIL (

 ) buttons at the same time. The carriage in the scanner should move forward and backward, and the lamp should turn on.
c.To end the test, disconnect the power cable.
If the scanner lamp does not turn on or the carriage does not move, a problem exists with the scanner hardware. See product support on page 19.
scanner initialization problems
If you receive a message that the scanner initialization failed:
1Close the error message dialog box and close the application that was open when you received the error message.
2Then, do the following:
–Turn the scanner off by disconnecting the power cable. Turn the scanner back on by reconnecting the power cable.
–Disconnect the USB cable from the computer and then reconnect the USB cable.
–Ensure that the cables that connect the computer to the scanner are securely fastened.
–Turn the computer off for 10 seconds and then turn it on again.
If the scanner still fails to initialize, run the Repair utility (Windows computers only). See scanner still does not work properly in the troubleshooting section of the HP Scanjet 8200 series help.
troubleshooting
To solve other problems with the scanner, see the troubleshooting section of the HP Scanjet 8200 series help.
To solve problems with the scanner software, see the HP Photo & Imaging software help.
English
user’s manual |
13 |

3 scan from the ADF
This section describes how to select originals that are acceptable for the Automatic Document Feeder (ADF), and how to load and scan originals from the ADF.
choose acceptable media for the ADF
The ADF works best when the originals meet the following specifications:
•standard media of A4, U.S. letter and legal sized paper
•nonstandard media ranging in size from 88.9 by 127 mm (3.5 by 5 inches) to 216 by 356 mm (8.5 by 14 inches)
•media weights from 60 to 90 g/m2 (16 to 24 pounds)
•media that is square-shaped or rectangular and in good condition
•media that is free of perforations, or punch holes
•media that is free of wet glue, correction fluid, or ink
Note: Avoid putting multipart forms, transparencies, magazine pages, gumbacked pages, and light-weight paper in the ADF.
Before placing an original in the ADF, check for and remove:
•curls or wrinkles
•staples, paper clips, and any other attached material
If the originals do not meet these criteria, scan from the scanner glass.
load originals in the ADF
1Place a stack of similarly-sized originals face up in the document input tray, with the first page on top. See the icon on the paper input tray.
load paper and center in the tray
2Adjust the paper guides to center the stack.
3Use the DUPLEX switch on the ADF to select one-sided or two-sided originals.
4Press a scanner button or use the HP Director to begin scanning. Follow the instructions on the computer screen to finish scanning.
14
scan from the TMA
4
Use the Transparent Materials Adapter (TMA) to scan 35 mm slides or negatives.
Note: To scan large transparent items, such as a presentation transparency, place the item on the scanner glass under a sheet of white paper and scan as usual.
scan slides
To scan 35 mm slides, use the slide holder that is part of the built-in TMA. 1 Open the scanner lid and remove the TMA cover.
English
remove the TMA cover
2Click the SCAN PICTURE button ( 

 ).
).
A dialog box appears asking what you are scanning.
3Select Slides from a Transparent Materials Adapter (TMA).
Note: Do not click Scan until the slides are loaded and the lid is closed.
4Remove the negative holder, if present, from the slide holder.
remove the negative holder
5Place up to three slides into the slide holder. Insert the slides with the front of the slides facing you.
insert the slides
15

chapter 4
6After loading the last slide, insert the slide light-shield until it touches the slides.
Note: Inserting the slide light-shield prevents stray light on the scanned image.
insert the slide light-shield
7Close the scanner lid.
8In the Scan Picture window, click Scan.
9The scanner performs a preview scan, and the preview image appears.
10Select a final scan area within a slide. Click and drag a border around the area you want for a final scan (final scan area).
Final scan area select a final scan area
11Scale the image to the desired size and make any other adjustments you want, and then click Accept.
12A dialog box appears asking if there are more originals to scan. If you have more slides to scan, click Yes, and then perform one of the following steps:
–Place another slide in the TMA, click New Scan, make adjustments, and then click Accept.
OR
–Select another image within the preview window, make adjustments, and then click Accept.
13When you have finished scanning your items, click No when you receive the prompt for another scan.
The images appear in the HP Photo & Imaging Gallery.
14When finished, remove the slides. Replace the slide light-shield, the negative holder, the negative light-shield, and the TMA cover.
16 |
hp scanjet 8200 series |

scan from the TMA
scan negatives
To scan 35 mm negatives use the negative holder that is part of the built-in TMA. 1 Open the scanner lid and remove the TMA cover.
English
remove the TMA cover |
2 Click the SCAN PICTURE button ( 

 ).
).
A dialog box appears asking what you are scanning.
3Select Negatives from a Transparent Materials Adapter (TMA).
Note: Do not click Scan until the negative is loaded and the lid is closed.
4Remove the negative light-shield from the negative holder. The negative holder is stored in the slide holder.
remove the negative light-shield
5Slide a negative strip into the negative holder so that the shiny side faces the scanner glass when the scanner lid is closed.
insert a negative strip
Note: Negatives are easily damaged. Touch them only on their edges.
6If you are scanning a negative strip that has fewer than four frames, insert the negative light-shield into the negative holder until it touches the negative strip.
user’s manual |
17 |

chapter 4
Note: Inserting the negative light-shield prevents stray light on the scanned image.
insert the negative light-shield
7Close the scanner lid.
8In the Scan Picture window, click Scan.
The scanner performs a preview scan, and the preview image appears.
9Select a final scan area. Click and drag a border around the area you want for a final scan (final scan area).
Final scan area select a final scan area
10Scale the image to the desired size and make any other adjustments you want, and then click Accept.
11A dialog box appears asking if there are more originals to scan. If you have more negatives to scan, click Yes, and then perform one of the following steps:
–Place another negative strip in the TMA, click New Scan, make adjustments, and then click Accept.
OR
–Select another image within the preview window, make adjustments, and then click Accept.
12When you have finished scanning your items, click No when you receive the prompt for another scan.
The images appear in the HP Photo & Imaging Gallery.
13When finished, remove the negative strip. Replace the negative holder, the negative light-shield, and the TMA cover.
18 |
hp scanjet 8200 series |

product support
5
This section contains support information including phone numbers and website information.
For regulatory information, see the regulatory_supplement.htm file on the CD that comes with the scanner.
accessibility website
Customers with disabilities can get help by visiting www.hp.com/hpinfo/ community/accessibility/prodserv.
hp scanjet website
Visit www.scanjet.hp.com for the following information:
•tips for scanning more effectively and creatively
•HP Scanjet driver updates and software
support process
The HP support process works most effectively if you perform the following steps in the order specified:
1Read the troubleshooting section of the User's Manual and review the electronic help for the software and scanner.
2Access the HP Support website. If you have access to the Internet, you can obtain a wide range of information about your scanner. Visit the HP website for product help, drivers, and software updates at www.hp.com/ support. Customer Care is available in the following languages: Dutch, English, French, German, Italian, Portuguese, Spanish, Swedish, Traditional Chinese, Simplified Chinese, Japanese, and Korean. (Danish, Finnish, and Norwegian support information is available in English only.)
3Access HP e-support. If you have access to the Internet, connect with HP via e-mail by going to www.hp.com/support. You will receive a personal reply from an HP Customer Care technician. E-mail support is available in the languages listed at that website.
4Contact your local HP dealer. If your scanner has a hardware failure, take it to your local HP dealer for a solution. Service is free during your scanner's limited warranty period. After the warranty period, the dealer will quote a service charge.
5Contact HP support by phone. Please consult the following website to check the details and conditions of phone support in your country or region: www.hp.com/support. As a part of HP's continuing efforts to improve phone support information services, we advise you to check the HP website on a regular basis for new information regarding service
English
19

chapter 5
features and delivery. If you cannot solve the problem by using the above options, call HP while you are in front of your computer and scanner. For faster service, please be prepared to provide the following information:
–the scanner's model number (located on the scanner's lid)
–the scanner's serial number (located on the bottom of the scanner)
–the computer's operating system
–the version of the scanner software (located on the scanner's CD label)
–messages displayed at the time the situation occurred
The applicable conditions for HP phone support are subject to change without notice. Depending on your country/region, a fee may be charged for phone information.
Telephone support is free from the date of purchase for the period shown in the following table:
Locations |
Free Phone Support Period |
United States |
1 year |
|
|
Africa |
30 days |
|
|
Asia Pacific |
1 year |
|
|
Canada |
1 year |
|
|
Europe |
30 days |
|
|
Latin America |
1 year |
|
|
Middle East |
30 days |
|
|
phone support in the United States
Support is available both during and after the warranty period.
Within the period of your warranty, telephone support is provided free of charge. Call (208) 323-2551. If this is a long distance call for you, long distance charges will apply.
U.S. phone support is available in both English and Spanish 24 hours a day, 7 days a week (days and hours of support may change without notice).
After the warranty period, call (208) 323-2551. Charges are $25.00 per issue, and are charged to your credit card. If you think your HP product needs service, call HP Customer Support, which can help determine if service is required.
20 |
hp scanjet 8200 series |
 Loading...