


ENGLISH |
AVR 142 |
Audio/Video Receiver |
OWNER’S MANUAL |
AVR 142 |

Table of Contents
3Safety Information
3Unpacking
4 Remote Control Functions
8Front Panel Controls
9Rear Panel Connections
10 Installation and Connections
10Audio Equipment Connections
10Video Equipment Connections
11HDMI Connections
12System Configuration
12 |
First Turn On |
12 |
Settings to be Made With Each Input Used |
12 |
Input Setup |
12Speaker Setup
13Surround Setup
13Configuring the Surround Off (Stereo) Modes
13Stereo-Direct (Bypass) Mode
14Stereo Digital Mode
14 |
Delay Settings |
14 |
Night Mode Settings |
14 |
Output Level Adjustment |
16 |
Operation |
16Basic Operation
16Source Selection
16Controls and Use of Headphones
16Surround Mode Selection
17Digital Audio Playback
18Selecting a Digital Source
18 |
Digital Status |
18Surround Mode Types
19Night Mode
19 Tape Recording
19Output Level Trim Adjustment
196-Channel Direct Input
19Display Brightness
20Memory Backup
20 Tuner Operation
20 RDS Operation
22Troubleshooting Guide
22Processor Reset
23Technical Specifications AVR
DECLARATION OF CONFORMITY
We, Harman Consumer Group International
2, route de Tours
F-72500 Château-du-Loir
France
declare in own responsibility, that the product described in this owners manual is in compliance with technical standards:
EN55013(2001) & + A2(2006)
EN55020(2002) & + A2(2005)
EN60065:2002
EN61000-3-2(2000)+A2(2005)
EN61000-3-3 (1995)+A1(2001)+A2(2005)
EN61000-4-2(1995) & + A1(1998) & + A2(2001)
EN61000-4-3(2002) & + A1(2002)
EN61000-4-4(2004)
Jurjen Amsterdam
Harman Consumer Group Inc.
04/09
Typographical Conventions
In order to help you use this manual with the remote control, front-panel controls and rear-panel connections, certain conventions have been used.
Example – (bold type) indicates a specific remote control or front-panel button, or rear-panel connection jack
– (OCR type) indicates a message that is visible on the front-panel information display
– (number in a square) indicates a specific front-panel control
– (number in a circle) indicates a rear-panel connection
– (number in an oval) indicates a button or indicator on the remote.
2TABLE OF CONTENTS
Safety Information
Important Safety Instructions
1.Read these instructions.
2.Keep these instructions.
3.Heed all warnings.
4.Follow all instructions.
5.Do not use this apparatus near water.
6.Clean only with a dry cloth.
7.Do not block any ventilation openings. Install in accordance with the manufacturer’s instructions.
8.Do not install near any heat sources such as radiators, heat registers, stoves or other apparatus (including amplifiers) that produce heat.
9.Do not defeat the safety purpose of the polarized or grounding-type plug. A polarized plug has two blades with one wider than the other. A grounding-type plug has two blades and a third grounding prong. The wide blade or the third prong is provided for your safety. If the provided plug does not fit into your outlet, consult an electrician for replacement of the obsolete outlet.
10.Protect the power cord from being walked on or pinched, particularly at plugs, convenience receptacles and the point where they exit from the apparatus.
11.Only use attachments/accessories specified by the manufacturer.
12.Use only with the cart, stand, tripod, bracket or table specified by the manufacturer or
sold with the apparatus. When a cart is used, use caution when moving the cart/apparatus combination to avoid injury from tip-over.
13.Unplug this apparatus during lightning storms or when unused for long periods of time.
14.Refer all servicing to qualified service personnel. Servicing is required when the apparatus has been damaged in any way, such as power supply cord or plug is damaged, liquid has been spilled or objects have fallen into the apparatus, the apparatus has been exposed to rain or moisture, does not operate normally, or has been dropped.
15.Do not expose this apparatus to dripping or splashing and ensure that no objects filled with liquids, such as vases, are placed on the apparatus.
16.To completely disconnect this apparatus from the AC Mains, disconnect the power supply cord plug from the AC receptacle.
17.The mains plug of the power supply cord shall remain readily operable.
18.Do not expose batteries to excessive heat such as sunshine, fire or the like.
The lightning flash with arrowhead symbol, within an equilateral triangle, is intended to alert the user to the presence
of uninsulated“dangerous voltage” within the product’s enclosure that may be of sufficient magnitude to constitute a risk of electric shock to persons.
The exclamation point within an equilateral triangle is intended to alert the user to the presence of important operating
and maintenance (servicing) instructions in the literature accompanying the product.
WARNING: To reduce the risk of fire or electric shock, do not expose this apparatus to rain or moisture.
READ THIS BEFORE OPERATING YOUR UNIT.
Do not install this equipment in a confined space such as a case or similar – Install it away from direct sunlight, heat sources, vibration, dust, moisture, and/ or cold.
Avoid installing this unit where foreign objects may fall onto this unit and/or this unit may be exposed to liquid dripping or splashing. On the top of this unit, do not place:
Burning objects (i.e. candles), as they may cause fire, damage to this unit, and/or personal injury.
Containers with liquid in them, as they may fall and liquid may cause electrical shock to the user and/or damage to this unit.
Do not cover this unit with a newspaper, tablecloth, curtain, etc. in order not to obstruct heat radiation. If the temperature inside this unit rises, it may cause fire, damage to this unit, and/or personal injury.
Install this unit near the AC outlet and where the AC power plug can be reached easily.
This unit is not disconnected from the AC power source as long as the Main Power Switch is ON. This state
is called the standby mode. In this state, this unit
is designed to consume a very small quantity of power.
Do Not Open the Cabinet
There are no user-serviceable components inside this product. Opening the cabinet may present a shock hazard, and any modification to the product will void your guarantee. If water or any metal object such as a paper clip, wire or a staple accidentally falls inside the unit, disconnect it from the AC power source immediately, and consult an authorized service station.
Installation Location
■To assure proper operation and to avoid the potential for safety hazards, place the unit on a firm and level surface. When placing the unit on a shelf, be certain that the shelf and any mounting hardware can support the weight of the product.
■Make certain that proper space is provided both above and below the unit for ventilation. If this product will be installed in a cabinet or other enclosed area, make certain that there is sufficient air movement within the cabinet. Under some circumstances a fan may be required.
■Do not place the unit directly on a carpeted surface.
■Avoid installation in extremely hot or cold locations, or an area that is exposed to direct sunlight or heating equipment.
Cleaning
When the unit gets dirty, wipe it with a clean, soft, dry cloth. If necessary, wipe it with a soft cloth dampened with mild soapy water, then a fresh cloth with clean water. Wipe dry immediately with a dry cloth. NEVER use benzene, aerosol cleaners, thinner, alcohol or any other volatile cleaning agent. Do not use abrasive cleaners, as they may damage the finish of metal parts. Avoid spraying insecticide near the unit.
Moving the Unit
Before moving the unit, be certain to disconnect any interconnection cords with other components, and make certain that you disconnect the unit from the AC outlet.
Unpacking
The carton and shipping materials used to protect your new receiver during shipment were specially designed to cushion it from shock and vibration. We suggest that you save the carton and packing materials for use in shipping if you move, or should the unit ever need repair.
SAFETY INFORMATION |
3 |
ENGLISH

Remote Control Functions
2
0 1 |
3 4 |
||||
|
|
|
|
|
|
|
|
|
|
|
|
|
5 |
|
6 |
|
|
|
7 |
|
|
|
8 |
|
9 |

 A
A

 B
B


 CD
CD


 E
E


 GF
GF
 H QP
H QP


 I O
I O


 JK N
JK N
 L
L
M |
Power On Button
Not active
IR Transmitter Window
Power Off Button
Mute
Input Selectors 6-Channel Direct Input
Volume Up/Down
HD Mode Selector
Speaker Select/Setup
OK Button
Delay/Status Button
Memory/Angle Button
Clear Button
Preset Up/Down
RDS Select/Info Button
Playlist
A-B
DTS Neo:6 Mode Selector
Stereo Mode Selector
Logic 7 Selector
Dim Button
Transport Buttons
Skip Up/Down Buttons (DWN)/(UP)
Night Mode
DTS Digital Mode Selector
Dolby Mode Selector
Repeat
Random
Tone Mode/Progressive Scan/Interlaced Button
Tuning Up/Down
! Direct Button
" Tuner Mode/Zoom
# Numeric Keys
$ Digital Select/Audio Mode
% Navigation Buttons
& Channel Select /Disc Menu Button
' V.OFF/Test Button
(Surround Mode Selector/Program Down/ Subtitle Button
) Sleep/Program Up/Audio Select Button
* Title
+ AM/FM Tuner Select
, AVR Selector
4REMOTE CONTROL FUNCTIONS
Remote Control Functions, common for AVR 142 and a HK DVD Player
IMPORTANT NOTE: The combined AVR and DVD remote has some buttons that perform different functions. If you press the AVR Button ,, one set of functions is active, identical to the functions for buttons CD, Tape, Video 1/2/3. If you press the DVD/ HDMI1 Button , some of the buttons change their function as indicated above the button itself, and explained below. Refer to the function table for an overview of functions in both modes. NOTE that pressing the HDMI1 and DVD Buttons activate the alternative commands as seen in the Function List on page 7. The DVD functions work with harman/ kardon DVD players only.
Power On Button: Press this button to turn on the power to the AVR or the DVD selected by pressing either the AVR or the DVD/HDMI1 Button ,or
.
This indicator is not active.
IR Transmitter Window: Point this window towards the AVR when pressing buttons on the remote to make certain that infrared commands are properly received.
Power Off Button: Press this button to place the AVR or a selected device unit in the Standby mode. If held for more than 3 seconds, both the AVR and the DVD switch to Standby.
Mute: Press this button to momentarily silence the AVR or TV set being controlled, depending on which device has been selected.
Input Selectors: Pressing one of these buttons will perform three actions at the same time. First, if the AVR is not turned on, this will power up the unit. Next, it will select the source shown on the button as the input to the AVR. Finally, the DVD/HDMI1 Button will switch the double-function remote buttons to their DVD functions. After pressing the DVD/HDMI1 Button, you must press the AVR Selector button ,again to operate all the AVR’s functions with the remote. Note that pressing the DVD Button switches on BOTH the AVR and the DVD, whereas pressing the AVR Button just switches on the AVR.
6-Channel Direct Input: Press this button to select the component connected to the 6-Channel Direct Input as the audio. Note that when you wish to use the Six Channel Direct Input in conjunction with a video source, you must first select the video source by pressing one of the Input Selectors . Then press this button to choose the 6-Channel Direct Input as the audio source.
Volume Up/Down: Press these buttons to raise or lower the system volume.
HD Mode Selector (DVD): This function is active with harman/kardon DVD players only.
Speaker Select/Setup: Press this button to begin the process of configuring the AVR’s Bass
Management System for use with the type of speakers used in your system. Once the button has been pressed, use the buttons %to select the channel you wish to set up. Press the OK button and then select the speaker type (see page 12 for more information.)
For DVD: Press this button to use the DVD’s on-screen menu system to adjust the player’s configuration settings. Note that the Info Button must be pressed to access the DVD’s Information menu to obtain detailed disc information, and to configure the playback mode of the disc.
OK Button: This button is used to enter settings into the AVR’s memory. It is also used in the setup procedures for delay time, speaker configuration and channel output level adjustment.
Delay/Status Button: Press this button to begin the process for setting the delay times used by the AVR when processing surround sound. After pressing this button, the delay times are entered by
pressing the OK button and then using the buttons %to change the setting. Press the Set button again to complete the process (See page 14 for more information).
For DVD: Press while a disc is playing to view banner display. Use the ARROW buttons to move through the different features in the Banner Display. When
a symbol is highlighted, press OK on the remote to select it.
Memory/Angle Button: Press this button to enter a radio station into the AVR’s preset memory. Two underline indicators will flash at the right side of the Main Information Display , you then have five seconds to enter a preset memory location
using the Numeric Keys #. (See page 20 for more information.)
For DVD: Press to access various camera angles on a DVD (If the DVD contains multiple camera angles) or to rotate JPEG images.
Clear Button: Press this button to clear incorrect entries when using the remote to directly enter a radio station’s frequency.
Preset Up/Down: When the tuner is in use, press these buttons to scroll through the stations programmed into the AVR’s memory. When CD or DVD is selected using the Input Selector button , these buttons may function as Slow Fwd/Rev (DVD) or ”+10” (CD).
RDS Select/Info (DVD) Button: Press this button to display the various messages that are part of the RDS data system of the AVR’s tuner. (See page 20 for more information on RDS).
For DVD: Press for detailed informations on the disc playing (Video/Audio Bit rate, Movie aspect ratio and others), and for current player settings made. Note that the unit doesn’t react on any transport button as long as the info menu is displayed. Press again to remove information from screen.
Playlist (DVD): Press this button to change the playback order of the disc.
A-B (DVD): Press to select section A-B and to play repeatedly.
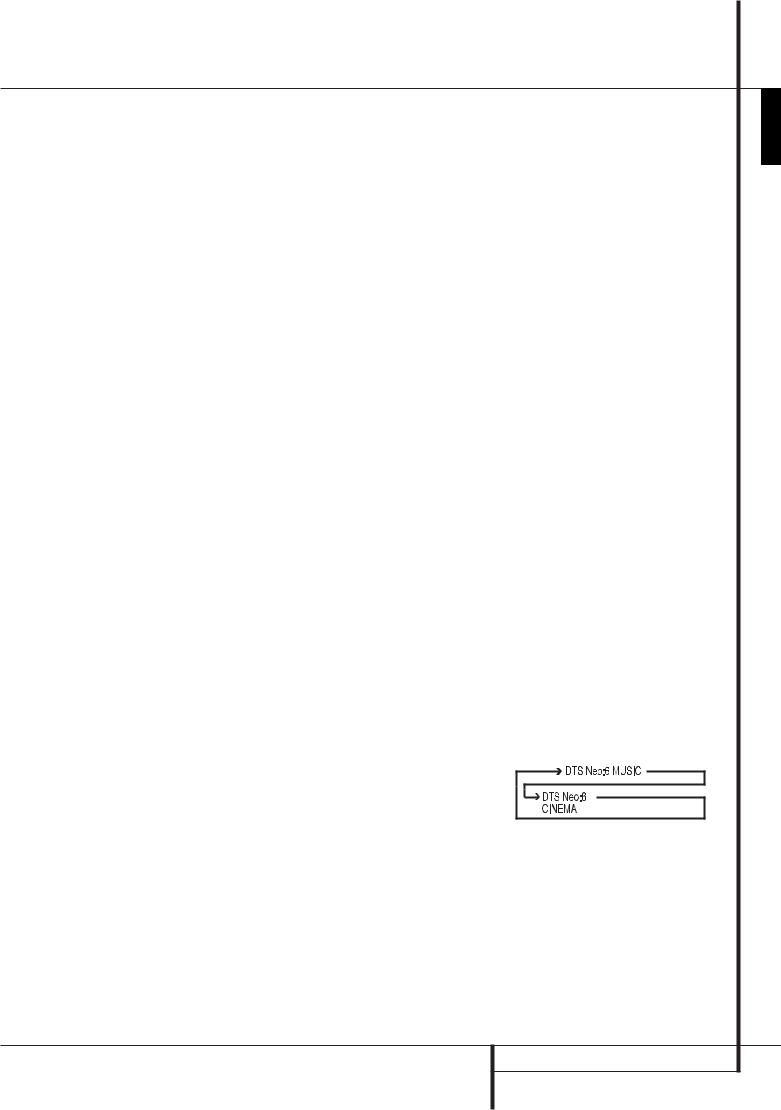
DTS Neo:6 Mode Selector: Pressing this selector button cycles the AVR through the various DTS Neo:6 modes, which extract a five-channel surround field from two-channel program material (from PCM source or analog input signal). The first press selects the last DTS Neo:6 surround mode that was in use, and each subsequent press selects the next mode in the following order:
REMOTE CONTROL FUNCTIONS 5
ENGLISH

Remote Control Functions, common for AVR 142 and a HK DVD Player
Stereo Mode Selector: Press this button to select a stereo playback mode. When the button is pressed so that e e appears in
the Main Information Display , the AVR will operate in a bypass mode with true fully analog, two-channel left/right stereo mode with no surround processing or bass management as opposed to other modes where digital processing is used. When the button is pressed so that e appears in the Main Information Display , you may enjoy a two-channel presentation of the sound along with the benefits of bass management. When the button is pressed so that ?e eappears, the stereo signal is routed to all five speakers, if installed.(See page 13 for more information on stereo playback modes).
Logic 7 Selector: Press this button to select one of the available Logic 7 surround modes. (See page 16 for the available Logic 7 options).
Dim Button: Press this button to activate the Dimmer function, which reduces the brightness of the front panel display, or turn it off entirely. The first press of the button shows the default state, which is full brightness by indicating e in the
Main Information Display . Press the button again within five seconds to reduce the brightness by 50%, as indicated by e . Press the button again within five seconds and the main display will go completely dark. Note that this setting is temporary; the display will always return to full brightness when the AVR is turned on. In addition,both the Power Indicator and the blue accent lighting inside the volume control will always remain at full brightness regardless of the setting. This is to remind you that the AVR is still turned on.
Transport Buttons: These buttons operate the DVD player.
Skip Up/Down Buttons (DVD):
(DWN): Press to go to beginning of current track. Press again quickly to go to beginning of previous track. After pressing the PAUSE button, each press of this button will move the image in reverse frame by frame.
(UP): Press to go to beginning of next track. After pressing the PAUSE button, each press of this button will move the image forwards frame by frame.
Night Mode: Press this button to activate the Night mode. This mode is available only with Dolby Digital encoded digital sources, and it preserves dialog (center channel) intelligibilty at low volume levels (See page 14 for more information).
DTS Digital Mode Selector: When a DTS source is in use the AVR will select the appropriate mode automatically and no other mode will be available. Pressing this button will display the mode currently selected by the AVR´s decoder, depending on the surround material played and the speaker setting.
Dolby Mode Selector: This button is used to select one of the available Dolby Surround processing modes. Each press of this button will select one of the Dolby Pro Logic II modes, Dolby 3 Stereo or Dolby Digital. Note that the Dolby Digital mode is only available with a digital input selected and the other modes only as long as a Dolby Digital source is not playing.
Repeat (DVD): Each press of this button changes the playback mode to repeat a chapter or track or the entire disc. A repeat icon will appear in the upper right corner of the screen indicating the current repeat mode. If the Player Information Screen is active, the changes will be displayed on screen.
Random (DVD): Press for RANDOM playback in random order.
Tone Mode/Progressive Scan/Interlaced Button: Pressing this button enables or disables the Bass and Treble tone controls. When the button is pressed so that the words eappear in the
Main Information Display , the settings of the Bass and Treble controls will affect the output signals. When the button is pressed so that the words
eappear in the Main Information Display , the output signal will be“flat,” without any bass or treble alteration.
For DVD: Press this button to change the resolution of the Component Video Output between standard definition and progressive definition (PAL interlaced and PAL progressive; NTSC interlaced and NTSC progressive).
The new setting will become effective after quitting the Setup menu.
Tuning Up/Down: When the tuner is in use, these buttons will tune up or down through the selected frequency band. If the Tuner Mode button "has been pressed or the Band button on the front panel was held pressed so that appears in the Main Information Display , pressing either of the buttons will cause the tuner to seek the next station with acceptable signal strength for quality reception. When the appears in the Main Information Display , pressing these buttons will tune stations in single-step increments. (See page 20 for more information).
!Direct Button: Press this button when the tuner is in use to start the sequence for direct entry of a station’s frequency. After pressing the button simply press the proper Numeric Keys #to select a station (See page 20 for more information on the tuner).
"Tuner Mode/Zoom: Press this button when the tuner is in use to select between automatic tuning and manual tuning. When the button is pressed
so appears in the Main Information Display , pressing the Tuning buttons will move the frequency up or down in single-step increments. When the FM band is in use and appears in the Main Information Display , pressing this button will change to monaural reception making even week stations audible. (See page 20 for more information.)
When a DVD or VCD is playing, press this button to zoom the picture so that it is enlarged. There are 4 steps to the zoom function, each progressively larger. Press through each of the zoom stages to return to a normal picture.
#Numeric Keys: These buttons serve as a tenbutton numeric keypad to enter tuner preset positions. For DVD play you may enter track numbers directly, followed by OK to go to the track.
$Digital Select/Audio Mode: Press this button to assign one of the digital inputs to a source. (See page 10 for more information on using digital inputs.) Audio Mode: When operating the DVD, press this button to switch between Audio Modes.
%Navigation Buttons: These are multi-purpose buttons. They will be used most frequently to select a surround mode. These buttons are also used to increase or decrease output levels when configuring
the unit, to select speaker configuration or to select the digital inputs.
&Channel Select /Disc Menu Button: This button is used to start the process of setting the AVR’s output levels with an external source. Once this button is pressed, use the buttons %to select the channel being adjusted, then press the OK button, followed by the buttons again, to change the level setting. (See page 19 for more information.)
DVD Disc Menu: Displays the actual DVD Disc Menu on the TV screen in play mode. When playing discs with JPEG images, pressing this button will access the thumbnails.
'V.OFF/Test Button: Press to turn off video output of a DVD-player for improved performance from audio-only discs. Press again to restore video output.
Tone: Press this button to begin the sequence used to calibrate the AVR’s output levels. (See page 14 for more information on calibrating the AVR).
6REMOTE CONTROL FUNCTIONS
Remote Control Functions, common for AVR 142 and a HK DVD Player
(Surround Mode Selector/Program Down/ Subtitle Button: Press this button to begin the process of changing the surround mode. After the button has been pressed, use the buttons % to select the desired surround mode. (See page 16 for more information).
When a DVD is playing, press to select a subtitle language or to turn subtitles off.
Note: Due to the variations in how DVD discs are authored, the subtitle languages selected with the Subtitle Button may not accurately reflect the actual languages available on the disc. It is recommended that subtitles be selected using the disc’s menu.
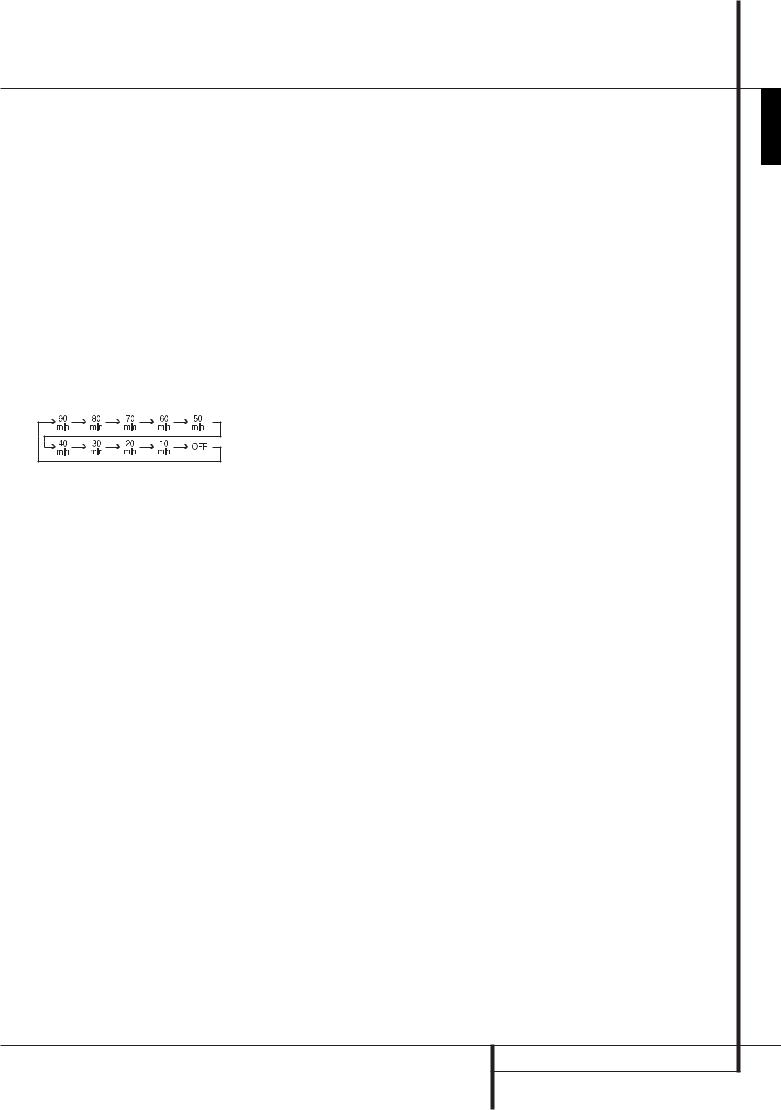
)Sleep/Program Up/Audio Select Button: Press this button to place the unit in the Sleep mode. After the time shown in the display, the AVR will automatically go into the Standby mode. Each press of the button changes the time until turn-off in the following order:
Hold the button pressed for two seconds to turn off the Sleep mode setting.
DVD: Press to access various audio languages on a DVD (If the DVD contains multiple audio streams).
*Title: When a disc is playing, press to make the DVD-player go back to the first section of the disc. If you are playing a DVD-Audio disc that contains other formats the DVD is capable of playing, such as linear PCM or Dolby Digital 5.1, pressing this button may enable you to switch playback from one audio format to another.
+AM/FM Tuner Select: Press this button to select the AVR’s tuner as the listening choice. Pressing this button when the tuner is in use will select between the AM and FM bands.
,AVR Selector: Pressing this button will switch the remote so that it will operate the AVR’s functions. If the AVR is in the Standby mode, it will also turn the AVR on.
Function List
Button Name |
HK AVR Remote Command |
HK DVD Remote Command |
AVR/TAPE/CD/AUX/VID1/VID2/VID3/HDMI2/HDMI3 |
DVD/HDMI1 |
|
Power ON |
Power On |
Power On |
Power OFF |
Power Off (press and release) |
Power Off (press and release) |
|
Power Off (press and hold) |
Power Off (press and hold) |
Mute |
Mute |
Mute(AVR) |
AVR |
AVR Power On |
AVR(AVR) |
DVD |
DVD |
DVD(AVR) |
VID1 |
VID 1 |
VID 1(AVR) |
HDMI1 |
HDMI 1 |
HDMI 1(AVR) |
AM/FM |
AM/FM |
AM/FM(AVR) |
CD |
CD |
CD(AVR) |
VID2 |
VID 2 |
VID 2(AVR) |
HDMI2 |
HDMI 2 |
HDMI 2(AVR) |
AUX |
AUX |
AUX(AVR) |
TAPE |
TAPE |
TAPE(AVR) |
VID3 |
VID 3 |
VID 3(AVR) |
HDMI3 |
HDMI 3 |
HDMI 3(AVR) |
SLEEP / AUDIO |
Sleep |
Audio |
TITLE |
|
Title |
6CH |
6CH |
6CH(AVR) |
VOL Up |
Vol Up |
Vol Up(AVR) |
SURR. / SUBT. |
Surround Mode |
Subtitle |
TEST / V.OFF |
Test Tone |
Video Off |
HD-M |
|
HD Mode |
VOL Down |
Vol Down |
Vol Down(AVR) |
CH. / DISC MENU |
Channel Select |
Disc Menu |
SPKR / SETUP |
Speaker Select |
Setup |
Level+/Up |
Level+/Up |
Up |
Left |
Left |
Left |
OK |
SET |
Enter |
Right |
Right |
Right |
Level-/Down |
Level-/Down |
Down |
DIGITAL / AUDIO MODE |
Digital Select |
Audio Mode |
DELAY / STATUS |
Delay |
Status |
1 |
1 |
1 |
2 |
2 |
2 |
3 |
3 |
3 |
4 |
4 |
4 |
5 |
5 |
5 |
6 |
6 |
6 |
7 |
7 |
7 |
8 |
8 |
8 |
TUN-M / ZOOM |
Tuner Mode |
Zoom |
9 |
9 |
9 |
0 |
0 |
0 |
MEM / ANGLE |
Memory |
Angle |
TUNING Up |
Tuning Up |
|
DIRECT |
Direct Tuning |
|
CLEAR |
Clear |
Clear |
PRESET Up |
Preset Up |
Slow Up |
TUNING Down |
Tuning Down |
|
TONE / P/I |
Tone Mode |
P/I |
RDS / INFO |
RDS |
Info |
PRESET Down |
Preset Down |
Slow Down |
RANDOM |
|
Random Play |
REPEAT |
|
Repeat Play |
A-B |
|
A-B Repeat Play |
PLAYLIST |
|
Playlist |
DOLBY SUR |
Dolby Surround |
Dolby Surround(AVR) |
DTS SUR |
DTS Surround |
DTS Surround(AVR) |
DTS NEO:6 |
DTS NEO:6 |
DTS NEO:6(AVR) |
NIGHT |
Night Mode |
Night(AVR) |
LOGIC 7 |
Logic7 |
Logic7(AVR) |
STEREO |
Stereo |
Stereo(AVR) |
SKIP DOWN |
Skip Down(DVD) |
Skip Down |
SKIP UP |
Skip Up(DVD) |
Skip Up |
DIM |
Dimmer |
Dimmer |
Rew( ) |
Rew(DVD) |
Rew |
Play( ) |
Play(DVD) |
Play |
FF( ) |
FF(DVD) |
FF |
Open/Close |
Open/Close(DVD) |
Open/Close |
Stop |
Stop(DVD) |
Stop |
Pause |
Pause(DVD) |
Pause |
REMOTE CONTROL FUNCTIONS 7
ENGLISH

AVR Audio/Video Receiver
Front Panel Controls
|
|
F |
E |
D |
AVR 142 |
|
|
|
|
|
|
|
3 |
|
1 2 |
6 C |
7 8 9 |
A B 4 G 5 H |
|
Main Power Switch: Press this button to apply power to the AVR. When the switch is pressed in, the unit is placed in a Standby mode, as indicated by the orange LED . This button MUST be pressed in to operate the unit. To turn the unit off completely and prevent the use of the remote control, this switch should be pressed until it pops out from the front panel so that the word“OFF” may be read at the top of the switch.
NOTE: This switch is normally left in the“ON” position.
System Power Control: When the Main Power Switch is“ON,” press this button to turn on the AVR; press it again to turn the unit off (to Standby). Note that the Power Indicator will turn blue when the unit is on.
Power Indicator: This LED will be illuminated in orange when the unit is in the Standby mode to signal that the unit is ready to be turned on. When the unit is in operation, the indicator will turn blue.
Headphone Jack: This jack may be used to listen to the AVR’s output through a pair of headphones.
Be certain that the headphones have a standard 6.3 mm stereo phone plug. Note that the speakers will automatically be turned off when the headphones are connected.
Digital Optical 3 Input: Connect the optical digital audio output of an audio or video product to this jack.
Aux input stereo minijack: Connect this minijack to any audio source, typically MP3 players or portable CD players. An analog headphone output jack or line level out jack may be used.
Surround Mode Group Selector: Press this button to select the top-level group of surround modes. Each press of the button will select a major mode grouping in the following order:
Dolby Modes CDTS Digital Modes CDSP Modes C Stereo Modes CLogic 7 Modes
Once the button is pressed so that the name of the desired surround mode group appears in the Lower Display Line , press the Surround Mode Selector to cycle through the individual modes available. For example, press this button to select Dolby modes, and then press the Surround Mode Selector to choose from the various mode options.
Tuning Selector: Press the left side of the button to tune lower frequency stations and the right side of the button to tune higher frequency stations. When a station with a strong signal is reached,
eor ewill appear in the Main Information Display (see page 20 for more information on tuning stations).
Tuner Band Selector: Pressing this button will automatically switch the AVR to the Tuner mode. Pressing it again will switch between the AM and FM frequency bands, holding it pressed for some seconds will switch between stereo and mono receiving and between automatic and manual tuning mode (See page 20 for more information on the tuner).
Preset Stations Selector: Press this button to scroll up or down through the list of stations that have been entered into the preset memory. (See page 20 for more information on tuner programming.)
Input Source Selector: Press this button to change the input by scrolling through the list of input sources.
RDS Select Button: Press this button to display the various messages that are part of the RDS data system of the AVR’s tuner. (See page 20 for more information on RDS).
Surround Mode Selector: Press this button to select from among the available surround mode options for the mode group selected. The specific modes will vary based on the number of speakers available, the mode group and if the input source is digital or analog. For example, press the Surround
Mode Group Selector to select a mode grouping
such as Dolby or Logic 7, and then press this button to see the mode choices available. For more information on mode selection, see page 13.
Volume Control: Turn this knob clockwise to increase the volume, counterclockwise to decrease the volume. If the AVR is muted, adjusting volume control will automatically release the unit from the silenced condition.
Remote Sensor Window: The sensor behind this window receives infrared signals from the remote control. Aim the remote at this area and do not
block or cover it unless an external remote sensor is installed.
Main Information Display: This display delivers messages and status indications to help you operate the receiver.
Digital Coax 3 Input: This jack is normally used for connection to the output of portable digital audio devices, video game consoles or other products that have a coax digital jack.
Video 3 Input Jacks: These audio/video jacks may be used for temporary connection to video games or portable audio/video products such as camcorders and portable audio players.
8FRONT PANEL CONTROLS
 Loading...