


Game Experience
May Change
During Online Play
Copyright ©2004 by Blizzard Entertainment. All rights reserved.
The use of this software product is subject to the terms of the enclosed End User License Agreement. You must accept the End User License Agreement before you can use the product. Use of World of Warcraft, is subject to your acceptance of the World of Warcraft® Terms of Use Agreement.
World of Warcraft, Warcraft and Blizzard Entertainment are trademarks or registered trademarks of Blizzard Entertainment in the U.S. and/or other countries.Windows and DirectX are trademarks or registered trademarks of Microsoft Corporation in the U.S. and/or other countries. Pentium is a registered trademark of Intel Corporation. Power Macintosh is a registered trademark of Apple Computer, Inc. Dolby and the double-D symbol are trademarks of Dolby Laboratory. Monotype is a trademark of Agfa Monotype Limited registered in the U.S. Patent and Trademark Office and certain other jurisdictions. Arial is a trademark of The Monotype Corporation registered in the U.S. Patent and Trademark Office and certain other jurisdictions. ITC Friz Quadrata is a trademark of The International Typeface Corporation which may be registered
in certain jurisdictions. All other trademarks are the property of their respective owners.
Uses high-quality DivX® Video. DivX® and the DivX® Video logo are trademarks of DivXNetworks, Inc. and are used under license. All rights reserved.
AMD, the AMD logo, and combinations thereof are trademarks of Advanced Micro Devices, Inc All ATI product and product feature names and logos, including ATI, the ATI Logo, and RADEON are trademarks and / or registered trademarks of ATI Technologies Inc. NVIDIA, the NVIDIA logo, and GeForce are registered trademarks or trademarks of NVIDIA Corporation in the United States and/or other countries.
Uses FMOD SoundSystem. Copyright ©2001-2004 Firelight Technologies Pty Ltd. All rights reserved.
Uses Ogg Vorbis audio compression format. Copyright ©2004 Xiph.Org Foundation. All rights reserved.
Uses MP3 audio compression format. Copyright ©2001-2004 Thomson. All rights reserved.
Uses ‘zlib’ general-purpose compression library. Copyright ©1995-2002 Jean-loup Gailly and Mark Adler. All rights reserved.
Uses the FreeType 2.0 library. The FreeType Project is copyrighted ©1996-2002 by David Turner, Robert Wilhelm, and Werner Lemberg. All rights reserved. Uses Morpheus TrueType font. Copyright © 1996 Kiwi Media, Inc. Design by Eric Oehler. All rights reserved. Uses Folkard TrueType font. Copyright © 2004 Ragnarok Press. All rights reserved. Uses Yoonfonts. Copyright © 2004 YoonDesign Inc. All rights reserved.
World of Warcraft requires access to the Internet and acceptance of the World of Warcraft Terms of Use Agreement. Requires subscription to play. Internet connection required. Additional Online fees may apply, and player is responsible for all applicable internet fees.
WARNING - SEIZURES
A small percentage of people may experience a seizure or blackout triggered by light patterns, flashing lights, or other images that appear in computer games. If you have an epileptic condition, consult your physician before installing or playing this game. Even people who have no history of epilepsy may experience a seizure while viewing a computer game.
A seizure can be accompanied by any of the following symptoms: altered vision, convulsions, disorientation, eye or muscle twitching, involuntary movements, or loss of movement.
If you experience any of these symptoms, immediately stop playing and consult a doctor.
Parents or guardians of children playing this game should monitor their children closely. If your child suffers any of these symptoms, stop playing the game immediately and consult a doctor.
®
Blizzard Entertainment
P.O. Box 18979, Irvine, CA 92623
(800) 953-SNOW |
Direct Sales |
(949) 955-0283 |
International Direct Sales |
(949) 955-1382 |
Technical Support |
(800) 59-BLIZZARD |
Billing and Account Services |
http://www.blizzard.com |
World Wide Web |
wowtech@blizzard.com |
Technical Support |
billing@blizzard.com |
Billing and Account Services |

CONTENTS
Chapter 1: Installation |
6 |
Chapter 5: Your Character |
46 |
Troubleshooting |
8 |
Attributes |
47 |
Technical Support Contacts |
9 |
Experience |
50 |
Chapter 2: Creating an Account 11 |
Rest State |
52 |
|
Billing |
12 |
What It Means to Level |
54 |
Chapter 3: Getting Started |
13 |
Equipment |
58 |
Soulbound Equipment |
60 |
||
Creating Your Character |
14 |
Inventory & Bags |
64 |
Understanding |
|
Chapter 6: Races |
66 |
Your Interface |
16 |
||
Moving in the World |
20 |
Class Descriptions |
68 |
Your First Battle |
22 |
The Warrior |
70 |
The Experience Bar |
24 |
The Mage |
72 |
Looting Your Kill |
24 |
The Priest |
74 |
Equipping Your Character |
26 |
The Rogue |
76 |
Leveling Up |
27 |
The Druid |
78 |
Adjusting Your Action Bar |
29 |
The Paladin |
80 |
Dying & Corpse Retrieval |
30 |
The Shaman |
82 |
Chapter 4: Advanced |
|
The Hunter |
84 |
|
Hunter Pets |
84 |
|
User Interface |
32 |
||
Chat Log |
36 |
The Warlock |
86 |
Pet Action Bar |
37 |
Combat Pets |
88 |
Macros |
38 |
Chapter 7: Talents |
90 |
Help Request |
42 |
Chapter 8: Skills |
92 |
Main Menu |
43 |
Weapon Skills & |
|
Interacting with the World |
44 |
Armor Proficiencies |
94 |
|
|
Trade Skills |
95 |
|
|
Gathering Trade Skills |
96 |
|
|
Herbalism |
97 |
|
|
Mining |
98 |
Skinning |
98 |
Chapter 11: PVP |
|
Production Trade Skills |
99 |
Horde Versus Alliance |
131 |
Secondary Skills |
103 |
Normal Server |
131 |
Chapter 9: The World |
104 |
Player Versus Player Server |
132 |
Player Versus Player Rewards |
134 |
||
Intercity Travel |
105 |
Duels |
135 |
Cross-Continental Travel |
106 |
Chapter 12: Community |
136 |
Hearthstones and Inns |
107 |
Chatting |
136 |
Mounts |
108 |
Channels |
136 |
Banks |
109 |
Looking for Players /who |
138 |
Merchants |
109 |
/emote |
138 |
Trainers |
109 |
Speech |
139 |
Flight Masters |
109 |
Language |
139 |
Economy |
111 |
Ignoring Players |
139 |
Buying and Selling |
111 |
Inspecting Players |
139 |
Trade Channel |
113 |
Grouping |
140 |
Auction Houses |
114 |
Group Looting |
142 |
Placing a Bid |
114 |
Trading |
142 |
Auctioning an Item |
116 |
Friends |
144 |
Chapter 10: Adventuring |
118 |
Guilds |
145 |
Quests |
118 |
Postal Service |
148 |
Quest Log |
119 |
Inbox |
148 |
Completing a Quest |
120 |
Send Mail |
149 |
Places of Interest |
123 |
Maps |
150 |
Dungeons |
123 |
Appendices |
|
Tagging |
126 |
I. History |
156 |
|
|
II. Races in Conflict |
168 |
|
|
III. Glossary and Acronyms |
192 |
|
|
IV. Customer Support |
196 |
|
|
Credits |
200 |

Chapter 1
Installing the Game (PC)
System Requirements
OS: Windows 98/ME/2000/XP
Processor: Intel Pentium3 800MHz, or AMD Duron 800MHz
Memory: 256MB RAM
Video:
Minimum: 32MB 3D graphics processor with Hardware Transform and Lighting, such as an NVIDIA GeForce 2 class card or above.
Recommended: 64MB 3D graphics processor with Vertex and Pixel Shader capability, such as an NVIDIA GeForce FX 5700 class card or above.
For a complete list of supported 3D cards, please visit: http://www.blizzard.com/support/wow
Sound: DirectX compatible sound card
Install Size: 4 gigabytes of free Hard Disk space
Installation Instructions
Place the World of Warcraft CD into your CD-ROM or DVD-ROM drive. If your computer is autoplay enabled, an installation window will automatically pop up on your Windows desktop. Click the Install World of Warcraft button and follow the on-screen instructions to install World of Warcraft to your hard drive.
If the installation window does not appear, open the My Computer icon on your desktop and double-click on the drive letter corresponding to your CD-ROM or DVD-ROM drive to open it. Double-click on the Install.exe icon in the CD-ROM contents and follow the on-screen instructions to install World of Warcraft.
Inserting Multiple CDs
World of Warcraft comes on 4 CDs. During installation, you will be prompted to insert additional CDs to continue installation. Open your CD-ROM or DVD-ROM drive, insert the requested CD, and click on the OK button to resume installation.
Installing DirectX
6You will need to install DirectX 9.0c in order to properly run World of Warcraft. During installation you will be prompted to install DirectX if you do not already have the most up-to-date version installed on your computer.
Installing the Game (Mac)
System Requirements
OS: Mac OS X 10.3.5 or newer required
Processor: 933MHz G4/G5 processor
RAM: 512MB RAM, DDR RAM recommended
Video: ATI or NVIDIA graphics processor with 32MB VRAM, 64MB recommended
Controls: A keyboard and mouse are required. Input devices other than a mouse and keyboard are not supported
Install Size: 4 gigabytes of free Hard Disk space
Installation Instructions
Place the World of Warcraft CD into your CD-ROM or DVD-ROM drive. Double-click on the World of Warcraft CD icon. Then double-click on the Installer application to copy the required game files to your hard drive.
Inserting Multiple CDs
World of Warcraft comes on 4 CDs. During installation, you will be prompted to insert additional CDs to continue installation. Open your CD-ROM or DVD-ROM drive, insert the requested CD, and follow the onscreen instructions to resume installation.
Single Button Mice
With a single-button mouse, hold down the Command key on the keyboard while you click the mouse button to simulate a right-click in the game.
All Platforms
Setting up an Account
You must create an account before you can play World of Warcraft. Chapter 2: Account Setup and Billing, has instructions on how to create an account, as well as information on billing and account support.
Connectivity
You must have an active Internet connection to play World of Warcraft.
Modem: 56K or better
Mouse
Multi button mouse with scroll wheel recommended.
Troubleshooting
If you experience any trouble running World of Warcraft, be sure to read the most recent readme.txt and patch notes text files. These files detail the latest changes and any bug fixes made to the game. Your problem might already be listed there, along with possible solutions.
Many times, errors in running the game can be attributed to a lack of updated drivers. Ensure that the drivers for all your hardware are up to date before contacting Blizzard Entertainment for customer support.
General Troubleshooting [PC]
General Lockups/Video Problems
If your computer hard locks without an error message, reboots during game play, will not start, or has distorted graphics of any sort, please make sure you have the latest video card drivers for your 3D accelerator. Contact your hardware manufacturer to find the latest drivers available, or check our Driver Update Information page on our support website for links to the most common hardware vendors at http://www.blizzard.com/support/wow
Sound Issues
If you are experiencing sound distortions, periodic loss of sound, loud squelches, whistles, or pops, confirm that you have the latest version of DirectX installed on your system. Also, verify that your sound drivers are compatible with the newest version of DirectX. Contact your hardware manufacturer to find the latest drivers available, or check our Driver Update Information page on our support website for links to the most common hardware vendors at http://www.blizzard.com/support/wow
General Troubleshooting [Mac]
Most lockups, video problems, or sound problems can be solved by installing the latest available software updates from Apple. All of the latest video and sound drivers are included in the OS available from Software Update from the Apple menu.
You can find additional troubleshooting instructions at: http://www.blizzard.com/support/wow/
8
Technical Support Contacts
Web Support
The Blizzard Entertainment Technical Support website has solutions to the most common game questions and problems. This free service is available 24 hours a day, 7 days a week. You can find our Technical Support website located at: http://www.worldofwarcraft.com/support
Email Support
You can email the Technical Support department at any time at wowtech@blizzard.com. Under normal circumstances you will receive an automated reply within 15 minutes, detailing solutions to the most common problems. You will receive a second email sent typically between 24 to 72 hours later, containing a more detailed solution to your particular problem or question.
Automated Phone Support
Our automated phone support is offered 24 hours a day, 7 days a week and has an 80% success rate at addressing the most common questions and concerns. To use this automated phone support, please call (949) 955-1382. Automated support carries no charge beyond any normal long distance charges from your phone company for calls outside of your local area.
Live Phone Support
We offer live phone support Monday through Friday 9 A.M. to 6 P.M., Pacific Standard Time (except on U.S. holidays). Contact our Technical Support staff by calling us at (949) 955-1382. This form of support carries no charge other than any normal long distance charges from your phone company for calls outside of your local area. NO GAME-PLAYING HINTS WILL BE GIVEN THROUGH THIS NUMBER. Please be sure to consult our troubleshooting section before calling Technical Support, and be near your computer if possible when calling.
Note
For updated information about protecting your computer and World of Warcraft account, along with answers to commonly asked questions and additional troubleshooting material, go to http://www.worldofwarcraft.com/support

Game Hints
If you are seeking a game tip, hint, or additional game information for World of Warcraft, please visit: http://www.worldofwarcraft.com
Game Performance
If you encounter slow or choppy game play, there are several game options that can be adjusted to improve performance. These options are accessible via the Video Options Menu. Selecting a lower resolution, decreasing the FarClip, World Detail, and Animation settings will have the greatest effect.
Chapter 2
Account Setup and Billing
Creating an Account
After you have successfully installed World of Warcraft, start a game by dou- ble-clicking on the World of Warcraft icon on your desktop. You can also start a game from the Start menu.
Once you start the game, you are taken to the Login screen. After agreeing to the Terms of Use (see below), you will see a blank Login field and a blank Password field in the middle of the screen. Below that is a "Create Account" button. Click on this button to setup an account.
You will immediately be taken out of the game and back to your desktop. Your web browser will automatically open and take you to the World of Warcraft account creation web page. Follow the instructions on the web page to successfully create an account.
When you are finished, return to the World of Warcraft Main Login screen, enter your Login and Password in the appropriate fields, and press the Enter World button. You are now ready to play World of Warcraft.
Terms of Use Agreement
The first time you load World of Warcraft, a Terms of Use Agreement will appear on your screen before you can progress to the Login screen. To play the game, you must read the agreement in its entirety and click the Agree button. The Agree button is grayed out initially, but becomes enabled when you scroll to the end of the agreement. After agreeing to the Terms of Use, you are allowed to play the game. If you refuse the Terms of Use, you cannot play the game. Anytime the Terms of Use Agreement is updated, it will reappear when you next start the game. You must read it again and click the Agree button to progress to the Login screen.
10

Internet Connection
World of Warcraft is a massively-multiplayer online role-playing game. That means it is played entirely online and has no offline component. You must have an active Internet connection to play this game.
Blizzard is not responsible for any fees you may incur from your internet service provider that are in addition to your monthly World of Warcraft subscription fee.
Billing
When you purchase World of Warcraft, you also get a free trial period during which you can play the game free of charge. At the end of this trial, you will have to assume the monthly subscription fee in order to continue playing World of Warcraft.
Payment Methods
During your account creation, you must specify your method of payment. You can pay your monthly fees by credit card, with pre-paid time cards sold by Blizzard Entertainment online and in local game stores, or by other methods depending on your location.
Account and Billing Issues
If you have any questions or issues dealing with billing or your World of Warcraft account, please contact Billing and Account Services. Our
representativesτ can help you with many issues, including: Questions regarding billing
τ Registering or setting up an account
τ Recovering your account or password
τ Canceling your account
τ Reactivating a canceled account
τ Or any other Account or Billing issues
|
We offer live phone support Monday through Friday 9 A.M. to 6 |
|
P.M. PST (Hours may be extended due to peak workloads). This |
|
form of support carries no charge other than any normal long |
|
distance charges from your phone company for calls outside of |
|
your local area. NO GAME PLAY HITS WILL BE GIVEN THROUGH |
|
THIS NUMBER. |
12 |
You can contact us by email at billing@blizzard.com or by phone |
at 1-800-59-BLIZZARD (1-800-592-5499). |
Chapter 3
Getting Started
If this is your first time playing a massively multiplayer online role-playing game, then you may find this chapter helpful. It will walk you through creating a character and playing through your first level in the game.
Many of the game concepts introduced in this tutorial are explained in greater detail in later chapters of the manual. If you are unclear about game terms, be sure to read the glossary of terms and acronyms in Chapter 11: Community.
Note
World of Warcraft, like many massively-multiplayer online roleplaying games, is constantly evolving. In an effort to keep the game challenging and balanced, Blizzard will occasionally implement changes to the game through patches. In some cases, new content and game systems will also be added. At the time of the printing of this manual, the information contained herein was accurate and relevant. However, as the designers do adjust the game from time to time to give you the best gaming experience possible, some information in this manual might no longer be current.
To see last-minute amendments to the game, read the readme.txt file on the CD. This file records all changes made to World of Warcraft just prior to release that were too late to include in the manual.
Also be sure to check out the latest patch notes and updated information on the World of Warcraft strategy page at http://www.worldofwarcraft.com. The website is continuously updated to reflect the most current version of the game and includes more detailed information on the topics covered in this manual.
Creating Your Character
You've created an account to play World of Warcraft (WoW) and have entered the game for the first time. At the character creation screen, you have many options for making your first character.
Choose Your Race
Your first choice when making a character is your race. The eight races in WoW are divided into two factions: the Horde and the Alliance. At one time in Azeroth's past, the Horde was a force of evil, and the Alliance was a bastion of good. However, in today's war-torn Azeroth, such black and white distinctions are gone. Both factions are simply fighting to preserve their way of life in the wake of the Chaos War.
Each faction has four races. The Alliance is comprised of the dwarves, gnomes, humans, and night elves, while the Horde consists of the orcs, tauren, trolls, and undead. Each race has a unique set of characteristics and its own list of available class choices. Some of the different races also begin in their own unique starting area, while others share a beginning region.
Note
When choosing a race, remember that you can only interact meaningfully with members of your own faction. When dealing with races of the opposite faction, your interaction options are much more limited, and sometimes, hostile. If you wish to play with your friends, you should choose races on the same side.
Read the descriptions to the left to learn more about each race before you arrive at your decision.
Choose Your Class
After choosing your race, it's time to select a class. There are nine classes in the game, and each has its own unique set of abilities and powers. These nine are the druid, hunter, mage, paladin, priest, rogue, shaman, warrior and warlock. Not every class is available to every race.
Although each class is unique, they do fall into general categories. Warriors and rogues engage in melee combat, and have special
14abilities but no spells. The priest is a potent healer, while the mage is a powerful offensive caster. The hunter and warlock both excel in dealing damage, and also have pets to support them. Druids
are a class with a variety of spells, including healing, but they also have shapeshifting powers as well. The paladin is a class with melee capability, healing, and defensive spells that is available only to Alliance races. The shaman is a hybrid class capable of healing, supporting group members, and fighting in melee. It is available only to Horde races.
If you want more detailed information on each class before you decide, refer to Chapter 6: Races and Classes.
Choose Your Gender
You can be a male or female character in World of Warcraft. Men and women are equal in Azeroth, so the only differences between the two genders are cosmetic.
Choose Your Appearance
When making a character, you can customize his appearance by adjusting his skin color, the look of his face, hair style, hair color, and facial hair. You can create hundreds of unique appearances with the different combinations, or if you want the game to create a random appearance, click on the "Randomize" button. To get a better view of your character, you can click the left and right arrows at the bottom of the screen. These arrows let you rotate your character 360 degrees.
Name Your Character
Now name your character by typing his name in the field at the bottom of the screen. Your name can only contain letters and must be 2 to 12 characters in length. Have several choices ready because your first choice might already be taken. Choose your names wisely as accounts with bad names may be changed or terminated. For more information about our naming policy, go to http://www.worldofwarcraft.com/policy/naming.shtml
Enter the World
After creating and naming your character, click the Create button, and if the name is not already taken, your character is ready. The next time you enter the character screen, your character will be waiting for you. Click on it now, and press the “Enter World” button.
After watching a movie introducing your racial heritage, you appear in a small village in the wilderness.

Your Name Target Portrait/Tool Tip
Character
Portrait
Party Icons
Chat/
Combat Logs
You!
Chat Menu
Action Bar
Understanding Your Interface
The main screen is the first thing you see when you enter the actual world of Warcraft. In the middle of the screen is your character,
16while the rest of the view is occupied by your environment.
You can adjust this view by using your mouse wheel, or by pressing the Home and End buttons. To zoom in your view and see through a first-person perspective, push your mouse wheel forward.
Status Icons |
Zone Name |
Day/Night Clock
Mini Map
Ailments and “Buffs”
Map Zoom In
Map Zoom Out
Smart Cursor
Experience Bar
Tool Tip
Interface |
Latency |
Bag |
Backpack |
Panel |
Bar |
Slots |
|
To pull back for a bird's-eye view, roll your mouse wheel backward. You can also slowly roll your mouse wheel to arrive at a view setting in between these two extremes.
You can rotate the camera around your character by clicking on an empty part of the screen and moving the mouse while holding down the left button. You can tilt the camera up or down by doing the same.

Description of User Interface Items
Action Bar: Holds any spells or abilities you place here from your Spellbook and Abilities window. Once placed, they can be activated with a quick hotkey or mouse click.
Ailments: Any negative conditions, or debuffs, on your character appear here. Such ailments usually are inflicted upon you by monsters you are fighting.
Bag Slots: Your inventory in the game. All items not equipped on your character are stored here. One backpack is automatically provided for you. To fill the other four slots, you must purchase, find, or make additional bags.
Character Portrait: Shows your character name, face, level, and health bar. Depending on your class, the second bar could be your mana, rage, or energy bar.
Chat Button: Click on this button to access party and guild chats, private messaging of individual players, emotes, and voiced speech. Many of these same chat options are also available through hotkeys or commands that you can type at the chat prompt.
Chat Log: All chat messages appear here, along with miscellaneous character messages. You can scroll up or down this log by clicking the arrows, and jump to the latest message by clicking on the bottom button.
Chat Prompt: Type here to send messages to other players or to the general area. Press the "Enter" key to open it.
Combat Log: All messages related to combat appear in this window. Watch it during combat to see how you are affecting your opponent, and vice versa.
Day/Night Clock: This clock shows you the time of day if you mouse over it.
Experience Bar: Shows your current experience point total and how much you need to reach next level.
Interface Panel: These tabs enable you to access your character information, spellbook and abilities window, character talents, quest
18 |
log, world map, social options, the |
|
main menu, and GM support. |
||
|
Latency Bar: Measures the speed of your connection to the World of Warcraft server. A green bar means your connection is good. A yellow bar means you may experience intermittent delay, called lag. A red bar means your connection is poor and you will experience significant delay.
Name: The name of your selected target. A tag underneath a name might be a player's guild affiliation.
Rest Marker: Shows your rest state. In rested state, you earn 200 percent of experience from kills. In normal state, you earn 100 percent of experience. Rest state does not affect quest or exploration experience.
Selection Circle: This circle appears around a target when you select it. The color of the circle indicates hostility. Red = Aggressive. Yellow = Passive until you attack. Green = Non-combatant.
Tool Tip: This appears when you click on or mouse over a creature or character. Inside is the target's name, level, and class or type. The color of the tool tip indicates hostility. Aggressive targets are red, passive targets that fights when struck first are yellow, non-hostile targets that cannot be attacked are green, and player characters are white.
Minimap: A miniature map of your character's surroundings. You can zoom the view in or out using the plus and minus keys. The name of your current zone or location appears above the minimap. Towns appear on the edge of the minimap as arrows, while party members, pets, and resource nodes appear as dots within the minimap.
Smart Cursor: When your mouse cursor moves over an object or character that you can interact with, it changes shape to reflect a new action you can perform. See page 44 for more info.
Status Icons: Any positive conditions, or buffs, affecting your character appear here. Most buffs are cast on you by yourself, friendly players, or NPCs.
Target Portrait: Shows the name, face, and health bar of any creature or character you click on in the game. Depending on the target, it might also have a mana, rage, or energy bar.
Moving In the World
After you acquaint yourself with the interface, it's time to move around the world.
You move your character primarily using the key board. Movement for forward, backward, left, and turning right, are already mapped onto
s, a, and d keys, as well as the arrow keys. Turning left and right means your character turns, thus changing the camera view, but your character does not actually move left or right. To move left or right, you can use the q and e keys, or you can hold down the right mouse button and press a or d. You will then run to one side or the other while facing forward. This sort of running is referred to as strafing.
To toggle auto-run, press the Num Lock key.
You can jump while moving by pressing the spacebar. To sit, press the x key. All your movement commands, as well as other commands, can be customized from the Key Bindings menu in the main menu.
Interacting with NPCs
Standing in front of you will be one or more non-player characters (NPCs). Mouse over one and you will see his name and occupation appear in a pop up box called the tool tip in the bottom right corner of your screen. Mouse over any other nearby NPCs to see who and what they are as well.
One or more of the NPCs in front of you will have a yellow exclamation point over their heads. This mark indicates that they are quest givers. If you mouse over other NPCs, you will find that some are trainers, vendors, or guards. If you can interact with an NPC, your cursor will change to a chat balloon or an icon
representing the action you can perform with the NPC. A trainer, for instance, who offers extra learning for your class, is represented by a book cursor. A vendor, who sells you items, is represented by a bag.
To talk to or interact with any NPC, simply right-click on it. A box
20or window will then appear on your screen with instructions or options for you to act on.
Acquiring Quests from NPCs
Talk to the first quest giver NPC in your view. You'll notice that your cursor now appears as a chat balloon. When you right-click on the quest giver, it will begin talking to you through a dialog box. This dialog box is where you will read about the NPC’s quest, what objectives you need to accomplish to complete the quest, and what reward, if any, you'll garner for your success. Many of the quests in your beginning area are simple. The quest givers here will ask you to slay some simple beasts to prove your mettle, gather items off of the environment or fallen creatures, or deliver letters to other NPCs.
To accept a quest, click on the Accept Quest button at the bottom of the quest dialog box.
You'll notice now that the yellow exclamation over the quest giver has changed to a gray question mark. The question mark tells you that this NPC is who you need to return to when you finish the objectives for your quest. However, the gray color indicates that you are not yet ready to speak to the quest giver because you haven't completed your goals.
Tracking Your Quests
No matter what race or class you play, you should have several quests to accomplish after talking to the various NPCs in your starting area. To help you keep track of your many quests, World of Warcraft offers the quest log. Mouse over the goblet at the bottom of the screen in the interface panel. The info box that pops up tells you this is the quest log. The letter “L” in parentheses is the hotkey that corresponds to the quest log. Click on the goblet or press "L" to open the log.
All the quests you have acquired will be listed here under a heading that corresponds to your starting zone. Clicking on a quest calls up a short synopsis of the quest, the quest description, and the quest reward. If you need to remind yourself of information regarding a quest, always look in your quest log first. Rereading the quest description will often give you the clues you seek.

Accomplishing Your First Quest
At least one of your first quests calls for you to slay some monsters to prove your mettle. The type of beasts will vary depending on your starting region: Gnomes and dwarves in Coldridge valley must slay rockjaw troggs, while orcs and trolls in the Valley of Trials must slay mottled boars. Other races will have other required targets.
Now head out into the wilderness around your starting region to hunt for these monsters.
Looking at Creatures
When you see the monster you must kill, mouse over it. Each time your mouse passes over a creature, its tool tip appears in the bottom right corner of your screen. As with NPC tool tips, this box shows you the monster's name, level, and type. The color of the tool tip is also very important to take notice of. If the color of the box is red, then the monster is hostile and will attack you on sight if you get close enough. If the color is yellow, then the creature is passive, meaning you can walk by it and not provoke attack. However, passive creatures will fight back if you attack them.
Your First Battle
Left-click on the monster to select it. Now you can rush up and right-click on it to attack!
Notice that after selecting the monster that its portrait shows up at the top of the screen next to your own, so you can monitor its health as you fight. A circle also appears around the monster, telling you that it is now selected. Notice that the color of the circle matches the color of the monster's tool tip.
The monster will now have closed to melee range. Whether you are a warrior or spellcaster, now you are engaged in close-range combat. As you are fighting, the attack icon in the first slot of your action bar is flashing. That means you are attacking a foe.
Spellcasting Delays and Interruptions
If you are a spellcaster, you can try to cast a spell in melee combat, but if you get hit, your spell might get interrupted or delayed. In addition, once you cast a spell, there is a brief delay before you can cast it again. Watch your action bar closely. Any ability you use will become grayed out once you use it. You have to wait for the ability or spell to brighten before you use it again. Depending on the spell or ability, this wait can be very short or very long.
Using Hotkeys to Fight
Although you began this fight by using your mouse to right-click on the monster, you can also fight using hotkeys. A hotkey is a key stroke that is mapped to an action, allowing you to perform that action by pressing the appropriate key instead of navigating through the user interface to find the action and then click on it with the mouse. For instance, if you are close to a monster and want to attack it, you can either right-click on it, or press the 1 key on your keyboard, which corresponds to the attack icon on the first slot in your action bar. If you had a spell or ability in the second slot, pressing the 2 key would activate that spell or ability.
Experience
When the monster dies, it collapses to the ground, and a number appears over your head. This is the experience point award you just earned for killing the monster. This experience also appears in your chat log and your combat log.
22

The Experience Bar
Some purple has also appeared in the experience bar that runs across the bottom of your screen above the action bar. Mouse over it to see the reading, which tells you how much experience you have and how much experience you need to reach the next level. Each time you make a kill, explore a new locale, or complete a quest, you earn experience, which adds to this bar. When the bar is full, you gain a new level, and your experience bar resets to zero, while the amount you need for the next level grows.
Looting Your Kill
Turn back to the monster's corpse. Sparkles of light drift up from its body. That means you can loot it. Mouse over the corpse, and your cursor changes to a bag. Right-click on the corpse to open up the loot window.
Inside the loot window should be some items. If you killed a humanoid monster, such as a kobold, you would find money inside the window. If you killed a beast, like a wolf, you might find wolf parts. Keep in mind that you won't always get loot from a kill; some monsters carry nothing.
Right-click or left-click on the items in the loot window to pick them up. When you pick up the last item in the loot window, the loot window closes, and the sparkles disappear.
As soon as you loot the corpse, open your backpack. Inside one of the slots you will find the item you just looted. Multiple items will take up multiple slots, unless they are of the same type, in which case they might stack.
Recovering Health
While you were fighting, you lost some health. Now that you've looted your kill, you can rest. During a battle, be sure to monitor your health by watching your combat log and your health bar next to your portrait. In some cases, you might have to run away before you lose all your health and die.
All characters automatically recover health after combat at a gradual rate. This healing rate increases if you sit down. If you also eat while sitting, this healing rate improves even more dramatically.
Left-click or right-click on the food icon in the last slot of your action bar. Your character then sits and begins eating. While your character is eating, it gains back health rapidly. When it is finished eating, your character will be at full health and ready to attack more monsters.
Turning In Your First Quest
The quest you are trying to fulfill asks you to kill a certain number of monsters. When you have fulfilled the requirement and killed the necessary number, return to the NPC that gave you this quest. Whereas before you saw a gray question mark over that NPCs head, now you should see a yellow mark. The change in color tells you that you have accomplished your objectives and can turn in the quest.
Right-click on the NPC to open a dialog box and speak to it. Click on the Complete Quest button at the bottom of the box and your quest is erased from your quest log and a message in your chat log tells you that you finished the quest.
Upon turning in the quest, you'll gain a large experience point reward, which appears over your character, in your chat log, and in your combat log. Look at your experience bar and you will see that it has been filled with more experience.
If there was a material reward offered for the quest, it will be added to your backpack. If you had a choice of rewards, you will need to select one by clicking on it in the dialog box before you can click the Complete Quest button.
24

Collecting Items for a Quest
Now it's time to continue questing. Open your quest log. One quest asks you to collect a number of items for the NPC. These types of quests are called collection quests. In many cases, a collection quest can only be fulfilled by killing monsters and looting the necessary items from their corpses. Some collection quests, however, simply ask you to retrieve items from objects in the world. The first orc and troll collection quest, for example, asks you to bring back cactus apples from the numerous cactus plants dotting the Valley of Trials.
Go to the object that offers the desired collection item. In the case of an orc or troll player, this would be a cactus plant. In the case of any other player race, this would be the corpse of a monster you just killed. Your quest log description will always tell you exactly what monster you must kill in order to find the item. Always refer back to your quest log if you forget what monster drops the item you need.
To get the item, open up the object's loot window. Keep in mind that if you are looting a monster, you aren't always guaranteed an item. Don't worry. Quest collection items do drop fairly regularly. Keep killing monsters and you'll eventually collect the required number.
Pick up the item from the loot window and once you do so, a message on your screen tells you the item you just looted, how many of those items you now have, and how many you still need.
When you have collected the necessary number, turn in this quest for another experience award, and possibly a material reward as well.
Equipping Your Character
At least one of your beginning quests offers you a material reward that is a piece of armor. When you gain this reward, you want to equip it immediately.
Open your Character Info window by clicking on the small portrait of your character in the bottom of the screen or by pressing the hotkey “C.”
Your character appears in the middle of the info window, with slots on either side of it. Mouse over these slots to see that they correspond to areas of the body where you can wear armor. Your Hands slot is empty.
Open your backpack, and left-click on the piece of armor in your backpack. The slot that you can place it in should now be glowing. Bring the cursor to that empty slot in your Character Info window, and click on the slot. The armor will then drop into the slot, improving your character's armor rating. Look at your character closely. Your character is now wearing the new armor.
Leveling Up
The experience you earned from killing monsters and completing your quests should fill up your experience bar. If not, kill a few more monsters or try to finish another quest. When your experience bar fills up, a congratulatory sound and a flourish of light tell you that you’ve just leveled up. Your chat log also congratulates you on gaining a level. Every time you level up, your character increases in power. Not only do you gain extra health, but you also gain increases to one or more of your primary attributes, such as agility or stamina. Spellcasters also gain mana when they level up.
26

Training Your Character
Now that you have gained a level, it's time to visit your class trainer.
Characters gain access to new spells and abilities whenever they gain levels. To learn these new abilities, you must speak to your class trainer. Right-click on the trainer to open the Training window.
Inside the window are all the abilities you could possibly learn. Abilities you can learn right away are green. Abilities that are beyond your current level are red. You can mouse over an ability to see what it does. If you can't learn it yet, mousing over it will tell you the minimum level requirement for that ability.
If you see any spell or ability that you can learn right now, click on it and then click the Learn button at the bottom of the Training window. Learning a new spell or ability always costs money.
If You Need Money
If you don't have enough money to buy a new spell or ability, sell some of your loot at a merchant. Merchants are identified as such in their tool tips. To buy or sell from them, right-click on them to open up their merchant window. Your backpack also opens at the same time. Right-click on an item you want to buy or sell and the money automatically trades hands. When you have the money you need, return to the trainer.
Adjusting Your Action Bar
After you learn a new ability or spell, it's time to add it to your action bar. This allows you to use it easily in battle. Click on the Abilities button on the bottom of your screen. This button looks like a book. You can also press the “I” hotkey.
In your Abilities window, you see your attack ability, along with any other abilities you already have. An ability that has the "passive" tag next to it does not need to be activated and is always on. These types of abilities never need to be placed on your action bar.
The ability you just learned should be on this ability page. If you learned a spell, it will be on the spell page. In some cases, you might have to click on the spell or ability tab at the bottom of your book to access it. Mouse over the new spell or ability icon in your spellbook or abilities book to see what it does. Then add it to your action bar. Left-click and hold the icon. Then drag it onto the third slot in your action bar. It now appears there. You can now use it by clicking on it or by pressing the appropriate hotkey, which is the 3 key.
Onto Greater Adventures
Now that you have secured greater equipment and grown in power, it is time to continue your adventures in Azeroth. Complete whatever quests remain for you in your starting area. Speak to all the non-player characters you can one last time, and at least one of them will offer you a quest to venture beyond your home to greater settlements beyond.
Take heart in the lessons you have learned and journey forth with courage. Good luck. The World of Warcraft awaits.
28
A Special Note on Dying
No matter how good an adventurer you are, eventually you will know the sting of death. Thankfully, death in the World of Warcraft isn’t permanent.
Ghosts
When your health is reduced to 0 or less, through battle or accident, you die. A release window pops up over your corpse with a button you can press to release your spirit. If you choose the Release Spirit button or wait longer than five minutes, your spirit appears as a ghost at a nearby graveyard. All zones have at least one graveyard where dead characters reappear.
At the graveyard is a spirit healer. When you are a ghost, you can come back to life by retrieving your corpse or by asking the spirit healer to resurrect you. If you ask the ghost healer to resurrect you, you will lose a significant portion of experience. This amount will never force you to lose a level, however. If you do not wish to be raised immediately, then you must run to your corpse and recover it. It is almost always better to run to your corpse rather than ask a spirit healer to resurrect you. That's because all you lose when you run to your corpse is time. Aside from this slight inconvenience, there are no other penalties associated with dying and retrieving your corpse. Most zones have multiple graveyards interspersed around the zone so you likely won't be too far from your corpse anyway.
Corpse Retrieval
While you are a ghost, you run at increased speed. When you get close to your corpse, a resurrection window appears on your screen. To resurrect yourself, press the Resurrect Now button in the window. Be very careful about where you revive yourself. If you died fighting monsters, make sure the monsters are gone. When you raise yourself from the dead, your new body will replace your ghost, and you will appear with your health and mana bars half full.
Resurrection Waiting Period
If you have died repeatedly over a short period of time, subsequent resurrections might have a waiting period of a few minutes before you can return to life. However, this waiting period resets
30to zero if you then play for an extended period without dying. There is no resurrection waiting period if you are resurrected by the spell of another player.
Resurrection Spells
You can also be brought back from the dead through magic. Certain character classes can cast spells to raise you from the dead. The priest, shaman, and paladin all have resurrection spells. The difference between the resurrection spells of these casters is that they bring you back at different strengths. None of these classes begin play with their resurrection spells available, so it is an option that only higher-level characters can accommodate. When one of these classes casts a resurrection spell on you, you will be asked to consent to the resurrection. If you agree, you appear next to the caster with minimal health and mana as dictated by the spell.
Resurrection Sickness
When you are resurrected by a spell or soulstone, you revive with a condition called resurrection sickness. It lasts for a few minutes. During this time, all your character attributes are severely reduced and your maximum health and mana are much lower than normal. After the resurrection sickness passes, your attributes, health, and mana are restored to their normal numbers.
Resurrecting a Ghost
Even if you have already released your spirit and are now a ghost running back to your corpse, you can still benefit from a resurrection spell. In this case, you will get the same resurrection window asking you to consent to the resurrection. If you agree, you will appear near the casting shaman, priest, or paladin in your newly revived body.
Chapter 4
Advanced User Interface
This chapter provides additional details and advanced user options for your interface beyond the beginning information provided in Chapter 3: Getting Started.
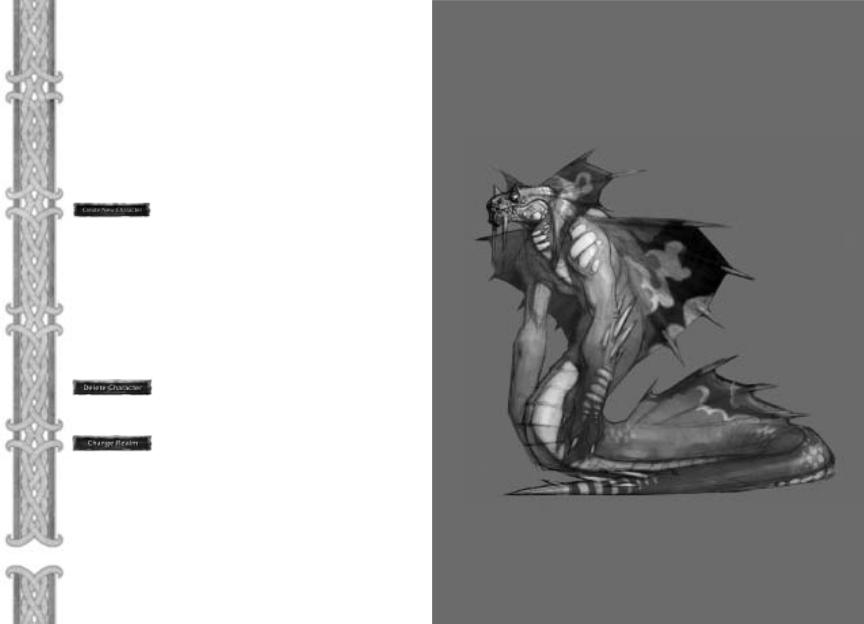
Character Selection Screen
At the Character Selection screen you can make a new character, choose a character to play, change your current realm, enter the WoW website, access tech support, and adjust your account settings.
Clicking the Create New Character button takes you to the character creation screen, where you can generate a character to play in the game. Chapter 3: Getting
Started walks you through the character creation process. For detailed information on races and classes, see Chapter 6: Races and Classes.
The right side of the Character Selection screen lists any characters you have created. If you haven’t yet made any characters, this area is blank. You can have up to ten characters per realm.
Each character entry shows the character's name, level, current location, and rest state. For more on the rest state, refer to Chapter 5: Your Character. Clicking on a character displays it in the center of your screen.
To delete a character, select that character and then press the Delete Character button. You will be prompted to confirm the deletion. Click the Okay button to
permanently erase that character.
Realms are discrete game worlds. You can interact with all the players in your realm, but not with players in other realms. When you first play World of Warcraft,
your realm will be pre-selected for you.
If you wish to play in a different realm, press the Change Realm button. A list appears showing all available realms and the current number of players in each realm. Click on the realm you want to join, and press the Okay button.
32
Interface
Understanding Your Target
As you adventure in World of Warcraft, you will encounter more than just friendly NPCs and simple beasts. You will meet many creatures and characters, and you will need to understand how to interpret the information you get when viewing them.
FRIENDLY PLAYERS
Other friendly players appear with blue names over their heads, whether you have them selected or not. If they belong to a guild, their guild name will appear under their name. When you mouse over or select a friendly player, its tool tip will also appear blue.
OPPOSING PLAYERS
By default, all player characters have blue names. However, if a player turns on the player versus player flag and indicates that he or she wants to fight other players, then that player's name and tool tip turn red, indicating that they are hostile.
NON-PLAYER CHARACTERS (NPCS)
NPCs are any humanoid character you can interact with, such as merchants, aerial mount masters, and quest givers. Their names only appear over their heads when you click on them. The tool tips of friendly NPCs are green. The tool tips of enemy faction NPCs are red.
MONSTERS
Monsters are any characters that are not also faction's NPCs and that will fight back if you attack them. There are two categories of monsters: passive and aggressive. Passive monsters have yellow names and tool tips and only fight if struck first. Aggressive monsters have red names and tool tips, and attack you on sight. Some monsters are also social, and will call for help from others if they are in combat.
CRITTERS
Critters are non-combative animals, such as sheep, rabbits, cows, and prairie dogs. These animals will never fight you, even if you attack them. Killing a critter earns you no experience.
34
Additional Portraits
PET PORTRAIT
Some character classes can summon pets. If such a character is currently controlling a pet, a pet portrait appears underneath the main character portrait. The pet portrait displays the pet's name, health bar, and
energy, mana, or rage bar. You can mouse over the bars for exact numbers.
PARTY MEMBER PORTRAITS
If you are grouped with other players, their portraits appear under yours as well. If you also have a pet, the party member portraits appear under your pet portrait. Each party member portrait displays the character's name, health bar, and energy, mana, or rage bar. Mousing over the party member's portrait also reveals its level and class, as well as any spell effects that are currently affecting the selected party member.
Spell and Ability Icons
Any beneficial spell or ability affecting your character appears in the upper right area of your map as an icon. You can mouse over the icon to see the buff's effect and duration. You can prematurely end any buff by right-click- ing on its icon here.
Minimap
Simple geographical features, like rivers, mountains, and towns, are shown on your minimap. If you are near a town, its direction is indicated as a white arrow at the edge of your minimap.
If you have a pet or are grouped with another player, then this pet or player is shown on your minimap as a large green dot. If a party member is outside the radius of your minimap, then a yellow arrow at the edge of the minimap shows you his or her direction.
Whenever you use an ability that finds resources, such as find herbs or find minerals, then any applicable resources that are sufficiently nearby appear on your minimap as yellow dots. When you mouse over one of these dots, you see the name of whatever resource it represents. If the resource's name is grayed out, then that particular resource node is underground.
You can zoom the minimap in or out by pressing the plus and minus arrows on the edge of the minimap.
You can close the minimap by clicking the x above it. This closes the map, but not the name of the area.
Chat Log
In addition to chat messages from players in your immediate surroundings, the chat log also displays private messages from other players, guild messages, yells from other players, and any non-chat messages relating to your character development, such as notices for when you gain a level, earn a skill point, or acquire a quest. Only the last eight lines of messages are displayed, although you can scroll the log up to view previous messages. To jump back to the latest message, click on the bottom arrow key next to the chat log.
CHAT BUTTON
The chat button is especially important because it houses all the commands for effectively communicating with other players in World of Warcraft. By clicking on this button, you have access to party and guild chats, private messaging of individual players, emotes, and voiced speech. Many of these same chat options are also available through hotkeys or commands that you can type at the chat prompt.
CHAT PROMPT
The chat prompt appears below the chat log when you press the Enter key. At the chat prompt, you type the messages you want to say to your fellow players. Chat commands, such as yelling and whispering, can also be typed at the chat prompt instead of selected through the chat button.
For more information about chatting and using the special chat commands, refer to Chapter 10: Community, which tells you how to interact with other players in the World of Warcraft.
Combat Log
The combat log displays your actions and the actions of other nearby players, NPCs, and creatures. Combat, purchases, item creation, experience awards, or other activities are recorded in this combat log. The actions of monsters and other players appear in different colors to distinguish them from your actions.
The arrow keys to the right of the combat log let you scroll up and down the log to see previous actions. To jump back to the latest
action, click on the bottom arrow key.
36
Action Bar
At the bottom of the screen is your action bar: the toolbar where you can store frequently used actions for quick and easy access. You can place abilities or inventory items in your action bar and then use them with the click of a mouse or the press of a key. For example, instead of opening your inventory bag and clicking on a hunk of bread to replenish your health, you can just click the hunk of bread icon on your action bar.
There are 12 slots on your action bar, and each can hold one spell, ability, or usable inventory item. Each action icon also has a hotkey – displayed in the icon's upper left corner – that corresponds to the 1 through 0 keys and the – and + keys on your keyboard. You can perform the action in an action slot by clicking on the icon there or by pressing the hotkey on your keyboard.
POPULATING YOUR ACTION BAR
To place an action in a slot on your action bar, open the window where the action appears (such as your Spellbook or backpack), left-click and drag (or or shift-left-click) the icon of the action to one of the 12 slots on the bar. To remove the command from your action bar, pick the action icon up by left-clicking on the icon in the action bar and then click on an empty area of your screen. This dumps the icon from your bar, although the action still remains in your Spellbook & Abilities panel or your inventory.
Holding your mouse over an action slot tells you what the action in that slot is.
NAVIGATING YOUR ACTION BARS
There are six action bars, but only one can be displayed at a time. You can
τYou can scroll up or down your action bars by pressing the up and down arrows to the right of the action bar.
τYou can jump to an action bar by holding down the Shift key and pressing any number key from 1 to 6. That will take you to one of the six action bars.
τYou can scroll through the action bars by holding down the Shift key and scrolling with your mouse wheel.navigate through the six action bars in three ways.
MACROS
Macros are a very advanced type of user option that allows you to create hotkey buttons for your action bar that duplicate text messages, actions, and spellcasting. You could, for instance, bind the phrase "Hello everyone" to a single button using macros so that whenever you wanted to greet your guildmates, you only had to press your macro button instead of retyping the phrase each time.
You can even bind spells and abilities to your macro, and add text to your casting. Some players bind a healing spell, for example, and a phrase such as "I am healing %t [targeted player name]" to a single button.
Macros can save you a lot of time by automating some of your more common and repeated actions in the game.
CREATING A MACRO
To create a macro, open your chat prompt and type /macro.
Once you do that, a macro window pops up. To create a macro, press the New button, type a name for your macro, and then select an icon for your macro and click the Okay button.
Next, in the macro text box, type the command you want to automate. When you are finished, you then drag the icon corresponding to this macro to an available slot on your action bar. The next time you want to execute the macro, you can just click on the macro icon on your action bar or press the appropriate hotkey.
For more detailed instructions on how to create and use macros, read the World of Warcraft strategy site at http://www.worldofwarcraft.com and look for game information. You can also type /macrohelp at the chat prompt for in-game instructions.
Pet Action Bar
If your character has access to a combat pet as a class feature, then anytime you summon a pet, a smaller action bar appears above your own. This pet action bar is used and populated the same way as your regular action bar. The hotkey for pet action bar icons is ctrl plus the appropriate number key. For example, the hotkey combination for your pet's first action bar icon is ctrl+1.
38
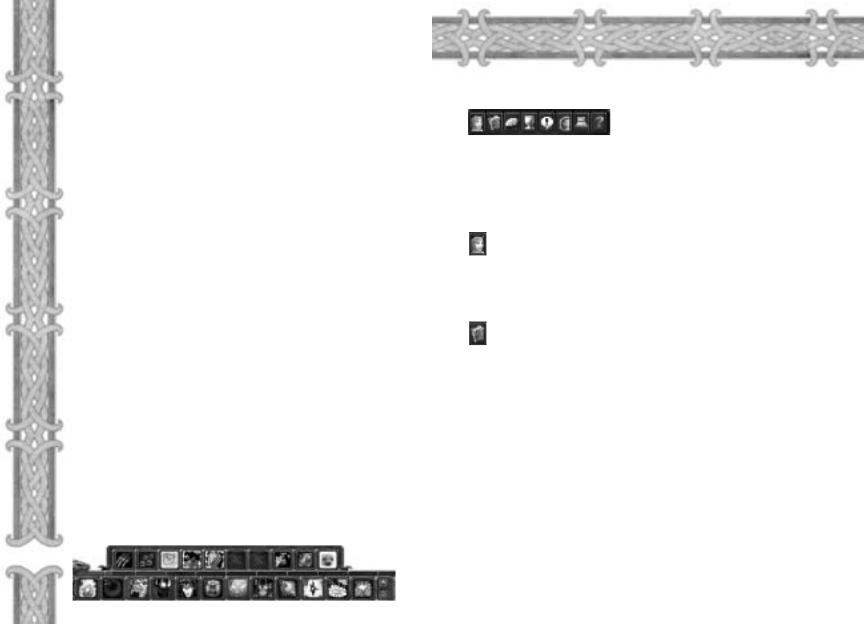
Interface Panel
The interface panel is the line of buttons at the bottom of your screen to the right of your action bar. By pressing on the individual
buttons, you can view your character, open your spells and abilities book, select your character's talents, access your quests, interact with other players, see the world map, adjust game options, and get help. If you hold your mouse over each tab in the interface panel, you can see the name of the panel and its corresponding hotkey.
Character Info
The first button on the interface panel is Character Info. Clicking on this panel opens a window that shows your character and any equipment it is currently wearing. In addition to equipping yourself with items, you can
also see the attributes, skills, and reputation of your character. This panel is explained in great detail in Chapter 5: Your Character.
Spellbook & Abilities
Clicking on the Spellbook & Abilities tab opens a book containing all the spells and abilities your character has. Most spells and abilities are acquired by purchasing them from a trainer, but some are only available as quest rewards. Any spell or ability you acquire shows up here once you pay for it. Holding your mouse over a spell or ability in the book tells you what that spell or ability does, how often you can cast it, and how
much energy, mana, or rage it costs to use.
To use a spell or ability, you can open this book and then right-click or left-click on it to activate it. However, a much easier way to use an ability or spell is to add it to your action bar.
Your spells and abilities are kept in two separate sections. To switch between sections, press the appropriate tab at the bottom of the book. If you have more spells or abilities than can fit on one page, you can scroll to successive pages by clicking the left and right arrows at the bottom of the book.
If you have a combat pet, you will have a third tab on the bottom of your book with your pet's abilities.
In addition to class abilities and spells, the Spellbook & Abilities panel also is where trade skill abilities show up. The associated ability of a trade skill, such as the find herbs ability you get when you learn herbalism, appears in the Abilities section of your Spellbook & Abilities panel. You can drag such trade skill abilities to your action bar and use them as you would class abilities.
Talents
The Talents button opens up your character’s Talent window. Talents are additional powers you can select for your character that not only improve your existing abilities and spells, but that also customize your character. Using talents, two players of the
same class can differentiate their characters greatly.
More information on talents can be found in Chapter 5: Your Character. The World of Warcraft online strategy guide at http://www.worldofwarcraft.com is your best source for up to date Talent information.
Quest Log
Whenever you acquire a quest, that quest is added to your quest log. All your currently active quests appear here.
The Quest Log window is organized into two sections: the quest list and the quest information window. The quest list shows all the quests you currently have, organized by the zone in which you acquired the quest. A zone only appears if you have a quest from there.
When you select a quest from the list, the quest info window displays all the information you need to complete it. The summary gives you the bare essentials for the quest: the goal you must achieve and the NPC you must talk to in order to complete the quest. Below the summary is the same text you received when you first acquired the quest, including the exact instructions and location of the quest, and any additional information you received at the time you acquired it. At the bottom of the quest info window is the reward heading, which tells you what you get if you complete the quest. Keep in mind that not all quests specify their possible rewards, and some quests unlock other quests.
When you complete a quest, it disappears from your quest log.
Your quest log can hold a maximum of 20 quests at a time. If you try to acquire a new quest, you get a message telling you your quest log is full. If that happens, you can complete a current quest to free up room to take on another quest, or abandon a current quest.
The quest log is explained in greater detail in Chapter 10: Adventuring.
Social
The Social window is where you keep track of your friends in the game, search for specific players, and display lists of players in the game by level, zone, name, or class. The four different sections of the Social window are: Friends, Ignore, Who, and Guild. You can switch between sections by clicking on the tabs at the bottom of the window. For more information on
the Social window, refer to Chapter 10: Community.
FRIENDS
You can add people you enjoy playing with to the list in your Friends section. You can then refer to your friends list to see which friends are logged on and where they are playing. You are also notified when your friends log on or off.
IGNORE
The Ignore section is where you list players you wish to prevent from interacting or communicating with you.
WHO
This section is used to search for groups of players using key words, such as guild names, character classes, and races.
GUILD
The guild section is only available if you are a guild member. This section allows you to manage your guild relationships. It displays all members of your guild, whether they are online or offline, and shows their basic character information. If you are not a member of a guild, this tab is grayed out.
40
World Map
The World Map tab opens up a full-screen map of the world. The world map defaults to a hand-drawn map of your current zone. Any locations you have explored appear on the hand-drawn map. As you continue exploring, more locations will
be drawn onto your map.
Your character appears as a yellow dot on the world map. If you are grouped, party members also appear as yellow dots. To tell who each yellow dot is, hold your mouse over the dot. The character's name will then pop up on your mouse cursor.
Major cities, such as the capitals for the eight playable races, already appear on your world map, even if you haven't explored them yet. Major cities that are not capitals also appear on the map.
To zoom out to a view of your continent, right-click on the map. Right-click again to zoom out for a map of the world. You can also adjust the view by clicking on the Zoom Out button at the top of the map.
The name of the zone or continent you are viewing is always displayed at the top of the world map. If you mouse over an explored location or known landmark, such as a city or mountain range, its name will appear at the top of the map instead.
You can also jump to a map of a specific zone by selecting a zone from the zone pulldown menu at the top of the screen. Left-click on the arrow next to the menu to open it, and then click on the desired zone. To jump to a different continent, press the arrow in the continent pulldown menu to the left. Jumping to a new continent will reset the zone pulldown menu to the zones in that continent.
Note
The world map covers your entire screen, blocking out your
main window and the action bar. Be careful when opening the
world map while you are in combat or running.
Help Request
The Help Request button opens up the suggestion, bug, and 42 Game Master (GM) request menu. From here, you can report a bug, offer a suggestion for making the game better, or ask a GM for help. For more information on the Help Request panel, refer to
Appendix IV: Customer Support.
Main Menu
Clicking on the Main Menu tab opens up the main menu. From here, you can adjust video and sound options, customize controls, logout, quit, or resume playing. You can also open the Main Menu by pressing the Escape key.
VIDEO AND SOUND OPTIONS
The Video Options button lets you control the detail you see in the game, as well as the resolution and brightness of the game. The Sound Options button lets you control the volume of music, ambient sounds, and character sounds in the game. Players with powerful systems should choose the highest settings for a richer experience, while players with less powerful systems should choose lower settings to increase game performance. To further enhance performance, certain settings, such as music volume or ambient sounds, can be disabled altogether.
INTERFACE OPTIONS
From this menu you can turn on more advanced options such as inverting the mouse, turning on the status bar (combat log), showing your pet melee and spell damage, turning on the right-click to move option, and more. More information on these advanced options can be found at the World of Warcraft strategy site at
http://www.worldofwarcraft.com
KEY BINDINGS
The Key Bindings menu lists all the hotkey commands in World of Warcraft and the default buttons associated with them. You can then customize all these hotkeys by typing in your own letters or mouse buttons. If you are later dissatisfied with your own key bindings, you can restore the Blizzard defaults.
LOGOUT AND QUIT
Clicking the Logout button takes you back to the Character Selection screen, while the Quit button closes World of Warcraft and takes you to the desktop.
CONTINUE
Pressing this button closes the main menu and takes you back to the game.
Interacting with the
World Around You
Your mouse cursor is your primary means of interacting with the game world in World of Warcraft. It appears as a pointing gauntlet by default, which you can use to point at and then click on objects and characters in the game world. The keyboard is also used to complement the mouse in navigating around the world.
Smart Cursor
When your mouse cursor moves over an object or character that you can interact with, it sometimes changes shape to reflect a new action you can perform. It might turn into a bag if you mouse over a merchant, or a winged boot if you mouse over an aerial mount master. Experiment by visiting many NPCs and interacting with them.
Right-Clicking Versus Left-Clicking
If you want to select an object, creature, or character in World of Warcraft, left-click it. Left-clicking is also used if you want to select and drag items from your inventory bags or take spells and abilities from your Spellbook & Abilities panel to place in your action bar.
If you want to interact with an object or character, you must rightclick it. Right-clicking will then perform an automatic command depending on the type of object or character you click on. For example, right-clicking a monster automatically begins an attack on it, right-clicking a resource node automatically makes you harvest it if you have the appropriate gathering trade skill. Right-click- ing on other players opens up an interaction menu. If a target of a right-click has no possible interaction, then you will see an error message on your screen or your character will perform no action.
Click to Move
|
This option is turned on from the Interface Options menu. When |
|
this is turned on, right-clicking on an object, NPC, or monster |
|
automatically moves you to the necessary interactive distance to |
|
begin an interaction. If you are far away from a resource node and |
|
right-click on it, your character will run up to the node and then |
|
begin harvesting when you get in range. If you right-click on a |
|
quest giving NPC, you’ll run up to the NPC and when you get |
|
within range, automatically pop open the NPC’s dialog box and |
44 |
begin conversing. |
You can also simply click on the ground to move to the location you select. The same principle applies to attacking monsters or using abilities on monsters. If you right-click on a monster, you run up to attack range.
The click to move functionality isn’t just restricted to right-clicking. If you have a target selected and then perform an ability, whether through the action bar or your spells and abilities book, your character automatically moves to within range and uses the ability. Click to move is a useful option, but keep in mind that it also means your character will move automatically at the slightest right-click of the mouse.
Abilities That Require a Target
Some abilities require that you select a target after you click on them and before they occur. For example, for an Arcane Intellect spell, you would need to click on the Arcane Intellect icon on your action bar (or press the appropriate hotkey), then click on the target, and then your spell would be cast.
If this is the case, your hand cursor will glow, indicating that you must choose a target. A bright glow tells you that the target you are clicking on is legal. A dull glow indicates that you must find a new target.
Logging Out of the Game
To end your session in World of Warcraft, you can click on the Log Out or Quit buttons from the main menu. If you click on the Log Out button, a log out box appears in the middle of the screen. A 20-second timer in the log out box counts down to zero, at which point you are logged out of the game. To cancel your log out, press the cancel button. If you log out of the game while in an inn or one of the six capital cities, you log out immediately without a wait. When you click on the Quit button, you get a similar box and options. However, logging out takes you back to the Character Selections screen, while quitting closes the game and takes you to the desktop.

Chapter 5
Your Character
Your character has a variety of distinguishing features, such as attributes, skills, abilities, and talents, that come together to create a unique individual within the game.
Character
Info Window
To view information about your character, click on the Character Info button at the bottom of the screen. Alternatively, you can press the hotkey C to open up this window.
Within this window, you can see your character, all equipment he is wearing, attributes, and secondary characteristics. Tabs at the bottom of the window can also be clicked to open up your character’s reputation and skills pages.
Attributes
The basic building blocks for your character are your attributes. They determine your physical and mental aptitude.
The five attributes that define your character are listed below. They are primary attributes that influence secondary characteristics.
Strength: Strength determines the physical power of your character. A high strength improves your attack power. Strength is also a determining factor in how much damage you block if you use a shield. Rogues and hunters only use a partial value of strength to determine their power.
Agility: Agility improves your armor rating, your chance to dodge an attack, and your chance to score a critical hit with a melee or ranged attack, thus dealing increased damage. Rogues and hunters also use agility, in combination with strength, to determine their attack power.
Stamina: Stamina affects your hit points, no matter what class you play. However, characters designed to absorb damage, such as warriors and paladins, gain more benefit from stamina than classes who have other capabilities, such as rogues and druids, who in turn gain more benefit than pure spellcasters, such as mages.
Intelligence: Intelligence improves your mana reserves. Intelligence has no bearing on non-spellcasting classes.
Spirit: Spirit determines the regeneration rate for your health and mana. A high spirit results in much faster regeneration, while a low spirit gives you reduced regeneration.
46

Secondary Characteristics
Your secondary characteristics are stats that depend in some part on your class selection and your primary attributes. Such stats include your health, mana, energy, rage, attack, power, damage per second, defense, armor, and resistances.
Health: Health, also called hit points, represents how much damage your character can take before it dies. Health is set by your class, and increases as you level up. In addition, the stamina attribute gives you a bonus to your health. Each class gets a different number of bonus hit points for each stamina point they possess, with classes that are melee fighters getting the most increase due to stamina, and spellcasters getting the least. Your health is displayed as a green bar at the top of the screen next to your character portrait.
Mana: Mana is what you pay to cast your spells if your class has any spellcasting capability. These classes are mages, priests, warlocks, druids, shaman, paladins, and hunters. The spells of these classes have mana costs that must be paid in order to be cast. The amount of mana you have is set by your class, with primary spellcasters, like priests and mages, getting more than hybrid spellcasters, such as druids and shaman. Classes that are even less reliant on spells, such as hunters and paladins, have even less mana. In addition, your character’s intellect gives you a bonus to mana. Each class gets a different amount of bonus mana, with primary spellcasters getting more for each point of intellect than other spellcasters. Your mana is displayed as a blue bar next to your character portrait.
Energy: Energy is used to power rogue abilities. Unlike mana or health, energy does not improve with level, nor is it influenced by any attribute. A rogue’s energy bar always starts at 100 points, unless modified by a rogue talent. When a rogue uses a special attack or ability, it costs energy points. Energy replenishes fairly quickly over time, so a rogue can continue to perform special attacks during a battle. However, energy regeneration isn’t rapid enough to allow a rogue to continue to use many abilities indefinitely. The rage bar is displayed in yellow underneath the character's health bar.
Rage: Rage is spent on the use of warrior abilities. Unlike mana or energy, rage does not begin as a full bar. It, like energy, is not influenced by an attribute. Rage has a limit of 100, but a warrior’s rage bar always starts at zero. Your rage bar appears as an empty bar under your health. As it fills up, it turns red.
Attack: Attack, also called attack rating, increases your chances of hitting a target in battle with your weapon. It is directly tied to your weapon skill with your current weapon.
Power: Power, also called attack power, increases the damage you do with your weapons. All classes have a base attack power. Classes geared towards combat have higher base power than classes that are geared towards spellcasting. Strength is added to power as a bonus, resulting in greater attack power for stronger characters.
Damage: Damage depends on the weapon you use and on your power. All weapons have a damage rating. When you equip the weapon, the damage of your character includes the weapon’s damage, plus bonuses from your power and class. Spells and abilities can temporarily boost damage. Damage-per-second, or DPS, is shown as tool tip info.
Defense: Defense reduces your chance of being hit in combat by physical blows. It is directly tied to your defense class skill.
Armor: Armor reduces the amount of damage you take from physical blows. Armor is actually made up of your agility, plus the armor rating of any armor you have equipped. Based on your armor rating and type of armor, you have a chance to reduce the damage you take from enemy attacks.
Resistances: Resistances give you a percentage chance to resist some or all of the damage or effects from spells. Resistances begin at zero, but can be improved with items and spells.
48

Character Levels
In World of Warcraft, your character level determines how powerful you are. Higher-level characters are stronger, more durable, and more deadly than lower-level characters. Higher-level characters can also accomplish more with their spells and abilities, and overcome much tougher obstacles and enemies.
All characters start at level one in the game, and can advance in level by earning experience. The level cap in the game is 60. Once you achieve level 60, you cannot gain any more levels. Keep in mind that as an online role-playing game, World of Warcraft is always being updated with extra content. While at its release, the game has a level cap of 60, this cap will increase in the future as the game continues to evolve.
Experience
Experience is the only means of advancing your character levels, and is gained in two primary ways. Most experience comes from defeating monsters and from completing quests. A third means of gaining experience – exploring the world – gives you so little experience compared to the two primary methods that it can’t really help you gain character levels.
Experience from Monsters
Every time you kill a monster that is a challenge for your character, you earn experience. The more challenging the monster, the greater the experience reward. The weaker the monster, the less the reward.
Trivial Monsters
You are able to tell which monsters are trivial because their level will appear gray in their target portrait.
You do not gain experience for killing monsters that are so far below your level that they pose no challenge. This threshold changes depending on your level. At low levels, you gain no experience from killing monsters more than five levels lower than you. This minimum level threshold grows slightly for higher-level characters, though, so that high-level characters have more leeway in the kills they can make and earn experience for.
50 |
“You no take candle!” |
|
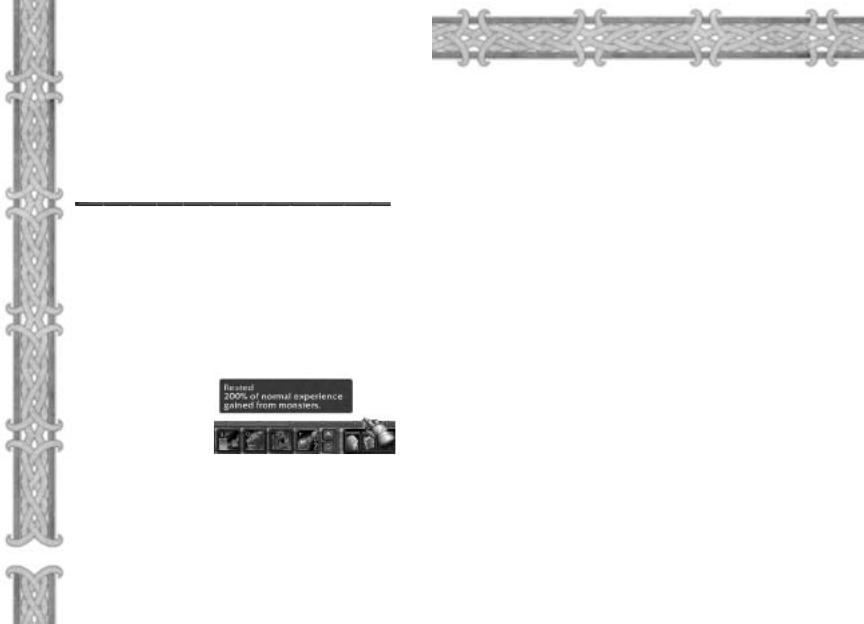
Quest Experience
When you turn in a completed quest, you gain an experience reward. This quest reward is often substantial, and equal to several, if not a dozen, monster kills at once. Quests will range in difficulty, so the rewards will also vary.
Doing quests is an extremely efficient way to earn experience and gain levels. Players who only kill monsters do not typically level as quickly as those who also complete quests. Furthermore, not only do quests help you level more quickly, but they also carry material rewards as well.
The Experience Bar
Stretching across the bottom of your screen is your experience bar. At the beginning of a level, it is empty, but as you earn experience, it begins to fill. You can mouse over the experience bar to see your current experience, and the amount you need for next level. When it fills up completely, you gain a new level, and the experience bar resets to zero.
In addition, the amount of experience you need for the next level increases an incremental amount. Leveling up becomes progressively harder, not only because your challenges are greater at higher levels, but also because the experience requirement grows.
Rest State
In World of Warcraft, the rest state has a great effect on how much experience you earn from kills. When your character is rested, they earn 200 percent of the experience from a kill. However,
rest state is a temporary condition, and you become less rested after you accumulate a certain amount of experience through encounters.
All characters begin the game in a normal state. Rest state can only be accumulated when your character is standing in an inn, logged out from an inn, or logged out from the wilderness. While you are in an inn or logged out from an inn, your rest state increases every few hours. If you log out in the wilderness, your rest state accumulation is much slower. For the purposes of rest state accumulation, logging out in one of the six capital cities – Orgrimmar, Thunder Bluff, Undercity, Darnassus, Ironforge, and Stormwind – is the same as logging out from an inn.
Rest state grows slowly every hour you are logged out of the game or in an inn, but the longer you are away from the game, the greater your rest. There is a maximum amount of rest state you can amass, and that usually is enough to give you a 200 percent experience bonus for one and a half experience bars. However, in order to accumulate that much rest, you usually need to be logged out for more than a week.
Rest state is meant as a reward for those who are away from the game and then return. It’s a way to jump back into the game and level quickly if you’ve been left behind while your friends all leveled during your absence. It is not meant as a continual reward for those who play as often as several hours a day.
Rest State Marker
A rest state marker exists on your experience bar to tell you how rested you are. When the filled portion of your experience bar hits the marker, your character then goes to a normal rest state. In this normal state, you earn 100 percent of experience from a kill, meaning you get no experience bonus. To regain your rest, you must then go to an inn or log out of the game. The rest state marker only appears on your experience bar when you are rested.
Rest State and Quests
Experience you earn from completing quests has no effect on your rest state. Nor does rest state give you a bonus to quest experience. Quest experience does not move you to the normal state any faster. Only monster experience is counted towards your loss of rest.
52

What It Means to Level
When you gain a level, your character becomes more powerful. Your attributes increase; you class skills increase; and as a result, many secondary characteristics, such as health and mana, improve as well. In addition, you gain the ability to purchase trade skills and talents, and to acquire to new abilities.
Attribute Increases
Primary attributes that are important to your class automatically increase by one or two points when you level up. These attribute increases will change from level to level, but spellcasters will usually gain intellect and spirit boosts, while melee fighters will often gain stamina and strength boosts. However, over the course of your character’s full level range, you will get increases to most, if not all, attributes.
Secondary Characteristics
When you level, you also get an increase in health. If your character is a spellcaster or has spellcasting abilities, you also get an increase in mana. In addition, if your stamina and intellect increase when you level, you also get another boost to your health and mana through your attribute improvement.
Class Skills
Your class skills, which determine the effectiveness of your class spells and abilities, do not automatically improve when you level up. Instead, they improve as you use them. However, the skill cap you have in a class skill does increase when you gain a level. For example, as a first level priest, your maximum skill level in holy magic is five. As you cast holy spells, your holy skill will eventually max out at five points, until you advance to the next level and your holy magic skill cap increases.
Talents
Your talents are accessible from the Talents window, which can be opened by clicking on the Talents button at the bottom of the screen or by pressing the hotkey N. See chapter 7.
Spells and Abilities
Aside from attribute and stat increases, the other major way in which your character grows in power is through access to new spells and abilities.
Learning New Spells and Abilities
When your character increases in level, it is a good idea to return to your class trainer to learn new abilities. Class trainers exist in all major cities, but not every class will be represented. You won’t find any shaman trainers in Alliance cities, for example, because the shaman is a Horde-only class. Even within a faction, trainers only exist where a large segment of the population can train in that class. Shaman trainers don’t exist in the undead capital of Undercity because undead can’t be shaman either.
You can always talk to your class trainer, no matter your level. The trainer then shows you a list of all spells and abilities you can learn in the training window.
All your spells and abilities are organized into different categories or schools. These categories mirror your class skills. Shaman, for example, have earth, fire, and water skills.
By browsing through the list of items, you can see all the spells and abilities to look forward to as you level. When you click on a spell or ability, a summary of it appears at the bottom of the window. You can also see the level requirement for the ability. If you mouse over the picture of the ability, an info box opens that reveals more detailed information.
Once you achieve a high enough level to learn a new spell or ability, return to your trainer, select a spell or ability, and click on the Train button at the bottom of the window to learn it.
54
Using Spells and Abilities
Once you acquire a new spell or ability, it is added to your Spellbook or Abilities book. You can then copy the spell or ability to your action bar for easier use. Passive abilities, which are always on, do not need to be attached to your action bar for use.
All spells and abilities that you use fall into several different categories.
Instant cast: Instant-cast spells or abilities can be used or cast instantaneously. You cannot be interrupted when using the spell or ability.
Timed cast: Timed-cast spells and abilities have a brief casting time. When you click on the spell or ability to use it, a casting meter appears at the bottom of your screen. When the meter fills, your spell is cast. You can be interrupted while casting the spell if you are hit or affected by an enemy’s special attack. Each hit from an enemy resets your casting meter or pushes it back, delaying the time it takes you to use the spell or ability. An attack that completely interrupts your spell or ability, such as a stunning effect, will erase your entire casting meter. In this case, you must recast the spell or ability.
Channeled: Channeled spells only take effect as long as you continue casting them. When you channel a spell, a reversed casting meter appears at the bottom of your screen. It begins full, and as you channel the spell, the meter dwindles. When the meter is depleted, the spell ends. While you are channeling the spell, the target suffers or benefits from the effect, which usually occurs every few seconds. If you move while channeling a spell or you are affected by an interrupting effect, the channeled spell ends. If you are hit in combat, the channeling bar will deplete further, but without an increase in the channeled spell's effect. In other words, being hit in combat while you are casting a channeled spell causes the casting time and effects of your spell to be decreased.
Passive: Passive abilities are always on. They do not need to be cast and cannot be used through the action bar. As soon as you learn them, they are in constant effect. Some examples of passive abilities are dodge and block.
Spell and Ability Delays
Spells and abilities can’t always be cast or used repeatedly. Instead, many of them have a brief delay you must observe before you can cast or use the ability again. After you use a spell or ability, its icon on the action bar and Spells and Abilities book darkens. When it brightens again, you can use it once more. This delay is often called the spell or ability’s cooldown time by players.
56

Equipment
Although much of your character’s power comes from your attributes and abilities, the equipment you wear is just as important to your growth.
In many cases, your equipment can improve your character dramatically by giving you a great DPS boost, enhancing your attributes, improving your armor and defense, or boosting your spell power and resistances.
On the Character Info window, there are equipment slots on either side of your character model. These equipment slots correspond to different parts of your character’s body. The slots on the side are for armor and jewelry. The four slots at the bottom are for your hand-held equipment, which can include melee weapons, ranged weapons, shields, ammunition, wands, and miscellaneous objects.
ARMOR SLOTS
The different body parts on which you can equip armor are your head, shoulders, back, chest, wrists, hands, waist, legs, and feet. You can have one piece of armor per slot.
Of these armor types, the ones that are easiest to acquire, and thus available at early levels, are back, chest, wrists, hands, waist, legs, and feet armor. Later you begin to find rings and shoulder armor. At mid-levels you find necklaces and helmets. At higher levels you find trinkets.
SHIRT SLOT
Your character has a slot to wear a shirt. However, shirts are usually decorative and have no in-game benefits. They can, however, make you stand out among your fellow players. Tailors can make a variety of different colored shirts, and you can also find shirts as quest rewards or treasure.
TABARD SLOT
One slot on the left is for a tabard, which is a vestment with your guild crest. You can purchase a tabard even if you are not in a guild. If you do, it will appear as a plain gray tabard. It will acquire your guild insignia when your guild chooses a design or when you join a guild that already has a design.
JEWELRY
There are two slots for a character to wear rings. Rings are rare
58magic items that you can win as quest rewards or find as drops from monsters. There is a wide variety of rings. Some improve attributes and statistics, while others give you the ability to heal
or do spell damage. Rings do not show up on your character when you wear them, although they are equipped.
Necklaces are similar to rings, but there is only one necklace slot.
Trinket’s are even rarer than rings and necklaces. They do not show up on your character, but can confer a wide range of abilities on you.” Trinkets do not have the same qualities. They are usually right-click effect items.
HAND-HELD EQUIPMENT
The four slots at the bottom of your character window are for your handheld equipment. The first slot is for your primary hand; the second slot is for your offhand; the third slot is for your ranged weapon; and the fourth slot is for your ammunition.
MELEE WEAPONS
If you wield a one-handed weapon, it must be placed in your primary hand to be effective. If you wield a two-handed weapon, it is placed in your primary hand slot, but also occupies your offhand slot.
Your offhand slot can accommodate a secondary weapon if you have the dual wield class skill. It can also hold an offhand item, such as a shield, torch, orb, magic branch, or lantern. If you are wielding a two-handed weapon, your offhand slot is already occupied.
RANGED WEAPONS
Your ranged slot can hold a ranged weapon appropriate for your character, whether that is a wand, bow, gun, or thrown projectile. You can have a ranged weapon equipped here, at the same time that you have a melee weapon equipped in your primary and offhand slots.
To ready a ranged weapon for use, open your Ability book. If you have an equipped ranged weapon, a shoot ability should appear in your book. You can shoot your ranged weapon by clicking the shoot ability in the book, or drag the shoot icon to your action bar to use. Any time you need to use your ranged weapon, you can press this button and fire away. Your character will pull out the ranged weapon and attack. Unlike melee attacks, ranged attacks cannot be toggled on or off. You need to press the shoot button each time you want to attack.
AMMO SLOT
Guns and bows require ammunition to use. In this case, you need to place ammunition, bullets or arrows, in the ammo slot. As long as you have ammo of the appropriate type in your inventory, you can fire your weapon.
 Loading...