

CINEMA
EVENING
The Edition
PROGRAM
Thursday, February 14, 1929One CentNo.
EDITION
GANGSTERS
CRIME DOES PAY...
WANNA BE A GANGSTER IN A CHICAGO
STYLE CITY OF THE 1920’S?
Wanna control an underground organization dealing in
extortion, illegal liquor, prostitution, violence, intimidation,
gambling, gang warfare, bribery of officials, permanent elimination
of individuals and a host of moneymaking activities?
Can you simultaneously maintain a decent and honest
reputation on the surface by supporting good causes, helping the
police and running legitimate businesses? Will you be able to meet
the challenge of balancing these two personas to gain influence and
control over the city?
Gangsters is a highly original game that blends together three
major elements of successful strategy gaming; real-time game
world, interaction man-management and business management.
The aim of this game is to build your gang and business empire
to rule the city. To do this you will have to beat three other gangs
operating in the city, and avoid arrest by the authorities. The
specific win conditions balance a need to gain wealth, honour and
influence.
Gangsters is set in a non-specific Chicago-like city in the 1920s
called ‘New Temperance’. The city, in which most of the in-game
activity takes place, is viewed by an isometric multi-level map
contained in the main window of a Windows 95 style environment.
MASSACRE
One February evening in North
Chicago, seven well-dressed men
were found riddled with bullets
inside the S.M.C Cartage Co.
garage. They had been lined up
against a wall, with their backs to
their executioners and shot to
death. With the exception of Dr.
Reinhardt H. Schwimmer these
men were mobsters working under
the leadership of gangster and
bootlegger, “Bugs ” Moran. Within
a few seconds, while staring at a
bare brick wall, these seven men
had become a part of Valentine’s
Day history: the St. Valentine’s
Day Massacre.
[Continued back cover]
POLICE
CORRUPTION?
During the height of prohibition
and the never-ending
competition between gangster
rivals Al “Scarface” Capone and
George “Bugs” Moran, bloody
warfare was nothing new to the
authorities of Chicago.
However, investigators on the
scene found the Valentine’s Day
Massacre to be somewhat
puzzling. The victims were
mobsters, with an endless
supply of weapons and well
known capability for brutality.
HOW DOES THE BANK SURVIVE? • WHO’S IN CHARGE OF THE CITY? • WHERE CAN YOU GET YOUR WEAPONS FROM? IT’S ALL INSIDE!
ORGANIZED CRIME
ORGANIZED CRIME
GANGSTERS PAGE 3
BEFORE YOU READ ON YOU BETTER CHECK THIS
HEALTH WARNING
EPILEPSY WARNING
Please read before using this computer game or allowing your children to use it. Some people
are susceptible to epileptic seizures or loss of consciousness when exposed to certain flashing
lights or light patterns in everyday life. Such people may have a seizure while watching
certain television images or playing certain computer games. This may happen even if the
person has no medical history of epilepsy or has never had any epileptic seizures. If you or
anyone in your family has ever had symptoms related to epilepsy (seizures or loss of
consciousness) when exposed to flashing lights, consult your doctor prior to playing. We
advise that parents should monitor the use of computer games by their children. If you or
your child experience any of the following symptoms: dizziness, blurred vision, eye or muscle
twitches, loss of consciousness, disorientation, any involuntary movement or convulsion,
while playing a video game, IMMEDIATELY discontinue use and consult your doctor.
CONTENTS
INTRODUCTION 5
GAME OVERVIEW
INSTALLING GANGSTERS
PLAYING GANGSTERS
ABOUT THIS MANUAL
QUICK START
USING HELP
CONTROL CONVENTIONS
TUTORIALS 9
TUTORIAL 1: THE GANG ORGANIZER
TUTORIAL 2: THE FIRST WORKING WEEK
TUTORIAL 3: EXPANDING FURTHER
TUTORIAL 4: ACTION IN THE WORKING WEEK
REFERENCE GUIDE 27
GAME MENUS
LOADING GANGSTERS
STARTING A NEW GAME
THE MAIN MENU
NEW GAME MENU
CHANGE DETAILS MENU
LOAD GAME MENU
TUTORIALS SCREEN
GAME OPTIONS SCREEN
SCENARIO SCREEN
SHORT GAME MENU
ADVANCED OPTIONS SCREEN
THE GANG ORGANIZER 33
LIEUTENANTS SECTION
Layout of the Lieutenant’s Section
The Lieutenants
The Lieutenant’s Team
6
6
6
6
7
7
8
11
15
20
24
28
28
28
28
29
29
30
30
30
31
32
32
33
33
34
35
Allocating Hoods, Weapons and Vehicles
Giving Orders to your Lieutenants
The Lieutenant’s Orders
The Lieutenant’s Reports
THE ACCOUNTANT SECTION
Layout of the Accountant Section
The Accountant
The Accountant’s Orders
Giving the Accountant a Vehicle
The Accountant’s Reports
THE LAWYER SECTION
Layout of the Lawyer Section
The Lawyer
The Lawyer’s Orders
Giving the Lawyer a Vehicle
The Lawyer’s Reports
DIPLOMACY
Viewing the Diplomatic Status
Setting the Diplomatic Level
Viewing your Gang Details
Viewing other Gang Details
Using Snitches
THE NEWSPAPER
GRAPH REPORTS
THE CITY MAPS
GAME OPTIONS
THE CLIPBOARD
People
Buildings
Using the Clipboard with Orders
RESOURCES
Pool
Vehicles
Weapons
PRECAUTIONS TO TAKE DURING USE
• Do not stand too close to the screen. Sit a good distance away from the
screen, as far away as the length of the cable allows.
• Preferably play the game on a small screen.
• Avoid playing if you are tired or have not had much sleep.
• Make sure that the room in which you are playing is well lit.
• Rest for at least 10 to 15 minutes per hour while playing a computer game.
36
GOODS
36
LAUNCHING THE WORKING WEEK
39
THE WORKING WEEK
41
THE WORKING WEEK SCREENS
43
THE GAME CLOCK
43
THE ICON BARS
43
THE ROOFTOP VIEW
44
THE STREET VIEW
45
MESSAGES
45
ACCELERATED TIME
46
TAGGED WINDOWS
46
STREET ORDERS
46
THE END OF THE GAME
47
WINNING THE GAME
49
LOSING THE GAME
49
SCORE
50
THE HALL OF FAME
51
MULTIPLAYER GAMES
51
51
APPENDICES 87
51
APPENDIX 1: PEOPLE
52
APPENDIX 2: GANGSTER SKILLS
53
APPENDIX 3: WEAPONS
54
APPENDIX 4: VEHICLES
54
APPENDIX 5: BUILDINGS AND BUSINESSES
60
APPENDIX 6: SHORTCUT KEYS
62
62
CREDITS 98
62
62
TECHNICAL SUPPORT 100
63
64
LIMITED WARRANTY 100
65
66
NOTES 101
67
68
68
68
68
69
73
74
75
77
78
80
82
82
82
83
83
84
88
92
94
95
96
97
PAGE 4 GANGSTERS
GANGSTERS PAGE 5
INTRODUCTION
W elcome to New Temperance, a city of opportunity at the heart
of America. The right opportunity, for the right kind of person.
For the last 11 years, since the ratification of the 18th
Amendment enforced the ban on the production and sale of
alcohol, New Temperance has been a liquor free city. The
crime rate is the lowest within the state, thanks to effective
policing and the strong, sober, sense of community that has
existed ever since the settlers first halted their covered wagons
and decided to call this place home.
Money is plentiful, and industry strong.
The parks and rivers are clean, and the air is sweet.
Everyone is neighbourly , and childr en still respect their elders.
But things are about to change….
This city has been overlooked by the bootleggers, whilst
Chicago and other cities have been drowned in illegal liquor.
But do not spend too much time congratulating yourself in
finding this gold mine; others have undoubtedly come to the
same conclusion. Even now they are putting down roots in
the city, building the strength to take control of areas of the
city that could so easily be yours.
It’s time to get out there, and show them who’s Boss.
GAME OVERVIEW
In Gangsters, your goal as a new mobster is to become the
city’s crime overlord. You take the role of one of four rival
Gang Leaders. Each one starts off in a different quarter of the
city and has the task of eliminating the competition!
The game has two main sections: the Gang Organizer
and the Working Week.
The Gang Organizer is where you organize your teams,
view city information and give orders to your Gang. The
Working Week is where you see the results of the orders, look
for new targets and take immediate action against any intruders.
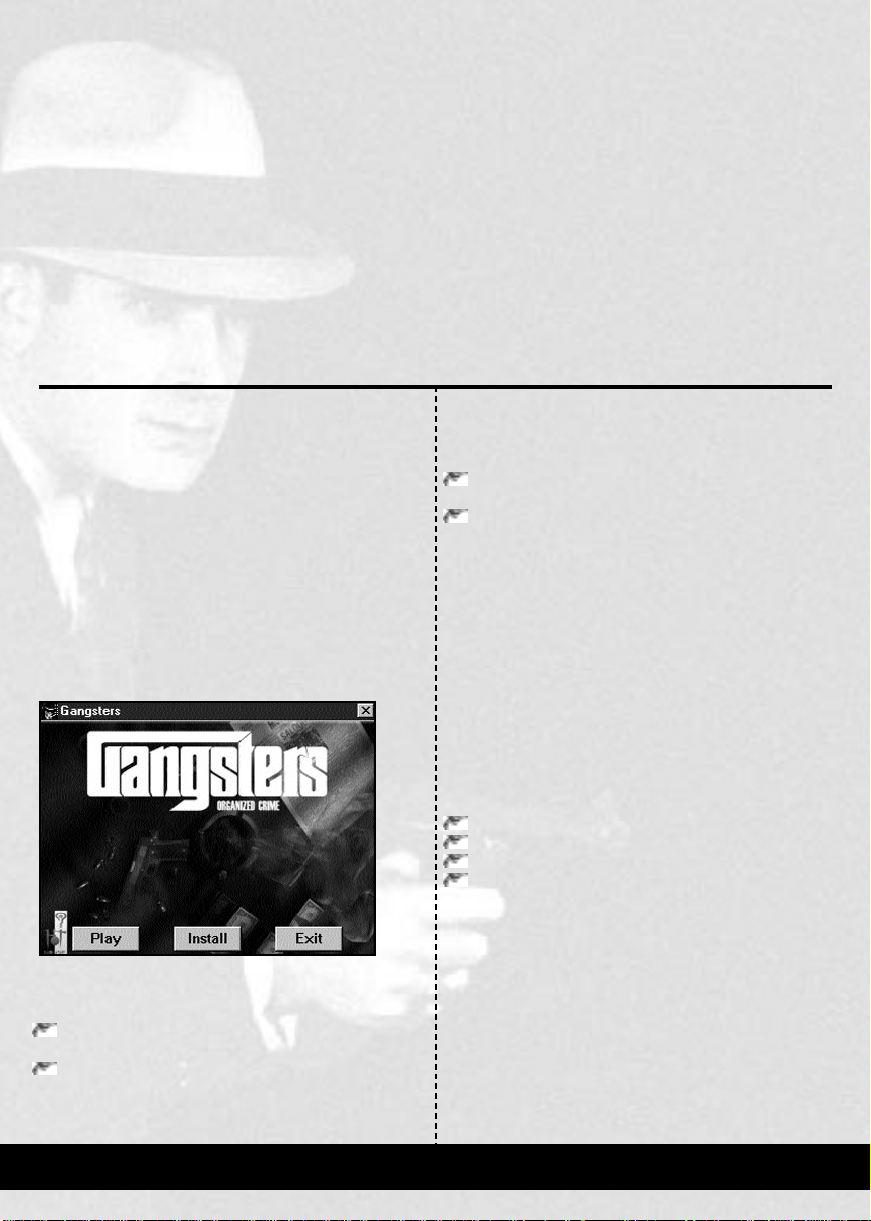
INSTALLING GANGSTERS
Insert the Gangsters CD into your CD-ROM drive. If
autorun is enabled, Gangsters will automatically take you
into the Autoplay Screen.
Click on the Install button, then follow the on-
screen instructions as directed.
If the Autoplay feature has been disabled, double click on the
CD-ROM drive icon from My Computer, and select
Setup.Now.Exe Once installed, Gangsters will appear
in the Program Group on the Start Menu.
PLAYING GANGSTERS
To play Gangsters, place the CD into its drive.
Once the Autoplay screen has loaded, click on the Install
Game button.
If Autoplay is disabled, or the computer was turned on with
the CD already in its drive, click on the Start Menu button,
then select the Programs Group and click on Gangsters.
Alternatively , open the Hothouse Cr eations folder, situated in
My Computer \ C \ Program Files, and double click on the
Gangsters icon.
ABOUT THIS MANUAL
This manual is divided into three sections:
TUTORIALS
These have been written for people who are experiencing
their first outing to New Temperance. There are four
tutorials, which guide through important stages of the game:
The Gang Organizer
The Working Week
Expanding further
Action in the Working Week
REFERENCE GUIDE
The reference guide allows you to look up information as you
play the game. This section contains details of all the options
available to the player, and is designed to help you navigate
the screens and the city as quickly as possible.
APPENDICES
Appendices at the back of the manual contain other useful
information.
PAGE 6 GANGSTERS
QUICK START
It is strongly recommended that you start by working
through the tutorials.
TO LOAD A TUTORIAL
Click on Tutorials in the Main Menu.
Click on a tutorial in the Tutorials Screen.
Click on Load Tutorial.
If you want to start a new game immediately, this can be
done from the Main Menu.
TO START A NEW GAME
Click on New Game in the Main Menu.
Click on Start Game.
If you start a new game in the way
described above, you will begin with
the following settings:
1. The game will be a full game.
The winner is the first to eliminate the other Gang
Leaders, become Mayor or Go Straight.
2. Y our name and face will be taken fr om the last stored face.
If you have not played Gangsters before, this face will be
random.
3. All opponents will be set to a random difficulty.
4.
You will start the game with one office and a suitable front.
5. Your team will consist of six hoods.
One will be placed into the front, two into a team and the
remainder placed in the pool.
6. You will possess one car, and three pistols.
7. Your bank balance will be $6000.
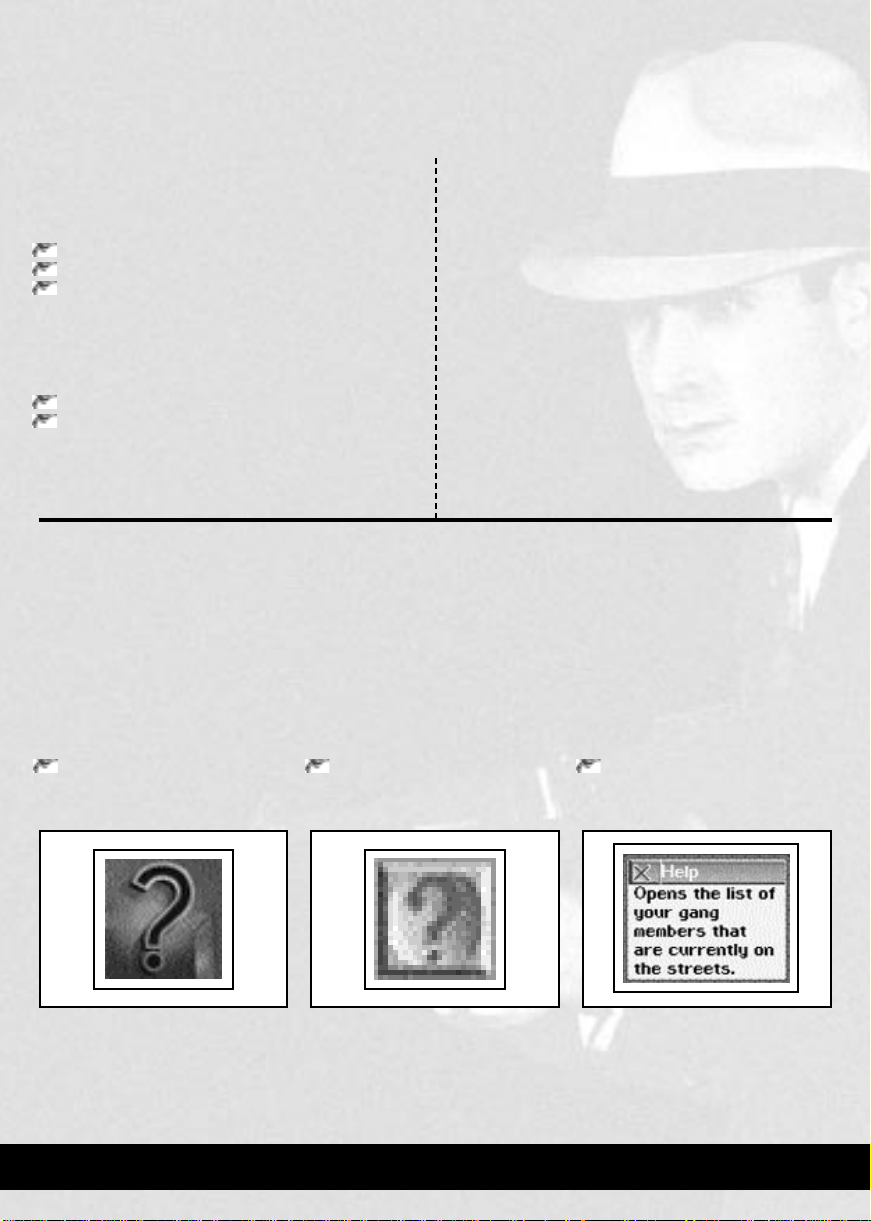
USING HELP
Help is available
one of three places:
throughout
Gangsters. Depending on which screen you are currently viewing, the help button is available in
In the Gang Organizer, the help
button is a question mark, located
in the top right corner.
The next time you click on an object, help for that object will appear. F or quick refer ence, you will find that all items are t ool tipped.
In the Working Week, the
help button is a question mark,
located on the icon bar.
Clicking on the help button
attaches a question mark to the
mouse cursor.
GANGSTERS PAGE 7
CONTROL CONVENTIONS
Throughout this manual, you will find terms used to describe
the mouse actions. These are:
CLICK
Move the mouse cursor over an object and press the Left
Mouse Button (LMB).
RIGHT CLICK
Move the mouse cursor over an object and press the Right
Mouse Button (RMB).
DOUBLE CLICK
Move the mouse cursor over an object, and pressing the LMB
twice in quick succession.
DRAG AND DROP
Certain features of the game allow you to “drag and drop”
objects from one group or area to another.
• DRAG
Place the mouse cursor over the object to be moved, then
click and hold down the LMB. While the LMB is held
down, the object will move as the mouse cursor.
• DROP
To drop an object, release the LMB when the object and
mouse cursor are over the destination.
BOUND
You may be asked to select an area of the City Map, which
may be performed either by “clicking” on individual items, or
by “Bounding” an area. To do this, move the mouse cursor to
the corner of the area to be selected and press the LMB.
Then, with the LMB held down, move the cursor diagonally
to cover the desired area. Release the mouse button to finalise
the selection.
To cancel a selection, repeat the process or click on blocks.
MURDER
HAVE YOU SEEN, HEARD... ANYTHING?
CALL YOUR NEAREST POLICE STATION
PAGE 8 GANGSTERS
GANGSTERS PAGE 9
TUTORIALS
TUTORIALS
In the tutorials, you will look at getting your criminal empire
started, and look at some of the game’s features that you will
need to use later on.
TUTORIAL ONE: THE GANG ORGANIZER.
An introduction to the Gang Organizer and the first
week’s orders.
TUTORIAL TWO: THE FIRST WORKING WEEK.
Watching your Gang’s progress.
TUTORIAL THREE: EXPANDING FURTHER.
Empire expansion and preparing for conflict.
TUTORIAL FOUR: ACTION IN THE WORKING WEEK.
Keeping an eye open for events, and how to use the Street
Orders.
Each tutorial can be loaded separately, or you can run
through Tutorial 2 by continuing with Tutorial 1. Tutorial 4
can also be played by completing Tutorial 3.
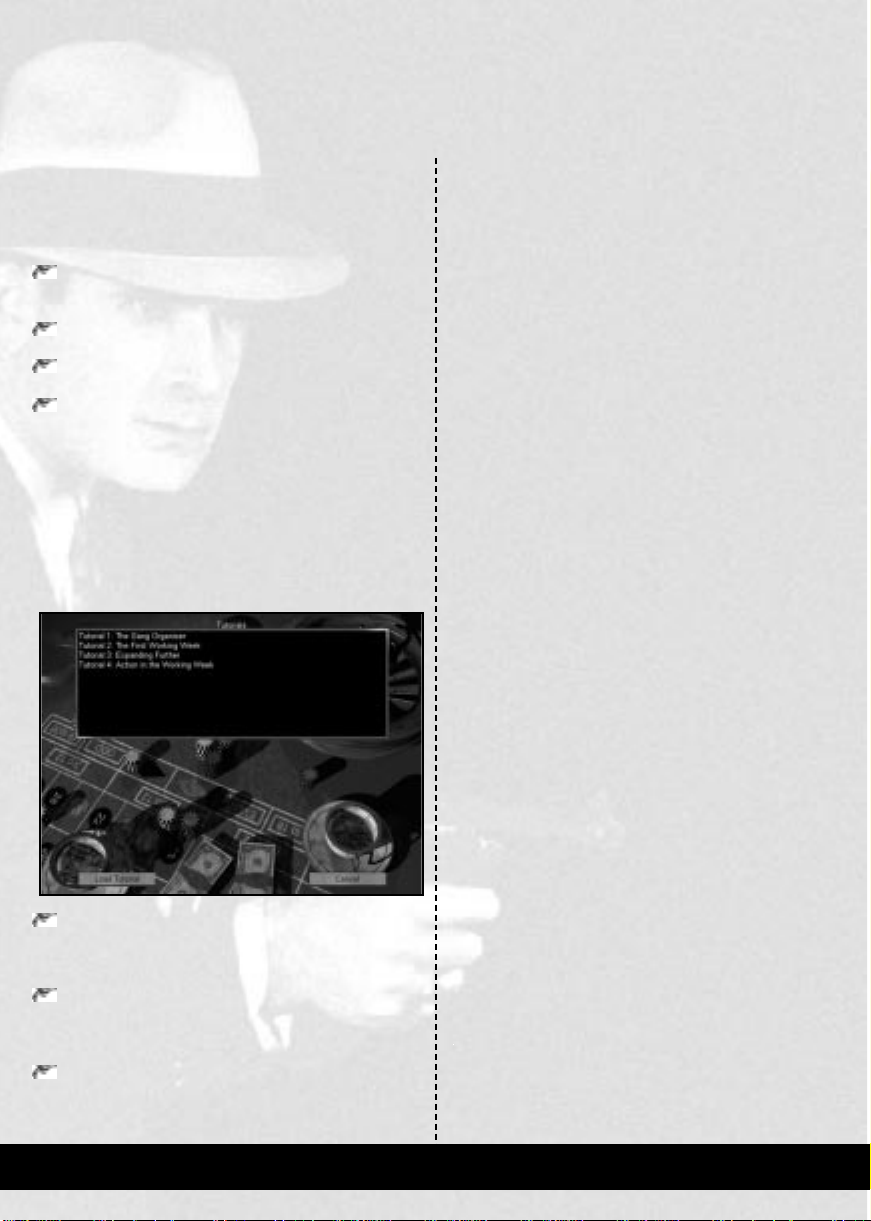
LOADING A TUTORIAL
To load a tutorial, follow the instructions below:
Click on the Tutorials button, from the Main Menu.
Y ou will no w see the Tutorials Screen. The tutorials are titled
“Tutorial 1” through to “Tutorial 4”.
Click on the desired tutorial.
Information about the tutorial will now be displayed in the
window at the bottom
Click on the Load button.
The game will now take a few moments to construct the city ,
depending on the speed of your computer.
of the screen.
PAGE 10 GANGSTERS
TUTORIAL 1:
THE GANG ORGANIZER
In this first tutorial, you will look at the Gang Organizer,
and give the first week’s orders to get your empire started.
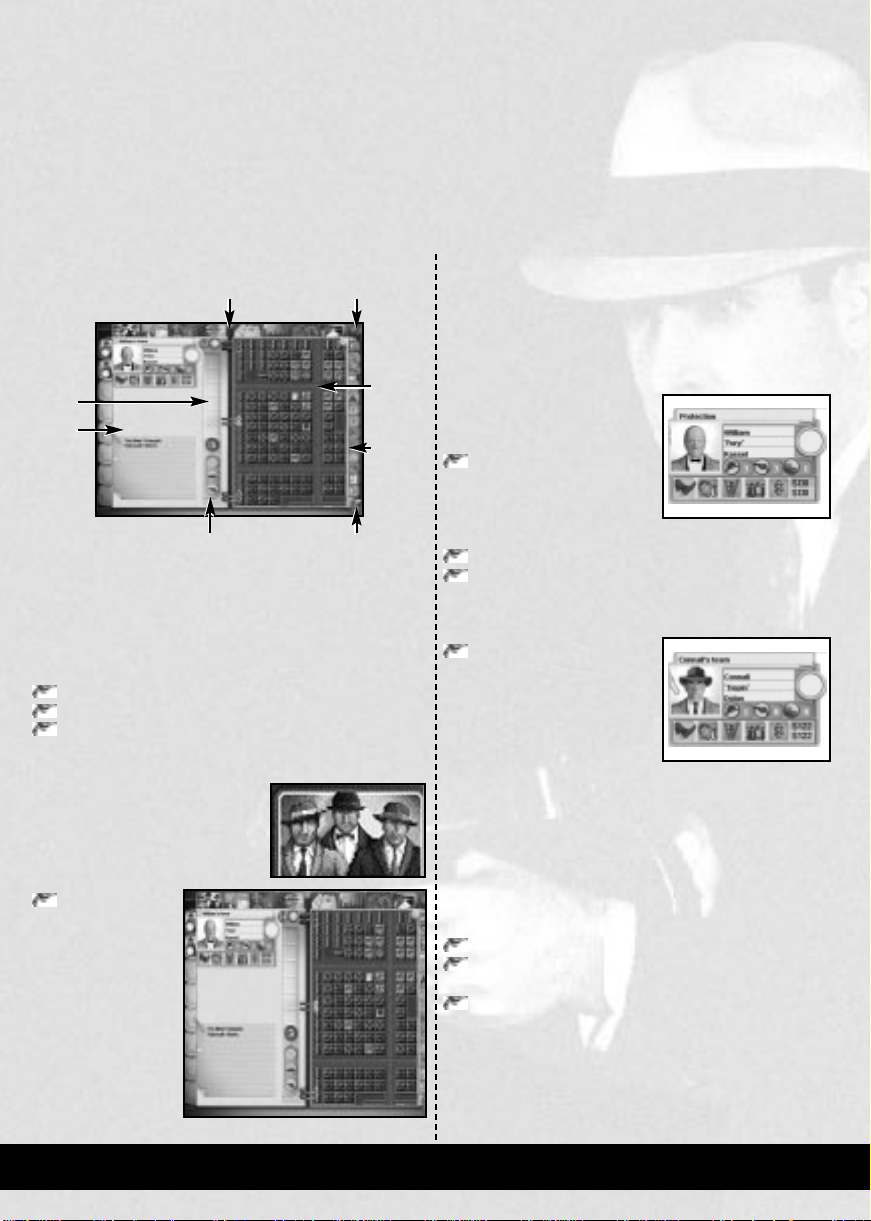
SECTION TABS HELP
REPORTS
PANEL
DETAILS
PANEL
HIT THE STREETSRESOURCES
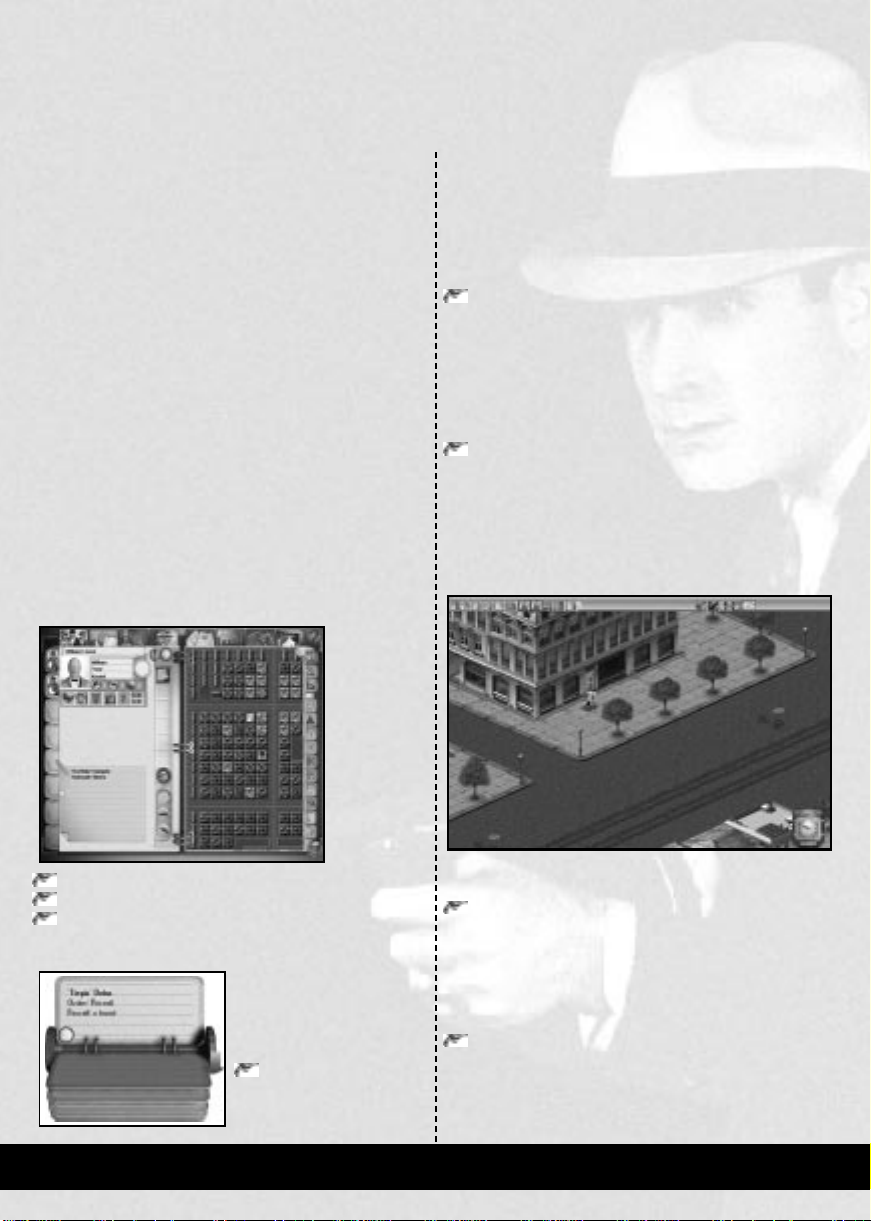
The Gang Organizer takes the form of a journal, such as
might be owned by any respected gentleman of the 1920s.
When you first see it, it will be on the Newspaper, where you
can see the headline heralding the arrival of crime in New
Temperance.
Before giving any orders, you will perform three quick
routines:
Team check
Territory check
Finance check
These quick checks should be done regularly, since they help
you spot at a glance if there are any
problems concerning your hoods,
the situation in the city and your
financial situation.
To do these checks, you need to
access the Lieutenant’s Section.
Click on
the Lieutenant
Section Tab.
You will now see
the Lieutenant’s
Section of the Gang
Organizer. From
here you can perform
the three checks
mentioned above.
RESOURCE
DETAILS
PANEL
MAP
BUTTONS
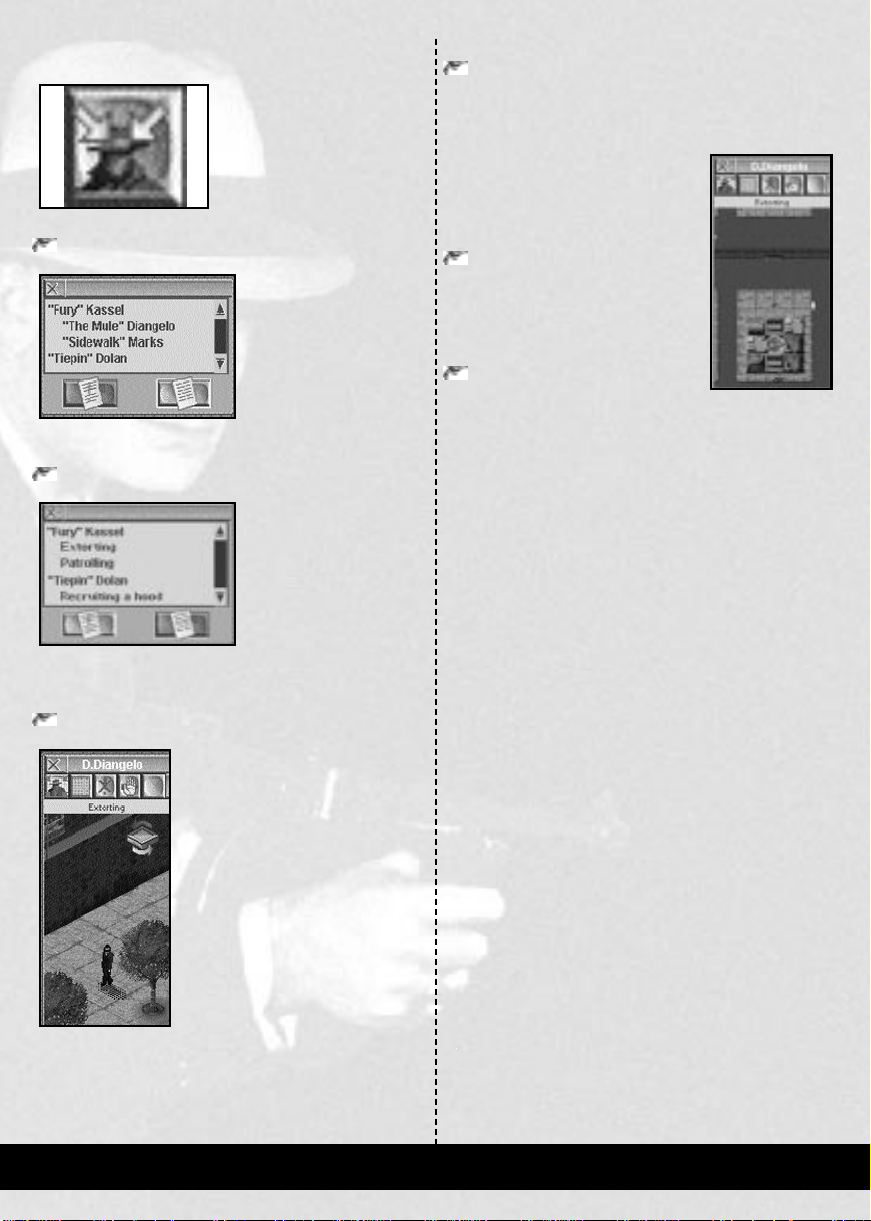
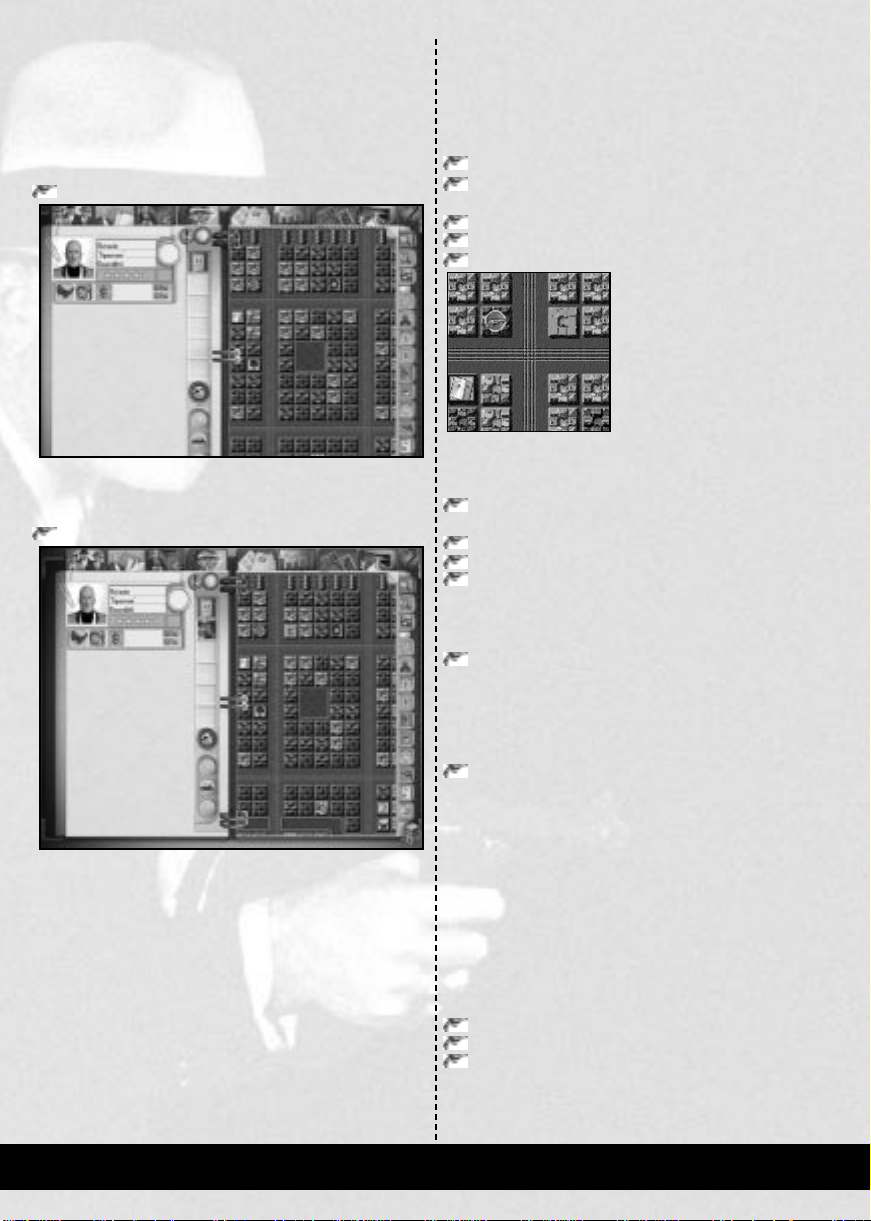
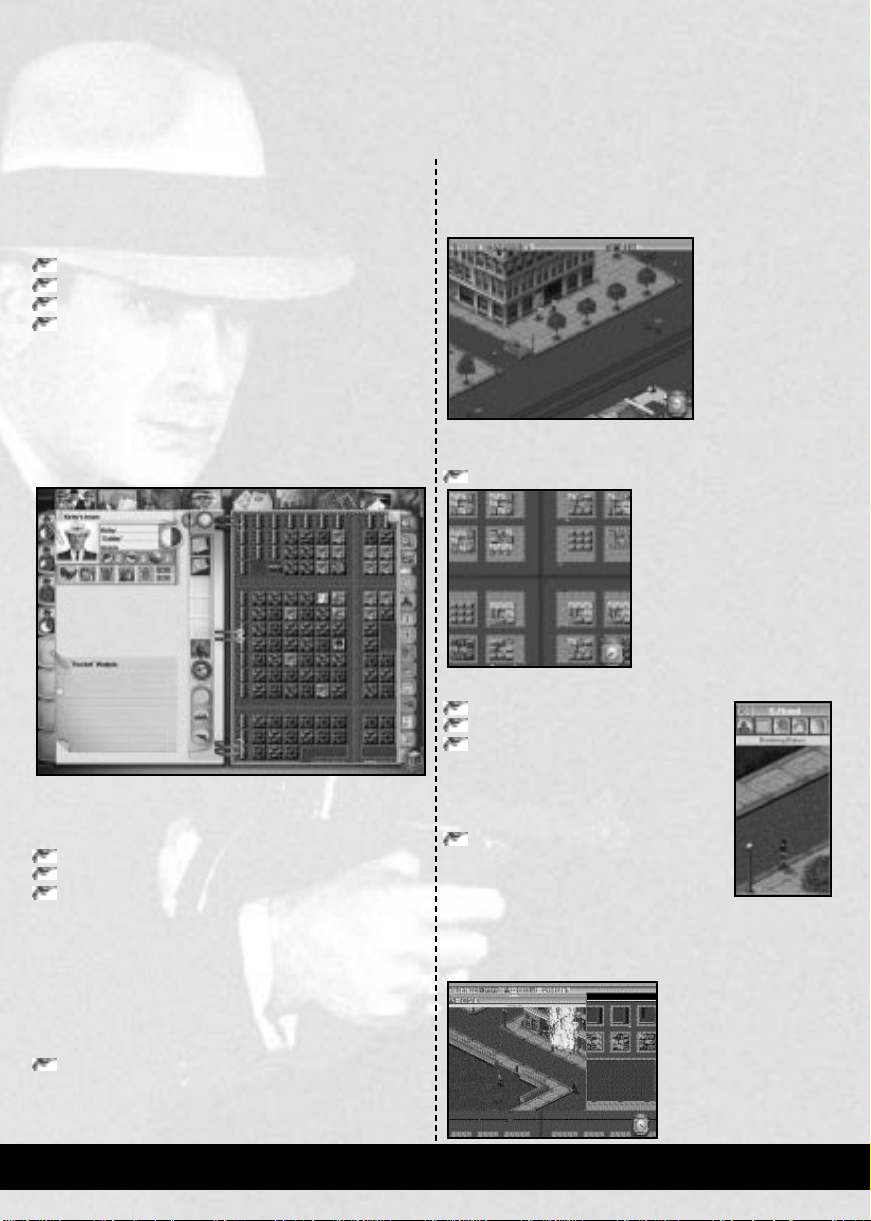
TEAM CHECK
The Team Check takes stock of the people in your Gang. You
will see a character’s face and name at the top left of the page.
This is William “Fury” Kassel, your first Lieutenant. The
team name above Kassel’s own name shows that he is to be in
charge of your first “Protection” racket.
Looking at the indicators
below Kassel’s name, you will
notice the following:
Kassel has two hoods in his
team, (these are Domingo
“The Mule” Diangelo and
Ezekiel “Sidewalk” Marks)
their names will be visible at the bottom of the page.
Kassel has three weapons.
Kassel has one vehicle.
Now you have looked at Kassel, you need to check your other
Lieutenant.
Click on the second
Lieutenant Tab, situated on
the left side of the page.
This is Connall “Tiepin” Dolan.
If you look at the team name, it
simply indicates that he is in control of “Connall’s team”.
Unlike Kassel, Dolan is not in charge of anyone but does
have a weapon.
RENAMING A TEAM
Y ou need to make Dolan r esponsible for r ecruiting, and name
his team accordingly.
Click in the team name box.
Delete the team name currently in place and type in the
word “recruiting”.
Hit Return.
You have now appropriately renamed Dolan’s team. This acts
as an instant reminder of the role for which Dolan has been
made a Lieutenant.
Now that you have performed a team check, you will
perform a Territory Check.
GANGSTERS PAGE 11

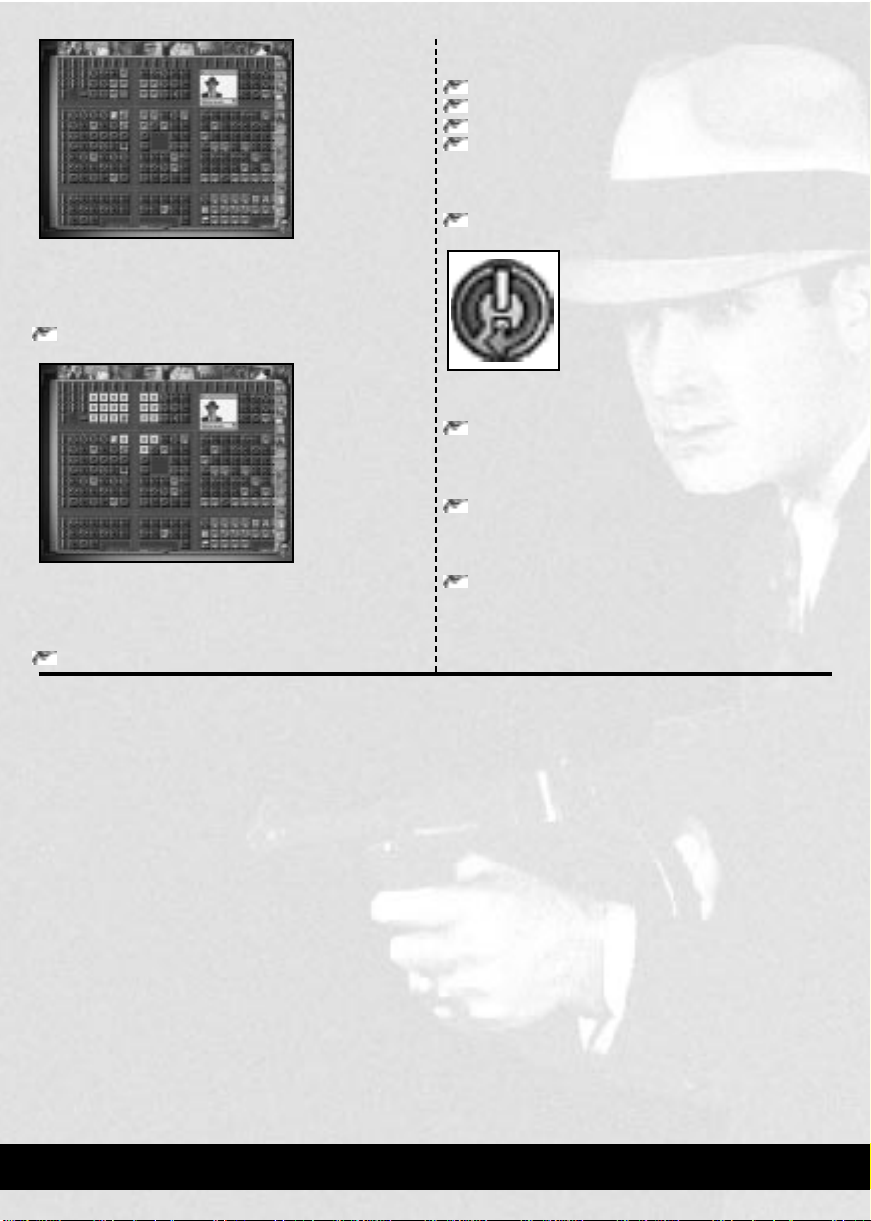
TERRITORY CHECK
Checking your territory regularly helps you keep an overview
of where you are situated, where key sites are, and how large
your empire has grown. The first thing you need to do is
switch to the Maps.
Click on the seventh Section Tab; Maps.
You will now be viewing the City Plan map, full screen. This
map shows the city from the highest possible altitude.
Your Headquarters can be seen in the top left of the map,
marked by the pistol icon.
Click the fourth button on the right side of the map,
marked Territory.
FINANCE CHECK
The Finance Check allows you to keep track of your income
and expenditure.
Click on the Accountant Section Tab.
The Accountant Section will appear. Even though you do not
have an accountant, you can still view your Finances page. This
page gives details of the money that has come in and gone out
in the last week. Currently, this will show the following:
A legal income from a Removals Company that you own.
A small loss showing for the illegal income. This is due to
the costs of your Headquarters.
The substantial cost of approximately $750 in wages for
your five Gang members. (There is also a hood running
the Removals Company. You will look at the details of
this hood in the second tutorial.)
In the bottom half of the page is the summary of your
finances. This shows tax details, along with your total cash
and assets. As you can see, you have $6000 in cash. Although
you have plenty of cash for now, the negative profit figure
above the tax details shows that you are running at a loss. You
need to start making money, or you will soon go bankrupt.
A red outline will appear around the block that your
Headquarters is situated on. This red outline shows your
territory, blocks on which you either own or protect a
business.
Hold down the right-mouse-button, and move the mouse.
This scrolls the map. You do not have to move the pointer
to the edge of the map; the map moves around the
pointer, wherever it is positioned.
Scroll the map, then return back to your Headquarters.
You will not have been able to see any of the territories of
your opponents since you do not know the location of any of
their Headquarters, or any businesses they control. This
situation will change as the game progresses.
When you have finished looking around the map, you will
perform a Finance Check.
Now that you know your current personnel, territory and
financial status, you can start planning orders to make gains
in all three areas.
GIVING ORDERS
Before giving any orders, it is essential to decide exactly what
to do. There will usually be more to do than time and
manpower allows. You must prioritise your orders. In this
case, it is essential you increase your income and desirable
that you expand your personnel and territory, while securing
your current area.
To do this, you must give your hoods the following
orders:
Recruit
Extort
Patrol
PAGE 12 GANGSTERS
The Time Indicator, to the right of Dolan’s name, is partially
RECRUITING GANG MEMBERS
The Recruit order will be used to increase the number of
people in your team. At this stage of the game, you will be
looking only to increase the number of hoods in your Gang.
Later in the game it is possible to recruit Accountants and
Lawyers. The task of recruiting will be given to Dolan, the
Lieutenant of the “Recruiting” team.
Click on the Lieutenant’s Section Tab.
Click on the second Lieutenant Tab.
This makes Dolan the selected Lieutenant.
Click on the Orders button.
This changes the Reports Panel to the Orders Panel. The
Orders Panel shows the four order types available to your
Lieutenants:
Business Orders.
Personnel Orders.
Minor Crimes.
Violent Crimes.
Click on the button marked Personnel Orders.
The Right Panel changes, to show the available Personnel Orders.
Click on the Recruit button.
A job card appears, with the order to “recruit” a hood and
asking you to select the required territory or hood. You will see
that a number of blocks on the map are highlighted in blue.
These are all the pool halls and gyms in the city, along with the
Labour Exchange and the Docks. These are all the sites from
which you can recruit hoods.
A set of three buttons at the bottom of the Right Insert
allows you to select the character type you wish to recruit:
filled with red. This shows that he thinks the recruit order
will take almost half the week. A miniature version of
this indicator has appeared on Dolan’s Lieutenant Tab, on
the left. Now that you have taken steps to recruit some more
hoods, the next step is to Extort some businesses and star t
the protection racket.
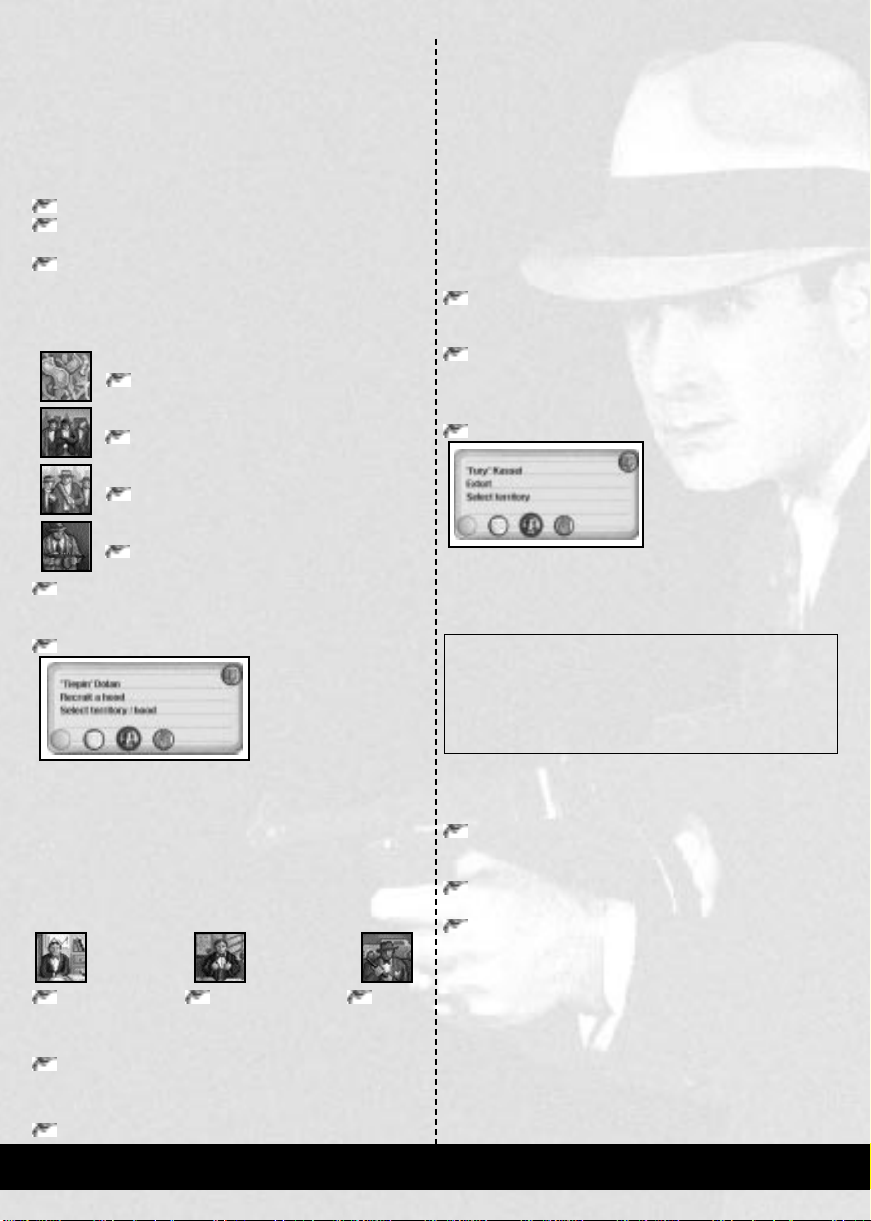
EXTORTING
By using Extortion, you can collect protection money. You
will also increase your Territory , since every block partially or
wholly extorted becomes part of your Territory.
You will now have Kassel as your selected Lieutenant.
The Right Panel will change to show the minor crimes that
you can perform.
job card also prompts you to select the territory for the order.
Y ou will notice that the majority of the blocks on the map have
changed to a blue color. This color denotes the blocks that are
available for extortion, currently most of the city!
HINT
While you can select anywhere in the city, it is advisable to stay
close to your current territory. The further afield you try to
extort, the greater the chance of a business owner rejecting your
attempts. They might even inform the police about your hood,
which is known as “squealing”.
You are now going to define the area for extortion. This will
be the block that your headquarters is on, plus those to the
North, West and Northwest, forming an area 2 blocks square.
You will see that the blocks are highlighted in red.
Click on the first Lieutenant Tab, to select Kassel.
Click on the Minor Crimes button.
Click on the Extort button.
A new job card will appear
on the left side, below
Kassel’s face and name. This
card shows Kassel’s name,
and the fact that you are
giving an “Extort” order . The
Bound an area around the four blocks.
Click on the manpower button, to raise the manpower
level to two.
Click on the Confirm Order button on the job card.
The Time Indicator, to the right of Kassel’s name, is filled
Accountant Lawyer Hoods
The default is always to recruit hoods. This is what you
require, so no action further need be taken here.
Click the highlighted block two above your Headquarters.
Also click on the highlighted block across the main road.
These blocks will turn red, to indicate that they have been selected.
Click on the Confirm Order button on the job card.
approximately half way around with red. This shows that he
thinks the extortion of the area selected will take two people half
the week. You will also see that a miniature version of this
indicator has appeared on Kassel’s Lieutenant Tab, on the left.
You can now see at a glance which Lieutenants have been given
orders, and which can be given extra tasks. Now that you have
given the order to start the protection racket, the last remaining
order is to instruct a hood to Patrol your current territory.
GANGSTERS PAGE 13
PATROLLING
The Patrol order will secure your territory, by having a hood
constantly walking around the block. As Dolan has already
been given a task, and one of Kassel’s team is still free, you
will give the patrol order to Kassel.
Click on Personnel Orders, in the Orders Panel.
Click on the Patrol button.
Your territory will already be highlighted, and the job card
will state “Territory selected”. This is because the area has
already been allocated to Kassel. (See Tutorial 3 for further
details of allocating Lieutenant’s Area.)
Click on Confirm Order, on the job card.
Having given these orders, you will have covered all the
requirements for the week. You will now take the step that
normally follows the completion of orders; Hitting the
Streets.
HIT THE STREETS!
Hitting the Streets is
the final step to
sending your Gang
members out on their
tasks. It is also the
final step of this
tutorial, for once you
click on this button
you will be starting
Tutorial 2; the First
Working Week.
Click on the
button at the
bottom right,
labelled
Hit the
Streets!
PAGE 14 GANGSTERS
TUTORIAL 2:
You will now see a rolodex appear at the bottom left of the
THE FIRST
WORKING WEEK
In this tutorial, you will run through the basic parts of the
Working Week. This will involve looking at what is going on
in the city, and finding your way around the city easily.
The Working Week is the part of the game where your
Gang members go out on their jobs. These errands can be
anything from opening businesses and making donations, to
collecting protection money and killing people who get in
your way . Street Orders are also available for use in the week,
allowing you to divert patrols and other members of your
Gang to intercept intruders or any other people that you
want killed or hurt.
Before you can achieve any of this, you need to be
proficient in the basic control and manipulation of the maps
and windows available in the Working Week.
If you are entering this tutorial from Tutorial 1, please begin
at the steps under the heading “The Start of the Working
Week”. If you have loaded Tutorial 2 from the Tutorials
Screen, You will be viewing the Gang Organizer.
Before Hitting the Streets, you may like to perform the
checks as covered in Tutorial 1:
page. The rolodex gives the names of people who have been
given orders, what their orders are, and any target that may
have been selected. The map will also highlight areas selected
for orders.
To see the other orders that have been given, you need to
cycle through the cards on the rolodex.
Click on the Next and Previous Orders arrows on the
rolodex
Once you are satisfied with your position, the next thing to
do is to Hit the Streets. This is where you will see your hoods
attempt to fulfil the orders they were given in the Gang
Organizer. N ow that you ar e familiar with your situation, you
can now Hit the Streets.
Click on the button at the bottom right, labelled Hit the
Streets!.
After the enemy Gangs have planned their actions, you will
be taken into the city.
THE START OF THE WORKING WEEK
Team Check
Territory Check
Finance Check
If you need help with these, please refer to Tutorial 1.
You might also like to check
your Lieutenant’s orders.
Click on the This Week’s
Orders button in the
Reports Panel.
The Street Viewwill appear. Pause the game, so that you can
take a look around at your own leisure.
Click on the first icon in the icon bar, labelled Pause.
The game will stop running, although you will still be able to
perform other actions such as scrolling and locating your
base. Being able to locate your base quickly is essential, as
attacks on your Headquarters need prompt responses from
both you and your hoods.
Click on the button in the icon bar, labelled Center on
Headquarters.
If you have scrolled away from your Headquarters, you will
be taken back immediately . If you have not mo ved the scr een,
there will be no visible changes.
GANGSTERS PAGE 15
VIEWING BUILDING DETAILS
The block that is directly in the center of your view is the one
where your Headquarters are located. Your Removals
Company is also on this block.
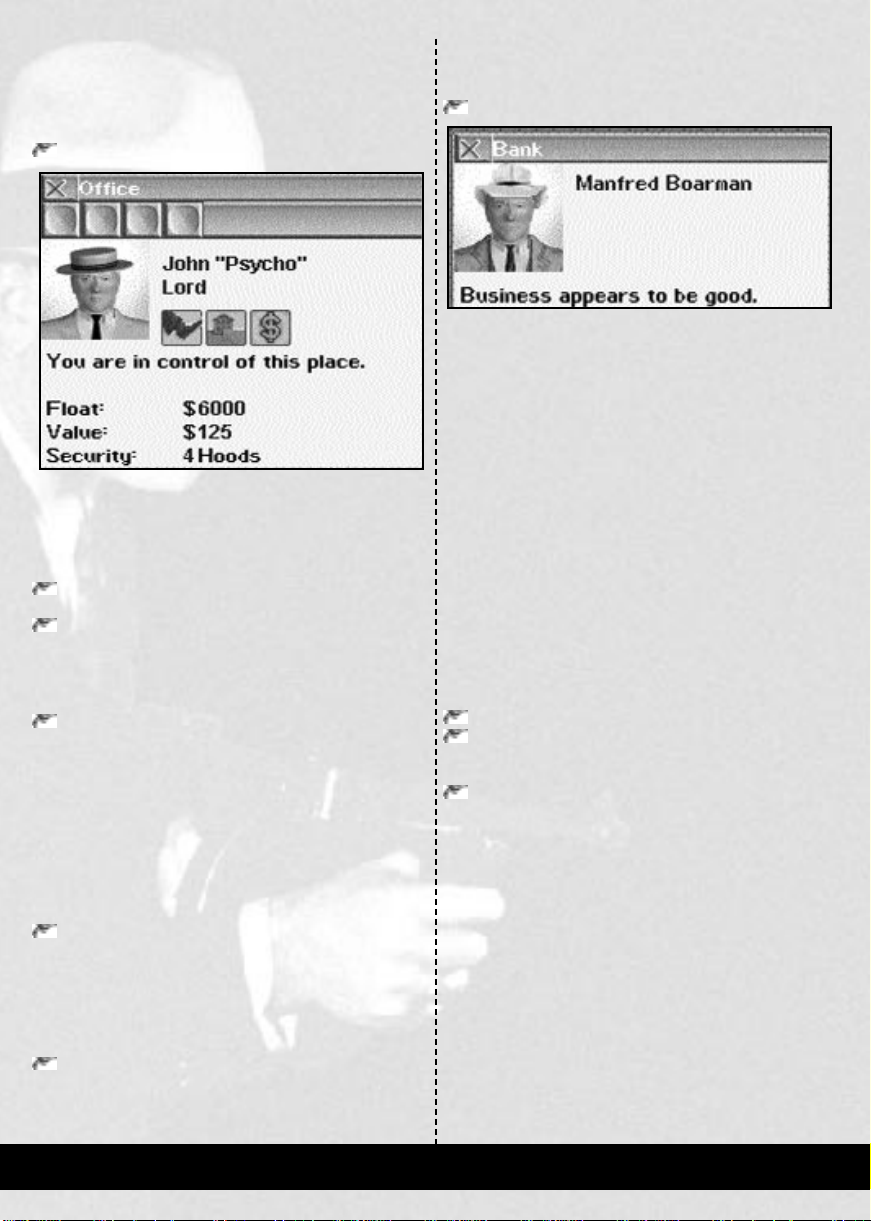
Double click on the center location of the block.
This will open a Building Details Window, displaying your
Office. You will notice that your face and name are displayed.
You will also see how much money you have, along with
other details. When you have finished looking at the details
of your office, look at the Removals Company.
Close the Office window, by clicking on the X at the top
left of the window.
Click on the building at the bottom of the block.
During the week, this is a method of spotting potential
extortion or robbery targets. The clothes of the person
running a business are reflective of their income.
Open a Building Details Window on the Small Bank.
This is situated one block to the East, just across the main
road from your Headquarters. Notice that the manager of the
bank is wearing a suit. This, with the fact that the bank is a
fairly large building, means that it should produce a lucrative
income for either protection or robbery. Checking potential
targets is a process that you should perform whenever
possible. Some targets, such as banks, can have a police
guard, so it is vital that you know the situation before you
send your hoods there.
Having looked around the places in the immediate area, you
can now look at moving around the city in greater steps. This
will be performed using scrolling and the different map
levels. Becoming effective at moving around the city is a vital
part of Gangsters. Fleeting sights of people can save your
hoods, your businesses and even your own life.
This is part of the Removals Company that occupies the
whole side of the block. You will see a small box stating that
the business is a Removals Company.
Click on the box containing the words “Removals
Company”.
The Building Details Window for the Removals Company
shows that this business belongs to you and is the “Front ” for
your office: All people who wish to enter or leave your office
must do so through here. The window shows that the site is
being run by Lech “Artful” Marivich, who is one of your
hoods. You are also shown how much money the site has
made, how much the site is worth, and what its market
conditions are.
Close the window, by clicking on the X at the top left of
the window.
Different buildings give different levels of information, based
on how involved with them you are; your own buildings give
full detail, those you have no involvement with show scant
details.
Open and Close different Building Details Windows
around the area.
SCROLLING
To scroll the map
Click and hold the RMB.
Move the mouse in the direction required.
If you wish to locate your Headquarters again
Click on the button in the icon bar, labelled Center on
Headquarters.
Try scrolling around the map over reasonable distances, then
finding your way back again, using both scrolling and the
Center on Headquarters button. You can also try scr olling to
and from other notable landmarks, such as bridges, parks or
prominent buildings.
The more confident you become at navigating distances
and finding people and places just by the “feel” of the city,
the more effective you will be at finding your own people and
places. This will help enormously when you are in combat, or
have enemy hoods intruding on your territory.
Once you are happy with scrolling around this level, you
can begin moving between the different map levels.
PAGE 16 GANGSTERS
CHANGING MAP LEVELS
In the week, you are able to zoom in and out to any map level
you wish. This helps with the navigation of greater distances
than can be comfortably achieved within the Street View, and
can also help with monitoring your hoods.
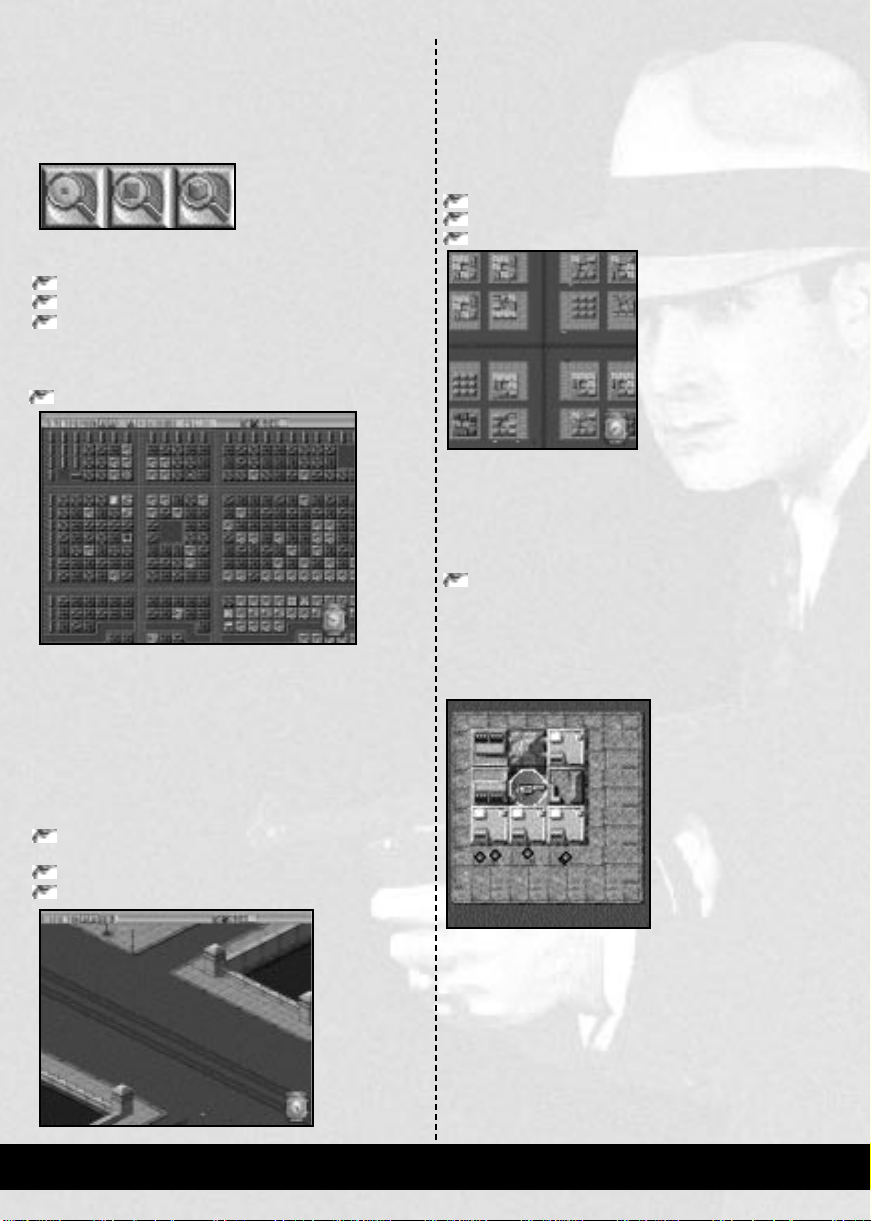
Changing maps is achieved by
using the three zoom buttons
in the icon bar. These three
buttons all have the picture of
a magnifying glass on them, and have a single letter to denote
the level to which the button will take you:
L (Low magnification): The City Plan
M (Medium magnification): The Rooftop View
H (High magnification): The Street View
The button for the level you are currently on is never
displayed, to avoid accidental selection.
Click on the City Plan button.
The view will change to show the City Plan. If you have
already run through Tutorial 1, you will notice that this map
is identical to the one that is in the Gang Organizer.
A small frame will briefly flash on the map. This signifies
the area you were viewing in the previous map level.
You are going to use this map for a quick move of
viewpoint, from one side of the city to the other. This
becomes very useful for performing quick checks on vital
points within the city.
Scroll the map, until you find the bridge furthest to the
right of the city.
Click on the button for the Street View.
Click on the bridge.
The view will change back to the Street View, with the bridge
displayed. Try scrolling around the map, and zooming from
one level to another; the aim of this exercise is for you to
become proficient at moving around the city. Now that you
are familiar with scrolling and zooming as an aid to quick
navigation, you are going to take a look at the city itself.
Before doing this, make sure that you have done the
following:
Close any Building Details Windows that you have open.
Change the map to the Rooftop View.
Center the map on your Headquarters.
These actions will result in you seeing a view similar to the
one shown in the picture above. You are in the Rooftop View.
This allows us to view people and buildings and covers a
larger area than the Street View. Now that you are in the
correct place, you can take a look at what is happening. T o do
this, you need to start time passing again.
Click on the Pause button.
The cars and people in the city will start moving. People are
shown as colored dots. Some of the dots will be dark blue, the
remainder shades of brown. The brown people are normal
citizens, whilst the dark blue dots are police officers.
After a few seconds, you will see some red dots appear out
of your Removals Company. These are your hoods, who
are on their way to perform the orders they were given in the
Gang Organizer.
Now your hoods are out on the streets, you can look at
ways of monitoring their progress.
GANGSTERS PAGE 17
USING TAGGED WINDOWS
To keep an eye on your people,
you can use Tagged Windows.
Tagged Windows are small
display panels that follow your
Gang members, tell you what
orders they are currently
performing and also allow you to
give some directions to the individuals.
Click on the button marked Tagged Characters.
A window will appear,
listing the names of the
people from your Gang that
are currently out on the
streets and showing the
weapons that they are
carrying. The names that are
positioned right to the left
are your lieutenants and those slightly indented are the hoods
working below them.
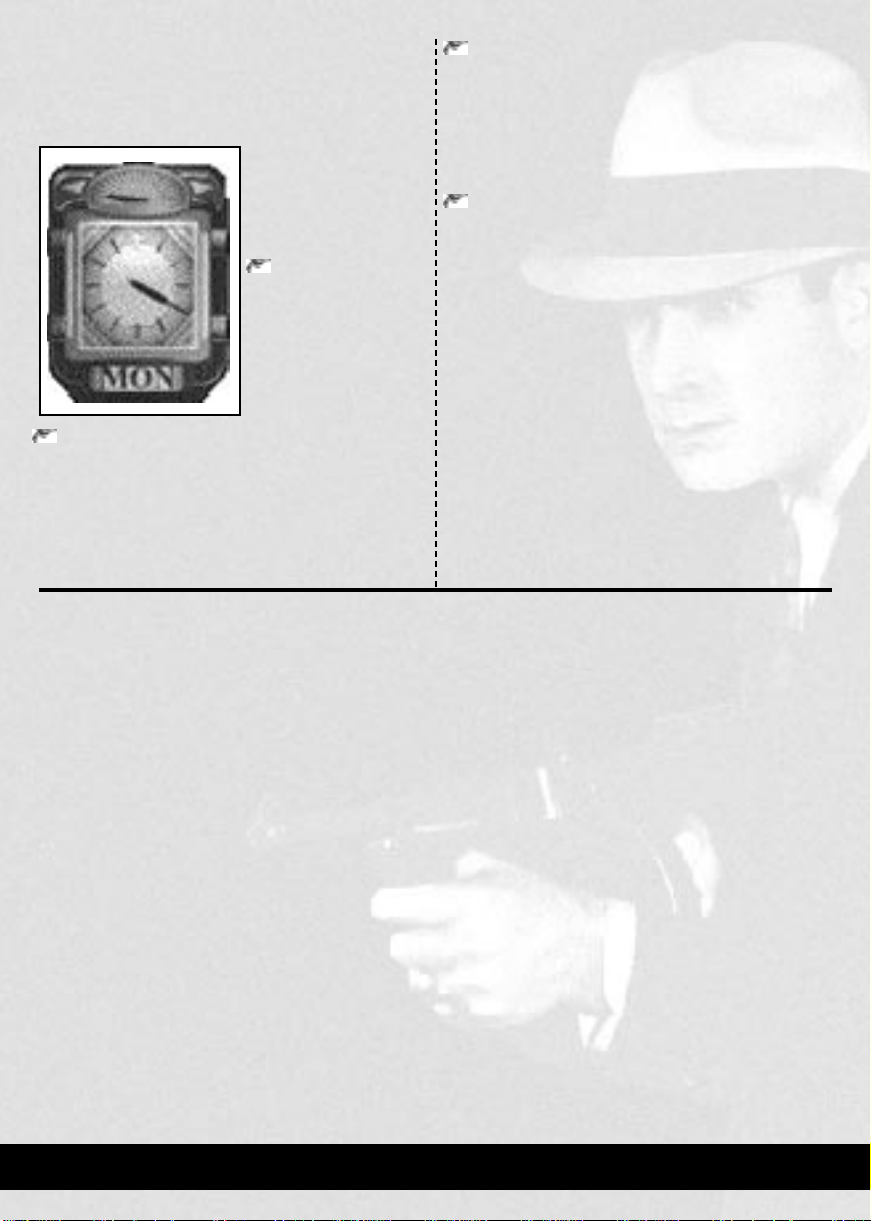
Click on the button in the window, marked Orders.
This changes the list to
show the activities of the
hoods, which will reflect the
four tasks allocated in the
Gang Organizer. The two
names shown are the names
of your two lieutenants and
the tasks beneath each of the
names are the orders they have been given. Open a window
on one of the hoods performing the extortion order, so that
you can follow him as he carries out his task.
Click on the word Extorting in the window.
To change the view of the window
Click on the second button in the Tagged Window,
labelled Change View.
This changes the view within the Tagged Window to that of
the Rooftop View. You will see that your hood is surrounded
in the window by a flashing square. This
makes it easier to see exactly where your
hood is in the window, which is
especially useful if he or she is within
either a crowd or a building.
Click on the Change View button
again.
This takes the Tagged Window back to
the Street View. You now need to find
exactly where your hood is in the city.
Click on the first button in the
Tagged Window, labelled Center
View.
The Main Window will now instantly scr oll until the hood is
positioned centrally in the map. There are other options
associated with the Tagged Windows, but the two covered
above are the most important for finding and orientating any
of your hoods. You will find that different situations demand
different window combinations. Using the Tagged Window
in Street View and the Main Window in the Rooftop View is
probably best for monitoring, whilst the other way around is
more useful for combat.
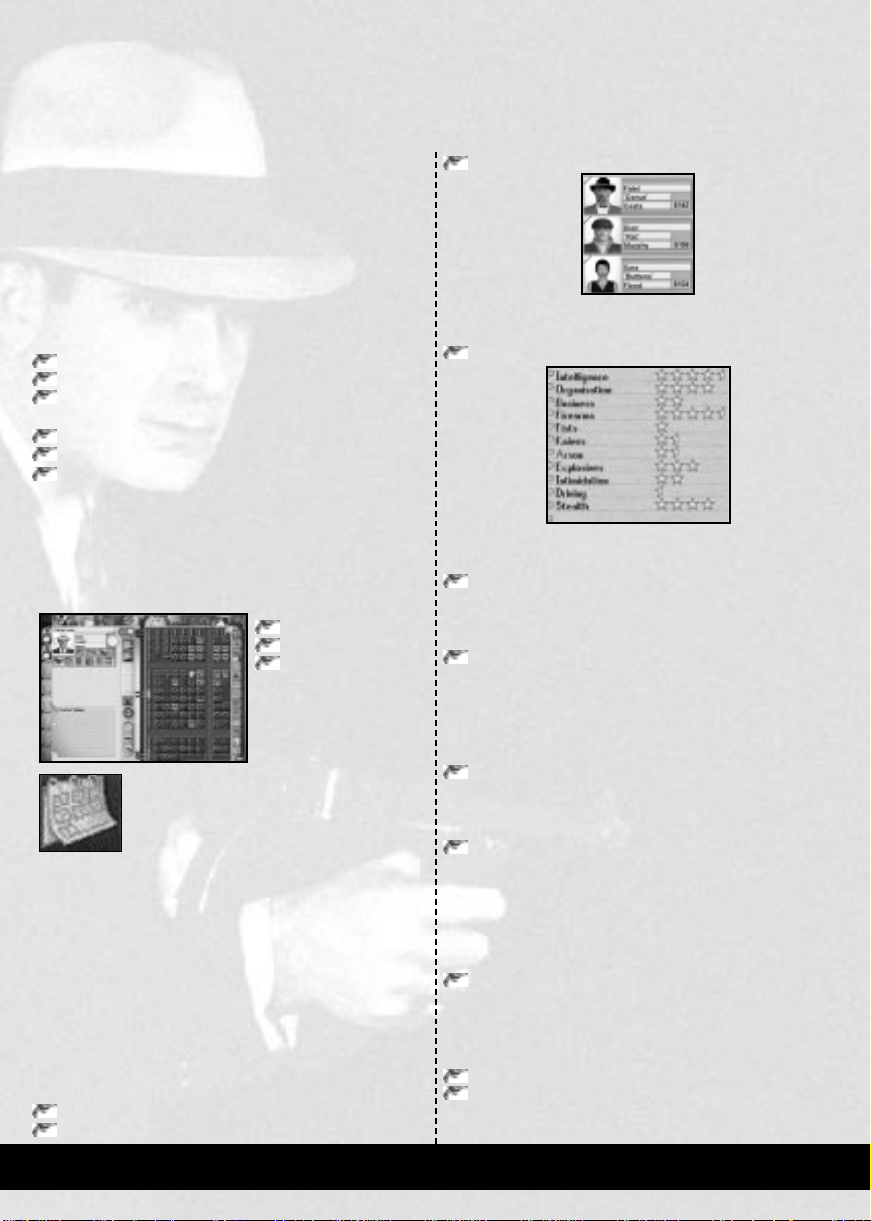
A Tagged Window will appear. In the
window, you will see a number of
buttons plus the name of the hood in
the icon bar at the top. The hood will
appear in the main part of the window,
in a small section of the Street View.
The word “Extorting” shows the
current activity of the hood. You can
watch your hood walk in and out of
each building, as he visits each site
nominated for extortion.
The Tagged Windows can display
either the Rooftop or Street View,
whilst the windows themselves can be
There is no limit to where or when you can use Tagged
Windows during the Working Week.
You will now look at one of the combinations of views
available, so that you can see the difference more than one
perspective makes.
used in any of the three available views.
PAGE 18 GANGSTERS
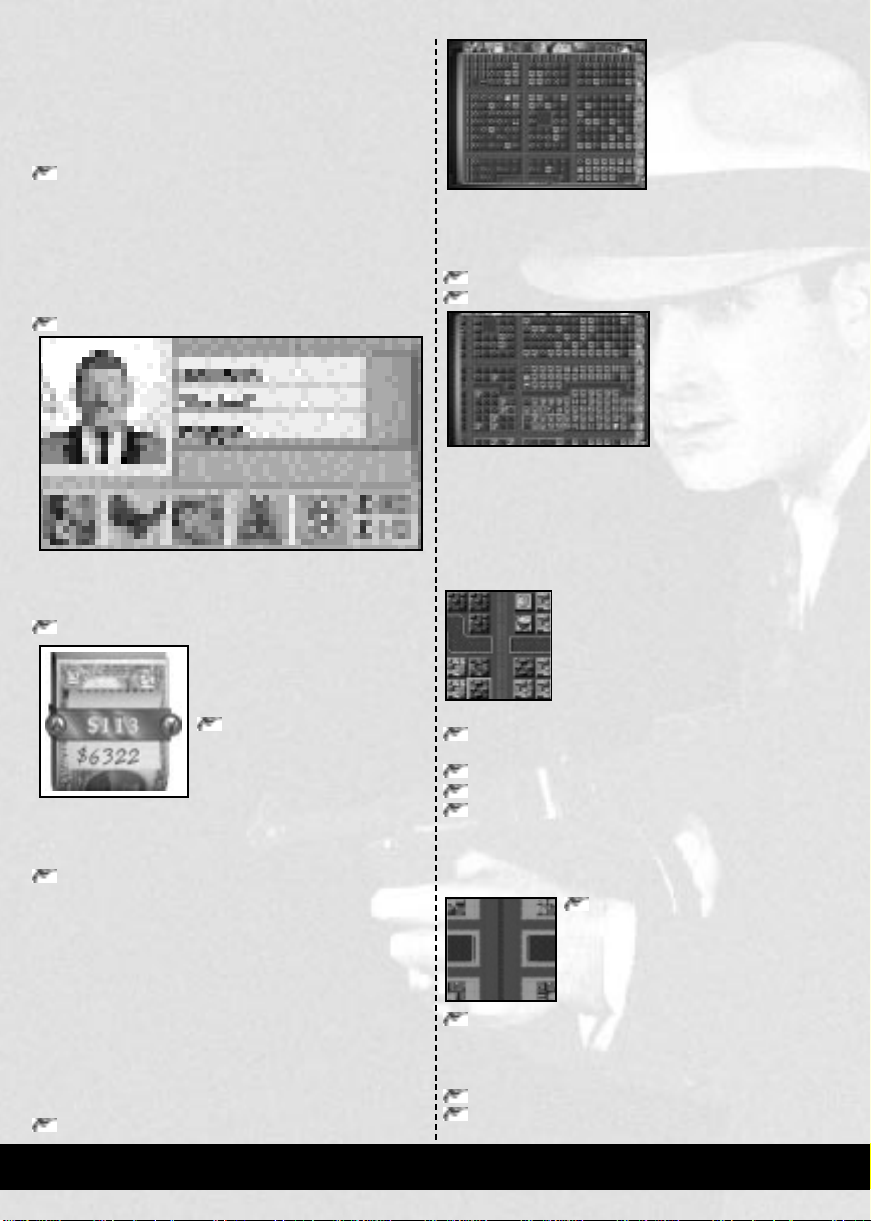
THE CLOCK
Now you are familiar with moving around the map and
monitoring your hoods, you can take a look at the uses of the
Clock, situated at the bottom right of the Main Window.
The Clock runs from
Monday through Friday,
when the week will end.
The clock can also be used
to accelerate time.
Click on the right
shoulder of the clock.
The needle at the top of the
clock will move a fraction
to the right, and the speed
of both the clock hand and
the activity on screen will
increase noticeably.
Click on the left shoulder of the clock.
The needle and the on-screen activity will slow down again.
The right and left shoulders of the clock are used to
accelerate and decelerate time respectively. You can also use
the less than and greater than keys, < and >. For now, you can
happily accelerate the week to its conclusion.
Click four times on the right shoulder of the clock.
The needle will be positioned far to the right of the dial at the
top, and the hands of the clock will have disappeared. The
game is now running at its fastest possible speed. Leave the
game running at this speed, until the week has concluded.
This is the end of the second tutorial.
Click on the OK button in this window to take you out
of this tutorial, and back to the Tutorials Screen.
You should now be comfortable with moving around the
different map levels, monitoring the position and progress of
your hoods, and able to manipulate the basic features of the
Working Week. When you have reached a high level of
confidence in the operation of the Working Week, you will be
able to control your Gang members more effectively, and
thereby incur fewer lost hoods and activities.
The next tutorials will look at additional features of both the
Gang Organizer and the Working Week. It is advisable that
you become fluent with the basics of the Working Week
before attempting the more advanced commands and
controls.
To proceed with the next tutorial, you need to load Tutorial
3 from the Scenarios Screen.
GANGSTERS PAGE 19
TUTORIAL 3:
Click on the Recruit People button.
EXPANDING FURTHER
This tutorial expands on the progress you made following
Tutorials 1 and 2. As your Gang expands, things will
inevitably start to go wrong. You may find that you have
fewer hoods than you would like, Gang members will
become unhappy and business owners will start to refuse to
pay protection. As a Gang Leader, it is your task to ensure
that these situations are dealt with promptly.
In this tutorial, you will learn the following:
Completing the recruitment order
Keeping your Gang members happy
Dealing with unruly business owners
You will also learn three new orders:
Bomb
Collect Protection
Go to
Although not all subjects will be covered by the end of this
tutorial, you should be comfortable with the Gang Organizer.
Once the tutorial has loaded, you will find yourself in the
Gang Organizer. The first thing you should do is to appraise
your situation. To do this, perform the three checks as
mentioned in the first tutorial:
Team Check
Territory Check
Finance Check
If you need help with these,
please refer to Tutorial 1.
You might also like to
check the orders your
Lieutenants have already
been given; those that were covered in the first
tutorial. If you need help with viewing “This
Week’s Orders”, please refer to Tutorial 2.
When you are happy with your position, you
need to hire some hoods.
The recruit report displays all the hoods available for hire.
Each shows their photograph, their name and wage demand.
Click on the face of Fidel “Donut” Costa.
Costa’s details appear at the bottom of the page. Costa has a
very high firearms, stealth, organisation and intelligence rating.
Click on the button marked Recruit as New Lieutenant.
A window appears, stating that Costa will require an extra $50
a week to be a Lieutenant and asking you to confirm the action.
Click Yes.
Costa becomes a new Lieutenant and can be accessed from
the third Lieutenant tab. All new Lieutenants become
immediately selected, so you will now see Costa displayed at
the top left of the page.
Click on the face of the next hood, Dion “Rat” Murphy.
Murphy, like Costa, has high firearms and stealth ratings, but
is not so good in other areas.
Click on the button next to Murphy’s attributes list,
labelled Recruit to Team.
RECRUITING
You should already be familiar with issuing the “Recruit”
order. The “Recruit” report is produced as the result of a
successful “Recruit” order that was given in the previous
Working Week, and is covered in Tutorial 1. When the week
has concluded, all the people available for recruitment can be
seen. These are the hoods, accountants or lawyers that were
visited and spoken to by your Gang members during the
previous Working Week. To view or recruit the people you
must access the “Recruit” report. This is located in the Reports
section of the Lieutenant Section. If you are not in this screen
Click on the Lieutenant Section Tab.
Click on the Reports button.
When you have done this, rename Costa’s team “Security”.
and give Fidel the two Tommy Guns that are in your
weapons pool. Please refer to Tutorial 1 if you need help with
this actions.
Click on the face of the last hood; Sara “Buttons” Flood.
Flood has high ratings across most of the range of skills, but
is especially good with explosives. She will make an excellent
Lieutenant for a team involved with bombing activities.
Promote Flood to the fourth Lieutenant tab.
Rename Flood’s team “Bombers”.
You have now recruited three additional people. You will be
giving them orders shortly.
PAGE 20 GANGSTERS
DEALING WITH UNHAPPY
GANG MEMBERS
Now that you have expanded your team, you need to look at
dealing with an unhappy Gang member.
Click on the first Lieutenant tab, to select Kirby “Gabby”
Green.
Green’s hood, Uladislas “Rocket” Wojtyla, is not happy.
There are several possible causes of his unhappiness; having
been attacked, demoted or feeling underpaid.
Whatever the reason, his name is now displayed in red. If
his name remains red too long, he may leave you to work for
a rival Gang.
Click on Uladislas’ name.
This displays his face and name just below those of Kirby
“Gabby” Green. You will see that Uladislas’ pay demand is
$40 higher than the amount he is actually being paid.
Click on the Hoods Pay button.
The money roll appears, showing
the amount Uladislas is being paid
each week.
Click on the Increase Pay
arrow, situated on the money
roll, until the amount reaches
the same as his pay demand.
This is the amount that Uladislas wants to be paid each week.
Hoods are always mercenary, and only increases in money
will keep them happy.
Click on the Hoods Pay button again.
This confirms Uladislas’ wage increase, and r educes any threat
of his leaving the Gang. As soon as the money clip is closed,
Uladislas’ name will turn black again.
USING THE “GO TO” ORDER
Now that your team members are all content, you must check
out something that you may have noticed in your Territory
Check; the border of the green Gang meets the border of the
orange Gang.
First, access the Maps.
Click on the seventh top tab, labelled Maps.
You will now see the City Plan. You are going to perform
another Territory Check, but this time you will need to look
more carefully at what is happening in the city.
Click on the Territory button.
Scroll towards the bottom of the map.
You know the territories of each of the rival Gang Leaders.
You can clearly see that there are points where the border of
the Green Gangmeets that of the Orange Gang. This could
prove to be an area of extreme violence in the weeks to come,
so you will need to use a Go to order to secure this region.
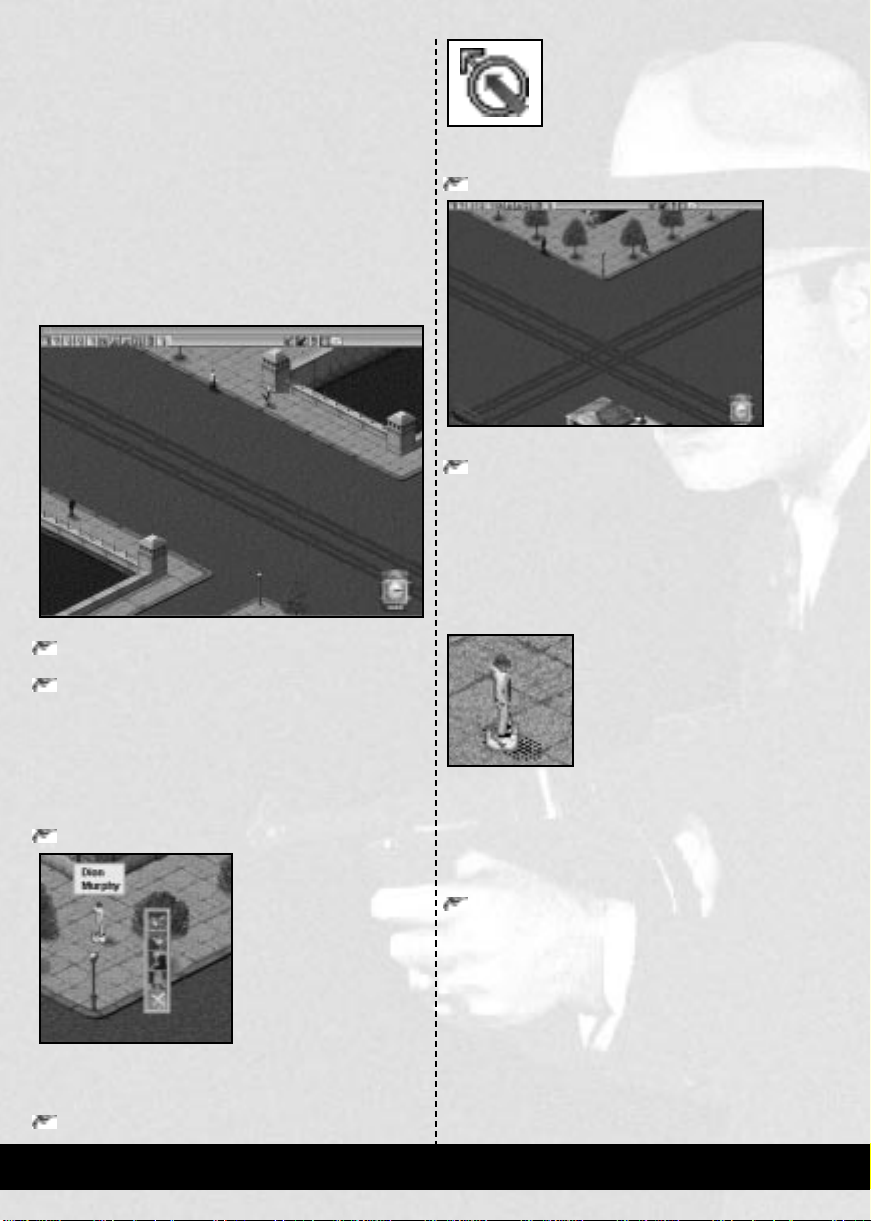
Near to the conflict area between the Gr een and Orange Gangs,
there is a key strategic point that could be worth guarding.
This is the bridge crossing just to the South
of the Public Baths. Strategic points such
as these are good places to send hoods. A
patrol order could be used to guard this
point, but it is better to send hoods to the
bridge to stay there and watch for enemy
hoods attempting to cross into your territory.
Click on the Lieutenant Tab for the third team, lead by
Fidel “Donut” Costa.
Click on the Orders button.
Click on the Personnel Orders button.
Click on the button labelled Go to.
The map is highlighted blue throughout. This shows that
you can select to go anywhere, although this instruction does
not guarantee the safety of any area for your hoods.
Click on the bridge.
The map zooms in to the Rooftop View.
Some orders require you to make a further
definition of a target, which can only be
done using the clipboard or this map level.
Click on the pavement area half way down the bridge, to
the right of the main road.
The job card will fill in the name of the road.
Click once on the manpower button, to raise it to 2.
Click on the Confirm Order button.
GANGSTERS PAGE 21
DEALING WITH UNRULY
BUSINESS OWNERS
Now that you have taken steps to prevent any violence
between the Green and the Orange Gang, you should look at
dealing with unruly business owners.
Click on the Lawyer Section tab.
In this tutorial set-up, you have already recruited a Lawyer.
Please refer to Tutorial 1 if you need information regarding
the recruiting of people.
Click on the report labelled Squealers.
This is called squealing and is an activity you cannot afford
to ignore, since the police will now be hunting the hood who
performed the extortion.
You are therefore going to bomb Eno’s store. This is the
convenience store two blocks to the right of your
Headquarters.
Click on the Lieutenant’s Section Tab.
Click on the Lieutenant Tab for Sara Flood; the
“Bombers” team.
Click on the button for Orders.
Click on the button for Violent Crimes.
Click on the Bomb button.
Small areas of the map should now be colored blue. These are
the areas that are valid targets for bombing, and currently
consist of buildings that fall into the following categories:
Those occupied by, or belong to, people who have
squealed on you.
The City Hall and the Courthouse.
The Police Department and the F.B.I. Headquarters.
Known enemy owned sites.
Eno belongs to the first group, so the block he is on is
highlighted.
Click on the highlighted block two to the right of your
Headquarters.
This is where Eno is. Since he is the only valid target from the
above list to live on the block, his business is automatically
selected and filled in on the job card.
Confirm the order.
This will send Sara on her way to bomb Eno’s business.
You will see that a block is highlighted on the map and one
name also appears on the clipboard; Eno Colburn. Eno will also
appear in the squealer category of business owners in the
clipboard, should you not have a Lawyer.
Eno Colburn is a business owner who has refused to pay
protection money. This must be dealt with promptly, before
other business owners realise that refusal is an option.
There are a number of choices for dealing with people
who refuse to pay protection money. Most people can simply
be intimidated or assaulted; this often helps change their
mind. For some others, more extreme measures are needed.
Eno is one of the latter. Not only did he refuse to pay
protection, but he also told the police about your actions.
COLLECTING
PROTECTION MONEY
Before sending out people to collect the protection money,
you will first of all give Kirby “Gabby” G r een, the Lieutenant
responsible for collecting protection, an area to cover. This is
not essential, but will allow you to leave certain activities to
your Lieutenants without the need for repeated orders.
Click on the Maps tab.
Click on Territory.
Click on the button below Territory, labelled
Lieutenant’s Area.
PAGE 22 GANGSTERS
A small window will open, in which you will see a Lieutenant
and their name displayed. Since Kirby Green is the
Lieutenant of the first team, it is his face and name that you
will now see.
Bound an area of the map, so that the bound area encloses
the whole of your territory.
The selected area will turn white. Should you have missed
any blocks, you can add them by clicking on the blocks
individually. If you select any blocks twice, they will become
deselected.
Click on the Lieutenant’s Area button again.
The area is now allocated to Kirby. You must now take the
following steps to start collecting the protection money:
Click on the Lieutenant’s Section Tab.
Click on the Orders button.
Click on the button for Business Orders.
Click on the Collect Protection button.
The map will now show all of your area selected, and the job
card will state that the territory has been selected.
Click once on the Manpower button.
This increases the number of hoods sent on the order to two.
Click on the Repeat Order button.
This button instructs Kirby to issue orders to collect
protection money each week, until told otherwise.
Click on the Confirm Order button.
Now that the orders have been given, you need to Hit the
Streets so your hoods can get on with their tasks.
Click on the button at the bottom right, labelled
Hit the Streets!
This ends the third tutorial and starts Tutorial 4.
GANGSTERS PAGE 23
TUTORIAL 4:
ACTION IN THE
WORKING WEEK
This tutorial covers:
Monitoring people in the Rooftop View
Moving people using Street Orders
Messages
Combat with Street Orders
By the end of this tutorial, you should know enough to
always be aware of what is going on and how to take action
should the need arise.
If you are entering this tutorial from Tutorial 3, please
begin at the steps under the heading “The Start of the
Working Week”.
THE START OF
THE WORKING WEEK
When the week has
begun, you will find
yourself in the Street
View. The first
thing to do is to
monitor one of your
Gang members. The
person you will use
for this is Sara Flood, the Lieutenant that was given the
“Bomb” order.
Click on the button to switch to the Rooftop View.
When your hoods have emerged, you must find Sara Flood.
Click on the Tagged Characters button.
Click on the Orders button.
Click on the text displaying “Bombing”.
When loaded, this tutorial will begin in the Gang Organizer.
Before launching the Working Week, you may like to perform
the checks as covered in Tutorial 1:
Team Check
Territory Check
Finance Check
If you need help with these, please refer to Tutorial 1.
You might also like to check what orders your lieutenants
have been given, using the “This Week’s Orders” report. For
help with this action, please refer to Tutorial 2.
When you are satisfied with your position, the next thing
to do is to Hit the Streets.
To launch the Working Week
Click on the button at the bottom right, labelled Hit the
Streets!
When the computer players have planned their actions, you
will be taken into the city.
A T agged Windowwill open on Flood. This
will follow her around the city, always
remaining centerd.
Click and hold the left mouse button on
the bottom right corner of the Tagged
Window and drag the mouse down
and right a short distance.
This will expand the window , allowing you to see mor e of the
area around Sara.Using the combination of S tr eet View in the
T agged W indow and Rooftop View in the main, y ou can keep
track of several of your
Gang members.
You can now watch Flood
complete the bombing of
Eno Colburn’s store.
PAGE 24 GANGSTERS
USING THE
“GO TO” STREET ORDER
Your next objective is to give a simple “Go to” order, using
the Street Orders.
The Street Orders can be used at any time during the
week, although typically it will be to move patrols to
intercept intruders, or to instruct hoods to follow a character.
You will now give a Go to order, useful for moving patrols or
guards to places of combat. Use Dion M urphy for this action.
Both he and Fidel Costa will be approaching the bridge to
which they were sent by the time Sara Flood has bombed Eno
Colburn’s store.
Scroll down the map, until you find the bridge where
Dion and Fidel are heading.
Zoom into the Street View, with the zoom frame centerd
on the bridge.
The mouse pointer will now change to show that a “Go to”
order has been selected.
Scroll down to the junction of the two major roads.
The major roads are the widest visible in the city.
Click on the corner to the South-East of the major road
junction.
This is where you are going to send Murphy. This point is
well within the territory of the Green Gang, and will
consequently allow us to keep an eye open for enemy hoods.
You will see that when you have selected the destination the
orders box disappears and the mouse pointer returns to
normal. Murphy will start to walk towards the junction.
The two hoods will soon arrive at the bridge. When they do
so they will start to look around, keeping watch for enemy
activities and hoods. You are now going to select Murphy to
the major road junction directly South of where he and Costa
are currently standing.
Click on Murphy.
When Murphy arrives, he will stand at the corner. A hand
will be visible beneath him. This shows that he is waiting for
your next instruction.
Soon after Murphy arrives, you will hear a ringing noise
and a button will flash at the end the icon bar, This marks
the arrival of a message.
Pause the game.
MESSAGES
You may have noticed buttons flashing and ringing noises.
Each time this happens, a new message has been placed in the
Message Box.
The Message Box is used to store and relay messages
The floor marker around Murphy’s feet will begin to flash
and an order box will appear. The order box contains the
commands that can be given to Murphy.
Click on Go to.
GANGSTERS PAGE 25
concerning events that are taking place in the city as they
happen. Older events are also stored, but these are pushed
out as the Message Box overflows.
The icon that appeared will have been to report that Dion
has spotted an enemy Gang member.
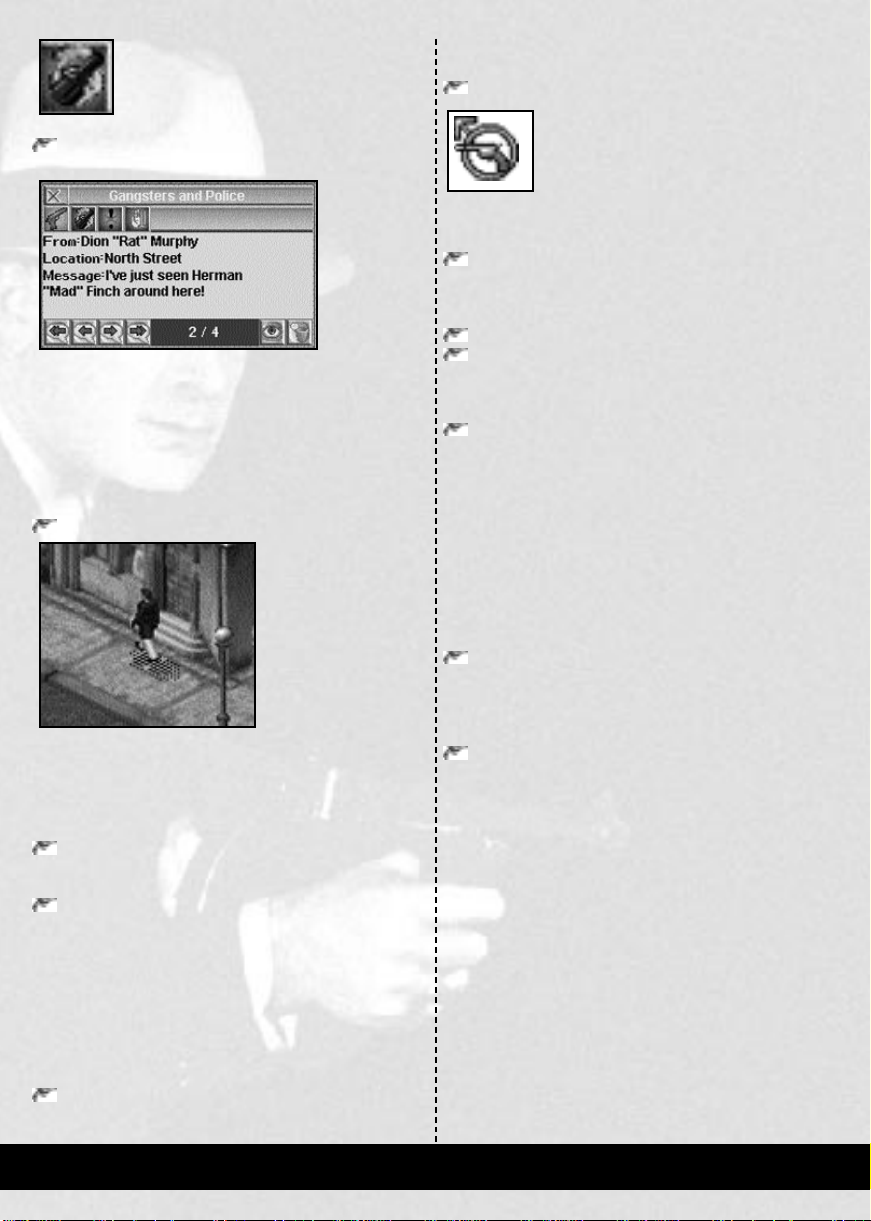
Click on the second messages button; Gangsters and
Police Messages.
This opens the message box at the reports of enemy Gangsters,
Police and the FBI agents that have been seen. The message
states that Murphy has spotted an enemy Gang member.
The buttons at the top of the Message Box allow you to
choose the messages that you wish to receive. The buttons at
the bottom of the Message Box are used for scrolling
backwards and forwards through the messages and viewing or
disposing of a particular message.
Click on the View Event button
in the Message Box.
The floor marker around Murphy’s feet will begin flashing
again and the order box once more appears.
Click on Kill.
The mouse pointer will now change to show that a “Kill”
order has been selected.
Click on the Center button in the Green Gang member’s
Tagged Window.
The Main window view will center on the target.
Click on the opposing Gang member.
Click on their name to complete the order.
The Orders Box will disappear, and Murphy is ready to
continue.
Click on the Pause button to start time passing again.
Murphy will now start to move towards the enemy hood.
Once he is in range, he will open fire.
Murphy is a first rate shot, and is carrying a Tommy Gun.
The enemy Gang member does not stand a chance against a
hood of Murphy’s quality, and will soon fall to the floor,
dead.
Having completed the order, Murphy will immediately
vacate the area before any police arrive. When he has travelled
a small distance he will return to the site, pretending to be an
innocent bystander.
Using a Go to order, send Murphy back to the bridge
where Costa is positioned.
You will find that a large portion of the Working Week has
This action will center the view on Murphy.
Nearby, you will find a person with either a green or an
orange marker around their feet. This will be a member of
the Green Gang or the Orange Gang accordingly.
Click on the X at the top of the Message Box.
This closes the Message Box.
Open a Tagged Window on the member of the Green Gang.
Now that you have found a member of an opposing Gang, you
are going to attempt to kill them with another Street Order.
Combat orders during the week are given in much the
same way as the Go to order was. The only difference is that
a person rather than a place becomes the target.
You can use this order with the game still paused. As you
become familiar with this action, you will probably give the
command whilst the game is still running.
Click on Murphy.
passed at this point.
Click four times on the right shoulder of the clock, to
accelerate the week to its conclusion.
When the Working Week has completed, the tutorial will
finish. The game will drop back out to the Tutorials Screen.
A SUMMARY
OF THE TUTORIALS
When you have completed the tutorials, you should find that
you can manipulate the major features of both the Gang
Organizer and the Working Week.
Although many features of the game are not directly
covered in the tutorials, if you apply similar operating
principles to them you will find that you can use them
effectively in a short space of time.
Should you find it useful, you can replay any tutorial, in
any order. Simply load the desired tutorial from the Tutorials
Screen.
PAGE 26 GANGSTERS
The reference guide allows you to look up information as you play the
game. This section contains details of all the options available to
the player, and is designed to help you navigate the
screens and the city as quickly as possible.
GANGSTERS PAGE 27
GAME MENUS
The Game Menus are used to configure the following options:
The type of game.
Game parameters.
Controls.
Effects.
Click on the button marked New Game.
This will take you to the New Game Menu.
LOADING GANGSTERS
To load Gangsters, place the CD into its drive.
Once the Autoplay screen has loaded, click on the Playbutton
If Autoplay is disabled, or the computer was turned on with
the CD already in its drive, click on the Start Menu button,
then select the Programs Group and click on Gangsters.
Alternatively, open the Hothouse Creations folder,
situated in My Computer \ C \ Program Files, and double
click on the Gangsters icon.
Once the game has loaded, the first screen you will see is
the Main Menu.
STARTING A NEW GAME
By default, the game settings will be to play a full game. If
this is the type of game you wish to play, you can bypass the
menus using the Quick Start method, although you might
want to change your character’s name first. To change your
character’s name, please refer to the New Game Menuin this
chapter.
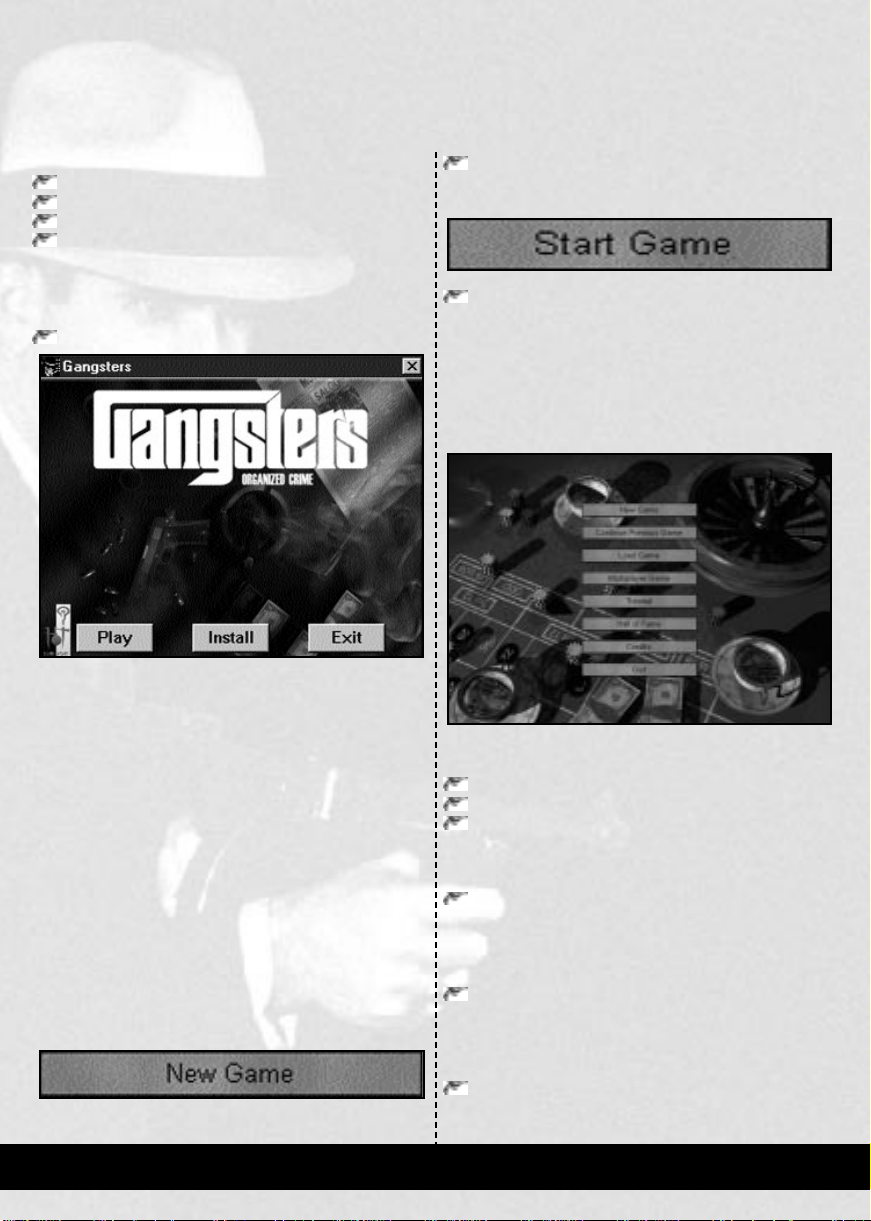
QUICK START
In order to Quick Start a game,
Click on the button marked Start Game, in the Single
Player Menu.
This will take you straight to the Gang Organizer for the first
week.
THE MAIN MENU
The Main Menu will be the first screen displayed once you
have launched the game. This screen allows you to:
Start a new game
Load a previously saved game
View the Hall of Fame
The buttons on the screen have the following functions:
NEW GAME
Click this button to play a single player game.
In a single player game, all of your opponents will be computer
players. The button will take you to the New Game Menu.
CONTINUE PREVIOUS GAME
Click this button to continue the game where you last left it.
Deciding to continue with the previous game loads the last Autosave
file. This will always take you directly to the Gang Organizer.
LOAD GAME
Click this button to load a previously saved game.
The Load Game button takes you to the Load Game Screen,
where you can load any previously saved single player game.
PAGE 28 GANGSTERS

MULTIPLAYER GAME
Click this button to play a Multiplayer Game.
This button will take you to the Multiplayer Menu, where
you can create or join a Multiplayer game. For further details
on Multiplayer Games, please turn to page 84.
TUTORIALS
Click this button to load a tutorial.
This button takes you to the Tutorials Screen, where you can
select to play one of the four tutorials.
The Game Options button accesses the Game Options
Screen, where you can change the type of game to be played.
For further details of Game Options, please turn to page 60.
START GAME
Click on Start Game to begin a new game of Gangsters.
CANCEL
Click on Cancel to return to the Main Menu.
HALL OF FAME
Click on this button to view the Hall of Fame.
This button will take you to the Hall of Fame Screen,
where you can view the achievements of great criminals that
have gone before you. For a description of the H all of Fame,
please turn to page 83.
CREDITS
Click on the Credits button to view the game credits.
QUIT
Click on this button to exit the game.
NEW GAME MENU
The New Game Menu is the screen from where you can
launch a new single player game.
CHANGE DETAILS
Your details appear at the top of the screen. These are:
CHANGE DETAILS MENU
The Change Details Menu allows you to change any of the
following features:
Your face
Your name
The Gang color you want to play with.
CHANGING YOUR FACE
A default face is always displayed, but you may like to choose
your own face. There are a number of buttons below your
face to do this:
Click on the top button to change the gender between
male and female.
Click on the buttons below the gender button to change
the nationality and traits.
Click on the last set to change the facial features.
CHANGING YOUR NAME
A default name is always displayed, but you may like to
Your face
Your name
The color of Gang you will be playing
Click on the Change Details if you wish to change any of
the above items.
GAME OPTIONS
Below your details is shown a description of the game you are
about to play.
Click on the Game Options button to change the game options.
change this. To change any of the names
Click in the name box.
Type in your name.
CHANGING YOUR GANG COLOUR
In a normal or short game of Gangsters, you will always start
as the red Gang. To change your Gang color:
Click on a colored square below the name entries.
The color that you click on is the color you will play the game
with.
GANGSTERS PAGE 29
ACCEPTING AND REJECTING CHANGES
Click on OK to accept any changes and return to the
New Game Menu.
Click on Cancel to reject any changes and return to
the New Game Menu.
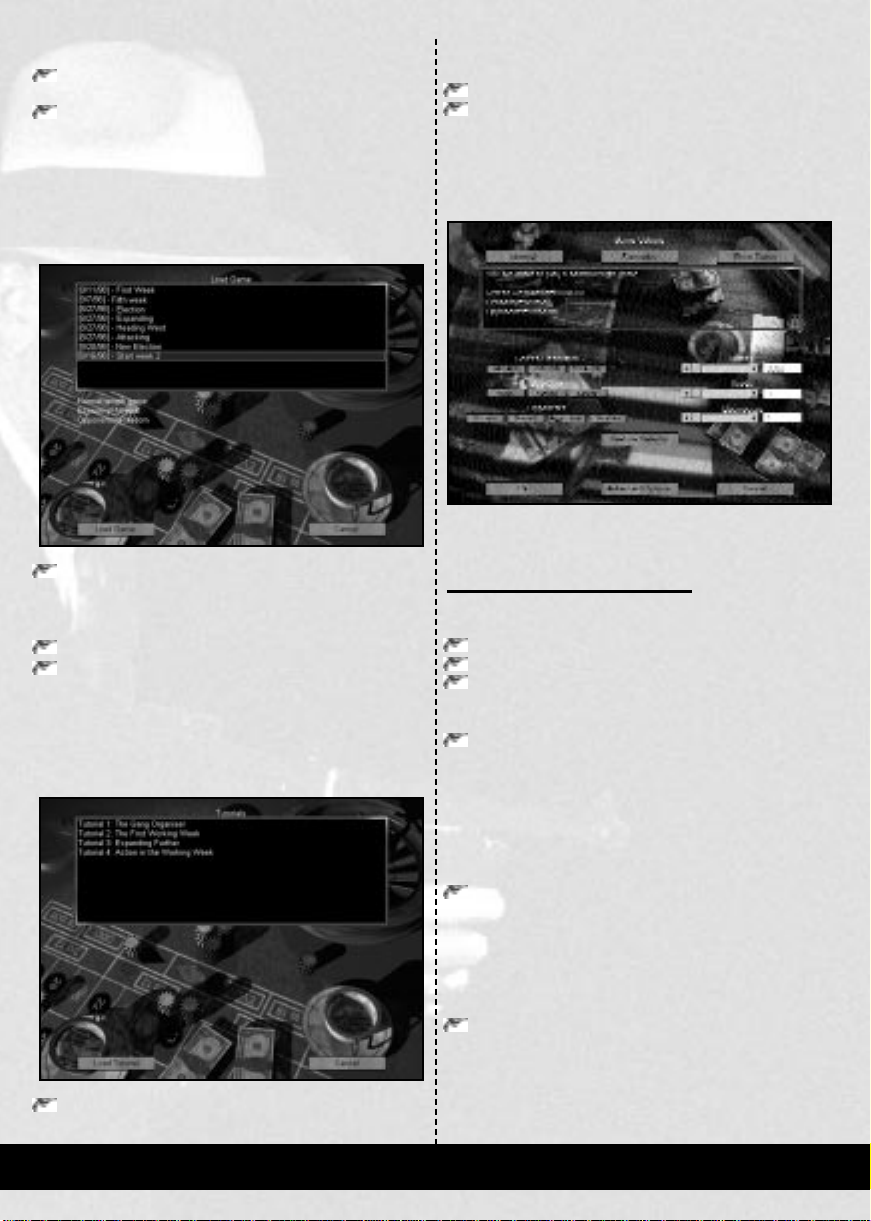
LOAD GAME MENU
The Load Game Menu allows you to retrieve previously
stored games. The window at the top of the screen contains
the list of saved games.
Click on a saved game to view its details.
The details are shown in the window below the list of saved
games.
Click on Load Game to play the selected saved game.
Click on Cancel to return to the Main Menu.
The details are shown in the window below the list of
tutorials.
Click on Load Tutorial to play the selected tutorial.
Click on Cancel to return to the Main Menu.
GAME OPTIONS SCREEN
The Game Options Screen allows you to change the type of
game you are playing.
The settings that you can change are the duration of the
game and setting a target amount of money or territory.
SETTING THE GAME TYPE
The three buttons at the top of the screen are used to define
the game type:
Normal game
Scenario
Short Game
TUTORIALS SCREEN
The Tutorials Screen allows you to play any of the four
tutorials. The window at the top of the screen contains the list
of tutorials.
NORMAL GAME
Click on Normalto select a full length game of Gangsters.
The Nor mal selection is the default setting. A full game is
played through from beginning to completion. The win
criteria for this game are that you must either eliminate the
rival Gang Leaders, become mayor or Go Straight.
SCENARIO
Click on Scenario to access the Scenario Screen.
This button accesses the Scenario Screen, where you can
select to play one of a number of challenging games of
Gangsters.
SHORT GAME
Click on Short game to access the Short Game Menu.
This button accesses the Short Game Menu, where you can
select to play a shorter game of Gangsters.
Click on a tutorial to view its details.
PAGE 30 GANGSTERS

SELECTING THE START CONDITIONS
The buttons and sliders below the game type buttons are
used to define the game conditions:
Screen Resolution
Economy
Opponents
Money
Hoods
Territory
SCREEN RESOLUTION
The Screen Resolution buttons allow you to select the
resolution that you wish to play Gangsters in:
640 pixels by 480 pixels
800 pixels by 600 pixels
1024 pixels by 768 pixels
The more powerful your computer, the higher the resolution
you can use.
Click on the button for the desired screen resolution.
ECONOMY
The Economy buttons allow you to select how much profit
businesses make:
Strong means that businesses will make good profits
Normal means that businesses will make reasonable profits
Weak means that businesses will make low profits
Click on the button for the desired economy.
OPPONENTS
The Opponents buttons allow you to select the type of
opponent you wish to face:
Passive means that opponents will only resort to
violence as a last resort
Normal means that opponents will make reasonable
decisions about violence
Aggressive means that opponents will attack at the
slightest provocation
Random gives a selection from the above options
Click on the button for the desired opponents.
displaying the number of hoods that you wish to be
employing at the start of the game.
HINT
Be careful with giving yourself large quantities of hoods. This
action not only increases your manpower but also your wages bill.!
TERRITORY
The Businesses Slider determines how many businesses you
control at the start of the game. This value can be set from
one to ten businesses. The business you must start with is the
front to your Office. The additional businesses are those that
you start out initially extorting, which guarantees a modestly
greater income than normal at the start of the game.
Click and hold the left-mouse-button on the slider.
Drag the slider left and right, until the box at the right is
displaying the number of businesses that you wish to
possess at the start of the game.
RESTORE DEFAULTS
Click on Restore Defaults to reset all the game options.
This button will remove any changes made to the game conditions.
OK
Click on OK to save the settings and return to the New Game M enu.
CANCEL
Click on Cancel to lose any changes made and to return
to the New Game Menu.
ADVANCED OPTIONS
Click on Advanced Options to access the Advanced
Options Screen.
SCENARIO SCREEN
MONEY
The Money Slider determines how much money you have at the
start of the game. This can be varied between $3000 and $10,000.
Click and hold the left-mouse-button on the slider.
Drag the slider left and right, until the box at the right is
displaying the amount of money that you wish to have at
the start of the game.
HOODS
The Hoods Slider is used to set how many hoods you start the
game with. The slider can be adjusted so that you can start
with between three and ten hoods. If you select three hoods,
one will be placed into your front and the other two into a
single team. All additional hoods will be placed in the pool.
Click and hold the left-mouse-button on the slider.
Drag the slider left and right, until the box at the right is
The Scenario Screen contains the list of games that have been
specially prepared, displayed in a list at the top of the screen.
The Scenarios are designed to be exciting missions that are an
addition to Gangsters. These are games that are set in varying
cities, and each has set objectives. The scenarios vary in
difficulty, and bring you up against challenges that have faced
other mobsters in the past. Below the list is a window
containing information about the selected entry.
GANGSTERS PAGE 31

LOADING A SCENARIO
Click on the desired game in the list of games to view its
details.
When a scenario is selected, the window at the bottom of the
screen gives you information about the scenario. This
includes when and where the game is set, what has happened
previously and what the objectives are.
Click on the Load Scenario button to load the scenario.
Click on another scenario if you want to select another item.
Click on the Cancel button to return to the Game
Options Menu.
SHORT GAME MENU
There are three types of Short Game that you can play in G angsters:
TERRITORY GAME
This game type also has no time limit. The players must each
race to be the first to control a set number of city blocks.
The slider below the Territory Game button varies the
amount of territory each Gang leader must control, from one
hundred to five hundred.
Click and hold the left-mouse-button on the slider.
Drag the slider up and down, until the box at the top is
displaying the number of games you wish to play.
OK
Click on OK to save the settings and return to the Game
Options Menu.
CANCEL
Click on Cancel to lose any changes made and to return
to the Game Options Menu.
ADVANCED OPTIONS SCREEN
If you experience problems with running Gangsters, the
Advanced Options Screen allows you to re-configure the
game for your computer.
Power
W ealth
Territory
In each, the aim of the game is to reach a target amount of
the selected criteria.
POWER GAME
The Power Game runs for a variable number of game weeks.
At the end of this time, you must be the most powerful Gang
leader of all those that have survived. To be the most
powerful requires a combination of wealth, territory and
manpower.
Click on the Power button to select a game of a fix ed length.
The Power Game runs for a variable number of game weeks.
At the end of this time, you must be the most powerful Gang
leader of all those that have survived. To be the most
powerful requires a combination of wealth, territory and
manpower. The slider below the Power Game button varies
the amount of time from 20 to 100 weeks.
Click and hold the left-mouse-button on the slider.
Drag the slider left and right, until the box at the top is
displaying the number of game weeks you wish to play.
WEALTH GAME
This requires each player to achieve a certain value of assets.
The first to do so wins the game. This game has no time
limit. The slider below the Wealth Game button varies the
total amount of money and assets each Gang leader must
achieve, from $100,000 to $500,000.
Click and hold the left-mouse-button on the slider.
Drag the slider left and right, until the box at the top is
displaying the number of game weeks you wish to play.
WARNING: DO NOT ATTEMPT
TO RECONFIGURE ANY OF
THESE OPTIONS IF YOU ARE
UNSURE OF THEIR PURPOSE!
These options will not take effect until Gangsters is next loaded.
ENABLE SOUND
Click on this button to toggle sound.
ENABLE CD AUDIO
Click on this button to toggle CD Audio.
ENABLE VSYNC
Click on this button to toggle the Vsync.
ENABLE MMX
Click on this button to toggle MMX.
MOUSE REVERSAL
Click on this button to toggle the mouse direction in the Y axis.
OK
Click on OK to save the settings and return to the Game
Options Menu.
RESTORE DEFAULTS
Click on Restore Defaults to reset the options to their
original settings.
CANCEL
Click on Cancel to lose any changes made and to return
to the Game Options Menu.
PAGE 32 GANGSTERS

THE GANG ORGANIZER
The Gang Organizer is the first screen you will see at the
start of the game, once you have set all the game options and
launched the game. You will also see the Gang Organizer
following each Working Week.
SECTION TABS HELP
REPORTS
PANEL
DETAILS
PANEL
RESOURCE
DETAILS
PANEL
MAP
BUTTONS
LAYOUT OF THE LIEUTENANT’S SECTION
The Lieutenants Section has the following features:
The Section Tabs
The Team Details Panel
The Resource Details Panel
The Lieutenant Tabs
The Reports Panel
The Right Panel
The Map Buttons
THE SECTION TABS
The Section Tabs are the same as those displayed in every
other Section of the Gang Organizer, and are used to move
between the different Sections.
HIT THE STREETSRESOURCES
The screen takes the form of a journal, where you as the
player can access information on your Gang members,
resources and businesses.
The Gang Organizer is divided into eight Sections. Each
Section covers a different part of running an empire, and is
accessed from the eight Section Tabs at the top of the screen:
Lieutenants Section Newspaper
Accountant Section Graphs
Lawyer Section City Maps
Diplomacy Game Options
Click on the relevant Section Tab to access the desired
screen.
Each of the Sections is covered separately in this chapter.
LIEUTENANTS SECTION
The Lieutenants
Section is probably the
most impor-tant part of
the Gang Organizer.
This is where you
organize your hoods
into teams, distribute
weapons and vehicles
and give the majority of
orders to expand your
empire and dominate the opposition. When you first access
the Lieutenant’s Section, the left side of the screen will
contain the details of the Lieutenant, whilst the right side will
contain the City Map. (Please turn to page 54 for further
details of the City Maps).
Click on the Lieutenants Section Tab to access the
Lieutenants Section.
THE TEAM DETAILS PANEL
The Team Details Panel is where the Lieutenants and their
teams are displayed.
THE RESOURCE DETAILS PANEL
The Resource D etails P anelis where information concerning
the city and your Gang are displayed. At differing stages of
the Lieutenants Section, the Resource Details Panel can
hav e either of the following functions:
It is referred to as the Resource Details Panel when
viewing Hoods, V ehiclesand Weapons. (See Resourceson
page 63).
It can display the available mapsof the city and is referred
to as The Map.
It can also display the accountants, lawyers and hoods
available for hire and is referred to as the Recruitment
Display.
THE LIEUTENANT TABS
The Lieutenant Tabs allow you to view any of your
Lieutenants.
Move the mouse over a Lieutenant Tab to see which team
will be selected, and who their Lieutenant is.
A tooltip will appear, showing the name of the Lieutenant
and their team.
Click on a Lieutenant Tab to select a Lieutenant.
Selecting a new Lieutenant will display their face and details
at the top of the Section.
THE REPORTS PANEL
The Reports Panel displays the reports available from your
Lieutenants. When you are giving orders, this panel changes
to become the Orders Panel.
GANGSTERS PAGE 33

THE RIGHT PANEL
The Right Panel only appears with the Lieutenant orders,
some of the reports and a few other Sections. It is used to
offer you further options relating to current order and reports
selected. At varying stages of the Lieutenants Section, the
Right Panel is referred to as one of the following:
When performing a Business Order, the Right Panel is
referred to as the Business Orders Panel.
When performing a Personnel Order, the Right Panel is
referred to as the Personnel Orders Panel.
When performing a Minor Crime, the Right Panel is
referred to as the Minor Crimes Panel.
When performing a Violent Crime, the Right Panel is
referred to as the Violent Crimes Panel.
When viewing the Deaths report, the Right Panel is
referred to as the Gang Selection Panel.
When viewing the Accountants, Lawyers and hoods
available for recruiting, the Right Panel is referred to as
the Character Selection Panel.
When viewing hoods in the pool or Diplomacy Section,
the Right Panel is referred to as the Skill Panel.
THE MAP BUTTONS
The Map Buttons are available in several of the Sections in
the Gang Organizer. They are used for displaying information about the city. Please refer to the section in this
chapter titled City Maps for fur ther details.
THE LIEUTENANTS
THE NAME OF THE LIEUTENANT’S TEAM
Above the Lieutenant’s face, you will see the name of the
Lieutenant’s team. This is usually derived from the first name
of the Lieutenant. To change a team name
Click on the current name of the team.
Use Backspaceand Deleteto remove the current team name.
Type in the new team name.
Hit Return.
THE LIEUTENANT’S TEAM SUMMARY
The Lieutenant’s Team Summary is shown below the
Lieutenant’s name. The three icons have numbers alongside
and tell you:
How many hoods are in the team
How many weapons are in the team’s possession
How many vehicles the team has at its disposal
THE LIEUTENANTS PAY DEMAND
The Lieutenants, like all other members of your Gang,
always display the amount of money they want to be paid
above their current Pay. If this value becomes appreciably
higher than the amount you are paying the Lieutenant, their
name and their pay amounts will turn red. Once this
happens, you must take action before they consider
deserting. See the paragraph on the Lieutenant’s Pay, below.
THE LIEUTENANT’S ACTUAL PAY
The Lieutenant’s Actual Pay is the amount of money that
you are actually paying your Lieutenant. If this value
becomes appreciably lower than the amount the Lieutenant
wants as shown by their Pay Demand, their name and their
pay amounts will turn red. Once this happens, you must take
action before they consider deserting. See the paragraph on
the Lieutenant’s Pay, below.
THE LIEUTENANT’S TIME INDICATOR
To the right of the Lieutenant’s name, you will see a round
dial. This is the Time Indicator, which is used to show how
The Lieutenants themselves are always shown at the top of
the Team Details Panel with their name and a portrait.
The other details and options shown are:
The name of the Lieutenant’s team
The Lieutenants Team Summary
The Lieutenant’s Pay Demand
The amount of money that you are actually paying them
The Lieutenant’s Time Indicator
A button to sack the Lieutenant
A button to have the Lieutenant killed
A button to demote the Lieutenant
A toggle button to switch between viewing the
Lieutenant’s teamat the bottom of the Team details panel
and viewing the Lieutenant’s skills
A button to edit the Lieutenant’s Pay
much time your Lieutenants have allocated to any orders you
have given to them.
SACK LIEUTENANT
Sack Lieutenant results in the Lieutenant being thrown out
of the Gang and back onto the streets. The character soon
becomes available for recruitment again, although they will
be openly hostile towards you and will be more than happy
to work for another Gang. Sacking a Lieutenant places all the
hoods from their team back into the hood’ s pool. (P lease refer
to Resources on page 63).
Click on Sack Lieutenant to dismiss the Lieutenant.
A window will appear, prompting you to confirm your
actions.
Click Yes to confirm the dismissal.
Click No to reject the action.
PAGE 34 GANGSTERS

KILL LIEUTENANT
Kill Lieutenant results in your Lieutenant being murdered
immediately. Killing a Lieutenant will not be investigated by
the police, but will cause your other Lieutenants to become
more upset with you and they will increase their pay
demands accordingly. You should only consider killing
Lieutenants that are openly hostile towards you or are
skimming large amounts of money from your profits for
themselves. Their punishment will serve as an example to
others, reducing skimming and the neglecting of orders.
Click on Kill Lieutenant to have the Lieutenant executed.
A window will appear, prompting y ou to confirm y our actions.
Click Yes to confirm the killing.
Click No to reject the action.
This method applies to all Lieutenants, hoods, the
Accountant and the Lawyer.
HINT
Refusing a pay increase leads to an increase in hostility
and a reduction in loyalty. Eventually, your Gang
members will leave if you do not pay them enough. You
have been warned!
THE LIEUTENANT’S TEAM
When building, reviewing and reorganising your teams, it is
important to check the suitability of all the members of a
Lieutenant’s team. The better the hoods are at their tasks
individually, the more effective the team will be as a whole.
DEMOTE LIEUTENANT
Demote Lieutenant places a Lieutenant and his or her team
back into the pool. This may become necessary when you
reorganise your teams. The Lieutenant will however become
more hostile towards you unless you reinstate them as a
Lieutenant before you launch the next Working Week.
Click Demote Lieutenant to return the Lieutenant to the pool.
LIEUTENANT’S TEAM / ATTRIBUTES
Lieutenant’s Team / Attributes swaps the piece of paper at
the bottom of the Team Details Panel between showing the
names of the hoods in the Lieutenant’s team and a list of the
lieutenant’s skills.
Click Lieutenant’s Team / Attributes to view the
Lieutenant’s attributes.
Click Lieutenant’s Team / Attributes to return the
display to the Lieutenant’s team.
See The Lieutenant’s Team below for further details about
the team members.
LIEUTENANT’S PAY
The Lieutenant’s Pay button allows you to change the rate of
pay of the Lieutenant. If the Lieutenant’s name is displayed
in red, it means that they are unhappy with their pay. Like all
other characters, you can make a Lieutenant happy again by
increasing their pay.
Click Lieutenant’s Pay to open the money roll.
The Money Roll shows how much money the Lieutenant is
currently being paid and how much money you have
available.
Click on the Increase Pay button to increase the
Lieutenant’s pay.
Click on the Decrease Pay button to reduce the
Lieutenant’s pay.
Note: Each team can contain up to ten people, including the
Lieutenant.
In order to review the hoods in a Lieutenant’s team, you must
have their names displayed on the piece of paper at the
bottom of the Team Details Panel. If the panel is currently
showing the Lieutenant’s skills.
Click Lieutenant’s Team / Attributes to return the
display to the Lieutenant’s team.
Once the hood’s names are displayed.
Click on the name of any hood to view their details.
The hood’s name and face
appear, along with a full
list of details.
If any member of the
team has been kidnapped
or arrested, they are shown
as a person tied to a chair
or a face behind bars
respectively.
The buttons below the
hood allow the following
actions to be carried out
on the character:
Send Hood to Pool
Sack hood
Kill hood
Promote hood
Hood’s pay
These work the same as those for the Lieutenant, except that
Promote converts the hood into a new Lieutenant, provided
that at least one of the eight Lieutenant Tabs is free.
HINT
Decreasing their pay will make your Lieutenants very unhappy!
Click on the Lieutenant’s Pay button to close the money
roll and accept your changes.
Click on the Promote Hood button to convert the hood
into a Lieutenant.
GANGSTERS PAGE 35

ALLOCATING HOODS,
WEAPONS AND VEHICLES
As you get further into the game, you will find that you need
to allocate more people, weapons and vehicles to your
Lieutenants. These will enable the individuals and teams to
perform more orders, fight more effectively and travel to and
from places a lot faster.
You do not need to give weapons or vehicles to individual
hoods. Since the Lieutenant knows who will be carrying out
what orders, it is he or she that can best distribute the
equipment.
HINT
Until you can afford weapons for everyone, try to ensure that
firearms are at least carried by as many of your hoods as
possible. Prioritise their activities and only give the more
powerful weapons to hoods that are facing the greater risks.
Allocating such resources to your Lieutenants can be achieved
using the three Resource buttons. These are located at the
bottom of the Reports Panel when it is being used as either
the Or ders Panel or the Reports Panel. For further details on
the purchase and allocation of resources, please refer to the
section on Resources, on page 63.
GIVING ORDERS TO YOUR LIEUTENANTS
The Lieutenants have the most extensive range of orders of
any character. In Gangsters, you need only give the
Lieutenants your orders; they will take care of how the orders
are dealt with amongst their teams.
To give an order to any Lieutenant, they must be the
selected character. (i.e. visible at the top left of the
Team Details Panel.) Once you have the desired
Lieutenant selected and have the Orders Panel visible, you
can then start to issue the order.
The Orders Panel displays the order groups available:
1. Business Orders
2. Personnel Orders
3. Minor Crimes
4. Violent Crimes
1. BUSINESS ORDERS
The Business Orders are
concerned with financial issues.
2. PERSONNEL ORDERS
The Personnel Orders include
commands to increase security,
explore and general movement.
3. MINOR CRIMES
The Minor Crimesare actions that are not so serious.
They can be violent, but are generally aimed at
manipulating people and places, without causing
excessive damage or injury.
4. VIOLENT CRIMES
The Violent Crimes are the extreme measures.
These are all aimed directly at places or people.
The buttons for the Clipboard and the Resources
are also still available at the bottom.
SELECTING THE ORDER TYPE
To select an Order:
Click on the order group to access the list of orders that
you require.
Please refer to The Lieutenant’s Orders for a description of
the orders available in each group.
PAGE 36 GANGSTERS

The Business Orders Panel will change to either the
Personnel Orders Panel, the Minor Crimes Panel or the
Violent Crimes Panel, depending on which order group you
selected.
Click on the desired order button.
Once you have selected the order, the job card appears.
The job card allows you to define the order and its targets. It
also allows you to set the priority of the order, the number of
people to be sent on the order and whether the hoods should
wait for your command before starting. (See page 38 for the
Order Options.)
When the job card appears, it will be displaying the name
of the Lieutenant and the selected order.
The map will also be showing any areas that are or
possess valid targets for the order. These locations are
highlighted in blue and can be directly clicked on to select
the location or its occupant as the target.
To select a location as the target you can again use either the
Clipboard or the Maps. Clicking individual highlighted
blocks on the map will select the location or its occupant as
the target. To select an area as the target, you must click and
drag the mouse pointer to bound box an area on the map.
Additional blocks or locations can be added to or removed
from the selection using single clicks.
HINT
As a guideline, one hood can Extort or Intimidate between
two and three blocks each week, whilst a hood Collecting
Protection can visit around eight blocks in a week. Recruit
can vary wildly, since sites suitable for recruitment can be
evenly spaced, densely packed or widely spread.
In some special cases, the target for the job card may already
be complete. This applies to Collect Protection or Patrol
orders given to a Lieutenant who has been allocated territory.
The area selected in these cases will be the entire area allocated
to the Lieutenant and is highlighted in red. If the area selected
is acceptable, you have only to allocate the necessary
manpower and confirm the order. Once you have selected the
area and the target, the order is complete. You can see when
an order is complete; a Confirm Orderbutton appears at the
bottom right of the card. This allows you to agree to the
order, which is then allocated to the Lieutenant. The order
can be rejected at any time, using the Cancel Order button.
Click Confirm Order to agree to the order.
Click Cancel Order to cancel the order.
Depending on the order selected, the card may now be
prompting you to select from the following:
A person
A location
An area
To select a person as the target you can either use the
Clipboard or the Map.
TO USE THE CLIPBOARD
Click on the Clipboard button to open the Clipboard.
Click through the options until you find the target’s name.
Click on the target’s name from the Clipboard.
Note: If you give an order to attack an enemy Gang member
whose position is unknown to you, your hoods will still attempt
to complete the order. They will travel around the pool halls
and gyms, visiting unattached hoods and asking for
information about the location of their target. The more
intelligent and intimidating your hoods are, the more accurate
the information they will receive and the faster they will be
able to hunt down the intended victim.
TO USE THE MAP
Click on the building that contains the target.
If a valid target can be obtained from a block or location, the
job card will automatically access the character.
The Lieutenant will then inform you if they have the
required manpower and time for the task.
If they think they can perform the order, they will show what
fraction of a week they feel will be required to complete the
task, using their time indicators. One indicator is situated on
the Lieutenant’ s car d at the top left, whilst the other appears on
the Lieutenant’s tab, once the first order has been given. These
indicators fill with red as the week is allocated, until they are
full and the Lieutenant cannot accept any further orders.
If you select an area greater than the number of hoods
allocated to the order can visit, the Lieutenant will tell you
that the team cannot perform the order.
The Lieutenant will then show you the area that can be covered on
the map. At this stage, you can make one of four actions:
Accept the area offered and confirm the order.
Change the selected area for the order, by clicking on the
highlighted blocks and selecting the desired ones.
Increase the number of hoods allocated to the task and
reissue the order. (See Order Options on page 38 for
details of increasing the Manpower.)
Cancel the order altogether.
HINT
When you are giving orders that do not consume the whole week,
try to leave the Lieutenants with a small amount of time to cover
events such as police presence, combat and heavy traffic. Leave a
little time as a “buffer” for the activities of your hoods.
GANGSTERS PAGE 37

ORDER OPTIONS
Although you can confirm the order as it stands, there are a
number of options that can apply to some or all orders.
These allow you to define features of the order, such as who
goes on the order and how important the order is.
Note: These options must all be set before the order is confirmed.
The options available are as follows:
1. Special Order Options
2. Priority
3. Manpower
4. Wait
1. SPECIAL ORDER OPTIONS
There are two special options that may be applied to certain
orders:
For patrol and collect protection orders, this is the
Repeat Orderbutton. This allows you to state if you wish
the order to be repeated each week, allowing you to only
give the order once.
For smash up, torch, and bomb orders, this is the
Public/Private button. This gives you the option to state
whether the order is performed publicly or privately.
HINT
Orders performed publicly effect a larger area than those performed
privately. This can result in a larger area suddenly becoming more
“friendly”, but can also lead to more witnesses of the crime.
Click on the relevant button to initiate the special action.
2. PRIORITY
The Priority button allows you to define how important the
order is. Setting Priority makes the task more important.
People given a priority order are more likely to avoid combat
unless they are fired on first and are also more likely to ignor e
the police and the FBI in their efforts to get the order done.
Click on the Priority button to set the order to priority.
3. MANPOWER
The Manpower button allows you to state how many people
you wish to perform an order. Increased manpower comes in
most useful when you are giving area orders such as collect
protection and extort, performing orders in another Gang’s
territory, or when securing your own area.
Click Manpower to increase the number of people sent
on a task.
Right-Click Manpowerto decrease the number of people
sent on a task.
4. W
AIT
The Wait button is used for orders where you want the hoods to
inform you they are about to start on the task. The hoods will wait
until you instruct them to Continue, using the Wait / Continue
button in the T agged Windows. (P lease refer to Tagged Windows,
on page 78). Wait can be especially useful when an order is
dependent on other orders being successfully completed.
Click on the Wait button to make the hoods wait before
attempting the order in the Working Week.
HINT
Avoid using Wait too frequently. This can not only waste your
hood’s valuable time, but events can leave you with a large part
of your team doing nothing whilst you take care of other issues.
SELECTING PREFERRED PEOPLE FOR ORDERS
It is possible for you to select specific hoods for orders. This
is useful if you want hoods to attempt tasks for which they
would not normally be selected. As with normal orders, you
can set the manpower above one, although you have no
control over whom the hood takes with them.
Click on the name of the hood to nominate them as the
preferred person before the order is confirmed.
Click on the current Lieutenant’s tab to revert back to the
Lieutenant.
HINT
Try to avoid giving too many orders with preferred people.
Each time hoods are allocated in this way, the Lieutenant
removes them from the list of hoods available for other tasks.
VIEWING AND EDITING ORDERS
It is possible to cycle through and edit a particular
Lieutenant’s orders whilst you are in the orders mode.
Click on the up and down arrows to scroll through the
confirmed job cards.
Note: If only one order is present, these arrows will not appear.
Click on the Edit Order button to open the job card
again, so that the order may be edited.
Once the Edit Order button has been selected, the order can
be edited in any way.
Click on Confirm Order to store the order.
Click on Cancel Order to reject the order.
HINT
Do not send four hoods to do a task that one hood could easily
achieve. Tr y to send just enough hoods for the task, and save
your other hoods for different tasks.
PAGE 38 GANGSTERS

THE LIEUTENANT’S ORDERS
The Lieutenants have the largest number of orders of any
character and these are divided into four groups:
Business Orders
Personnel Orders
Minor Crimes
Violent Crimes
BUSINESS ORDERS.
The Business Or dersare concerned with financial issues and allow
you to instruct your Lieutenants to perform the following actions:
1. Buy premises
2. Set up Business
3. Run Business
4. Collect protection money from extorted businesses
5. Adjust protection money levels in protected businesses
6. Export goods held in a warehouse
7. Donate money to charity
1. BUY PREMISES
Buy premises allows you to buy any empty land,
warehouse, commercial business, industrial block
or tenement block within two blocks of your
territory. The Lieutenant who receives the order always sends
his or her most suitable hood to run a purchased business.
This character will be the hood with the best levels of
organisation and business skills. In order to start
establishing illegal businesses, empty land must first be
bought at the center of blocks. This in turn can only be
bought when you have purchased either a legal business on
the block to serve as the front, or have set up a legal business
on some empty land around the edge of the block.
HINT
An increase in violent activities can lead to lower land values and
businesses being cheaper to buy. A cessation of violence, once you
have bought the site, will lead to a gradual pick up in trade and
therefore profit.
2. SET UP BUSINESS
Once you have bought some empty land, the Set
Up Business order allows you to open nearly any
type of business in the location. There is obviously
a time and a cost attached, which you are asked to confirm.
Once established, the site will automatically open. As with
Buy Premises, the Lieutenant sends the most appropriate
hood to run the site.
Illegal businesses can only be set up in the center
location of commercial or tenement blocks. To set up an
illegal business, you must own both the center location and
at least one legal business on the block. If you are attempting
to set up an illegal business, you will be asked to nominate a
legal business on the block as the front for the illegal
business. The front allows access to the illegal site, and also
shields the business from the attentions of the F.B.I.
HINT
Try to set up an illegal business that is similar in operation to the
legal business that will be the front. The more similar they are in their
operation or produce, the less likely the F.B.I. are to find the site.
Be selective about the places you buy. Not all legal sites can cover the
cost of even just the hood’s wage. Try to establish illegal businesses
that more than cover their own costs, plus the costs of the front.
3. RUN BUSINESS
Instructing a hood to Run the Business can be used to
place and replace hoods. The Lieutenant always picks
the best hood for the business and sends them there.
Any hood already running the business will return to your
Headquarters.
4. COLLECT PROTECTION
The order to Collect Protection money instructs your
Lieutenant to send out hoods to the protected
businesses. These hoods visit the sites and pick up the
protection money from the business owners. Collect Protection
requires no special skills and so is a useful task to give to cheap,
poor quality hoods. Occasionally, business owners may refuse to
pay . You will need to take action promptly against these people, or
they may drop out of the racket altogether, or squeal to the police.
HINT
The protection racket is a highly effective way of both expanding
your empire and making large quantities of money quickly.
5. ADJUST PROTECTION
Adjust Protection allows you to increase or
decrease the amount of money your hoods squeeze
from the business owners. You can select an area or
an individual site to adjust. You can change the protection
between zero and double the normal amount that is extorted
when the site first joins the protection racket . The final level
set is that which will be used when the Working Week is
launched. Increasing and lowering the protection levels of
protected businesses affects the hostility of the owner. If you
attempt to extort an excessive amount, they may refuse to pay
and may even squeal to the police.
6. EXPORT
The Export order allows you to dispose of surplus goods
in your warehouses. The money you obtain is dependent
on the total exported and requires hoods to move the
goods out to the Railroad Terminal or the Docks. For details of
warehouses and goods, please refer to Goodson page 67.
7. DONATE
Donate commands the Lieutenant to take an amount
of money to the orphanage or church that you select.
The amount of money to take is calculated from the
squalor of the area local to the receiving charity. The poorer the
area, the less money is required for the people to sing your
praises. Donations can make areas easier to take over.
GANGSTERS PAGE 39

PERSONNEL ORDERS
The P ersonnel O rderscontain direct commands for your hoods:
1. Guard a particular Business for the week
2. Patrol a part of your territory
3. Explore an area of the city
4. Recruit hoods, an Accountant or a Lawyer
5. Go to a point and secure it
1. GUARD BUSINESS
Guard Businessis used for securing your own sites.
The hood travels to the site and remains for the
week.
HINT
The closer the site to one of your offices, the quicker the hood will get there!
A hood guarding the front to an illegal business can guard both the
front and the illegal business, since any attackers will have to get past the
hood to get at the illegal business.
2. PATROL
The Patrolorder is used to instruct hoods to secure
any area selected within your territory. They will
walk or drive around the designated area, looking
out for intruders.
3. EXPLORE
The Explore order sends a hood out to investigate
an area that you select.
Successful explorations result in the full details of
all businesses visited being found out and illegal businesses
also run the risk of discovery. Stealth is the important factor
for the hood performing this task.
4. RECRUIT
Recruit is one of the most important orders. You
should always be on the lookout for more and
better quality hoods, available from gyms, pool
halls, the docks and the labour exchange.
Accountants are recruited from accountancy businesses and
the main bank and Lawyers from the law companies and the
courthouse. Known hoods can also be recruited from other
Gangs. The key skill for this task is intelligence, since the
hood must be able to convince the person of the value of
joining your Gang.
HINT
Recruiting known hoods from other Gangs can be extremely risky. Your
hood will first have to find them and then persuade them to join. This often
involves travelling into enemy territory and may result in the death of your
hood if the target refuses to join. Make sure the hood you want is worth it!
5. GO TO
Go to is useful when you wish to secure a particular
spot, or just to send some hoods to where they
might become useful. The hoods will head for the
closest point on the pavement to where you select and will
not move from the spot unless you tell them otherwise. This
is also useful for positioning a fixed lookout.
MINOR CRIMES
Minor Crimes are actions that are not so serious. They can be
violent, but are generally aimed at manipulating people and
places without causing excessive damage or injury. Except for
Raids, they are generally overlooked by the police:
1. Bribe a citizen or business owner
2. Intimidate a person
3. Extort a business
4. Raid a business
5. Kidnap a rival Gang member
1. BRIBE
intelligent hood to be able to persuade the person to take the
money .
2. INTIMIDATE
are all worthy targets of intimidation, which is obviously the
key skill required here.
3. EXTORT
weekly amount of their income, in return for your
protection. The hoods performing this order need to be good
at intimidation, or you run the risk of the people refusing
and possibly even telling the police.
HINT
The further away from your base you try to extort, the more
likely people are to reject your attempts.
4. RAID
bring in more money at an early stage of the game. Raiding
sites with trucks can also result in goods being stolen from
the target location. These goods are brought back to your
warehouses if you have any, and are either distributed
amongst the businesses that can utilise them or kept in
storage for Export.
Some sites, once raided, will suddenly obtain a police guard.
HINT
Be selective about the sites that you raid. You cannot hope to steal
much money from a pawnbroker!
Hoods can Bribe citizens, business owners, the
press and the clergy. This action is a useful way to
bend people to your will, but requires a reasonably
You should only need to Intimidate the people of
the city when they go against your wishes. People
who refuse to pay protection, witnesses and jurors
If this order fails, further steps may need to be taken.
The Extort command is the first process in
establishing a protection racket. Businesses are
visited by your hoods and persuaded to pay a
The Raid command should only be given to hoods
that have good levels of stealth. A raid is a higher
profile crime than the protection racket, but can
PAGE 40 GANGSTERS

5. KIDNAP
The Kidnap command can only be used against
enemy Gang members. Kidnapping an enemy hood
is extremely risky, but can reap rich rewards if
successful. Apart from any money they carry, y ou will also get
the opportunity to interrogate them and find out about the
enemy hoods and businesses for free. See the Prisoners r eport
for further details.
VIOLENT CRIMES
The Violent Crimes are the extreme measures. These are all
aimed directly at places or people:
1. Smash up a building
2. Assault a person
3. Torch a building
4. Bomb a building
5. Kill a person
6. Ambush any rival hoods seen in an area
1. SMASH UP
Smash up is the least violent action you can take
against a business and normally puts the site out of
commission for a week or two. Intelligence and
stealth are the best ingredients for success.
2. ASSAULT
The Assault order is best given to hoods with high
intelligence and fists ratings. The hoods will try to
find the target and then give them a beating. This
can often persuade wayward citizens to see things your way.
Assaulted hoods will always head for home after they have
been assaulted. You will be able to give in-week orders, but
they will otherwise head for cover.
3. TORCH
The Torch order is useful if you wish to do
maximum damage at minimum cost. It does not
require explosives and is slightly more destructive
than smashing up the place. Arson, stealth and intelligence
are what is required from a hood.
4. BOMB
The Bombcommand is a drastic measure. This can
potentially destroy a whole block and requires a
bundle of explosives to be purchased. This
command requires not only a high bombing rating, but also
stealth and intelligence to ensure that the hood does not
become caught in the blast.
Used correctly, this order can devastate an opponent’s
economy and also turn the people he or she is protecting
against them.
5. KILL
To Kill a person requires firearms, intimidation,
intelligence and stealth. This, like bombing,
should only be used when all other alternatives
have been exhausted.
6. AMBUSH
The Ambush order instructs your hoods to travel to
another part of the city. When at the destination, they
move around the area, looking for enemy Gang
members. When they spot a target, they immediately open fire.
When the target is destroyed, they return to your Headquarters.
HINT
Be careful with Violent Crimes. An assault may end with the
death of the target, leaving your hoods faced with a murder
charge. Bombings can also cause the death of several occupants
of a building, leaving you with far more charges than a straight
Kill order would have done. Decide what has the best chance
of achieving the result you desire and think about the outcome
before giving the order.
If a potential target usually spends the week walking the
streets, giving a Kill or an Assault order against them may not
succeed because your hoods will have to find them first. If the
target has a regular routine, learn it, and send some hoods on
an Ambush.
THE LIEUTENANT’S REPORTS
Click on the Reports button to access the Lieutenant’s reports.
The Lieutenants have a set of reports that you can access.
These reports appear in the Reports Panel and are only
available when there are items within the category to report.
There are six reports usually available to each Lieutenant:
This W eek’ s Orders
Last W eek’ s Orders
Deaths and Defections
Other Gangs
Prisoners
Recruitment
Click on the relevant report button to access the report.
Click on the report button again to cancel the report.
THIS WEEK’S ORDERS
This Week’s Orders displays a
rolodex.
The rolodex is a device that
holds a stack of cards. These list
all of the orders that have been
allocated to your Lieutenants and
includes details of the Lieutenant’s name, the order they were
given and the details of any target. The map, displayed to the
right, highlights any locations or areas relevant to the order.
Click on the up and down arrows on the side of the
rolodex to view the next or previous orders.
Click on the Edit Order button on the job card if you
wish to edit the order.
GANGSTERS PAGE 41

LAST WEEK’S ORDERS
Last Week’s Orders displays the results of the previous week’s
orders, via the rolodex. The report shows the outcome of the
orders given to your hoods the previous week. If any of the or ders
fail for any reason, the Lieutenant informs you exactly why the
order failed. If an order is failed, most will give you the chance to
repeat the task. Those that will not allow this involve reactions
where the repeating of the order will only produce the same
result, such as sending the same person to recruit from an area.
Click on the Repeat Orderbutton to issue the order again.
DEATHS AND DEFECTIONS
Death uses the rolodex to show the hoods who have been
killed in the previous week. The four buttons in the Deaths
Panelallow you to select the particular Gang you wish to view .
Click on the button with the relevant Gang color to view
the deaths from a particular Gang.
The rolodex displays the names of all the hoods who died.
Those who were working under a Lieutenant also have the
name of their Lieutenant displayed. The map is used to show
where they died. The report also shows any members of your
Gang that have defected in the previous game week. These
people will have left your Gang, and are looking for other offers.
OTHER GANGS
The Other Gangs report uses the rolodex to display the
members of other Gangs seen and describes any activities they
were seen to be performing. The map will highlight exactly
where the member of the other Gang was seen
.
PRISONERS
If you have successfully carried out a kidnapping, the Prisoners
report becomes available.
of those people who have been captured by your Gang
members, but also allows you to perform any of the following
actions on the prisoner:
1. Interrogate the prisoner
2. Assault the prisoner
3. Kill the prisoner
4. Release the prisoner
1. INTERROGATE
Using interrogate, you can attempt to obtain information
regarding an opponent’s Gang members and territory. You
must be quick, since the longer they remain a prisoner without
talking, the less the information they can divulge to you.
Click on Interrogate to interrogate the prisoner.
2. ASSAULT
Assaulting the prisoner can make them divulge information
quicker, but may also result in their accidental death.
Click on Assault to have the prisoner beaten and interrogated
If you successfully force information out of a prisoner, you
will become immediately aware of all the people and places
they inform you about and you can take immediate action
against these people and sites.
The report shows not only the names
3. KILL
Killing prisoners removes them as a future threat, but also
causes rumours to spread. This can lead to an increase of
activity against you by the prisoner’s former Gang Leader.
Click on Kill to kill the prisoner.
4. RELEASE
Releasing the prisoner sends them back to their original
Gang Leader and causes no future increase in aggression.
Click on Release to have the prisoner thrown out of the
Hideaway and sent back to their own Gang Leader.
RECRUIT
The Recruit report is the last report available. Once a recruit
order has been successfully performed, the hoods,
Accountants and Lawyers who are willing to be employed by
you are shown in this report.
Click on Recruit to access the Recruit report.
If more than one character type was selected, the buttons at the
top of the Character Selection Panel allow you to select the
category of character to view:
Accountant
Lawyer
Hood
Click on the relevant
character type to view the
available people.
Each character available is
shown in a similar fashion to
the Hoods Section in the Resources, with the star rating and
their current pay shown alongside their name and face. (See
the end of this chapter for details of Resources)
Click on a prospective employee’s face to view their details.
If the character is a hood, you will also be given these options
for the character:
Recruit as new Lieutenant
Pay Demand
Recruit to Team
Recruit to Pool
Click on Recruit as new Lieutenant to recruit the hood, and
have them made into a Lieutenant. You can only do this if
you have a free Lieutenant tab. The hood will ask for $50
more each week to do this.
Click on Pay Demand to view the character’s pay demand in
the money clip.
Click on Recruit to Team to recruit the hood, and have them
sent to the currently selected Lieutenant’s team.
Click on Recruit to the Pool to recruit the hood, and have
them sent to the hood’s pool. Please refer to the Resources
section for further information on the hoods.
.
In the cases of an Accountant or Lawyer, the only option is
to Recruit. Y ou can only emplo y one Accountant or Lawyer
at a time. If you employ another Accountant or Lawyer, the
previously employed character will be sacked.
PAGE 42 GANGSTERS

THE ACCOUNTANT SECTION
The Accountantis the character responsible for receiving and
recording your finances and for keeping an eye on the people
who handle money. The Accountant also covers up evaded
tax and large amounts of illegal income, although excessive
amounts might lead to detection and investigation by the
FBI. The Accountant Section may still be accessed even if
you do not have an Accountant, but in this case you will only
be allowed to view the Finances, Bribed People and
Employed Police reports.
Click on the Accountant Section tab to access the
Accountant Section.
LAYOUT OF THE ACCOUNTANT SECTION
The Accountant Section has the following features:
The Section Tabs
The Accountant Details Panel
The Resource Details Panel
The Reports Panel
The Map Buttons
THE SECTION TABS
The Section Tabs are the same as those displayed in every
other Section of the Gang Organizer, and are used to move
between the different Sections.
THE ACCOUNTANT DETAILS PANEL
The Accountant Details Panel is where the Accountant and
his or her details are displayed.
THE RESOURCE DETAILS PANEL
The Resource D etails P anelis where information concerning
the city and your Gang are displayed. At differing stages of
the Accountant Section, the Resource Details Panel can have
either of the following functions:
It can display the available mapsof the city and is referred
to as The Map.
It can also display the reports of the Accountant.
THE REPORTS PANEL
The Reports Panel displays the reports available from the
Accountant. When you are giving orders, this panel changes
to become the Orders Panel.
The Reports Panel also allows you access to the
Clipboard and your Resources. The Accountant only has
access to vehicles from the Resources. (For details on the
Clipboard and the Resources, turn to pages 62 and 63
respectively).
THE MAP BUTTONS
The Map Buttons are available in several of the Sections in
the Gang Organizer. They are used for displaying
information about the city. Please refer to the section in this
chapter titled City Maps for fur ther details.
THE ACCOUNTANT
The Accountant is always shown at the top of the
Accountant Details Panel with their name and portrait.
The other details and options shown here are
The Accountant Summary
The Accountant’s Skill
The Accountant’s Pay Demand
The amount of money that you are
actually paying the Accountant
The Accountant’s Time Indicator
A button to sack the Accountant
A button to have the Accountant killed
A button to edit the Accountant’s Pay
A button to start and stop the Accountant Evading Tax
THE ACCOUNTANT SUMMARY
This shows whether the Accountant has a vehicle or not.
THE ACCOUNTANT’S SKILL
A number of stars, from half a star to five stars, shows how
good the Accountant is at his or her task. The more stars, the
better the Accountant.
THE ACCOUNTANT’S PAY DEMAND
This is where the Accountant shows how much they would
like to be paid each week. If this value becomes appreciably
higher than the amount you are actually paying the
Accountant, their name will turn red. Once this has
happened, there is a risk of the Accountant deserting. See the
paragraph on the Accountant’s Pay, below.
THE ACCOUNTANT’S ACTUAL PAY
This shows the amount you are actually paying the
Accountant each week.
GANGSTERS PAGE 43

THE ACCOUNTANT’S TIME INDICATOR
This shows how much time the Accountant has allocated to
orders. Since the Accountant can only perform an Audit,
which consumes the whole week, this indicator will fill once
you have given such an order.
SACK ACCOUNTANT
Giving the Sack Accountant command results in your
Accountant being thrown out onto the streets. He will be
available for further recruitment, but he will also be more
hostile towards you. The Accountant will almost certainly
ask for more money if you try to recruit him again.
HINT
Be careful when sacking the Accountant. He may be carrying a
list of any taxes recently evaded. These could be used against
you if the Accountant is arrested. Sacking the Accountant also
upsets the Lawyer.
Click on the Sack Accountant button to sack the Accountant.
Click on the Yes button to confirm the sacking.
Click No to cancel.
KILL ACCOUNTANT
Taking the option to Kill the Accountant means that the
Accountant cannot talk about any of the crimes you have
committed. Killing the Accountant inside your Headquarters
does not produce a crime, since none of your team present are
prepared to go to the police. All deaths within your
Headquarters do however cause your hoods to become restless.
Click on Kill Accountant to have the Accountant killed.
Click on the Yes button to confirm the killing.
Click No to cancel.
ACCOUNTANT’S PAY
If you find that your Accountant’s name is shown in red, it
means that the Accountant is not especially happy with the
way he or she has been treated recently. He or she will be
demanding more money. The Accountant’s Pay button
allows you to keep your Accountant happy; you can increase
or decrease their pay as much as you like.
Click Accountant’s Pay to open the money roll.
The Money Roll shows how much money the Accountant is
currently being paid and how much money you have available.
Click on the Increase Pay button to increase the
Accountant’s pay.
Click on the Decrease Pay button to reduce the
Accountant’s pay.
HINT
Refusing a pay increase leads to an increase in hostility and a
reduction in loyalty. Eventually, your Accountant will leave if
you do not pay enough. You have been warned!
EVADE TAX
Evade tax is a special function of the Accountant. You pay
taxes on all your profit, so the Accountant offers a service
where some of this money can be held back using less than
legal methods. The amount the Accountant can hide varies
with how much legal income you made in the previous week
and how good the Accountant is. Occasionally, the
Accountant will evade more tax in one week than he can
reasonably hide. In these cases, the Accountant will simply
make a note of it and cover up the amount later.
Click on the Evade Tax button to instruct the Accountant
to begin evading tax.
Click on the Evade Tax button to instruct the Accountant
to stop evading tax.
THE ACCOUNTANT’S ORDERS
Besides the option to evade tax, the
Accountant has just one order that
can be performed:
Audit
The Audit helps you keep an eye on the finances of your
empire. Just as your Accountant may keep back revenue from
the government, so your Lieutenants and hoods may keep
back small amounts of money from you. This is known as
skimming.
Audit instructs the Accountant to visit one of your
Lieutenants or businesses. Here, the Accountant will check
the books and compare the amount of money given to him
and the amount that was taken by the business or Lieutenant.
The results are reported in the Audit report at the end of
the week.
To have the Accountant perform an audit
Click on the Audit button in the Orders Panel to bring
up the job card.
Click on the Clipboard button to view the list of your
Lieutenants and those hoods who are running businesses
for you.
Click on the name of one of your Gang members in the
Clipboard to select them for auditing.
Note: Decreasing his or her pay will make your Accountant
very unhappy!
Click on the Accountant’s Pay button again to close the
money roll and accept your changes.
This method applies to all Lieutenants, hoods, the
Accountant and the Lawyer.
The map will highlight the location of the selected character.
Click on Confirm Order on the Job card.
In the following Working Week, the Accountant will travel
to the site of the character to be audited, and will go through
their books. The results of the Audit will be reported in the
Audit report. (See Accountant Reports, below.)
PAGE 44 GANGSTERS

GIVING THE ACCOUNTANT A VEHICLE
If you want to, you can give the Accountant a vehicle. This
helps the Accountant reach Audit destinations quickly and
safely. A vehicle is allocated to the Accountant the same way
as giving one to a Lieutenant.
For details on allocating vehicles, please turn to the
Vehicles section in Resources, at the end of this chapter.
THE ACCOUNTANT’S REPORTS
Like your Lieutenants, the Accountant gives information as
weekly reports.
The reports available to the Accountant are as follows:
Finances
Bribed People
Employed Police
Tax Evasion
Audit
Click on the appropriate button to view a report.
Click on the report button again to cancel the report.
All of the reports are available from the Reports Panel and
concern issues where money is involved.
FINANCES REPORT
The Finance report is one
of the most important
items in any of the Gang
Organizer sections. It
displays a summary of the
income and outgoings for
the week. On this Section, you can see how much money has gone
on wages and purchases and how much money has come in from
your legal and illegal activities.
HINT
If either of the incomes shows a negative value, this means that
this form of business is actually costing you money!
The top of the Section always shows the week number that you
are on, including the time limit if you are playing a fixed time
game. (Please refer to Game Menus on page 28 for details of
setting up a fixed time game). The bottom of the Section contains
the totals of your cash and assets; together, these represent your
total wealth. The entry titled “Risky Money” displays the amount
of illegal income that the Accountant has not been able to cover
up. The more money that appears in this row, the greater the
chance of the FBI have of detecting your illegal businesses,
laundering operations and warehouses. This in turn adds to both
your suspicion and the evidence being built up against you by the
FBI. The actual risk shown below is based on any increase in your
suspicion of your income and your illegal business. Stopping
your illegal income will drop the risk for that week to zero, but the
FBI will be keeping an eye on you for several weeks before your
suspicion drops and they start looking for other illegal activities.
HINT
Another way to lower the risk is to increase your legal income
by buying legal businesses.
If you are running low on money, an icon may appear next to
your wages bill. This is a dollar bill with either a numerical
half or zero upon it. The half means that your hoods have
received only half pay, whilst the zero means that they have
received no pay.
HINT
Each week that your Gang members receive less than full pay,
they become more and more irate!
BRIBED PEOPLE
The report on Bribed People shows who has recently
received money from you. This is a summary of the bribe
order and uses the Clipboard to show which officials you
have started to influence. This report is always available,
whether you have an Accountant or not.
Employed Police opens the Clipboard at the employed
police Section. This list contains all the police who have been
put on a regular income.
Click on a name to view the name and face of the selected
officer.
Other information displayed includes how much you are
paying them and how much you are paying all the employed
police in total. A button below the officer’s name gives you
the option to dismiss them. This report is always available,
whether you have an Accountant or not.
TAX EVASION
The Tax E v asion r eport displays the sums of money that your
Accountant has not declared to the authorities over the
previous eight weeks. The red number displayed at the top of
the report is evaded tax that has not been covered up by your
Accountant. The amount that your accountant can cover up
varies with the legal income that you have each week and the
skill of the accountant. Tax that has not been co ver ed up may
cause you trouble if the Accountant is arrested, and can also
highlight the presence of your illegal businesses to the FBI.
AUDIT
The Audit report is only available if the Accountant
successfully audited one of your Lieutenants or hoods in the
previous week. This report gives a brief summary of how
much money the character brought in and how much was
actually turned over to your Accountant. If there is a
difference, it is up to you to take action.
GANGSTERS PAGE 45

THE LAWYER SECTION
The Lawyer is the character responsible for keeping your
Gang members out of prison and for all activities that involve
corruption, such as the bribing of dignitaries, the employing
of police and the running of an election campaign.
This Section may still be accessed even if you do not have
a Lawyer, but you will only see the M ost Wanted report. (See
Lawyer Reports, on page 49)
Click on the Lawyer Section Tab to access the Lawyer
Section.
LAYOUT OF THE LAWYER SECTION
The Lawyer Section has the following features:
The Section Tabs
The Lawyer Details Panel
The Resource Details Panel
The Reports Panel
The Map Buttons
THE SECTION TABS
The Section Tabs are the same as those displayed in every
other Section of the Gang Organizer, and are used to move
between the different Sections.
THE LAWYER DETAILS PANEL
The Lawyer D etails Panel is where the Lawyer and his or her
details are displayed.
THE MAP BUTTONS
The Map Buttons are available in several of the Sections in
the Gang Organizer. They are used for displaying
information about the city. Please refer to the section in this
chapter titled City Maps for fur ther details.
THE LAWYER
The Lawyer is always shown at the top of the Lawyer Details
Panel with their name and portrait. The other details and
options shown here are:
The Lawyer Summary
The Lawyer’s Skill
The Lawyer’s Pay Demand
The amount of money that you are actually paying the Lawyer
The Lawyer’s Time Indicator
A button to sack the Lawyer
A button to have the Lawyer killed
A button to edit the Lawyer’s Pay
THE LAWYER SUMMARY
This shows whether the Lawyer has a vehicle or not.
THE LAWYER’S SKILL
A number of stars, from half a star to five stars, shows how good the
Lawyer is at his or her task. The more stars, the better the Lawyer.
THE LAWYER’S PAY DEMAND
This is where the Lawyer shows how much they would like to be
paid each week. If this value becomes appreciably higher than
the amount you are actually paying the Lawyer, their name will
turn red. Once this has happened, there is a risk of the Lawyer
deserting. See the paragraph on the Lawyer’s Pay, below.
THE LAWYER’S ACTUAL PAY
This shows the amount you are actually paying the Lawyer each week.
THE RESOURCE DETAILS PANEL
The Resource D etails P anelis where information concerning
the city and your Gang are displayed. At differing stages of
the Lawyer Section, the Resource Details Panel can have
either of the following functions:
It can display the available mapsof the city and is referred
to as The Map.
It can also display the various reports of the Lawyer.
THE REPORTS PANEL
The Reports Panel displays the reports available from the
Lawyer. When you are giving orders, this panel changes to
become the Orders Panel. The Reports Panelis also used for
allowing access to the Clipboard and your Resources. The
Lawyer only has access to vehicles from the Resources. (For
details on the Clipboard and the Resources, please refer to
the relevant sections at the end of this chapter.)
THE LAWYER’S TIME INDICATOR
This shows how much time the Lawyer has allocated to orders.
SACK LAWYER
Giving the Sack Lawyer command results in your Lawyer
being thrown out onto the streets. He will be available for
further recruitment, but he will also be more hostile towards
you. The Lawyer will almost certainly ask for more money if
you try to recruit him again.
HINT
Be careful when sacking the Lawyer. He may be carrying a list of any
crimes recently committed. These could be used against you if the Lawyer
is arrested. Sacking the Lawyer also upsets the Accountant.
Click on the Sack Lawyer button to sack the Lawyer.
Click on the Yes button to confirm the sacking.
Click No to cancel.
PAGE 46 GANGSTERS

KILL LAWYER
Taking the option to Kill the Lawyer means that the Lawyer
cannot talk about any of the crimes you have committed.
Killing the Lawyer inside your Headquarters does not produce
a crime, since none of your team present are prepared to go to
the police. All deaths within your Headquarters do however
cause your hoods to become restless.
Click on Kill Lawyer to have the Lawyer killed.
Click on the Yes button to confirm the killing.
Click No to cancel.
LAWYER’S PAY
If you find that your Lawyer’s name is shown in red, it means
that the Lawyer is not especially happy with the way he or
she has been treated recently. He or she will be demanding
more money. The Lawyer’s Pay button allows you to keep
your Lawyer happy; you can increase or decrease their pay as
much as you like.
Click Lawyer’s Pay to open the money roll.
The Money Roll shows how much money the Lawyer is
currently being paid and how much money you have available.
Click on the Increase Paybutton to increase the Lawyer’ s pay .
Click on the Decrease Paybutton to reduce the Lawyer’s pay.
Note: Decreasing his or her pay will make your Lawyer very
unhappy!
Click on the Lawyer’s Pay button again to close the
money roll and accept your changes.
This method applies to all Lawyers, hoods, the Lawyer and
the Lawyer.
HINT
Refusing a pay increase leads to an increase in hostility and a
reduction in loyalty. Eventually, your Lawyer will leave if you
do not pay enough. You have been warned!
THE LAWYER’S ORDERS
The Lawyer has an exclusive set of commands. Some actions
are performed automatically, such as the covering up of crimes
and defending your hoods in court. Other functions, such as
the corruption of official figures and the clearing of your name,
must come as orders directly from you.
The Lawyer has four orders:
Bribe Officials
BRIBE OFFICIALS
The Bribe Officialsorder is used to make single payments of
cash to the people in positions of authority:
The Mayor
The Police Chief
The Judges
The DAs
Police officers
The one dignitary that the Lawyer cannot bribe is the head
of the F.B.I., who is completely free from corruption.
The corruption of officials always requires money and can
be very useful if you can afford to do it. Unless the target official
is very hostile towards you, the application of money can see to
it that your illegal activities are forgiven far more easily.
Bribing the Mayor causes this character to become more
lenient on you. This results in his influencing the Police
Chief, who in turn will ensure that fewer police are sent to
patrol your patch.
The bribing of the judges is most effective when they are
sitting on cases where your hoods are being tried. Although
expensive, a suitably applied bribe will result in the case
being immediately thrown out and your hood released.
Each DA is responsible for ensuring your hoods are
prosecuted with the full weight of the law. Successfully
bribing one of these characters whilst they are prosecuting a
member of your Gang will result in your Lawyer obtaining
the names of either the witnesses or alternatively the jurors.
A second bribe will usually reveal the other list of names.
Once you have the list, you can go out and start visiting these
people, to try to persuade them to either forget what they
saw, or to state “Not guilty” when a verdict is reached.
The bribing of police officers can prevent the need for a
case to ever get to court. If an officer is closing in on a
suspect, a large amount of cash can result in the investigation
being called off through a sudden lack of evidence.
• Click on Bribe Officials to open a jobcard.
The map will highlight the locations of all officials. You can
click on the map, or use the Clipboard to select the name of
the target.
Click on the Clipboard button.
The Clipboard will only display the list of the dignitaries
who can be bribed:
The Mayor
The Police Chief
Police Officers
Judges
DAs
Employ Police
Go Straight
Run for Office
Click on the category of person required.
The names of the people in the group are shown in the
clipboard.
Click on the name of the person to bribe.
GANGSTERS PAGE 47

The map will highlight their location. A money roll will
appear, showing ho w much money the person will want to be
successfully bribed.
Click on Confirm Order on the job card to allocate
the order.
Click on Reject Orderon the job card to cancel the order.
HINT
Bribes can get you a quick fix in an emergency, but it does not
do any harm to keep dignitaries on your side. The occasional
bribing of the Mayor and the Police Chief can make all the
difference to your success.
EMPLOY POLICE
Employing police is an option that is worth considering
when you are planning hits on people and places.
Giving the order to employ police results in the Lawyer
patrolling an area of the city. Within this area, he looks for
police and makes them the offer of a supplementary income,
provided they turn a blind eye to the activities of your hoods.
Click on Employ Police to open a job card.
The map will highlight areas available for employing police
in blue. Any illegal activities planned will be highlighted in
yellow.
Click on individual blocks, or bound an area, to select the
area for the Lawyer to cover.
Click on Confirm Order on the job card to allocate
the order.
Click on Reject Orderon the job card to cancel the order.
HINT
Even though you may have police on your payroll, it is still a
bad idea to push your luck. Most police will ignore activities
such as assaults and robberies, but very few officers can turn a
blind eye to murder.
GOING STRAIGHT
Going Straight is an objective in Gangsters, available in
single player games only. This can only be performed with
the help of your Lawyer. You will only be allowed to go
straight if you have assets in excess of $250.000, no court
cases in process against your Gang members and no illegal
businesses except for your offices. For further details on
Going Straight, please refer to the chapter entitled The End
of the Game.
Click on Go Straight to begin attempting to leave a life
of crime.
Click on Go Straight again to cancel going straight.
HINT
When you give this order, the rival Gangs will attempt to
thwart your plans. Their action may involve attempting to
extort your territory, or even attacking your businesses and
hoods. They will attempt nearly anything to make your hoods
commit a crime, thereby dragging you back into the conflict.
RUN FOR OFFICE
When an election occurs, you may find yourself with the
opportunity to Run for Office. The Lawyer will only
offer you this option if you have both the power base
(100 blocks) and the capital to stand a chance of
winning. If you win the election, you will become Mayor
and win the game. Running for office has its own cost
and its own risks. For each of the six weeks that pass, you
must spend money keeping the people in your area
happy. All through the campaign, the opposing Gang
leaders will plan actions in your territory to destroy the
morale of your supporters.
HINT
If you find that another Gang Leader is attempting to become
mayor, your best choices ar e to run for office yourself, or to start
bombing and killing people within the opponent’s territory.
Click on Run for Office to begin campaigning for the
election.
Click on Run for Office again to withdraw from the
election.
For further details on Becoming Mayor, please refer to the
chapter titled The End of the Game
PAGE 48 GANGSTERS

GIVING THE LAWYER A VEHICLE
If you want to, you can give the Lawyer a vehicle. This helps
the Lawyer reach Bribe and Employ Police destinations
quickly and safely. A vehicle is allocated to the Lawyer in the
same way as giving one to a Lieutenant. For details on
allocating vehicles, please turn to the Vehicles section in
Resources, at the end of this chapter.
THE LAWYER’S REPORTS
The Lawyer gives information as weekly reports.
There are six reports available to the Lawyer:
Most Wanted
Squealers
Crimes
Elections
Legal Proceedings
Employed Police
Click on the appropriate report button
to access any of the reports.
Click on the report button again to
cancel the report.
All of these reports are available from the Reports Panel and
concern important legal issues.
MOST WANTED
The Most Wanted report shows a list of the people being
watched by the FBI. This report is always available,
whether you have a Lawyer or not. If you find that one of
your hoods is on the list, you should consider keeping
them off the streets for a few weeks. Doing this allows the
hood’s rating on this list to drop, although they are still
claiming a wage.
HINT
The Most Wanted report only shows dangerous and habitual
criminals. Hoods can be arrested for minor crimes without ever
appearing on this list.
SQUEALERS
Squealers displays the Clipboard, open at the list of people
who have informed the police of your illegal activities. These
people must be dealt with promptly, before they cause you
too much trouble.
CRIMES
Crimes displays a list of all the crimes that your Gang have
committed in the previous week.
Each crime is listed with various details:
The name of the hood
The crime
The risk of arrest
ELECTIONS
The report on Elections only appears when an election takes
place. As the election is fought, you can see how each of the
candidates is doing from this report.
HINT
Keep an eye on this each week during an election. You may
find that another fledgling crime lord has also entered the
race for office!
LEGAL PROCEEDINGS
If any of your hoods are arrested, the Legal Proceedings
report becomes very useful. This uses the rolodex to show
who in your Gang is awaiting trial, or is actually on trial. The
report also shows the name of the judge and the DA and the
current status of the case.
EMPLOYED POLICE
Employed Police opens the Clipboard at the employed
police Section. This list contains all the police who have
been put on a regular income and also gives you the option
to dismiss them.
Click on the name of the officer to
view their details.
Click on Sack to dismiss the officer
from your pay.
Click on Yes to confirm the action.
Click on No to disagree to the action.
HINT
Dismissing police saves money, but often leaves them
infuriated!
GANGSTERS PAGE 49

DIPLOMACY
Diplomacy is where you can not only view and set your
relationship with rival Gangs, but you can also find out about
your opponents, using Snitches.
Click on the Diplomacy Section Tab to access this
Section.
There are five levels of diplomacy between opposing Gang
leaders:
Alliance
Peace
Cease-Fire
Aggression
Gang Warfare
Each of these controls not only the relationship and tactics
between opposing Gang leaders, but also influences each
player’s hoods. The more violent the setting, the more
inclined hoods are to avoid a rival’s territor y and the more
likely they are to open fire if they see any hoods from the
opposing Gang.
ALLIANCE
An Alliance is where the two Gang Leaders agree to divide
the city. Gang members can pass freely through each other’s
territories. The Alliance is the most delicate of treaties; it can
take only one false slip to lose the friendship. A game will end
if the only Gang Leaders remaining are Allied, unless one
decides to break the Alliance.
PEACE
A Peace setting is more stable than an alliance, but ultimately
the two Gang Leaders will have to go to war when their
opponents are killed.
CEASE-FIRE
The Cease-Fire setting is used when you want to avoid
attacking the hoods of another Gang, unless they appear
within your territory. Cease-fire is the most stable of treaties;
any hood that is killed in your area will usually bring no
repercussions, because they should not have been there in the
first place! Avoid sending your hoods into other areas, unless
it is necessary.
AGGRESSION
An Aggressionsetting means that the Gangs are effectively at
war. The members of each Gang will usually attack each
other on sight, and all movement within each other’s
territory is forbidden. Gang Leaders with an Aggression
status will not deliberately plot against each other, but will
not consider each other when planning actions.
GANG WARFARE
Gang Warfare is the ultimate in Gangster violence. Gangs
Leaders at this status will deliberately plan hits against each
other’s people and places. This setting means that territory
means nothing; it is the number of guns that counts.
PAGE 50 GANGSTERS

VIEWING THE DIPLOMATIC STATUS
Keeping an eye on the diplomatic level is an important task
and is worth doing at least once each week.
When you first access the Diplomacy Section, you will see
that all the details displayed relate to your Gang and your
face is shown at the top left.
Click on one of the top five tabs down the left side of the
Section to view the status of any of the other Gangs.
When viewing a rival Gang, you will see that the Diplomatic
Status Bar, just below the face of the opposing Gang leader,
has two arrows pointing to it; one above and one below.
The bottom arrow is the last known status of the opposing
Gang Leader towards you and is always shown in the
opposing Gang’s color. The status comes from events on the
street and the rumours that spread after any of your actions.
Consequently, it always updates one Working Week after the
opponent has changed the setting themselves.
The arrow above the bar is your setting. It is through using
this that you can make offers of peace and declarations of war
towards your opponents.
SETTING THE DIPLOMATIC LEVEL
As the game progresses, you may find it desirable to seek a
change of status with your opponents. This may be for any
number of reasons such as declaring war or seeking peace.
Click on the desired new setting in the Diplomatic Status
Bar to change the diplomatic status.
HINT
Large changes of diplomatic status, such as switching from
Peace to Gang Warfare, can be used to get the drop on your
opponent. Only make such a drastic change if you intend to
follow it up with a serious assault on your opponent’s territory.
VIEWING YOUR GANG DETAILS
The details of your Gang are shown when you first enter the
Diplomacy Section.
Your face and name are shown at the top left of the
Section, and the right side of the Section displays all the
hoods in your Gang. These can be sorted by their skills in the
same manner as the hoods resources Section.
Click on any skill to sort the hoods according to their
rating in the selected skill.
The Clipboard is also displayed to the left. This contains the
names of all the members of your Gang.
The Diplomacy Section also allows you to view the
location of all the Gang members known by you, provided
that you also know their position.
Click on the Map/Gangsters button to open the list of
hoods and to display the map.
The map is displayed on the right side of the Section.
Click on the name of any Gang member to see where they
are located.
VIEWING OTHER GANG DETAILS
The Diplomacy Section also allows you to look at the other
Gangs. The list of hoods and businesses are not necessarily
exact; only the people and places that you know about are
displayed.
The tabs down the left side of the Section are shown in
the four identifying colors of the Gangs. Each allows you to
view the details of the Gang that is represented by the color.
Click on the colored tab that represents the Gang about
which you wish to view details.
The top arrow will move from its current status to the one
you selected.
This is the status that you are offering. A change in status
instructs your hoods to act according to the new status
selected, but your opponent might not agree; both parties are
in agreement only when both your arrow and the arrow from
your opponent are at the same status. This is especially
important when seeking an alliance. An alliance is only active
between two Gangs when both diplomatic status arrows are
pointing to “Alliance”.
Y ou can change the status as many times as you like in the
Gang Organizer; your opponent will not take any notice
until the end of the next Working Week.
Your face and name will be replaced by the face and name of
the Gang Leader who runs the Gang that you selected. The
Clipboard, pool Section and the map will all be now
displaying information relating to the known details of the
particular Gang.
Once you have selected an opposing Gang, the Section
itself operates in the same manner as that for your own hoods
and businesses. Locations will only be highlighted on the
map if you know about the particular businesses where the
hoods are situated.
GANGSTERS PAGE 51

USING SNITCHES
The final function of the Diplomacy Section is to allow you
to purchase information on the hoods of the opposing
Gangs. You do this by using the snitches.
At the start of the game, all the Gang leaders know most
of their rival’s forces. As recruiting occurs and people are
replaced, the list will become gradually less and less well
informed. Relying on just your businesses or enemy attacks
to help identify rival hoods is not a very satisfactory way of
getting to know about your opponents, so there is another
way; using the snitches.
Snitches are ordinary people, who make their living
walking from one Gang leader’s territory to the next,
poking their noses into other people’s business, then selling
the information on to whoever wants it.
Each of the snitches can be found on a tab at the bottom
of the left side of the Section.
Click on one of the snitch tabs to select a snitch.
This places their name and face at the top of the left Section
and a new bar is displayed just below.
The bar is used to select the Gangs that you wish to know
about, including those hoods who currently do not belong
to a Gang.
HINT
This can be a very useful way to find and recruit high quality
hoods.
Click on the relevant colored buttons to select the
Gangs you want to get information about.
Once a Gang has been selected, the snitch will tell you how
many people from that Gang they know about and how
much money they want for the information. You can click
on as many Gangs as you wish and the cost will increase as
each successive extra piece of information is offered.
Click on the tick on the money roll to confirm the
exchange of information.
If you purchase the information, the names of the hoods
are added to the list of people that you know about for
each Gang.
You may only use one snitch per week; buying the
information from one will cause the others to look
elsewhere for paying customers.
There is also no guarantee that the hoods you are
informed about are of any quality; they may be valuable
killers or Lieutenants, or they may be cannon fodder. The
only guarantee given by the snitches is that the hoods you
are informed about were not already known to you.
Snitches never sell information on the businesses of a
rival Gang Leader. They will tell you where to find a hood
who is not currently employed by a Gang Leader, but the
sites of rival Gangs are places that you must find for
yourself.
PAGE 52 GANGSTERS

THE NEWSPAPER
SECTION TABS HELP
NEWSPAPER
HEADINGS
HIT THE
STREETS
The Newspaper is the first screen you will see following the
start of a game and the end of every Working Week.
Four Newspapers are available in the city; the New
Temperance Herald, Post, Tribune and Times. Each one is
situated in a different corner, where they vie for sales by
influencing their clientele. Each newspaper affects the
people living and working in the immediate area around
itself, influencing their opinions as they pick up their
morning paper on the way in to work.
Click on the Newspaper Section Tab to access the
Newspaper Section.
You will only ever see one newspaper. This is usually the one
closest to the site of your main office. If you own any
Newspapers, it is the closest owned Newspaper that is
delivered to your door.
The Section is laid out as the top half of a newspaper. The
main headline is always displayed when the Section is
accessed, since this item is comparatively the most important
piece of news. News items are always laid out as summaries,
so that you can read them promptly and understand each
item, without having to search for the information.
At the top of the Section is the name of the newspaper.
Below this is a line of up to 7 buttons:
Business Moves
Law Enforcement
Crimes
Charitable
Deaths
Political News
Front Page
Those not applicable in any week are not displayed.
Click the appropriate button to read any of the reports.
BUSINESS MOVES
Business Moves shows any major businesses that have been
bought, sold or established in the previous week.
LAW ENFORCEMENT
The Section on Law Enforcement displays arrests, raids and
the results of court cases.
HINT
W atch to see if either you or another Gang Leader is mentioned
as the target for a “crackdown”. If this happens, the Gang
Leader named will almost certainly experience an increase in
the level of policing in his or her area.
CRIMES
The Crimes Section shows any murders, arson attacks or
bombings that have occurred.
HINT
Keep an eye on where the majority of crimes take place. If
several people are reported to be killed in the same area, it
could mean that there is a state of aggression between two rival
Gang Leaders. If this is the case, their attention will be away
from you.
CHARITABLE ACTS
The Charitable ActsSection shows any major donations that
have occurred and is also used as the Section where the
religious leaders make pleas for money.
DEATHS
Everyone who died in the previous week is shown in the
Deaths Section.
POLITICAL NEWS
Political N ewsis where you can read the forecasts and results
of elections and also see if the mayor has made any
declarations.
FRONT PAGE
The Front pageitem covers the week’s most important item.
HINT
If you own the newspaper, it no longer passes on news of your
major purchases to the other papers. Buying a valuable business
like a department store becomes a lot safer once it is hidden
from your enemies.
GANGSTERS PAGE 53

GRAPH REPORTS
THE CITY MAPS
The City Maps display the City Plan and Rooftop Views
full screen within the limits of the journal. They allow the
user to navigate the city, with full use of overlays.
They are also the easiest way to get straight to the details
on the map, such as seeing how your territory has increased.
Click on the City Maps Section Tab to access the City
Maps.
At the edge of the maps is a set of map tabs. These allow you
to select not only the map type you want to view, but also the
type of overlay you wish to view.
Click on the appropriate tab to access any of the overlays.
The Graph Reports Section is laid out as a single sheet of
paper and can show information useful to the running of
your empire.
• Click on the Graph Reports Tab to access the Graph
Reports Section.
There are seven graphs available, all of which are shown as
buttons at the bottom of the Section:
• Overall Power Rating
• Assetts
• Territory Controlled
• Manpower
• Gang Loyalty
• Crimes
• Suspicion
• Click on the relevant button to access any of the graphs.
The title is shown at the top of the graph. All graphs show
the last eight weeks, starting from week one and working
upwards.
The graph itself occupies most of the Section and this
allows you at a glance to make comparisons of the strengths
and weaknesses of your own position and the position of
your opponents. The bottom of the Section always shows the
week number that you are on, including the time limit if you
are playing a fixed time game. (Please refer to the chapter on
Game Menuson page 28 for details of setting up a fixed time
game.) At the bottom right are the methods by which you can
display the information.
• Click on the button marked Line Graph to view
the information as a line chart.
CITY PLAN
The City Plan button accesses the lowest map level. This is
an overhead view of the city , sho wn from the highest altitude.
This map can be used for viewing wide area information,
sh own as overlays and easy traversing of the map.
Block types can also be identified in this level; clicking on
a block will result in the building showing whether it is a
commercial, industrial or tenement block, or possibly even a
special case block such as a church or the courthouse.
• Click on the button marked Bar Graph to view the
information as a bar chart.
• Click on the button marked Your Data to view
information about your Gang only.
• Click on the button marked All Data to view information
about all the Gangs.
PAGE 54 GANGSTERS

ROOFTOP VIEW
The Rooftop View button takes you closer to the city. The
number of blocks displayed is significantly less, although on
this level you can investigate individual locations as well
as wider area and block information.
Both maps have a set of overlays associated with them.
These help you navigate your way around the city and find
important information. Some of the overlays can be used
simultaneously to others, allowing you to view up to three
pieces of information at any time.
displayed in the window is colored white. Areas allocated to
other Lieutenants are shown in your chosen Gang color.
To change the selected Lieutenant
Click on the arrow next to the Lieutenant’s name to view
a list of all your Lieutenants.
Click on any Lieutenant’s name to change to the selected
Lieutenant.
The map will update to show the area of the newly selected
Lieutenant.
Bound an area of your territory with the mouse to
allocate it to your Lieutenant.
Repeating the process will remove the area from the
Lieutenant’s jurisdiction. Individual blocks can also be
toggled on and off using single clicks of the mouse.
Note: You cannot allocate an area to a Lieutenant if it has already
been allocated to another. In order to transfer the area, you must
first remove it from the Lieutenant currently running it.
CONTROLLED BUSINESSES
CENTER ON HEADQUARTERS
This button scrolls the map back to the block containing
your Headquarters.
Click on Center on Headquarters to scroll to your main office.
TERRITORY
This button highlights all of the area you control. The
highlight is always displayed as a border around the edge of
your blocks and is shown in your chosen Gang color. The
known territory of rival Gangs is also highlighted in their
respective colors.
Click on Territory to view the known territories of the Gangs.
Click on Territory again to remove the overlay.
LIEUTENANT’S AREA
You can allocate an area to a Lieutenant and leave them to
look after actions such as collecting protection and patrolling.
Clicking on this icon highlights
all areas currently allocated to
your Lieutenants; any area
allocated to the Lieutenant
Click on Controlled Businesses to open a window
displaying the businesses that you own or protect.
Click on a business type to highlight all the blocks
occupied by the selected business type.
If you are in the Rooftop View, the individual locations are
highlighted.
A Scroll bar at the side of the Controlled Businesses window
allows you to scroll through the list.
Click on the scroll bar to scroll through the list of
business types.
Three buttons at the top of the window allow you to select
whether you wish to view owned, protected or all controlled
businesses.
GANGSTERS PAGE 55

Click on All to view the list of all the buildings that you
control.
Click on Owned to view the list of buildings that you
own.
Click on Protected to view the list of buildings that you
have successfully extorted.
A search line is included at the top; this is so that you may
enter the particular business type you wish to view.
To use the search box
Click in the search box.
Begin to type in the type of business required.
As you type, the list will attempt to match the name. This
helps you avoid scrolling through long lists of business types
Click on the desired business when it becomes visible in
the box.
LAND VALUE
Land Value highlights the relative value of the land that the
blocks and locations occupy.
Land Value is defined by the block type and area, and is
not affected by the business on it unless it is a high value site
such as a department store or bank. The overlay uses a color
scale to display relative values and a key is displayed at the
edges of the map.
Click on Land Value to view the value of the land as a
color scale.
Click on Land V alueagain to remove the overlay.
SECURITY
As your empire grows, it becomes imperative that you keep
an eye on where your hoods and other people are
positioned. This button displays not only which businesses
are in your control, but also any other businesses that you
have explored. The security value is shown by means of a
color scale, for which a key is shown at the edges of the
map. In the City Plan View, the value represents the
average number of hoods that are located on the block. In
the Rooftop View, the numbers in the location are shown.
Actual numbers can be viewed by opening the Building
Details Window
Click on Security to view the security of your empire as a
color scale.
Click on Security again to remove the overlay.
HOSTILITY
When deciding exactly where the trouble in your territory is,
this overlay helps enormously. The population of New
Temperance will form their own opinion of you, from
marginal affinity to open hostility. The range of hostility is
shown using the color scale and displays an average value
where a block has more than one business. The Rooftop View
displays the actual values for each individual business. In
both cases, a key is shown at the edges of the map.
Click on Hostility to view the hostility of the businesses
in your empire as a color scale.
Click on Hostility again to remove the overlay.
BUILDING TYPES
This overlay is similar to the Controlled Businesses in
appearance, but has the effect of displaying all building
types, including municipals, irrespective of whether the
player owns them or not. The search entry box is available
and this also functions in the same manner as for the
Controlled Businesses.
Click on Building Types to open a list of all known
buildings in the city
Click on Building Types again to close the list.
CRIME HOT SPOTS
As the action heats up, this overlay becomes more useful. At
a glance, you can see if any areas in the city are receiving mor e
than their usual quota of violence. This may mean that two
Gangs are in competition for the area and as such they are
both being diverted away from other areas.
Click on Crime Hot Spots to view the illegal activity in
the city as a color scale.
Click on Crime Hot Spots again to remove the overlay.
RECENT EVENTS
This button is used to show the more extraordinary events that
have occurred in the previous week, such as deaths and
explosions.
Click on Recent Events to view where the more violent
crimes occurred in the previous week.
Click on Recent Events again to remove the display.
CLEAR OVERLAYS
This simply removes all present overlays.
Click on Clear to remove all overlays.
BUILDING DETAILS
In the City Maps, you can freely view the legal and illegal
businesses that you know about from the Rooftop View.
BUSINESS TYPES
Legal businesses, which can also be bought, are the most
common business type that you will find. The list of legal
business types is huge, and includes
Bakers
Pawnbrokers
Jewellers
Department Stores
Banks
Shoe Stores
There are three functions to any legal business owned by a
Gang Leader:
They provide an income.
They can launder counterfeit money and fence stolen
goods.
They can provide a front for an illegal business
Fronts are legal businesses that hide illegal businesses behind
them. The more similar the businesses are, the better the
PAGE 56 GANGSTERS

front can hide the illegal site. Illegal businesses are sites that
house some form of illegal activity. They are always being
hunted by the F.B.I., who will close them down and arrest
anyone found inside. Illegal businesses have the benefit that
they make huge amounts of money in comparison to a legal
business. Illegal businesses can only occupy the center
location of any commercial or tenement block.
VIEWING BUILDING DETAILS
The Rooftop View allows you to investigate any business in
greater detail. The amount of detail given for each business
varies with your involvement and explorations, but
investigating businesses is certainly a useful way to keep track
of the performance of businesses and to locate prime targets
for buyouts or attacks. To view the details of a building.
Double-click on its location in the Rooftop View.
This will open the Building Details Window.
Note: Click once on any location if you are not sure which
building you want to view, or are just generally scanning
individual sites in the area. This will display a small box showing
the building type. If you still wish to view the building’s details,
simply click on the box.
You can also locate one of your own buildings by clicking on
the map tab for Controlled Businesses, then selecting the
business type you want from the lists of owned and protected
businesses. Please refer to the Controlled Businesses
Overlay, above. The Building Details Window displays
everything you know about the building. This varies with
your knowledge of the site, based on the following factors:
Type
Extortion
Exploration
Ownership
The more involved with a business you are, the more
information you are shown. You will receive the most
information from the businesses that you own.
A business owned by you will show the following details:
The face and name of the hood running the site.
How good they are at running the site. This is an average
value of the hood’s Organisation and Business ratings.
How much you are paying the hood each week, with
their pay demand shown above.
How many illegal goods of each type the business is
storing. (please refer to Goods on page 67) Not all
businesses can store each type of the three illegal goods.
Each business will only show the goods types that it can
store.
If the business is also a front for an illegal business, it will
say so at the top of the viewing area. The illegal business
occupies the center location and can only be accessed
through the legal business that serves as the front.
HINT
If you want to protect an illegal site, it can be more effective to
guard the front. This means that one hood can protect both sites
GIVING ORDERS TO YOUR BUSINESSES
Those businesses that you own all have commands associated
with them. These are orders that you can give to both the
business itself and the hood running the business for you.
There are four commands that you can give to a business:
Commence / Cease trading
Repair Damage
Shutdown
Sell Business
COMMENCE / CEASE TRADING
Cease trading instructs the hood to stop doing business.
Once selected, you will make no money for the entire week,
although you will have to suffer the costs of the site and the
hood’s wage. This is a temporary measure, best suited to
avoid the attention of the FBI.
Click on Commence / Cease Trading to stop the business
trading.
Click on Commence / Cease Trading once more to begin
trading again.
HINT
Be careful with this order. Once the command to cease trading
has been given, the commence trading command cannot take
effect until the following week.
REPAIR DAMAGE
Repair Damage only becomes applicable if the business is
damaged through the action of other people.
SHUTDOWN
Shutdown the business is a more drastic instruction, which
should only be given if you are certain to lose the business, or
cannot support its current costs. Once the order has been
given, the hood will close down the site, leaving it as empty
land.
GANGSTERS PAGE 57

Click on Shutdown Business to begin closing the store.
Click on Yes to confirm the action.
Click on No to cancel the action.
Note: Illegal sites must be shut down before the land can be sold.
SELL BUSINESS
Sell the Business orders the hood to get rid of the site.
Click on Sell Business to receive an offer for the business.
The hood will use the money roll to show you how much
money you will get for the land, which you can then confirm
or reject.
Click on the tick on the money roll to confirm the sale.
Click on the cross on the money roll to reject the sale.
Note: Illegal sites must first be shut down before the land is sold.
GIVING ORDERS TO THE HOODS IN BUSINESSES
The hoods within the business usually have three options
available to the player:
Sack hood
Return to base
Hood pay
SACK HOOD
Sack hood informs the hood that you no longer require his
or her services. The hood will leave the building and join the
ranks of hoods available for hire.
Click on Sack Hood to dismiss the character.
Click on Yes to confirm the action.
Click on No to reject the action.
Click on the Increase Pay button to increase the hood’s
pay.
Click on the Decrease Pay button to reduce the hood’s
pay.
Click on the Hood Pay button to close the money roll
and agree to the displayed amount.
FIXING ELECTIONS
One type of illegal business allows you to fix the voting in
elections. This is the Teamsters building. Teamsters skim
money from the unions, and also influence the “block
voting” system used in elections.
Fixing elections can be used to help a player become
mayor, as the union swings the block vote from the industr ial
area. You can have any number of Teamsters buildings, but
only one counts towards the union vote.
Those situated behind Union buildings are most
successful in this role. The fixing of the vote is an automatic
function that takes place during an election.
Click on Commence / Cease Trading in the Building
Details Window to cease trading.
HINT
The Teamsters building can be countered by controlling the
industrial sites. Workers will never go against a Gang Leader
when hoods are watching over them!
DAMAGED AND DESTROYED BUILDINGS
Through enemy action, it is possible that one or more of your
buildings may become damaged or destroyed. If this
happens, the building will cease trading immediately and the
hood will head for your Headquarters.
RETURN TO BASE
Return to base tells the hood to come back to the office that
is your headquarters. The hood will do so instantly, causing
all the money for the week to be lost.
Click on Return to Base to instruct the hood to head for
your Headquarters.
Click on Yes to confirm the action.
Click on No to reject the action.
HINT
Try replacing hoods, instead of temporarily abandoning the
business. This avoids losing money. If at all possible, give a
replacement the order to Run the Business.
Once your building has been hit, the level of damage depends
on the building, the order given and the ability of the hood
who performed the order. Smashing up a site generally
produces the smallest amount of damage and bombing the
greatest.
If a building is damaged, it maintains its identity but ceases
to function. Opening the Building Details Window on this
building shows how much time and money it will cost to
repair the building, which can be agreed to using the Repair
Damage button that appears in the icon bar.
Click on the Repair Damage to begin repairing the
building. The money is deducted from your safe in
weekly installments until the business is repaired.
HOOD PAY
Hood Pay displays the money roll. This shows how much
money you are paying your hood and allows you to increase
or decrease the amount he or she is paid in an identical
manner to the hoods in the Lieutenants Section.
Click on the Hood Pay button to edit the pay of the
hood.
If the button is greyed out, it is because you cannot afford the
repairs or the building is not actually damaged.
Once the building is repaired, it will remain empty until
you send a hood to Run the Building, using the Run
Business. (See the Lieutenants Section at the star t of this
chapter.)
This opens a money roll, which shows how much money the
hood is currently being paid and how much they actually
want to be paid.
PAGE 58 GANGSTERS

As an alternative to repairing the site, you can choose to do
either of the following:
Set up another building
Sell the building
Leave it damaged
SETTING UP ANOTHER BUSINESS
Setting up another building is always an option for the site.
You can use the opportunity to set up a more profitable
building, if you so wish. (See the Lieutenants Section at the
start of this chapter.)
SELLING THE BUILDING
Selling the building, when it has been damaged, will only
generate a portion of the building’s value.
This is however an option to consider when you are short
on money. (See Giving Orders to your Businesses, earlier in
this section.)
LEAVING THE BUILDING DAMAGED
Leaving the building damaged is always an option. This
means none of your opponents can occupy the space and as
such forms a barrier. Unfortunately, large tracts of destroyed
areas can lead to slum areas, making all businesses in the area
less profitable.
Illegal businesses cannot operate behind damaged
buildings. They will cease trading and remain so until you
open the building back up again. (You cannot sell the front
until the illegal site has been sold.)
If the building is destroyed, the space it occupied instantly
becomes empty land. When this occurs, you no longer have
the option to repair the building, but just to perform one of
three other options:
Set up another building
Sell the land
Leave it destroyed
These are the same as for destroyed buildings, except that the
sale value is based purely on the value of the land.
As with damaged buildings, illegal businesses cannot
operate behind destroyed buildings.
They will cease trading and remain so until you open the
building back up again. (You cannot sell the front until the
illegal site has been sold.)
GANGSTERS PAGE 59

GAME OPTIONS
The final section in the Gang Organizer is the Game
Options.
Click on the Game Options Tab to access the Game
Options.
The Game Options Section is where you can access the
various available game options:
Objectives
Load Game
Save Game
Music and Sound Volume
CD tracks.
Quit
LOAD GAME
The Load Game button opens the list of saved games in the
space to the left of the Section. Each game is located within
a Game Slot.
Click on the Game Slot that contains the desired game.
A cheque will appear, giving details of the game.
Click on the tick to load the game.
Click on the cross to cancel the selection.
Once the game has loaded, you will be left in the Game
Options Section.
Click on the desired Section tab to exit the Game
Options Section.
SAVE GAME
Click on any of the buttons to select the desired function.
OBJECTIVES
This button opens a window that displays the game
objectives. The window also includes how far each Gang
Leader is towards reaching the objective.
The Save Game button opens the list of save game slots in
the space to the left of the Section.
Click on the Game Slot if you wish to save the game.
A cheque will appear, suggesting a suitable name for the
game to be saved. If you want to change the name of the
game to be saved
Click on the suggested name.
Delete the suggested name, and type a name of your
choice.
Hit Return on your keyboard to confirm the name.
The game will now be saved with the name you have given it.
Click on the tick to confirm saving.
Click on the cross to cancel the save.
Once the game has been saved, you will be left in the Game
Options Section.
Click on the desired Section tab to exit the Game
Options Section.
PAGE 60 GANGSTERS

VOLUME SETTINGS
This button appears in the center at the bottom of the
Section and allows you to set the volume of the music and
sound effects.
Click on the Volume Settings button to open the volume
sliders
This causes a window to appear. The window contains two
sliders. The first slider is for the speech and sound effects,
whilst the second varies the volume of the music.
To increase or lower the volumes
Click and hold the mouse pointer on top of the slider.
Drag the slider up or down, to increase or decrease the
volume respectively.
The top two buttons allow you to turn on and off an ambient
track for the Working Week and the Gang Organizer. If you
switch off any of the ambient tracks, the window below
becomes available.
Click on the top left button to toggle the ambient track
on and off for the Working Week.
Click on the top right button to toggle the ambient track
on and off for the Gang Organizer.
The window contains the list of tracks available from the
CD.
Click on any track name to select it in the player.
The buttons below the track list allows you to select how to
play the tracks:
Click on the Random button to play tracks randomly.
Click on the Continuous button to play the tracks in
order.
Click on the Repeat Play to play the same track
continuously.
The random and continuous options all start with the
selected track, whilst the repeat track option plays the
selected track continuously.
QUIT
The Quit button displays the Quit Game Options.
Click on Quit Game Options to display the
Quit options.
To test the volume of the sound effects
Click on the Play Sample button below the sound effects
slider.
CD TRACKS
This button appears to the right at the bottom of the Section
and allows you to set the music to be played in both the
Working Week and the Gang Organizer.
This Section contains three buttons:
Restart this City
Start a new City
Quit Game
Click on the Restart this city button to take the current
game back to the beginning. You will be in the same City,
with the same people and starting conditions.
Click on the Start a New City button to start a new game
with the same setup options, but in a new City.
Click on the Quit Game button to take you
back to the Main Menu. From here, you can set up and
begin a new game of Gangsters, or leave the game
Click on the CD Player button to open the CD window.
altogether.
GANGSTERS PAGE 61

THE CLIPBOARD
The Clipboard is available as a directory of all the people and
places that you know.
Click on the Clipboard button to open the Clipboard.
At the bottom right of the Clipboard are two buttons:
People.
Buildings.
Click on People to view the list of people’s names.
Click on Buildings to view the list of building types.
People is normally the selection visible when you first access
the Clipboard. Some orders only allow the use of one Section
and on these occasions it is only the relevant Section that is
displayed when the Clipboard is opened.
PEOPLE
This section contains all the people in the city that you know
about and lists them by their occupations.
Dignitaries.
Police Officers.
FBI Agents
Gang Members.
Charity and Religious People.
Reporters.
Business Owners.
Citizens.
Each group also contains a number of filters. These are
displayed as a second row of buttons that allow you to access
specific people such as those business owners who have refused
to pay protection. All names are displayed alphabetically by
surname. All known Gangster names are shown in the color of
the Gang to which they currently belong.
Click on a name in the Clipboard to select a person.
Once a person has been selected their location is shown on
the map, provided that their whereabouts is known.
If there are more names in any list than the Clipboar d can
show on one Section, two red arrows will appear. The Up
arrow will show Sections of names that appear earlier in the
alphabet, the Down arrow those that appear later.
Click on the Up and Down arrows to view previous and
subsequent Sections of names respectively.
At the top of the Clipboard is a Search Box. This helps you
find people within a long list of names.
Type in the surname of the person that you want to find.
As you type the name in, the list of names is reduced to
match the letters you have already typed. Eventually, you will
be left with just the people with the surname of your choice.
Click on the desired name in the Clipboard to select a person.
BUILDINGS
Clicking on the third button allows you to view all the
buildings in the city that you know. The buildings are all
grouped by class:
Commercial.
Industrial.
Residential (Tenement Blocks).
Municipal.
Charities.
Illegal Businesses.
Empty Land.
The buildings can also be sorted by control; you have the
option to view the particular buildings within your own or
another Gang’s territory, or to view those that are nested in
“neutral” territory. All buildings are displayed alphabetically.
Click on a building type in the Clipboard to display the
locations of the selected type on the map.
If there are more types in any list than the Clipboard can
show on one Section, two red arrows will appear. The Up
arrow will show Sections of building types that appear earlier
in the alphabet, the Down arrow those that appear later.
Click on the Up and Down arrows to view previous and
subsequent Sections of building types respectively.
At the top of the Clipboard is a Search Box. This helps you
find a particular building type within a long list.
Type in the type of building that you wish to find.
As you type the name in, the list of buildings is reduced to
match the letters you have already typed. Eventually, you will
be left with just the one building.
Click on the building type in the Clipboard to view the
positions that the building is situated.
USING THE CLIPBOARD WITH ORDERS
The Clipboard can be used with the orders of the
Lieutenants, Accountant and the Lawyer. (See the
appropriate section.)
When the clipboard is used, only the people and places that
are valid targets for the particular order type are displayed.
The Clipboard operates in the same manner in all other
respects
PAGE 62 GANGSTERS

RESOURCE
As a crime lord, you need to balance your resources effectively. These resources are the men and women you
employ and the vehicles and weapons you possess. In Gangsters, you have a cache, or set of r esources, for each
of these three commodities.
You do not need to allocate weapons or vehicles to individual people, just as you do not have to give orders
to the individual Gangsters. You can give hoods, weapons and vehicles to the Lieutenants and they will sort
out the right resources for the tasks allocated.
The three resource buttons appear at the bottom of the Reports Panel.
The three resources available are
Pool
Vehicles
Weapons
Each of these changes the layout of the right side of the current Section, such that you can apply the
resources directly to the Lieutenant, Accountant or Lawyer displayed to the left.
GANGSTERS PAGE 63

POOL
Click on the Pool button to view the available hoods in
the pool.
Click on the Pool button again to close the Pool.
This contains the list of hoods who have not been allocated
to any team. They are shown in the Resources Details Panel.
In here will also appear the hoods from teams who have
previously belonged to a team, but have lost their Lieutenant
through death, demotion or dismissal.
The hoods in the pool show the following details:
Their face
Their name
Their rating in the skill currently
selected in the Skill Panel.
The amount of money
they want to be paid
The amount of money you are actually paying them
The row of stars vary in number from half a star up to five
complete stars. These stars are linked to the buttons to the left
of the hoods and indicate the ability of the hoods at the different
skills. One of the hoods will have a red border around their face.
This is the currently selected hood and their details are displayed
at the bottom of the page. If any member of the team has been
kidnapped or arrested, they are shown as a person tied to a chair
or a face behind bars respectively. If you have several hoods in
the pool, you may see a red arrow to the right of the hood’s faces.
This will be pointing down and indicates that you have more
hoods that you can view on subsequent pages.
Click on the re
This displays the next hoods in the list. If you start viewing
these, a red Page Up arrow also appears, which takes you
back up the list and is operated in the same way as the Page
Down arrow. The buttons on the Hoods Panel allow you to
sort the hoods in the pool into order by any skill you wish.
Click on the skill by which you wish the hoods to be sorted.
This will rearrange the hoods, such that the hood with the
highest value is always at the top of the first page. The
hood with the lowest value will be shown at the bottom of
the last page. The details of the currently selected hood,
shown below the faces of the hoods themselves, can be
changed to show the skills of any of your hoods.
Click on the face of any hood currently visible to
change the selected hood.
The red border will move to highlight the selected hood’s
face and the sheet of attributes is updated. At the side of
the piece of paper is a set of five buttons. These allow you
to perform the following functions on the hood:
Sack them.
Kill them.
Promote them to the rank of Lieutenant.
Move a hood over to the team of the Lieutenant
currently displayed at left.
Edit their pay.
d arrows to view additional hoods.
SACK HOOD
If you Sack a hood in the pool, the character is returned to the
streets and is available for recruitment for all Gangs. The
hood always becomes aggressive towards you and is much
more inclined to attack your Gang members upon sight. A
window is always displayed, asking you to confirm the action.
Click on the Sack Hood button to sack a hood.
Click on the Yes button to confirm the sacking.
Click on No to reject the action.
KILL HOOD
Choosing to Kill the hood is an alternative. Doing this does
not lead to an investigation, since the police do not hear
about it, but it does result in your hoods becoming nervous
and a bit restless. A window is always displayed, asking you
to confirm the action.
Click on the Kill Hood button to kill a hood.
Click on the Yes button to confirm the killing.
Click on No to reject the action.
HINT
Try to avoid this action as much as possible!
PROMOTE HOOD
In order to Promote a hood, you must have at least one free
Lieutenant tab.
Click on the Promote button to turn the selected hood
into a Lieutenant.
SEND TO ANOTHER TEAM
This button moves the selected hood into the team of any
Lieutenant that is currently displayed to the left of the pool.
You can only move a hood if you have a Lieutenant currently
displayed at the left and that Lieutenant does not already
have ten people in his or her team.
Click on the Send to Other Team button to move the
hood into the displayed Lieutenant’s team.
Alternatively, you can drag the character over to the left.
If you find that a hood’s name is shown in red, it means
that the hood is not especially happy with the way he or she
has been treated recently and is demanding more money. The
Hood’s Paybutton allows you to keep your hoods happy; you
can increase or decrease their pay as much as you like.
HOOD’S PAY
Click on the Hood’s Pay button to edit the pay of the
hood.
This opens a money roll, which shows how much money the
hood is currently being paid and how much they actually
want to be paid.
Click on the Increase Paybutton to increase the hood’ s pay .
Click on the Decrease Paybutton to reduce the hood’s pay.
Click on the tick on the money roll to confirm the changes.
Click on the cross on the money roll to reject the changes.
HINT
Small pay rises are accepted gratefully by your hoods, small decreases ar e not!
PAGE 64 GANGSTERS

VEHICLES
Click on the Vehicles button to access the Vehicles Page.
Click on the Vehicles button again to close the Vehicles
Page.
Vehicles are available to your Lieutenants, your Accountant
and your Lawyer. The vehicles in your vehicle cache are
always shown in the Resources Details Panel. Vehicles
allocated to your Gang members are shown in the Team
Details Panel, the Accountant Details Panel and the Lawyer
Details Panel respectively.
There are three vehicle types displayed on the right:
Coupe
Truck
Speedster
Any of the three types of vehicle can be given to a Lieutenant,
the Accountant or the Lawyer. The character will then use
them as he or she sees fit.
Click on the Give Vehicle button to pass a vehicle from
your vehicle cache to the selected character shown in the
Details Panel.
Click on the Select Vehicle button to pass a vehicle back
from the selected character to your vehicle cache.
Note: Alternatively, you can drag and drop the vehicles to and
from the selected character.
Each time you pass any vehicle to and from a character, the
indicator denoting the number of vehicles he or she possesses
increases and decreases. (This indicator is below the
character’s surname, at the top left.)
BUYING EXTRA VEHICLES
If you find that you require additional vehicles, these must be
purchased.
Click on the Vehicle Purchase button at the bottom
right of the Vehicles Page to enter the Vehicle Purchase
Screen.
The Vehicle Purchase Screen contains the three types of
vehicle, on a piece of paper torn out of a catalogue.
Click on the vehicle picture to select the vehicle type to
be purchased.
The vehicle selected will be highlighted and your money roll
will appear. The money roll displays the cost of the vehicle
and the total amount of money you have.
Click on the tick on the money roll button to purchase a
vehicle.
Click on the cross on the money roll to cancel the
purchase.
Buying a vehicle will cause one vehicle of the selected type to
be purchased and given to the displayed Lieutenant. The
money is automatically deducted from your safe.
You can also sell vehicles in the Vehicles Purchase Screen.
This is a reversal of the purchasing process.
Click on the Select Vehicle button alongside the vehicle
type to be sold.
The money roll changes to show the resale cost of the vehicle.
This is always 50% of the price you paid for it.
Click on the tick on the money roll to sell the vehicle.
Click on the cross on the money roll to cancel the sale.
Confirming the sale will cause one vehicle of the selected type
to be sold and removed from the displayed Lieutenant. The
money is automatically added to the money in your safe.
Note: Buying and selling vehicles can also be performed by
dragging and dropping the vehicles from one side to the other.
GANGSTERS PAGE 65

WEAPONS
Click on the W eaponsbutton to access the Weapons Page.
Click on the Weapons button again to close the Weapons
Page.
Weapons are only available to your Lieutenants. The
weapons in your weapons cache are always shown in the
Resources Details Panel, while the weapons allocated to your
Lieutenants are shown in the Team Details Panel. Knives
and baseball bats are never shown: These weapons are used
by your hoods for close combat and are supplied by the hoods
themselves. You only have to concern yourself with their
firearms and explosives.
There are six weapon types displayed on the right:
Twin pack pistols
Tommy Gun
Rifle
Shotgun
Pistol
Explosives
Any of the six types of weapon can be given to the currently
selected Lieutenant, who will then use them as he or she sees
fit.
Click on the Give Weapon button to pass a weapon from
your weapons cache to the Lieutenant.
Click on the Move/S ell Weapon button to pass a weapon
back from the Lieutenant to the weapons cache.
Note: Alternatively, you can drag and drop the weapons to and
from the Lieutenant.
Each time you pass any weapon except explosives to and from
a Lieutenant, the indicator denoting the number of weapons
he or she possesses increases and decreases. (This indicator is
below the Lieutenant’s surname, at the top left.) Explosives
are not considered in the total because they are not reusable.
In addition, if you give a bomb order to a Lieutenant who
does not possess any explosives, they will always try to take
some from the weapons cache.
BUYING EXTRA WEAPONS
If you find that you require additional firearms or more
explosives, these must be purchased on the Black Market.
Click on the Black Market button at the bottom right of
the Weapons Page to enter the Black Market.
The Black Market contains the six types of weaponry, on a
piece of paper torn out of a catalogue.
Click on the weapon picture to select the weapon type to
be purchased.
The weapon selected will be highlighted and your money roll
will appear. The money roll displays the cost of the weapon
and the total amount of money you have.
Click on the tick on the money roll to purchase a weapon.
Click on the cross on the money roll to cancel the
purchase.
Buying a weapon will cause one piece of the selected weapon
type to be purchased and given to the displayed Lieutenant.
The money is automatically deducted from your balance.
You can also sell weapons on the Black market. This is a
reversal of the purchasing process.
Click on the Buying Extra Weapon button alongside the
weapon type to be sold.
The money roll changes to show the resale cost of the
weapon. This is always 50% of the price you paid for it.
Click on the tick on the money roll to sell the weapon.
Click on the cross on the money roll to cancel the sale.
Confirming the sale will cause one weapon of the selected
type to be sold and removed from the displayed Lieutenant.
The money is automatically added to the money in your safe.
Note: Buying and selling weapons can also be performed by
dragging and dropping the weapons from one side to the other.
PAGE 66 GANGSTERS

GOODS
There are three types of Goods in Gangsters:
Liquor
Stolen goods
Counterfeit money
All of the goods types are ways of making huge amounts of
profit, but they are also all illegal.
Most businesses can store one or more type of the available
goods, and the stock held is shown in the Building Details
Window for each business that you have either bought,
extorted or explored.
LIQUOR
Liquor is a necessity for your speakeasies, which in turn
return a huge profit for a regular supply. Speakeasies are
second only to casinos when it comes to making illegal
money , and the city can support many more speakeasies than
it can casinos.
Although you can steal liquor from an opponents stills,
speakeasies or warehouses, the safest thing to do is to produce
it using stills. Stills are an illegal business and requir e a front,
but otherwise they cost little and can produce huge quantities
of illicit alcohol.
Cases of liquor are automatically distributed around your
speakeasies by trucks. Any surplus is taken to any warehouses
that you own, from where they can be retrieved in times of
shortage or exported if you so desire.
COUNTERFEIT MONEY
Counterfeit Money can be stolen from your rivals or
produced on your own presses. Once you have obtained or
produced the illegal currency, it is distributed around your
legal businesses for handing out with change to the members
of the public.
Any money that cannot be distributed is stored in the first
available warehouse for later distribution or export.
EXPORTING GOODS
A Warehouse becomes useful if you intend to deal in illegal
goods. The Warehouse can safely store up to 300 cases of
liquor or stolen goods, plus a further 15 cases of counterfeit
money. Excess goods can be stored here and either retrieved
at a later date or exported.
Exporting goods involves trucks moving the goods from
the warehouse to either the Docks or the Railroad Ter minal,
from where they are sent outside the city. This can be a good
way to obtain large amounts of cash, but the money you
receive is always less than the amount you can receive selling
the goods within the city. Another risk is that the FBI are
always interested in warehouses, and you can lose a large
amount of potential wealth in a single raid.
Turn to page 39 for details of the Export order.
STOLEN GOODS
Stolen Goods can be taken from some business types. Goods
such as jewellery, furs and small trinkets can easily be loaded
by your hoods and distributed around your own jewellers,
pawn shops and other such businesses. The goods are then
sold to an unsuspecting public, bringing more money to your
empire.
If you are unable to fence goods, they are taken to the
nearest available warehouse for exporting.
GANGSTERS PAGE 67

LAUNCHING THE
WORKING
WEEK
Once you have viewed all the reports you desire and have issued all the orders you see fit, you have
then to start the Working Week.
Click on the button marked Hit the Streets! to begin the Working Week.
For more details on the Working Week, please turn to the following chapter.
ICON BAR
THE WORKING
WEEK
The Working Week begins when you have clicked on “Hit
the Streets”, in the bottom right corner of the Gang
Organizer. This will take you directly into the city, and
allows your hoods to begin carrying out the orders given to
them within the Gang Organizer.
It is vitally important that you remember to keep an
eye on the activities of your hoods and any other
Gangsters that appear. Enemy Gangsters may be out to do
you harm and the rival Gang leaders will almost certainly
be watching out for any clues as to your location.
Spotting enemy Gangsters will not be easy; they dress the
same as normal citizens and often do a spot of window
shopping to try to throw you off their scent.
THE WORKING WEEK
The first thing that you will see after starting the Working
Week is an isometric view of the block where your main
office is situated. This is the Street View. For further details
see The Street View, covered later in this section.
SCREENS
The Working Week allows you access to the three city screens:
The City Plan
The Rooftop View
The Street View
Any of these can be viewed at any time during the W orking Week.
SCROLLING AROUND A MAP
The map screens enable you to look around the city.
To scroll around the map
Click and hold the right mouse button.
Move the mouse in the direction you wish to view.
THE GAME CLOCK
At the bottom right of the screen is the
Game Clock. This runs from Monday to
Friday, and represents the amount of time
that has passed. The clock can also be used
to accelerate and decelerate the rate at
which time passes. For full details of the
clock, please refer to Accelerated Time on
page 77.
CLOCKSTREET VIEW
PAGE 68 GANGSTERS

THE ICON BARS
At the top of each of the available screen views you will see
two icon bars, stacked one on top of the other. These bars
contain most of the options for the current view, some of
which are common to all views. All of the buttons in the icon
bar are activated by clicking on them.
The bar at the very top contains the Exit button.
Click on the Exit button to leave the game.
Click on Yes to confirm exiting the game.
Click on No to return to the game.
If you confirm the action, you will be taken back to the Main
Menu. On the next row are the player options, the first eight
buttons of which are common to all map levels:
Pause
Help
City Plan View
Rooftop View
Street View
Center on Headquarters
Tagged Characters
Clear Tagged Windows
PAUSE
Click on the Pause button to pause the game.
Click on the Pause button to start time passing again.
You can still scroll around the map, change view and access
the buildings whilst the game is paused, but no people or
vehicles move.
HELP
Click on the help button to change the mouse into a help
cursor.
Click on the object about which you wish to know to
bring up a help window.
Click on the X at the top left to close the help window.
CITY PLAN VIEW
Click on the City Plan button to view the city from the
City Plan.
The City Planbutton allows you to instantly zoom out to the
highest altitude. A frame will appear around the area that you
were previously viewing. Using this screen, you can see the
greatest area of the city. This map is useful for its
information, shown as overlays, and its use in the rapid
navigation of the city.
The City Plan button will not be available if you are
already in the City Plan.
For further details, please refer to City Plan, on page 54.
ROOFTOP VIEW
Click on the Rooftop View button to select this map
level.
From the Str eet View, you will be taken straight to this map
level. A frame will appear around the area that you were
previously viewing. In the City Plan, a frame will appear
around the mouse pointer. This envelops the area that you
will see in the Rooftop View.
Click on the area of the city that you wish to view.
The Rooftop View is an intermediate level, where you can see
people and vehicles, and investigate buildings using the mouse.
This button will not be available if you are already in the
Rooftop View .
For further details, please refer to the Rooftop View, on
page 73.
STREET VIEW
Click on the Street View button to select this map level.
A frame will appear around the mouse pointer. This envelops
the area that you will see in the Street View.
Click on the area of the city that you wish to view.
The Street View allows you to investigate buildings, and
control your hoods. It is this level that all player controlled
combat takes place, and you are portrayed the highest level of
detail in the city . The Street View button will not be available
if you are already in the Street View.
For further details, please refer to the S treet View, on page 74.
CENTER ON HEADQUARTERS
Click on Center on Headquarters to scroll to your Main Office.
This action is instantaneous and results in the block
containing your Headquarters being positioned centrally.
TAGGED CHARACTERS
Click on Tagged Characters to open a list of your Gang
members that are currently on the streets.
The window also shows you the weapon that they are
carrying. You can also view the orders that your Gang
members are currently carrying out:
Click on the Ordersbutton to view your Gang member’ s orders.
Click on the Names button to view the names of your
Gang members.
Tagged Characters allows you to instantly locate any of your
Gang members that leave the offices. Please turn to Tagged
Windows, on page 78.
CLEAR TAGGED WINDOWS
Click on Clear Tagged Windows to close all the Tagged
Windows that are currently open.
This button simply removes any Tagged Character Windows
that are open on screen.
All other buttons are either unique to the particular map
view, or have a slightly different effect due to the elevation of
the view. These are covered in the relevant map views.
GANGSTERS PAGE 69

THE CITY PLAN
The City Plan is an overhead view of the city, viewed from
the highest altitude. In this map, you can quite clearly see the
layout of the city, although you cannot see finer details such
as the people and traffic.
Some of the blocks have additional icons over them.
These buildings are important to you as the player. This is
either because they are key targets, such as the main bank or
a department store, or are places to be generally avoided, such
as the police headquarters and the hospitals.
Click on the icon to see what the building type is.
The most important icons are those for the Gang
Headquarters, which are displayed as guns.
The set of buttons in the icon bar at the top are used for
player options, and for portraying information
about the city. The player options are the first
seven buttons, as defined in The Icon Bars above.
The other buttons will activate information
overlays. All information is displayed on or around the blocks:
Territory
Lieutenant’s Area
Controlled Businesses
Land V alue
Security
Hostility
Building Types
Crime Hot spots
Recent Events
Clear
Combat Messages
Gangsters and Police Messages
Failed Order Messages
Waiting and Priority Messages
Message Override
Note: Some of the overlays use a color scale.
You can find a key for the scale at the four corners of the map.
TERRITORY
The Territory button highlights all of the area you control,
in your Gang color. The known territory of rival Gangs is
also highlighted in their respective colors. The highlight
always appears around the blocks.
Click on the T erritory button to view the known territory
of all the Gangs.
LIEUTENANT’S AREA
The Lieutenant’s Area button is used to allocate blocks to
your Lieutenants. In Gangsters, you can allocate an area to a
Lieutenant, and leave them to look after actions such as
collecting protection and patrolling.
Click on the Lieutenant’s Area button to select the
current Lieutenant.
Bound the area of your territory that you wish to allocate
to the Lieutenant.
Alternatively, you can click on individual blocks.
Click on the Lieutenant’s Area button to confirm the
selection.
If the map is displayed full screen, the process is slightly
different
Click on the Lieutenant’s Area button to view your
Lieutenants in a window.
Click on the arrow next to the currently displayed
Lieutenant to view the list of all your Lieutenants.
Click on the name of the desired Lieutenant to select
them.
Bound the area of your territory that you wish to allocate
to the Lieutenant.
Alternatively, you can click on individual blocks.
Click on the Lieutenant’s Area button to confirm the
selection.
Areas that have already been allocated to a Lieutenant cannot
be given to or shared by another Lieutenant. You must first
remove the area from the jurisdiction of a Lieutenant before
you can give it to another. To remove blocks from a
Lieutenant’s area is simply a reversal of the above process.
Click on the Lieutenant’s Area button to select the
current Lieutenant.
Bound the area of your territory that you wish to remove
from the Lieutenant, or click on the individual blocks.
Click on the Lieutenant’s Area button to confirm the
selection.
The same rules apply when the map is displayed full screen.
PAGE 70 GANGSTERS

CONTROLLED BUSINESSES
The Controlled Businesses button uses a window to display
all the businesses that the player either owns or protects.
SECURITY
As your empire grows, it becomes imperative that you keep
an eye on where your hoods are positioned.
Click on the Security button to view the security of the
businesses that you know about.
HOSTILITY
When deciding exactly where in your territory to find
trouble, the Hostility overlay helps enormously.
Click on the Hostility button to view the hostility of the
business people in your territory.
BUILDING TYPES
Building Types is similar to the Controlled Businesses in
appearance, but has the effect of displaying all known
building types, including municipals, irrespective of whether
the player controls them or not.
Click on the Building Types button to view a list of all
the known buildings in the city.
Click on the Controlled Businesses to view the list of
business types that you own or protect.
Click on the button marked Owned to view the list of
business types that you own.
Click on the button marked Protected to view the list of
business types that you protect.
Click on the button marked All to reset the list.
Scroll bars and a search line are also present in the window.
This is another aid to finding a specific building type.
Click on the scroll bars to move through the list.
Type the name of the business type you wish to view in
the search line.
The search line matches your typing to a business type. You
do not need to type the whole name of the business type; the
list will attempt to match the business type with each
keystroke you make.
Click on any business type in the list to view their
position on the map.
The map highlights all the blocks that a business of the
selected type appears.
LAND VALUE
Land Value highlights the relative value of the land that the
blocks and locations are standing upon. Land Value is defined
by the block type and area, and is not affected by the business
upon it, unless it is a high value site such as a department
store or bank. The overlay uses a color scale to display relative
values.
Click on the Land Value button to view the value of the
blocks in the city.
Scroll bars and a search line are also present in the window.
This is another aid to finding a specific building type.
Click on the scroll bars to move through the list.
Type the name of the building type you wish to view in
the search line.
The search line matches your typing to a building type.
Click on any building type in the list to view their
position on the map.
The map highlights all the blocks that a business of the
selected type appears.
CRIME HOT SPOTS
As the action heats up, the Crime Hot Spots overlay
becomes ever more useful. At a glance, you can see if any
areas are receiving more than their usual quota of violence.
This may mean that two Gangs are in competition for the
area, and as such they are both being diverted away from
other areas.
Click on the Crime Hot Spotsbutton to view the scale of
crime throughout the city.
RECENT EVENTS
The Recent Events button is used to show the more
extraordinary events that have occurred in the previous week,
such as deaths and explosions.
Click on the Recent Events button to view the major
crime events of the previous week.
CLEAR
Click on the Clear button to remove all present overlays.
GANGSTERS PAGE 71

COMBAT MESSAGES
The Combat Messages button displays the list of combat
messages in the Message Box. When this button is flashing it
means that combat is currently taking place.
Click on the Combat Messages button to open the
Message Box and view the combat messages.
Right click on the Combat Messages button to center the
main window on the event
If the button is not flashing, right clicking will center the
view on the location of the most recent message.
GANGSTERS AND POLICE MESSAGES
The Gangsters and Police Messages button displays the list
of messages concerning the activities of enemy Gang
members, police officers and FBI agents. This button flashes
either when an enemy Gang member has been spotted, or
when the police or FBI are taking action against your empire.
Click on the Gangsters and Police Messages button to
open the Message Box at the reports about Gangster and
law enforcement activities.
Right click on the Gangsters and Police M essagesbutton
to center the main window on the event.
If the button is not flashing, right clicking will center the
view on the location of the most recent message.
FAILED ORDER MESSAGES
The Failed Order Messages button flashes whenever a
member of your Gang fails to complete a task.
Click on the Failed Order Messages button to open the
Message Box at the reports about orders that have not
been successfully completed.
If the button is not flashing, right clicking will center the
view on the location of the most recent message.
WAITING AND PRIORITY MESSAGES
The Waiting and Priority Messages button displays
messages from members of your Gang who are either waiting
to begin an order, or are just starting or completing a priority
order.
Click on the Waiting and Priority Messages button to
view the reports from Gang members waiting to begin
tasks and those carrying out priority orders.
Right click on the W aiting and Priority Messages button
to center the main window on the location of the Gang
member who sent the message.
If the button is not flashing, right clicking will center the
view on the location of the most recent message.
MESSAGE OVERRIDE
Setting the Message Override button will override the
message filters in the message box; accelerated time will not
slow down for any messages, although the buttons will still
flash as normal.
Click on the Message Override button to override all
decelerate time settings in the message box.
Click on the Message Override button to revert to the
settings in the message box.
For details of message icons and the Message Box, please
refer to Messages, in the section towards the end of this
chapter.
Right click on the Failed Order Messages button to
center the main window on the location where the order
failed.
PAGE 72 GANGSTERS

THE ROOFTOP VIEW
The Rooftop View is the view of the city from a medium
altitude. In this map, you can see the layout of the city and
the people and traffic. You can also investigate buildings from
here. The Rooftop View can be used to navigate close areas
of the city and to keep an eye out for intruders and to
investigate buildings.
The buttons and overlays in this map are identical to
those used in the City Plan, with the exception that
information is displayed for each location, rather than each
block.
WATCHING PEOPLE IN THE ROOFTOP VIEW
As you look around the city in the Rooftop View, you will
notice that there are tiny cars and trucks moving around, and
people walking the streets. Keep a careful watch on the colors
of the dots; the colors represent the character type.
• Red, green, blue or orange Gang Members
• Pale blue Police
• Black F.B.I.
• White Gangsters who do not
belong to any of the
four Gangs
• Brown Citizens
VIEWING BUILDING DETAILS AND GIVING ORDERS
Within the Rooftop View, it is possible to not only view the
details of buildings, but also to give orders to your businesses.
Click on a building to display its type.
Click on the type to open the Building Details Window.
HINT
If you are sure you want to know about the building before you
see what type it is, simply double click on the location to
immediately open the window.
The building window displays the known information about
the location selected. For most buildings at the start of the
game, this will be just the name and face of the owner, what
type of business they are running, and how trade appears to
be. Nothing more can be found without exploring or
extorting sites. Once a place has been explored, you can find
out extra details. These include how much profit the site
made, how the market situation for a particular type of
business is, and how many Gangsters or police are in the
building.
The greatest levels of information and options are found
from the businesses that you own. For further details on
businesses, please refer to Giving Orders to your Businesses,
located in City Maps in the chapter on the Gang Organizer.
HINT
Try using extortion to obtain information close to your office,
and exploration to start locating enemy and economic targets.
GANGSTERS PAGE 73

THE STREET VIEW
The Street View places you within the city itself. It is an
isometric view that displays all the people, vehicles and
buildings. Like the Rooftop View, you can investigate
buildings freely. In this view, the name of the road beneath
the mouse pointer is also shown at the top of the screen. This
can help you to locate places that you are interested in
finding again.
The buttons in the icon bar at the top are used for player
options and for navigating your way around the city. The
buttons used with the receiving of messages are also
available. The player options buttons are the first seven
buttons in the bar, as defined in The Icon Bars above. The
other options are two buttons that allow you to view the city
differently and help you navigate, plus the five buttons used
for messages:
Flip Screen
Lower Buildings
Combat Messages
Gangsters and Police Messages
Failed Order Messages
Waiting and Priority Messages
Message Override
You may prefer at times to have no buildings displayed; in
combat, it might be useful to be able to see your opponents
more clearly.
Click on Lower Buildings to remove the buildings.
Click on Lower Buildings to return to normal building
display.
MESSAGE BUTTONS
The message buttons perform the same function in the Street
View as they do in the City Plan. (See Page 54).
For details of message icons and the Message Box, please
refer to Messages, in the section towards the end of this
chapter.
WATCHING PEOPLE IN THE STREET VIEW
Most people and vehicles on the streets are innocent
bystanders. They are no threat to you or anyone else and can
be safely ignored.
Click on any person to view their name.
Keep an eye open for people who could be enemy Gangsters;
they could be carrying out orders against your empire.
FLIP SCREEN
The Flip Screen button can be used to view the far side of the
blocks in the city.
Click on the Flip Screen button.
Click on a city block.
The map will be reversed around the block that you next
click on. An indicator is displayed to show that the
orientation has been reversed.
Note: When you reverse the view, left and right also reverse!
LOWER BUILDINGS
The Lower Buildings button is a toggle that allows you to
define how the buildings are portrayed. You will see on this
level that the buildings you are looking at have their roofs
automatically removed as you scroll around. This is done so
that you can still clearly see the pavements, and the people
walking around.
Your Gang members will always have your Gang color at their
feet.
Hit key numbers 1 to 8 to view the groups of people in
your Gang.
Hitting key number 1 cycles through your first Lieutenant
and the groups in his or her team. The other keys will cycle
through Lieutenants 2 to 8 and their groups respectively.
Each key stroke centers the current view on the Lieutenant or
Gangster in charge of a particular group or order.
PAGE 74 GANGSTERS

Occasionally, your hoods or shopkeepers may spot people
who are less than welcome; police, F.B.I. agents and of course
other Gangsters. Whenever these people are spotted, a
marker is either placed at their feet, or on the roof of
the vehicle they are travelling in. The marker is color
coded:
• Red, green, blue or orange Gang members
• Pale blue Police
• Black F.B.I.
• White Gangsters who do not
belong to any of the
four Gangs
HINT
Keep an eye open for the Gangsters that do not belong to a Gang.
These people are usually looking for employment and are excellent
at their selected tasks. Hire them before somebody else does!
Should you see a Gang member that has a hand displayed
beneath them, this indicates that the character is waiting. If
the character is a member of your Gang, you can tell them to
continue with their orders using the Wait / Continue option
in the Tagged Windows. Another icon that you might see
below a Gang member is that of extending prison bars. If
you see the bars below a person, it indicates that they are
being arrested, or are already under arrest.
VIEWING BUILDING DETAILS
You can view building details in the Street View, in exactly
the same way as in the section on the Rooftop View. Please
refer to the section on the Rooftop View on page 73.
MESSAGES
Any time during the Working Week, you can receive
information from your teams concerning events as they
occur.
The information arrives as messages. These are situated at
the far end of the icon bar. There are five buttons associated
with the messages:
Combat Messages
Gangsters and Police Messages
Failed Order Messages
Waiting and Priority Messages
Message Override
Each time that a message for a particular category arrives, the
relevant message button will flash for five seconds and an
audible sound will be heard.
COMBAT MESSAGES
The Combat Messages button displays the list of combat
messages in the Message Box. When this button is flashing,
it means that combat is currently taking place.
Click on the Combat Messages button to open the
Message Box and view the combat messages.
Right click on the Combat Messages button to center the
main window on the event.
If the button is not flashing, right clicking will center the
view on the location of the most recent message.
GANGSTERS AND POLICE MESSAGES
The Gangsters and Police Messages button displays the list
of messages concerning the activities of enemy Gang
members, police officers and FBI agents. This button flashes
either when an enemy Gang member has been spotted, or
when the police or FBI are taking action against your empire.
Click on the Gangsters and Police Messages button to
open the Message Box at the reports about Gangster and
law enforcement activities.
Right click on the Gangsters and Police M essagesbutton
to center the main window on the event.
If the button is not flashing, right clicking will center the
view on the location of the most recent message.
FAILED ORDER MESSAGES
The Failed Order Messages button flashes whenever a
member of your Gang fails to complete a task.
Click on the Failed Order Messages button to open the
Message Box at the reports about orders that have not
been successfully completed.
Right click on the Failed Order Messages button to
center the main window on the location where the order
failed.
If the button is not flashing, right clicking will center the
view on the location of the most recent message.
WAITING AND PRIORITY MESSAGES
The Waiting and Priority Messages button displays
messages from members of your Gang who are either waiting
to begin an order, or are just starting or completing a priority
order.
Click on the Waiting and Priority Messages button to
view the reports from Gang members waiting to begin
tasks and those carrying out priority orders.
Right click on the W aiting and Priority Messages button
to center the main window on the location of the Gang
member who sent the message.
If the button is not flashing, right clicking will center the
view on the location of the most recent message.
GANGSTERS PAGE 75

MESSAGE OVERRIDE
Setting the Message Override button will override the
message filters in the message box; accelerated time will not
slow down for any messages, although the buttons will still
flash.
Click on the Message Override button to override all
decelerate time settings in the message box.
Click on the Message Override button to revert to the
settings in the message box.
THE MESSAGE BOX
Clicking on any of the four message buttons will open the
message box.
The Message Box displays the reports applicable to the
message button that was clicked, with the most recent
message first.
The Message Box itself is a small window, split into four
areas:
Message type
Message filters
Message
Message display options and details
The filters are initially set to on.
Click on the filter to deactivate it.
Click on the filter to activate it again.
MESSAGE
The center of the window displays the message itself. The
message is shown along with who is making the report and
where they are.
MESSAGE DISPLAY OPTIONS AND DETAILS
The bottom of the window contains the options and details
for the messages in storage.
At the bottom left are four buttons that allow you to cycle
through the messages:
Most recent message
Forward one message
Back one message
Earliest message
The two numbers at the center are the message counter.
These denote both the number of the message you have
selected and the number of messages in total that are
currently in the message box.
The two buttons at the bottom right consist of the View
Event button, and the Clear button:
Click on the View Event button to scroll to the location
where the event took place.
Click on the Clear Message button to delete the message
currently selected.
MESSAGE TYPE
The top of the window displays the type of message being
reported. This part of the window also contains the button
for closing the window.
Click on the X to close the window.
MESSAGE FILTERS
The four buttons below the Message type are the filters for
the message box. When switched on, these buttons will slow
accelerated time to the normal speed, allowing you to act on
the messages with more ease. There are four buttons; one for
each message type:
Combat Messages
Gangsters and Police Messages
Failed Order Messages
Waiting and Priority Messages
PAGE 76 GANGSTERS

ACCELERATED TIME
You will occasionally find that your Gang members have
completed all their important orders and are either heading
back for base or working on routine orders such as collecting
protection. In these situations, you may wish to accelerate
time to the end of the Working Week.
At the bottom right of the screen you will see the clock,
which tells you how far through the Working Week you are.
The top of the clock has two shoulders and an indicator
needle. These are for accelerating time.
Click on the right shoulder to accelerate time.
Click on the left shoulder to decelerate time.
The needle indicates the rate at which you are playing the
game, from normal through to maximum in five stages:
• Needle far left Normal
• Position 2 x 2
• Position 3 x 4
• Position 4 x 8
• Far right Maximum
The mouse is disabled in the latter two positions. To slow
time down again, you can either use the < key or you can
press both mouse buttons simultaneously. The latter action
will always reset the time to normal.
The arrival of messages can also halt accelerated time. If
you have any of the message filters set and the message
override is off, incoming messages will always slow time to
the normal rate, allowing you to act on messages as quickly
as possible. See the section on Messages, on page 75.
GANGSTERS PAGE 77

TAGGED WINDOWS
During the Working Week, you can keep an eye on your
Gang members using Tagged Windows.
Each of the windows shows a small
area of the city in the Street View,
with the selected character central.
Should the character walk behind a
building, the view in the Tagged
Window reverses to keep the
character in sight. A marker will also
appear to show that the orientation
has been reversed.
Tagged Windows appear at the top
of the screen and have the following
features:
Character Name
Close Window button
CANCEL ORDER
Click on the Cancel Order button to delete the order the
character is performing.
The Cancel Order deletes the order completely; any other
hoods on the order will also cancel the task.
WAIT/CONTINUE
This button is a toggle.
Click on W ait/Continueto tell the Gang member to stop
the order they are performing.
Whilst a character is waiting, a hand is displayed beneath
their feet.
Click on Wait/Continue again to tell them to continue.
This button is also used to instruct hoods to continue, if they
are on a Wait instruction given in the Gang Organizer.
If the character is a member of your Gang, the following
details are also displayed:
The Gang Member’s Order
Center View
Toggle Display
Cancel Order
Wait/Continue
Get out of Vehicle
Return to Base
CHARACTER NAME
The name of the character is displayed at the top of the
Tagged Window.
CLOSE WINDOW BUTTON
Click on the X at the top left to close the Tagged Window.
THE GANG MEMBER’S ORDER
The Gang member’s order is displayed below the icon bar,
which contains the remaining Tagged Window buttons.
CENTER VIEW
Click on Center View to center the main screen on the
character.
Note: The main screen never reverses when you use this button,
irrespective of the view in the Tagged Window.
TOGGLE DISPLAY
Click on the Toggle Display button to swap the view in
the window between Street View and Rooftop View.
In the Rooftop View, a small pulsing square is placed around
the character. This is displayed in the Tagged Window,
whether the character is inside a building or on the street.
GET OUT OF VEHICLE
Click on Get out of Vehicle to tell Gang members to
leave their transport.
Once hoods have left their vehicle, they will continue with
their orders on foot.
OPENING TAGGED WINDOWS ON YOUR GANG MEMBERS
Tagged Windows can be opened for your Gang members
using the Tagged Characters List.
Click on the Tagged Characters List to open the list of
people in your Gang that are on the streets.
The people shown to the left in the window are your
Accountant, Lawyer and the Lieutenants and Gangsters in
charge of other hoods and tasks. The Accountant and Lawyer
will have an icon alongside to show their role:
• Accountant Dollar sign
• Lawyer Scales of justice
The Gangsters and hoods will display the weapons they are
carrying alongside their name.
Note: Anyone that has recently died is shown with a cross next
to their name.
PAGE 78 GANGSTERS

The indented names in the Tagged Characters List are the
hoods serving under a Lieutenant or Gangster. They always
appear directly below the person they are serving under.
Click on any name to open a Tagged Window on the
selected character.
A scroll bar is present to the right of the window.
Click on the scroll bar to view the list of people in the
Tagged Characters List.
Below the names of your Gang members are two buttons:
People
Orders
PEOPLE
Click on the People button to view your Gang members
who are on the street.
ORDERS
Click on the Orders button to see the orders your Gang
members are currently performing.
To find who is performing a particular order:
Click on the scroll bar until you find the order.
Click on the order.
The Tagged Window will be opened on the Gang member
performing the order.
SELECTING PEOPLE FROM THE STREET VIEW
It is possible to open Tagged Windows on anyone from the
Street View, irrespective of who they are or where they are in
the city.
Click on the person.
This displays the person’s name in a small box.
Click on the person’s name.
This will open a Tagged Window on the character. An
alternative method to the above is to
Double-click on the person.
This opens the Tagged Window immediately.
GANGSTERS PAGE 79

STREET ORDERS
During the Working Week, it may be necessary to change
your hood’s current orders. This can occur when patrols need
to be diverted to attack intruders, or to send hoods around a
safer route before continuing with their normal orders. You
can do these actions using the Street Orders.
HINT
Be careful when giving instructions to the people in Tagged
Windows; some actions may result in the Lieutenants being
unable to complete their tasks for the week.
Before giving a Street Order, you must first of all select the
people to perform the action.
Click on an individual hood, or bound a group of hoods
to select the people to perform the Street Order.
Hold down the Control key and click or bound
additional hoods to add them to the selected group.
Click or bound selected hoods to remove them from the
selection.
The names of the all selected hoods will briefly appear above
their heads, and their colored floor indicators will pulse.
When you have selected your first hoods, an Order Box
appears. This box has five options:
Kill
KILL
The Kill order allows your hoods to attempt to permanently
remove enemy hoods, police and other troublesome people
you may find on the streets.
Click on the Kill button to instruct the hoods to kill the
selected target.
The mouse pointer will change to the Kill cursor.
Click on a potential target to see their name.
Click on the name of the target character to complete the
order.
Alternatively, if you are certain of your target:
Double-click on the target to select and confirm the
order.
The Order Box will disappear and the hoods will attempt to
kill the target using the weapon of their choice. This will
usually be firearms, but may involve knives and bats if police
are around. Once the target has been killed, the hoods will
resume with their previous orders.
ASSAULT
The Assault order allows your hoods to attack opposing
hoods without killing them and risking savage reprisals from
their boss. Assault inly disables the target for the remainder
of the current working week.
Click on the Assault button to instruct the hoods to kill
the selected target.
Assault
Tail
Go to
Cancel
The mouse pointer will change to the Assault cursor.
Click on a potential target to see their name.
Click on the name of the target character to complete the
order.
Alternatively, if you are certain of your target
Double-click on the target to select and confirm the
order.
The Order Box will disappear and the hoods will attempt to
assault the target. The assault will usually involve fists and
bats, but may progress to knives and guns if the fight
escalates. Once the target has been assaulted, the hoods will
resume with their previous orders. Any hood successfully
assaulted will head for home, ignoring any orders that the
Lieutenant tries to give them. They will still be able to
perform Street Orders, but only until they reach your base.
PAGE 80 GANGSTERS

TAIL
Click on the Tail button to instruct the hoods to follow
the selected target.
CANCEL
Click on the Cancel button to cancel the Street Orders.
The Order Box will disappear and the hoods will continue
with their previous orders.
The mouse pointer will change to the Tail cursor.
Click on a potential target to see their name.
Click on the name of the target character to complete the
order.
Alternatively, if you are certain of your target
Double-click on the target to select and confirm the
order.
The Order Box will disappear and the hoods will follow the
target until they either lose them, combat occurs or the
Working Week ends.
HINT
Using Tail is an effective way to keep an eye on
somebody, without taking the extreme actions of killing
or assaulting them.
GO TO
Click on the Go to button to instruct the hoods to go to
the next selected location and wait there.
The mouse pointer will change to the Go to cursor.
Click on the desired destination to complete the
order.
The Order Box will disappear and the hoods will head for
the selected destination. Once at the destination, the hoods
will Wait for fur ther commands.
Note: The Accountant and Lawyer can only use Go to and
Cancel.
For examples of how to use the Street Orders, please refer to
Tutorials 2 and 4.
HINT
All Street Orders affect the time left for the hoods selected to
complete their other orders. The best way to get round this
is to give Patrol orders in the Gang Organizer. These
consume the whole week, and therefore are not impacted
severely.
GANGSTERS PAGE 81

THE END OF THE GAME
Gangsters can end in 3 ways:
By completely dominating the city.
By achieving a particular goal.
By your failure.
Each of these ways affects your final
rating and consequent position in the
Hall of Fame.
Whether you win or lose, you are
always shown a short sequence to show
the outcome of the game, before being
graded for a final score and the Hall of
Fame.
WINNING THE GAME
Depending on the game type you are playing, there are a
number of ways to win the game:
FULL LENGTH GAME
In the full length game, you can win by achieving any of the
following:
Eliminate the other Gang Leaders
Be elected as Mayor
Succeed in going straight
The elimination of the competition is the technical term for
not only killing the rival Gang leaders, but also ensuring that
they have no chance of resurrecting under the leadership of
one of the old Gang’s Lieutenants. In order to do this, the
Gang must be crippled from three angles:
Manpower
Territory
Money
The successful destruction of all opponents results in the
highest award bonus for a full game. Should there be two
remaining Gang leaders, who are in a firm agreement to
divide the city, this is also classed as having successfully
eliminated the competition.
In order to become Mayor , the curr ent M ayor must either
be eliminated, or you must wait for the next election to be
called. In either case, you must be powerful, wealthy and
popular in order to stand a chance of winning the election.
Once an election has been called, the runners have six weeks
in which to increase their own popularity, whilst attempting
to decrease the popularity of their opponents. Up to six
people can be entered for an election, but each entrant must
have control over enough of an area to be recognised as a
contender. Successfully becoming the Mayor has an
intermediate win bonus, since it is not as hard to achieve as
eliminating the competition.
Going Straight is the easiest way to win. To do this, you
must have $250.000 of assets. You are not permitted to be
involved with any illegal businesses, or to trials in progress
against your Gang members. Going Straight is the easiest
win to achieve in a full game and subsequently has the lowest
win bonus.
SHORT GAMES AND SCENARIOS
Each of these has its own win condition. In order to achieve
the highest possible win bonus, you must either reach the
selected win criteria first, or eliminate the other Gang leaders.
LOSING THE GAME
Just as there are a number of ways to win the game, there is
also a variety in the ways to lose the game. Most lose
conditions adversely affect your win score, and consequently
your position in the Hall of Fame.
FULL LENGTH GAME
There are few ways to lose a full length game:
Be killed
Go bankrupt
Be sent to prison
Lose an election to a rival Gang leader
Just as you can kill the other Gang leaders, so they can also
kill you. You must always watch your back. Keep security
tight and never hesitate to respond to or instigate an attack
when the situation demands.
To go bankrupt is fairly difficult; Gangsters will always
accept half pay, or even no pay, up to a point. It is only once
they become exceptionally aggrieved that they will walk out
on you. Vehicles, weapons and businesses can all be sold to
release emergency capital when necessary, but once these
have run out, you are in trouble.
Being successfully prosecuted and sent to prison is
another way to lose. The crimes you will commit all reflect
on yourself, and the legal process may eventually catch up
with you. If you cannot afford to bribe the judge, or fix the
jury, you could be facing a long future doing hard labour.
Losing an election means that you were not powerful
enough to prevent your opponent becoming mayor.
SHORT GAMES AND SCENARIOS
The lose conditions for the short games and scenarios are the
same as those for the full length games, plus failing to be the
first to reach the win condition also automatically triggers a
lost game situation.
Note: Going Straight is not available in a Multiplayer game.
PAGE 82 GANGSTERS

SCORE
Once you have finished playing a game, you are
automatically awarded a score.
The score is derived from a number of factors which
judge your performance and is based on both your best levels
of achievement and your situation at the end of the game.
The score comprises of the following factors:
Whether you won or not, and the method by which you
won
The amount of territory held
The number of hoods employed
The amount of cash held
Once these values have been calculated, you are then totalled
to give a score out of 100.
THE HALL OF FAME
The Hall of Fame is the section where your score is compared
to those of previous games and crime overlords. The section is
accessed automatically at the end of every game, and can also
be viewed from the Main Menu options.
The first screen you will see is that of the Top Gangsters.
Click on the Next Best button to view the next eight
Gang Leaders in the Hall of Fame.
Here you will find the Gang Leaders who have not reached
the same heights as the top three.
Click on the Top Gangsters button to return to the first
screen in the Hall of Fame..
The two other buttons on the screens allow you to clear all your
entries on the Hall of Fame and to return to the Main Menu.
Click on the Clear button to remove your entries from
the Hall of Fame.
Click on Exit to return to the previous screen that you
were viewing.
This screen shows the names and faces of the Gang
leaders, along with a list of their achievements for empire and
crime.
GANGSTERS PAGE 83

MULTIPLAYER GAMES
To set up or join a multiplayer game, you need to access the
Multiplayer Screen.
Click on the Multiplayer Gamebutton, in the Main Menu.
In the Multiplayer Screen, you can
Change your face
Change your name
Change your Gang color
Establish a connection
Create a new game
Join a new game
CHANGING YOUR FACE
A default face is always displayed, but you may like to choose
your own face. There are a number of buttons to the left of
your face to do this:
Click on the top button to change the gender between
male and female.
Click on the buttons below the gender button to change
the nationality and traits.
Click on the last set to change the facial features.
CHANGING YOUR NAME
A default name is always displayed, but you may like to
change this. To change any of the names
Click in the name box
Type in your name
Hit Return
ESTABLISHING A CONNECTION
Gangsters supports Multiplayer gaming over most protocols
that support Directplay:
IPX LAN
TCP/IP LAN
Modem connection
Null modem serial connection
Internet
Click on the Connection box to view the connection types.
IPX/TCP LAN (LOCAL AREA NETWORK) NETWORK
Gangsters supports LAN play using both IPX and TCP/IP
protocols, for which you must have a compatible network
card and drivers. IPX and TCP/IP supports games for up to
four human players.
Click on IPX or TCP/IP in the connection box to
establish a connection.
When you have selected this type of connection, a window
will appear asking for the IP address of the Data Name
Server. The address only needs to be entered if you are
playing over a Wide Ar ea N etwor k (WAN). If you are playing
over a LAN, click on OK.
MODEM CONNECTION
Gangsters can be played by two people over a Modem
connection. For this type of game, both players must possess
a Windows 95 modem with a minimum baud rate of
28.8kbit/s. One player must also possess the opponents
telephone number.
Click on Modem from the connection type box to make
a connection.
You will be prompted to enter the telephone number of the
other player.
If you are initiating the call, enter the telephone number
of your opponent, and click on OK. If you are receiving
the call, click on Cancel.
The modems will now attempt to connect, and you should
follow any further on-screen prompts.
INTERNET
Up to four people can play Gangsters over the Internet. All
players must possess a suitable modem as stated above, and
be logged on to the Internet. The player who creates the
game must have given the other players his or her IP address.
Select Internet from the connection type box, to make a
connection.
When you select an Internet connection, you will be
prompted to enter the IP address of the player hosting the
game.
Click on Cancel if you are the host.
To enter another address, type the new number into the
box, then click on OK.
The game will now establish the connection between players.
Player’s names will appear in the Players window.
NULL MODEM SERIAL CONNECTION
Two people may play Gangsters using a serial connection, for
which you must have a suitable RS232 protocol Null-modem
serial cable.
PAGE 84 GANGSTERS

To establish a connection, select Serial from the
connection type box.
Once a connection has been successfully made, the name of
any games in progress or waiting to begin will appear in the
Available Games window.
CREATING A NEW GAME
When you create a new game, you automatically become the
host of that game. All other players can only join the game.
Once you have connected to the desired protocol, you can
create a game by using the following steps:
Enter the name of the game in the New Session N ame box.
This can be your name, or any other identifying name that
helps other players identify the game you are creating.
Click on Create Game.
The name of your new game will be displayed in the
Available Sessions window. Your name will also be displayed
with your selected color in the Playerswindow. A descr iption
of the game to be played can be viewed in the Description
Box at the bottom of the screen.
Click on the Game Options button to change the game
details.
The Game Options Screen for the multiplayer game is
identical to that for the single player game. Please turn to
page 30 for details of how to use this screen. When all the
players have joined
Click on Start Game to begin the game.
JOINING A GAME
In order to join a game, you must still have made a
connection. When you successfully make a connection, the
Available Games window will display the names of all the
games that are in progress or waiting to begin.
Click on the name of a game in the window to display its
details.
The Players window below will display the names and Gang
colors of the people in the game. You will also notice that a
description of the game appears in the Description Box.
If a game can be joined, the available Gang colors become
highlighted at the top of the screen.
SELECTING A GANG COLOUR
Click on the relevant button to pick a Gang color.
JOINING THE GAME
Click on the Join Game button to join the game.
You should then see your name and Gang color appear in the
list of players.
Click on Start Game to begin the game.
LOADING A SAVED MULTIPLAYER GAME
To load a saved multiplayer game, there are a number of
criteria and rules:
The same players must be in the game.
Each player must have the same name, Gang and Gang
color as before.
Each player must be on the same computer as when the
game was saved.
The same player must be the host of the game.
The game will not run unless all four of the above conditions
are met.
Click on the Load Game button.
This will take you to the Multiplayer Load Screen. The host
of the game must be the first person to load the game.
Click on a saved game to view its details.
The details are shown in the window below the list of saved
games.
Click on Load Game to select the saved game and return
to the Multiplayer Screen.
Click on Cancel to ignore the saved games and return to
the Multiplayer Screen.
In the Multiplayer Screen, the name of the loaded game, its
players and its settings will be displayed in the Available
Games and Players windows. You will also see that your Gang
color has been selected automatically, and no other colors are
available. As each of the other players joins, their color will be
allocated to them. When all the players have joined the game,
the Start Game button will become available.
Click Start Game to launch the game.
MESSAGES
At any time during a multiplayer game, players can send
messages to each other using the four function keys, F9 to
F12:
F9 is a general broadcast key , wher e the message is sent to
all other players.
F10-F12 sends the message to just one of your
opponents.
Clicking on any of the buttons opens a text window, within
which you can type your message.
GANGSTERS PAGE 85

Hit Return to send the message.
Click on the X at the top left of the window to cancel the
message.
The message is displayed in a window on the destination
player’s screens.
Click on the OK button to remove the window.
HINT
You can secretly agree diplomatic measures with other players
using the message box. This can avoid unnecessary bloodshed
and also allows you to be treacherous!
NOTES ON MULTIPLAYER GAMES
It is worth noting that multiplayer games have several
differences from single player game.
THE DENSITY OF THE CITIES
As previously mentioned, the density of the cities in the
multiplayer games is less than that for normal games. This is
to ensure that you spend less time building a financial power
base, and more time fighting the opposition.
LOADING A GAME
Multiplayer games can only be loaded from the Main Menu.
SAVING MULTIPLAYER GAMES
Multiplayer games are automatically saved at the start of each
Working Week. Players cannot manually save the game.
END GAME CRITERIA
In a multiplayer game, no players may attempt to Go
Straight or Run for Office.
LAST MAN STANDING
The game will automatically end when there is only one
human player left alive. Human players are not replaced
when they are out of Multiplayer games.
PAUSING AND MINIMIZING
Should any player pause or minimize the game, all other
players will be informed of this action.
PAGE 86 GANGSTERS

The following appendices list features of the game that are not
essential to read in order to play the game, but
do supply additional information that
may help you understand
in greater depth.
GANGSTERS PAGE 87

APPENDIX 1: PEOPLE
Each member of the population in Gangsters has their own
specific role. This role varies from being ordinary citizens and
business owners, through to the law enforcers and the law
breakers.
This appendix describes in brief the roles and traits of
each type of character, along with whom they affect and by
whom they are affected.
GANG LEADERS
The Gang Leaders are the
major characters in the
game. As the player, you ar e
one of the four that always
compete for dominance of
the cities. Gang Leaders are
ultimately responsible for
all the activities of their
Gang, and this is why the FBI agents spend their time trying
to put the Gang Leaders behind bars.
The ultimate role of the Gang Leader is to become the
master of the underworld. How this is achieved is up to the
Gang Leader in question. Ultimately the game can be won by:
Increasing your wealth
Increasing your manpower
Increasing your territory
using the extensive reports they can deliver. Orders and
reports are covered in more details within the Lieutenants
Section, in The Gang Organizer. Please refer to this section
for further details.
The major role of your Lieutenants is to allocate orders
to your hoods. The better the intelligence and organization
of your Lieutenant, the more accurate your Lieutenant will be
in predicting the amount of time each order will take. Poor
Lieutenants not only give themselves more time for orders,
but also try to avoid placing themselves in any form of
danger, even if they are the most suitable person for the task.
Lieutenants are also in charge of allocating vehicles and
weapons. They distribute these as they see fit, predominantly
giving the best of each to hoods on priority orders and those
orders covering long distances.
HINT
Try to ensure an adequate supply of weapons and vehicles.
Some orders are almost certainly doomed to failure if the hoods
performing them have no firearms or transport.
All the members of your Gang, including your Lieutenants, are
affected by their pay. Pay them enough, and they will be loyal.
Pay them insufficiently and all sorts of things can start to go
wrong, even to the extent that they will desert your cause.
Actions must be aimed at achieving one or more of the above
items. Gang Leaders need to spend time organising the
activities of their Gang members, and ensuring that these are
carried out effectively during the Working Week.
Ultimately, as a Gang Leader yourself, you will find the
best approach that suits you. You can affect just about
everyone and everything in the city, but it is up to you to
determine who, where, when and how.
LIEUTENANTS
Effective Lieutenants are
the elite of your forces. In
order to be effective, a good
Lieutenant needs a combination of intelligence and
good organization. It is also
desirable that they should
be highly effective in at
least one other area, such as firearms or stealth skills; the
more, the better.
Your Lieutenants are the characters to whom you give the
majority of your orders for the coming week. They are also
the people from whom you can read the results of the orders,
HOODS
Your hoods are your major
workforce. These people,
both male and female,
perform the majority of all
the actions in the Working
Week, from donating
money and patrolling, to
intimidating and killing
other people. (See Orders.)
These tasks are passed
down from the Lieutenants.
One factor that affects
hoods is their intelligence;
the more intelligent a hood
is, the more likely he or she
is to survive for any length
of time. A lack of intelligence can lead to major
problems, such as a hood opening fire on other Gang
members. This may not seem bad at first, but can be
disastrous, especially when you have a peace treaty with the
very Gang your hood has just attacked.
PAGE 88 GANGSTERS

GANG ACCOUNTANTS
Gang Accountants are the
characters responsible for
looking after your finances.
A major part of this is
attempting to cover up
your illegal income. Any
illegal money that the
Accountant cannot cover
will come to the attention of the FBI, who will respond with
raids and attacks on your businesses.
The Accountant can be given only two orders. The first is
to evade tax for you, whilst the other is to perform an audit.
(To keep an eye on any of your hoods that deal with money.)
The Accountant can also give various financial reports.
These cover items of general finance, the results of audits,
and also include lists of taxes evaded and people corrupted.
GANG LAWYERS
Gang Lawyers are the
characters responsible for
looking after the legal
issues.
Their major role is
performed automatically,
which is the defending of
your Gang members in court, trying to keep them out of jail.
The Lawyer can also be given orders, and is also the only
person able to corrupt official figures. He can bribe anyone
from the Mayor to individual Police Officers and can even
employ police if you so wish.
A Lawyer becomes mandatory, should you wish to enter an
election or attempt to Go Straight. Only he can steer you
legally through these actions.
The Lawyer can also give various reports, all of which revolve
around criminal or legal actions. Amongst these are lists of
criminals, crimes and corrupted people. A progress report for
any election that may be taking place is also included. These
reports help you keep watch on the legal issues, and give clues
as to when you should make your hoods lie low, or when it is
time to try and damage the reputation of a rival Gang Leader
with a campaign of violence in their territory.
THE MAYOR
The Mayor is the most
senior dignitary in the city,
and is also a person with
whom all Gang Leaders
must attempt to be on
good terms.
The Mayor works with the
Police Chief to bring
criminals to justice. Each week, the Mayor allocates officers
to the Police Chief, who then uses them to police the city.
The Mayor can affect the opinion of the Police Chief
about the Gang Leaders. Each week, the Police Chief begins
more and more to share the view of the Mayor. This is in turn
passed from the Police Chief to The individual officers.
Should a Gang Leader be especially active, the Mayor may
make a declaration in the newspaper. In it, he will name the
main culprit; should this be you, accept the declaration as a
warning.
The Mayor always defends his seat in an election, unless
he is killed.
The effect of the Mayor reaches throughout most of the
people involved in the legal process. Consequently, you
should consider making the occasional payment to this
character.
POLICE CHIEF
The Police Chief is the
person responsible for the
effectiveness of policing
through the areas of the city.
The more hostile he is
towards you, the more police
you will find per block in your territory, and the more willing
they will be to open fire on and arrest your hoods on sight.
The Police Chief affects each Police Officer’s opinions of
the Gang Leaders. Each week, the Police Officers gradually
take the same opinion as the Police Chief, which affects their
reaction to you and your hoods. This however takes time,
and can be countered with bribes and other actions.
Whilst the Police Chief affects the opinions of the Police
Officers, the Police Chief is himself affected by the Mayor.
POLICE OFFICERS
The Police Officers have many
roles, from patrolling areas and
guarding businesses, to
investigating crimes and
providing an escort for the
criminals being taken for trial.
The police are fully equipped combatants; do not expect them
to flee from combat if they outnumber your hoods. Even if
they do flee, it will only be so they can call for help with the
situation. Unwary or unlucky hoods may even find themselves
being arrested, if they are not careful with their actions.
Fortunately for the Gang Leaders, the police are every bit
as corrupt as their chief. They will usually accept bribes
without question. Should you so desire, the police may even
be employed with a regular weekly wage! This action can
provide an extra measure of security against arrest when your
hoods are caught red-handed.
Each officer has his own opinion of each of the Gang
Leaders. Whilst bribery and employment can reduce their
hostility towards you, they are ultimately affected by the
Police Chief, whose regular talks sway the officer’s thoughts
towards his own.
GANGSTERS PAGE 89

THE HEAD OF THE F.B.I.
The Head of the FBI is the
person responsible for the
network of information
used in the detection and
destruction of illegal
businesses. This character
must be treated with
extreme caution, since he is
incorruptible, and reacts to violence with an even greater
determination to crack each player’s illegal businesses.
The more capable the Head, the better the information
network functions, and the more businesses are shut down
around the city.
DISTRICT ATTORNEYS
District Attorneys, or DAs
for short, are the people
who see that your hoods
are successfully prosecuted.
In all trials, the end result
is inevitably a battle of skill
between your Lawyer and
the DA
The DA holds the list of witnesses and jurors for each
trial or court case for which they are the prosecutor.
Consequently , it is the DA that must be bribed if y ou wish to
view this list.
F.B.I. AGENTS
FBI Agents are the
workforce in the fight
against illegal activities.
Like the Head of the FBI,
all agents are incorruptible.
Bribes and donations have
no effect on these people.
The only thing that does
have an effect is violence, and this simply makes them hate
you more.
FBI Agents are given the task of finding illegal businesses
detected by the Head of the FBI. Once they are near a
business, they will search the area thoroughly. Should an
illegal business be found, they then try to organize a raid for
the following week.
More effective than police, the FBI Agents are a force to
beware if you should find them in your territory.
JUDGES
Each time that a member of
your Gang is sent for trial, a
judge is allocated to oversee
proceedings and to pass
sentence, should they be
found guilty . F ortunately for
the Gang Leaders, judges
are generally as corrupt as
most of the population.
As prominent members of
the community, one of the
judges will always enter
against the Mayor in an
election. Should an election
be called as the result of the
death of the Mayor, two
judges will enter.
REPORTERS AND EDITORS
Reporters appear in each
of the four Newspaper
buildings around the city.
Their role is to visit scenes
after crimes have occurred,
taking photographs and
issuing stories in the
newspaper at the end of
the week.
The Editors of each
newspaper exert their
influence over an extensive
area of the city, using their
powers to change people’s
opinions about each of the
Gang Leaders.
RELIGIOUS AND CHARITY LEADERS
The priests in their churches,
like the owner of the orphanage,
all work hard for the benefit of
the poor of the city . Whenever an
area becomes especially squalid,
they use the newspapers to
appeal for funds and issue thanks
whenever donations are received.
Each week, the priests all
denounce the causes of poverty
and crime in their sermon, whilst
at the same time praising those
who they feel are being beneficial
to an area. This in turn affects
the feelings of the Business
Owners and Citizens to each of
the Gang Leaders. Making
donations ensures that you are
looked on favourably.
PAGE 90 GANGSTERS

BUSINESS OWNERS
The Business
Owners of the
city are the men
and women whose
very livelihood
and existence
depends on the
money circulating
around the city.
their money is potentially your money, and it is up to you to
extort or purchase the best sites.
Business Owners form the electorate of the city, thereby
requiring you to have a good relationship with the public
should you wish to run for office. They also sit on juries
during court cases, where once again a good relationship can
make the difference between a prosecution and an acquittal.
Business Owners who are within your protection may be
extremely stubborn. If they are paying, they will expect good
service, and a succession of attacks from another source may
see them leaving your empire in droves. Those outside your
influence may also be stubborn in another way . These people
may refuse to pay protection in the first place, and might
even go as far as squealing to the police about your activities.
Business Owners are not only affected by bribes or violent
actions taken against them, but they are also affected by the
feelings of the local priests and reporters. Sermons from both
pulpit and the local newspaper serve to enforce an opinion on
the members of the public.
As a Gang Leader,
CITIZENS AND SNITCHES
Since they spend most of their time walking out in the
open, it is likely that a citizen might be caught up in a violent
or criminal activity. Should violence be present, they will
always run away. If a non-violent crime is being committed,
there is a chance that the citizen will see the act being
performed. If this happens, the possibility exists that the
citizen will stand as a witness for the police. Extreme law
abiding citizens may even squeal to the police, informing
them of both crime and culprit, thereby saving the police the
task of an investigation.
Like the Business Owners, citizens are also affected by the
feelings of the local priests and reporters.
A special type of citizen is the snitch. These people are
normal in every aspect, except for one: The snitches walk
from one Gang area to another, hanging around with hoods
and picking up information on Gang membership. This
Citizens are the people who spend their time walking around
the city, visiting different places and shops, spending money
and keeping the market fluctuating. They window shop, read
papers, hover around accidents and deaths, and perform all
the usual activities that you might see people doing on any
street.
GANGSTERS PAGE 91
information is then sold to the other Gang Leaders in the
Diplomacy Section. Please refer to the Diplomacysection of
The Gang Organizer for further details on using snitches.
There are only ever three snitches at one time.

APPENDIX 2: GANGSTERS SKILLS
The skills and abilities possessed by hoods always affect the outcome of the various orders you can
give in Gangsters. Whilst your Lieutenants automatically check the suitability of people for the
instructions they are given, it helps to know what qualities to look for when recruiting hoods.
INTELLIGENCE
Intelligence is important for
several reasons.
For your Lieutenants, intelligence
forms part of their ability to
allocate orders efficiently. For all
Gangsters, intelligence is used in
tasks such as bribery and
recruitment, where the character
has to overcome potential
situations with their ability to think on their feet.
ORGANIZATION
Organization is only used by
Lieutenants and Gangsters who run
businesses. It forms part of the
ability of the Lieutenant to allocate
orders effectively, and also partly
determines how productive a
Gangster is within one of your
businesses.
BUSINESS
Business is the most important
skill for Gangsters who are
running businesses for you.
The greater this skill, the more
money will be brought in by
the Gangster.
FIREARMS
Firearms is used for determining
the outcome of any combat, from
organized hits to random kills.
Firearms is one of the most useful
skills, but should be balanced by
other skills for the hood to be
worth employing.
HINT
Firearms and stealth are a good
combination of skills for a hitman.
FISTS
A hood with a good Fists rating is
useful for assault orders and close
combat.
KNIVES
A good Knives rating makes a
hood useful for quick, silent kills.
Try to avoid using them for
assaults, as they can be too
effective.
PAGE 92 GANGSTERS

ARSON
Arson is the ability of the
character to torch buildings. This
is distinct from explosives, in that
arson is less damaging. Arson is
also less expensive and has fewer
implications for the popularity of
the player.
DRIVING
A good driver is always valuable.
The higher a hood’s driving skill,
the better they can get out of
trouble, and the faster they can get
to other places for emergencies.
EXPLOSIVES
The key action for the instant
removal of building and possibly
owner. The explosives skill defines
how good the hood is at removing
whole sections of a block.
HINT
Look for explosives and stealth
when recruiting a bomber
INTIMIDATION
This is a key skill for the business
side of the empire. Hoods who are
good at intimidation are valuable
people, since they can establish
large amounts of protection
money. They can also be used to
bring unruly business owners and
citizens back in line without the
need for violence.
STEALTH
For any hoods making their way
into enemy territory, stealth is
essential. The more stealthy a
hood is, the less chance they have
of being recognised or spotted by
opponents, and the more easily
they can dodge bullets should
combat arise.
HINT
Stealth is vital. Any hood may be good at killing, but the ability
of the hood to remain undetected is just as important.
GANGSTERS PAGE 93

APPENDIX 3: WEAPONS
There are five types of firearms available for purchase in Gangsters. You may see Gangsters using
knives and baseball bats in the game, but these are supplied by the hoods themselves. Your only
concern is to give them the best equipment possible for the jobs you require.
THE PISTOL
The pistol is a basic 6 shot
revolver. You should try to equip
all your hoods with one of these.
Although it has the same
maximum range as the shotgun,
the pistol is only effective at short
range.
Cost: $100
THE SHOTGUN
The shotgun is a dedicated close
range weapon. This repeater is at
its most effective at close ranges.
Although it can reach further, its
power drops off rapidly. At point
blank range, it is the most deadly
of all weapons.
Cost: $750
THE TOMMY GUN
The Thompson Machine Gun, or
Tommy Gun as it became
affectionately known, is one of the
best weapons available in
Gangsters. T urned down at first by
the police, it was adopted
wholesale by the Gangster
community, and consequently
purchased by the police and the
F.B.I. as the only weapon available to counter another
Tommy Gun. What the Tommy Gun lacks in accuracy, it
more than makes up for with quantity, with 10 bullets
leaving the muzzle every second. It is able to out perform
most weapons at most ranges. The Tommy Gun is
correspondingly expensive.
Cost: $2000
THE RIFLE
The rifle has a much greater reach
than either the pistol or the
shotgun, and is more accurate than
either of them except for close up
work. A combination of rifles and
shotguns can deliver a devastating
amount of firepower. This is
probably the best solution for
patrols and hit squads until
Tommy Guns or the Twin Packs of pistols can be purchased.
Cost: $750
TWIN PACK PISTOLS
The Twin Pack of pistols is the
ultimate weapon. In the right
hands, these heavy automatics will
out perform every other weapon
available. Used correctly, they have
the same range and power as the
rifle and the Tommy Gun, and are
only bettered close up by the
shotgun. Shrouded in secrecy,
these weapons are rarely available, and must be snapped up at
every occasion.
Cost: $3000
EXPLOSIVES
Widely available on the Black
Market, the standard explosives
bundle is enough to remove most
buildings. The bundle is equipped
with a timer that can be set just
long enough for the experienced
user to deposit and escape.
These bundles are not to
be used by the inexperienced! In
the wrong hands, these can easily destroy the user as well as
the building.
Cost: $500
PAGE 94 GANGSTERS

APPENDIX 4: VEHICLES
There are three types of vehicles available for purchase in the game, plus an
additional vehicle in the police car, which is not available. They differ in their
speeds and abilities, and consequently their costs.
THE COUPE
A family vehicle, available to everyone who wants to take
their first steps into luxury motoring.
The coupé is the most common vehicle around, and
possesses an average performance.
Cost: $3000
THE TRUCK
THE SPEEDSTER
The ultimate in transport. These automobiles are seen few and
far between, due to the fact that they cost far more than most
people earn in a year. S peedstersare fast, manoeuvrable and are
ideal for those jobs that need to be completed in a hurry.
Cost: $5000
THE POLICE CAR
When special loads need moving, the truck is the beast of
burden to do it. The truck can transport large quantities of
people and goods. Its one downside is its speed; the truck is
barely able to stay ahead of people, let alone another vehicle.
These vehicles should be protected whenever possible.
Cost: $3000
The Police Car is not available to the public, be they
on the right side of the law or the wrong.
This vehicle is a standard coupé, fitted with more
power to give it the ability to catch any other vehicle
on the road.
Not for sale
GANGSTERS PAGE 95

APPENDIX 5: BUILDINGS AND BUSINESSES
There are different types of building in the cities. These all
serve a purpose, whether it is to sell goods, provide services
to the public or any other function. All the buildings can be
placed within a specific group, based on their function.
The various types are usually portrayed differently on the
City Plan and the Rooftop View. The buildings in the Street
View have very distinct appearances. The descriptions below
describe briefly the role of each building type.
The descriptions also contain several tips for success in
Gangsters; it is up to you to find them.
COMMERCIAL
The commercial buildings are all profit making businesses.
They are all at the mercy of market forces, and their profits
can consequently fluctuate. Some commercial sites make very
little money , ev en to the extent that some cannot cover much
more than the wages of a reasonable hood. A few exclusive
businesses break this rule, generating enough money to
potentially pay for a whole team. These are prime sites to
look out for and include Main Banks and Department Stores.
The commercial center is the area where most people
spend the week. Whilst this means that these areas make the
most money, it also means that robberies and violent actions
here generate the most witnesses.
It is up to you to decide which are the better commercial
businesses to buy, rather than extort. Whilst department
stores and banks are obvious choices, there are other types
that benefit from Gangster activity.
which is in turn reflective of the area. The better the area, the
more money they produce.
MUNICIPAL
The municipal buildings are the specialist blocks. They
provide services to the community, from education and care,
to policing and court cases.
You cannot set up municipal businesses; only the city can do
this. Be careful when your hoods are in the area of one of these
buildings! Damage or injury close to any of these buildings
always produces a negative response, whether it is a loss in
popularity, or the sudden arrival of large numbers of police.
CHARITY
The charity buildings serve as a means of expanding your
popularity. The churches and orphanages require funds, to
keep the people fed in times of need. Giving money to these
places increases your popularity. It is worthy of note that the
church leaders continuously preach to their congregation;
getting these people onto your side can only have good results.
Another way to improve your popularity is to set up soup
kitchens. These must be set up in commercial blocks, and
have the immediate effect of making you incredibly popular
with the local people. This must be offset against the fact that
this business costs money to maintain. Only close them when
you have little other choice; shutting down a soup kitchen
upsets the population.
INDUSTRIAL
The industrial businesses, like the commercial, have their
profits governed by the market forces.
The workers in the industrial sites all belong to the
unions. In the event of an election, the unions deliver a block
vote to the person that controls them.
WAREHOUSES
Warehouses are a special type of industrial business. They do
not make money , and can only be used for the storage of goods.
Without a warehouse, it is impossible to export any goods.
TENEMENT BLOCKS
Tenement blocks are by far the most common building.
They can be treated the same as any other commercial or
industrial business, since it is the owner of the building that
you can extort or buy out, and not the individual tenants.
The occupants pay rent based on the value of the block,
ILLEGAL BUSINESSES
Illegal businesses are the special reserve of the mob. These
businesses all occupy the central location of the blocks, and
require a front for them to operate. The illegal sites either serve
to make huge amounts of money , or to supply other businesses
with the means to make even more money.
Like all other Gang owned businesses, these require a hood
to manage them, and to keep an eye on the money. Unlike the
commercial and other legal businesses, even the poorest illegal
business can cover the pay of the hood.
Offices are a special type of illegal business. Unlike all other
illegal businesses, they do not make money or supply goods.
They serve instead as a starting point for your hoods in the
working week: Your hoods will always begin the working week
at the office closest to the location of their first order.
Operating an illegal business is a crime! Their very
presence attracts the attention of the FBI, with all the
associated problems you may experience whilst a member of
the law department is walking around your territory. Should
the FBI agent discover the site, you can expect a raid very soon.
PAGE 96 GANGSTERS

APPENDIX 6: SHORTCUT KEYS
Gangsters incorporates several short cut keys. These are available throughout the
game, and are used as a complement to the mouse actions, rather than replacing them.
THE GANG ORGANIZER
Help ?
Lieutenant Section F1
Accountant Section F2
Lawyer Section F3
Diplomacy Section F4
Newspaper F5
Graphs F6
City Maps F7
Game Options F8
Lieutenant 1 1
Lieutenant 2 2
Lieutenant 3 3
Lieutenant 4 4
Lieutenant 5 5
THE WORKING WEEK
Lieutenant 6 6
Lieutenant 7 7
Lieutenant 8 8
Open Clipboard C
Hoods Section H
Vehicles Section V
Weapons Section W
Confirm Return / Enter
Reject Escape
Load Game CTRL+L
Save Game CTRL+S
Messages.
(Multiplayer only)
Quit CTRL+Q
F9 to F12
Help ?
Pause P
City Plan Insert
Rooftop View Home
Street View Page Up
Toggle Street View / Rooftop View Space Bar
Cycle Gangsters from team 1 1
Cycle Gangsters from team 2 2
Cycle Gangsters from team 3 3
Cycle Gangsters from team 4 4
Cycle Gangsters from team 5 5
Cycle Gangsters from team 6 6
Cycle Gangsters from team 7 7
Cycle Gangsters from team 8 8
Accelerate time by one step >
Decelerate time by one step <
Remove / Replace buildings B
Kill Street Order F1
Assault Street Order F2
Tail Street Order F3
Go To Street Order F4
Cancel Street Order Escape
View Combat Messages F5
View Gangsters and Police Messages F6
View Failed Order Messages F7
View Waiting / Priority Messages F8
Messages. (Multiplayer Only) F9 to F12
Quit CTRL+Q
GANGSTERS PAGE 97

PAGE 98 GANGSTERS

CREDITS
HOTHOUSE CREDITS
Gangsters is based
on an original concept by
Peter Moreland & Rob Davies.
The mobsters running
the operation throughout were:
Game Design
Martin ‘Badger’ Capel
Programming
Jonathan ‘High Stakes’ Evans
Artwork
Andrew ‘Red’ Gibbon
Programming
Cei ‘Baby Face’ Gladstone
Artwork
Jason ‘Erebus’ Howard
Programming
Tim ‘Hanson’ Mann
Producer
Peter ‘Pedro’ Moreland
Artwork
Steve ‘Tidy’ Teague
Programming
Jon ‘The Enforcer’ Wakeman
Marketing
Martin ‘Carsey Boy’ Carr
Sound Effects by
Allister Brimble
Music composed and produced
Dave Punshon and Richard W ells.
I
Philip Morris Music and Voice Production.
n game speech by
Production of Cinematic Sequences by
Maverick Media.
HOTHOUSE CREDITS
The Gang would like to thank:
Rob and his band of Cutthroats, Steve and his
brood of Abominations, Gina Silman, Justin
Manning, Leigh Atley, Nathan Hook.
Adrian ‘Snakey’ Smith, Audra ‘Gunner’ Kirk,
Andy ‘Geezer’ Johnson, Charles Cornwall,
Charlotte ‘Da Babe’ De Baeza,
Darren ‘Dazza’ Hedges, David ‘Fluffy’ Burton,
Debbie ‘Luscious’ Lash, Flavia ‘Pitbull’
Timiani, Frank Parker, Grant ‘Fat Boy’ Dean,
Ian ‘Lucky’ Livingstone, Janet ‘Bombay’
Swallow, Jeremy Heath-Smith, Jo Nicklin,
John ‘Johnny D’ Davis, John ‘Kav’ Kavanagh,
Jonathan ‘Manilow’ Kemp, Jonathan Lees,
Jonathan ‘Petal’ Rosenblatt, Kirstie Milne,
Leah Owens, Lee ‘Badluck’ Briggs,
Mike McGarvey, Michael ‘The Suit’ Souto,
Nick ‘The King’ Davies,
Noel ‘Skip’ Shields, Paul ‘Gats’ Glancy,
Paul ‘H’ Hyslop, Rashon ‘Mac’ Chowdhury,
Ray ‘Rockin’ Smith, Rebecca ‘Pumpkin’ West,
Rose ‘Fifi’ Montgomery, Steve Hickman,
Steve ‘Power Ball’ Starvis, Tim Brion,
Toni Mount, Tony ‘ Whiskers’ Bourne.
Frank ‘Rack ’em’ Hom,
Gary ‘All World’ Keith, James ‘Pit Pip’ Poole,
Kelly ‘Baby Face’ Zavislak, Paul ‘Go Cal’
Baldwin, Susan ‘Golden Voice’ Boshkoff,
Tricia ‘Straight Edge’ Gray, Mike McHale.
Beco Mulderrij, Kay ‘Flowers’ Lankarany,
Knut ‘Vampire’ Bergel,
Rolf Duhnke, Sascha Green-Kaiser, Lars
Wittkuhn, Volker Rieck.
Florent ‘Dr’ Moreau, Patrick ‘Sauve’ Melchior,
Priscille Démoly, Stéphan Gonizzi,
Stéphane Cormier.
and all the hoods in Eidos QA.
EIDOS INTERACTIVE CREDITS
Producers
Andy Johnson (UK),
Frank Hom (US)
Senior Producer
Grant Dean
European Development Manager
Steve Hickman
Localisation Manager
Flavia Timiani
QA Manager UK
Tony Bourne
QA Manager US
Mike Mchale
Marketing Director
John Davis
Marketing Manager
David Burton
Marketing Executive
Rebecca West
Creative Services Manager
Rashon Chowdhury
Public Relations
Jonathan Rosenblatt
Special Thanks
John Kavanagh,
Rose Montgomery,
Lee Briggs, Michael Souto,
Steve Starvis, Nick Davies,
Will Jeffries (Maverick Media),
Nigel Barton (Maverick Media),
Robbie Burns Promotions,
A Creative Experience.
Packaging design man-handled and directed
by da mob at A Creative Experience
Frank ‘Legit’ Parker, Nat ‘Frenchy’ Foster,
Mark ‘Shoes’ Beevers & Quinton ‘Ladies’ Luck
GANGSTERS PAGE 99

If you require technical assistance, call the Technical
Support helpline on:
+44 (0)20 7928 9655
or fax
+44 (0)20 7261 0540
or e-mail us on
w e b m a s t e r@s o l d - o u t . c o . u k
TECHNICAL
SUPPORT
PAGE 100 GANGSTERS
 Loading...