

Customer Support:
www.3do.com/support, 650-261-3454, customer–support@3do.com
Monday-Friday: 9am-12pm; 2pm-5pm Pacific Standard Time
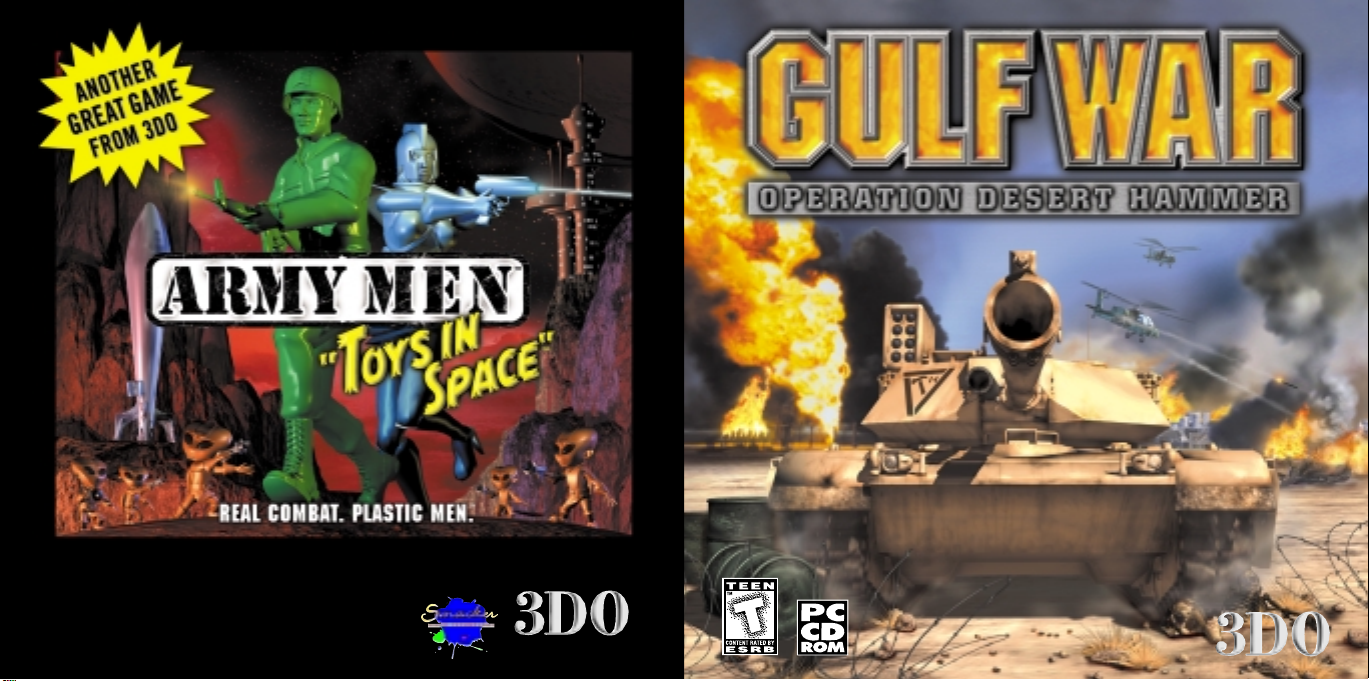
© 1999 The 3DO Company. All Rights Reserved. 3DO, Army Men, Real Combat.
Plastic Men., Toys in Space, Gulf War Operation Desert Hammer, and their respective
logos, are trademarks and/or service marks of The 3DO Company in the U.S. and
other countries. All other trademarks belong to their respective owners.
™
™
™
PMN-5047-001
© 1999 The 3DO Company. All Rights Reserved.
3
DO, Gulf War Operation Desert Hammer, and their respective logos, are trademarks and/or service
marks of The 3DO Company in the U.S. and other countries. All other trademarks belong to their
respective owners.
The software and related manual for this 3DO product are copyrighted. No portion of this product
may be photocopied, scanned, translated, reproduced, copied or reduced to any tangible or
electronic medium or machine-readable form, or publicly performed or displayed, without the
prior written consent of The 3DO Company. The owner of this product is entitled to use the software
and related manual for his or her own use, but is not entitled to reproduce and distribute any
copies of the software or manual to any other individual or entity; nor to rent or lease this product
or any copy thereof to any third party.
Uses Smacker Video Technology by RAD Game Tools, Inc. ©1994 – 1999
Military Channel is a registered trademark of Military Channel, Inc. All Rights Reserved.
TABLE OF CONTENTS
WELCOME TO THE WAR ....................................................2
RAMPING UP .............................................................3
BATTLEFIELD COMMAND ...................................................6
TACTICAL ADVICE ........................................................11
KEYBOARD REFERENCE GUIDE ............................................ 14
TAKING A BREAK ........................................................16
STARTING A SINGLE PLAYER GAME ........................................16
STARTING A MULTI-PLAYER GAME .........................................17
JOINING A MULTI-PLAYER GAME ..........................................18
PLAYING A MULTI-PLAYER GAME ..........................................19
CHANGING GAME OPTIONS ...............................................20
TROUBLESHOOTING INFO ................................................22
CONTACTING CUSTOMER SUPPORT ........................................28
™
WELCOME TO THE WAR
RAMPING UP
You have been commissioned into the newly formed U.N. Peacekeeping Forces
because you have shown extraordinary skill as both gunner and pilot, as well as
exceptional bravery and ingenuity under fire.
The M12 Hammer is the most advanced weapons platform produced by the free
world. It is fast, maneuverable, and can support multiple weapons systems within
its heavily armored chassis.
It can also use the OASIS (Operational Armor Stabilization and Integration System)
for re-building lost armor during combat operations. Due to the high thermal
signature of the OASIS system, it is hidden under small bodies of water. In layman’s
terms, move your tank into marked bodies of water to regenerate the shields.
OASIS locations are marked on the maps with palm tree icons.
The U.N. Alliance realizes that in order for your mission to be successful, you must
know the capabilities of the tools at your disposal. This training manual describes
the operation of the Hammer as well as contains other useful information such
as combat tactics. You may be able to take advantage of this information during
your campaign.
You carry the hopes of the free world on your shoulders, Commander. It is up to you
to finally eliminate the desert dictator and his terrorist army, now known as the
Federation of Militant Equal Nationalists (FMEN). Good luck!
-2-
This section provides the basic information you need to understand this manual and
install GULF WAR Operation Desert Hammer™ onto your computer. If you have difficulty
with installation or encounter problems during game play, see the
section.
BASIC CONCEPTS
MOUSE CONTROLS
Throughout this manual, left-click means you should move the mouse cursor to the
desired area of the screen and press the left mouse button once. To right-click means to
place the mouse cursor over the desired area of the screen and press the right mouse
button once. To double-click means to move the mouse cursor onto the desired area of
the screen and press the left mouse button twice in quick succession.
KEY COMMANDS
Whenever a keyboard shortcut or keystroke is mentioned in this manual, the key name
appears in bold, like this: Key.
GAME TEXT
Text set apart from the rest of the text by THIS font is spelled in this manual exactly as
it is in the game.
INSTALLING THE GAME
Place the GULF WAR CD into your CD-ROM drive. If you have the Autorun function
enabled, the installation screen should appear.Follow the on-screen instructions to
install GULF WAR.
-3-
Troubleshooting Info
If you have disabled the Autorun option or if it does not function correctly, open the
Windows ST
ART MENU, and select RUN. Left-click on BROWSE and choose the letter
of your CD-ROM drive from the list, then double-click on the file labeled set_up.exe.
Left-click on OK to begin installing GULF WAR; follow the on-screen instructions.
UNINSTALLING THE GAME
Open the Windows ST
ART MENU and select PROGRAMS. Left-click on 3DO, then left-click
on GULF WAR, and then left-click on UNINSTALL GULF WAR. To uninstall the game, follow
the on-screen instructions.
STARTING GULF WAR
Once you’ve installed GULF WAR, anytime you want to start a game, place the CD in the
CD-ROM drive. If you have the Autorun function enabled, a menu should appear. Left-click
AY to start the game.
on PL
If you have the disabled the Autorun option or if it does not function correctly, open
the Windows ST
ART MENU, and select PROGRAMS. Left-click on 3DO, then left-click on
GULF WAR and then left-click on PLAY GULF WAR to start the game.
CHOOSE YOUR CONFIGURATION
The first time you run the game, you will go into a CHOOSE YOUR CONFIGURATION screen.
This is the Version Wizard. Here you can choose to run the game in either “D3D”, “Glide” or
“Software” mode. If your system has a D3D compatible graphics card AND you are running
a processor that is 233MHz (P233) or faster, we recommend “D3D.” Otherwise choose the
“Software” option.
If you run the game in D3D mode, and your processor is slower than 233MHz, you will have
very poor performance (low frame rate) when running the game.
Gulf War will now use this configuration each time you play. To change it in the future,
open the Windows ST
ART MENU, and select PROGRAMS. Left-click on 3DO, then left-click
on GULF WAR then left-click on VERSION WIZARD GULF WAR to change the configuration.
MAIN MENU
There is an opening cinematic, introducing GULF WAR. To skip it, press a mouse button or any
key. After this cinematic the MA
IN MENU screen appears, with these options to choose from:
• Campaign
Brings up the single player campaign Options. For details, see
Player Game
.
Starting a Single
•Multi-player
Brings up the connection panel, from which you can JOIN
game. For details, see the section entitled
Starting a Multi-player Game
or CREATE a multi-player
in this manual.
• Options
Brings up the GAME OP
TIONS panel, from which you can configure GRAPHICS,
CONTROLS,AUDIO, and DIFFICULTY. This panel and its sub-menus are detailed under
Changing Game Options
.
•Exit
Returns you to your Windows Desktop.
•Credits
Select the CREDI
or a mouse button to exit the CREDI
TS button in the MAIN MENU to view the game credits. Press any key
TS screen and return to the MAIN MENU.
-4-
-5-
BATTLEFIELD COMMAND
This section details what to expect in the game. It includes an explanation of your
Hammer and the basics of waging war to accomplish your mission objectives.
MASTERING THE HAMMER
The Hammer is a cutting edge M12 tank. As a Hammer commander, you need knowledge
of piloting techniques, an intimate understanding of your HUD (Heads Up Display) readouts,
a fine grasp of your tank’s strengths and weaknesses, plus the courage to carry the fight
to the enemy.
THE CONTROLS
Note: For a summary of key and mouse commands, see the quick reference chart in
the center of this manual on pages 14-15.
Moving The Tank Around
At the start of a scenario, you are automatically placed behind the controls of your
Hammer. To move it, use the following keys:
= Move forward
= Move backward
Your Hammer always considers “forward” the direction your turret is currently facing;
by changing the direction you are “looking,” you change the direction of travel. You
change the direction your turret is facing by moving the mouse left, right, up, and down.
Your Targeting Reticle is located in the center of your view screen. Use the mouse to
move your Targeting Reticle over a target. Left-click to fire your Hammer’s chain gun and
right-click to fire the currently selected weapon. You can scroll through your available
weapons by pressing the Page Down key above the arrow keys.
Advanced Tank Controls
For advanced tank commanders, you may “unlock” the turret from the direction the tank
is facing. To do that, press the Delete key.
When you’re in this mode, the turret aims wherever the mouse is pointed. However, the
tank motion is controlled by the four arrow keys. and still move you
Forward/Backward and and turn you left and right.
Note: You can change the configuration of your game controls before you start the
game, see the section entitled Changing Game Options for more details.
-7--6-

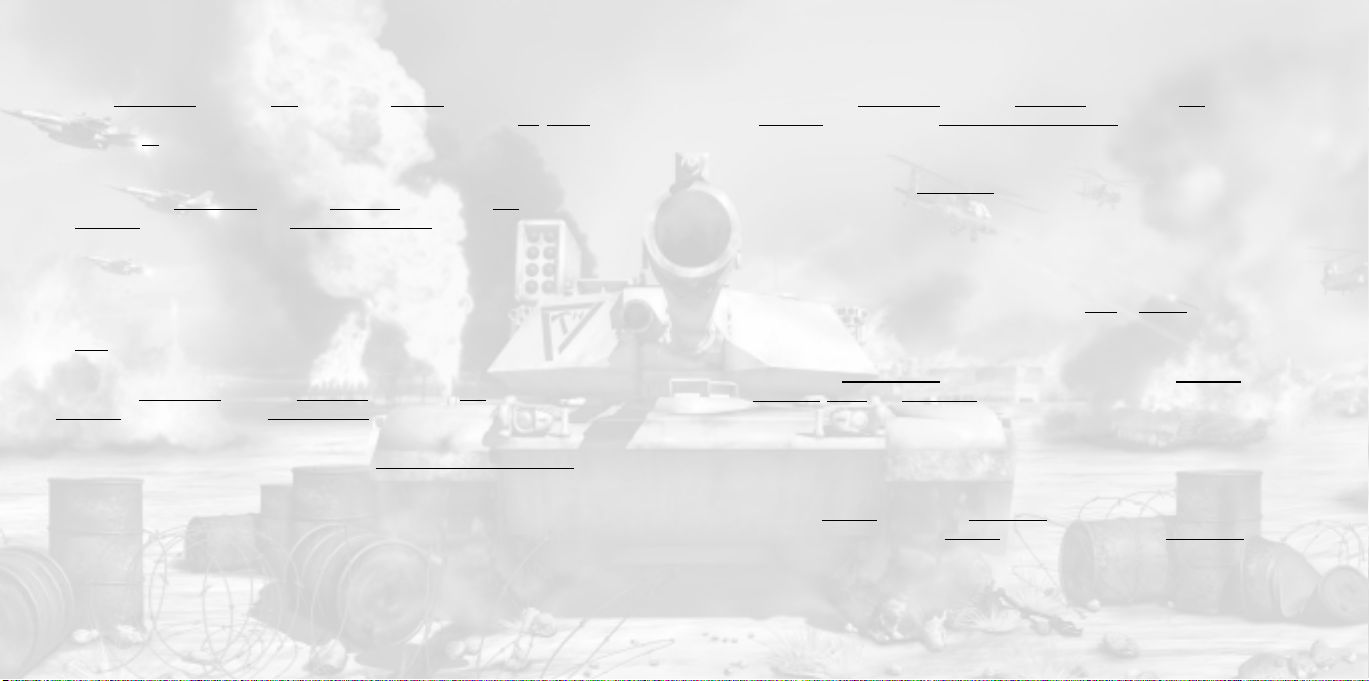
THE HUD
Your Hammer’s HUD is streamlined to provide only essential battlefield information.
Understanding this readout is crucial to success.
Active Strike Indicator
At the bottom left of your HUD is the Strike Indicator. It displays the possible strikes and
how many strikes you may deploy. To deploy a strike, center your reticle on an enemy
target, and press the key (on the numpad) to fire. Your strike system will mark the
enemy target with a green rectangle and automatically deploy the appropriate strike to
engage and destroy the marked target. The selected strike will highlight momentarily
on the Strike Indicator on the lower left of your HUD.
HEAT: This High
Explosive Anti-Tank
round will serve as
your workhorse.
Effective against all
targets, good range
and striking power.
SABOT: These are
the ultimate
armored vehicle
killers. They have
excellent range and
striking power but
work poorly on
buildings and soft
targets.
ATGM: This stands
for Anti-Tank Guided
Missile.
AAGM: This stands
for Anti-Air Guided
Missile. Great
chopper and enemy
jet killers. Nearly
worthless against
ground targets.
Hammer Armor Status Indicator
At the bottom center of the HUD is the Armor Status Indicator, displaying the current
strength of your armor. If your armor strength reaches zero, your Hammer is destroyed.
Active Weapon Indicator
At the bottom right of the HUD is the Active Weapon Indicator. The icon here represents
your currently selected weapon, and under the icon is the amount of ammunition
remaining for that weapon.
Targeting Reticle
The Targeting Reticle is located in the center of your HUD and is used to aim your weapons, as
well as deploy strikes. When the reticle is centered on a unit or structure, it will display
IFF (Identify Friend or Foe) for your target. If the target is an enemy, the reticle will turn
either Yellow or Red. Yellow if the target can be hit by strikes only, and Red if it can be hit
by strikes and weapons. If the target is friendly, the lines will remain Blue.
Radar
At the upper right of the screen is the Radar. It shows a partial overhead view of the
surrounding terrain, centered on your Hammer. All units are represented by colored icons.
Enemies
1. Red arrows represent enemy units.
2. Red squares represent enemy buildings.
Allies
1. All allies are Green
Waypoints
1. A small marks targets that should be destroyed in the current mission.
2. A marks the location of your OASIS.
3. A blinking diamond navigational point provides general directional guidance.
-9--8-

If a waypoint isn’t on the radar yet, it sits on the edge of the Radar, giving the
general direction of the waypoint.
TACTICAL ADVICE
STRIKE INDICATOR
NUMBER OF
REMAINING STRIKES
TARGETING RETICLE
ARMOR STATUS
-10-
ROUNDS REMAINING
FOR ACTIVE WEAPON
RADAR
ACTIVE
WEAPON
The M12 tank is a tanker’s dream. If you leave it in the open, the enemy will make it a
nightmare – then a coffin. Even the Hammer has limited armor. Be sure to keep moving!
Choose your weapons carefully as you have limited ammo and strike calls. Stay alert for
power-ups to re-supply your Hammer.
ESTABLISHING A FOOTHOLD
The first step in any mission is to understand what your objectives are. Pay close attention
to your mission briefing and all audio messages. They remind you of your goals and direct
you to new waypoints. Check your position on the map frequently by pressing End.
LIVING AND DYING
When (or if) you lose your tank, the camera will show you which enemy killed you.
To proce ed, press any key.
When you accomplish your mission, the camera will rise up and look down on your tank.
POWER-UPS
Along the way, you may be able to “liberate” supplies from your enemy to fortify your M12
Hammer. These supplies are frequently hidden inside of buildings or other objects. These
power-ups will look like this:
EXTRA AMMO EXTRA STRIKES EXTRA ARMOR
-11-

UTILIZING THE OVERHEAD SURVEILLANCE SYSTEM
Sometimes, it is necessary to look at the big picture. The Overhead Surveillance System
is the means by which to gain the overall lay of the land and orient yourself. The system
is accessed by pressing End. The topographical overlay takes up the majority of your HUD.
Units and structures, both enemy and friendly, are shown on the map and are differentiated
by color; enemies are in red while friendlies are in green. Waypoints are marked on the
Radar with a selection of three symbols. A small designates targets of that should be
destroyed in the current mission. A marks the location of your OASIS. Finally, general
directional guidance is provided by a blinking diamond navigational point. The player can
exit out of the system at any time by pressing Esc or End.
INFLICTING DAMAGE
Know your weapons, and use them. We didn’t come up with a bunch of weapons for
your Hammer just to keep our buddies in the private sector wealthy. Each one has its
strengths and weaknesses. Know the ranges and how much seeking each weapon has.
You’ll have to get closer t o use an ATGM on a very maneuverable target. Weap ons that
slug hard have smaller ammo limits, so save them for the important stuff. Don’t forget,
if you are firing at something directly, make sure you have the chain gun ( left mouse
button) going along with your other weapon to deal extra damage.
THE STRIKE SYSTEM
You have friends. Use on the numpad to get help from your friends. Target an
enemy and press . The appropriate Air or Artillery assets available for that mission
will be automatically called in an effort to take out that target. The four kinds of strikes are:
1. Jet Fighter-Bombers: These missile carrying aircraft are called in against enemy
units. They will launch and leave.
2. Choppers: The “snakes” of the sky will pop-up from where they are hiding, following
your progress, and attack the selected enemy with guided missiles. Great at killing
units, especially enemy choppers.
3. FAM: Fuel-Air-Munitions will be dropped from a Stealth aircraft and parachute to
just above the target, then release a devastating fireball in an expanding wave of
death. Called against buildings, trees or other non-moving targets.
4. MLRS: The cream of artillery support, the Multiple Launch Rocket System will pound
a good sized area. Called against buildings, trees or other non-moving targets.
Typically, strikes on moving objects will be jets or choppers. Strikes on non-moving
objects will usually be MLRS’s, or FAM’s.In certain missions where high accuracy is needed,
surgical strikes will be used.
The jets and choppers are considered “surgical” strikes, as they very rarely hit more than
the immediate target; FAM’s and MLRS’s are area weapons.
You have a limited number of strikes, so use them mostly to attack concentrations of
units and buildings that include mission objectives.
Note: In multi-player games, jets and choppers are not available and MLRS’s can
target moving objects.
-12-
-13-

ESC
KEYBOARD REFERENCE GUIDE
M
RETURN
DEL END PgDn
O/Ins
DEFAULT KEYBOARD
CONFIGURATION
ESC: In-Game Menu
M: Replay last audio message
RETURN: In-Game Chat (multi-player)
DEL:
END:
PAGE DOWN: Weapon Select
LEFT ARROW: Tur n Le ft
UP ARROW:
DOWN ARROW: Reverse
RIGHT ARROW: Turn Right
O/Ins: Call in Strike
Unlock/Lock Turret
(advanced control)
Overhead Surveillance
System On/Off
(advanced control mode only)
Forward
(advanced control mode only)
-15--14-

TAKING A BREAK
NEW
Begins a new campaign.
Once you start a mission, you can access the game menu at any time by pressing Esc.
This menu holds the following options:
BRIEFING
Brings up the mission briefing text that was displayed before the start of the mission.
RESUME
Returns you to the game. You can also use Esc to return to game play.
EXIT THE MISSION
Exits the scenario and returns to the DEBRIEFING
EXIT THE GAME
Exits the scenarios and returns to your Windows Desktop.
screen.
STARTING A SINGLE PLAYER GAME
To start a single player campaign, left-click on CAMPAIGN from the GULF WAR MAIN
MENU screen. This brings up the single player menu Options panel, which will allow you
to load a previously saved campaign or start a new one.
-16-
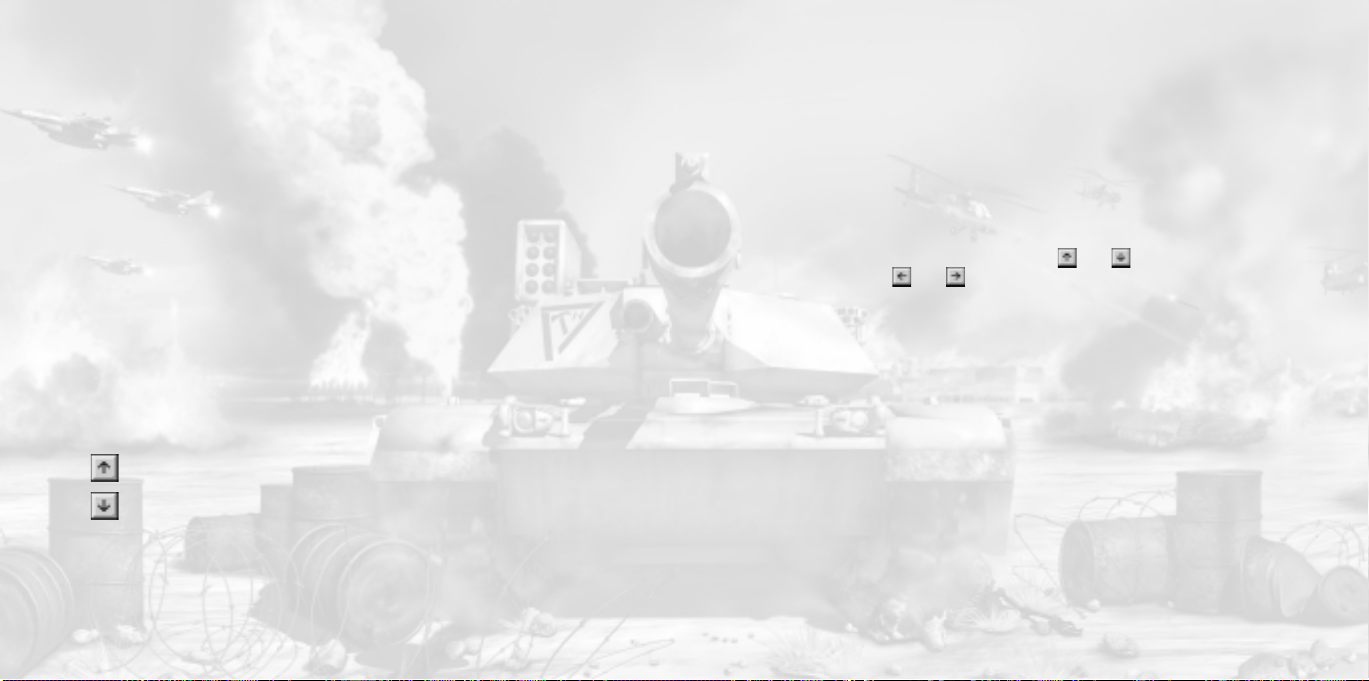
LOAD
You can load a previously saved campaign game by left-clicking on L
player menu options panel. Choose a saved campaign from the list; you can scroll the list
by using the up and down buttons on the right side of the box. When you have selected a
game; left-click on L
a game on the list and left-clicking on DELETE.
Note: You can not load or save multi-player games.
AUNCH to start GULF WAR. Erase previously saved games by selecting
OAD from the single
STARTING A MULTI-PLAYER GAME
GULF WAR supports up to eight players over a Local Area Network (LAN) and the Internet,
as well as two player games via modem or serial connection. To begin a multi-player
game, left-click on the MULTI option from the MAIN MENU screen. This brings up the
connection panel.
At the top of the panel is a box listing the available connections. Once you have selected
a connection type by left-clicking on it, the options to either CREA
appear. Select CREA
given. You can change this name by left-clicking inside the box, backspacing over the
name and typing in a new one. Below your name is a box for the name to identify the
game you are creating as the host. This name is seen by prospective players, so it can be
helpful to give a descriptive name, such as RATTRAP-8 (an eight player game using the
Mission 18 map), rather than simply JOE
TE to start a game. At the top of the screen your PLAYER NAME is
’S GAME.
-17-
TE or JOIN a game

MULTI-PLAYER SETUP SCREEN
Next, left-click inside the MA
between two and eight. Finally, to screen players you can left-click inside the PASSWORD
box and type in a password of up to sixteen characters in length. Players will be unable to
join your game without typing the correct password (Passwords are not case sensitive.)
Left-click on CREA
Once you have created your game, you as the host can set the following general scenario
parameters from the panel on the upper right of the screen:
•Frag Limit
Sets the number of Hammer kills a player needs to win a scenario.
• Time Limit
Sets the number of minutes the scenario will last. If the scenario is not won before the
time expires, the scenario ends anyway. The winner is the player with the most frags.
TE to proceed to the multi-player setup game screen.
XIMUM NUMBER OF PLAYERS box and select a number
JOINING A MULTI-PLAYER GAME
Left-click on JOIN from the connection panel to bring up the JOIN GAME screen. At the
top of the JOIN GAME screen is your player name. You may change it by backspacing over
the name and typing in a new one. Left-click to select a game from the list to play. The
option appears; left-click on the button to enter the game. If a password is required
JOIN
to join that game, a box will appear. Enter the password, then left-click on JOIN to bring
up the game setup screen.
From the game setup screen, you can join in the chat by typing in the slot below your
name. When you are ready to play, left-click on the box to the right of your name. When
all of the players have indicated they are prepared, the game host starts the game.
Note: If a player loses connection during play, they can not rejoin a game already
in progress.
PLAYING A MULTI-PLAYER GAME
Multi-player games are deathmatches. The game ends when the frag count has been
reached, or when the time limit expires.
To chat with other players during the game, press ENTER
ENTER again. Your message and the messages of other players appear in the center of
your screen.
Note: You must run the game once to initialize Version Wizard before you attempt
multi-player play on the supported online gaming services below.
USING MPLAYER.COM
To use the mplayer.com serv ice to play this game multi-player over the Internet , read the
file MPLAYER.TXT on the GULF WAR disc.
USING HEAT.NET
To use the HEAT.net service to play this game multi-player over the Internet, read the file
HEAT.TXT on the GULF WAR disc .
, type in your message, and press
-18-
-19-

CHANGING GAME OPTIONS
To change a game option, left-click on OPTIONS on the MAIN MENU. This brings up the
GAME OPTIONS panel, from which you can access the following sub-menus: GRAPHICS,
CONTROLS,AUDIO, and DIFFICULTY.
• Graphics
Here you can customize the way the game is displayed and possibly increase the speed
by reducing details. To do this, left-click on the HORIZ
on the BACK button to exit the GRAPHICS OPTIONS screen. Any changes you make are
automatically saved when you exit this menu, and are used every time you play
GULF WAR until you change them again.
HORIZON DISTANCE
Sets how far you can see before objects are lost over the horizon. Decreasing the
HORIZON DISTANCE speeds up the display of graphics. The default setting for this
option is 220 screen units. This option can not be changed during game play and must
be changed before the game begins.
• Controls
GULF WAR allows you to customize your control configurations. Left-click on C
from the OPTIONS menu to bring up the CONTROLS screen. Here you can change which
keys control what functions.
After making your changes, left-click on OK
menu or select KEYMAP1 or KEYMAP2 to cancel your changes.
Note: If you wish to make changes to your mouse sensitivity, you must do so
through Windows. Click on the Mouse icon in the Control Panel directory.
to save them and return to the OPTIONS
-20-
ON DISTANCE button or left-click
ONTROLS
• Audio
Left-click on A
panel. On this panel are controls to adjust the volume at which MUSIC and SOUND FX
are played. Use the slider button to change the volume, increasing the volume to the
right, decreasing to the left. From this panel you can also set the track of music you
wish to play on your CD, and have it either play that track continuously,play the tracks
of the CD in order and start the CD over after the last track, or randomly play tracks
from the CD.
Note: If you have a media player running (Windows CD player, video player, etc.)
you will need to exit that application before you can effect your game audio options.
• Difficulty
This replaces the GAME OPTIONS panel with the DIFFICULTY panel. On this panel are
three buttons for adjusting the difficulty of the game. Left-click on a button to
change the level of difficulty. At RO
enemy’s weapons are weakened and your own are increased. At the GENERAL level, the
most difficult of your forces’ weapons, including your Hammer’s, are greatly diminished
in power,while the enemy forces are given increased capabilities. At the default
OMMANDER level, you and your opponents are on equal footing.
C
UDIO from the GAME OPTIONS panel to bring up the AUDIO OPTIONS
OKIE, the easiest level of play, the strength of the
-21-

TROUBLESHOOTING INFO
This section provides information that can be useful in solving certain problems.
INSTALLATION
Problem: The CD is in the CD-ROM drive, but the computer is not recognizing it.
Answers: The CD may be dirty or scratched.
Solutions:
1. Make sure that the data side of the CD (shiny side) is not dirty or scratched.
If it is dirty,take a lint free non-abrasive cloth and wipe gently to clean it
(always wipe from the inside of the CD to the outside edges). If the data side
of the CD appears to be scratched, return the game to the store that you
bought it from, and exchange it for a new copy. If you are unable to exchange
the game at the store that you bought it from, please call Customer Support
for information on our exchange policy.
Problem: The computer freezes during install, or you receive an error message (such
as “*_ins error” or “An error has occurred during the move data process”)
during install.
Answers: Your computer may be using an older 16-bit CD-ROM driver; or there may not
be enough space on your hard drive for temporary files to expand; or the
CD-ROM drive might be having problems with how it buffers information. Or,
the Autorun or DMA settings on your CD-ROM drive could be interfering with
the game installation.
To check and see if your computer is using an older 16-bit CD-ROM driver:
1. Right-click on the ‘My Computer’ icon and select ‘Properties’.
2. Click on the ‘Performance’ tab.
3. In the Performance status box, if the File System line says “Some drivers
are using MS-DOS compatibility”, you are using a 16-bit CD-ROM driver.
Solutions:
1. For 16-bit CD-ROM drivers:
Contact the manufacturer of your CD-ROM drive or the manufacturer of your
computer for an updated 32-bit CD-ROM driver.
2. For 32-bit CD-ROM drivers:
1. Close all unnecessary programs running in the Background. Press the
CTRL+ALT+DEL keys at the same time to open the Close Program window,
select a program, and press the End Task button. Repeat this process until
all programs except ‘Explorer’ and ‘Systray’ are closed.
2. Delete all files in your C:\Windows\Temp folder, then empty the Recycle Bin.
3. Turn off read-ahead on the CD-ROM drive:
1. Right-click on the ‘My Computer’ icon and select ‘Properties’.
2. Click on the ‘Performance’ tab.
3. Click on the ‘File System’ button.
4. Choose the ‘CD-ROM’ tab at the top
5. Change the ‘Optimize access pattern for’ field to ‘No read-ahead’
6. Click on Apply, then OK and finally click Close (you will be prompted to restart
your system).
-22-
-23-

4. Turn off the Autorun and DMA settings on your CD-ROM drive:
1. Right-click on the ‘My Computer’ icon and choose ‘Properties’.
2. Click on the ‘Device Manager’ tab.
3. Click on the ‘+’ sign next to the CD-ROM line so that it becomes a ‘-’ sign.
4. Click on the line that appears under the CD-ROM line so that it is highlighted,
then click on the ‘Properties’ button.
5. Click on the ‘Settings’ tab.
6. Look for the Auto-insert Notification and DMA lines. If there is a check mark
in the boxes next to either of these lines, click on the box to remove the
check mark.
7. Click on the ‘Apply’ button, and then click on the ‘OK’ button.
8. When you are asked if you want to restart your system, choose ‘Yes’.
You can restore all of the CD-ROM settings back to normal after the game has been
successfully installed.
LAUNCHING THE GAME I
Problem: After launching the game from the Start menu or Desktop icon, you get a
blank screen, a black box that surrounds the mouse cursor, blurring or choppy
graphics, vertical lines on the screen, choppy sound, or no sound.
Answer: There is probably a conflict between your video or sound card and Microsoft’s
DirectX.
Solution: For Windows 95 and 98 users:
1. Press the ‘Start’ button on the Windows 95/98-task bar and select ‘Run’.
2. Type “c:\Program Files\directx\setup\dxdiag.exe” then click on the ‘OK’
button. This will run the DirectX Diagnostics Tool.
3. Make sure all your files are DirectX 6.1 compatible. Select the ‘DirectX Files’
tab make sure there are no exclamation points next to the file names. If you
find exclamation points under this tab you will need to reinstall DirectX 6.1 by
going to the ‘START’ Button on the Windows95 task bar then select ‘RUN’ and
type your CD-ROM drive letter followed by “: \DirectX\dxsetup.exe” and click
on the ‘Reinstall DirectX’ button. This will reinstall DirectX 6.1.
4. Make sure all of your drivers are DirectX 6.1 compatible. Select the ‘DirectX
Drivers’ tab and make sure there are no exclamation points next to any of the
file names. If you find exclamation points under this tab you will need to
update your drivers by contacting the manufacturer of the hardware through
their Phone Support or through their web site. 3DO has a listing of
manufactures sites available at: <http://www.3do.com/support>.
5. Test your hardware with the DirectX 6.1 Diagnostics tool. Run the tests that
are available on the ‘Display’, ‘Sound’, and ‘Input’ tabs. If one or more tests fail,
this could be due to driver incompatibility. Installing the newest drivers
available for your sound and video card hardware can usually resolve this.
For Windows 98 users:
1. Press the Start button on the Windows 98 task bar and select ‘Help’
2. Select the Search tab, type ‘DirectX Troubleshooter’ in the text box, and then
press the List Topics button. Select ‘DirectX Troubleshooter’ in the Topics
window, click the Display Button, and then follow the instructions to
troubleshoot your DirectX issue.
-24-
-25-

LAUNCHING THE GAME II
Problem: You try to start the game and the screen flashes briefly, and you are returned
to the desktop without an error message.
Answer: There are probably miscellaneous programs running in the background that
are interfering with the game and causing it to crash.
Solution: For Windows 95 users:
1. Press the CTRL+ALT+DEL keys at the same time to open the Close Program
window.
2. Click on a program so that it is highlighted, then click on the ‘End Task’ button.
3. Repeat this process until only ‘Explorer’ and ‘Systray’ are left in the Close
Program list, then try running the game.
For Windows 98 users:
1. Click on the Windows Start button, then choose Run.
2. In the Run line type in: “msconfig”, then push the ‘Enter’ key.(This will bring up
the System Configuration Utility.)
3. Select the ‘Startup’ tab, and turn all of the check boxes off, except for the one
next to ‘Systray’.
4. Press ‘OK’. When you are prompted to restart your system, click ‘Yes’.
5. Once your machine has restarted try running the program again.
Video and Sound card manufacturers regularly update their software drivers to enhance
performance and stability, and to improve compatibility with DirectX. You can find links
to many of these manufacturers’ sites by going to the Driver Updates section of our
support web site, which is located at http://www.3do.com/support.
You may obtain a list of Microsoft-certified video and audio drivers for your hardware by
going to <http://www.microsoft.com/hwtest/hcl/>. Drivers listed here are confirmed to
be compatibility with Windows 95, Windows 98 and Windows NT4.0.
Microsoft updates DirectX and its components regularly and posts them for download
from their web site at http://www.microsoft.com/DirectX.
GAME RUNS SLOW
Problem: You run the game and it runs very slow (only updating the screen a few times
Answer: You are probably running in D3D mode with a slow processor (200 MHz or below).
Solution:
Alternate Solution:
a second.)
1. Exit the game.
2. Go to the version wizard by opening the Windows ST
GRAMS. Left-click on 3DO and then left-click on GULF WAR then left-click
PRO
on VERSION WIZARD to change the configuration.
3. This will put up the “Choose Your Configuration” screen. Choose “Software”
from the list instead of “D3D” and left-click on OK.
4. The game will now run in the “software only” mode and you should see
improved performance.
1. Go to the GR
HORIZON DISTANCE. If you decrease this number,you will increase performance.
APHICS OPTIONS screen from the MAIN MENU and choose
ART MENU, and select
Note: For additional troubleshooting information, see the readme.txt file on the disc.
-26-
-27-

 Loading...