

Page 1
PILOT’S GUIDE
ª
Page 2

TABLE OF CONTENTS
Book 1: Game Players’ Guide . . . . . . . . . . . . . . . . . . . . . . . . . . . . . . . . . . . . .
viii
Requirements and Installation . . . . . . . . . . . . . . . . . . . . . . . . . .
1
The Technical Prerequisites . . . . . . . . . . . . . . . . . . . . . . . . . . . . . . . . . .2
Installing the Game . . . . . . . . . . . . . . . . . . . . . . . . . . . . . . . . . . . . . . . . . . .3
The Controls . . . . . . . . . . . . . . . . . . . . . . . . . . . . . . . . . . . . . . . .
5
Configuration . . . . . . . . . . . . . . . . . . . . . . . . . . . . . . . . . . . . . . . . . . . . . . . .6
D
IFFICULTY . . . . . . . . . . . . . . . . . . . . . . . . . . . . . . . . . . . . . . . . . . . . . . . . . . . . .6
C
ONTROL . . . . . . . . . . . . . . . . . . . . . . . . . . . . . . . . . . . . . . . . . . . . . . . . . . . . .11
G
RAPHICS . . . . . . . . . . . . . . . . . . . . . . . . . . . . . . . . . . . . . . . . . . . . . . . . . . . .12
S
OUND . . . . . . . . . . . . . . . . . . . . . . . . . . . . . . . . . . . . . . . . . . . . . . . . . . . . . . .12
Keyboard . . . . . . . . . . . . . . . . . . . . . . . . . . . . . . . . . . . . . . . . . . . . . . . . . . .13
P
AUSING . . . . . . . . . . . . . . . . . . . . . . . . . . . . . . . . . . . . . . . . . . . . . . . . . . . . . .14
Q
UITTING . . . . . . . . . . . . . . . . . . . . . . . . . . . . . . . . . . . . . . . . . . . . . . . . . . . . .14
Mouse . . . . . . . . . . . . . . . . . . . . . . . . . . . . . . . . . . . . . . . . . . . . . . . . . . . . . .14
Joystick . . . . . . . . . . . . . . . . . . . . . . . . . . . . . . . . . . . . . . . . . . . . . . . . . . . .15
Pedals . . . . . . . . . . . . . . . . . . . . . . . . . . . . . . . . . . . . . . . . . . . . . . . . . . . . . .16
The Main Menu . . . . . . . . . . . . . . . . . . . . . . . . . . . . . . . . . . . . . .
17
Quick Start . . . . . . . . . . . . . . . . . . . . . . . . . . . . . . . . . . . . . . . .
21
Flying a Single Mission . . . . . . . . . . . . . . . . . . . . . . . . . . . . . . .
23
The Hangar . . . . . . . . . . . . . . . . . . . . . . . . . . . . . . . . . . . . . . . . . . . . . . . . . 24
Mission Parameters . . . . . . . . . . . . . . . . . . . . . . . . . . . . . . . . . . . . . . . . 25
T
IME PERIOD . . . . . . . . . . . . . . . . . . . . . . . . . . . . . . . . . . . . . . . . . . . . . . . . . 25
T
IME OF DAY . . . . . . . . . . . . . . . . . . . . . . . . . . . . . . . . . . . . . . . . . . . . . . . . . .25
W
EATHER . . . . . . . . . . . . . . . . . . . . . . . . . . . . . . . . . . . . . . . . . . . . . . . . . . . . 26
I
NSTANT ACTION . . . . . . . . . . . . . . . . . . . . . . . . . . . . . . . . . . . . . . . . . . . . . . 26
M
ISSION TYPE . . . . . . . . . . . . . . . . . . . . . . . . . . . . . . . . . . . . . . . . . . . . . . . . 27
T
ARGET . . . . . . . . . . . . . . . . . . . . . . . . . . . . . . . . . . . . . . . . . . . . . . . . . . . . . . .28
N
UMBER OF AIRCRAFT . . . . . . . . . . . . . . . . . . . . . . . . . . . . . . . . . . . . . . . . . 28
C
RUISE ALTITUDE . . . . . . . . . . . . . . . . . . . . . . . . . . . . . . . . . . . . . . . . . . . . . .28
H
OME BASE . . . . . . . . . . . . . . . . . . . . . . . . . . . . . . . . . . . . . . . . . . . . . . . . . .28
F
RIENDLY SUPPORT ACTIVITY: SECONDARY AIRCRAFT . . . . . . . . . . . . .29
F
ORMATION SIZE . . . . . . . . . . . . . . . . . . . . . . . . . . . . . . . . . . . . . . . . . . . . . . 30
P
ILOT SKILL LEVEL . . . . . . . . . . . . . . . . . . . . . . . . . . . . . . . . . . . . . . . . . . . . 30
ii
Page 3

EXPECTED ENEMY ACTIVITY: ACTIVITY LEVEL . . . . . . . . . . . . . . . . . . . . .30
P
RIMARY AIRCRAFT . . . . . . . . . . . . . . . . . . . . . . . . . . . . . . . . . . . . . . . . . . . .30
S
ECONDARY AIRCRAFT . . . . . . . . . . . . . . . . . . . . . . . . . . . . . . . . . . . . . . . . .30
AAA A
CTIVITY LEVEL . . . . . . . . . . . . . . . . . . . . . . . . . . . . . . . . . . . . . . . . . .31
S
AVING A MISSION . . . . . . . . . . . . . . . . . . . . . . . . . . . . . . . . . . . . . . . . . . . .31
L
OADING A MISSION . . . . . . . . . . . . . . . . . . . . . . . . . . . . . . . . . . . . . . . . . . . 31
M
AKING REVISIONS . . . . . . . . . . . . . . . . . . . . . . . . . . . . . . . . . . . . . . . . . . . 32
Armaments Board . . . . . . . . . . . . . . . . . . . . . . . . . . . . . . . . . . . . . . . . . . 32
Fly Mission . . . . . . . . . . . . . . . . . . . . . . . . . . . . . . . . . . . . . . . . . . . . . . . . . 33
Take-off . . . . . . . . . . . . . . . . . . . . . . . . . . . . . . . . . . . . . . . . . . . . . . . . . . . . 34
Getting There . . . . . . . . . . . . . . . . . . . . . . . . . . . . . . . . . . . . . . . . . . . . . . 35
The Cockpit Controls . . . . . . . . . . . . . . . . . . . . . . . . . . . . . . . . . . . . . . . 36
M
ISSION MAP . . . . . . . . . . . . . . . . . . . . . . . . . . . . . . . . . . . . . . . . . . . . . . . . 36
C
OCKPIT RADIO . . . . . . . . . . . . . . . . . . . . . . . . . . . . . . . . . . . . . . . . . . . . . . . 37
A
UTOPILOT . . . . . . . . . . . . . . . . . . . . . . . . . . . . . . . . . . . . . . . . . . . . . . . . . . . 40
Viewpoint and the Camera . . . . . . . . . . . . . . . . . . . . . . . . . . . . . . . . . 40
F-
KEY VIEWS . . . . . . . . . . . . . . . . . . . . . . . . . . . . . . . . . . . . . . . . . . . . . . . . . . 41
S
NAP VIEWS . . . . . . . . . . . . . . . . . . . . . . . . . . . . . . . . . . . . . . . . . . . . . . . . . 42
C
HANGING PLANES . . . . . . . . . . . . . . . . . . . . . . . . . . . . . . . . . . . . . . . . . . . . 42
T
ARGETING . . . . . . . . . . . . . . . . . . . . . . . . . . . . . . . . . . . . . . . . . . . . . . . . . . . 42
V
IRTUAL COCKPIT MODE . . . . . . . . . . . . . . . . . . . . . . . . . . . . . . . . . . . . . . . 43
P
ADLOCK . . . . . . . . . . . . . . . . . . . . . . . . . . . . . . . . . . . . . . . . . . . . . . . . . . . . . 44
T
HE EXTERNAL CAMERA . . . . . . . . . . . . . . . . . . . . . . . . . . . . . . . . . . . . . . . 44
Accelerating Time . . . . . . . . . . . . . . . . . . . . . . . . . . . . . . . . . . . . . . . . . . 47
Encountering the Enemy . . . . . . . . . . . . . . . . . . . . . . . . . . . . . . . . . . . . 47
I
DENTIFICATION . . . . . . . . . . . . . . . . . . . . . . . . . . . . . . . . . . . . . . . . . . . . . . . 47
G
ROUND TARGETS . . . . . . . . . . . . . . . . . . . . . . . . . . . . . . . . . . . . . . . . . . . . .48
C
YCLING YOUR GUNS . . . . . . . . . . . . . . . . . . . . . . . . . . . . . . . . . . . . . . . . . .48
D
OGFIGHTING . . . . . . . . . . . . . . . . . . . . . . . . . . . . . . . . . . . . . . . . . . . . . . . . .49
P
ADLOCK AND TARGETING FEATURES . . . . . . . . . . . . . . . . . . . . . . . . . . . .49
D
IVE BOMBING . . . . . . . . . . . . . . . . . . . . . . . . . . . . . . . . . . . . . . . . . . . . . . . .50
S
TRAFING . . . . . . . . . . . . . . . . . . . . . . . . . . . . . . . . . . . . . . . . . . . . . . . . . . . . .51
F
IRING ROCKETS . . . . . . . . . . . . . . . . . . . . . . . . . . . . . . . . . . . . . . . . . . . . . . .53
Getting Shot Down . . . . . . . . . . . . . . . . . . . . . . . . . . . . . . . . . . . . . . . . .53
Returning and Landing . . . . . . . . . . . . . . . . . . . . . . . . . . . . . . . . . . . . . .53
Debriefing . . . . . . . . . . . . . . . . . . . . . . . . . . . . . . . . . . . . . . . . . . . . . . . . . .55
iii
Book 1: Game Player’s Guide
Page 4

Career Pilot . . . . . . . . . . . . . . . . . . . . . . . . . . . . . . . . . . . . . . . .
57
Creating a Pilot . . . . . . . . . . . . . . . . . . . . . . . . . . . . . . . . . . . . . . . . . . . . .58
Loading a Career . . . . . . . . . . . . . . . . . . . . . . . . . . . . . . . . . . . . . . . . . . . .60
The Briefing Room . . . . . . . . . . . . . . . . . . . . . . . . . . . . . . . . . . . . . . . . . .61
The Hangar . . . . . . . . . . . . . . . . . . . . . . . . . . . . . . . . . . . . . . . . . . . . . . . . .62
A
RMAMENT BOARD . . . . . . . . . . . . . . . . . . . . . . . . . . . . . . . . . . . . . . . . . . . .62
F
LY MISSION . . . . . . . . . . . . . . . . . . . . . . . . . . . . . . . . . . . . . . . . . . . . . . . . . .62
The Aerial Campaign . . . . . . . . . . . . . . . . . . . . . . . . . . . . . . . . . . . . . . . .63
B
ATTLE LINES . . . . . . . . . . . . . . . . . . . . . . . . . . . . . . . . . . . . . . . . . . . . . . . . .63
C
HANGING BASES . . . . . . . . . . . . . . . . . . . . . . . . . . . . . . . . . . . . . . . . . . . . .63
R
EPAIRS AND REPLACEMENTS . . . . . . . . . . . . . . . . . . . . . . . . . . . . . . . . . . .64
P
ILOT FATIGUE . . . . . . . . . . . . . . . . . . . . . . . . . . . . . . . . . . . . . . . . . . . . . . . .64
C
OCKPIT RADIO . . . . . . . . . . . . . . . . . . . . . . . . . . . . . . . . . . . . . . . . . . . . . . .64
R
ESCUE, CAPTURE, AND DEATH . . . . . . . . . . . . . . . . . . . . . . . . . . . . . . . . .64
Debriefing . . . . . . . . . . . . . . . . . . . . . . . . . . . . . . . . . . . . . . . . . . . . . . . . . .65
Medals and Promotions . . . . . . . . . . . . . . . . . . . . . . . . . . . . . . . . . . . . .65
Barracks . . . . . . . . . . . . . . . . . . . . . . . . . . . . . . . . . . . . . . . . . . . . . . . . . . . .66
L
OGBOOK . . . . . . . . . . . . . . . . . . . . . . . . . . . . . . . . . . . . . . . . . . . . . . . . . . . . .66
V
IEW MEDALS . . . . . . . . . . . . . . . . . . . . . . . . . . . . . . . . . . . . . . . . . . . . . . . .67
R
ADIO . . . . . . . . . . . . . . . . . . . . . . . . . . . . . . . . . . . . . . . . . . . . . . . . . . . . . . . .67
L
EAVE . . . . . . . . . . . . . . . . . . . . . . . . . . . . . . . . . . . . . . . . . . . . . . . . . . . . . . . .67
B
UNK . . . . . . . . . . . . . . . . . . . . . . . . . . . . . . . . . . . . . . . . . . . . . . . . . . . . . . . .67
Tour of Duty . . . . . . . . . . . . . . . . . . . . . . . . . . . . . . . . . . . . . . . . . . . . . . . .67
Squadron Commander’s Office . . . . . . . . . . . . . . . . . . . . . . . . . . . . . .68
S
QUADRON BOARD . . . . . . . . . . . . . . . . . . . . . . . . . . . . . . . . . . . . . . . . . . . .68
The End of the War . . . . . . . . . . . . . . . . . . . . . . . . . . . . . . . . . . . . . . . . . .69
Hall of Fame . . . . . . . . . . . . . . . . . . . . . . . . . . . . . . . . . . . . . . . . . . . . . . . .70
Multi-Player Missions . . . . . . . . . . . . . . . . . . . . . . . . . . . . . . . .
71
Connecting . . . . . . . . . . . . . . . . . . . . . . . . . . . . . . . . . . . . . . . . . . . . . . . . .72
IPX . . . . . . . . . . . . . . . . . . . . . . . . . . . . . . . . . . . . . . . . . . . . . . . . . . . . . . . . . .73
TCP/IP . . . . . . . . . . . . . . . . . . . . . . . . . . . . . . . . . . . . . . . . . . . . . . . . . . . . . .73
M
ODEM . . . . . . . . . . . . . . . . . . . . . . . . . . . . . . . . . . . . . . . . . . . . . . . . . . . . . .73
S
ERIAL . . . . . . . . . . . . . . . . . . . . . . . . . . . . . . . . . . . . . . . . . . . . . . . . . . . . . . .74
Joining a Mission . . . . . . . . . . . . . . . . . . . . . . . . . . . . . . . . . . . . . . . . . . .74
Hosting a Mission . . . . . . . . . . . . . . . . . . . . . . . . . . . . . . . . . . . . . . . . . . .75
Session Parameters . . . . . . . . . . . . . . . . . . . . . . . . . . . . . . . . . . . . . . . . .75
iv
Page 5

Flying a Multi-Player Mission . . . . . . . . . . . . . . . . . . . . . . . . . . . . . . . .77
C
OMMUNICATIONS . . . . . . . . . . . . . . . . . . . . . . . . . . . . . . . . . . . . . . . . . . . .77
D
EATH DURING TOTAL MAYHEM . . . . . . . . . . . . . . . . . . . . . . . . . . . . . . . .77
P
LAYER KILLS . . . . . . . . . . . . . . . . . . . . . . . . . . . . . . . . . . . . . . . . . . . . . . . . .78
The End of the Game . . . . . . . . . . . . . . . . . . . . . . . . . . . . . . . . . . . . . . . .78
Newsreel . . . . . . . . . . . . . . . . . . . . . . . . . . . . . . . . . . . . . . . . . . . . . . . . . . .79
View Objects . . . . . . . . . . . . . . . . . . . . . . . . . . . . . . . . . . . . . . . . . . . . . . .79
Book 2: Pilot’s Handbook . . . . . . . . . . . . . . . . . . . . . . . . . . . . . . . . . . . . . . .
83
Why You’re Here . . . . . . . . . . . . . . . . . . . . . . . . . . . . . . . . . . . . .
83
T
HEORIES . . . . . . . . . . . . . . . . . . . . . . . . . . . . . . . . . . . . . . . . . . . . . . . . . . . . .84
T
HE COMBATANTS . . . . . . . . . . . . . . . . . . . . . . . . . . . . . . . . . . . . . . . . . . . . .85
The Battle of Britain . . . . . . . . . . . . . . . . . . . . . . . . . . . . . . . . . . . . . . . . .92
T
HE FALL OF FRANCE . . . . . . . . . . . . . . . . . . . . . . . . . . . . . . . . . . . . . . . . . .92
E
NGLAND STANDS ALONE . . . . . . . . . . . . . . . . . . . . . . . . . . . . . . . . . . . . . .94
C
HANNEL RAIDS . . . . . . . . . . . . . . . . . . . . . . . . . . . . . . . . . . . . . . . . . . . . . . .96
T
HE CALM BEFORE THE STORM . . . . . . . . . . . . . . . . . . . . . . . . . . . . . . . . .98
T
HE STORM BREAKS . . . . . . . . . . . . . . . . . . . . . . . . . . . . . . . . . . . . . . . . . . .99
A
DLERTAG . . . . . . . . . . . . . . . . . . . . . . . . . . . . . . . . . . . . . . . . . . . . . . . . . . .101
T
HE BATTLE CONTINUES . . . . . . . . . . . . . . . . . . . . . . . . . . . . . . . . . . . . . .106
L
ONDON . . . . . . . . . . . . . . . . . . . . . . . . . . . . . . . . . . . . . . . . . . . . . . . . . . . .10 9
T
HE CRISIS . . . . . . . . . . . . . . . . . . . . . . . . . . . . . . . . . . . . . . . . . . . . . . . . . .111
Fortress without a Roof . . . . . . . . . . . . . . . . . . . . . . . . . . . . . . . . . . . .113
T
HESE MAD AMERICANS . . . . . . . . . . . . . . . . . . . . . . . . . . . . . . . . . . . . . .113
S
CHWEINFURT/REGENSBURG . . . . . . . . . . . . . . . . . . . . . . . . . . . . . . . . .116
O
PERATION ARGUMENT . . . . . . . . . . . . . . . . . . . . . . . . . . . . . . . . . . . . . . .120
B
IG “B”, MARCH 6, 1944 . . . . . . . . . . . . . . . . . . . . . . . . . . . . . . . . . . . . .122
P
REPARING FOR INVASION . . . . . . . . . . . . . . . . . . . . . . . . . . . . . . . . . . . . .126
S
UPPORTING THE INVASION . . . . . . . . . . . . . . . . . . . . . . . . . . . . . . . . . . . .129
O
PERATION BODENPLATTE . . . . . . . . . . . . . . . . . . . . . . . . . . . . . . . . . . . .13 0
T
HE FALL OF THE THIRD REICH . . . . . . . . . . . . . . . . . . . . . . . . . . . . . . . . .132
Conclusion . . . . . . . . . . . . . . . . . . . . . . . . . . . . . . . . . . . . . . . . . . . . . . . .133
A
REA BOMBING . . . . . . . . . . . . . . . . . . . . . . . . . . . . . . . . . . . . . . . . . . . . . .133
S
TRATEGIC BOMBING . . . . . . . . . . . . . . . . . . . . . . . . . . . . . . . . . . . . . . . . .133
T
HE INTERDICTION CAMPAIGN . . . . . . . . . . . . . . . . . . . . . . . . . . . . . . . . .13 4
v
Book 1: Game Player’s Guide
Page 6

Flight School . . . . . . . . . . . . . . . . . . . . . . . . . . . . . . . . . . . . . .
135
The Basics . . . . . . . . . . . . . . . . . . . . . . . . . . . . . . . . . . . . . . . . . . . . . . . . .136
E
SSENTIAL AERODYNAMICS . . . . . . . . . . . . . . . . . . . . . . . . . . . . . . . . . . .136
L
EVEL FLIGHT . . . . . . . . . . . . . . . . . . . . . . . . . . . . . . . . . . . . . . . . . . . . . . . .142
A
CCELERATION AND DECELERATION . . . . . . . . . . . . . . . . . . . . . . . . . . . .142
L
EVEL CLIMB AND LEVEL DESCENT (RISING AND FALLING) . . . . . . . .143
C
LIMBS AND DIVES . . . . . . . . . . . . . . . . . . . . . . . . . . . . . . . . . . . . . . . . . . .143
S
IMPLE TURNS (BANKING) . . . . . . . . . . . . . . . . . . . . . . . . . . . . . . . . . . . .145
F
INAL ADVICE . . . . . . . . . . . . . . . . . . . . . . . . . . . . . . . . . . . . . . . . . . . . . . .14 5
Instruments . . . . . . . . . . . . . . . . . . . . . . . . . . . . . . . . . . . . . . . . . . . . . . .146
C
OMPASS . . . . . . . . . . . . . . . . . . . . . . . . . . . . . . . . . . . . . . . . . . . . . . . . . . .147
A
RTIFICIAL HORIZON . . . . . . . . . . . . . . . . . . . . . . . . . . . . . . . . . . . . . . . . .147
A
IRSPEED INDICATOR . . . . . . . . . . . . . . . . . . . . . . . . . . . . . . . . . . . . . . . . .147
T
ACHOMETER . . . . . . . . . . . . . . . . . . . . . . . . . . . . . . . . . . . . . . . . . . . . . . . .148
A
LTIMETER . . . . . . . . . . . . . . . . . . . . . . . . . . . . . . . . . . . . . . . . . . . . . . . . . .148
O
IL PRESSURE GAUGE . . . . . . . . . . . . . . . . . . . . . . . . . . . . . . . . . . . . . . . .148
E
NGINE TEMPERATURE GAUGE . . . . . . . . . . . . . . . . . . . . . . . . . . . . . . . . .149
F
UEL GAUGE . . . . . . . . . . . . . . . . . . . . . . . . . . . . . . . . . . . . . . . . . . . . . . . . .149
M
ANIFOLD PRESSURE GAUGE . . . . . . . . . . . . . . . . . . . . . . . . . . . . . . . . .150
R
ATE O F CLIMB INDICATOR . . . . . . . . . . . . . . . . . . . . . . . . . . . . . . . . . . . .150
A
MMUNITION COUNTER . . . . . . . . . . . . . . . . . . . . . . . . . . . . . . . . . . . . . . .151
Formations . . . . . . . . . . . . . . . . . . . . . . . . . . . . . . . . . . . . . . . . . . . . . . . .151
E
CHELON . . . . . . . . . . . . . . . . . . . . . . . . . . . . . . . . . . . . . . . . . . . . . . . . . . . .151
V . . . . . . . . . . . . . . . . . . . . . . . . . . . . . . . . . . . . . . . . . . . . . . . . . . . . . . . . . . .152
F
INGER FOUR . . . . . . . . . . . . . . . . . . . . . . . . . . . . . . . . . . . . . . . . . . . . . . . .15 2
B
OMBERS AND ESCORTS . . . . . . . . . . . . . . . . . . . . . . . . . . . . . . . . . . . . . .153
Simple Manoeuvres . . . . . . . . . . . . . . . . . . . . . . . . . . . . . . . . . . . . . . .154
A
ILERON ROLL . . . . . . . . . . . . . . . . . . . . . . . . . . . . . . . . . . . . . . . . . . . . . . .154
B
ARREL ROLL . . . . . . . . . . . . . . . . . . . . . . . . . . . . . . . . . . . . . . . . . . . . . . . .155
L
OOP OVER . . . . . . . . . . . . . . . . . . . . . . . . . . . . . . . . . . . . . . . . . . . . . . . . . .155
L
OOP UNDER . . . . . . . . . . . . . . . . . . . . . . . . . . . . . . . . . . . . . . . . . . . . . . . .156
W
ING OVER . . . . . . . . . . . . . . . . . . . . . . . . . . . . . . . . . . . . . . . . . . . . . . . . .157
Emergency Procedures . . . . . . . . . . . . . . . . . . . . . . . . . . . . . . . . . . . .158
R
ECOVERING FROM A STALL . . . . . . . . . . . . . . . . . . . . . . . . . . . . . . . . . . .159
T
HE POWER STALL . . . . . . . . . . . . . . . . . . . . . . . . . . . . . . . . . . . . . . . . . . .160
G
ETTING OUT OF A SPIN . . . . . . . . . . . . . . . . . . . . . . . . . . . . . . . . . . . . . .163
L
OW FUEL . . . . . . . . . . . . . . . . . . . . . . . . . . . . . . . . . . . . . . . . . . . . . . . . . . .164
D
AMAGE . . . . . . . . . . . . . . . . . . . . . . . . . . . . . . . . . . . . . . . . . . . . . . . . . . . .166
C
OMING INONAWING AND A PRAYER . . . . . . . . . . . . . . . . . . . . . . . . .167
F
IRE . . . . . . . . . . . . . . . . . . . . . . . . . . . . . . . . . . . . . . . . . . . . . . . . . . . . . . . .168
vi
Page 7

BAILING OUT . . . . . . . . . . . . . . . . . . . . . . . . . . . . . . . . . . . . . . . . . . . . . . . . .169
Advanced Flight . . . . . . . . . . . . . . . . . . . . . . . . . . . . . . . . . . . . . . . . . . .171
A L
ITTLE AIR COMBAT THEORY . . . . . . . . . . . . . . . . . . . . . . . . . . . . . . . .171
Y
OUR WEAPONS . . . . . . . . . . . . . . . . . . . . . . . . . . . . . . . . . . . . . . . . . . . . .179
A
PPROACH . . . . . . . . . . . . . . . . . . . . . . . . . . . . . . . . . . . . . . . . . . . . . . . . . .185
D
OGFIGHT VS. HIT-AND-RUN . . . . . . . . . . . . . . . . . . . . . . . . . . . . . . . . . .186
I
MMELMANN . . . . . . . . . . . . . . . . . . . . . . . . . . . . . . . . . . . . . . . . . . . . . . . .187
S
PLIT-S . . . . . . . . . . . . . . . . . . . . . . . . . . . . . . . . . . . . . . . . . . . . . . . . . . . . .188
I
NTENTIONAL STALL . . . . . . . . . . . . . . . . . . . . . . . . . . . . . . . . . . . . . . . . . .189
S
KID . . . . . . . . . . . . . . . . . . . . . . . . . . . . . . . . . . . . . . . . . . . . . . . . . . . . . . . .190
S
LIP . . . . . . . . . . . . . . . . . . . . . . . . . . . . . . . . . . . . . . . . . . . . . . . . . . . . . . . .19 0
S
CISSORS . . . . . . . . . . . . . . . . . . . . . . . . . . . . . . . . . . . . . . . . . . . . . . . . . . .191
T
HACH WEAVE . . . . . . . . . . . . . . . . . . . . . . . . . . . . . . . . . . . . . . . . . . . . . . .192
A
DVANCED MANOEUVRING . . . . . . . . . . . . . . . . . . . . . . . . . . . . . . . . . . .194
Some Further Advice . . . . . . . . . . . . . . . . . . . . . . . . . . . . . . . . . . . . . . 200
T
ACTICAL QUICKIES . . . . . . . . . . . . . . . . . . . . . . . . . . . . . . . . . . . . . . . . . . 200
A
LTERNATIVE DELIVERY TECHNIQUES . . . . . . . . . . . . . . . . . . . . . . . . . . 202
L
ANDINGS . . . . . . . . . . . . . . . . . . . . . . . . . . . . . . . . . . . . . . . . . . . . . . . . . . 210
The Cockpits . . . . . . . . . . . . . . . . . . . . . . . . . . . . . . . . . . . . . .
217
Background . . . . . . . . . . . . . . . . . . . . . . . . . . . . . . . . . . . . . . . . . . . . . . . 218
United States Army Air Force . . . . . . . . . . . . . . . . . . . . . . . . . . . . . . 219
L
OCKHEED P-38 LIGHTNING . . . . . . . . . . . . . . . . . . . . . . . . . . . . . . . . . . 220
R
EPUBLIC P-47 THUNDERBOLT . . . . . . . . . . . . . . . . . . . . . . . . . . . . . . . . 222
N
ORTH AMERICAN P-51 MUSTANG . . . . . . . . . . . . . . . . . . . . . . . . . . . . 224
Royal Air Force . . . . . . . . . . . . . . . . . . . . . . . . . . . . . . . . . . . . . . . . . . . . 226
H
AWKER HURRICANE . . . . . . . . . . . . . . . . . . . . . . . . . . . . . . . . . . . . . . . . 227
H
AWKER TEMPEST V . . . . . . . . . . . . . . . . . . . . . . . . . . . . . . . . . . . . . . . . . 229
H
AWKER TYPHOON MK IB . . . . . . . . . . . . . . . . . . . . . . . . . . . . . . . . . . . . 231
S
UPERMARINE SPITFIRE . . . . . . . . . . . . . . . . . . . . . . . . . . . . . . . . . . . . . . 233
Luftwaffe . . . . . . . . . . . . . . . . . . . . . . . . . . . . . . . . . . . . . . . . . . . . . . . . . 235
F
OCKE WULF FW190 . . . . . . . . . . . . . . . . . . . . . . . . . . . . . . . . . . . . . . . . 236
M
ESSERSCHMITT BF109 (ME109) . . . . . . . . . . . . . . . . . . . . . . . . . . . 239
M
ESSERSCHMITT ME110 (DESTROYER) . . . . . . . . . . . . . . . . . . . . . . . 242
M
ESSERSCHMITT ME262A . . . . . . . . . . . . . . . . . . . . . . . . . . . . . . . . . . . 244
Glossary of Terms and Acronyms . . . . . . . . . . . . . . . . . . . . . .
246
customer support . . . . . . . . . . . . . . . . . . . . . . . . . . . . . . . . .
253
credits . . . . . . . . . . . . . . . . . . . . . . . . . . . . . . . . . . . . . . . . . . .
255
vii
Book 1: Game Player’s Guide
Page 8
Book 1: Game
player’s Guide
Great Britain and France declared war on Germany in early September of 1939, a mere
two days after Germany had invaded Poland. Less than a year later, France would be
occupied and England fighting for her own independence. Thus began the European
campaign of the Second World War. The conflict flared on ground and at sea, bloody
and hard-fought, but it would be in the air that the war was won.
Most of the fighting over Europe was too high for people down below to see. The sole
signs of the melee overhead were the distant buzz of engines and the occasional wreck,
yet battle was no less fierce in the air than on the ground. With only a thin skin of metal
as a shield, pilots had little room for error. Their fate was in their own hands. Success
was, of course, only fleeting—failure often final.
From the Battle of Britain in the summer months of 1940 until the day of Axis
capitulation five years later, the world’s military leaders engaged in a struggle for
control of the skies over western Europe. Aerial support was key to any offensive
assault and a principle means of defense as well. Crippling a nation was as simple as
wearing down its supply of pilots and planes.
In European Air War
™
, you step into the cockpit of a 1940’s fighter plane and join your
country’s daily struggle to achieve air superiority. Germany is wearing away the RAF’s
resources. The Allies strive to beat back the onslaught and shove their way straight to
Berlin. Now you assume your place in the pilot’s seat.
This book, the Game Player’s Guide, contains complete instructions on installing,
running, configuring, and playing
European Air War™The Pilot’s Handbook (later in
this manual) has historical background and a little advice on piloting. The Quick
Reference Card is a one-stop reference to all of the keyboard, mouse, joystick, and
other controls. Changes made to the game after this manual was written are described
in the Readme file; that file was written last, so any notations in it supersede all other
information.
Page 9
Requirements and
Installation
You’ve got the box open, the CD-ROM in your hands, your flight jacket on,
and that manic gleam in your eyes. What do you do now?
Page 10
The Technical Prerequisites
For European Air War to work, there are a few things your computer must have.
The processor has to be a 166 MHz Pentium or better. If you have a 3D
graphics acceleration card, you can play on a 133 MHz Pentium.
You must have at least 32 Mb (megabytes) of RAM (working memory).
You must have a CD-ROM drive.
Since the installation program will copy parts of European Air War onto your
hard disk, you must have a lot of empty storage space on your hard drive. How
much you need depends on how much of the game you choose to install; the
different amounts are calculated for you by the installation program, and it
shows you what you need versus what you have.
Your computer must be capable of SVGA quality graphics.
There must be a working mouse (or a device that fulfills the same function)
attached to the computer.
You must have DirectX version 6.0 (or higher). If you don’t have this, you can
install version 6.0 as part of the installation process. To use the game’s 3Dfx
Glide support, you must have Glide API version 2.43 (or higher) installed and
working.
There are also a few pieces of equipment that we strongly recommend you have:
To hear the game, you must have a sound card and the requisite drivers to
support DirectSound.
To fly well, we recommend you use a joystick. We encourage the use of
throttle controls and foot pedals (for the rudder).
For modem play, we recommend you use a modem capable of 28.8 kps or
faster.
If you think you have all of these, but still have a problem running the game,
please contact MicroProse Customer Support for assistance.
2
Page 11
Installing the Game
Before you can play European Air War, the installation program must copy some
files onto your hard disk. To have it do so, follow these instructions:
Turn on your computer. Windows 95 should load the Microsoft CD-ROM
Extension when the computer starts up. (If you have problems installing, this
extension may not be loaded. Check your computer manuals for instructions
on getting it loaded.)
Open the CD-ROM drive, place the European Air War CD in it, and close the
drive.
European Air War is a Windows 95 “AutoPlay” CD-ROM. That means that just
putting the disk in the drive for the first time starts up the installation program.
Click on Install to continue. (If you change your mind at this point, click Exit.)
As is usual in Windows 95 installation procedures, there are two decisions
you need to make before the installation process can begin. The first decision
is to what directory you want to install the game. You can accept the default,
type in a directory path, or use the Browse button to seek out a directory. Click
OK when you’re done.
The second decision is what sort of installation you want to do. Pick one of the
options presented:
Typical installs the required program files and some other stuff. This type
of installation strikes a balance between the needs of game speed (more
files copied) versus conserving hard disk space (less files copied).
Compact is the minimum; it installs only the required program files.
Custom gives you control of what gets installed. How much disk space
this takes up depends on what you select.
European Air War will now copy the files you selected to your hard drive from
the CD-ROM.
After the game itself has been copied over, European Air War installs a few
necessary utility programs. These include Microsoft’s DirectX drivers (version
6.0). The space these take up was included in the total noted on screen.
3
Book 1: Game Player’s Guide
REQUIREMENTS AND INSTALLATION
Page 12

Lastly, use the check-boxes to decide whether to add a shortcut on your
desktop for this game and whether to begin the game immediately when the
installation is done.
Once the installation is complete, the game is ready to play.
If you checked the play box, the game begins right away. If you forgot, you can
still start playing now:
Leave the European Air War CD-ROM in the drive.
Click the Play button.
To play later:
Make sure that the European Air War CD-ROM is in its drive.
If you checked the shortcut box, click on the European Air War shortcut on
your desktop.
If not, open the Windows 95 Start menu, then open the European
Air War sub-menu, then click the European Air War option.
You can also wait for the AutoPlay menu to pop up, then click the
Play button.
Have fun!
4
Page 13
The Controls
European Air War is an advanced, complex, historical military simulation.
You cannot play if you use only keyboard controls. Use of a mouse is
absolutely necessary, and a joystick comes in handy, too. In fact, we
strongly recommend that you use both.
Page 14

What follows is a brief introduction to the use of the configurable game options
and the standard game controllers. European Air War is designed to work with
most of the available Windows 95 compatible flight simulation add-on hardware
systems (“peripherals”). If you follow the installation instructions and the
documentation that came with the peripheral you’re using, you should not have
any problems. Customer Support will likely be able to solve whatever trouble you
do encounter. Calibration settings for joysticks and other hardware is taken from
Windows data; if you installed the hardware correctly, you should have no need
to recalibrate just for this game.
Configuration
The first time you fire up European Air War, before you even consider stepping
into the cockpit, you should click on the Configure Game button. Use the
configuration setup to specify how you want to control the game, as well as to
adjust the settings of such things as sound, screen resolution, and level of detail.
DIFFICULTY
These three menus—Flight, Combat, and Display—let you adjust the level of
realism and difficulty of each mission you fly. As you enable more realistic
settings, the overall Difficulty Rating increases, thus increasing your score at the
end of every mission (a reward for playing at a harder level).
Flight
Flight Model Depending on your abilities and what you want out of this game,
you can decide whether to use a Realistic flight model—with all
the difficulty of piloting a real aircraft—or an Easy one, which is
more forgiving.
Stalls/Spins This option, when enabled, makes it possible for your plane to
stall (when your speed is below that needed to sustain lift) or go
into a spin. Turn this option Off, and stalls and spins will not occur
unless your plane has been damaged.
6
Page 15

Torque Effect Radial engines create a turning force known as torque (see the
Pilot’s Handbook for details). Pilots of single-engine planes must
take this into account. Twin-engine machines don’t suffer the
same pull, because their engines rotate in opposite directions
and cancel the torque effect. If Torque Effect is Off, your plane
will show no signs of pulling. However, when this is toggled On,
single-engine aircraft will pull one side according to their
manufacture. Torque has no effect when the autopilot is
engaged, since the autopilot makes the necessary corrections.
Blackout\
Redout
While designers can tinker with planes to make them react better
at high acceleration, it’s harder to enhance the human body’s
performance under similar conditions. High-speed manoeuvres
can prevent a pilot’s heart from pumping enough blood into his
brain. When an airman pulls hard out of a dive, turns his aircraft
tightly at top speeds, or performs other high-speed aerial moves,
he may lose consciousness—black out.
Forcing too much blood into the brain (as when throttling forward
into a steep dive) is also a problem. If the pressure becomes too
great, tiny blood vessels in the pilot’s eyes burst. This is known as
a “redout.” Severe brain damage or death can result.
Losing consciousness is especially dangerous at low altitudes,
when you have too little time to recover, but even at great heights
it poses serious risks. These days, pressurized suits help fighter
pilots maintain control at high speeds. During World War II, such
suits were too bulky and unpredictable to be practical, so pilots
had to know their own limits.
If you enable blackouts, you subject yourself to the laws of nature
and human limitations. If not, you’ll maintain both vision and
consciousness even when performing unheard-of aerial feats.
7
THE CONTROLS
Book 1: Game Player’s Guide
Page 16
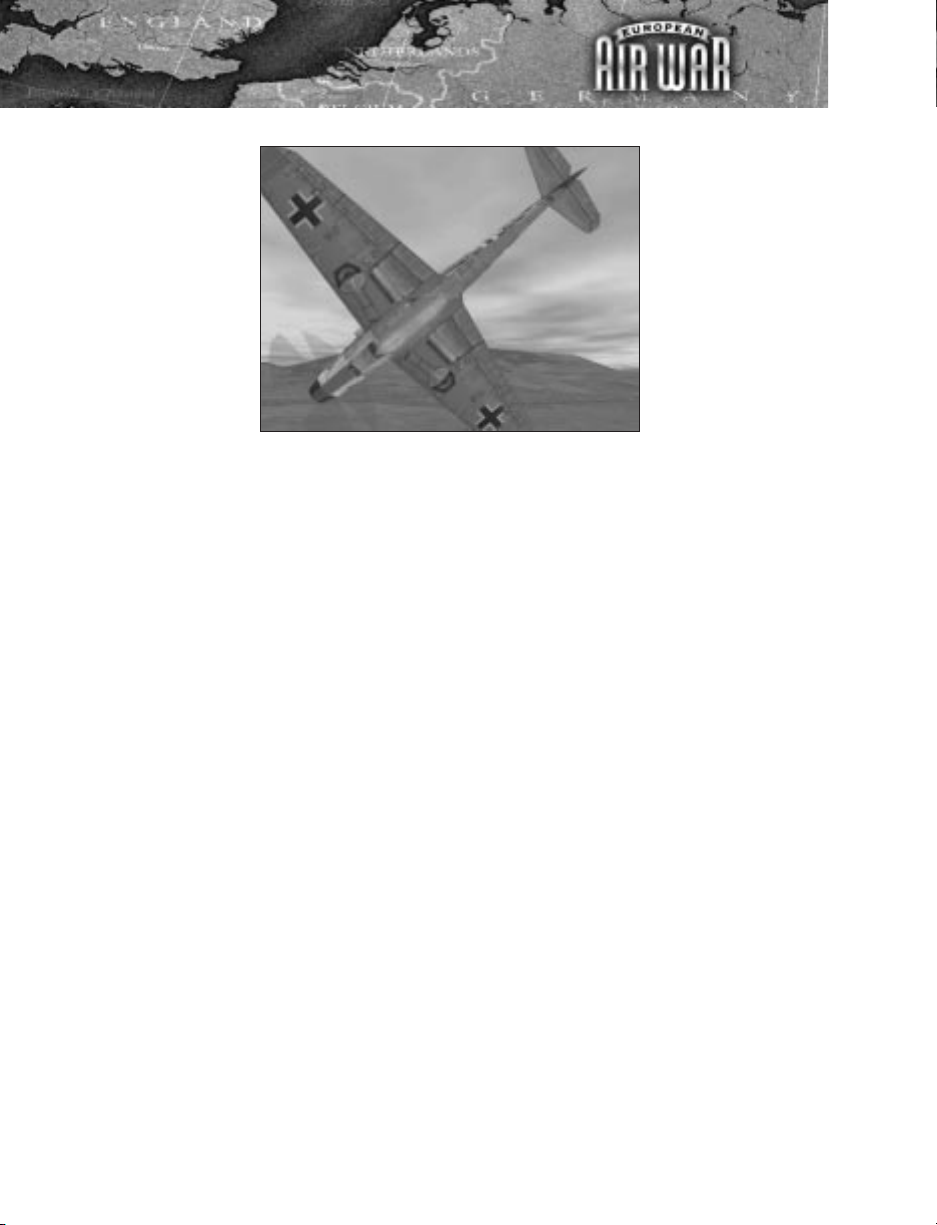
This pilot is at risk of blacking out.
Engine
Overheat
Even when equipped with complex cooling systems, engines
generate a lot of heat, and the harder they have to work, the more
heat they put out. It’s possible to damage an engine if you run it
too hard for too long. In some planes, holding the throttle fully
open for as few as ten seconds can lead to overheating, and
overheating can quickly escalate into permanent engine
damage—or complete failure. When Engine Overheat is
disabled, you can run your craft all day without once approaching
the danger point. If you opt for a more realistic scenario, beware a
heavy hand on the throttle.
Structural
Limits
Even the sturdiest and most dependable of planes has its
limitations. When it’s pushed beyond them, anything can
happen, from the annoying—like buffeting in a dive—to the
downright dangerous. A craft can fall into a spin or a stall, or a
wing might break off in mid-flight and leave you plummeting
helplessly back to the ground.
By selecting On, you open yourself up to many irksome but
realistic problems that pilots of the day had to contend with.
Leaving the option in the Off position, you avoid such
troublesome issues and can push your plane beyond its
physical limits.
8
Page 17

Wind/
Turbulence
When enabled, this option makes flying a bit harder, because
wind can slow you down, adjust your course, and generally
complicate things. Select Off if you do not wish to have your
course deviate due to the effects of wind and turbulence.
Combat
Enemy
Skill Level
This option provides a quick and easy way to modify the overall
difficulty. You can choose between Green (to face inexperienced
pilots), Veteran (pilots who have been in a few dogfights), and
Ace (the most experienced the enemy has to offer). Be
forewarned that the enemy skill level Ace is designed to push
even the most fanatic flight simulation veterans to the limits of
their abilities.
Landing A combat pilot can count on very few certainties, but one thing is
sure—what goes up must come down. Assuming that you haven’t
bailed out or showered down in a thousand pieces somewhere
over Europe, you know that you’re going to have to land your
crate. How you do that depends on your plane and your piloting
prowess. Some planes are easier than others to set down, but
bringing one in for a successful landing always requires skill and
an excellent knowledge of your machine. When you enable
Realistic, you must cope with the vagaries of bringing your craft
in manually. If you select Simple, touching down is a much
simpler affair.
Realistic
Gunnery
In actual air-to-air combat during World War II, it was no mean
feat to hit your target. Pilots needed great skill and marksmanship
(and sometimes luck) to down an enemy plane. Fortunately, in
European Air War it doesn’t have to be that difficult. Using a
more blocky, less-than-precise silhouette of enemy aircraft to
determine hits can turn many near misses into scores. Of course,
if you’d rather have the greater challenge, that can be arranged,
too. If Realistic Gunnery is off, you’ll have a slightly easier time
finding your mark. With the option on, hits on enemy aircraft are
determined using a slimmer and more realistic silhouette.
9
THE CONTROLS
Book 1: Game Player’s Guide
Page 18

Mid-Air
Collision
The limited range of World War II weapons means that air-to-air
combat takes place at close quarters. For your guns to be
effective, you have to be frighteningly near your target. Mid-air
collisions are of great concern; especially in the heat of battle, it’s
easy to lose track of who’s around you and where exactly they
are. This can be a fatal slip if Mid-Air Collision is enabled—aircraft
coming into contact with each other explode in a fireball. With
quick reflexes you might bail out, but at best you’ll be headed for
a dirt bath or a dousing. If you leave this option off, one aircraft
can pass right through another without effect.
Unlimited
Ammo
Ammunition is a valued commodity in aerial combat. Armed,
you’re a lethal threat, but when you run out of ammo, you must
break off the attack and head home, vulnerable the entire flight.
Every plane has weight and storage restrictions that limit how
much ammunition the ground crews can pack on board. During
the Second World War, a full load of bullets could be measured in
seconds of firepower. In addition, most pilots had to estimate
their remaining rounds without benefit of the ammunition
counters now standard on warplanes. If you enter battle without
Unlimited Ammo, be advised to use your weapons judiciously. If
you opt instead for a limitless supply, just try not to give yourself
away by the unrestrained use of your guns. (Note that this option
is always Off in multi-player missions.)
Invulnerable This option allows you to designate whether or not your plane
takes damage—from enemy fire, friendly fire, the ground, or
anything else. If you want to practice flying without having to
worry about damage, set this option On. When you’re ready to fly
in a real dogfight, turn this back Off. (Note that this option is
always Off in multi-player missions.)
10
Page 19

Display
Display Unit This option controls what system of measurement is used by
your commanding officers, your cockpit instruments, and your
map. Select English to use the Imperial system or Metric for
(oddly enough) the metric system. If you choose Default, each
nationality uses the system they had in place at the time of the
war.
HUD Display You can use this to turn on the cockpit Head-Up Display, which is
something no pilot during the war actually had. This projects
useful information in front of you.
Altimeter
Display
There are two types of altimeter. The type used during the war
gives readings based on ambient air pressure. This is ASL (Above
Sea Level). Modern radar altimeters read altitude AGL (Above
Ground Level). During the war, planes did not use radar
altimeters, and the description of the altimeter in this manual
reflects that. If you choose to use AGL, that description no longer
applies.
Airspeed
Display
Select the way you want the Airspeed Indicator in your cockpit to
work. IAS (Indicated Air Speed) measures your velocity relative to
the air around you; this is the type of indicator used in WWII-era
planes. TAS (True Air Speed) measures your actual rate of
movement relative to the ground below you; this is more reliable
for navigation, but less historically accurate.
CONTROL
This is where you designate exactly what hardware you’ll use to control which
aspects of the game—and exactly what controls correspond to which commands.
The Flight Control is the important one; it’s the main instrument for flying your
aircraft. Selections for the other options might change or be limited depending on
what you select here. In general, for instance, you cannot use the same
instrument as both Flight Control and for controlling the external camera—the
exception being that if your joystick is your flight control, you can use the joystick
“hat” to manoeuvre the camera.
11
THE CONTROLS
Book 1: Game Player’s Guide
Page 20

To customize (or completely reconfigure) the controls for the game, select
Advanced. This option gives you control over all four groups of controls—View
controls, Flight controls, Weapon controls, and general Game controls.
When you’re done, click OK to save your changes or Cancel to undo them.
GRAPHICS
The options on this screen influence how everything in every mission looks.
Generally, more detail makes playing the game more realistic and fun, but it also
tends to slow down the game’s operation. If you notice that your plane doesn’t
respond as quickly as you would like, or that movements on the screen are jerky,
you may need to lower the level of detail. Adjusting the settings to lower detail
levels or turning some of the options off should result in a smoother picture and
faster responses.
Make sure you select the correct 3D Renderer option—the type of 3D
acceleration you’re using. You can also adjust your distance visibility. The higher
the visibility, the farther you (and other pilots) can see.
If the background or the colour level is darker than you would prefer, try sliding
the Gamma Correction to the right to brighten the entire viewing area.
SOUND
The Sound screen lets you control not only the volume of game sounds but also
their quality. Choose between 8-bit and 16-bit sound. The higher setting (16-bit)
sounds better, but requires quite a bit more memory, as well. You can also
determine the number of sound effect channels; generally, more channels means
better quality, though you are limited by what your computer’s capabilities.
You adjust the levels for the different sound effects and the music separately.
Click anywhere along a line or drag the volume controls where you want them.
Bear in mind that the engine sound effects can clue you in to the health of your
plane—your engine may begin to labour before it actually fails. You can only react
in time if you hear the change in pitch. You probably don’t want to turn these
sound effects completely off.
12
Page 21

The last option in the sound configuration allows you to turn the subtitles on or
off. The officer presenting your briefings speaks in the language of his homeland,
as do all pilots on your radio. Thus, for example, if you are flying a German plane,
but you do not understand German, you would turn this option on to have your
briefing information and communications subtitled in your native language.
Keyboard
The keyboard is the primary control device for your computer, but it is often a
secondary controller while playing European Air War. Keystroke commands are
most commonly used to change the viewpoint while flying, to enter text in certain
fields (naming pilots, for example), and to control things like the throttle, gear, and
brakes.
Keyboard controls are represented in this manual by symbols. Thus, for example,
Function Key #1 would appear as 1, just as it does on the keyboard itself. Key
combinations that should be pressed at the same time are separated by plus
signs, as in c+a+d. All keys will be capitalized, but you do not need to
enter capital letters. (A capital P, for example, would appear as s+P, while a
lowercase p would be P.) We use the standard abbreviations for the special
keys.
Though some of the keyboard commands are described in the relevant sections,
please refer to the Quick Reference Card for the exact default keystrokes used
in controlling European Air War. You can change many of these defaults using
the Control option on the Configure Game menu, described in Configuration.
There are some keyboard command standards that are shared by virtually all
MicroProse games.
Note that on most of the game screens (not during missions), you can use the
z
to toggle labelling of all the hot spots on and off. This can be quite
helpful when you aren’t sure exactly what you can do on a particular screen.
You can also right-click to briefly view the hot spots; they stay visible as long as
you hold down the [RMB].
13
THE CONTROLS
Book 1: Game Player’s Guide
Page 22

PAUSING
At any time while in flight, you can press a+P to pause the game. All action in
the game will stop until you restart it, but you still have control of the external
camera and the viewpoint controls. Note that none of the controls except those
relevant to the camera and viewpoints will function while the game is paused. To
restart the action, press a+P again.
QUITTING
The Main menu includes an Exit option for leaving the game, but real life doesn’t
always allow enough time to work your way back to this menu to quit. To leave
European Air War at any time, you can press a+Q. The game prompts you to
verify that you want to quit. Note that if you are in the middle of a career mission
when you quit, your career continues with that mission when you come back to
the game.
If you wish to end your current mission without shutting down the whole game,
press q. You must verify this command. If you do, you proceed directly to your
debriefing, and the mission is counted a failure unless you completed your
objective before quitting.
Mouse
If you do not have a joystick attached to your system, the mouse is likely to be the
primary controller for European Air War. Even if you do have both a mouse and a
joystick, the mouse is important. The mouse is necessary for selecting from
menus and maps and moving around the briefing screens.
Mouse controls are represented in this manual in a manner similar to keyboard
controls. Thus, for example, the Left Mouse Button would appear as LMB.
Directional controls are represented by “mouse” commands in brackets—[Mouse
Left], for example.
14
Page 23
Throughout this manual, we stick to the standard terms for using the mouse:
‘Click’ means to click the left mouse button (LMB).
‘‘Right-click’ means to click the right mouse button (RMB).
‘‘Drag’ means to hold down the LMB while you move the mouse.
‘‘Right-drag’ should be obvious enough.
‘‘Double-click’ means to click the LMB twice rapidly.
The mouse controls for the external camera are described in the relevant section.
You can also use the Quick Reference Card as a quick reference. The mouse
motions used to fly the plane are summarized here. You can change these
defaults using the Control option on the Configure Game menu, described in
Configuration.
[Mouse Fwd] Stick forward, nose down (dive)
[Mouse Back] Stick back, nose up (climb)
[Mouse Left] Stick left, bank left (left turn)
[Mouse Right] Stick right, bank right (right turn)
Joystick
If you have access to one, it’s best to use a joystick as the primary control device
for European Air War. Even in tandem with a mouse, the joystick is essential—a
joystick is the optimum controller for the plane in flight.
Directional controls are represented in this manual by “stick” commands—[Stick
Left], for example. Joystick controls other than those for flight are described in
the relevant sections. You can also use the Quick Reference Card as a quick
reference. The default joystick controls used to fly the plane are standard and
fairly obvious; they are summarized here. You can change some of these defaults
using the Control option on the Configure Game menu, described in
Configuration.
15
THE CONTROLS
Book 1: Game Player’s Guide
Page 24
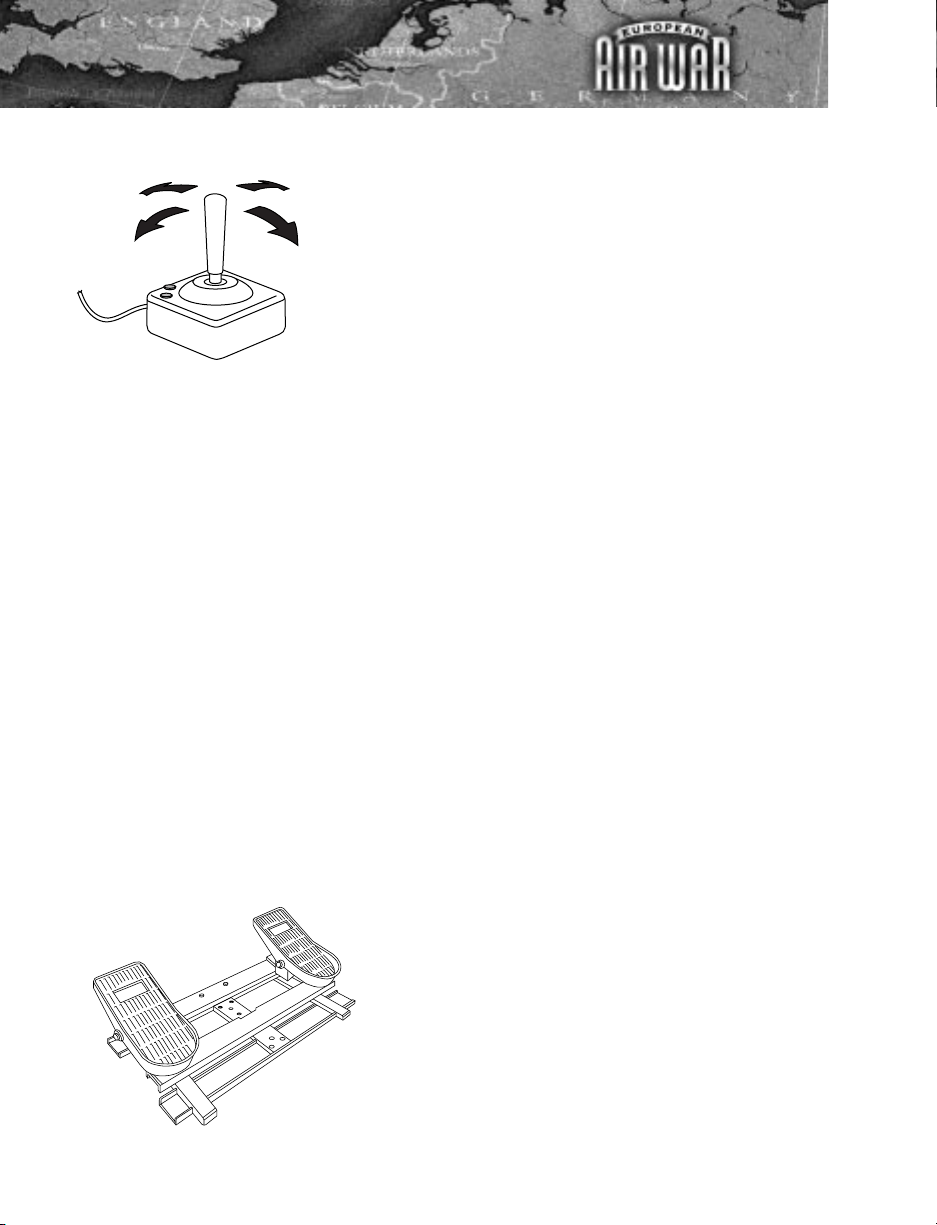
[Stick Fwd] Elevators down, nose down (dive)
[Stick Back] Elevators up, nose up (climb)
[Stick Left] Bank left (left turn)
[Stick Right] Bank right (right turn)
[Button 1] Fire guns
[Button 2] Fire Selected Weapon
Pedals
Foot pedals are optional hardware for controlling the rudder of the plane. If you
do not have rudder pedals, don’t worry; European Air War also allows you to
control the rudder from the keyboard, joystick, or mouse. Using rudder control,
several useful manoeuvres are available to you that are not possible using the
stick alone.
Rudder pedal controls (rudder controls in general, in fact) are represented in this
manual in bold type and enclosed in brackets. Thus, for example, sliding the left
pedal forward and the right pedal back would appear as [Rudder Left]. The
direction of the control (i.e. “left” or “right”) is based on the direction in which the
control motion moves the rudder, as is standard in aviation.
The rudder is the pilot’s only direct method of controlling the yaw of the plane.
(Please refer to ‘Yaw’ in the Glossary for a brief definition.) The primary uses of
the rudder are to counteract the adverse yaw caused by banking with the ailerons
and to steer the plane while on the runway. The rudder can also be helpful when
you’re making those little sideways adjustments as you approach the runway.
The two pedal controls are as follows:
[Rudder Left] Yaw left (counteract adverse yaw
of right bank)
[Rudder Right] Yaw right (counteract adverse yaw
of left bank)
16
Page 25

The Main Menu
Once the opening animation has come to an end, European Air War’s
Main menu appears. From this panel, you control how you will enter the
European Theatre of Operations. You can join the battle for a few brief
months in the early years of the war, fighting over Britain and the English
Channel for victory and the greater glory of your country, or sign on in
1943 for the duration of the hostilities over Europe. You might even
choose to test your wings and your daring on a single mission into the
depths of enemy territory. Once the battle has cooled, you can brush up
on the overall aerial campaign with special features like European Air
War’s Newsreel, also found on the Main menu.
Page 26
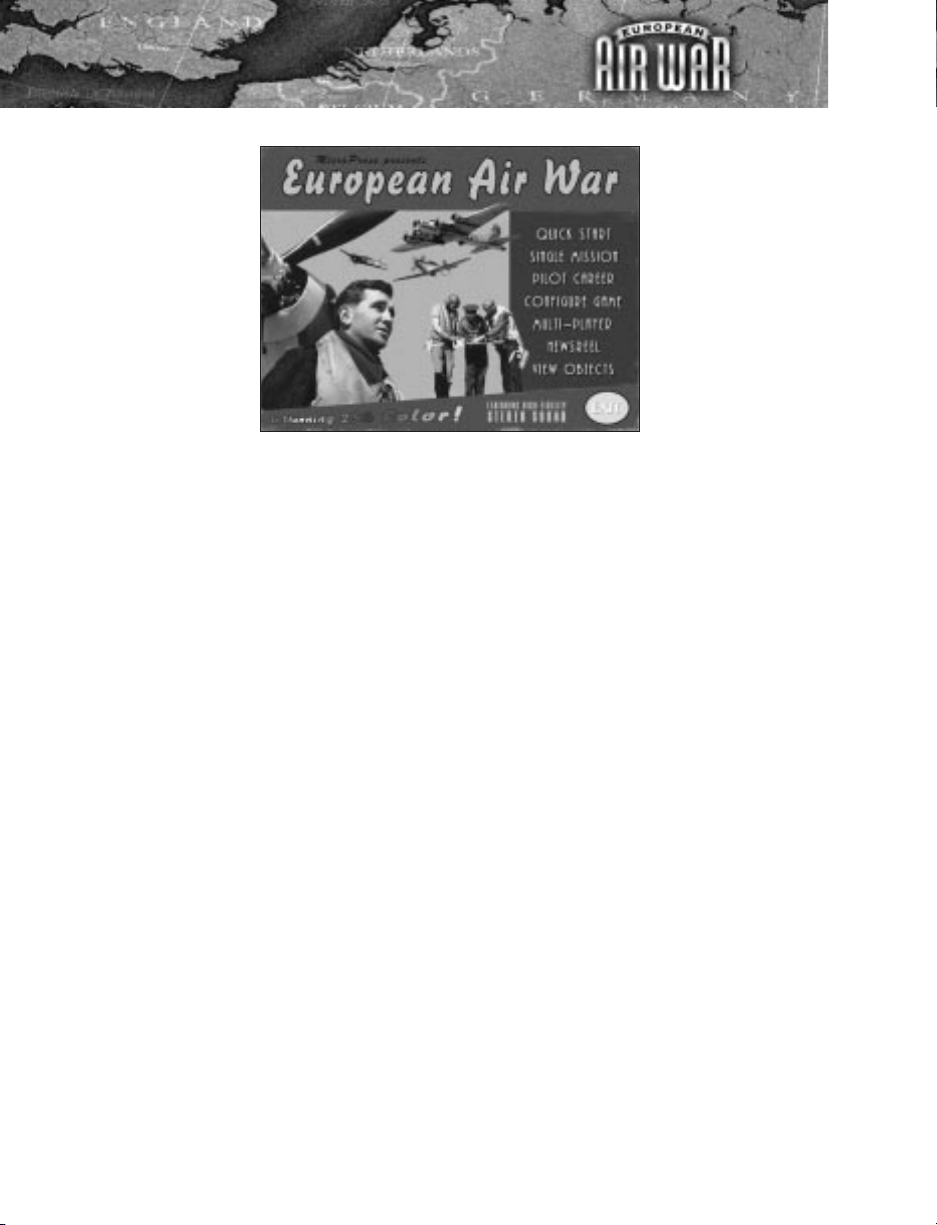
Main menu screen
Quick Start This is the fastest way to jump into the cockpit and get your
first taste of air combat.
Single Mission Design and fly individual missions for either the Axis or the
Allies. Single missions are a good way to practice in
preparation for a piloting career.
Pilot Career Start your career as a pilot for the RAF, USAAF, or Luftwaffe.
Configure
Game
Choose how to control your aircraft and other aspects of the
game.
Multi-Player Test your aerial combat skills against those of your friends.
Newsreel Watch brief films on some of the major aerial operations in
European Air War.
View Objects Examine
—in detail—all the planes in European Air War.
Exit Quit the game and return control to Windows.
18
Page 27
19
Book 1: Game Player’s Guide
Our thanks to RAF Wing Commander James Isles (Retired) for these brief
insights into the air war in defense of England, and for all the other information
he so thoughtfully supplied.
A Personal Experience of a Civilian
The Sunday morning of 3rd September 1939 was beautifully sunny and warm,
with the first tints of autumn beginning to appear. On this particular morning, I
had motored from my home in North Berkshire to be with my future wife, who
was at that time nursing at Lord Mayor Treloar’s Hospital at Alton.
For many months, there had been speculation whether or not there would be
war or peace in Europe in our time, since Hitler was already using force to gain
his way with a programme of annexations. It was known that the offer of
British support in the event of anyone threatening the independence of Poland
had become relevant on the 1st September. Thus, Britain was under obligation
to stand by her treaty.
An ultimatum issued by the British Government to Germany for the withdrawal
of troops from Poland had been rejected by Hitler. Thus, the Prime Minister
made his radio broadcast to the British people. The Matron of the Hospital at
Treloar’s had invited me into the hall where staff were assembled to listen to
the announcement. I shall always remember the empty silence in that hospital
in the moments that preceded the broadcast. When Mr. Neville Chamberlains,
the British Prime Minister, came to the microphone to speak to the British
nation he said:
“This morning, the British Ambassador in Berlin handed the German
government a final note stating that unless we heard from them by eleven
o’clock that they were prepared at once to withdraw their troops from Poland, a
state of war would exist between us. I have to tell you now that no such
undertaking has been received, and that consequently this country is at war
with Germany.”
Those awesome words that came over the air on that peaceful Sunday morning
stunned everyone into a silence like that which precedes an approaching storm.
Within a few months, that storm front had broken for me, and I had become a
Volunteer Reserve in the Royal Air Force.
19
Page 28
20
A pre-arrangement with a elderly aunt of mine living in London was that if war
was declared on 3rd September, I would drive direct from Alton to London,
collect my aunt, and deliver her to some relatives in Berkshire. The general
belief was that as soon as war had been declared, the German Luftwaffe would
release an onslaught of bombers against major cities in Britain—but particularly
on London. Having reached London in less than an hour and driving eastwards
along the Great West Road, I noticed that the streets were almost deserted. I
had seen some air-raid wardens ushering people into the shelters, and I realised
that an alert had been sounded. My aunt lived in nearby Hounslow, and I arrived
to find her and my uncle together with their dog in the air-raid shelter at the
bottom of the garden, where I joined them until the all-clear was given.
As we found out later, soon after the declaration, two officers of the French Air
Force had been on their way to join the Allied Air Mission in Britain. The
Observer Corps had spotted the French plane crossing the coast and flying
towards London, but they failed to identify the aircraft. However, it was plotted
and transposed to the Operations Centre at Headquarters Fighter Command,
who gave the signal “Air Raid Warning Red”. This brought the warning sirens
into use, and the civilian population—believing that the German air raids had
begun—made for the nearest shelters.
In the meantime, the French aircraft had landed at Croydon, a de-briefing had
sorted the matter out, everything was in order, and the all-clear was sounded.
As it turned out, this was an excellent exercise to test not only the Air Defence
System of the UK, but also the Civil Defence Organisation—all on the very first
day that war had been declared.
20
Page 29
Quick Start
If you’re one of those people who like to leap straight into the
cockpit and leave the details for later, here’s the shortest route to
the open skies:
Page 30

On the Main menu, choose Quick Start.
The game automatically recruits you for duty based on what plane you last
selected in the Luftwaffe, Royal Air Force (RAF), or United States Army Air
Force (USAAF) and designates where over Europe the air combat will unfold.
European Air War also selects your armaments and makes all other pre-flight
decisions.
Fly. The plane is already aloft and engaged with the enemy when you slide into
the cockpit. The skill of your adversaries is based on the selection you made in
the difficulty options. Your objective is simply to down them all before they do
the same to you.
Quick Start missions use the same aircraft controls as the rest of the game. For
details on how to pilot your plane, please refer to the Quick Reference Card and
to the Flying a Single Mission section in this manual. Operations in Quick Start
are small in scope, covering less terrain than other available flights, but they let
you dive in and get your feet wet (preferably not in the drink). At mission’s end—
success or your own untimely demise—you receive a mission summary report
and then return to the Main menu.
22
Page 31

Flying a Single Mission
In the thick of war, there’s precious little time for showing young pilots
more than the basics, but lack of experience will get you killed out there.
Don’t risk it all—life, limb, and love of flying—without adequate training
and preparation. European Air War’s Single Mission feature lets you
test the waters. Take the opportunity to practice the same manoeuvres
time and again until you master them. Train in a particular type of
mission or plane, or strive to be an all-around pilot with superior skills in a
variety of different circumstances. You might even want to try flying your
enemy’s planes to see what advantages and disadvantages they may
have. Single missions are also perfect for those not suited to the rigours
of military life.
Page 32

The Single Mission menu puts you at the controls, helping you design and carry
out your own missions without having to answer to your superiors. You decide
what kind of sortie to fly, and in which model of plane. You determine what enemy
forces you’ll face. You choose your target. You even select the weather. Better yet,
since you’re not a career man, you’ve got nothing to lose. Here you have no past
and no future, but can afford to live for the moment. Carpe diem!
Once you have selected the Single Mission option from the Main menu, you see
a board posted with pictures of the different planes you can choose from. Each
board contains only planes from one nationality. You can select a different nation
by clicking on the name of the country at the bottom right, near the Exit button.
Since you’ll be flying one of the planes you order aloft, it’s a good idea to pick
something you actually want to pilot. Maybe you’re training as a specialist in a
particular make and model, or perhaps you’d like to try something altogether
new. In any case, be sure to settle on a plane that captures your interest. After you
select a plane, you can set your mission parameters.
The Hangar
British Hurricanes await servicing in the hangar.
In the hangar, ground crews have been working feverishly for hours to prepare
your plane. Your fuel tanks are topped off. Now it’s time to make some final
decisions before taxiing down the runway. Make your selections carefully, as
they’ll determine how difficult a mission you face.
24
Page 33

You have several options as you wander around the hangar waiting for orders to
man your craft. Use the mouse pointer to search the shed until you’ve found each
one, or simply press the z to reveal them all.
Mission Parameters
Mission Parameters screen
The first time you create a mission, the parameters are on their standard settings.
Thereafter, they default to those from the last sortie you prepared. Move around
the document, clicking on the highlighted words to cycle through your available
choices.
If, as you fill in your preferences, you find that things aren’t turning out quite as
you’d planned, don’t worry. You can go back and change things at any time; you
can even reload and edit a mission after you’ve flown it and saved it.
TIME PERIOD
Select the year of battle. The date influences which aircraft models are in the
mission; only those in production in the year you choose are available for you and
your opponents to fly.
TIME OF DAY
Adjust the time of your take-off. Note that as your mission progresses, the light
shifts to reflect the time of day (or night). Depending on the hour of take-off and
the length of your flight, the sun may rise or set while you’re aloft.
25
FLYING A SINGLE MISSION
Book 1: Game Player’s Guide
Page 34

WEATHER
Even a Group Commander doesn’t have control over the weather during an
operation, but then, he usually doesn’t get to choose which planes the enemy
plans to fly, nor how many of them he’d like to meet in battle. So as long as we’re
departing from reality, we might as well go all the way.
Cloudy skies over England
Weather always has its say in determining if it’s possible to take to the air on any
given day, but during World War II this was especially true. In heavy cloud cover,
lacking modern instruments and technologies, bombers couldn’t bomb and pilots
couldn’t take off (or, worse, land). Yet weather could also turn the course of an
aerial skirmish; a pilot might use a well-placed cloud or a strategic moment in the
sun as effectively as a complicated manoeuvre to elude the enemy.
INSTANT ACTION
This option, available only on single missions, is for those players itching to get
embroiled in the fray. Click in the box to proceed directly to the combat area (as in
a Quick Start mission), with no lengthy flight to endure before you encounter the
enemy.
26
Page 35

MISSION TYPE
There are five basic mission types from which to choose. As each kind requires
aircraft specially tailored for its different goals, your choice of mission will limit
the models of plane available. Possible assignments include:
Fighter Sweep A fighter sweep is a flight designed to clear the skies and ground
of enemy aircraft, often in preparation for a following strike force.
Fighter planes fly ahead and soften an area’s defenses, clearing
the way for bombers or—less frequently—a second wave of
fighters. The more damage a sweep can inflict on its target, the
greater the chance for a successful follow-up strike.
Bomb Target This is a strike meant to damage and destroy enemy ground units
and structures. Oil plants, armament factories, sub pens, radar
towers, warehouses, bridges, hangars, and barracks all make
good marks. A strike often follows on the heels of a sweep,
hoping to catch fighters refueling from the earlier contest. Ideally,
you want to pounce before the enemy has had time to repair any
defensive installations or grounded aircraft that suffered damage
in the previous raid.
Interdiction Less structured than other types of operations, these “search and
destroy” flights generally patrol a particular area, attacking any
targets of opportunity encountered. These might include enemy
planes, air control towers, hangars, anti-aircraft guns, trains, and
convoys of ships or trucks.
Escort Escorts protect other aircraft, most often ungainly bombers,
from enemy planes as they fly toward and over a target area.
Frequently, escorts pass in the wake of a fighter sweep, which
attempts to poke holes in the air defense system around the
mark. Escorts hover near their more vulnerable compatriots,
straying only as far as needed to protect against enemy threats.
The survival of escort planes is incidental; their primary concern
is to give the convoy safe passage to the target.
Intercept Intercepts are defensive flights dispatched to head off enemy
aircraft. You must try by whatever means necessary to disrupt
and disband attacking formations before they can inflict any
damage.
27
FLYING A SINGLE MISSION
Book 1: Game Player’s Guide
Page 36

TARGET
Each time you select a target, it is marked on a large map of the European theatre.
You can scroll the map in each direction by moving your mouse pointer to an
edge. On the map, each target available for the selected time period is
represented by a small white box. To select a target, place your mouse cursor on
or near the white box (until the name of the target appears), then click.
NUMBER OF AIRCRAFT
This determines the number of friendlies. Depending on the number of primary
and secondary planes you order up, you have the power to crowd the skies over
Europe. If you’re angling for overwhelming aerial superiority, go for broke and
assign as many planes as possible, but if heavily congested airways don’t appeal,
you might consider something more modest.
CRUISE ALTITUDE
Select one of three different cruise altitudes: Low, Medium, or High. You can also
use Random, to make each mission different.
HOME BASE
To a career pilot, home base represents everything. It’s a safe haven after flying
an operation, the chance for a meal, a shower, and bed, and it’s where fellow
airmen gather to share harrowing tales and stories of stunning success. But for
you, home base is simply where all missions begin and end.
Your current home base appears on the mission parameter sheet. To specify a
new home base for your mission, click on the name of the base. A map of Europe
fills the screen, showing the available bases represented by white squares, your
current base represented by your national insignia, and your target represented
by a red square and an X. The white squares reflect the approximate locations of
your country’s actual bases of operation during the war. As you pass the mouse
over each square, its name appears.
28
Page 37

When you are selecting a home base, keep in mind your plane’s fuel consumption
and capacity. (Your range is marked on the map.) You need to have enough fuel
for a dogfight and the return trip home. Click on the base that suits, and you
return to the Mission Parameters screen, which now displays your chosen
command post. To return from the map without designating a home base, simply
press q. If you wish to view areas of the map that are currently off-screen,
move the mouse pointer to the extreme edge of the chart, and you can pan up,
down, or over.
FRIENDLY SUPPORT ACTIVITY: SECONDARY AIRCRAFT
Of all the criteria for your mission, none has more import than the planes you
send out for both sides. Different models of aircraft have different strengths and
weaknesses. Tightness of turn, dive speed, service ceiling, and acceleration all
vary according to a craft’s design, and your plane’s performance relative to your
adversaries’ determines whether you will be fairly matched. Each time you select
a plane, the second picture on the right side of the screen changes to show that
aircraft.
By opting for a specific mission type, you have already limited the models
available for your sortie; for instance, a bomber cannot be the primary aircraft on
a fighter sweep. The planes have to be suited to the mission at hand.
29
FLYING A SINGLE MISSION
Book 1: Game Player’s Guide
Page 38

FORMATION SIZE
Determine the size of the formation of your secondary aircraft. Remember that, in
general, the greater the number of planes flying on a mission, the slower the
game performs. (This is also affected by the way you have configured the game
options.)
PILOT SKILL LEVEL
Most flight instructors say there’s no substitute for innate intelligence when it
comes to being a pilot. If you haven’t got it in the brains department, there isn’t
much anyone can do. But they also admit that grey matter isn’t all that counts
when it comes to being a good aviator. Experience and skill can carry you almost
as far.
European Air War allows you to adjust the skill level of the computer pilots, both
friend and foe. (Sorry—there’s no comparable feature to enhance your own level
of play.) Choosing between Green, Seasoned, and Expert, you can select the
average level of pilot skill. This is not a guarantee that you won’t encounter
airmen of different experience levels. When you check Seasoned, for example,
you might still run into the occasional greenhorn or ace.
EXPECTED ENEMY ACTIVITY: ACTIVITY LEVEL
Set this activity level to reflect the approximate number of enemy craft you’d like
to take on with each encounter. Whereas European Air War permits you to pick
exactly how many of your country’s aircraft set out on a mission, your choices for
enemy flights are limited to Light, Moderate, Heavy or Random.
PRIMARY AIRCRAFT
Select the type of aircraft you want the enemy to have as their primary plane.
Each time you click on a selection, the third picture on the right side of the screen
will change to the plane you just selected.
SECONDARY AIRCRAFT
Select the type of aircraft you want the enemy to have as their secondary plane.
Each time you click on a selection, the last picture on the right side of the screen
will change to the plane you just selected. Your choices might be restricted based
on the type of mission.
30
Page 39

AAA ACTIVITY LEVEL
Select the amount of anti-aircraft artillery activity you want to fly against. The
higher the activity level you ask for, the greater chance the enemy will have of
hitting you, since more flak with be flying in the air.
SAVING A MISSION
Once you have gone through and set all the mission parameters, chances are
you’ll want to save the script to fly (or edit) later. If so, simply click on the Save
button.
At this point you have a couple of options for naming the new mission. You can
save the scenario under the default name (the two primary aircraft), or type in a
different name.
When you’ve chosen a name for the mission, click Save. If by chance you should
pick the same name as an existing saved mission, you are prompted to confirm
your choice (and permanently overwrite the old mission). Click Change to enter a
different name for the scenario, or use Save to replace the older version with the
one you have just created.
Naturally, if at any time you decide not to save your mission, use the Cancel
button to return to the Mission Parameters screen.
But what happens if you elect to fly your mission without saving it, later to
discover that you’d like to keep the set-up after all? As long as you haven’t created
another scenario, you can still go back and save it. Call up the Mission
Parameters screen from the Single Mission menu. The settings reflect the last
mission you designed. Simply click Save and proceed from there.
LOADING A MISSION
Starting a mission that you have saved is a snap—just choose Load from the
Mission Parameters screen. A window opens listing all the saved missions. Use
the mouse pointer to highlight the mission you plan to fly (you may need to scroll
up or down the list) and then click on it. Next, click Load (again). The screen of
parameters should pop up. At this point, you can:
1) Fly the mission as is.
2) Tinker with the mission conditions and then fly it immediately.
3) Fine-tune the parameters and save the mission for future play, then fly the
newly saved scenario.
Click on Cancel if you decide not to load a mission design after all.
31
FLYING A SINGLE MISSION
Book 1: Game Player’s Guide
Page 40

MAKING REVISIONS
Sometimes, after you fly a mission, you realize that it doesn’t quite measure up.
The plane doesn’t respond as well as you had hoped, or the weather’s not right, or
you made the enemy too weak. Whatever the reason, you can always modify an
existing mission. Load the old version (see above), which calls up the screen of
parameters. Make your changes, and then save the new edition. Saving it under
the same name will permanently delete the older copy, so if you wish to preserve
the original version, save your current changes under a different moniker.
Armaments Board
Before leaving the hangar, you should check out the Armaments Board. Here,
you select the weapons package you want the ground crew to load on board your
plane and your wingman’s. Click on the chalkboard to get to this screen.
Loading out
Your armament options vary according to the type of aircraft and the kind of
operation you’re undertaking. On a quick sweep, for instance, you might not be
allowed to carry bombs, since the extra weight would slow you down and limit
your manoeuvrability. On the other hand, a heavy external drop tank might be just
the thing; although it will initially curb your speed, it will also increase your range,
and you should be able to jettison the tank before it affects your manoeuvrability
in close combat.
32
Page 41

Highlight and click on the first flight you wish to arm, then cycle through the
ordnance packages to be had. Your selections appear in writing next to the plane.
On the projection screen to the right, you can see a slide of the load-out actually in
place on the aircraft.
Select a load-out for each flight on the day’s run, then click OK to return to the
hangar. There you can at last begin your mission.
Ground crews like these, photographed in the early
1950s, stow your ammo and bombs aboard.
Fly Mission
You’ve now cast the players and handed out the scripts, but be ready for a little
improvisation once you get in the air. The beauty of European Air War’s single
flights is their lack of predictability. The game takes the settings you’ve plugged in
and, within that set of limitations, generates an encounter. This means that with
the exact same setup, you can end up in an almost infinite variety of skirmishes.
You never know precisely what to expect.
Now that you have your mission loaded and customized to please, it’s time to don
your flight jacket and boots. Click on Fly Mission to climb into your plane and
prepare to take the enemy by storm.
33
FLYING A SINGLE MISSION
Book 1: Game Player’s Guide
Page 42

Take-off
It’s show time! Slip on your parachute, adjust your scarf and goggles, and join
your fellow airmen as they stride confidently toward their planes. Already, the
buzz of engines fills the air. The first few flights clear the runway. After a final
check with your ground crew chief, you climb aboard, strap yourself in, and
prepare for take-off.
Almost every mission requires that you get off the ground. There’s no two ways
about it, but how you actually rise to the skies is up to you. Takeoffs can be tricky
for the uninitiated. Lucky for you, European Air War lets you avoid them
altogether, if you so desire. Just sit back and let the autopilot take over; it’ll see
you into the air and on your way without a hitch.
Lifting off
If, on the other hand, you think you’re up to the challenge, here’s the procedure:
1) Extend your flaps.
2) Start the engines by pressing
s+[ for a single engine plane and
s+] to start the second engine in a twin engine craft like the P-38 and
the BF-110.
3) Give your engines 90 or 100% throttle by pressing
9 or s+=.
4) Press
B to release the wheel brakes.
34
Page 43

5) Roll forward until your plane gains sufficient momentum. The exact speed
needed for a smooth take-off differs according to the model of plane, but
it’s roughly 100–120 mph (160–195 kph) for each of the aircraft you can
pilot in European Air War.
6) Pull gently back on the stick to ease your plane off the ground.
7) As soon as you are fully airborne, raise the landing gear (press
G). This will
reduce drag and improve lift.
8) When you’re safely a thousand feet or so above the ground, pull in your
flaps.
Once aloft, climb to a comfortable cruising altitude. How high you want to fly
depends on your mission. To offer any protection, escort planes must remain
fairly close to their bombers, but on other types of operations, your intended style
of approach will determine your precise cruising altitude. Generally, greater
height gives increased visibility and a better energy state.
At this point you can loosen up just slightly and give yourself a small pat on the
back. You made it, but the best is yet to come.
Getting There
Career pilots are under orders to fly a particular plane and to assume a particular
role in flight formations. The pilot of a single mission does not have the same
constraints. As your mission gets underway, you will find yourself in the lead
plane of the primary flight (except on escorts, in which you will be the lead of the
secondary flight). If you’re comfortable with your plane and your role, great. If
not, you can always change aircraft. Inexperienced pilots, for example, should
probably not assume the lead; they have much to learn by trailing and watching
their more seasoned cohorts. (See Viewpoint and the Camera: Changing
Planes.)
35
FLYING A SINGLE MISSION
Book 1: Game Player’s Guide
Page 44

Crossing the English Channel
Take some time at the outset to learn about your plane. The more you know
about how it handles in different conditions, the better off you are in combat.
Experiment with different manoeuvres and learn how to make your craft do what
you want it to do. You’ve got to control it, not let it control you.
The Cockpit Controls
Before engaging in battle, you have to know your way around the cockpit of your
craft. An explanation of the various dials and gauges can be found in the Pilot’s
Handbook, but here are a few notes on other features available as you pilot your
plane.
MISSION MAP
Conveniently stashed in the cockpit is your very own map of Europe. When you
press a+M, the map appears; it’s a good idea to give the autopilot control of the
plane before you open the map. Otherwise, you might want to pause the action
once you have unfolded the map. Press a+P to do so. This allows you to take a
good, long gander without losing any of your flight time. To restart the action, use
a+P again.
36
Page 45

Consult the map to review your intended flight path; icons plot the progress of all
friendly aircraft. Press q or any of the view keys to exit the map. You return to
the cockpit in the standard forward-facing view (or whatever view you selected).
Your plane is moving at normal speed (unless you chose to pause the action).
COCKPIT RADIO
Combat pilots rely heavily on their vision and intuition to see them through battle,
but their radio is also an important ally, a vital link to fellow airmen. European Air
War ’s cockpit radio allows direct communication between you and the other
pilots on your side. Call out a warning—Bandits at ten o’clock!—ask for help, or
listen in as your flight leader issues new orders. Just be quick about it; you’ve still
got a plane to fly.
To initiate radio communication, use the t. A menu appears, listing the people
you can contact by radio—your squadron and Ground Control are on the same
frequency; if there are other squadrons involved in your mission, they’re on
another frequency, and you cannot communicate with them. Press the key that
corresponds to the intended receiver of your message.
When you’re prompted, choose what type of communication you wish to send.
If you don’t see the exact command you’re looking for, try the three menus—
Tactical, Formation, and Navigation.
Finally, choose the statement you want to pass along. If you have opted to issue a
command, you must select not only an action, but also the specific target.
Pressing q at any time cancels your message.
Radio Commands
Commands are best sent before battle. How well commands are followed
depends on pilot morale and skill. Dogfights can be quite chaotic, and you can’t
reasonably expect a rookie pilot to be able to quickly and efficiently rejoin you in
tight formation during a heated battle. All pilots will do their best to follow orders,
but don’t always expect immediate compliance. As the British learned early on,
it’s difficult to remain in formation (which requires a constant eye to avoid
collisions), and watch your enemies (and dodge their guns). It’s normally wise to
break apart or at least loosen formation prior to battle.
37
FLYING A SINGLE MISSION
Book 1: Game Player’s Guide
Page 46

If you are the lead plane in an element, you can send commands to your wingman
(you might sometimes have two), regardless of relative rank. If you are the flight
leader (number one), you can command your entire flight. Only if you are the
squadron leader can you send orders to other flights, or to the squadron as a
whole.
Depending on the situation, you can issue some or all of the following orders to
your wingman. (The default is Cover Me, so if you want any other behaviour, you
must order it.)
Engage
Bandits
Attack the enemy. If enemies have been sighted, your wingman is
free to break off and engage. If there are no enemies in sight, he
waits, then breaks off as soon as you make contact.
Cover Me Stay in formation, but if an enemy targets the lead plane (you),
break off and attack until the threat is removed, then return to
formation.
Attack
Ground Targets
Drop bombs (or launch rockets) at the mission’s ground targets.
Attack My
Target
If out of formation, but in the general area, attack whatever is the
lead plane’s target at the time the command is issued. If in
formation, stay in formation and fire at whatever enemy the lead
plane attacks. (As in all combat situations, self-preservation can
supersede orders; your wingman might need to break off from
time to time to avoid enemy fire.)
Disengage Break off the attack on the current target. Lacking other orders,
your wingman will probably return to formation, but might take
shots at any easy targets on the way.
Regroup Give priority to getting back in formation—avoid enemies when
possible in order to rejoin the lead. (In general, if you are trying to
get planes back into formation, flying straight and slow makes it
easier for everyone catch up and get in place.)
Target Attack enemies. The target commands are on the Tactical sub-
menu. There are three choices: Target All, Target Fighters and
Target Bombers. These order your wingman to focus the attack
on the type of plane you specify (or all enemies). This overrides
the default attack orders for the mission (for example, on a
Bomber Intercept, the default is to target bombers).
38
Page 47

Break The Break commands are also on the tactical sub-menu. You can
order you wingman to break Right, Left, High, or Low. This tells
him to separate form you in the specified direction, generally so
that the two of you can attack a target from different directions.
Drop Tanks Release the external fuel tank.
If you are the flight leader, you can issue nearly all of the same orders to your
flight. The exception is that you cannot order the whole flight to Attack My
Target. There are a few additional flight commands.
Tighten
Formation
Close up the formation. This command is on the Formation submenu. Tight formations look better, and when attacking bombers
can result in more concentrated firepower, but the disadvantages
normally outweigh the advantages.
Loosen
Formation
Spread the formation out a bit, normally about double the current
space. This command is on the Formation sub-menu.
Checkpoint You use the Next and Previous checkpoint orders to get a
loitering flight to continue on course or backtrack. (These
commands are on the Navigation sub-menu.) The map includes
navigation checkpoints, in case any plane becomes lost or gets
hung up engaging the enemy, and these commands tell the flight
to move to one of those checkpoints.
Loiter Here Circle the current position and await further orders. This
command is on the Navigation sub-menu.
Return To
Base
Ground control normally gives this order, but as leader, you can
decide (if you’re massively overwhelmed, for example) to retreat
and return home. Your mission will likely be considered a failure,
but that’s better than failing the mission and getting everyone
shot down. This command is on the Navigation sub-menu.
If you’re the squadron leader, you can give orders to flights other than your own,
and to the squadron as a whole. Squadron Commands are the same as the flight
commands, except that you can choose to issue them to the whole squadron or
to a specific flight.
39
FLYING A SINGLE MISSION
Book 1: Game Player’s Guide
Page 48

Ground Control
You can use the radio to call ground control and request a vector to the nearest
enemy, a vector to your friendly bombers (if you’re on an escort mission), or a
vector back to home base. The vectors to the bandits and bombers are intercept
vectors—the suggested heading for quickest intercept. Note that ground control
is based on primitive radar and a network of civilian spotters. Therefore, some of
the ground control information might be less than accurate.
You can call ground control to request assistance—additional fighters scrambled
to help you out. Depending on how well the battle or war is going, there might or
might not be any available.
Cockpit Red Light
Night missions were perilous affairs prior to the advent of radar. Nonetheless,
wartime strategy requires from time to time that an operation begin before dawn
or near dusk, and so your plane comes equipped with a small light to illuminate
the cockpit dials. (In the dark, your instrument panel can be hard to read.) Since a
bright white light could significantly reduce your night vision, the bulb produces a
soft red glow. To turn it on or off, press s+L. The light works only after dark.
AUTOPILOT
All of the planes come equipped with an autopilot that can take over control of
your craft in flight. (Historical purists should know that few of the aircraft you can
pilot in European Air War actually had an autopilot installed, and none had one
as sophisticated as this. It has been included strictly to ease game play in certain
situations.) Upon encountering enemy aircraft, the autopilot notifies you of their
presence and disengages itself, leaving you once again at the helm. Autopilot can
also assume command during take-off to ensure that you get safely aloft. Of
course, under no circumstances can autopilot save you when your craft has been
damaged beyond control—you must bail out.
Viewpoint and the Camera
Now that you’ve had a chance to get acquainted with the inside of your cockpit,
take a peek at the world outside the plane. It’s time to try out the various
viewpoints and your external camera.
40
Page 49

F-KEY VIEWS
The F-key Views are a standard feature of many flight simulations. Pressing one of
the numbered function keys changes your point of view. There is a slight overlap
of views, so that you have no blind spots. The views are:
1 Standard front-facing cockpit view
2 Right wing, front view
3 Right wing, rear view
4 Over right shoulder view
5 Over left shoulder view
6 Left wing, rear view
7 Left wing, front view
Use s with any of these keys to get a 45-degree up version of the same view.
Full Up view Lap view
There are a number of other controls that change your point of view. Most of
these are for the external camera and are discussed in a later subsection. The
other important ones are listed here:
c+1
Lap view
Lower your eyes as low as possible to view the
instrument panel
8 Virtual Cockpit Activate the Virtual Cockpit mode (see below)
41
FLYING A SINGLE MISSION
Book 1: Game Player’s Guide
Page 50

SNAP VIEWS
Snap Views allow you to quickly scan a field of vision using the numeric keypad.
The key layout is designed in a very easy to use, logical order. The views are:
Numpad 1 Left Shoulder
Numpad 2 Six (blind spot)
Numpad 3 Right Shoulder
Numpad 4 Left Rear
Numpad 5 Up*
Numpad 6 Right Rear
Numpad 7 Left Front
Numpad 8 Front
Numpad 9 Right Front
Numpad 0 Instruments
* You can use the Numpad 5 key in combination with the other snap views to get
a high view. For example, 5+3 looks up and over your right shoulder.
CHANGING PLANES
On single missions (but not on career operations or in multi-player games),
pressing c+6 allows you to jump into the cockpit of a different plane. This
can come in handy. As a rookie, it might be more useful to assume position as a
wingman than to fly the lead plane. You can gain valuable experience just by
watching your more accomplished flight mates. Others (those with sadly
deficient morals) might want to change planes after their own has been badly
torn up. Repeatedly pressing c+6 cycles you through each available aircraft
on your mission (flyable planes only). Cycle too far, though, and you’ll end up back
in your original crate.
TARGETING
As a convenience, and to help simulate the way a pilot locks his attention onto a
specific target and estimates the distance to it, you have the option of using the
not-quite-historically-accurate Targeting feature.
Closest Enemy c+T puts the target marker on the enemy plane nearest you,
and labels that marker with the name of the plane and its
distance from you.
42
Page 51

Next Enemy T moves the targeting marker to the next enemy plane. Using
this, you can cycle through all of the enemies in sight.
Previous
Enemy
s+T moves the targeting marker to the previous enemy
plane.
Closest
Friendly
c+Y puts the target marker on the friendly plane nearest you.
Why would you want to target friendly planes? Hopefully, just to
find out who’s who and how far away they are.
Next Friendly Y moves the targeting marker to the next friendly plane. Using
this, you can cycle through all of the friendlies in the mission.
Previous
Friendly
s+Y moves the targeting marker to the previous friendly
plane.
Clear The B key removes the targeting marker.
VIRTUAL COCKPIT MODE
The game’s Virtual Cockpit view is the next closest thing to being in an actual
cockpit. You can swivel your head and crane your neck just as a fighter pilot does,
with none of the limitations (or frustrations) of static views. At first it’s easy to get
disoriented in Virtual Cockpit mode, but with practice, you’ll find it extremely
natural and useful in combat.
To access this virtual view, press 8. All the cockpit dials remain functional, and
you still control the craft, but the camera control now moves your “head.” Pushing
the control forward tilts your head forward (and your view down), while pulling it
back tips it back (and your view upward). Moving to the left or right pans in that
direction. (Please refer to the Glossary if you need definitions of ‘tilt’ and ‘pan.’)
Using the virtual cockpit, you have the same range of view as a pilot in a real
fighter plane.
43
FLYING A SINGLE MISSION
Book 1: Game Player’s Guide
Page 52

44
PADLOCK
An added advantage of the virtual cockpit view is its padlock feature, which
allows you to simulate the way a pilot keeps a single enemy aircraft in view at all
times. Activate the padlock mode by pressing Numpad * (the asterisk on the
numeric keypad). You can also turn it off with this key. Your view immediately
shifts to your current target and stays on him. Once you’ve locked onto a
particular craft, it’s easier to manoeuvre until you face him, and then go for the
jugular. Beware, though, the deadly threat of target fixation. That’s when you
concentrate on a single plane, completely forgetting about all the others training
their sights on you. To exit padlock view, press any of the other view F-keys.
Use the Numpad / key (slash) to padlock the plane nearest the center of your
view. Note that this is not necessarily the closest enemy, but it’s the one you have
the best shot at at that moment.
Note that you can activate the padlock feature even if you are not in the Virtual
Cockpit. You are switched into Virtual Cockpit mode, then the padlock goes into
effect.
THE EXTERNAL CAMERA
Hanging out in the pilot’s seat is fun, but sometimes you want (or need) a
different perspective on the world. Time to dust off the external camera, which
lets you roam at will outside your plane, get a fresh view of a dogfight, or search in
the distance for signs of the enemy. If you plan to stray far, consider enabling the
autopilot—or pause the action altogether (a+P). This frees your hands and your
concentration while you set up any unusual camera angle. Leaving an external
camera view is as simple as selecting another camera viewpoint or any of the
static views.
The external camera gives you a bird’s-eye view of the action.
Page 53

Camera Controls
Some of the external camera views allow you to control the camera and some do
not. Some give you partial control. Regardless of what you can and cannot do
with a camera, if you can control a specific movement, the keys you use to do so
are always the same. The default mouse controls are:
LMB+[Fwd] Zoom in or move forward
LMB+[Back] Zoom out or move backward
[Left] Track left (clockwise) around the plane
[Right] Track right (counterclockwise) around the plane
[Fwd] Track up—over around the plane
[Back] Track down—under around the plane
RMB Reset to original placement
You can use the keyboard and joystick, as well—with one or two slight
modifications. If you plan to use a joystick with a “hat” to control the external
camera views, first configure which button or key activates the zoom functions
(which one acts in place of the LMB). You control all other camera movements
exactly as with the mouse. When you’re operating the external camera with the
keyboard:
H Track left (clockwise) around the plane
J Track right (counterclockwise) around the plane
U Track up—over around the plane
N Track down—under around the plane
Camera Views
There are several different views for the external camera. Each has its own
benefits, and the best circumstance for use of each depends on your needs.
(Keep in mind that the keys listed are the defaults; if you’ve re-configured them,
you must use the controls you set.)
45
FLYING A SINGLE MISSION
Book 1: Game Player’s Guide
Page 54

Chase s+8 This view has the camera fly along with your plane and
keep it in focus. You can inspect your craft from any
angle, check for damage, or just admire the sleek beauty
of your plane.
Flyby c+8 With this view, the camera positions itself ahead of your
plane, then stays still and follows as you go by. It’s a nice
view, but it’s not often useful.
Track Next 9 Track mode functions much like the Chase view, except
that it follows planes other than yours, and it sticks closer
to the plane. This command changes the focus of the
camera to the next plane. If the camera is not yet in Track
mode, this command puts it in that mode.
Track Previous s+9 Change the focus of a camera in Track mode to the
previous plane. If the camera is not yet in Track mode,
this command puts it in that mode.
Target 0 When you have a plane targeted (see Targeting for the
scoop), you can get a close-up view of that plane using
Target mode.
Player to Target s+0 This Target mode view positions the camera so that your
plane is in the foreground and your target’s in the
background. The camera moves to maintain this
relationship, which can be handy when you’re trying to
get in position to fire. If the camera is not yet in Target
mode, this command puts it in that mode.
Target to Player c+8 This Target mode view is just like Player to Target, except
that your target is in the foreground and you’re in the
background. If the camera is not yet in Target mode, this
command puts it in that mode.
Bomb - Any time when one of your bombs has been released but
hasn’t yet hit the ground, you can switch to a camera
mounted on the bomb.
Player to Bomb s+- Any time one of your bombs is in flight, you can watch it
from a camera under your plane.
Bomb to Player c+- Any time one of your bombs is en route, you can look
back at your craft from a camera mounted on the bomb.
46
Page 55

Accelerating Time
As any World War II pilot knows, getting to the target area can take considerable
time. Once you feel at ease in your aircraft, you can opt to speed up your trip. The
game provides a way to hasten your jaunt. While not historically accurate, this
feature nevertheless saves you the tedium of long stretches of flight with little
action.
European Air War’s time acceleration feature allows you to stay in the cockpit
and use any of the external camera views while you move several times faster
than normal. Pressing U increases your rate of speed (for greater
acceleration, repeat), while Y reduces it. For anything faster than four
times normal, you’ll probably want to engage the autopilot. At great speeds, even
slight movement of the joystick can cause you to swing wildly out of control, with
events happening so quickly that you may not have the chance to recover.
Encountering the Enemy
Sure it’s fun to fly—doesn’t everyone dream of sliding into the cockpit of a fighter
plane and soaring into the skies? Just don’t forget that there’s a war on. Sooner
or later, you’re going to come up against an enemy aircraft, and you’d better have
a plan.
If you’re new to flying, you should study the Pilot’s Handbook for the skinny on
combat tactics and manoeuvres, but in the meantime, cast a glance through the
next few pages. They’ll get you started on the basics of battle.
IDENTIFICATION
As a military pilot, your first priority is to identify any unknown aircraft you
encounter. Before you can take action, you’ve got to determine whether you’ve
spotted an enemy plane or one of your own, and you’ll have to do it without
benefit of radar or the IFF (Identification Friend or Foe) systems routinely installed
in modern warplanes. Sometimes you’ll know just by how the bogey acts;
opening fire on you is generally a pretty good indication of hostile intent. At other
times, though, you must get close enough to identify a plane by its shape and
markings. (If you’d rather not risk your own neck—and don’t mind being
unscrupulous—you can use the external camera to roam ahead and check
things out long before you arrive on the scene.)
47
FLYING A SINGLE MISSION
Book 1: Game Player’s Guide
Page 56

As with unidentified planes, you should also verify any and all ground targets
before commencing an attack. If they’re in the vicinity of the target’s coordinates,
they’ll more than likely belong to the enemy, but they might not be your specific
mission target.
Take heart that the enemy has all the same technological restrictions as you.
They, too, must rely on visual identification. If you’re sneaky enough about your
approach, they may never even know that you are there.
Closing in on the enemy
GROUND TARGETS
There are a variety of objects on the ground at which you can aim. These include
bases, factories, forts, airfields, submarine pens, bridges, AA guns, and convoys
of ships or trucks. Each carries different strategic or tactical weight. Many will be
targets of opportunity on the return trip—a good way to rid yourself of extra
munitions and to curry favour with your commanding officers.
CYCLING YOUR GUNS
Because ammunition is such a precious commodity, a pilot will often try to
conserve his meagre supply by firing only certain of his guns. Every fighter in
European Air War comes outfitted with a feature designed to help you do just
that. At the outset, your guns are set to go off in tandem. Using S, however, you
can cycle through different combinations of firepower. (To cycle backwards, try
s+S.) Since the guns are set up differently on each plane, cycling patterns
vary among the aircraft. You can review the selections by pressing c+S.
48
Page 57

DOGFIGHTING
Dogfighting refers to a close-quarters combat between aircraft. It evokes
romantic images of World War I flying aces: the Red Baron bravely manning his
triplane, scarf swirling in the slipstream. Yet these dogfights are anything but
elegant. Your sole aim is to give the enemy a worm’s-eye view of the world before
he does the same to you. Speed, manoeuvrability, and a stout machine will all
stand you in good stead, but in a dogfight there is no substitute for pilot skill—
except maybe luck.
Fighter pilots entering battle must believe that they’re at least as good as the next
guy, and that means practicing. Only over time can a pilot establish a repertoire of
trusted moves, and only through extensive combat experience can he cultivate a
strong situational awareness. These are the tools that will see him through a
dogfight.
The type of plane in which you enter a dogfight is important; generally speaking,
you’ll fare better if it’s nimble. More important, however, is to know and exploit
your craft’s strengths. A bomber cedes the advantage of manoeuvrability to a
lightweight fighter. However, if he plans it right, the bomber pilot has nothing to
fear in close-quarters combat. Because of his craft’s great weight, he can pick up
plenty of speed in a dive and outrun most other aircraft. Anyone senseless
enough to follow sets himself up directly in the sights of the tail gunner.
A few basic rules apply to dogfights. As in most forms of aerial combat, the
higher plane has a distinct advantage. While a plane at a slower speed is more
manoeuvrable than a faster moving craft and is capable of a tighter turn, it is
also an easier mark. Against another fighter, strive to get in position behind and
slightly above him. From there, you can dictate the course of the fight.
Conversely, don’t let your enemy linger long in that position, unless you can
spare a few tail parts.
PADLOCK AND TARGETING FEATURES
During a dogfight, it can be difficult to locate and follow an enemy. European Air
War includes a couple of features that, though not entirely historically accurate,
can help you in times of need.
You can activate a targeting marker by pressing c+T. The marker places a box
on the enemy plane closest to the center of your view and labels that box with the
name of the plane and its distance from you. (See Targeting, in Viewpoint and
the Camera, for more.)
49
FLYING A SINGLE MISSION
Book 1: Game Player’s Guide
Page 58

Combine this feature with the Padlock feature (Numpad * and /), which has
your view follow the targeted plane, and you should have no trouble keeping your
enemy in sight. With a little practice you should be able to use these two features
together to rack up plenty of kills. (See Padlock, in Viewpoint and the Camera,
for more.)
DIVE BOMBING
Bombers exist for a reason; they’re designed to pack quite a punch. Yet you’ll find
that with a knowledgeable pilot at the helm, other aircraft can also serve
effectively on bombing runs. With a bit of practice, you’ll hardly even miss having
a true bomb sight, and though your explosives don’t carry the same wallop,
they’re more than enough to do some damage.
All the same, don’t kid yourself; dropping your bombs is a harrowing task that will
push your aircraft to its limits. For one, your target is far from unwary. Enemy
fighters swarm in droves around the bomb site, even when a successful sweep
has recently blown through. There’s no end to the flak from anti-aircraft artillery
(AAA) on the ground, and to make matters worse, you have to fight your way
down through all the traffic to have a shot at delivering your packages. It’s a
daunting assignment. Hope you’ve got nerves. Press W to arm your payload.
Flak from anti-aircraft artillery can be very dangerous.
50
Page 59

Traditionally, a dive bombing run starts fairly high. In between jukes to dodge the
flak, you’ve got to dive long enough to line up with the target. When you’re almost
over the objective, push your nose down into as close to a vertical drop as your
plane can handle. (You’ll learn in time what your craft can tolerate.) Using Button
2 or e, unleash your bombs before you’re directly above the target. Since the
explosives are moving with the same speed as the plane, they’ll continue to travel
forward after you release them. If you’re firing on a moving target, take its motion
into account as well.
The saying goes that a miss is as good as a mile, and generally speaking this is
true. However, bombs can still take a heavy toll, even without scoring a direct hit.
The closer you can get before releasing your payload, the better, but be sure to
leave enough room to pull out before the ensuing explosion.
Standard dive bombing approach
STRAFING
Guns blazing, you swoop low over a landing strip and pepper the ground with
lead—few methods of combat elicit the simple glee of a strafing run. Strafing
means firing your guns at a ground target while making a low-level pass
overhead. Most Allied fighter planes returning home from an escorting mission
would expel all remaining ammo on any ground target that was on the flight path
home. Many grounded Luftwaffe planes—as well as some train and truck
convoys—were destroyed in this way. Don’t underestimate the amount of
damage you can do to the ground targets, or how easy it is for them to shoot at
your tail as you pass by.
51
FLYING A SINGLE MISSION
Book 1: Game Player’s Guide
Page 60

Strafing an airfield
The key to a successful strafing pass is to fly low and fast. Bear in mind that you
will lose some altitude during the course of the run. Get low enough to fire, but
not so low that you’ll end up brushing the ground. Speed is also essential. To
protect yourself from anti-aircraft fire from below, you must fly as fast as possible
without sacrificing the ability to aim your weapons. Fire off your rounds, aiming as
you would at any target in the air, then pull up at the end of your pass. If you’ve
got the bullets and the bravado to make a second run, perform a wing over and
have at it.
Effective strafing can be as devastating as a bomb—note the damage to this hangar.
52
Page 61

FIRING ROCKETS
During the later part of the war, both sides had the ability to carry and fire rockets.
These rockets were very basic, crude weapons that, once fired, followed a
straight course until they hit an object. Most of the rockets were meant for
ground targets, due to their inability to fly a straight path for a long distance. To
use rockets on a ground target, Press R to arm your rockets, perform a strafing
attack, and use Button 2 or e to release a rocket salvo just before you are
about to pull the nose of the plane up. Remember to get as close as possible to
the target, since these rockets have a tendency to lose accuracy as they travel
farther.
German pilots enjoyed using their rockets to break up bomber formations. the
B-17 and B-24. To fire a rocket effectively at a bomber, you don’t need to get
close—1,000 meters or so is a good range.
Getting Shot Down
No one likes to ponder his own mortality, least of all a military pilot who depends
on steady courage and confidence to get him through battle, but death is a fact of
war. No one is immune. Fortunately, as the pilot of a single mission, you have
multiple lives to squander. Each time you are shot down or bail out, European Air
War reassigns you to the least-damaged friendly craft remaining aloft, and you
find yourself in the cockpit once again. If the new plane doesn’t suit your liking,
cycle through the rest of the available aircraft and select another (see Viewpoint
and the Camera: Changing Planes). There is no guarantee, however, that it will
be airworthy. When the final friendly plane falls from the sky, your luck and your
mission come to an end.
Returning and Landing
Unless your aircraft has suffered heavy damage, returning home should be no
more difficult than the flight to the combat area. Just be sure to watch over your
shoulder as you speed away from the target. Even in the face of devastating
destruction, enemy forces frequently manage to mount an attack on parting
planes. Approaching from behind, they are hard to pick up. Your best bet is to fly
high and fast.
53
FLYING A SINGLE MISSION
Book 1: Game Player’s Guide
Page 62

Once you’re out of immediate danger, it might be tempting to cruise home in
relative tranquility by letting the autopilot take over, but keep your eyes peeled on
the return flight for “targets of opportunity.” (This is when visual identification
becomes both more difficult and more important.) Laying waste to a target of
opportunity, in addition to raising your score, can help you dispose of leftover
munitions that might otherwise break free on landing and cause headaches—or
worse—at home base. If you plan on landing with bombs still aboard, you’d better
make it a gentle touchdown.
If you’d rather not land your plane, you don’t actually have to. Simply fly back
into friendly territory and then quit. You proceed directly to your debriefing.
(Note that if you quit the mission in enemy territory, you are not credited with a
successful sortie.)
Many World War II pilots enjoyed performing a flyover before landing, waggling
their wings to indicate a successful mission and a safe return. Unless you’re a
veteran, that kind of panache can get you killed; landing is the most difficult and
dangerous part of flying, and it requires all of your concentration. A myriad of
things can go wrong on a touchdown, any one of them enough to send you
crashing to earth.
To land, you need to allow yourself plenty of room to manoeuvre. This is the most
frequently ignored axiom of flight, and the most important as well. If possible,
begin your descent a full three miles or more from the runway. As you approach,
line your plane up with the edge of the landing strip, coming in only slightly above
stalling speed. Avoid going too slowly, though, lest you lose control or stall your
craft. Try also to refrain from making excessive corrections to your plane’s
attitude.
54
Page 63

In preparation for touchdown, lower the landing gear and fully extend your flaps.
Ideally, you’d like to come in steady and nose-high. Any tilt or sideways
movement can throw off your approach. Try to touch down simultaneously with
all three wheels. As soon as you set down on solid ground, cut the throttle and
apply your wheel brakes. You should still have enough steering (using the rudder,
not the stick) to guide your plane, just in case you’re veering toward the edge of
the runway.
Coming in with wheels down
Debriefing
Following every sortie, you receive a mission summary detailing your
performance. This info should be self-explanatory. It includes a recap of the
objective and a tally of enemy casualties. Your total score is based on what you
destroyed or damaged during the operation, as well as on whether the mission
was a success. This is then modified by the difficulty settings that you selected
before your flight began.
When you’re done here, you are free to go. You have your choice of two options.
They are:
Re-fly Immediately attempt the same mission again. The objective and
all other parameters are exactly the same, although the point of
enemy contact and number of enemies might well be different.
OK After a single mission, this returns you to the Main menu. If you
just finished a career mission, this is how you return to the
barracks.
55
FLYING A SINGLE MISSION
Book 1: Game Player’s Guide
Page 64

A Hurricane Pilot’s Combat Report
Whilst leading Red Section on a patrol SE of London, I noticed AA fire just
west of London, and on investigation I noticed a force of some forty enemy
aircraft which I could not immediately identify. I put my section into line
astern.
I made towards the AA fire, when two ME109s appeared to my right. I turned
and attacked them. I gave one a burst, and it half rolled and dived vertically to
12,000 feet, when it straightened out. I had dived after it, and as soon as it
had finished its dive, I recommenced my attack. I was then going faster than
the 109 and continued firing until I had to pull away to the right to avoid
collision. The enemy aircraft half rolled and dived vertically, with black smoke
streaming—it seemed—from underneath the belly of the aircraft. I followed it
down until it entered cloud at about 6,000 feet and had to recover from the
dive, as the 109 was then travelling at something like 480 mph. I then made
my way through the cloud at a reasonable speed and sighted the wreckage of
the aircraft burning furiously.
The aircraft was painted yellow from spinner to cockpit.
I climbed up through cloud and narrowly missed a JU88, which was on fire
and being attacked by several Hurricanes. Unfortunately, as I was getting low
on fuel, I could not make further contact with the enemy and so returned to
base.
56
Page 65

Career Pilot
So you think you’re ready for the big time. You want to enlist, and not a
moment too soon as far as your country is concerned; there’s always a need
for more pilots. This war’s to be won in the air, and taking part is your
chance for promotion, maybe a medal or two, and (if you’re really
outstanding) a place in history and a wing in the Hall of Fame. That’s all well
and good, but before you head to the recruiter’s office, make sure your life
insurance is up to date. There are no guarantees in this line of work.
Page 66

Creating a Pilot
Joining up is simple, but there’s still some paperwork to fill out before you receive
clearance to fly. Once you decide to enlist, click Pilot Career on the Main menu.
At this point, you choose the period in which you want to take part:
Battle of Britain: 1940 Start a shortened tour of duty in the
Battle of Britain.
European Theatre: 1943 Sign up for a full-fledged career in
the European theatre of war starting in 1943.
European Theatre: 1944 Sign up for a full-fledged career in
the European theatre of war starting in 1944.
In creating a pilot, your very first decision is whether to sign up for an abbreviated
stint that lasts only through the Battle of Britain or enter combat in the European
theatre of war. Click on whichever career you prefer. You must also to select
which air force you want to join. Point and click on the nationality you wish to
fight for. (Note that the United States did not participate in the Battle of Britain; to
fly for the USAAF, you must embark on a full European career.)
There are a few other options near the bottom of the screen.
Start Begin the career, using the current selections.
Load Resume the career of a pilot already in the game.
Hall of Fame Rub elbows with the most celebrated aces of European Air War.
Exit Leave this screen without starting a career.
58
Page 67

When you choose Start, the game presents the Personal Record screen, where
you set your name, rank, and unit. A name has been chosen for you, but if you
prefer, you can create your own. Simply highlight the name box, delete what’s
there, type a name, then press e.
Personal Record screen
Next, using mouse clicks in the appropriate spots, cycle through the ranks at
which you can start. Rank defaults to the lowest standing in each of the three air
forces, but you are free to choose something a little more glorified. Higher rank
lends greater control over decisions, but also greater responsibility. Don’t get in
over your head.
Now, you assign yourself as a new recruit to a specific unit. The group or wing you
highlight determines which plane you fly in your initial action. For a European
career, it also affects the date of first combat. Highlight your choice of group or
wing and click on it. Then designate one of the squadrons or staffel detailed to
this group.
Finally, you have the option to change the settings that determine some of the
overall characteristics of your career.
Difficulty Select the overall level of challenge you want to deal with; among
other things, this affects the flight and combat skill of the other
pilots.
59
CAREER PILOT
Book 1: Game Player’s Guide
Page 68

Length Choose how long a hitch you intend to sign up for—Normal or
extra Long.
Limited
Aircraft
If you turn this on, you can lose a career not only by being killed,
but by losing too many aircraft in the course of the campaign.
Limited
Supply
When enabled, this provides the added realism of limited access
to vital equipment; the availability of drop tanks, rockets, and
other supplies might be curtailed by the vagaries of war.
You are now ready to launch your career. Click OK to accept your recruitment and
assignment. The pilot data is automatically saved (although you can’t load it until
you’ve flown at least one mission as that pilot). Military officials welcome the
newest airman to the conflict with a brief message (you can bypass this by
pressing any key) before handing you over to your commanding officer. Report
immediately to the Briefing Room.
If, for whatever reason, you prefer to scrap your career, click on Cancel, and you
return immediately to the Career menu. From there you have the same choices
as before: to create a new pilot, load an existing career, or exit to the Main menu.
Loading a Career
Sometimes, instead of creating a new pilot identity, you want to resume a career
in progress. No problem. From the Career menu, choose Load. (The option is
available only if you have previously created and saved at least one pilot career.)
European Air War furnishes you with a list of all the saved pilot careers, as well
as the airmen’s nationalities and present status. You can continue an active
career or permanently delete a pilot from the list.
Continuing To continue a career already in progress, move the mouse pointer
to an active pilot and click to designate your choice. That pilot’s
career resumes when you click OK.
Deleting For those undistinguished pilots whose careers are floundering or
downright dead in the water, or for any other airman whom you
might wish to polish off permanently, the Load menu offers a
Delete function. Remove any pilot from the list of saved careers
by highlighting his name and clicking on (surprise) Delete. You
must verify this choice, so that you can’t accidentally snuff out
your most promising pilot in mid-career.
As always, Cancel returns you directly to the previous menu.
60
Page 69

The Briefing Room
The Briefing Room is your first stop after starting or loading a career. Here, you
join the others in your squadron and await the call to man your planes. You have
no idea what the day will bring.
Unlike single missions, career mission assignments are handed down from
above. Remember, you’ve officially renounced any ties to the civilian way of life,
including the right to act on your own initiative. You’ve got no control over the
planned strategy of aerial encounters (your chain of command reserves that
honour), and you’ll probably never even hear all the details—the less you know,
the better, lest you somehow fall into enemy hands.
There are a couple of things you can count on, though. You will carry out the
same kinds of missions that you flew in training (refer to Mission Type in the
Flying a Single Mission section for details), and you’ll never have a mission
completely free of enemy resistance.
Listen up. Your commanding officer is about to fill you in on the details of your
day. This is the only chance you have to learn about your mission—when it starts,
where the target is, what kind of enemy activity you can expect, and all the other
nitty-gritty particulars. Your life depends on knowing this stuff, and your fellow
pilots are counting on you not to let them down. The entire course of the war
could hinge on the success of this one operation, so pay attention.
Your CO begins to brief you on your mission. As you listen, you can follow his
words via the text at the bottom of the screen. During the talk, you view a
detailed map of Europe, complete with your intended flight path, expected flak
concentrations, and way points. Letters mark the way points in your journey—the
coordinates ending each leg of your flight.
As any air force man will tell you, commanders tend to get long-winded, even in
so-called briefings. If you’d prefer not to hear your CO drone on, just press q or
click anywhere on the screen. Nowhere else in the military can you so easily
silence those in command—and without fear of repercussions!
Following your leader’s prepared presentation, you have the option to review the
very same details at your leisure. Press the z to reveal all of your choices.
(Wait until he’s finished, though. Keep in mind that if you click anywhere, you’ll
cut your commander off—so take care not to use the mouse unless you mean to.)
61
CAREER PILOT
Book 1: Game Player’s Guide
Page 70

Click on the map to examine your flight plan up close. Only a small area of the
map is visible, but you can access other regions by guiding the mouse pointer to
the edges of the chart. Press q or OK to return to the briefing room.
The mission description is also available for your reading pleasure. The better you
know the details, the more prepared you are for the operation. If you didn’t quite
catch all the information or want to re-familiarize yourself with it prior to take-off,
select the briefing room easel. Use q to exit the display when you’re done.
When you’re satisfied that you’ve absorbed everything possible about the
mission’s objectives, click Continue to move out to the hangar. Or if you prefer,
Quit your career and return to the Main menu. (Your career will be scrapped for
good, so don’t take this action lightly.)
The Hangar
The Hangar for career pilots resembles that in Single Mission, with a few
important exceptions. They are as follows:
ARMAMENT BOARD
Selection of weapons is contingent upon your rank. At low ranks, you may be
unable to choose even your own armament load, while higher ranking officers
can alter the ordnance selection for their own flights—and eventually armaments
for each flight on the mission.
FLY MISSION
Once you’ve finished poking around the hangar, slip into your Mae West, check
your dog tags, and click on Fly Mission. You’re set for take-off. (Refer to Flying a
Single Mission for details on getting aloft and piloting your craft.)
In contrast to flying a single mission, on a career mission you will not necessarily
be in the lead plane at take-off. Instead, you are assigned a flight position
appropriate to your rank and experience. You might want to glance around before
lifting off, to establish your position relative to the other planes on your flight. The
easiest way is to use one of the external camera views.
62
Page 71

Awaiting your turn to take off
The Aerial Campaign
Career missions play out in much the same fashion as individual ones, relying on
the same flight controls and types of encounters. Career flights, however, have an
added dimension—time—which changes certain aspects of the game.
BATTLE LINES
The battle lines drawn between the nations at war move periodically during the
course of the conflict. Towns and territories gain their liberty or learn to live under
the harsh conditions of wartime occupation. Each battle line’s movement more or
less follows a historical timeline, but depending on the damage you inflict on
enemy forces, you can hasten or put off the shift.
CHANGING BASES
During World War II, commanders constantly shuffled pilots (and other
personnel) from base to base as dictated by strategic and logistic needs. You, too,
may be called upon to move to a new location at any point for tactical reasons. In
that event, you and your unit will receive packing orders. Allow a 48-hour delay
while all support personnel and equipment arrive, and then you’re good to go. At
the next mission briefing, you get your first glimpse of your new home base.
63
CAREER PILOT
Book 1: Game Player’s Guide
Page 72

REPAIRS AND REPLACEMENTS
In the wake of a raid, no air base crew twiddles its thumbs and sits idly by waiting
for the next one. Instead, support personnel (and pilots) work feverishly to repair
the damage and brace for the next onslaught. This holds in European Air War as
well; ground targets undergo repairs and renovations. Just because you bombed
the starch out of an airfield last week, knocking out the anti-aircraft artillery,
munitions sheds, and runways, don’t think for a minute that they won’t soon be
up and running again.
The supply of planes and pilots, too, requires constant replenishment as a
result of wartime attrition. When necessary, your HQ furnishes replacements,
although—as in any war—your unit may not receive a full complement, supplies
being at times limited.
PILOT FATIGUE
Pilot fatigue was a serious problem in the Second World War. It arises when
airmen fly numerous missions in a very short period, with little chance for rest.
Flying every day, a pilot can never fully relax, and the mental strain takes its toll
over time. Fatigue threatens a person’s reactions and decisions, the very
cornerstones of a fighter pilot’s skills. Yet in the thick of the hostilities,
commanding officers can’t necessarily afford to ground their airmen or send
them away for a week of R&R. In European Air War, no pilot—except perhaps
you—is immune to the effects of fatigue.
COCKPIT RADIO
Your rank and flight position determine whom you can contact by radio and what
you can say. Anyone can make observations, give warnings, or request help, but
all other radio communications are restricted. Your options depend on your rank.
(Please refer to Cockpit Radio, in The Cockpit Controls, for details on using the
radio.)
RESCUE, CAPTURE, AND DEATH
Your plane went down, and now you’re stuck. All you can do is snack on bugs and
bits of bark as you wait for someone to happen by. Who comes to your rescue
depends on where you wound up.
64
Page 73

If you landed in one piece in friendly territory, you’ll no doubt be picked up by
locals and wend your way back to your unit. Behind enemy lines, though, you
have a much slimmer hope of flying again for your country. Of course, there’s
always the off chance that the resistance might smuggle you to safety, but it’s far
more likely that you’ll wind up a prisoner of war, scratching out an existence in an
enemy camp. A POW’s career as a pilot is as good as over.
Death is the only thing worse than internment as a POW. How you die doesn’t
much matter; the result is the same. You’re history; your career is at an end.
Perhaps you can take some small measure of consolation knowing that your
death and discharge were honourable, so your family will receive your pension.
Debriefing
At the end of every career sortie, you get a written debriefing—even those of you
who didn’t make it back. If you thought that by dying on the mission you’d be
exempted, you were wrong; the military owns you in death as in life.
Medals and Promotions
Sure, everyone dreams of returning home a highly decorated war veteran, and
you’re no exception. You’d love to be the toast of the town. To be a hero, though,
you’ve got to act the part, which means earning your laurels in battle. Medals are
awarded in recognition of incredible feats of daring, bravery, and courage
performed in the line of duty.
A slew of medals
65
CAREER PILOT
Book 1: Game Player’s Guide
Page 74

Given a stellar service record, you might someday earn promotion to a higher
rank. In part, this reflects recognition of your increased knowledge and skill, your
growth as a pilot, and your battle experience. You must also have demonstrated
potential as a leader, and there must, naturally, be a vacant position. If chosen for
promotion, you should feel honoured and lucky to have made the grade. If the
chain of command passes you over in favour of another, climb back into the
cockpit and work out your anger on the enemy.
Barracks
Back at the barracks after the latest flight, some pilots catch a game of poker,
some read the mail from home, and the smart ones retire for some shut-eye. Drift
around the room to find all of your options. (Press the z for assistance.)
USAAF barracks
LOGBOOK
The Logbook lets you view the various missions you have flown throughout your
career. It details the date and type of flight, the target location, the number of kills
you tallied, and other statistics. To change the page and peruse missions not
currently displayed, use the Previous and Next buttons. Press q or click Exit to
return to the barracks.
66
Page 75

VIEW MEDALS
After a particularly rough day in the cockpit, you might feel the need to console
yourself with mementos of your past glory. If you’re a decorated veteran, View
Medals allows you to do just that with a simple click on the footlocker. You can
select any medal by moving to pointer over it and clicking. This calls up the
original citation. When you’re done, hit q or Exit.
RADIO
One way to relax at the end of a gruelling mission is to lie back and listen to some
of your favourite tunes playing softly on the barracks radio. The radio has a couple
of short selections of music from which to choose. A click on the barracks radio
turns it on, and subsequent clicks change the station.
LEAVE
The door from the barracks leads you directly to the Main menu. In the process, it
saves your campaign.
BUNK
Back in the barracks, select the bunk to advance to the next mission while saving
the previous day’s flight.
Tour of Duty
German pilots, once in the Luftwaffe, fought ’til the bitter end—either their own or
that of the Second World War. The only ways out of service were capture, death,
and dismemberment. American and British pilots didn’t have it quite so tough;
they signed up for a tour of duty, at the end of which they either retired or
re-enlisted.
You have it easier than they did. No matter which nationality you choose, each
tour of duty last approximately one year, at the end of which you have the option
to retire. If you re-up, subsequent hitches also last a year.
67
CAREER PILOT
Book 1: Game Player’s Guide
Page 76

Squadron Commander’s Office
Hope you enjoyed the promotion ceremonies, because now that you’re
commander of an entire squadron, there’s going to be no more goofing around—
too many lives depend on you. As a symbol of your new status, you now have
your own quarters, complete with a softer pillow specially requisitioned for your
sleeping comfort. Not that you’ll get to use it much; as Squadron Commander,
you’re never off duty. While you pace back and forth across your office, keep an
eye out for the options you have, or use the z to reveal them. They
include, among others, viewing your logbook and medals or humming along with
the radio (all of which you should remember how to do from your time in the
barracks).
A squadron leader’s quarters
There are a few notable differences between your old digs and the new ones.
SQUADRON BOARD
The Squadron Board lists all the airmen in the squadron, their rank, missions
flown, and other data.
68
Page 77

Squadron Board
Don’t discount the data here; remember that experience significantly affects pilot
performance. If an airman has flown a few missions, his skills are likely to be
much improved over a green pilot right out of training. Fatigue is a factor, as well,
and both exhaustion (too many missions) and taking too many days off between
flights can strip a pilot of his fighting edge. It’s up to you to achieve the best
balance with your men.
The End of the War
Sooner or later, the war will come to an end. You can escape home life only so
long. And while we’re disillusioning you, there’s another thing you should know;
no matter what you accomplish as a pilot—even if you manage to win the Battle
of Britain for the Luftwaffe—the Germans are going to lose the war.
If you’re alive as peace breaks out, you receive a final tally screen listing how you
fared. Following a particularly distinguished career, you might even be honoured
with induction into the Hall of Fame.
69
CAREER PILOT
Book 1: Game Player’s Guide
Page 78

Hall of Fame
The Hall of Fame is a tribute to the all-time best pilots of the war. There you can
see the aces from each of the three air forces in the European Theatre of
Operations or view the best pilots from the Battle of Britain. With a little
perseverance and a lot of luck, maybe some day you’ll enter these hallowed halls.
For now, look but don’t touch. The top eight pilots in each category appear next to
their rank, kills, and other info. For more details on any of the men, click on a
name.
70
Page 79

Multi-Player Missions
Competing against computer pilots is all well and good, but think how
great it would be to smoke someone you actually know—a friend, your
roommate, or even your boss. European Air War’s multi-player missions
are designed for those individuals who want to test their mettle against
real live people, not mere machines. After all, other human beings can be
so much more devious than a computer—not to mention vindictive.
To get started, select Multi-Player from the Main menu.
Page 80

Connecting
Once you have selected Multi-Player from the Main menu, the Connection
screen appears. This is where you begin the process of setting up or joining a
multi-player mission. The first thing you should do here is name yourself. Click on
the Player box (near the bottom) and enter the name you want to be known by
during the mission.
The next decision you must make—by selecting a Protocol option in the top box—
is what type of connection you want to use. The connection determines both how
many players can attach to the game and how their computers will hook up. All of
the available options use DirectPlay to connect; they are:
IPX Connect to a local area network (LAN). A local area network
is a bunch of computers all linked by a particular network
system, as in many offices. (We are not suggesting that you
play at work. Really.) Up to eight LAN players can do battle
between themselves or against computer opponents.
Internet TCP/IP Connect to the Internet using a specific Internet address, or
attach to a local area network using the TCP/IP protocol. Up
to eight players can battle each other or the computer.
72
Page 81

Modem Communicate via modem with a second computer. Modem
games are limited to two players, who will either go head-to-head
or work cooperatively against a common enemy.
Serial Establish a direct serial link to a second computer, using a cable
strung between the two machines. A maximum of two players
can join forces in battle or fight each other head-to-head.
Depending on the protocol you chose, you might need to enter some necessary
data.
IPX
There is no extra data to enter for an IPX LAN connection. If you’re connected to
the network, the game searches for games currently running and forming and
displays the game information for you.
TCP/IP
If you plan to join a game on the Internet, you must instruct the game to search
for a particular host. To do so, type in a specific Internet address when you’re
prompted for it.
Leave the box blank if you intend to play over a LAN.
MODEM
Prior to modem play, both players should agree which computer will serve as the
Connect computer and which will Wait on Connection. The player at the Connect
computer acts as the host.
Both players must be aware of which Comm Port their modem is attached to and
should know as well the baud rate of their modems. It’s also a good idea to have
the other player’s phone number at hand. This might seem obvious, but you’d be
surprised how often the most elementary things get forgotten.
Once you select the Modem option, you are prompted to specify whether you are
the Connect or the Wait on Connection computer. Next, you must choose
which Comm Port the modem is attached to and select the baud rate of the
modem. Note that no matter what speed you enter, the game will default to that
of the slower machine.
73
MULTI-PLAYER MISSIONS
Book 1: Game Player’s Guide
Page 82

Finally, the player at the Connect machine must enter the other player’s phone
number and, thus, begin the attempt to establish the connection between the
two computers. (The player whose computer is Waiting on Connection should
just hang tight until the Connect computer links up.)
SERIAL
A serial connection is similar to a modem connection, except that instead of using
the phone lines to hook up the computers, there is now a direct physical link—a
cable—between them. Because modem and serial connections are so similar, the
procedure players use for linking up with each other’s computer is pretty much
the same. Players must still agree whose computer will be designated to Connect
and whose will Wait on Connection. Each player also has to fill in the Comm
port and baud rate. In fact, the only difference between establishing a serial
connection or a modem link is that for serial connections, you don’t need to enter
a phone number.
Joining a Mission
If you’re joining a mission that’s being set up and run—hosted—by someone else,
then you’ve already done most of the work. Once you’re connected, the Games
Available box shows you the games you can access. (You can’t join a game that’s
already started.) The Players box shows you who is involved in whichever game
you select.
If you join a game, remember that the Flight and Combat difficulty settings for
the mission are determined by the host of the game. Your default settings are
not changed, but they’re overridden for the duration of the multi-player mission.
When you’re ready to join, select the game you want, then click Join. You
proceed to the Session Parameters screen.
74
Page 83

Hosting a Mission
If you’re setting up and running the mission, you are the host. Hosting is not much
different from joining a mission, except that you have more control over the
situation. The first thing you get to do is name the game. Click on the New Game
box, then type in the name you want to give the mission. Consider making it a
name the other players you expect to take part will recognize easily.
If you host a game, remember that your Flight and Combat difficulty settings
are enforced on everyone who joins the mission.
When that’s done and you’re connected, click New to proceed to the Session
Parameters screen.
Session Parameters
Now that you’ve arrived at the Session Parameters screen, much of the hard
work is over. Here, the host sets the parameters of the game, and those joining
choose their own place in the mission. If you’re not hosting, your choices on this
screen are limited, since only the person initiating the game can control certain
parameters. If you’re the host, you have control of the scenario.
The Joined Players box shows you the players who have already chosen to join
the mission and the settings they have determined—name, nationality, and so on.
The Chat box allows you to communicate with other players before the mission
begins.
To change any of the parameters, click on the current setting to cycle through the
options. They include:
Air Force Choose the country you wish to fly for. This decision affects
which aircraft you can opt to pilot. Your air force also determines
your enemies and your allies—except in games of Total Mayhem,
where it’s every pilot for himself.
75
MULTI-PLAYER MISSIONS
Book 1: Game Player’s Guide
Page 84

Aircraft Choose the type of plane you want to fly; your options depend on
both the time period (chosen by the host) and your air force. Your
weapons load-out is determined according to the needs of the
mission; you have no control over it.
Region The host determines the scene of the hostilities. The possibilities
reflect historical battle areas of the selected time period.
Time Period The host selects the year in which the engagement will take
place. Your choice influences both the battle region and aircraft
availability for all players.
Time of Day The host stipulates the time of day at take-off. Options include
anything from dawn all the way through nightfall, thus
determining whether the sun or darkness will be a factor in the
battle.
Battle Size The host selects the number of planes in the game. Settings
include Small, Medium, and Large. This selection is independent
of the number of players in the game; any planes without a player
pilot are controlled by the computer. The number of player pilots
can never exceed eight.
Pilot
Experience
The host sets the experience level of the computer pilots. This not
only dictates the average skill, but also alerts potential players
before they join.
Mission Type The host chooses one of the usual mission types for this
operation. All forces on the same side as the host fly this mission;
the enemies’ objective is to prevent their success. For example,
if the host selects an escort mission, the opponents find
themselves flying an intercept. The exception is a Total Mayhem
mission, in which it’s every pilot for himself, with no allegiance
and no objective but to survive and destroy.
When you’re finished, click on Launch to begin (move on to your briefing ) or
Cancel to return to the Connect screen.
76
Page 85

Flying a Multi-Player Mission
Once you’re actually in the mission, you’ll find that the similarities outweigh the
differences. You get the usual briefing, then get airborne.
The aircraft in multi-player missions handle much the same as they do in Single
Missions, but you’ll notice a few slight differences. You can’t, for example, use the
time acceleration feature, and you cannot pause the action—period. That means
you’ll have to keep your wits about you at all times.
COMMUNICATIONS
In other missions, the cockpit radio is simply a means of communicating requests
and commands between you and the computer pilots (and ground control). In a
multi-player mission, the cockpit radio can be used in the same fashion, but it also
comes in handy as a method of chatting with other human players—enemies and
friendlies alike.
Press the tilde ~ to open the Chat menu. This gives you various options for
sending messages to the other players in the mission. Choose your recipient(s),
then type the text of your message. Press e when you’re done, and the
message goes out.
In the heat of battle, it’s can be pretty difficult to type a full sentence without
getting shot down. That’s why the game includes some pre-set taunts that are
available at the touch of a key. Using the menu, select the recipient(s) of your
message, then hit one of the shortcut keys (1 through 0).
DEATH DURING TOTAL MAYHEM
Sooner or later, you’ll probably get shot down or forced from the skies. If you’re
playing a Total Mayhem mission, don’t panic—this isn’t the end. You and your
plane are “re-spawned”—recreated near the area of battle—so that you can
continue flying and fighting.
77
MULTI-PLAYER MISSIONS
Book 1: Game Player’s Guide
Page 86

PLAYER KILLS
Multi-player games keep a running tally of every pilot’s kills. Players receive
credit for downing enemy fighters and bombers. On the other hand, points are
deducted for shooting down a friendly aircraft, for crashing a structurally sound
plane, and for other such bonehead manoeuvres.
If you’re interested in tracking other players’ records (as well as your own) during
play, use 0. This places a kill tally on your screen. These scores are continually
updated throughout the game. To remove this tally, press 0 again.
The End of the Game
At game’s end, you’ll no doubt want to know how well you did. That’s the whole
point, after all. Just sit tight, and the Final Tally screen appears (unless, of course,
you quit before the battle came to a close). The Final Tally, quite simply, shows
the statistics for all players.
The overall air force winner (not listed for a Total Mayhem mission) is calculated
based on the success or failure of each side’s mission. The triumph of an escort
mission depends on the number of bombers that made it over the target. Strikes
take into account both the damage inflicted on the objective and the severity of
one’s own air casualties, while for an intercept to be a success, you have to have
stymied your adversary. Sweeps are decided based on each side’s total kills.
An overall individual winner is recognized as well. The title Ace of Aces is
awarded to the player who, at game’s end, has the greatest number of kills.
This recognition is bestowed independently of the air force winner.
78
Page 87

Newsreel
With the Newsreel option, those of you who aren’t up on your history can watch
brief snippets on some of the major aerial operations in European Air War.
Three-minute narrated films present actual footage from the battles as well as
commentary on the strategies involved. When you click on a particular battle,
you’re treated to a video of actual combat scenes. Once the segment has come to
an end, you may view another or return to the Main menu.
View Objects
A valuable resource, the View Objects archives store a wealth of information
about every plane in European Air War. Here, away from the frenzy of battle, you
can study up on the technology of your adversaries, review a plane’s dimensions,
performance, and standard armament at your leisure, or learn to recognize
different aircraft at a glance.
The z reveals your options. Click one of the decks to choose which set of
planes you want to peruse. Use the Previous and Next buttons to call up
different planes or models from the open deck. Whatever plane is currently
visible, the View Plane option shows you the actual in-mission object for that
aircraft, and Details calls up a listing of statistics for that plane.
For each plane, if the film canister is open and there’s a film inside, you can view a
one-minute multimedia presentation on that aircraft. The presentation includes a
brief history of the plane, as well as slides or film footage of the craft in action.
Once the presentation has come to an end, you can replay the piece or browse
through the exhibit at your own pace. Exit returns you to the Main menu.
79
MULTI-PLAYER MISSIONS
Book 1: Game Player’s Guide
Page 88

Observations of a Flight Lieutenant
A Flight Lieutenant who had flown Wellington bombers during the earlier part
of the war, before being transferred to a Fighter Squadron, was making his
first combat trip in a Hurricane. Enemy aircraft, including bombers and
fighters, attacked Dover harbour in two waves, with their escort circling
several thousand feet above, and formations of Hurricanes and Spitfires rose
into the sky to meet the attackers. This is an observation of the combat made
by the Flight Lieutenant.
“We were up bright and early waiting by our Hurricanes; suddenly we
received an alarm enemy bombers were over the Channel. We raced to our
aircraft, and just as the engines were starting up, the air-raid sirens sounded.
We took the air to their wail. When we were at 8,000 feet, we made a turn
and saw thirty or forty Junker 87s about to dive down and bomb four ships
in Dover harbour. As we raced to intercept them, I watched the first low
begin their dive. I watched their bombs falling when they got down to 2,000
feet and saw them exploding in the water around the ships. There were ten
bombs at one time, and the water all ’round the ships was heaved up into a
number of huge fountains.
“As we raced along at 300 miles an hour, I saw the bombers waiting
their turn to go in and attack. Somewhere above were the escorting
Messerschmitts. They were being looked after by a Squadron of Spitfires, so
we had the bombers pretty well to ourselves. Not all of them got the chance
to attack. A number of them did not get their turn. But I shall never forget the
sight of them stepped up in the sky.
80
Page 89

“It was only a matter of seconds before we were flying down to our targets. I
first saw a Junker 87 being chased by six Hurricanes, and I felt like cheering
when I saw the bomber go down in flames. Immediately afterwards, another
Junkers flew right across my bows. I raced after him, got him in my gun-sights,
and let him have it. I was overtaking him fast, and when I stopped firing, he
was covering my entire windscreen, only fifty yards away. I stopped firing
because he blew up. I had heard about enemy aircraft blowing up in the air,
and this was my first experience of it. Both his petrol tanks exploded at the
same moment. Pieces of the aircraft were blown in all directions, and I had to
dive away sharply to avoid being hit by the fragments. When I looked again, I
saw the wrecked bomber tumbling down towards the sea. Then, below me, I
saw three Junkers racing for home. They were only about thirty feet above the
surface of the water, going away as fast as they could. I dived and attacked
them in turn and chased them about a dozen miles out to sea. I gave the first
one a good burst, and I knew I hit him. Then I blazed away at the second and
hit him, too, before turning back.
“Our Squadron came out of the combat untouched, except for one bullet through
the wing of one aircraft for four bombers destroyed and six others damaged—
and some of them didn’t even get the chance to drop their bombs.
“When I first saw the Germans, I felt a kind of fascination. I was surprised that I
was able to see so much of the battle. After dealing with my first Junkers, I
was able to notice other members of the Squadron shooting down other
German bombers. I saw out of the corner of my eyes a short dogfight, which
ended in one of our Squadron shooting down a Messerschmitt 109.
“One of the other things which stands out in my mind was a sailing boat with a
big red sail steadily passing down the coast. Aircraft were blazing away at one
another in the sky above. Occasionally, one would smash into the sea and
disappear, but that little boat with the red sail appeared to take no notice. It
seemed incongruous.
“When the battle was on, I was surprised because there was no confusion.
Everything was very orderly. Each combat was distinct in itself. Things seemed
to happen as in a well-rehearsed play. I was astonished to find myself able to
be a spectator and a fighter at the same time. From the moment we took off to
the moment we landed, exactly thirty-six minutes had elapsed, though I
suppose the fight itself did not last more than five minutes. After that we had
breakfast.”
81
1. INTRODUCTION
Book 1: Game Player’s Guide
Page 90

Page 91

Book 2: pilot’s
handbook
Welcome to the pilot training program for European Air War. The
supplementary information in this portion of the manual is intended to help you
stay airborne long enough to fulfill your duties. Though skill, daring, and
marksmanship are extremely important factors in any aerial combat, it has
been proven time and again that knowledge is the key to victory. When you
know the enemy’s strengths and weaknesses, you’re ready to go into battle.
When you know your own, you’re ready to win.
Why You’re Here
By the outbreak of war in 1939, the aircraft had matured from the fragile,
lightly armed, wood and canvas kites of the Great War into fast, heavily
armed killing machines. In the 1940s, no army could win a battle on the
ground if their enemy controlled the sky. In addition, the battle was no
longer limited to the front lines. With bomber formations attacking cities
and industry far from the field of battle, whole nations finally understood for
the first time what it meant to be in a war. Combat aircraft had changed the
face of battle forever.
Page 92

THEORIES
Technology has always caused drastic changes in warfare. In less than three
decades, improvements in aircraft design changed the way nations plan and
prepare for war. Aircraft engines had become smaller, lighter, and more powerful.
By the middles of the 1930s, wood and canvas biplanes had been almost
universally replaced by all metal, mono-wing designs. Technology not only
creates weapons and equipment, but necessitates new tactics as well. During the
decade prior to the war, nations developed both aircraft and tactics to suit their
own concepts of what would be needed in the next war.
Unlike those of ground and naval warfare, the strategies and tools of aerial
combat changed radically between the First and Second World Wars. Whereas in
the earlier conflict individual dogfights had prevailed, by 1940, this was no longer
the case; whole new breeds of specialized planes had been designed that would
forever alter war in the air. The advent of bombers, for instance, called for very
different offensive and defensive strategies than those in use. Germany had spent
the previous decade experimenting with novel techniques of battle, both in the
Spanish Civil War and during top-secret training in Soviet Russia. Great Britain, on
the other hand, had not substantially altered its approach to aerial combat.
English flyers would now have to learn everything from scratch.
All nations planned on the tactical use of air power to influence ground battles.
Fighters, the theory went, would gain control of the skies over the battlefield,
much as their predecessors had in the First World War. Light bombers would then
range over the battlefield, attacking enemy headquarters and supplies—as well as
enemy ground troops. The Germans went an additional step, planning for their
aircraft to function as mobile artillery. As the war progressed and experience
mounted, the tactical importance of air power grew with it.
One of the most controversial developments during the Second World War was
the bombing of civilian targets. For the first time, more civilians lost their lives due
to military action than soldiers. The theory was that this “terror bombing” would
break the morale of the enemy’s population, forcing them to surrender. The
reality was far different. Germany was the first to use terror bombing, in the Great
War and the Spanish Civil War, and it continued to use the tactic in Holland and
Belgium. During the Battle of Britain, the Germans initially avoided bombing
cities, but then accidentally bombed London. The British immediately retaliated,
attacking Berlin and other German cities. This started a series of escalations,
resulting in both sides switching more and more to area bombing of enemy cities.
84
Page 93

Back in the 1920s, the Americans had been the first to propose and plan for an air
campaign to destroy enemy production and military industry. American senior
commanders disliked the concept of area bombing. However, most of the Third
Reich’s factories and supplies were located inside European cities. The
Americans invented and emphasized the new term strategic bombing to
eliminate any criticisms, as their Army Air Corps developed the art of bombing
industrial sites inside a city. By the end of the war, U.S. bombers were able to
destroy their targets, but the collateral damage to surrounding areas was still
extensive. It would be another fifty years before their dreams of precision
bombing became a reality.
THE COMBATANTS
The Luftwaffe
The German Wehrmacht developed a combined air and ground doctrine, called
blitzkrieg, or “lightning war.” To support this doctrine, the Luftwaffe evolved into a
tactical air force the main focus of which was close air support of ground units. Its
aircraft were designed to attack over relatively short ranges, carry lighter bomb
loads, and hit small targets with precision. The German bomber force consisted
of fast, twin-engine “schnell” bombers, perfect for supporting advancing ground
forces, but inadequate for deep or so-called “strategic” bombing. This oversight
did not become apparent until the Battle of Britain, and could not be corrected
before the Allied bomber offensives began.
Until that battle, Germany had not needed a plane for those tasks; as each nation
fell, the Luftwaffe advanced its medium-range bombers far into the newly
conquered territories, where they could easily be launched against the next
victim. The German warplane industry had thus skirted the issue of a heavy
strategic bomber. Existing German medium bombers and dive bombers were
meant to support—and be supported by—infantry, much like artillery. By 1943, it
was too late. The Luftwaffe was forced to concentrate more and more on the
fighter defense of Germany and could spend fewer resources on bomber
development.
85
WHY YOU’RE HERE
Book 2: Pilot’s Handbook
Page 94

The Germans used four primary bombers during the war. The first of these, the
Dornier Do17, was one of the Luftwaffe’s two principal workhorses during the
early war years. Known as the “Flying Pencil” for its long and slender fuselage, the
Do17 had been converted from a civilian aircraft at the outbreak of war. It was
considered the most accurate of the Luftwaffe medium bombers. The Do17 was
a favourite of both air and ground crews because of its reliability, but the bomber
did have some shortcomings. Among other things, it was slow and had scant
defensive armament. (Dornier crews were known to carry hand grenades and
toss them out at pursuing fighters.) The plane also lacked the payload capacity of
most other bombers. It took large numbers of Dorniers to inflict any lasting
damage. The Do17 was withdrawn from service in 1942.
The other workhorse of the early war was the Heinkel He111. During Germany’s
masked rearmament of the early thirties, it had been introduced under the guise
of a high-speed civilian transport and mail plane. At the outbreak of war, it was
quickly converted into a medium-range bomber. When it first went into military
service, the He111 could outrun most single-engine fighters, and it placed
Germany in the forefront of bomber technology, but by the Battle of Britain its
fangs had already begun to dull. This bomber could easily be overtaken by the
swifter English fighters.
The Junkers Ju87 “Stuka” (short for the German word for “dive-bomber”) had
earned great notoriety as a precision bomber during the blitzkrieg of Poland and
France. Its hulking form and fearsome whine damaged the psyche of the people
as surely as its bombs ravaged the land. During the summer of 1940, though, the
Stuka floundered badly—first at Dunkirk and then again in the opening
encounters of the Battle of Britain. The Ju87 served best in support of ground
troops. Unaided by soldiers and artillery, it was out of its league. It was extremely
slow and could not protect itself against a modern fighter defense, except when
accompanied by a large escort. Heavy losses in the initial weeks over England
led to the Stuka’s redeployment elsewhere, in areas where it could exploit its
strengths, but at lesser rates of attrition. Thereafter, it made only the occasional
raid over Britain.
86
Page 95

The Junkers Ju88 was the newest Luftwaffe bomber. It was a versatile machine
that undertook all types of high-speed bombing. In addition, the Ju88 laid mines,
performed reconnaissance work, and provided close support. It was sturdier than
any other Luftwaffe bomber, and the plane’s high diving speed allowed it to
evade even the feisty Spitfire. The RAF considered the Ju88 the most formidable
plane in its class. As the war progressed, the Ju88 progressed with it, becoming a
night fighter, reconnaissance plane, and close support aircraft. This versatility
made it arguably the best medium bomber design of the war.
A band of Ju88s heads for Great Britain.
Besides its array of bombers, the Luftwaffe began the war with two fighter
designs, the Bf109 and Bf110, both made by Messerschmitt. These were
supplemented by both the Focke Wulf 190 and the Me262 as the war
progressed.
The Bf109 was one of the fastest machines of any air force at the start of the war.
It was an outstanding aircraft that outclassed its early opponents in most
categories. The 109 responded quickly and cleanly to the throttle, was good in
high-g turns and fast in a dive, and possessed remarkable low-speed handling.
The 109 was fitted with a fuel-injected engine, which allowed the plane to fly
inverted. The craft’s greatest deficiency was its range; it couldn’t go north of the
Thames except on the briefest of sorties, and it often had to turn back even before
it reached the target area. As a defensive fighter, the Me109 continued to be a
tough opponent throughout the war, undergoing numerous upgrades from the
E-4 model flown in the Battle of Britain, through the G-6 and on to the K-4 version
by the end of the war.
87
WHY YOU’RE HERE
Book 2: Pilot’s Handbook
Page 96

The Bf110 Zerstörer (Destroyer), a twin-engine fighter with twice the range of the
smaller Messerschmitt, was built for both offensive and defensive roles. Its
designers envisioned a machine that could either clear a path for bombers
through the defensive fighter screen or defend a region from the approach of
enemy bombers. The Bf110, however, soon proved a disappointment. It was too
large and sluggish for a dogfight, and its top speed was slower than that of the
British fighters. Squadrons flying the planes took unreasonably high losses, yet
not until the end of the Battle of Britain were these planes taken off fighter duty
and limited to reconnaissance work. The 110 was used with some success as a
defensive fighter, and was a threat to unescorted bomber formations. Its
replacements, the failed Me210 and the Me410, both suffered from the same
basic problems. The Me410, with its massive armament, was a formidable tank
buster on the Eastern Front, and as a heavy fighter over Germany, it was a serious
threat to Allied bombers. On the other hand, like its predecessors, it was no
match for Allied fighters.
The Focke Wulf Fw190 was designed in the late 1930s as a complement to the
Me109. The success of that design and a shortage of fighter engines delayed
production until 1941. By this time, the need for additional fighters—and the use
of a radial bomber engine—solved both problems. The Fw190 was a fast and
highly manoeuvrable fighter, and was a favourite of many Luftwaffe pilots.
Produced in ten different versions, the Fw190 was a match for any Allied fighter.
The final version, the Fw190D, used a Junkers Jumo inline engine instead of the
BMW radial, had comparable flight characteristics to the P-51D, and must be
considered one of the best designs of the war.
The Me262 Schwalbe, or swallow, was the first operational jet fighter to see
combat. The Me262 was over 100 miles per hour faster than any Allied fighter,
and it packed a tremendous amount of firepower. Its quad 30mm cannon were
capable of destroying a bomber in a short pass. Unable to fight the 262 in the air,
Allied fighters learned to attack them while they were attempting to land, and
were therefore vulnerable. Many large scale dogfights occurred between Allied
fighter sweeps and the normal German fighters trying to protect the landing
262s. Although the Me262 had the potential to change the air war in the
Luftwaffe’s favour, it never lived up to this potential. Production was delayed for
over a year by Hitler’s insistence on a fighter-bomber design. This type of high
level interference continued to plague the program until the end of the war, as
production was needlessly diverted to production of night fighters and bomber
versions. Less than one quarter of the 1,430 jets produced were issued to fighter
units. Imagine the havoc that would have occurred if the American bombers had
faced numbers of Me262s in late 1943.
88
Page 97

The Royal Air Force
Across the Channel, the RAF had different aerial needs. As early as 1937, Great
Britain realized that it had fallen behind Germany in the production of bombers—
but bombers are not critical for defense. Instead, fighters would be the saviours of
the English. While bomber production never stopped, fighters were much
cheaper to build. They were also in greater supply. At the outset of the battle, the
English aircraft industry was suffering a shortfall against the number of planes
contracted. The manufacture of fighters, however, had flagged only slightly; it
had already been assigned priority, and the British were quickly tightening up the
system of production. Between May 1940 and the war’s end five years later,
aircraft production never fell below the planned numbers.
In 1940, the RAF relied heavily on two types of fighters to save their island from
invasion. When the battle began, more than half of Fighter Command’s
squadrons were equipped with Hawker Hurricanes, long a mainstay of the RAF.
For a fighter, it was considered slow—the German Bf109 was faster and could
outmanoeuvre the Hurricane with ease—but what the Hurricane lacked in speed
and rate of climb, it more than compensated for in other categories. It had a
greater range than any other fighter, enabling it to maintain a longer flight. The
plane had the added benefit of an older construction, which could be serviced at
virtually any RAF base in Great Britain. Perhaps the Hurricane’s greatest asset,
however, was its armament of eight machine guns. The craft amassed more
enemy kills during the battle than all other British fighters and ground defenses
combined.
Fighter Command rises to meet the challenge.
89
WHY YOU’RE HERE
Book 2: Pilot’s Handbook
Page 98

Enemy tallies notwithstanding, it was the Supermarine Spitfire that attracted the
public’s eye. With its graceful and distinctive lines, it stood for the English people
as the symbol of hope and victory. The Spitfire was not quite as durable as the
sturdy Hurricane, and it was more vulnerable in places to enemy fire, but it had
greater acceleration and was amazingly manoeuvrable. Pilots praised its superior
handling. The Spitfire could turn a tighter circle than any other fighter used
during the war, which let it get behind its German counterparts. Continued
improvements to the Spitfire kept it in the front line throughout the war. The
different versions, from the IXC through the XIVE, continually met the challenge
posed by the improving German fighter designs.
The RAF also fielded some of the best fighter-bomber designs of the war. The
Hawker Typhoon, which first saw service in 1942, was an excellent ground
support aircraft. It was superseded in 1944 by the Tempest. This new bomber
was one of the only interceptors with enough speed at altitude to intercept the V1 “buzz-bombs,” and Tempests managed to shoot down almost 35 percent of all
of the V-1s launched against England. The Tempest’s speed also made it an
excellent choice to send against the Me262 bases. Perhaps the role both of these
aircraft are best remembered for is as close air support fighter-bombers. After
Normandy and throughout the Allied invasion, squadrons of Typhoons and
Tempests ranged over the battle zone, attacking German units with cannon fire
and rockets.
The Army Air Force
The American Army Air Force had several advantages over the British and
Germans. The geographic isolation of North America had insured that the AAF
possessed both long range fighters and strategic bombers. Between the wars,
American aviators had led the world in strategic and operational bombing theory.
Finally, America had the advantage of two years of combat in Europe to prepare
for the war. These factors, combined with America’s industrial capacity, insured
that the USAAF would be a potent factor in the war.
American heavy bombers were unique in being designed from the outset to fly
long range, unescorted missions deep into enemy territory. They were built on
extremely tough airframes and carried an extensive array of defensive machine
guns. The standard American bomber at the start of the war was the B-17 “Flying
Fortress,” a name the aircraft more than lived up to. In Europe, the AAF fielded
two major types of bombers, the B-17 and the B-24 “Liberator.” The B-24s were
used in Africa and Italy, while the B-17 carried the brunt of the fighting in England.
90
Page 99

U.S. medium bomber designs were, in effect, scaled-down versions of their heavy
bombers. The best example is the B-26 “Marauder.” These aircraft were intended
to perform missions against the same strategic targets as the heavies, but only at
intermediate ranges. This would allow the AAF to attack in depth and spread the
enemy defenses. During the war, the medium bombers came into their own on
interdiction missions, attacking transport and logistics targets and isolating the
German front lines from reinforcements and supplies.
The AAF relied on variants of three fighters in the European Theatre of
Operations: the P-38, the P-47, and the P-51. The P-38 and P-51 were excellent
air superiority fighters that could be pressed into service as fighter-bombers if
needed. The P-47, on the other hand, was a fighter-bomber that also made an
excellent fighter.
The P-38 “Lightning” was designed as a high altitude interceptor, but its speed,
power, and durability led to its use in almost every type of fighter-bomber
mission. Lightnings fought on all fronts of the war, and the aircraft remained in
production in several variations until the end of the war. The first P-38s were
deployed to England in 1942, but most were moved to Africa in late 1942,
forming the backbone of the 12
th
AAF fighter squadrons.
The P-47 “Thunderbolt” was considered by many to be the best heavy fighter of
the war. The Thunderbolt was an exceptional bomber escort and fighter-bomber.
With drop tanks, it could escort bomber formations into Western Germany.
Throughout 1943, the Thunderbolt was the main U.S. fighter over Europe. When
the P-51 began to take over the bomber escort role in 1944, the P-47 became the
main U.S. fighter-bomber. Thunderbolts earned a reputation second to none as a
close support aircraft, and any ground commander felt better knowing a “cab
rank” of Thunderbolts was overhead.
When most people think of a WWII aircraft, the P-51 “Mustang” leaps to mind.
Any discussion of the best fighter in WWII will include the P-51. This agile, fast
fighter was deadly in the hands of a trained pilot, and its ability to escort bombers
all the way to the target was unequalled. The P-51 served in all fronts and beyond
the war, remaining in U.S. service into the 1950s—and in some smaller air forces
for another twenty years or more. Arguably, the Mustang was the best pistonengine fighter in history
91
WHY YOU’RE HERE
Book 2: Pilot’s Handbook
Page 100

The Battle of Britain
In the spring of 1940, Germany was on the offensive in western Europe. It had
already conquered Denmark and Norway, and in early May, German troops
began an invasion of France. Few doubted that if France fell, Great Britain would
be next.
THE FALL OF FRANCE
Adolf Hitler’s true designs lay on Soviet Russia. As early as 1939, he had
expressed plans to invade the vast territory to the northeast. Taking Poland by
storm had been the first step toward this objective, but it had drawn both the
French and the English into the hostilities. Since Germany couldn’t afford to
attack two powerful adversaries at the same time on two separate fronts, Hitler
wished to dispatch the threat from western Europe before proceeding on his
conquest of the east.
As the closest powerful ally to the European coast, England received numerous
appeals for military aid from countries already under attack. They poured in from
across western Europe—Belgium, the Netherlands, and France all requested
immediate assistance. Whenever possible, Britain responded. In France, the
British Expeditionary Force sprang into action, as did the Royal Air Force, which
committed both fighters and bombers to the battle.
There were those, however, who opposed such international aid, among them Air
Chief Marshals Sir Hugh Dowding and Sir Cyril Newall, responsible for air defense
over England. Arguing that committing more aircraft to the fray would do nothing
except expose Britain to possible attack, Dowding and Newall fought to keep
their men and planes in Great Britain. Air Ministry, however, was not swayed by
their pleas, and the two men watched with dismay while their fighter defense
was spread ever thinner.
92
 Loading...