


n 1094 the Greek Emperor Alexius I asked Pope Urban II for aid. Turkish armies had overrun the Eastern provinces of the Greek empire and were getting close to the capital, Constantinople. The Pope appealed to Western European knights to put their differences and petty squabbles aside and help the Greeks in the east. He
summoned them together to take part in a Holy War that would also serve as a pilgrimage to Jerusalem. The First Crusade would soon begin.

TARTED. . . . . . . . . . . . . . . . . .4
1.1 System Requirements and Installation. . . . . . . . . . . . . .4
1.2Starting the Game and Game Modes. . . . . . . . . . . . . .5
1.3Game Options. . . . . . . . . . . . . . . . . . . . . . . . . . . . .6
1.4 Game Overview. . . . . . . . . . . . . . . . . . . . . . . . . . . . .7
1.5About the Manual. . . . . . . . . . . . . . . . . . . . . . . . . . .7
1.6Winning and Losing. . . . . . . . . . . . . . . . . . . . . . . . .8
1.7Playing a Multiplayer Game. . . . . . . . . . . . . . . . . . . .9
1.8 Map Editor Overview. . . . . . . . . . . . . . . . . . . . . . . .11
1.9 Crusader Games. . . . . . . . . . . . . . . . . . . . . . . . . . .12
2.0GAME BASICS. . . . . . . . . . . . . . . . . . . .15
2.1Main Screen Overview and Navigating the Map. . . . . .15
2.2 Camera Interface. . . . . . . . . . . . . . . . . . . . . . . . . . .15 2.3 Placing your Keep. . . . . . . . . . . . . . . . . . . . . . . . . .17
2.4Population Growth. . . . . . . . . . . . . . . . . . . . . . . . .17
2.5Rationing and the Granary. . . . . . . . . . . . . . . . . . . .18
2.6Setting Taxes. . . . . . . . . . . . . . . . . . . . . . . . . . . . .18
2.7Popularity in Brief. . . . . . . . . . . . . . . . . . . . . . . . . .19
2.8Gathering Food and Resources. . . . . . . . . . . . . . . . .20
2.9Increasing Your Population. . . . . . . . . . . . . . . . . . . .21
3.0 INFLUENCING YOUR POPULARITY. . . . . . . .22
3.1 Food. . . . . . . . . . . . . . . . . . . . . . . . . . . . . . . . . . .22 3.2 Tax. . . . . . . . . . . . . . . . . . . . . . . . . . . . . . . . . . . .23 3.3 Crowding. . . . . . . . . . . . . . . . . . . . . . . . . . . . . . . .24 3.4 Fairs and other events. . . . . . . . . . . . . . . . . . . . . . .24 3.5 Religion. . . . . . . . . . . . . . . . . . . . . . . . . . . . . . . . .24 3.6 Working Inns. . . . . . . . . . . . . . . . . . . . . . . . . . . . .25 3.7 Fear Factor. . . . . . . . . . . . . . . . . . . . . . . . . . . . . . .26
4.0 MANAGING YOUR ECONOMY. . . . . . . . . . . .28
4.1 The Stockpile. . . . . . . . . . . . . . . . . . . . . . . . . . . . .28
4.2 Resources. . . . . . . . . . . . . . . . . . . . . . . . . . . . . . .29
4.3 The Granary. . . . . . . . . . . . . . . . . . . . . . . . . . . . . .30
4.4 Food Types. . . . . . . . . . . . . . . . . . . . . . . . . . . . . . .31
4.5 Tax Rate. . . . . . . . . . . . . . . . . . . . . . . . . . . . . . . .32
4.6 The Marketplace. . . . . . . . . . . . . . . . . . . . . . . . . . .33
5.0MILITARY FORCES. . . . . . . . . . . . . . . . .34
5.1Military Goods and the Armory. . . . . . . . . . . . . . . . .34
5.2The Barracks. . . . . . . . . . . . . . . . . . . . . . . . . . . . .34
5.3The Mercenary Post. . . . . . . . . . . . . . . . . . . . . . . .35
5.4Available Units. . . . . . . . . . . . . . . . . . . . . . . . . . . .35
5.5Gathering your Forces. . . . . . . . . . . . . . . . . . . . . . .38
5.6 Marching Orders. . . . . . . . . . . . . . . . . . . . . . . . . . .39 5.7 Changing your Units Stance. . . . . . . . . . . . . . . . . . .39 5.8 Military Commands. . . . . . . . . . . . . . . . . . . . . . . . .40
5.9Map Bookmarks. . . . . . . . . . . . . . . . . . . . . . . . . . .42
6.0DEFENDING YOUR PEOPLE. . . . . . . . . . . .42
6.1 The Gatehouse. . . . . . . . . . . . . . . . . . . . . . . . . . . .42
6.2Building High and Low Walls. . . . . . . . . . . . . . . . . .43
6.3Turrets and Towers. . . . . . . . . . . . . . . . . . . . . . . . .43
6.4 Placing Stairs. . . . . . . . . . . . . . . . . . . . . . . . . . . . .44
6.5 Traps. . . . . . . . . . . . . . . . . . . . . . . . . . . . . . . . . . .44
6.6 Moat Digging. . . . . . . . . . . . . . . . . . . . . . . . . . . . .44
6.7Mounted Siege Equipment. . . . . . . . . . . . . . . . . . . .45
6.8Boiling Oil. . . . . . . . . . . . . . . . . . . . . . . . . . . . . . .45
7.0SIEGE WARFARE. . . . . . . . . . . . . . . . . .46
7.1Capturing the Gatehouse. . . . . . . . . . . . . . . . . . . . .46
7.2Portable Shields. . . . . . . . . . . . . . . . . . . . . . . . . . .47
7.3 Battering Rams. . . . . . . . . . . . . . . . . . . . . . . . . . . .47
7.4 Siege Towers. . . . . . . . . . . . . . . . . . . . . . . . . . . . .47
7.5 Catapults. . . . . . . . . . . . . . . . . . . . . . . . . . . . . . . .47
7.6Trebuchets. . . . . . . . . . . . . . . . . . . . . . . . . . . . . . .48
7.7Fire Ballista. . . . . . . . . . . . . . . . . . . . . . . . . . . . . .48
7.8Digging Tunnels. . . . . . . . . . . . . . . . . . . . . . . . . . .48
7.9 Filling in Moats. . . . . . . . . . . . . . . . . . . . . . . . . . . .48
8.0 REFERENCE SECTION. . . . . . . . . . . . . . .49
8.1 Non-military Characters: . . . . . . . . . . . . . . . . . . . . .49
8.2 Food Flowchart . . . . . . . . . . . . . . . . . . . . . . . . . . .53
8.3 Weapon Flowchart . . . . . . . . . . . . . . . . . . . . . . . . .54
8.4 Buildings Table. . . . . . . . . . . . . . . . . . . . . . . . . . . .55
8.5European Unit Table. . . . . . . . . . . . . . . . . . . . . . . .69
8.6Arabian Unit Table. . . . . . . . . . . . . . . . . . . . . . . . .71
8.7 Hotkeys. . . . . . . . . . . . . . . . . . . . . . . . . . . . . . . . .72
8.8Multiplayer Commands. . . . . . . . . . . . . . . . . . . . . .73
8.9Map Editor Commands. . . . . . . . . . . . . . . . . . . . . .73
Credits . . . . . . . . . . . . . . . . . . . . . . . . . . . . . . . . . . . .74
Technical Support . . . . . . . . . . . . . . . . . . . . . . . . . . . .78
Electronic Registration . . . . . . . . . . . . . . . . . . . . . . . . .78
License Agreement . . . . . . . . . . . . . . . . . . . . . . . . . . . .79
1.0GETTING STARTED
1.1SYSTEM REQUIREMENTS AND INSTALLATION
OS: |
Windows 98, ME, 2000, XP. |
CPU: |
Pentium® II 300MHz (550MHz recommended) |
RAM: |
64MB (128MB recommended for mulltiplayer) |
CD-ROM: |
8X Speed |
HDD: |
850 MB |
VIDEO: |
DirectX 7 (or greater*) compatible 4MB video card |
SOUND: |
DirectX 7 (or greater*) compatible sound card |
MODEM: |
56k (for Internet Play) |
OTHER: |
Micorsoft compatible mouse and keyboard |
* DirectX 8.1 included
Place the CRUSADER CD in your CD-ROM drive. If the CD auto runs, left click on the INSTALL button. If the CD does not auto run, click on the START button then select RUN followed by BROWSE. Using the pull down arrow, select your CD-ROM drive with the CRUSADER CD inserted. Click on 'autoplay.exe' and select OPEN, followed by OK then select the INSTALL button.
When the welcome window is presented, select NEXT to continue.
The license agreement window will now be displayed. Please read through this agreement. If you accept the agreement, select YES to continue.
The next option is to select a destination folder. To use the default folder select NEXT to continue. If you want to change the destination folder click on BROWSE and enter the location where you wish CRUSADER to be installed.
Next you can create a shortcut folder or use the default within the PROGRAMS menu. When you are happy with your folder name, click NEXT to continue.
Once CRUSADER has been installed you will be asked if you wish to install Gamespy. This will allow you play on-line. Follow the on screen prompts to install Gamespy.
To remove CRUSADER from your PC, insert the CRUSADER CD in your CD-ROM drive and when the auto run screen appears, click on the UNINSTALL button and follow the on screen instructions. You can also remove CRUSADER by selecting the game from the taskbar by clicking on START,
PROGRAMS and selecting UNINSTALL from within the folder.
We recommend you view the Readme file before running CRUSADER as this contains the most recent information on the game.
Each time you insert the CRUSADER CD into your CD-ROM drive, the game will auto run and a PLAY button will be available. Click the PLAY button to run the game.
You can also run the game by selecting the game from the taskbar by clicking on START, PROGRAMS and selecting CRUSADER from within the folder.
1.2 STARTING THE GAME AND GAME MODES
When you load FireFly Studios’ CRUSADER for the very first time you are presented with a screen prompt asking you to enter your name. Type in the name you wish to be known as and then press OK to continue to the main menu screen.
a.) Crusader
Crusader Trail: Fight through 50 linked Crusader Games.
Custom Game: This game mode allows you to play against up to seven AI opponents.
b.) Historical Campaign - This button allows you to select one of the four campaigns.
The Call to Arms: Follow the route of the first crusaders and learn the ways of the desert.
Saladin's Conquest: Take charge of the Arabian forces as they attempt to regain control.
The Kings' Crusade: Joins forces with the Kings of Europe as they attempt to hold out against the Arabian attackers.
Crusader States: Play the skirmish campaign and battle multiple opponents.
c.) Castle Builder - Here you can build to your hearts content. You have no enemy to fight, no goals to achieve and no deadline to stick to. You merely choose the map you wish to build
4 |
|
|
|
5 |
|
|
on and away you go! Pressing the F1 key during a Castle Builder game will allow you to bring on an invasion or trigger an event of your choice.
d.) Multiplayer - Play a multiplayer game with up to eight friends via a local area network (LAN) or with up to four human players and four computer opponents on the Internet using Gamespy.
e.) Custom Scenarios - This allows you to build and play your own maps.
f.) Options - From here you can adjust the game settings to suit your machine. You can also load previously saved games from the options menu.
g.) Tutorial - This will take you through the basic concepts of the game.
1.3 GAME OPTIONS
The game options panel can be accessed by selecting the key icon to the left of the mini-map within the game.
Save - This allows you to save your game using a file name of your choice.
Load - From here you can load a previously saved game.
Options - This allows you to change the following elements of the game:
Game Play Options - This lets you change the game speed and turn the in-game help on or off.
Video Options - This allows you to change the resolution of the game as well as how fast the map scrolls. You can also select the standard mouse pointer if you are having problems with the Crusader pointer.
Sound Options - From here you can turn the sound on or off and adjust the volume levels for the music, sound effects and speech.
Help - This takes you to the contents page of the in-game help facility.
Restart Mission - This option will reset the mission back to the
beginning.
Quit Mission - This option quits the current mission and takes you back to the main menu.
Exit CRUSADER - This closes CRUSADER and returns you back to the operating system.
Resume Game - Selecting this returns you to the game.
1.4 GAME OVERVIEW
CRUSADER is a castle simulator set in the barren wastelands of the near east. You begin the game at the dawn of the eleventh century with only the lowliest of troops and fortifications at your disposal.
As you progress through the campaigns you will gain more weapons and resources to add to your arsenal. To succeed you will need to master the ways of the desert and learn to fight a new enemy under harsh conditions.
For those among you who have played STRONGHOLD we have put together a shortlist of the major game play differences you will come across in CRUSADER.
a.) Farms can only be placed on grassland near an oasis.
b.) An additional seven Arabian units, all with varying strength, skills and weakness have been added. These can be hired from the mercenary post.
c.) The bonuses you receive from religion and ale have been increased significantly so religious and ale production buildings come into play much more often.
d.) Getting units to the top of gatehouses will now capture them. e.) Low walls have been introduced to replace wooden walls and a
lookout tower has been introduced.
Good luck my liege, go forth and conquer.
1.5 ABOUT THE MANUAL
This vast tome may appear a little daunting at first but luckily there is no need to read all of it to begin playing. You may find it useful to go through the in-game tutorial first by selecting the tutorial button from the start screen. Alternatively, 2.0 Game Basics will introduce you to all of the main concepts. Once you know the basics you
6 |
|
|
|
7 |
|
|
can read through the sections that you want more information on.
'Notes' will appear now and again to give you more information on the last topic discussed.
Note: You do not have to read these bits if you don't want to, as they are only here to answer frequently asked questions on the last topic.
'Tips' will also appear throughout to give you information relating to game dynamics such as shortcut keys or other alternative ways of doing things.
Tip: It is quicker to skip these sections to start with as they are only here to suggest different ways of doing something you have just learned about.
There are also 'Hints' which suggest possible game play strategies.
Hint: Don't read hints if you prefer to figure things out on your own.
1.6 WINNING AND LOSING
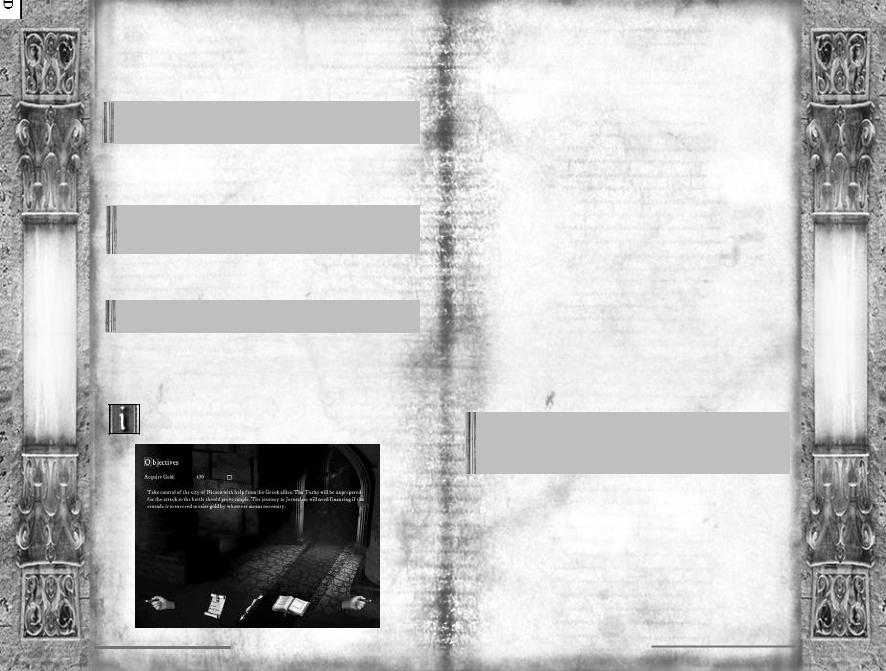
Each historical mission within CRUSADER has a unique set of objectives.
To view the objectives you have yet to complete, select the briefing button to the left of the mini-map.
You will see the mission briefing text for the current scenario. All of the completed objectives will have a dagger through their checkbox.
If the objective of the mission is to eliminate all the enemy units, then you will also see a timeline. This indicates the time until the last invasion arrives on the map.
To complete each mission, you will need to complete all of the objectives shown during the mission briefings. On completion you will be shown how well you scored. Extra points are scored or subtracted depending on, how much you exceeded an economic goal and how many troops you lost.
If the lord is killed, or you run out of time, the mission is lost and you will have to try again.
1.7 PLAYING A MULTIPLAYER GAME.
You can start a CRUSADER multiplayer game either via the Gamespy Arcade™ matchmaking service or by setting up a local connection.
a) Looking for a game on Gamespy Arcade™
Launch Gamespy Arcade and move to the CRUSADER lobby. Here you can find other players to compete against. Once all the players are ready the host will launch the game and you will be sent into the CRUSADER multiplayer options screen.
Note: You can autorun Gamespy Arcade™ from within the CRUSADER multiplayer Service Provider screen in which case CRUSADER will exit and Gamespy Arcade™ will start, re-launching CRUSADER once you have chosen your opposition.
b) Setting up a local connection
Clicking on Multiplayer in the Combat Options screen brings you to the Service Provider screen. Here you will see the list of available connection methods installed on your machine. Click on your preferred method and follow the on screen instructions to connect. One player will host the game and the remaining players can join the game set up by the host.
After you have connected to a multiplayer game you will arrive at the multiplayer options screen. After you have joined a game you should signal that you are ready to start the game by clicking on the
8 |
|
|
|
9 |
ready icon. You can then tell the host which type of game you would like to play by using the chat window, but you cannot set any of the game parameters as only the host has control over these.
Players Connected - Here you can see a list of connected human players or AI opponents along with their ready status or, in the case of AI opponents, a shield with CPU written on it. All human players must be set to ready before the game is launched. You can also form teams here. By default each player plays separately but the host can ally players together by clicking on the table icon. Being in an alliance with another player means that your troops will not attack each other, you can trade commodities between each other's castles and you will win the game if the victory conditions are met jointly.
If you are hosting the game you can change any of the default game type options below:
The game type (Normal, Crusader, Deathmatch) - This allows you to set the initial levels of gold and troops that the human players or AI opponents begin the game with.
Remove this player - Clicking one of these buttons will remove that player from the game.
The Chat Window - You can send messages to the other connected players from here by typing a message and then pressing return.
Map Selection - The maps available will differ depending upon the number of players joining. Maps can be selected from the bottom right window. You will see an overview of the selected map appear in the top right window and a short description of the map below it. You can send another player your map if they do not have it in their game.
Within Play Options you have the following options:
Strong Walls - Setting the strong walls option to on will prevent standard military units from damaging defensive structures such as walls and towers. Only siege weapons will be able to deal out damage to these structures.
Game Speed - Slow down or speed up the game.
Auto Save Game - You can choose whether you want the game to save at a set amount of time or not at all.
When every player is ready and you are happy with the game settings, the game can be launched.
In Game Chat - During the course of a multiplayer game you can send messages to other players by bringing up the chat entry panel. You do this by pressing the ‘Enter’ key. Before you start entering your message you need to decide who to send your message to. The default is to everyone but if you wish to send a message to a specific player, click to deselect the other players. Once you have typed your message, press ‘Enter’ to send it. If you want to cancel the message press the ‘Esc’ key.
Taunts - Clicking on the numbered buttons will send a taunt message out to your opponents.
For any updates to the CRUSADER multiplayer game, please refer to the Readme file.
1.8 MAP EDITOR OVERVIEW.
After selecting the map editor button, you will be presented with four additional options.
Play a Map - Allows you to select a map created within the editor
and play it.
Load a Map - This option allows you to load and edit a previously
saved map.
New Map - This contains the following options:
New Castle Builder Map - From here you can create a new landscape map. The 'To Map' button will take you to the mapediting screen and the 'Edit Scenario' button will let you change the various starting conditions for the map.
New Custom Scenario Map - From here you can create your own scenario map, containing it's own events.
Note: The map type can be changed while editing the map by pressing Alt+comma.
10 |
|
|
|
11 |
|
|
New Crusader Map - From here you can create a map that works in the the Custom game mode or Multiplayer. When you enter the map editing screen there are options for placing the players starting keeps and structures. The number of keeps you place on the map dictates the maximum number of players that can use the map.
Once in the map editor you will have at your disposal an array of landscape editing tools and a custom scenario builder to enable you to create the most beautiful map or the ultimate skirmish.
You may share these missions for the purposes of game play but may not sell or make other commercial uses of the missions. Firefly Studios Ltd. reserves all other rights to the editors and files.
1.9 CRUSADER GAMES
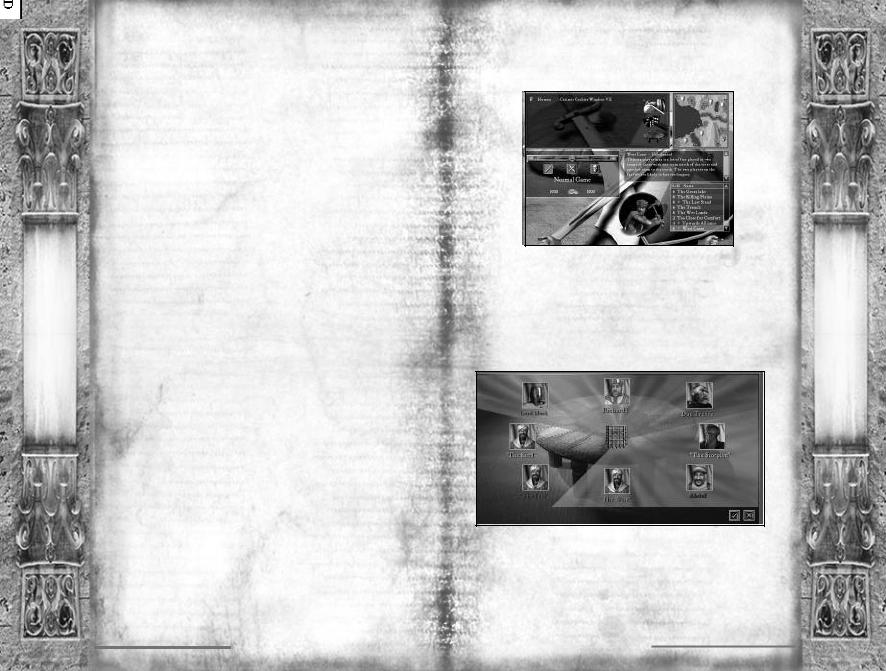
Crusader games are fought against AI opponents. After selecting Crusader from the main menu you'll be given two options.
The first option is the 'Crusader Trail', which is a series of preset crusader games that are linked together. When you select this option you'll be taken to a map showing how far you have travelled so far. The crusader banner shows your current location and the swords show the areas you have conquered.
After clicking on the start button in the bottom right you'll be taken to the info screen. Here you can see whom you will be fighting, who your allies are, which map you'll be playing on and how much gold everyone will start with. Teams are separated by crossed swords to show who is allied with who.
As you progress through the Crusader Trail the games will get tougher, as you and your allies are pitted against stronger enemies with bigger advantages over you.
The date in the top left corner of the Crusader Trail Map screen records how long you have taken overall. If you go back and replay a crusader game you have already conquered in a quicker time, your overall date will be reduced accordingly. See how fast you can complete the Crusader Trail, if you can complete it at all that is!
The second Crusader game type is the ‘Custom Game’.
When you click on this option you will be taken to a crusader lobby where you can set-up the type of game you wish to play.
The box in the top left of the screen sets up the AI opponents and teams. The sword and shield button in the top right of this box adds extra opponents and the arrow button to the right of each opponent removes opponents you don't want to play against. The opponents you select will build different styles of castle, use different foods, resources and weapons, and use different fighting tactics.
Clicking on the round table button will bring up the team selection panel shown below.
Press and hold the left mouse button while selecting a player's picture to drag them around the screen. Dragging players on top of each other puts them on the same team. To remove a player from a team, drag their picture onto the portcullis at the center of the table. When you are happy with the teams, click OK to go back to the skirmish lobby and you will see each team has been assigned a different color.
12 |
|
|
|
13 |
|
|

The buttons below the player set up box allows you to change the game type (Normal, Crusader, Deathmatch) - This allows you to set the initial levels of gold and troops that the human players or AI opponents begin the game with.
Maps can be selected from the bottom right of the screen. A thumbnail and brief description of the map will appear above the map selection panel.
Once in the game you can ask your allies for support by pressing the ‘Enter’ key or by pressing the bugle shield at the bottom of the screen.
Selecting the 'Set Orders' button from the panel that appears allows you to give military orders such as attack an enemy or defend your castle.
The 'Send Goods' button will send the goods that have been requested by one of your allies.
The 'Request Goods' button allows you to request a certain amount of a specific food, resource or weapon type from one of your allies.
After you have made your demands the AI player will consider your request and respond accordingly.
Icons will appear around the portraits of your allies to let you know which goods they are requesting, if they need help and whether they are attacking or defending. An icon in the top right of their portrait shows which resources your ally is requesting. A flashing exclamation mark in the bottom right of their portrait shows that your ally is under attack and is requesting assistance. A shield displayed in the bottom left shows your ally is defending and a sword shows your ally is attacking.
Clicking on the crown shield will bring up the Order of Merit panel. This shows who the greatest lord is and the amount of gold and troops each player has. You can sort these by clicking on the icons at the top of the window.
2.0 GAME BASICS
This section will take you through all of the main features within CRUSADER. If you rarely play computer games it is recommended that you go through the in-game tutorial by selecting the tutorial button. If you play computer games regularly, then scan this chapter to familiarize yourself with the basics.
2.1 MAIN SCREEN OVERVIEW AND NAVIGATING
THE MAP.
After starting a new game the screen will look like this:
Building |
Selection Scroll |
Building |
Categories |
Popularity |
Treasury |
Population/ |
Max Population |
Game Options Briefing Delete Undo Mini-Map Scribes Report
To scroll around the map, push the mouse pointer to the edge of the screen. As you scroll around, the overhead mini-map will move with you.
Tip: You can also use the cursor keys to scroll around the map.
Another way to get to a specific location is by left clicking on the overhead mini-map in the bottom right of the screen.
2.2 CAMERA INTERFACE
When you press and hold the right mouse button on the main display you will see the four camera interface icons appear.
14 |
|
|
|
15 |
|
|
To Rotate the Map:
Move the mouse pointer upwards onto the rotate icon, it will highlight and the map will rotate ninety degrees. The map will continue to rotate if you leave your mouse over the rotate icon and won't stop until you release the right mouse button.
Tip: You can also rotate the map by pressing the 'X' or 'C' keys.
To Zoom:
Holding down the right mouse button and moving the mouse pointer over the zoom icon, will zoom out your view, allowing you to see more of the map. Repeating the process will zoom back in again.
Tip: You can also zoom in and out using the 'Z' key.
To Peek Behind Things:
Moving the mouse pointer downwards onto the peak icon will pull the landscape, trees, walls and some buildings down to the same level. Releasing the button will make the landscape spring back up.
Tip: For a quick peek press the 'V' key.
Hint: This feature will prove very useful later on when you want to peek behind walls!
To Flatten the Landscape and Buildings:
Moving the mouse pointer to the left over the flatten icon, flattens the landscape and buildings. To restore the landscape and buildings to their original height, repeat the proces.
Tip: You can also use ‘Spacebar’ to flatten the landscape and buildings.
Hiding the Management Panel:
To hide the management panel and make the game go full screen, press the ‘Tab’ key. To restore the management panel, press the ‘Tab’ key again.
2.3 PLACING YOUR KEEP
If not already built, you must place your starting keep on the map before any other buildings become available. To construct a building, select it from the building selection scroll at the bottom of the screen then left click on the main display when you are happy with it's position.
Note: If you happen to place a structure over an area of inaccessible ground, parts of the footprint will turn red warning you that you cannot build there.
Once the keep is placed a lot of things will start happening. One of the first things you will see is your starting resources being transferred from your starting goods onto your stockpile. These resources are now available for you to use in construction.
2.4 POPULATION GROWTH.
In addition to the Keep and the stockpile you will see a campfire. Moving the mouse pointer over it will reveal the population growth indicator. The more popular you are, the faster it will fill and the quicker your population will grow. Every time the indicator makes one full rotation, a peasant will
arrive and stand by the campfire until work becomes available.
Note: Only 24 peasants will fit around the campfire, after this limit is reached you will need to find them work.
If the halo turns red it means that you are unpopular. The halo will then show how quickly people are leaving your castle.
16 |
|
|
|
17 |
|
|
2.5 RATIONING AND THE GRANARY.
When you build a Granary the food in your starting goods will be transferred to it and the game will begin.
Note: In single player invasion missions the game timer does- n't start until both the keep and granary have been placed, but this is not the case for multiplayer missions.
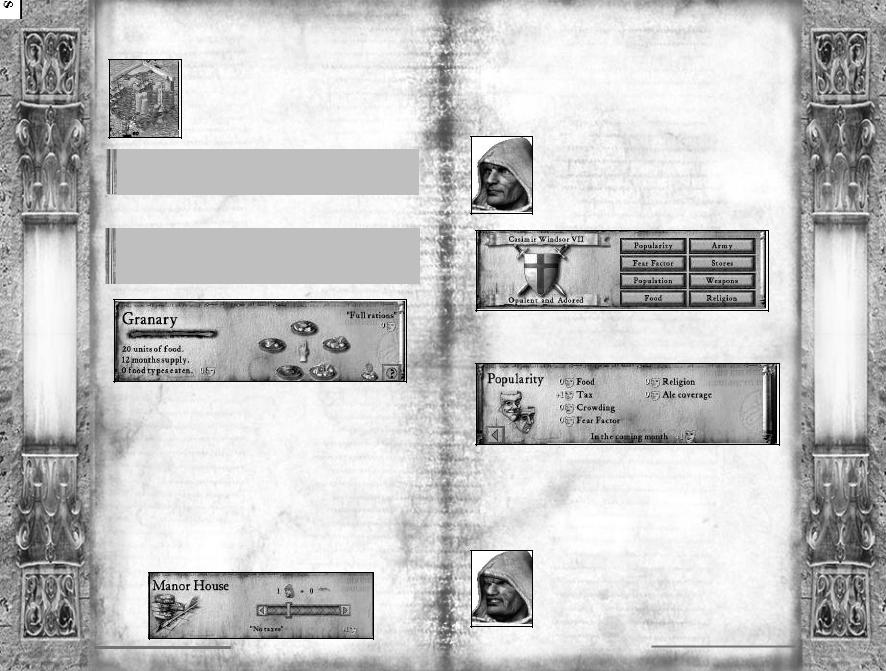
Left clicking on the granary will bring up the granary panel.
Tip: Left clicking on any building or person will bring up a screen giving you more information on them. Right clicking after placing a building will clear the building cursor and give you back the standard mouse cursor.
This panel lets you see your food details and allows you to make changes to your rationing. On the right of this panel there are five plates with varying amounts of food on them, which symbolize the different ration settings from 'no rations' up to 'double rations'. Reducing your rations below the default of 'full rations' will have a negative effect on your popularity whereas increasing them will have a positive effect. You will see the rate of consumption by watching the speed of the bar in the granary panel or by watching the units of food disappear from your granary.
2.6 SETTING TAXES
Left clicking on your Keep will bring up the tax panel, which lets you view your tax details and change your tax rate.
You can set your taxes to anything from a ‘generous bribe’ all the way up to a ‘crueller than cruel’ tax by moving the slide bar left or right. Increasing your tax rate above the default setting of 'no taxes' will have a negative effect on your popularity and reducing taxes to hand out bribe money will have a positive effect.
2.7 POPULARITY IN BRIEF
The scribe holding up an open book allows you to see critical information at a glance. The expression on his face reflects your popularity and he will also let you know what he thinks about some of your actions! Left clicking on the report book will bring up the reports panel.
Left clicking on the popularity button will show you all the information regarding your popularity.
At the bottom of the panel, after the words 'In the coming month, you will see the overall effects of your actions on castle popularity for the coming month. Making changes to your tax rate and rationing are the two main ways of manipulating your popularity. Ensure your popularity rating remains above 50 otherwise people will begin leaving your castle.
If your scribe stops smiling and your popularity rating starts being displayed in red, you will begin to lose workers. Your popularity will be displayed in red if it is below 50 and displayed in green if it is 50 or higher.
18 |
|
|
|
19 |
|
|
Tip: Listen out for announcements from your advisor. He will let you know if you are running into any problems.
2.8 GATHERING FOOD AND RESOURCES
Running along the bottom left of the screen you will notice six shields.
Castle |
Industry |
Farm |
Town |
Weapon |
Food |
Buildings |
Buildings |
Buildings |
Buildings |
Buildings Processing |
|
|
|
|
|
|
Buildings |
These are the building category buttons, which change the type of buildings displayed on the building selection scroll above them. Moving your mouse pointer over these shields will highlight them and bring up a brief description of the button above the building selection scroll.
Tip: If you can't work out the function of any of the icons in the game, move your mouse pointer over the icon and it's description will appear.
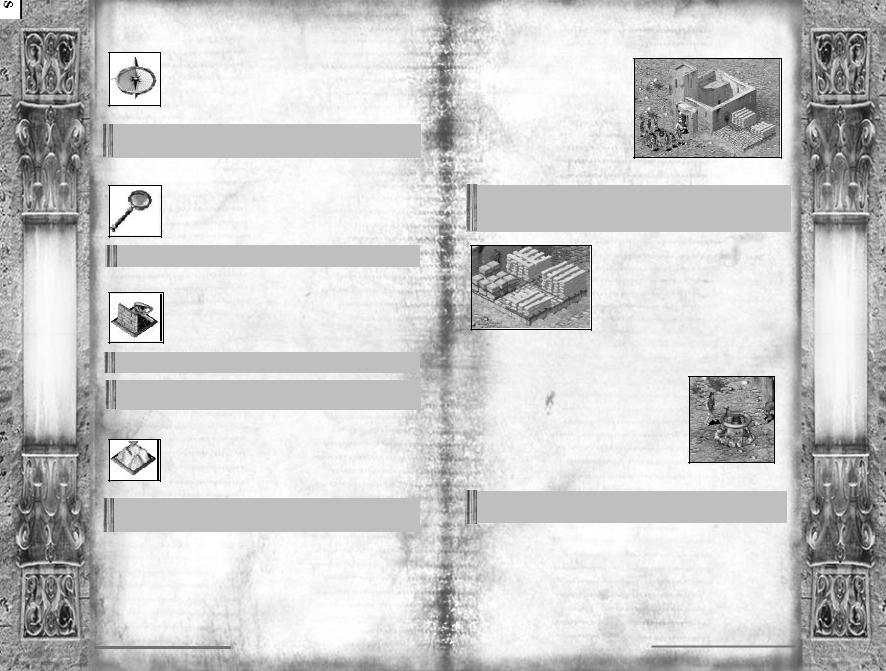
The most basic resource in the game is wood and is required in the construction of almost every building. Left clicking on the shield with the picture of a hammer will select the industry buildings category. When you place a woodcutter's hut on the map an available peasant will turn into a woodcutter and get to work cutting down trees.
A quick and easy way to gain food early on is by hunting deer by building hunter's huts found in the farm buildings category. Once the meat is prepared they will place it in your granary, swelling your food stocks. You should always be aiming to balance the rate at which you consume food with the rate at which it is being put into your granary.
Undo - If you change your mind when placing a structure, left click on the undo button to the left of the mini-map and your last action will be cancelled. All of the resources will be recovered.
Delete - To remove a structure from your settlement, left click on the delete button to the left of the mini-map then select the structure you wish to remove. Half of the resources spent in construction will be recovered.
2.9 INCREASING YOUR POPULATION
To increase your available housing, build more hovels found in the town buildings category. Your available housing will increase by eight and your settlement will continue to grow, but so of course will the mouths to feed.
Recap:
WUse the camera interface and mini-map to help you find a suitable location for your settlement. Don't
forget to use the spacebar to flatten the landscape!
WThe keep and granary must be placed before any other buildings become available.
WPopularity is your key game variable.
WChanging your tax rate and rationing will influence your popularity.
WMake sure you start gathering wood and food early on.
WBuild more housing to increase your population, keeping an eye on your food supply and popularity
as you expand.
20 |
|
|
|
21 |
|
|
3.0 INFLUENCING YOUR POPULARITY
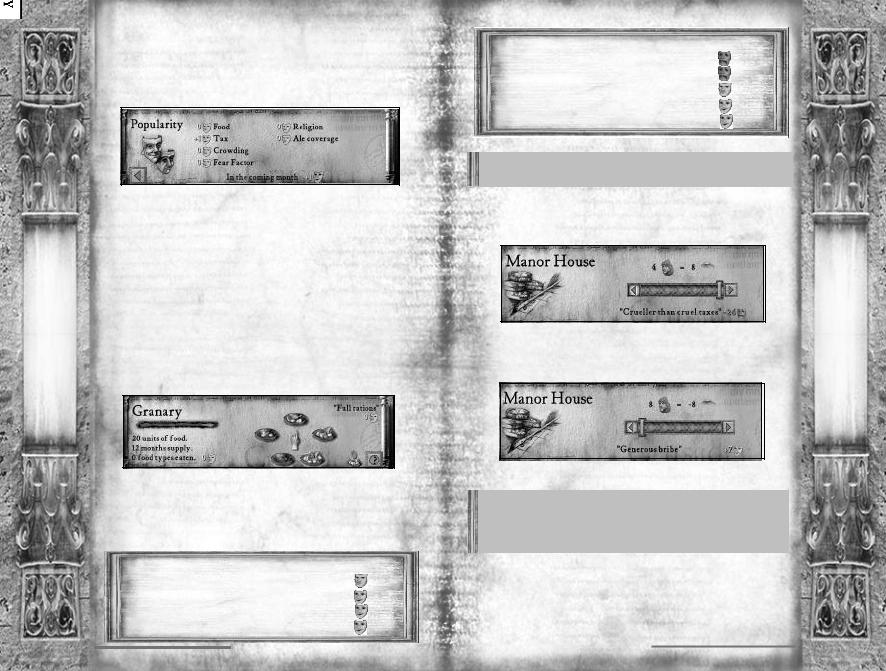
This chapter will take you through each of the factors governing popularity. These are listed for you when you open the popularity panel from the report menu.
To the left of each is a face. 

 A green smiling face
  means that you will gain a positive effect from that factor;
a yellow face shows that there is no effect and the red sad face  represents a negative effect. The sum of these reflects either a bonus or penalty to your overall popularity. This is shown after to the words 'In the coming month'. There are a total of six ways to effect popularity with the two main factors being food and tax.
3.1 FOOD
Changing your rationing is one of the quickest ways to influence your popularity. Both the number of food types eaten and your ration setting affect your food bonus or penalty. These separate influences can be seen in the granary panel.
Your people will be happier with you if you supply them with more than one type of food. Less than full rations damages your popularity while increasing your rations boosts it.
The bonuses and penalties from food types eaten and rationing are as follows:
FOOD TYPES EATEN |
BONUS TO POPULARITY |
1 |
0 |
2 |
+1 |
3 |
+2 |
4 |
+3 |
RATIONS |
BONUS TO POPULARITY |
None |
-8 |
Half |
-4 |
Full |
0 |
Extra |
+4 |
Double |
+8 |
Tip: You can press the 'G' key to quickly center on your granary and bring up the granary panel.
3.2 TAX
The people of CRUSADER do not enjoy paying taxes so any positive tax rate you set will have a negative effect on your popularity.
When you have sufficient gold in your treasury you may decide to give your peasants a handout in the form of bribe money each month.
Doing this will have a positive effect on your popularity.
Hint: You will find bribery proves useful when you are running low on food. Change your rations to half then hand out bribe money to offset the worst of the penalty until you find a way of restoring your granary stock.
The following table shows the popularity bonuses and penalties that you will receive from the various tax settings.
22 |
|
|
|
23 |
|
|
Generous Large |
Small |
No |
Low |
Average |
|
Bribe |
Bribe |
Bribe |
Taxes |
Taxes |
Taxes |
+7 |
+5 |
+3 |
+1 |
-2 |
-4 |
High |
Mean Extortionate |
Downright |
Even |
Crueler |
|
Taxes |
Taxes |
Taxes |
Cruel Taxes |
Crueler than Cruel |
|
-6 |
-8 |
-12 |
-16 |
-20 |
-24 |
Note: Attempting to give out bribe money when your treasury is empty will not have any additional effect on popularity.
Tip: Pressing the 'H' key quickly centers the view on your keep and brings up the keep panel.
3.3 CROWDING
Your keep provides you with some starter housing for your people after which you need to place houses to increase your maximum population level. Each house provides shelter for another 8 people.
Crowding will occur when your population exceeds your available housing. The population indicator will turn red if you have an overcrowding problem. Overcrowding may occur if a house is deleted or destroyed by the enemy. To remedy overcrowding, simply build more housing.
3.4 FAIRS AND OTHER EVENTS
Occasionally during the course of the game, travelling fairs will pay surprise visits to your castle and provide entertainment. Whilst they are in town you will gain a temporary bonus to popularity.
Other events such as lions attacking or disease will also occur, bringing temporary changes to your current popularity.
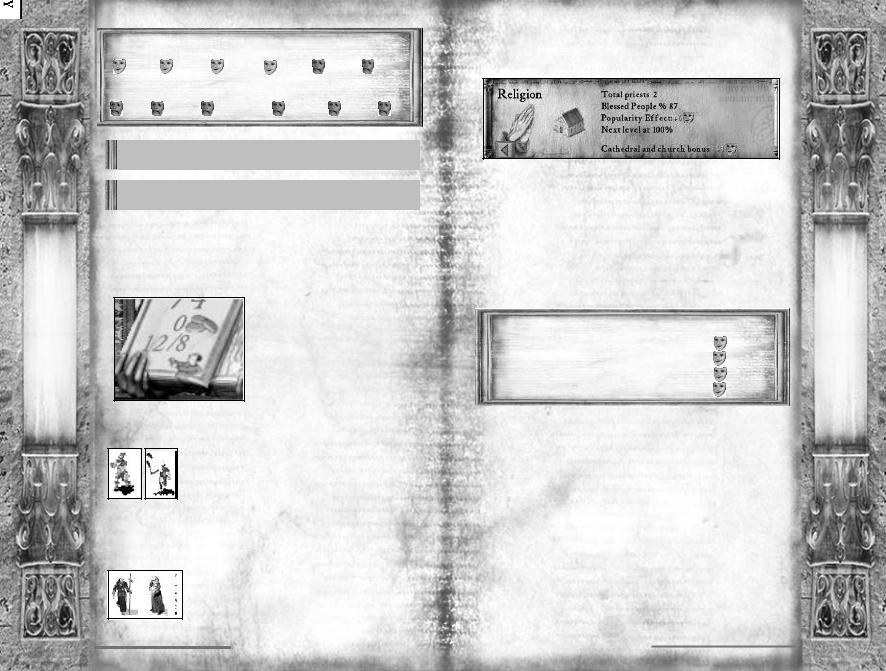
3.5 RELIGION
When a religious building is placed, priests will arrive and begin blessing your people.
By opening the Religion panel from the advisors report menu, you can see the percentage of people who have been blessed as well as the bonus you are receiving to popularity.
The blessing given by the priest wears off after a short while, at which point that person must be blessed again. Covering the religious needs of the community therefore is a continual process. The higher the percentage of blessed people, the higher the bonus you will receive to your popularity.
As your castle population grows the percentage of your people blessed will start to fall, thus lowering your bonus. To rectify this you will need to place extra religious buildings. The bonuses you gain from blessing your people are as follows:
PEOPLE BLESSED |
POPULARITY BONUS |
2 5 % |
+2 |
5 0 % |
+4 |
7 5 % |
+6 |
100% |
+8 |
In addition to the bonus you gain from blessing your people, having a church in your castle gives you an additional +1  bonus to popularity and having a cathedral gives you a +2
  .
.
Cathedrals also allow you to recruit fighting monks.
The available religious buildings can be seen in the town buildings category.
3.6 WORKING INNS
A working inn is one with a supply of ale and an innkeeper. The innkeeper will collect ale from the stockpile and deliver it to the inn automatically. Once ale is available at an inn, your people will start to drink it. To check to see if an inn is working, select it and look at it's panel.
24 |
|
|
|
25 |
|
|

This panel shows how many barrels and flagons of ale the inn has in stock. It also shows the number of working inns (ones with ale) you have and the percentage of your people that are supplied by them. As this percentage grows the popularity boost you gain, rises also.
As your population rises however this percentage will fall, requiring you to build more inns. Ale is drunk from each inn at the same rate regardless of its location but inns further away from the stockpile will take longer to get re-supplied by the over worked innkeeper. Inns are in the 'Food Processing Buildings' category. The bonuses you gain from providing your people with ale are as follows:
ALE COVERAGE |
POPULARITY BONUS |
2 5 % |
+2 |
5 0 % |
+4 |
7 5 % |
+6 |
100% |
+8 |
3.7 FEAR FACTOR
Fear factor lets you know how people see you, as either cruel and ruthless or easy going and forgiving. Your fear factor determines how productive your workers are as well as the moral of your troops.
Placing good things around your castle will make you seem easy going, boost troop moral and increase your popularity but at the same time will reduce your workers efficiency.
Constructing some gardens in the castle for example will make everyone happy, but you will find that your workers tend to loiter about at the gardens after delivering their goods instead of heading straight back to work.
To see these structures left click on the ‘Good Things’ button in the 'Town Buildings' category.
On the other hand, you may wish to appear more cruel and ruthless. You can increase work efficiency by placing bad structures around your castle. This will unsurprisingly have a negative effect on your popularity and reduce troop moral.
Placing a few gallows for example may not be the most popular of decisions but it has the effect of encouraging people to work that extra bit harder. Your workers will even start to deliver extra goods when they make deliveries to the stockpile, granary or armory.
To see these structures, left click on the ‘Bad Things’ button from the 'Town Buildings' category.
The bonuses and penalties to troop moral for good and bad structures are as follows:
FEAR FACTOR |
ATTACK RATING BONUS |
-5 |
-25% |
-4 |
-20% |
-3 |
-15% |
-2 |
-10% |
-1 |
-5% |
0 |
0 |
+1 |
+5% |
+2 |
+10% |
+3 |
+15% |
+4 |
+20% |
+5 |
+25% |
26 |
|
|
|
27 |
|
|
 Loading...