


CONTENTS
Combat Ships . . . . . . . . . . . . . . . . . . . . . . . . . . . . . . . . . . . . . . .55
The Romulan Stations . . . . . . . . . . . . . . . . . . . . . . . . . . . . . . . . . .59
The Cardassian Union . . . . . . . . . . . . . . . . . . . . . . . . . . . . . . . . . . . . . .63
The Cardassian Fleet . . . . . . . . . . . . . . . . . . . . . . . . . . . . . . . . . . . . . . .63
Non-Combat Ships . . . . . . . . . . . . . . . . . . . . . . . . . . . . . . . . . . . .63
Combat Ships . . . . . . . . . . . . . . . . . . . . . . . . . . . . . . . . . . . . . . .64
The Cardassian Stations . . . . . . . . . . . . . . . . . . . . . . . . . . . . . . . .68
Species 8472 . . . . . . . . . . . . . . . . . . . . . . . . . . . . . . . . . . . . . . . . . . .72
Species 8472 Organisms . . . . . . . . . . . . . . . . . . . . . . . . . . . . . . . .72
Active Units . . . . . . . . . . . . . . . . . . . . . . . . . . . . . . . . . . . . . . . . .73
Passive Units . . . . . . . . . . . . . . . . . . . . . . . . . . . . . . . . . . . . . . . .77
Ferengi Alliance . . . . . . . . . . . . . . . . . . . . . . . . . . . . . . . . . . . . . . . . .79
Transporting Crew . . . . . . . . . . . . . . . . . . . . . . . . . . . . . . . . . . . . . . . .79
Map Objects . . . . . . . . . . . . . . . . . . . . . . . . . . . . . . . . . . . . . . . . . . . .80
Trading . . . . . . . . . . . . . . . . . . . . . . . . . . . . . . . . . . . . . . . . . . . . . . .84
Multiplayer and Instant Action . . . . . . . . . . . . . . . . . . . . . . . . . . . . . . .85
Star Trek: Armada II in GameSpy™ Arcade . . . . . . . . . . . . . . . . . . . . . . . . .90
Option Screens . . . . . . . . . . . . . . . . . . . . . . . . . . . . . . . . . . . . . . . . . .91
Admiral’s Log . . . . . . . . . . . . . . . . . . . . . . . . . . . . . . . . . . . . . . . . . . .93
Credits . . . . . . . . . . . . . . . . . . . . . . . . . . . . . . . . . . . . . . . . . . . . . . . .95
Customer Support . . . . . . . . . . . . . . . . . . . . . . . . . . . . . . . . . . . . . . . .99
Software License Agreement . . . . . . . . . . . . . . . . . . . . . . . . . . . . . . . .101
INSTALL
I N S T A L L I N G
S T A R T R E K : A R M A D A I I
H O W T O I N S TA L L
Before installing, close all other applications. Also make sure Virtual Memory is on (located in your System Control Panel). Verify that you have 1.3 GB of free hard drive space.
Insert the Star Trek: Armada II CD into your CD-ROM drive. If AutoPlay is enabled, wait a few moments until the Star Trek: Armada II title screen appears. On the title screen click the Install button to begin the installation process, and then follow the on-screen instructions.
If AutoPlay is not enabled, double-click on the My Computer icon on your desktop. Double-click on the CD-ROM drive icon. Double-click on the Star Trek: Armada II setup.exe icon. When the launch screen appears, click Install.
After Star Trek: Armada II setup is complete, your computer will install the Microsoft DirectX 8.0a drivers if you do not already have them. When DirectX 8.0a installation is complete, you will need to restart your computer for the new drivers to take effect.
Now you can run Star Trek: Armada II by choosing Programs/Star Trek: Armada II/Star Trek: Armada II from the Start menu or by clicking Play on the CD title screen or double-click the Armada II shortcut on your desktop.
Please register your copy of Star Trek: Armada II. To make it easy and fast, you can use our electronic registration system. There are two ways to access the system: (1) from the Star Trek: Armada II title screen click on Help/Support, and then click Register or (2) From the Start menu go to Star Trek: Armada II/Register.
T I T L E S C R E E N B U T T O N F U N C T I O N S
Install—Installs the game. Once the game has been installed, this button will change to Play.
Reinstall—This function allows you to reinstall the program in the event of corrupted or damaged files.
Play—If the game has already been installed to your system, click this button to play Star Trek: Armada II.
Uninstall—Click this button to remove Star Trek: Armada II from the system. Some files will be left behind. The Uninstaller will supply a list of leftover files, (i.e., saved games).
2 |
3 |

TROUBLESHOOTING
Help/Support—This button will take you to the help files, readme, game manual (.pdf), technical support, online help, electronic registration, along with supplying the options to install DirectX and Adobe® Acrobat Reader®.
Extras—This will allow you to install Earthlink and Gamespy and supply information on other Activision Star Trek titles.
Links—The Links button will take you to other Star Trek and Activision, Inc. related web sites.
Exit—Click this button to close the title screen and exit Star Trek: Armada II.
T R O U B L E S H O O T I N G
We have supplied Help documents that can help you in troubleshooting problems. There are two ways to access this help file:
1.From the title screen, click on Help/Support then Help Documents.
2.After installation, from the Start menu, select Programs/Star Trek: Armada II/Armada II Help/Armada II Help Documents.
A U T O P L AY
If the Star Trek: Armada II title screen does not appear, try performing the following steps:
1.Double-click on the My Computer icon on your desktop or right-click on the icon and choose the Open option.
2.Select the Refresh option located in the View pull-down menu.
3.Double-click on the Star Trek: Armada II CD icon in the window or right-click on the icon and choose the AutoPlay option.
4.After the Star Trek: Armada II title screen appears, click on the Play/Install button. If the AutoPlay feature does not function, please check the following:
A.Make sure the CD is clean and properly placed in the CD-ROM drive.
B.Your CD-ROM driver may not be optimized for use with Windows 95/98/ME/2000. To verify this, perform the following steps:
a.Open the Windows 95/98/ME/2000 Control Panel folder and double-click on the System icon.
b.Click on the Performance tab. If any of your hardware drivers are not fully optimized for use with Windows 95/98/ME/2000, they will be listed here with an explanation of the exact problem and suggestions on how to fix it.
TROUBLESHOOTING
D I R E C T X 8 . 0 A
Upon completion of the Star Trek: Armada II setup, the installation process will continue by determining if Microsoft’s DirectX 8.0a needs to be installed on your computer. If so, the appropriate files will be installed on your computer automatically.
Q.What is DirectX 8.0a and why do I need it?
A.Microsoft’s DirectX 8.0a is a set of functions that gives Windows 95/98/ME/2000 games and other applications their power. Using these functions allows applications to perform advanced functions in networking, graphics, sound, and input beyond what’s possible on other operating systems and accounts for many of the performance gains associated with Windows 95/98/ME/2000 games. Star Trek: Armada II uses Direct3D, DirectDraw, DirectSound and DirectInput, four of the DirectX 8.0a functions.
Q.If I don’t have DirectX 8.0a will Star Trek: Armada II install it for me?
A.Yes. If InstallShield does not detect DirectX 8.0a on your computer, it will install DirectX 8.0a for you, if you choose. After the entire installation is complete, you will need to restart your computer in order for DirectX 8.0a to take effect.
Q.I already have other Windows 95/98/ME/2000 games installed on my computer. Will the Microsoft DirectX Installer change my DirectX files?
A.If you already have other Windows games on your computer, chances are you already have an earlier version of DirectX installed. In this case, the Microsoft installer will detect and overwrite any previous versions with DirectX 8.0a. At that point, you will need to restart your computer for the changes to take effect.
If, however, you already have DirectX 8.0a installed on your computer, the Microsoft DirectX 8.0a installer will detect that and not overwrite any DirectX 8.0a files. You will not need to restart your computer after installation in order to run Star Trek: Armada II.
4 |
5 |

CHAPTER
P R O B L E M S & S O L U T I O N S
Intro Movie and Cinematics do not play properly
•Make sure your system meets the minimum requirements for the program, especially your CD-ROM drive. The program requires a CD-ROM drive with a minimum sustained transfer rate of 600K/sec (a quad-speed drive).
•You may not have enough RAM to run movies. Check to make sure you have sufficient RAM to run this product. You need at least 64 MB.
•Too many other applications may be running. Close down other applications (especially DOS boxes or modem programs) and try again. We strongly recommend that you not run other applications while running Star Trek: Armada II.
Game freezes
•Make sure your computer has at least 64 MB of RAM.
•Make sure you are using the latest 32-bit drivers for all your peripheral devices.
No sound, partial sound, or no voices or sound effects
•Make sure you have a 100% DirectX 8 Windows-compatible sound card in your computer.
•Make sure your speakers are plugged in correctly and turned on, and make sure the volume is turned up to an audible level.
•Make sure you are using the latest 32-bit sound drivers for your sound card.
•Make sure your audio card is properly installed and that you have the correct audio drivers installed. Check your audio card’s installation and its setup parameters within Windows 95/98/ME/2000 to be sure all are correct. See your card’s manual and your Windows 95/98/ME/2000 manual for details.
•Check your settings in your Control Configuration.
Game too slow
•Make sure you are running Star Trek: Armada II on a Pentium II 300 or higher system with 64 MB of RAM. A lower system usually will not run Armada II satisfactorily.
•Try turning off some game options in the Graphic Settings screen or lowering the Graphic Detail setting.
•Make sure you have no other applications running in the background.
•Make sure your screen resolution is set as low as it can be in the Graphic Options screen.
•The game may run faster if more RAM is available. Increasing the RAM in your system to 128 MB of RAM will make the game run faster.
PRELUDE
P R E L U D E
S TA R D AT E 5 4 5 0 0 . 3
It has been six months since the Federation and its allies drove back the Borg incursion into the Alpha Quadrant, wrestling the Omega Particle from the Borg Collective’s grasp, and driving the Borg from Federation space. Though the Quadrant is still recovering from the devastation brought about by the invasion, an emergency meeting of the Federation Council has directed Starfleet to find out how and where the Borg have been entering the Alpha Quadrant.
Once found, the Federation forces have orders to launch the first ever offensive into the Delta Quadrant in their war with the Borg—a strategic operation to eliminate the Borg threat once and for all.
Such an operation carries risks—only some of which can be anticipated.
With the Federation’s strength and attention focused on the Delta Quadrant, there are those in the Alpha Quadrant who might feel the time is right to reassert their power. While the forces of the Klingon Empire are begrudgingly left to play the role of Alpha Quadrant peacekeepers, they learn that it will take all of their strength—and their forces—to preserve the Quadrant.
In the Delta Quadrant, the Borg find themselves set upon by not just the intruders from the Alpha Quadrant, but by a merciless assault from the fluidic space dwellers, Species 8472.
6 |
7 |
MAIN MENU
M A I N M E N U
The Main menu is the gateway into Star Trek®: Armada II single and
multiplayer play. The following selections are available: Single Player, Instant Action, Multiplayer, Options, Replay Intro, and Credits. You can also press Exit to leave the game.
S I N G L E P L AY E R
To play single player, click on Single Player in the Main menu—this takes you to the Single Player Menu. Here, you'll find the Tutorial and Federation campaigns.
To begin, click on the image in the upper left of the screen. This will start the Tutorial. A submenu will appear listing the training missions. Once a mission is completed, the next mission will become accessible.
You are not required to play through the Tutorial, but it is recommended. The storyline and success in the missions requires that they be played in order. You begin with the Federation Campaign and progress through the Klingon Campaign to the Borg Campaign.
Note: All missions that you've played are then available to play again at any time, in any order.
I N - G A M E C I N E M AT I C S
Each mission begins with an in-game cinematic. These communicate the mission’s objectives in cinematic form. If you’ve already seen the in-game cinematic and wish to go directly to the mission, tapping the Spacebar will skip the ingame cinematic.
MAIN MENU
M I S S I O N O B J E C T I V E S S C R E E N
Once the in-game cinematic is complete, an objective screen will appear in the center of the screen that restates the mission objectives. Click on the OK box and it will disappear, beginning the mission. To access the objectives during the mission, press the Objectives button on the upper right toolbar.
S AV E / L O A D
To save a game during game play, click on the Menu button on the upper right tool bar and select the Options menu. From there, clicking on Save will bring up the Save Game screen. Type in a description of the saved game or accept the default description (the mission title and the time).
To load a saved game from the Main menu, click on the Load option on the Single Player menu. Click on the game you wish to load and then click the Load button. To load a game from within a mission, hit Esc or click on the Menu button on the interface to go to the Options menu. From the Options menu, click on Load Game to go to the Load Game screen. Click on the game you wish to load and then click the Load Game button.
M O U S E S E L E C T I O N
Your mouse can perform almost every action in Star Trek: Armada II.
Left-click is for selecting an object, and right-click to give default orders. Advanced users can use the alternative right-click and hold interface. Right-click and hold will bring up the context-sensitive command palette. You can toggle that option on the Command Palette button found on the upper right tool bar Option menu.
8 |
9 |
INTERFACE
I N T E R F A C E
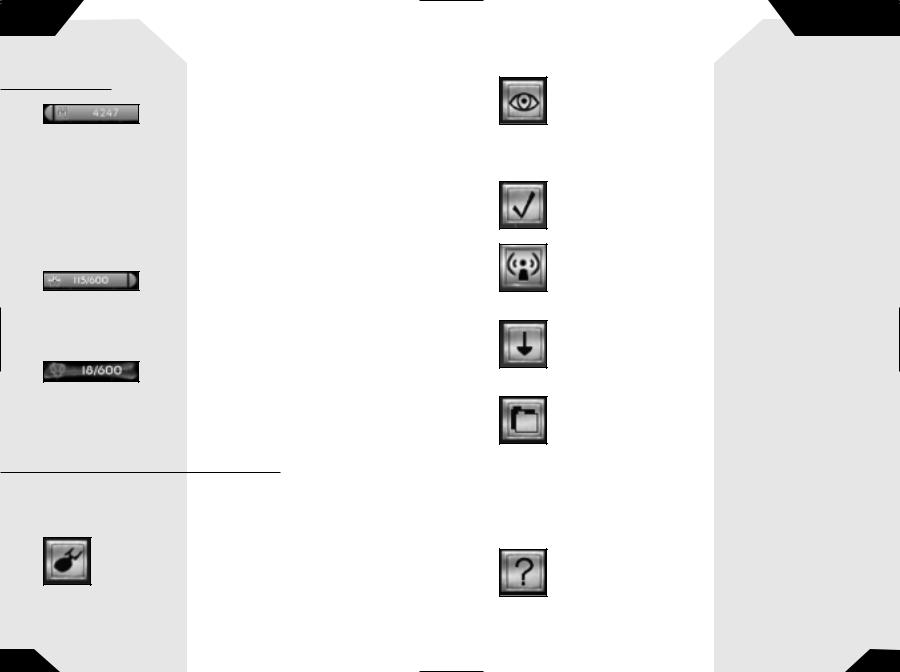
R E S O U R C E S
Along the top left of the interface, you’ll find the resources. From left to right, the resources are: Dilithium, Metal, Latinum, Crew, and Officers.
Dilithium
Dilithium is a crystalline substance used in warp propulsion systems aboard starships, and is mined from moons. Dilithium regulates the matter/anti-matter reactions that provide the energy necessary to warp space and travel faster than the speed of light.
The size and maximum speed of a ship typically reflects the amount of dilithium required for its development—larger starships require increased quantities of this resource. While stationary structures (such as a Shipyard) typically have lower energy requirements, their construction still demands a quantity of dilithium.
When an order to build a unit is given, the dilithium required for that object is taken from your dilithium account. Cancelling construction of a unit replaces the dilithium for that unit back into your account. Decommissioning a ship or station replaces dilithium back into your account.
To collect dilithium, a mining station needs to be built—preferably near a dilithium moon. Once built, a freighter will mine dilithium from the nearest dilithium moon. More freighters can be built to increase the rate at which a team acquires dilithium. Only one freighter can mine a moon at one time, although one can be mining a moon while another is returning its load to a mining station.
Certain moons contain an infinite supply of dilithium. These moons have a noticeably purple tint to them, and their quantity will not alter as they are mined for resources.
Note: Species 8472 have no use for dilithium, and this resource will not appear on the screen when playing as Species 8472, but it can be converted to bio-matter which Species 8472 uses for embryo evolution.
INTERFACE
Metal
This resource represents the variety of metals and materials needed for the construction of starships and
military installations. Metal is extracted from planets.
Metals are used primarily in the construction of stations. The size of the unit typically reflects the amount of metals needed—larger structures require more metal. Decommissioning a ship or station replaces metal back into your account.
To collect metal, you must build an Orbital Processing Facility near a planet. Once finished, the facility will begin mining metal from the planet.
Latinum
These valuable metal ingots are used as a medium of exchange, primarily outside of the Federation. Liquid at room temperature, latinum is typically suspended in ingots of gold, which come in standard sizes for ease of trade.
Latinum is used primarily for trade and during the development and research of new technologies.
Latinum is extracted from Latinum nebulae by mining ships. Harvesting latinum from nebulas is possible by sending a mining ship into a latinum-rich nebula and instructing it to harvest. Once it has completely filled its storage bays, it will head toward a starbase to drop off its load before returning to the nebula. Full latinum freighters are very vulnerable when carrying these volatile metals and can be spotted by the gaseous trail they leave behind.
Note: The Borg have no use for latinum, and this resource will not appear on the screen when playing as this race.
Bio-matter
A unique breakdown of matter employed solely by Species 8472 yields Bio-matter, the only resource that they need as a race. Using their Collector and Transmuter (see Species 8472 Organisms on page 70), Species 8472 are able to derive Bio-matter by converting standard resources (such as dilithium or metal) or taking it directly from other races's ships and stations.
10 |
11 |
CREW
C R E W
Each ship and most stations require a set number of crew members from your crew pool in order to be built. Crew filters into your crew pool at a steady rate by
possessing a starbase. The rate that crew accumulates is based on the number of starbases built. If you have no starbase, you’ll receive no additional crew. You also gain crew by colonizing planets.
Once an order to build a unit is given, the crew required for that project are taken from your crew pool. Canceling construction of a unit replaces the crew for that unit back into the crew pool. Decommissioning a ship or station transfers the remaining crew from that unit back into the crew pool.
Species 8472 do not utilize crew and therefore cannot colonize planets.
O F F I C E R S
The number of officers that you have restricts the total number of ships and stations that you can possess at one time. Each ship or station requires a set number of officers.
Note: You are limited to 600 officers total.
Pilots
(Species 8472 only)
Like officers for other races, the maximum pilot count restricts the total number of organisms that can be built. Each organism requires a set number of pilots. Species 8472 ships require only a single pilot.
O P T I O N B U T T O N S
Along the top right of the interface in Single Player mode, you’ll find the Option buttons. From left to right, they are: Idle Ship, Toggle View, Show Objectives, and Toggle For More Buttons.
Idle Ship
Sets the focus to the next ship that has no current orders.
OPTION BUTTONS
Toggle View
Switches the view between the Strategic and Tactical Views.
The Strategic View is the traditional top-down view of the map, with a visible grid. You can zoom in and out using the mouse
wheel. The Tactical View is full 3D. Moving the mouse will rotate your view; you can also zoom in and out with the mouse wheel.
Show Objectives
Shows the current mission objectives.
Comm Menu
Opens the Multiplayer Options menu to change alliances, modify chat settings, and give resources or units to other players.
Advanced Buttons
Brings up the following additional option buttons: Toggle Palette,
Toggle Help, and Main Menu.
Toggle Palette
Controls the location of the Command Palette. The first
(and default) setting will fix the command palette for selected objects in a row to the right of the mini map. The second setting
will bring up the command palette next to a selected ship if you right-click and hold for a moment on a selected ship or station. You can also press the X key to trigger this action. With a ship selected, right-clicking on another object will either bring up the icon for the default action (mining for a freighter on
a moon, trading for a cargo ship on a trading station, etc.), or a menu of commands available for that context.
Toggle Help
Will allow you to toggle the tooltip help messages. The default setting will bring up a tooltip box if you move the cursor over any interface element. If the cursor remains over the same element for
a moment longer, an extended tooltip will appear, giving more information on
12 |
13 |
CINEMATIC WINDOW
the topic. Clicking once on Toggle Help will bring up a fixed box with the extended tooltip that will remain over the Mini Map, active when you mouse over any element. The third setting of Toggle Help will stop all tooltips from appearing.
Main Menu
The Main menu will bring up the following choices: Save Game, Load Game, Graphics Settings, Sound Settings, Game Settings, Abort Mission, Return To Game, View Admiral’s Log, Tech Tree, Exit
to Windows, and Restart Mission. (For detailed descriptions, see the Save/Load, Options, and Admiral's Log sections.)
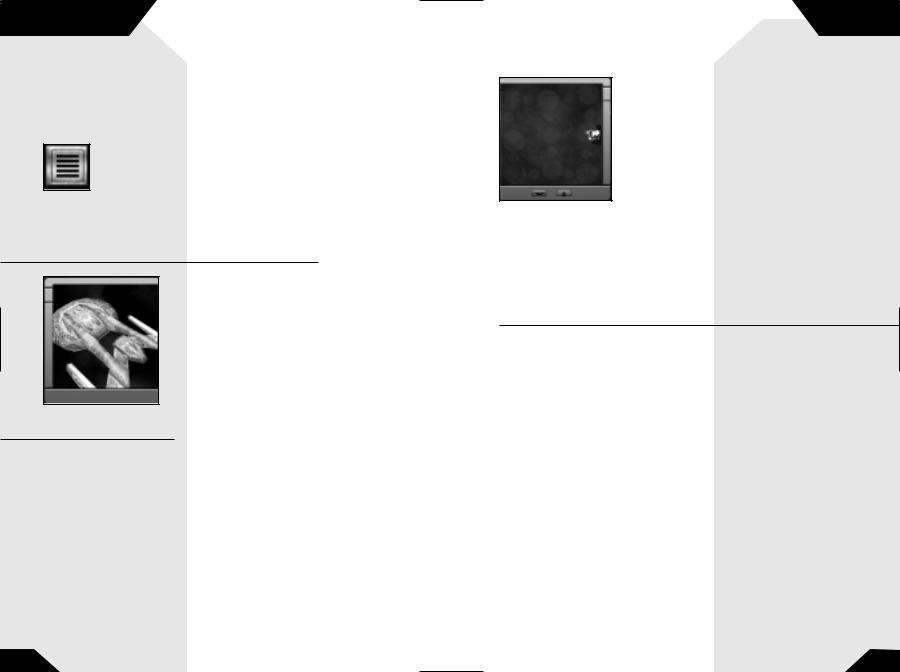
C I N E M A T I C W I N D O W
In the lower right corner of the screen, you’ll find the Cinematic Window. The view will show events occurring in other parts of the map, prioritized by significance. Clicking on the window will bring you directly to that event. Double-clicking on this window will also change your view from strategic to tactical and vice versa.
M I N I M A P
In the lower left corner of the screen, you’ll find the mini map. The entire game board is displayed, showing where you’ve been and what you can currently see. Any space objects that are permanent game fixtures will also be displayed, once they are seen. Enemy stations are also displayed, though only in their last known position if they’re currently out of your line-of-sight. All ships and stations are represented by their team color.
WARP SPEED
S H R O U D A N D F O G O F WA R
Unexplored regions of the map appear as a colored shroud on the mini map and in both the Tactical and Strategic views in the main display window. Explored regions that are no longer in the line-of-sight of any of your ships or stations become covered with a fog of war. The terrain and stations within this fogged area appear as they last appeared to a friendly ship/station. The view updates when a ship/station comes back within your line-of-sight.
F I LT E R S
The mini map can be filtered to the following states for both ships and stations: Show All, Friendly Only, Enemy Only, Show None, and Neutral Only via the buttons on the bottom of the mini map.
W A R P S P E E D
To travel long distances quickly, you may use warp speed. To warp, select a ship or group of ships that are capable of warp (Mining, Construction, and Cargo ships are among the ships that aren’t capable of warp) and right-click on the mini map to the point you’d like them to go. Alt-right-click in the main window will also have the selected ship or ships warp to the location of the cursor.
Ships will automatically come out of warp speed in the proximity of planets, moons, asteroids, black holes, and nebulae. They will return automatically to warp speed once they’ve passed by the gravitational well of an object.
The translucent purple radius around an object on the mini map represents the gravitational well.
A ship in warp will not be able to fire on targets, and will be more vulnerable to attack, as its shields must be down to warp. Sensor strength is also reduced, so the amount of the map revealed below the shroud when warping is significantly less than when traveling at impulse speed.
A move order made on the main screen will automatically be set at impulse speed. A move order made by clicking on the mini map will automatically be set at warp speed.
Pressing Alt + right-click will set you to warp on the main screen and use impulse speed on the mini map.
14 |
15 |
SHIP DISPLAY
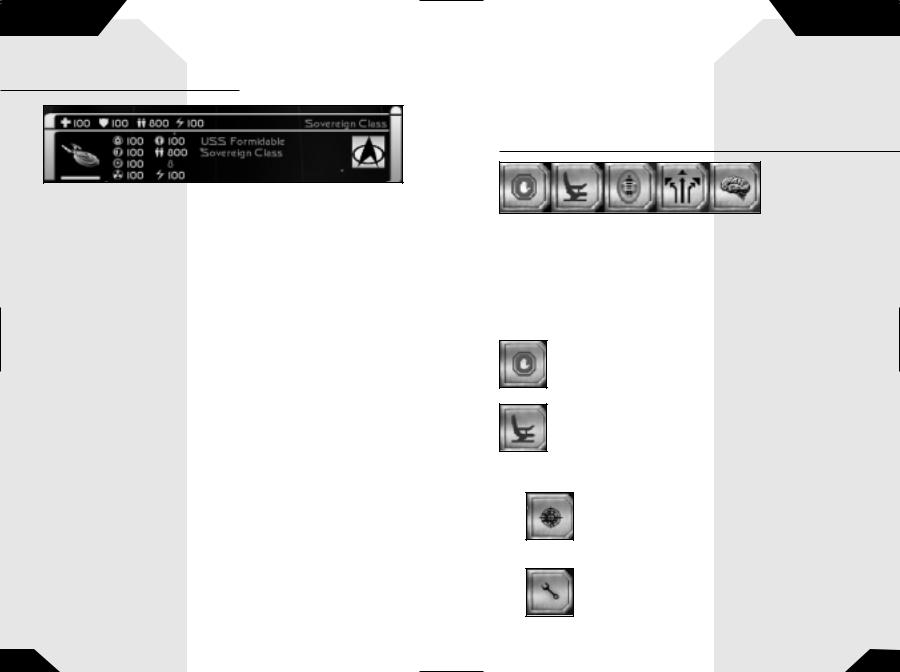
S H I P D I S P L A Y
Between the mini map and the cinematic window, you’ll see the ship display. When one ship is selected on the main screen, its vital statistics appear on the ship display.
Next to the schematic of the ship, there is a detailed look at the state of the ship. The icons on the left (in descending order) represent: Sensors, Shield Generator, Weapon Control, Engines. To the right of these are: Life Support, Crew, Officers Needed to Operate, and Special Energy (used for special weapons).
Any damage not directly absorbed by the shields can damage these systems. The more crew available to the ship, the faster damaged systems can repair. The color of the system icon and percentage reflects the health of that system: green is optimal, yellow means that the functionality has been compromised, and red reflects severe damage to the system. If a system completely fails, the ship will lose the use of that system (e.g., if life support fails, the crew will begin to die off).
Damage to a system will be reflected in the ship images display by the location of that system turning red. Below the picture of the unit, there is also a bar that reflects the health of the ship. The size and color of the bar corresponds to damage taken.
If multiple ships are selected (up to 16 ships can be selected at once), their ship images will show up in the ship display. Damage to various systems will be indicated by sections of the thumbnail turning red, and the health of the ship will be indicated by the bar underneath it.
M O U S I N G O V E R S H I P S
Mousing over any ship on the main screen in Star Trek: Armada 2 will bring up a quick status report on that ship.
COMMAND MENU
Directly over the ship display, the name of the ship and its class will appear. Below the name, four icons represent the strength (as a percentage) of the following systems: Health, Shields, Crew, and Weapons.
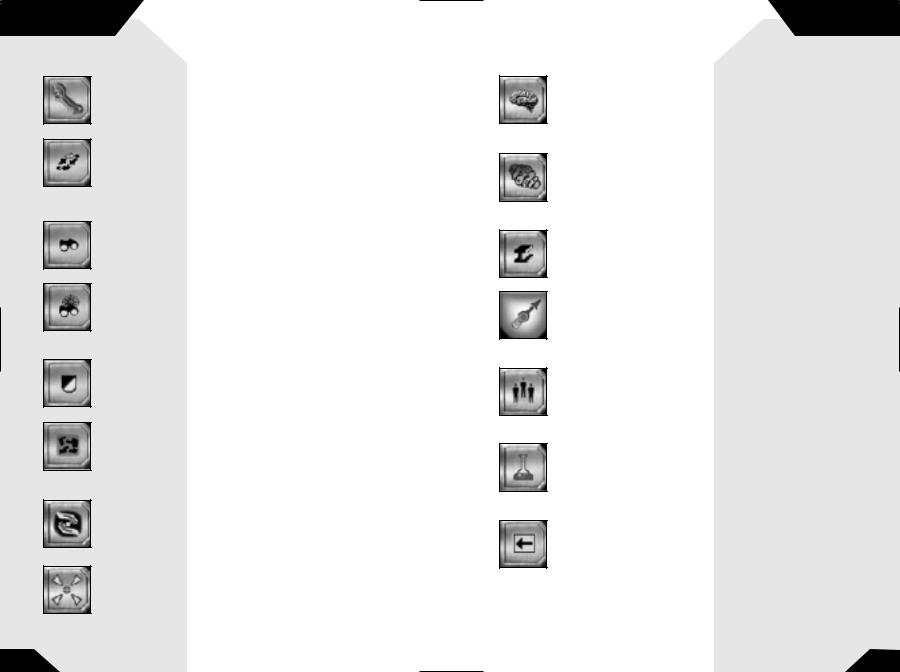
C O M M A N D M E N U
The Command menu shows you the different command buttons available to ships and structures. These buttons include Stop, Orders, Transport, Formations, AI, and Special Weapon. Clicking on the Orders, Formations, and AI buttons bring up sub-menus. The buttons on these menus are explained below under Ship Orders.
S H I P O R D E R S
Stop
Orders this vessel to stop its current actions.
Orders Menu
All ships have an orders button. When clicked, you have access to the orders button menu, which usually includes the following buttons:
Attack
Orders the vessel to attack a target or go to a location and attack any enemies there.
Repair and Recrew
Sends the vessel to the nearest shipyard for faster repair and recrewing from the crew pool.
16 |
17 |
COMMAND MENU
Priority Repair
Has the ship ignore all further orders until the ship is repaired.
Patrol
The vessel will patrol an area of space between its current position and the patrol point. To make more complex patrol routes, you can use the TAB key and right-clicking to lay down waypoints.
Scout
The ship will search unexplored areas of the map.
Search and Destroy
The ship will search for enemy ships and stations and destroy them.
Guard
Has the ship follow and protect the designated vessel or structure.
Decommission
Will disassemble and recover resources from a ship or station. Ships must return to a shipyard to be decommissioned. (Except for Species 8472.)
Trade Menu
Go to the Trade menu to exchange resources.
Set Rally Point
Choose a location where vessels will collect after exiting the station.
COMMAND MENU
AI Menu
Go to the AI menu to set the autonomy level for the selected ship(s) or stations.
Evolve Menu
Go to the Evolve menu to change your embryo into another form (Species 8472 only).
Build
Go to the Construction menu to select ships and stations to build.
Tractor Beam
Lock on a target vessel with disabled or derelict engines, allowing it to be towed.
Recrew
Reinforce the crew of the station with crew taken from the crew pool. You can’t recrew while under attack.
Research
Go to the Research menu to construct pods that allow the use of special weapons.
Back
Return to the previous menu.
18 |
19 |

FORMATIONS MENU
Transport
Sends a boarding party over to another vessel. On enemy vessels, the boarding party will fight the crew and take the ship over if no crew remains. It will reinforce crew on friendly vessels.
Note: You can only transport onto enemy ships if their shields are at 0%.
Transport Attack
Found on assault ships, this command will have the ship attack the target with normal weapons until the target's shields are down, and then send a boarding party of specially trained troops onto the other vessel.
Self Destruct
Initiates auto-destruct sequence, destroying the craft and damaging everything in the immediate area.
F O R M A T I O N S M E N U
All ships have a formations button. When clicked, you have access to the formation button menu, which includes the following buttons:
Assault Wall
Offensive. Places combat ships up front, frigates in middle, and artillery at far back.
Column
Movement. Puts ships in a column for movement with a narrow sensor footprint.
X Formation
Blockade. Spreads combat ships out widely to guard map areas.
AI MENU
Sheet
Array ships in 2D plane. Maximizes sensor scanning.
Clover Leaf
Attack in a clover leaf pattern. This can only be used for assaults.
Circle
Attack by circling target. This can only be used for assaults.
Arrow
Attack by darting back and forth. This can only be used for assaults.
When a group of ships are selected, you may choose a formation.
The ships will organize themselves into the formation that you choose, remaining in that formation while they attack and move.
A I M E N U
Clicking on the AI button brings up the AI menu, which contains the following buttons:
Note: For Advanced Users—A ship will inherit the AI state of the ship or station that constructed it.
Green Alert
This sets the unit into Green Alert. A unit on Green Alert will not fire until ordered. It will not engage or pursue.
Yellow Alert
This sets the unit into Yellow Alert. This level of alert requires that a craft only fires on an enemy if it is fired upon. It will pursue this craft within a small radius of its center point, then disengage and return to its point of contact.
20 |
21 |
AI MENU
Red Alert
(Default status)
This sets a unit into Red Alert. In Red Alert, a craft will fire on any enemy craft it sees. It will pursue this craft within a small radius of its center point.
Note: If a vessel is cloaked, the default will go to Yellow Alert. Also, alert status mainly affects ships not engaged in other activities. For example, a freighter mining dilithium will continue to mine when attacked, regardless of alert status. If it is not engaged in an activity, it will act according to its alert status.
Low Movement Autonomy
A ship will not move from the location that you designate until you order it to.
Medium Movement Autonomy
A ship will maintain its position in formation, moving with the formation as needed.
High Movement Autonomy
The ship may leave its location to pursue an enemy that it spots, following that enemy until it destroys it, or moves out of range.
No Special Weapon Autonomy
A ship will only use conventional weapons when attacking the enemy.
Medium Special Weapon Autonomy
The ship may use conventional and special weapons in attacking an enemy, until special weapons energy falls below 50%. Then, it will only use conventional weapons.
High Special Weapon Autonomy
The ship may use conventional and special weapons to attack an enemy, regardless of remaining special weapons energy.
FLEETS
F L E E T S
In Star Trek: Armada 2, ships can be grouped into fleets which will then respond as a group to the orders you give them. To create a fleet, left-click and drag or Shift-select a number of units (up to 16) that you want in a fleet. Once selected, press Ctrl-(number) (the Ctrl button plus one of the number keys at the top of the keyboard), and those units will reflect that they are now in that fleet—the number of the fleet will appear next to the ship when selected. To select the fleet, simply press the number key for that fleet.
A ship can be added to a fleet by selecting it and hitting Ctrl-Shift and the number of the fleet. To remove a unit from a fleet, select the unit and hit Ctrl–(minus key on the top of the keyboard).
To quickly move to the location of a fleet, a double-tap on the fleet number will bring you to that fleet's location.
A few things to note about fleets:
•Ships can only belong to one fleet at a time
•A construction facility can belong to a fleet, and every ship produced by that facility will automatically join that fleet (until the 16 slots are filled)
•If a fleet is selected, any AI orders given become the default for that fleet. Changing AI orders will affect the entire fleet.
S H I P S , S P E C I A L
W E A P O N S , A N D S T A T I O N S
The six playable races in Star Trek: Armada 2 each have their own specific fleets, special weapons, and stations. Building ships and stations, as well as efficient control of special weapons, is essential for victory. Below is a list of each race’s fleet (including which ship possesses which special weapon) and stations.
Most special weapons require a set amount of special energy to operate. These special weapons are built at the research and science stations. Once built, a pod representing the special weapon appears on the station. If one of these pods or stations is destroyed by an enemy, your fleet loses access to that special weapon.
Special weapons operate in two ways. Most special weapons work simply by clicking on the special weapon icon located in the Command menu. A few special weapons require a target, be it a location or another object, to fire at. For these weapons, you’ll need to click on both the special weapon icon and the target of the weapon.
22 |
23 |
THE FEDERATION
R A C E S
T H E U N I T E D F E D E R AT I O N O F P L A N E T S
The United Federation of Planets is an interstellar alliance of planetary governments and colonies established in 2161. There are over 150 members of the Federation and their territory spreads across 8,000 light years. The UFP is governed by the Federation Council, composed of representatives from the various planets and located in the Earth city of San Francisco. The agency responsible for all deep space exploration, scientific research, and military actions for the Federation is known as Starfleet. Starfleet provides security and defense for all the colonies of the Federation through its vast fleet of starships. The flagship of the Federation—and the pride of Starfleet—is the
USS Enterprise-E, commanded by Captain Jean-Luc Picard.
T H E F E D E R A T I O N F L E E T
N O N - C O M B AT S H I P S
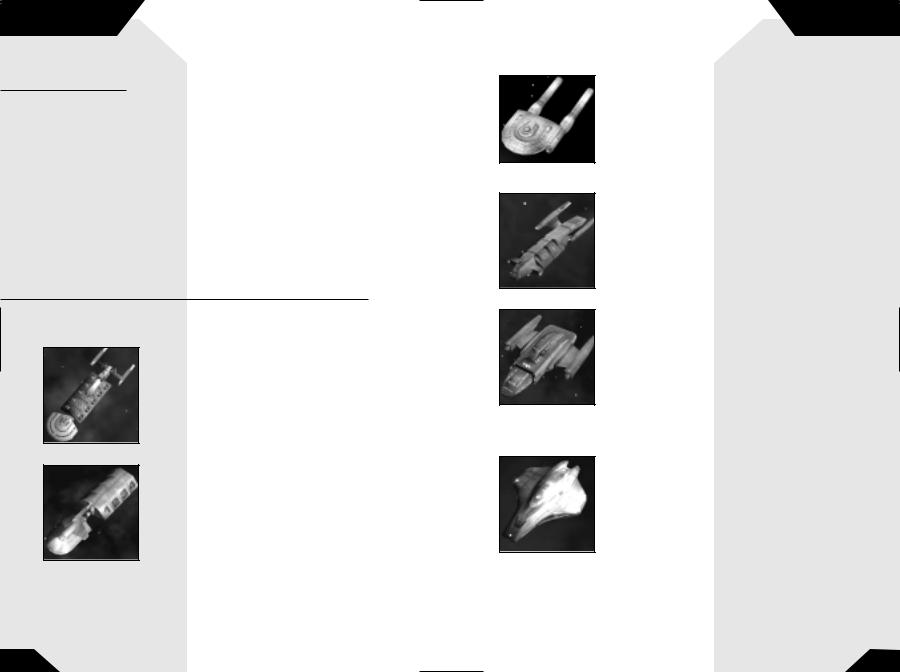
Freighter
The Federation freighter is outfitted with a reinforced hull, capable of carrying large amounts of unprocessed dilithium or latinum. Freighters have no weapons, though their heavy shielding allows them to withstand considerable damage in combat.
Construction Ship
The Federation construction ship is loaded with a team of worker bees in its cargo bay. When constructing a station, these one-person engineering shuttlecraft are deployed from the construction vessel. While the construction ship transports the raw materials, the worker bees assemble the areas with welding lasers. Like freighters, construction vessels are not armed with
weapons. They do have a tractor beam that allows them to tow derelicts and ships with disabled engines.
THE FEDERATION
Repair Ship
The Federation repair ships are able to provide mobile repair capabilities to both ships and facilities. Unarmed, they are heavily fortified so that they may carry out their critical duties, even in combat situations.
Note: If set to High Special Autonomy, these units will repair nearby ships and stations automatically.
Cargo Ship
Federation merchant ships ply the space lanes, moving between the trading stations near worlds both inside and outside the Federation. They are equipped with excellent shields, but no defensive armaments, relying on their maneuverability to get them out of harms way.
Colony Ship
The Federation is always on the lookout for new planets to colonize. The colony ship is able to transport enough colonists and supplies to start a fledgling colony. Once colonization is complete, the colony ship will travel down to the surface of the planet.
Note: Not all planets are suitable for colonization.
C O M B AT S H I P S
Venture-class Scout
The lightly armored, highly maneuverable scout vessel is capable of deep space travel. The Venture-class ship has limited space, preventing a large crew complement.
Designed primarily for reconnaissance and short-range exploration, it is equipped with a single forward-firing pulse phaser, should it need to engage in combat. It is ideal for quickly exploring unknown areas of space.
24 |
25 |
THE FEDERATION
Special Weapon: Tachyon Detection Grid
Venture-class ships can have their sensor arrays modified to use a Tachyon Detection Grid, allowing them to detect cloaked ships within their sensor range.
Iwo Jima-class
One of the newest additions to the Federation’s Starfleet, the Iwo Jima-class assault ship went into production in 2375. Carrying Federation marines, the Iwo Jima-class is designed to deploy its cargo both quickly and efficiently to the target (a ship or a facility) and take control of it in the shortest possible time. Federation marines have a reputation for toughness,
and come from a variety of Federation member races. A pulse phaser and a tractor beam for immobilizing targets complement the Iwo Jima-class ships.
Note: Marines can only be transported onto a ship whose shields are down. The assault ships must also lower their own shields during the transport process, leaving them vulnerable to enemy fire. Transport Attack will direct the ship to fire at an enemy vessel until the shields are down, and then begin transporting marines aboard.
Aegian-class
Recently integrated into Starfleet, the Aegian-class frigate is a quick ship that carries a powerful battery of photon torpedoes and phasers and is used to protect fleets.
Special Weapon: Shield Enhancer
The Aegian-class frigates can be modified to function as a Shield Enhancer. When activated, this boosts the shield
strength for all friendly ships within a specified distance to the frigate. Once the special energy is depleted the effect is turned off.
Defiant-class
Initially designed as an escort vessel, the Defiant-class began development in 2366 with the explicit intent of defending the Federation against the Borg. Since their initial production run, the Defiant has quickly filled the ranks of the Federation fleet and is now one of its most abundant starships. Each Defiant is outfitted with two
THE FEDERATION
forward-firing pulse phasers on its bow, allowing it to unleash a barrage of firepower at any opponent they face.
Special Weapon: Anti-matter Mines
The Defiant-class can be modified to carry a payload of anti-matter mines. These mines lie still in space until they detect the engine signatures of a nearby enemy ship, causing them to home in on their target and detonate.
Sabre-class
The Sabre-class is another recent addition to Starfleet, designed for heavy combat operations. The first prototypes were hurried into production to defend against the Borg, providing a quick-response addition to the Starfleet defenses. The Sabre-class is armed with pulse phasers and photon torpedoes.
Steamrunner-class
The Steamrunner-class went into production in 2371 as part of Starfleet’s response to the larger, disposable Jem’Hadar fleets. As a result, the Steamrunner is armed with long-range tri-cobalt torpedoes. These torpedoes— effective as long-range artillery—cause tremendous damage. As a consequence of the tremendous energy it takes to fire its weapons, the Steamrunner tends to be
slower and have less shielding than its counterparts, making it an easier target if engaged at close range.
Special Weapon: Engine Overload
The Steamrunner-class can be outfitted with an Engine Overload weapon. This blast disables the engines of multiple enemy ships, allowing it to use its
long-range torpedoes on immobile targets or escape from an incoming attack.
Akira-class
Put into production in 2370, the Akira-class was designed to provide offensive strength and support to Starfleet’s armada. The Akira has since become an invaluable asset to Starfleet, first by helping to repel
the Borg offensive of 2373, and later in the Dominion War. Its extensive shielding, maneuverability, and powerful phaser banks make it useful in both offensive and defensive situations.
26 |
27 |
THE FEDERATION
Special Weapon: Chain Reaction Pulsar
The Akira can be refitted to carry a Chain Reaction Pulsar. The Chain Reaction Pulsar is an enhanced torpedo that automatically homes in on the nearest enemy ship. It is capable of hitting multiple targets in quick succession, gaining energy with each hit.
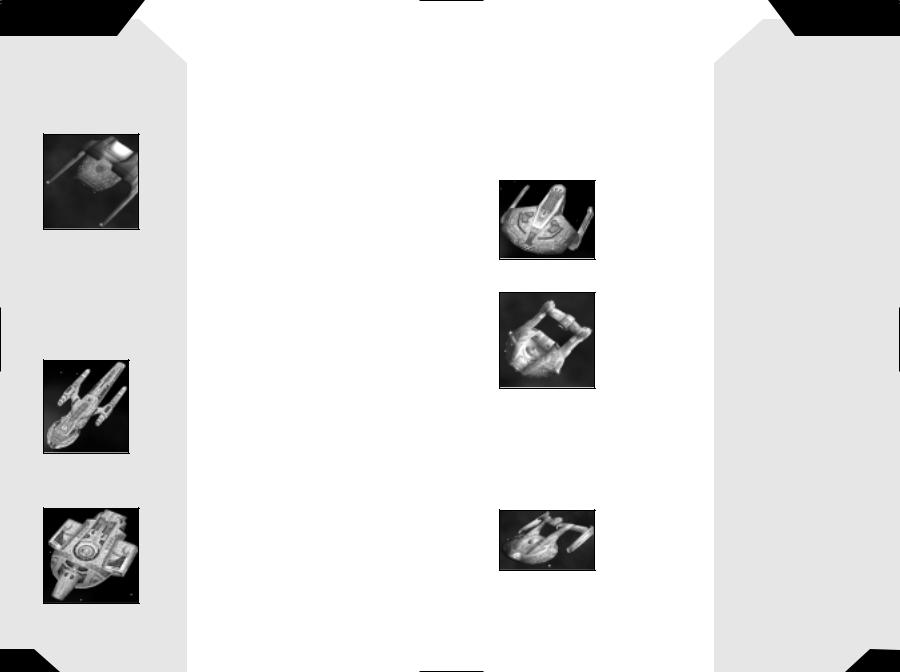
Intrepid-class
Introduced in the early 2370s, the Intrepid-class was Starfleet’s answer to their growing need for a versatile and quick class of ships, capable of excellent maneuverability at both impulse and warp speed. Using their variable configuration nacelles, the Intrepid-class ships have greater control of the warp field. Armed with
both phasers and photon torpedoes, the Intrepid-class ships rely more heavily on their speed and maneuverability to survive in combat.
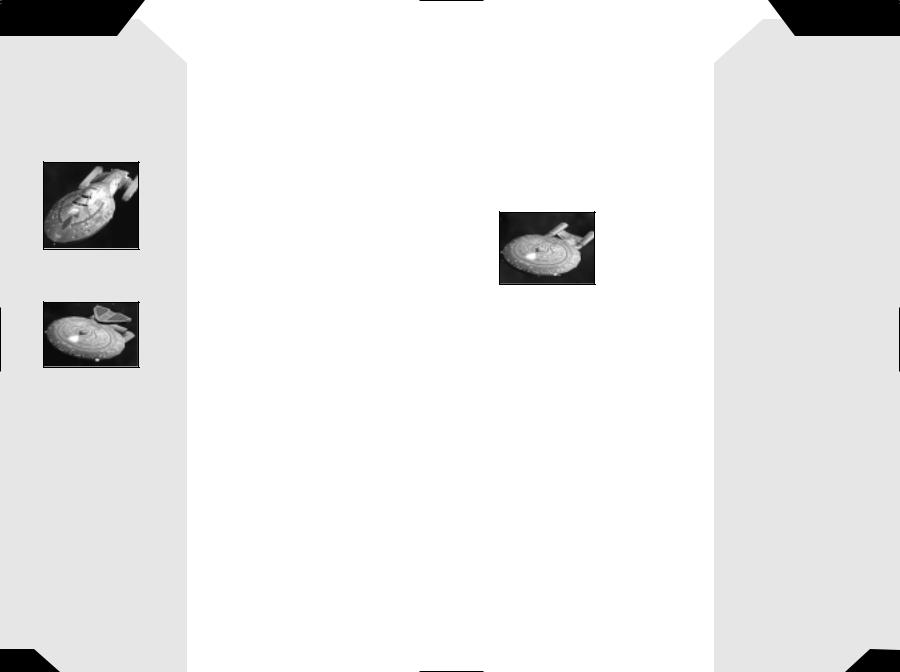
Nebula-class
Designed originally for scientific research and exploration, the Nebula-class starships have been refitted for combat since the Dominion War. With an extensive array of multi-purpose weaponry and new technology at its disposal, the Nebula is a great complement to the
Federation fleet. In addition to the Nebula’s phaser banks, it can be outfitted with four special weapons researched at the Federation Science Station.
Special Weapons:
Shield Disruptor
This weapon was based on technology adapted from the Breen Shield Dampening Weapon. It disables the shields of a group of enemy ships for a short time, allowing weapons to damage the hull and systems directly.
Gemini Effect
The Gemini Effect was created as a result of Dr. Paul Manheim’s temporal research in 2364. The effect creates a temporal disturbance in the space-time continuum, allowing two of the same ship to exist simultaneously in different locations.
THE FEDERATION
Point Defense Phaser
The initial concept for this weapon goes back as far as the twentieth century, with the Strategic Defense Initiative. Perfected in 2374, the PDP destroys incoming torpedoes before they can do any damage.
Engineering Team
Each Nebula-class can be assigned teams of Starfleet engineers. These miracle workers can be transported onto other allied ships, temporarily increasing their repair rate and shield recharge rate.
Galaxy-class
Introduced into Starfleet in the early 2360s, the Galaxy-class was designed to be the flagship of the fleet. A well-armed and formidable class of ship, the Galaxy-class has been at the heart of exploration and defense of the Federation. Galaxy-class ships have the
ability to separate their saucer section from the stardrive section, making them one of the fleet’s most versatile classes.
Saucer separation is generally employed so that the saucer section—which contains most of the crew—can remain in relative safety while the star drive (or battle) section goes into battle or other hazardous situations.
Saucer separation can only be attempted at sub-light speeds and not while the ship is at warp speed. While separated, the following rules apply:
Saucer Module:
•Not capable of warp speed, only impulse speed
•Contains 71% of the total crew
•Contains shorter range sensors than stardrive section
•Faster impulse speed
•2 Phaser strips
•1 aft-firing photon torpedo
28 |
29 |
THE FEDERATION
Stardrive Section:
•Capable of warp speed
•Long range sensors
•Contains only 29% of total crew (making repair times slower)
•Stronger shields
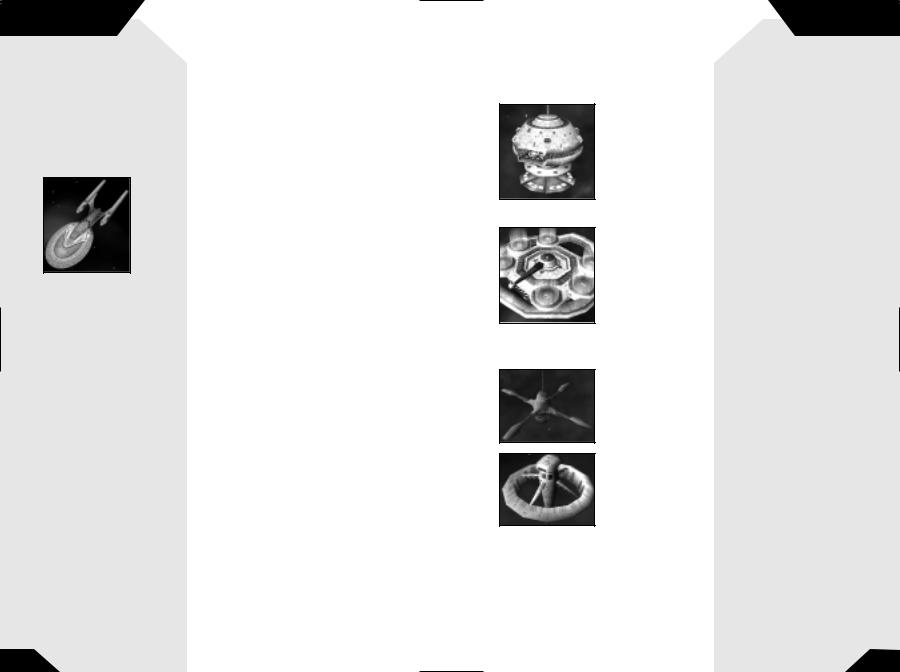
Sovereign-class
The Federation’s most advanced starship, the
Sovereign serves as the new flagship of their armada. The Sovereign’s powerful shields, cutting edge weaponry, and advanced technology allow it to defend the Federation and her allies from threats of any kind. The Sovereign is armed with powerful phasers and quantum torpedoes.
Special Weapon: Corbomite Reflector
Originally used as a bluff by Captain James T. Kirk, the fictitious Corbomite Reflector became a reality in 2363 when a long-retired engineer submitted plans for the device to Chief Engineer Geordi LaForge. Sovereign-class vessels have since been modified to accommodate a reflector, which enables it to redirect enemy fire back at its opponents. When activated, a portion of the incoming fire is reflected directly back at the enemy vessel, while the rest is deflected into space.
Note: Phaser fire and disruptor fire will still hit the ship when the Corbomite Reflector is active.
THE FEDERATION
T H E F E D E R AT I O N S TAT I O N S
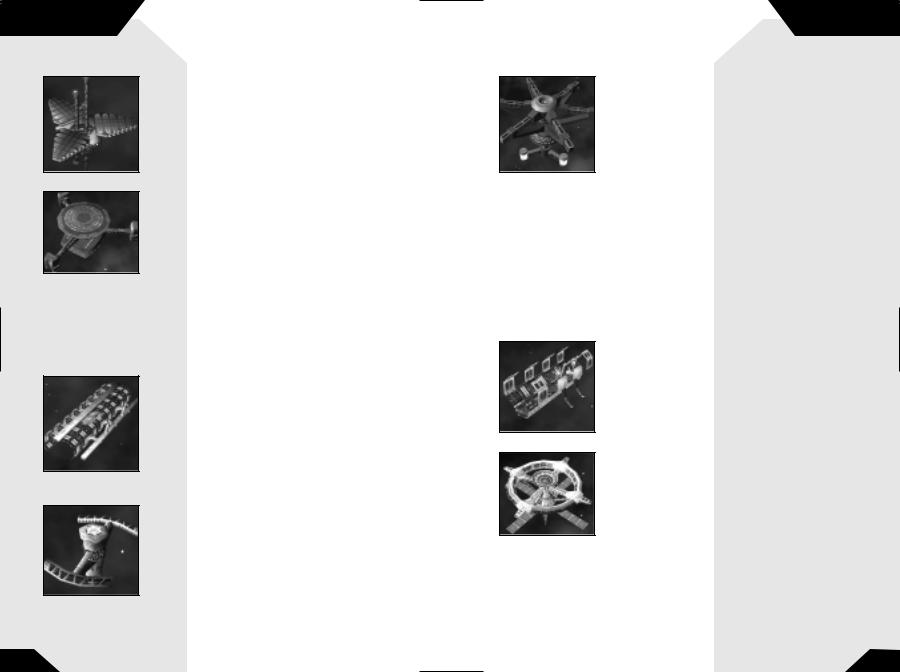
Federation Starbase
The Federation Starbase is the center of the Federation fleet in a sector. Once a starbase is operational, crew begins to be transported into the crew pool at a steady rate. Building additional starbases will increase this rate. The station can build construction ships, cargo ships, repair ships, and freighters, the basic units for establishing an outpost in the area.
Federation Mining Station
The Federation Mining Station is necessary for harvesting and processing dilithium. The facility comes with a freighter, which begins mining the nearest dilithium moon or latinum nebula as soon as the mining station is operational. Once the freighter has a full payload of dilithium, it will return to the mining station. However, if the freighter is hauling latinum,
it will return to the starbase to unload.
Federation Orbital Processing Facility
Federation Orbital Processing Facilities are built by construction ships and are placed over a planet to tap the planet’s metal resources. Once built, they stay in a fixed orbit over the planet while mining.
Federation Pulse Cannon
The Federation Pulse Cannon is a small, unmanned defensive platform. It provides support for Federation outposts by firing pulse phasers at all enemy vessels within its range. You must have a starbase to build a pulse phaser cannon.
30 |
31 |
THE FEDERATION
Federation Sensor Array
The Federation Sensor Array is an unmanned, small satellite that provides line-of-sight in a wide area around it. The sensor array can be modified to use a Tachyon Detection Grid to locate cloaked ships if developed by a research station.
Federation Trading Station
The Federation is rich with culture and trade, and the Trading Station is the center of the economy. Once constructed, a trading station can be used to buy or sell dilithium, metal, and latinum—particularly useful when there is an abundance of one resource but a limited supply of another. You can build a cargo ship that can
then be sent to other trading stations you construct, or trading stations of other allied players. Ferengi traders will periodically send trading ships to any trading stations you construct, generating latinum for you.
Note: To build a cargo ship, select your starbase. Then select the Build icon and build a cargo ship.
Federation Shipyard
The Federation Shipyard has two bays, one for construction and one for repair. This allows it to construct or repair one ship at a time. The Federation Shipyard can build the Venture-class, Iwo Jima-class,
Defiant-class, Akira-class, Steamrunner-class,
Intrepid-class, Sabre-class, and Colony ships.
Federation Torpedo Turret
The Federation Torpedo Turret is a larger, unmanned defensive platform. It provides support for Federation outposts by firing quantum torpedoes at all enemy vessels within its range.
THE FEDERATION
Federation Research Facility
The Federation Research Facility allows you to upgrade the
Venture, Defiant, Steamrunner, Akira, and Sovereign-class, each with its own special weapon. When each new ship’s technology is researched, a new pod is built onto the research facility. Though they are attached to the facility, each pod has its own shields and can be targeted independently from the main structure. If the research
facility is destroyed, all pods on the facility are destroyed with it. A research facility can build the following pods:
Tachyon Detection Grid—Venture-class
Anti-matter Mines—Defiant-class
Engine Overload—Steamrunner-class
Chain Reaction Pulsar—Akira-class
Corbomite Reflector—Sovereign-class
Shield Enhancer—Aegian-class
Federation Advanced Shipyard
The Federation Advanced Shipyard has two bays, one for construction and one for repair, like its smaller counterpart. The advanced shipyard can build the
Aegian-class, Nebula-class, Galaxy-class, and Sovereign- class vessels. You must possess a Research Facility to build an advanced shipyard.
Federation Science Station
The Federation Science Station upgrades the Nebula-class vessels. When each new technology is researched, a new pod is built onto the Science Station. Though they are attached to the station, each pod has its own shields and can be targeted independently from the main structure. If the science station is destroyed, all pods on the station
are destroyed with it. The science station can build the following pods:
Shield Disruptor—Nebula-class
Gemini Effect—Nebula-class
Point Defense Phaser—Nebula-class
Engineering Team—Nebula-class
32 |
33 |
 Loading...