


Fisher & Paykel WA75T65GW1 User Guide

NZ AU PAC
Installation instructions
and User guide
Clothes washer
4323_NZ_AU_PAC_GW_MW_Washer_UG11.indd 1 8/10/09 2:45:21 PM

Intelligence working for you
75 years of laundry experience has led to the development of one of the world’s most advanced
wash systems, the Smart Drive™.
Unlike conventional machines, Smart Drive™ clothes washers use intelligence to adapt the wash
action and water levels to save on water and electricity use; making it kinder on your wallet and
the environment.
Intelligent electronics
A powerful microprocessor controls every aspect of
the Smart Drive™, allowing it to continually monitor
and respond to each wash. It contains over 10,000
lines of instructions in its ‘brain’ – the result of many
years of testing and fine-tuning, to give you the best
possible performance.
Direct drive motor
Our revolutionary direct drive motor is capable of
infinite wash actions, continuously adjusting its speed
to the movement of your clothes, removing dirt while
caring for the fabric, delivering the ultimate wash.
Reliability
The Smart Drive™ has no mechanical brake, pulleys or
gears, which means fewer moving parts and greater
reliability.
Saves time
With a top spin speed of 1000 rpm, Smart Drive™
reduces clothes drying time by up to 30%.
Energy conservation
The unique wash action means a typical load uses
only the same amount of electricity as a 100-watt
light bulb left on for an hour.
Eco
Designed to make every drop count, using up to 25%
less water than a traditional rinse.
4323_NZ_AU_PAC_GW_MW_Washer_UG11.indd 2 8/10/09 2:45:22 PM

1
Contents
Important!
SAVE THESE INSTRUCTIONS
The models shown in this User Guide may not be available in all markets and are
subject to change at any time. For current details about model and specification
availability in your country, please visit our local website listed on the back cover
or contact your local Fisher & Paykel dealer.
Installation Instructions 2
Getting started
Before you do your first wash 5
Using your EXCELLENCE washer 6
Using your PRIDE washer 8
Lid lock 10
Wash cycles and options
Wash cycles and options 11
Wash options and advancing the cycle 12
Water levels 13
Saving water & time – ECO & QUICK WASH options 14
SOAK, SPIN HOLD, DELAY START 15
Washing bulky items, Washing woollens 16
FAVOURITE cycle 17
Customising the wash cycles 18
Before you wash
Sorting, Loading 19
Detergent 20
Fabric softener, Scrud 21
Changing pre-set options
Option adjustment mode 22
Wash temperatures, Rinse options 24
CONTROLLED COLD, End of cycle beeps, AUTO water level 25
Out of balance recovery routine 26
Machine information
Specifications 26
Cleaning your Smart Drive™ 27
Products that might damage your Smart Drive™ 28
Smart Drive™ sounds and beeps, Automatic lint system 28
Saving water 29
Problem solving
If your Smart Drive™ beeps for help 31
Operating problems 33
Wash problems 34
Manufacturer’s Warranty 36
Customer Care 37
4323_NZ_AU_PAC_GW_MW_Washer_UG11.indd 1 8/10/09 2:45:22 PM

2
Installation instructions
Unpacking
To ensure the best performance from your new
Smart Drive™ please follow the instructions below.
Removing the packaging
1
Remove the outer packaging.
2
Tilt the machine backwards and walk it off the bottom
packer one foot at a time.
3
Remove the bottom packer from under the machine by
pulling it out the front.
4
Lift the lid and remove the bowl packer from the bowl.
5
Remove the hoses and accessories.
6
Keep the bottom packer and bowl packer in case they
are required for future transit.
Important!
Please ensure that the bottom packer has been removed before operating your machine.
Location
Your washer must be installed on a level surface, and not on any textured floor coverings
(eg carpet, rugs) to ensure that the opening at the bottom of the machine is not obstructed.
In your clothes washer you will find:
4 rubber inserts for the levelling feet (joined together).
1 hose guide.
2 inlet hoses.
Drain hose
1
Carefully pull the drain hose out from the back
of the machine by pulling the exposed part of
the hose downward and outward.
2
To guide the drain hose over the tub or
standpipe the hose guide MUST be fitted to the
drain hose.
To prevent syphoning:
The drain hose should not extend more than 20
mm from the end of the guide.
The height of the standpipe or tub should be
between 850 – 1200 mm.
The drain hose can be trimmed to length.
3
Place the drain hose in the tub or standpipe.
Fig.1 Tilt washer backwards to remove packer
Pull hose
through guide
(20 mm)
maximum
Flex hose
guide apart
Standpipe 850 – 1200 mm
Fig.2 Fitting the drain hose guide
4323_NZ_AU_PAC_GW_MW_Washer_UG11.indd 2 8/10/09 2:45:22 PM
3
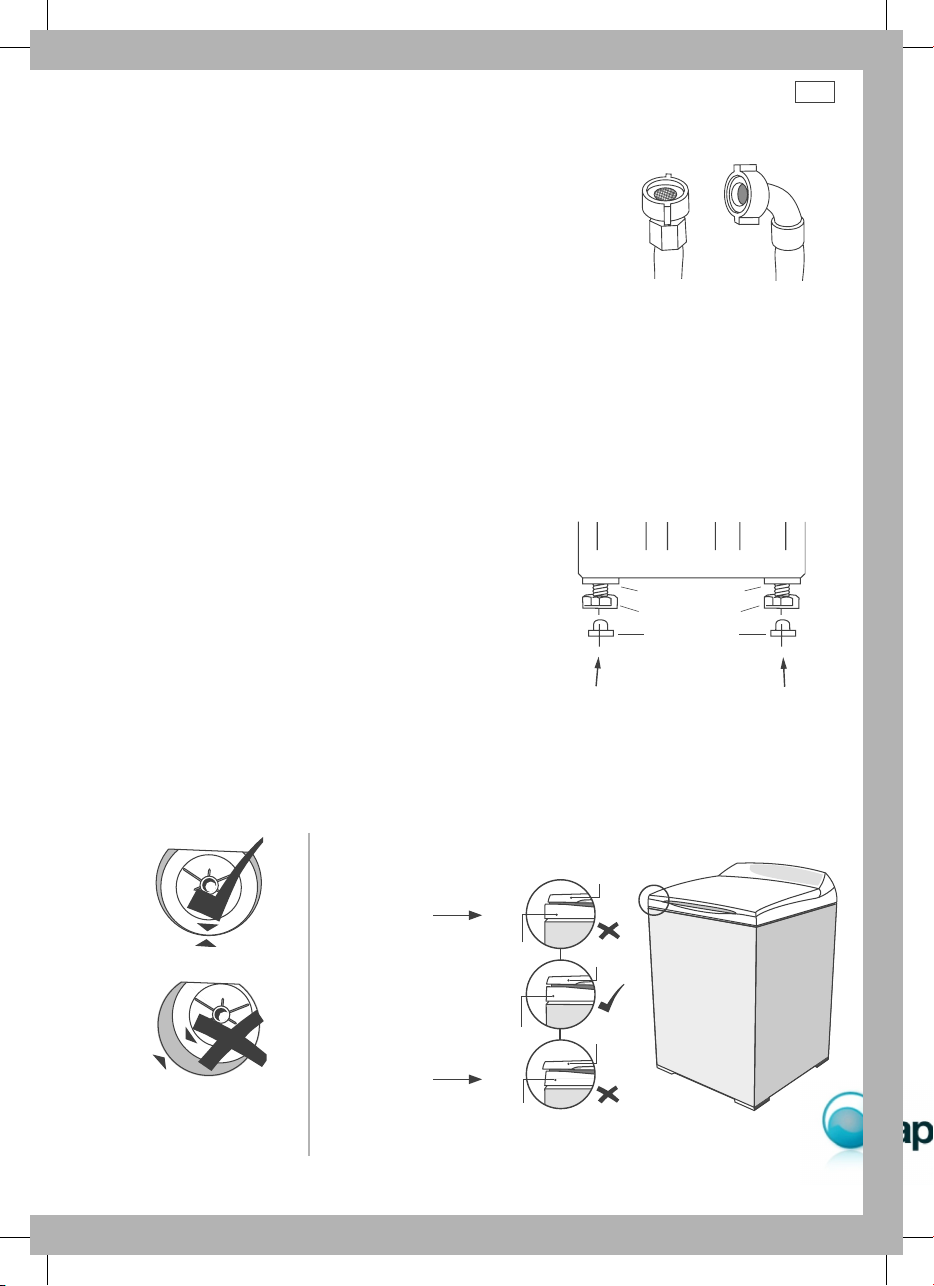
Inlet hoses
1
Connect the straight ends of the inlet hoses to the taps.
There are washers fitted in both ends.
2
Connect the elbow ends of the inlet hoses to the machine inlet
valves. Inlet valves are marked on the back of the machine
H=Hot C=Cold
3
Ensure you have correctly connected hot to hot, and cold to cold.
Cold supply only:
If you only have a cold water supply, an inlet valve cap (blanking cap) MUST be connected to
the hot inlet valve. The cap prevents water leaking out of the hot valve. The cap is available from
your Fisher & Paykel Dealer or Authorised Repairer, Part No. 388491. This appliance incorporates
backflow protection complying with AS3500.1. No further backflow protection is required for
connection to the water supply.
Levelling
It is IMPORTANT to level the machine to ensure even
spin performance.
1
Separate the four rubber foot inserts from the moulding
and fit into the feet on the base of the machine.
2
Move the machine to its final position (we suggest a
minimum clearance of 20 mm each side).
3
Adjust the feet (wind down) so the machine is level and
cannot rock.
To check if your machine is level:
Look down on the wash bowl and make sure it sits slightly forward of centre. Close the lid.
Visually check that the lid fits evenly on both sides (see Fig.5). If not, adjust one of the front feet
slightly until it matches. The diagram on the top and bottom are not correct.
4
Turn on the water and check all hose connections for leaks. Make sure there are no kinks in the hoses.
5
Uncoil power cord, remove and discard the plastic pin cover and plug into wall socket.
Installation instructions
Adjustable feet
Corner cabinets
Rubber insert
Fig.3 Inlet hose ends
Machine end
Tap end
To check levelling look
down on the wash bowl
Correct
Incorrect
Fig.5 To assess levelling check lid alignment
Lid Alignment
Lid
Topdeck
Lid
Lid
Topdeck
Topdeck
Wind right foot down
(out) to correct
Wind left foot down
(out) to correct
Fig.4 Adjusting levelling feet
4323_NZ_AU_PAC_GW_MW_Washer_UG11.indd 3 8/10/09 2:45:22 PM
4
Water supply
For best operating conditions your hot water
should be approximately 65°C. Your cold water
should not exceed 35°C or your hot water exceed
75°C. Temperatures above these may cause the
machine to fault or cause damage to the machine.
If you have an uncontrolled water heating source
(eg a wet back or solar heating system) you should
fit a Safe Valve. This will ensure the hot water temperature remains within safe limits.
Inlet water pressure: Max.1 MPa (150 psi) Min. 34 Pa (5 psi)
Inlet water flow rate: Min. 3 litres/min
Minimum height of taps to clear the top of the machine is 1150 mm.
Draining
Regularly check that your standpipe or tub is free from lint or other obstructions, which may
affect how your machine works or may cause flooding.
In multi-storey apartments or any upper floor, the machine should be installed on a drained floor.
Draining must comply with local by-laws.
Clothes washer safety
This clothes washer is not intended for use by children and persons with reduced physical,
sensory or mental capabilities, or lack of experience and knowledge, unless they have been given
supervision or instruction concerning use of the appliance by a person responsible for their safety.
Your Smart Drive™ can be opened while it is filling and agitating. Supervise children at all times
to ensure they do not play with the washer.
WARNING!
Electrical Shock Hazard
If you are using an extension cord or a portable electrical outlet device
(eg multi-socket outlet box), ensure that it is positioned so that it does
not come into contact with water or moisture.
Failure to do so may result in death or electrical shock.
Accessories and spare parts
Available from your Fisher & Paykel Dealer or Authorised Repairer.
Inlet Valve Cap Part No. 388491
Hose Inlet Long (2m) Part No. 422680
Hose Inlet Large Bore Part No. 426123
Drain Hose Extension Part No. 425627p
Power Cord If the power cord of your clothes washer is damaged it must be replaced
by a Fisher & Paykel Authorised Repairer, as it is not a standard power cord.
Installation instructions
Hot ‘N’ Safe Valves available are:
RMC TVA 50HF
RMC TVA 75HFS
Adjustable between 35°C – 55°C
RMC TVA 50HP
For instantaneous gas hot water supply
4323_NZ_AU_PAC_GW_MW_Washer_UG11.indd 4 8/10/09 2:45:22 PM
5
Getting started
Thank you for buying a Fisher & Paykel Smart Drive™ washing machine. We are very proud of this
washer and trust it will serve you well for many years.
At Fisher & Paykel we aim to provide innovative products that are simple to use, ergonomic and
energy efficient. Thousands of tonnes of washing and 75 years of laundry experience have been
programmed into your washing machine to help give you the best possible performance.
We hope you enjoy your new washing machine,
we have certainly enjoyed designing it.
Before you do your first wash
You owe it to yourself and your Smart Drive™ to have it installed correctly by a technician from a
Fisher & Paykel Authorised Repairer.
Before you start, it is a good idea to go through the following checklist:
1
Has the basepacker been removed?
2
Is the hot hose connected to the hot valve marked ‘H’? Is the cold hose connected to the cold
valve marked ‘C’?
3
Is the drain hose threaded through the ‘U bend‘ (with no more than 20 mm extended) and on to
your standpipe?
4
Are the rubber inserts secured into the feet on the base of your machine and is the machine
levelled? Refer to ‘Installation instructions’, page 3.
If you have bought a PRIDE model it is a good idea to check the warm fill temperature. (Refer to
page 24).
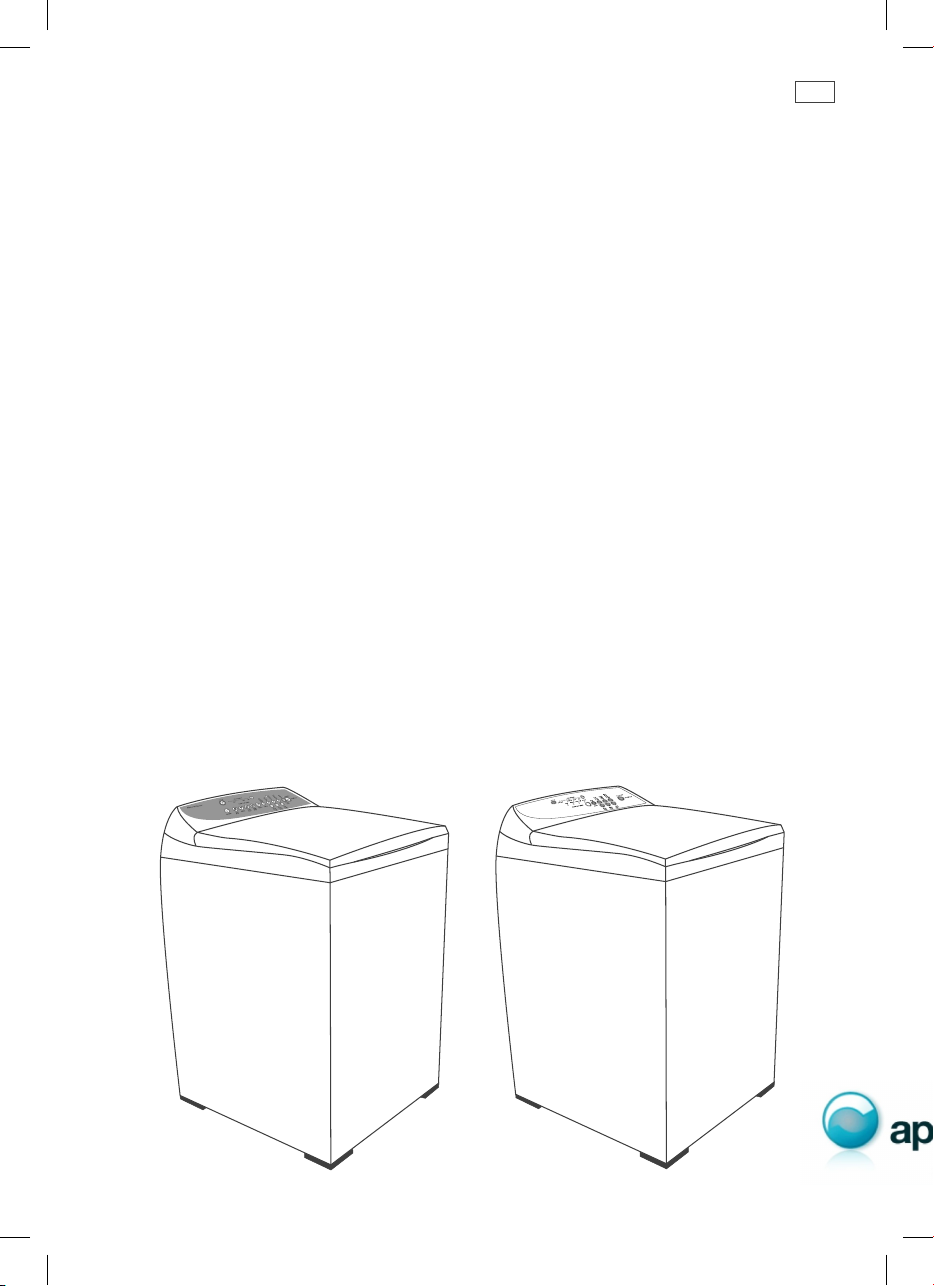
Fig.6 EXCELLENCE washer Fig.7 PRIDE washer
4323_NZ_AU_PAC_GW_MW_Washer_UG11.indd 5 8/10/09 2:45:22 PM

6
Using your EXCELLENCE washer
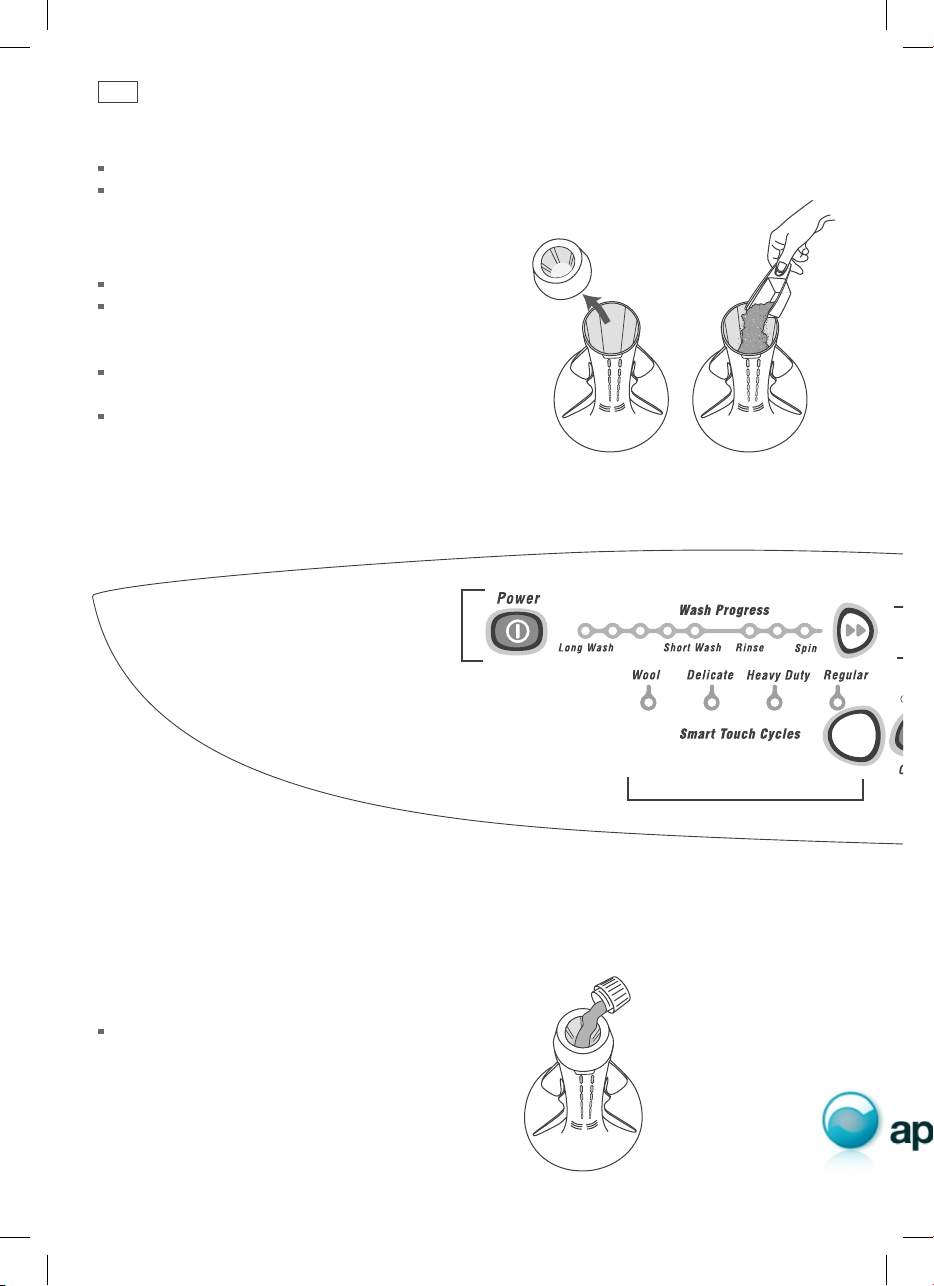
Place the load evenly around the agitator (refer to ‘Sorting’ and ‘Loading’, page 19).
Remove fabric softener dispenser.
A. Detergent
Follow the instructions on the detergent package.
Use the mark on the agitator, nearest to the top of
the clothes, as a guide to the correct amount
of detergent to use (refer to ‘Detergent’, page 20).
Pour the detergent down the centre of the
agitator stem.
Replace the fabric softener dispenser (this stops
small articles falling down the centre of the agitator).
B. Fabric softener
If you wish to use fabric softener, place it in the
dispenser on the top of the agitator.
Important!
Fabric softener must not be used if you have
selected the ECO or QUICK WASH option.
(Refer to ‘Fabric softener’, page 21).
EXCELLENCE – WA75T65GW1, WA65T60GW1, WA55T56GW1
D
C
4323_NZ_AU_PAC_GW_MW_Washer_UG11.indd 6 8/10/09 2:45:23 PM

7
Using your EXCELLENCE washer
C. Power
Press POWER to turn the machine on.
D. Wash cycles
Select the desired wash cycle by pressing the button.
E. Wash options
Select the WASH TEMPERATURE and other wash options (refer to pages 12 – 16).
F. Advance
Use to advance through to the desired part of the wash cycle (refer to page 12).
G. Start
Press START/PAUSE to start the machine.
If you wish to stop your EXCELLENCE washer
Press START/PAUSE.
If it is during spray rinse or spin there is a slight delay while the bowl is coasted to a stop and the
lid is unlocked.
Important!
For best fabric and colour care remove your clothes as soon as the cycle has finished.
E
G
F
4323_NZ_AU_PAC_GW_MW_Washer_UG11.indd 7 8/10/09 2:45:23 PM
8
Using your PRIDE washer
Place the load evenly around the agitator (refer to ‘Sorting’ and ‘Loading’, page 19).
Remove fabric softener dispenser.
A. Detergent
Follow the instructions on the detergent package.
Use the mark on the agitator, nearest to the top of
the clothes, as a guide to the correct amount
of detergent to use (refer to ‘Detergent’, page 20).
Pour the detergent down the centre of the
agitator stem.
Replace the fabric softener dispenser (this stops
small articles falling down the centre of the agitator).
B. Fabric softener
If you wish to use fabric softener, place it in the
dispenser on the top of the agitator.
Important!
Fabric softener must not be used if you have
selected the ECO option.
(Refer to ‘Fabric softener’, page 21).
PRIDE – WA55T56MW1 (MW512)
D
C
F
4323_NZ_AU_PAC_GW_MW_Washer_UG11.indd 8 8/10/09 2:45:23 PM

9
Using your PRIDE washer
C. Power
Press POWER to turn the machine on.
D. Wash cycles
Select the cycle you want by pressing the SMART TOUCH CYCLES button located below the
REGULAR option. Scroll through the cycles until the light for the one you want is lit.
E. Wash options
Select the WASH TEMPERATURE and other wash options (refer to pages 12 – 16).
F. Advance
Use to advance through to the desired part of the wash cycle (refer to page 12).
G. Start
Press START/PAUSE to start the machine.
If you wish to stop your PRIDE washer
Press START/PAUSE.
If it is during spray rinse or spin there is a slight delay while the bowl coasts to a stop and the
lid is unlocked.
Important!
For best fabric and colour care remove your clothes as soon as the cycle has finished.
E
G
F
4323_NZ_AU_PAC_GW_MW_Washer_UG11.indd 9 8/10/09 2:45:23 PM

10
Lid lock
Your Smart Drive™ has a lid lock, which locks
when your machine is spinning. This ensures
the lid cannot be opened during hazardous
parts of the cycle, providing added safety for
you and your family.
The LID LOCK light (above the START/PAUSE
button) comes on when the lid is locked to
tell you when you cannot open the lid. In
short it means you can open the lid while your
Smart Drive™ is filling, agitating and draining,
but not while it is spinning.
When the LID LOCK light is on, the lid is locked.
When the LID LOCK light is off, the lid is not
locked and the lid can be opened.
If the LID LOCK light is flashing the lid lock is
in process of locking or unlocking (ie while the
machine coasts down or START/PAUSE has been
pressed). During this stage the lid still cannot
be lifted.
Important!
If the lid is left open, the machine will be unable to lock and the cycle will be halted.
The machine will play a tune and the LID LOCK light will flash until the lid is closed and
START/PAUSE is pressed.
The lid lock remains unlocked for the majority of the cycle allowing you to add clothes,
dissolve detergent or to add fabric softener (if you do not want to use the Automatic Fabric
Softener Dispenser).
The chart below shows the stages when
the lid is locked.
Fill Unlocked
Agitate Unlocked
Spray Rinse Locked
Deep Rinse Unlocked
Spin Locked
Important!
Keep children away from the machine, especially when you are using hot water, as the lid can
be opened during fill and agitate.
DO NOT put anything down the slot in the top deck of your machine.
DO NOT try to disable the lid lock.
Fig.8 LID LOCK light
Fig.9 Lid lock
EXCELLENCE
PRIDE
4323_NZ_AU_PAC_GW_MW_Washer_UG11.indd 10 8/10/09 2:45:23 PM
 Loading...