How it Works
Log In / Sign Up
Buy Points
How it Works
FAQ
Contact Us
Questions and Suggestions
Users
Fisher Paykel
Loading...
R
RS1884FLJ1
5
RS1884FLJK1
9
RS1884FRJ1
10
RS1884FRJK1
5
RS2474BRU1
2
RS2474F3LJ1
2
RS2474S3RH1
2
RS2484F
RS2484FJ
RS2484FLJ1
3
RS2484FLJK1
7
RS2484FRJ1
5
RS2484FRJK1
5
RS2484S
2
RS2484SH
RS2484SL1
5
RS2484SLHK1
2
RS2484SLK1
10
RS2484SR1
10
RS2484SRHK1
RS2484SRK1
5
RS2484VL2K1
6
RS2484VR2K1
6
RS2484WL
RS2484WLU1
5
RS2484WLUK1
RS2484WR
RS2484WRU1
3
RS2484WRUK1
2
RS3084F
RS3084FJ
RS3084FLJ1
11
RS3084FLJK1
4
RS3084FRJ1
5
RS3084FRJK1
11
RS3084S
2
RS3084SH
RS3084SL1
5
RS3084SLHK1
2
RS3084SLK1
9
RS3084SR1
12
RS3084SRHK1
RS3084SRK1
6
RS3084WL
RS3084WLU1
2
RS3084WLUK1
5
RS3084WR
RS3084WRU1
3
RS3084WRUK1
2
RS32A72J1
3
RS32A72U1
3
RS3684WRUVE1
RS36A72
3
RS36A72J
3
RS36A72J1
7
RS36A72J1N
5
RS36A72U
3
RS36A72U1
RS36A72U1N
14
RS36A80
3
RS36A80J
4
RS36A80J1
14
RS36A80J1N
8
RS36A80U
4
RS36A80U1
11
RS36A80U1N
19
RS36W
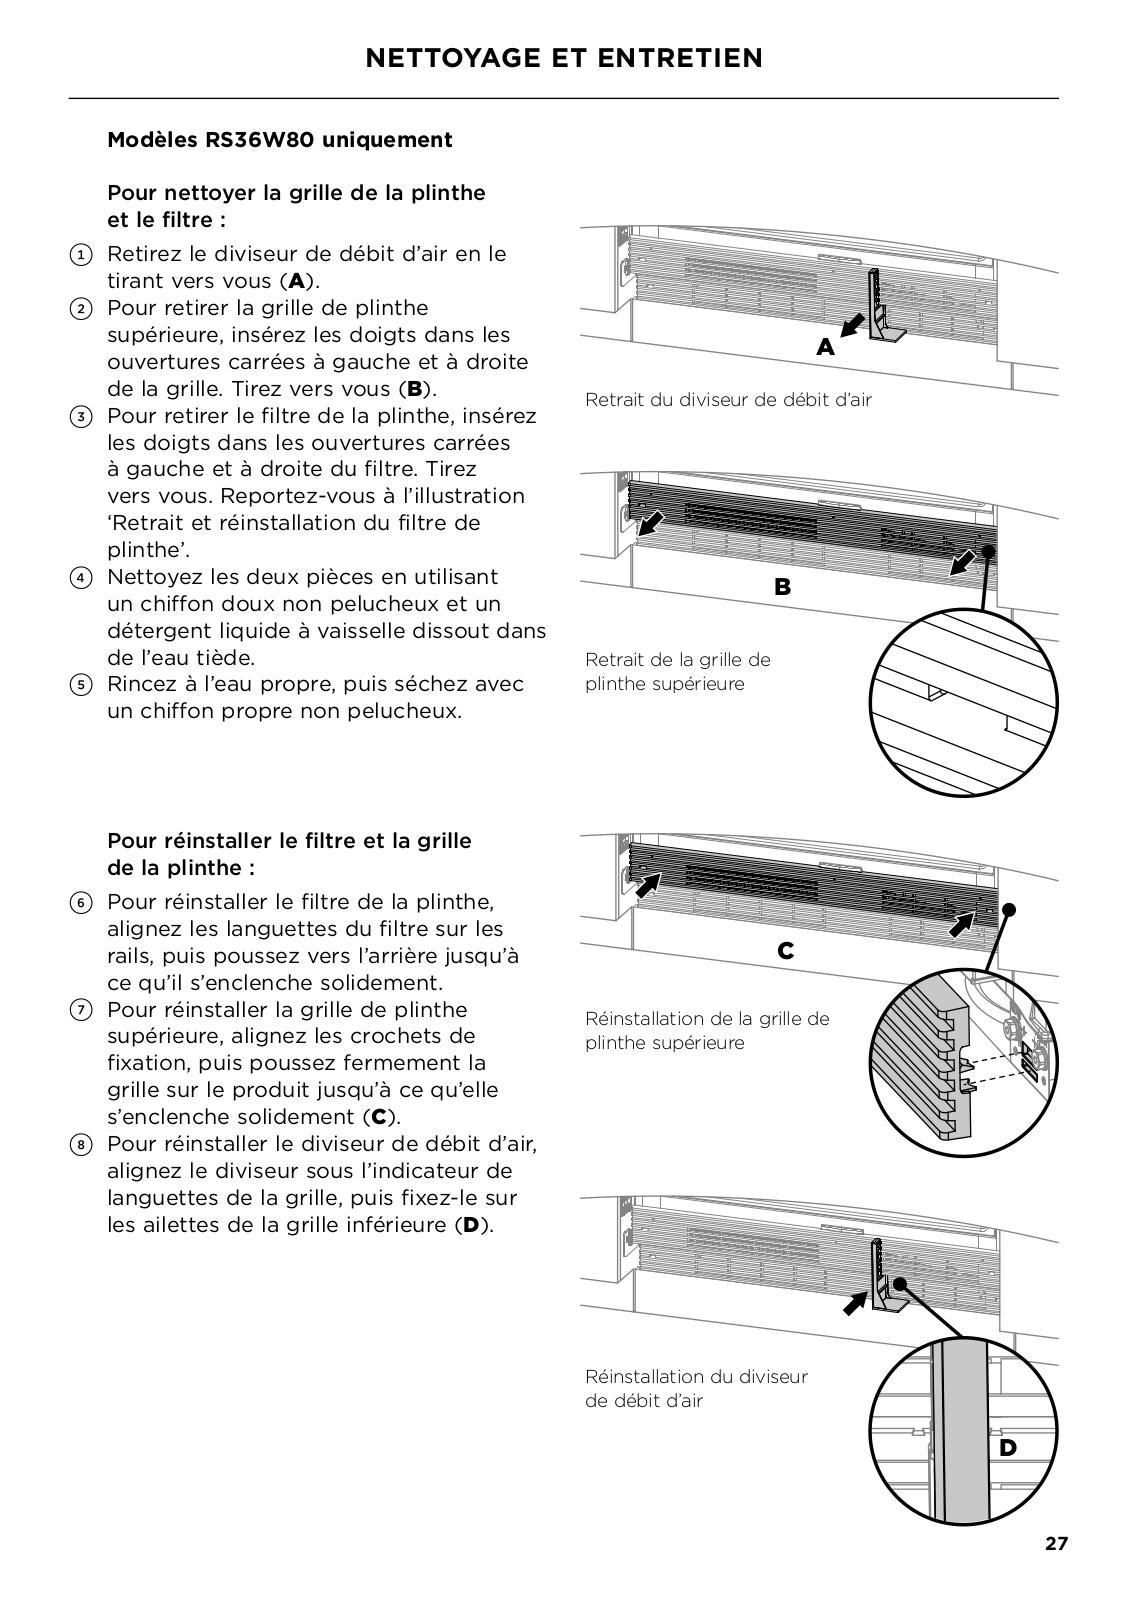
RS36W80
4
RS36W80LJ
RS36W80LJ1
7
RS36W80LJ1N
14
RS36W80RJ1
RS36W80RJ1N
6
RS36W80RU1
6
RS36W80RU1N
14
RS4621F
RS4621FLJK1
2
RS4621FRJK1
3
RS6009SBL1
RS6009SBLT1
RS6019BRU1
RS6019F2L1
RS6019F3LJ1
RS6019S2R1
RS6019S3RH1
RS60RDWX1
3
RS6121F
RS6121FLJK1
RS6121FRJK1
2
RS6121S
RS6121SLHK1
RS6121SLK1
3
RS6121SRHK1
RS6121SRK1
RS6121VL2K1
2
RS6121VR2K1
2
RS6121WLUK1
RS6121WRUK1
RS7621F
RS7621FLJK1
3
Loading...
Loading...
Nothing found
RS32A72U1
Installation Manual
92 pgs
36.3 Mb
0
Quick Guide
3 pgs
327.93 Kb
0
User Guide
80 pgs
16.69 Mb
0
Table of contents
Loading...
Fisher Paykel RS32A72U1, RS32A72J1 User Guide
...
Fisher Paykel User Guide
Download
Specifications and Main Features
Frequently Asked Questions
User Manual
Download
Loading...
+
hidden pages
Unhide
You need points to download manuals.
1 point = 1 manual.
You can buy points or you can get point for every manual you upload.
Buy points
Upload your manuals
 Loading...