


Fisher & Paykel WD8560F1, WD8060P1, WD7560P1 User Manual

INSTALLATION INSTRUCTIONS
USER GUIDE
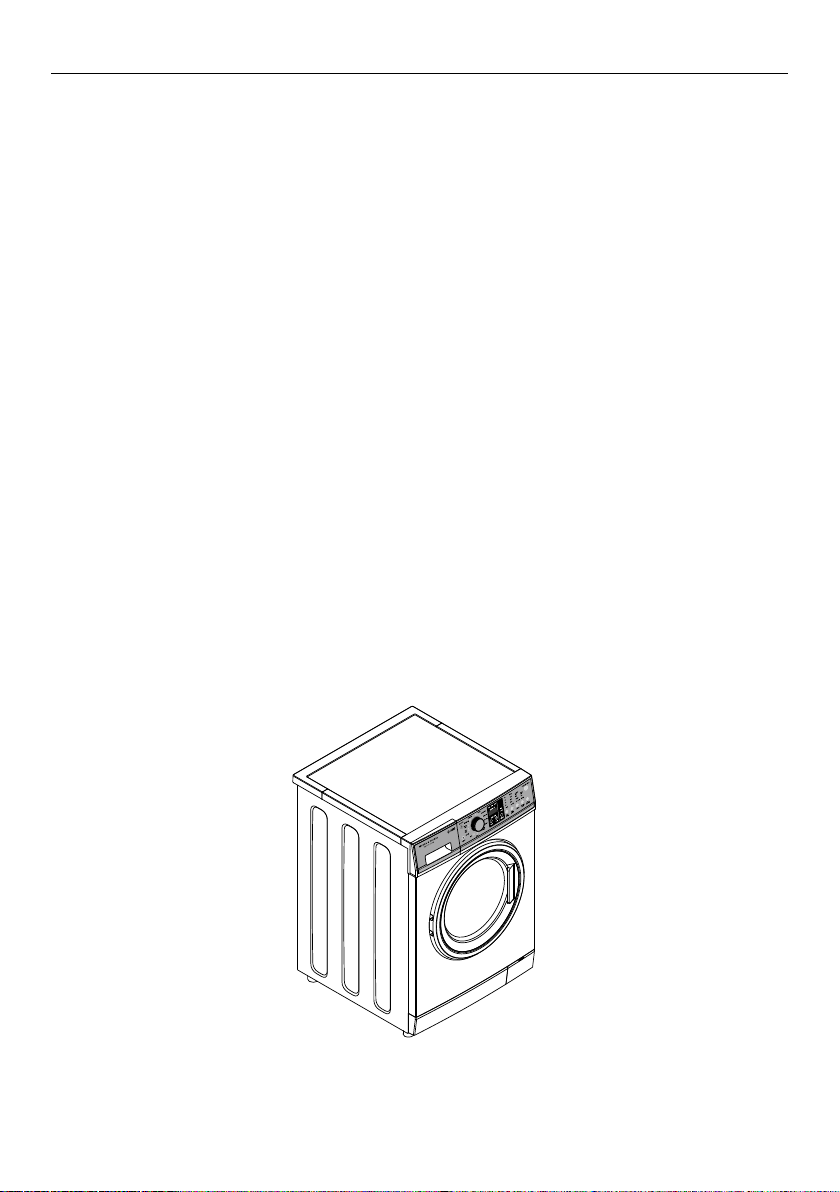
Front Loading Washer Dryer
WD8560F1, WD7560P1
and WD8060P1 models
NZ AU GB


CONTENTS
Introduction 3
Safety and warnings 4
Installation instructions 9
Before you do your first wash 17
Getting started quickly 18
Washer dryer controls 20
Safety features 22
Sorting and loading 23
Detergent and fabric softener 27
Wash and dry cycles 30
Wash and dry cycle options 32
Customising wash and dry cycles 36
Caring for your washer dryer 37
Before you call for service 40
Fault codes 42
Troubleshooting 43
Consumption data table 51
Product Fiche according to Commission Delegated Regulation (EU) 96/60/EC 52
Manufacturer’s Warranty 53
Customer Care 55
European Directive 2012/19/EU on Waste Electrical 57
and Electronic Equipment (WEEE)
IMPORTANT!
SAVE THESE INSTRUCTIONS
The models shown in this user guide may
not be available in all markets and are
subject to change at any time. For current
details about model and specification
availability in your country, please go to
our website www.fisherpaykel.com or
contact your local Fisher & Paykel dealer.
Registration
Register your product with us so we can
provide you with the best service possible.
To register your product visit our website:
www.fisherpaykel.com
1

INTRODUCTION
Welcome
Thank you for buying a Fisher & Paykel washer dryer. We are proud of this washer dryer
and trust it will serve you well for many years.
Your washer dryer gives you the ultimate convenience in one simple machine. There
are numerous wash, dry and continuous wash and dry cycles with additional options,
meaning you can perform every wash and dry task with ease and have the knowledge
that your clothes are receiving the best possible care.
With the ability to automatically sense when your clothes are dry, your washer
dryer is more efficient, making it kinder on your wallet and the environment. Having
the technology of a water condensing dryer allows clothes to be dried in a closed
environment where the hot moist air is condensed and pumped directly into a drain,
therefore requiring no external ventilation.
At Fisher & Paykel we aim to provide innovative products that are simple to use,
ergonomic and that will exceed expectations. Thousands of tonnes of laundry and
80years of experience have been programmed into your washer dryer to help give you
the best possible performance.
Please take the time to read these instructions carefully before you begin using your
machine. Following the advice in this user guide will ensure you get the performance
you expect from your machine with the best possible wash and dry results. Keep these
instructions for future reference.
We hope you enjoy your new washer dryer. We have certainly enjoyed designing it for you.
Front loading washer dryer
3
SAFETY AND WARNINGS
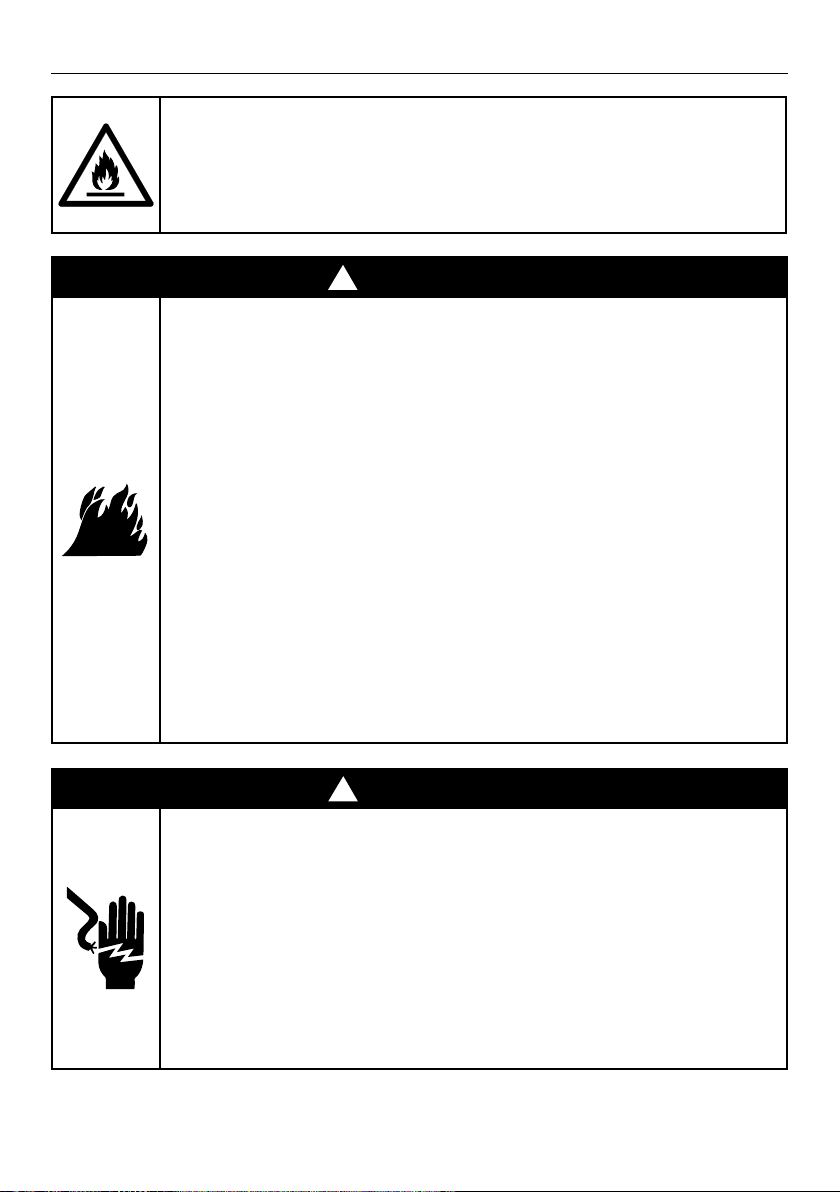
Caution, risk of fire — this is a safety symbol.
Failure to follow the warnings outlined in
these user instructions can cause a fire
hazard.
!
WARNING!
Fire Hazard
• Only dry fabrics that have been washed
with water.
• Do not use heat to dry articles containing
foam rubber or similarly textured rubber–
like materials, dry on ‘Air Dry’.
• Do not stop a washer dryer before the
end of the drying cycle unless all items
are removed and spread out in order to
dissipate the heat.
• A washer dryer produces combustible lint;
clean pump filter regularly.
• Failure to follow these instructions can
result in death or personal injury.
!
WARNING!
Electric Shock Hazard
If you are using an extension cord or a
portable electrical outlet device
(egmulti-socket outlet box), ensure that it
is positioned so that it does not come into
contact with water or moisture.
Failure to do so may result in death or
electrical shock.
4

SAFETY AND WARNINGS
IMPORTANT SAFETY INSTRUCTIONS
WARNING!
When using your washer dryer, follow basic
precautions, including the following:
• CAUTION: In order to avoid a hazard due to inadvertent
resetting of the thermal cut-out, this appliance
must not be supplied through an external switching
device, such as a timer, or connected to a circuit that
is regularly switched on and off by the utility.
• This washer dryer is not intended for use by persons
(including children) with reduced physical, sensory
or mental capabilities, or lack of experience and
knowledge, unless they are supervised or given
instructions on how to use the washer dryer by
someone responsible for their safety.
• The washer dryer should only be used for washing,
rinsing and drying of textiles where this is indicated
on the care label.
• The door will be locked from the start of the cycle
until the cycle is complete for safety reasons. It is
possible to open the door during the cycle under
certain conditions (refer to page20).
• Never force the door open.
• Keep children away from the washer dryer while it is
in operation.
• Supervise children to ensure they do not play with
the washer dryer or climb inside the drum.
• Do not touch the door during a drying cycle as the
door can become hot.
• Do not open the detergent dispenser during the cycle.
• The only user-removable parts of the washer dryer
are the inlet hose, detergent dispenser and the pump
5

SAFETY AND WARNINGS
filter. No other parts are designed to be removed
by anyone other than a Fisher & Paykel trained and
supported service technician.
• When disposing of the washer dryer, it is
recommended that the door is removed to avoid
children getting trapped inside, and that the
electrical cable is cut off close to the washer dryer.
• Do not add gasoline, dry-cleaning solvents, or other
flammable or explosive substances to the wash
water. These substances give off vapours that could
ignite or explode.
• Do not wash or dry articles that have been
previously cleaned in, washed in, soaked in, or
spotted with gasoline, dry-cleaning solvents, or
other flammable or explosive substances as they
give off vapours that could ignite or explode.
• Undergarments that contain metal reinforcements
should not be placed in the washer dryer. Damage to
the machine can result if the metal reinforcements
come loose during washing or drying.
• Check and remove all objects from pockets, eg
lighters and matches.
• The maximum mass of dry textile material is four
kilograms (WD7560P1 and WD8060P1 models) or
five kilograms (WD8560F1 model). Do not overload
your washer dryer.
• Never wash or dry rubber articles, fibreglass, or any
plastic items or film, eg plastic lined tablecloths and
baby bibs.
• Clothes must go through the cool down/airing phase
in the final part of the drying cycle. This ensures
items are left at a temperature where they will not
be damaged. If for any reason the washer dryer is
stopped before the cycle has finished, dry clothes
6

SAFETY AND WARNINGS
should be removed immediately and not left in the
dryer. Clothes should be quickly spread out flat to
cool so heat can dissipate, not left bunched up, eg in
a clothes basket.
• This washer dryer has been designed for domestic
use only, not for commercial applications, such
as massage/beauty clinics where there may be
increased lint accumulation or flammable materials
in the atmosphere or load.
• Do not operate this product if there is an
accumulation of lint in or around the washer dryer.
• Children should be supervised to ensure they do not
play with the washer dryer.
• Unplug the machine from the power supply when it
is not in use.
• Do not swing or put weight on the door.
• Your washer dryer is designed to stop operating in
the event of power outage. When power is resumed,
the machine will remain off until the ‘POWER’ button
is pressed. To restart the washer dryer, press ‘POWER’,
select your wash or drying cycle and touch
.
• Never attempt to repair the washer dryer yourself.
• For problems that cannot be solved from information
in this user guide, turn off and unplug your washer
dryer and contact a Fisher & Paykel trained and
supported service technician.
Spontaneous combustion
IMPORTANT!
To reduce the risk of fire in a washer dryer the
following should be observed:
• Items that have been spotted or soaked with
vegetable oil or cooking oil are a fire hazard and
should not be placed in a tumble washer dryer.
7

SAFETY AND WARNINGS
• Oil-affected items can ignite spontaneously,
especially when exposed to heat sources such as a
washer dryer. The items become warm causing an
oxidation reaction in the oil. This oxidation creates
heat. If the heat cannot escape the items can
become hot enough to catch fire. Piling, stacking
or storing oil-affected items can prevent heat from
escaping creating a fire hazard.
• Fabrics that contain vegetable oil, cooking oil or
have been contaminated by hair care products
should not be washed or dried. If unavoidable, these
fabrics should be washed in a hot water wash with
extra detergent — this will reduce, but not eliminate
the fire hazard. The cool down cycle of the washer
dryer should be used to reduce the temperature of
these items. They must not be removed from the
washer dryer and piled or stacked while hot.
• Items that have previously been cleaned in, washed
in, soaked in or spotted with flammable liquids or
solids, eg petrol/gasoline, kerosene, dry cleaning
solvents, vegetable or cooking oil, acetone,
denatured alcohol, some brands of spot removers,
turpentine, waxes and wax removers or other
flammable or explosive substances should not be
placed in a washer dryer.
• Do not dry unwashed items in the washer dryer.
• Fabric softeners, or similar products, should be used
as specified by the fabric softener instructions.
• The washer dryer must not be used if industrial
chemicals have been used for cleaning.
8

INSTALLATION INSTRUCTIONS
Please read and follow the ‘Safety and warnings’ and ‘Installation instructions’
sections carefully before using your washer dryer!
Accessories
Please check you received the following accessories with your Fisher & Paykel washer
dryer. You will find them inside the drum:
1 x Inlet hose
1 x Drain hose guide
1 x Installation instructions and user guide
1 x Spanner
1 x Installation leaflet (attached to the top of the washer)
1 x Hose clamp (WD8060P1 model only)
Unpacking
To ensure the best performance from your new washer dryer please follow the
instructions below.
Removing the packaging
Remove the outer packaging (including the polystyrene packer and plastic wrapping).
1
All packaging must be removed prior to use. Ensure these materials are kept out of
reach of children. Note: a small amount of water may be seen inside the packaging and
inside the washer dryer. This is the result of factory testing and is normal.
Tilt the product backwards and ‘walk’ it off the base one foot at a time. Not doing so
2
may cause damage to your floor and washer dryer.
Remove all packaging and accessories from inside the drum.
3
Removing the transit bolts
The clothes washer dryer is fitted with 4 transit bolts at the rear to prevent internal
damage during transportation.
IMPORTANT!
The 4 transit bolts MUST be removed prior to operation of the machine. Failure to
remove these will result in damage to the product.
Ensure packaging materials are kept out of reach of children.
Please help protect the environment and dispose of the packaging from around the
washer dryer in an environmentally friendly manner.
9
INSTALLATION INSTRUCTIONS
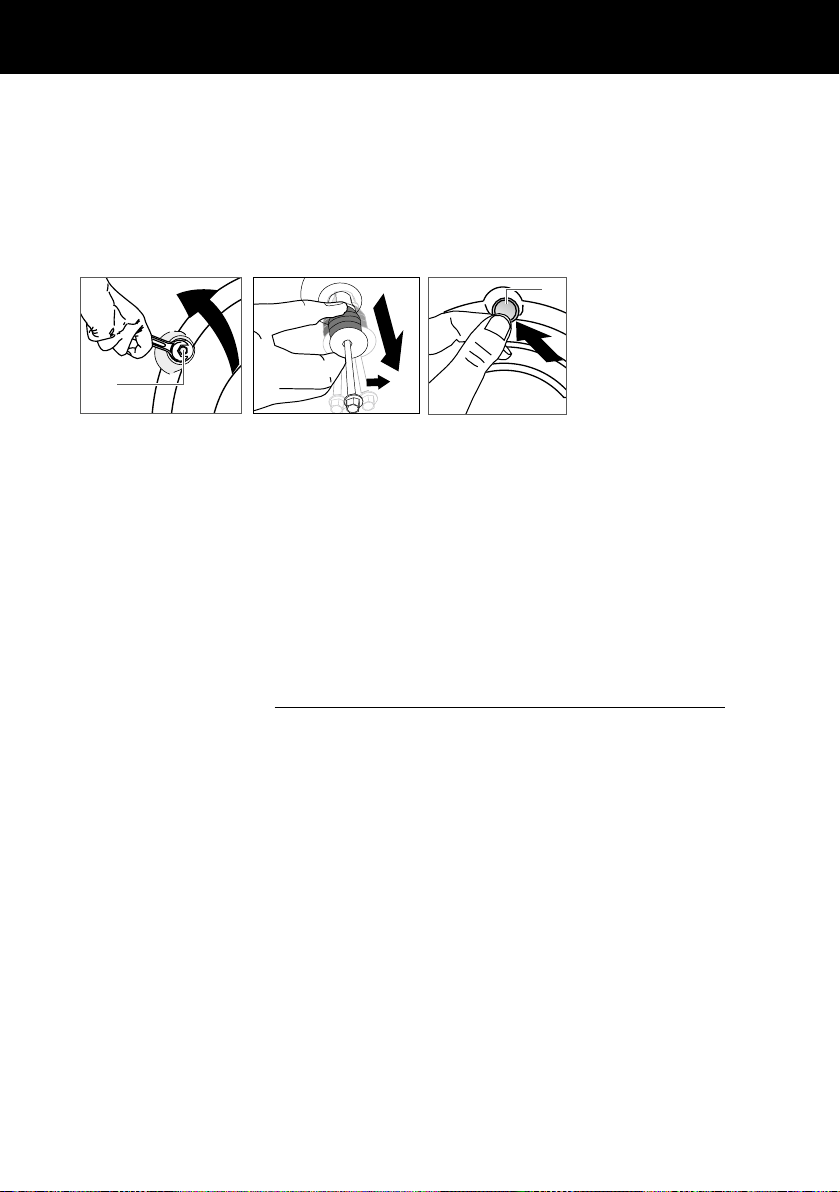
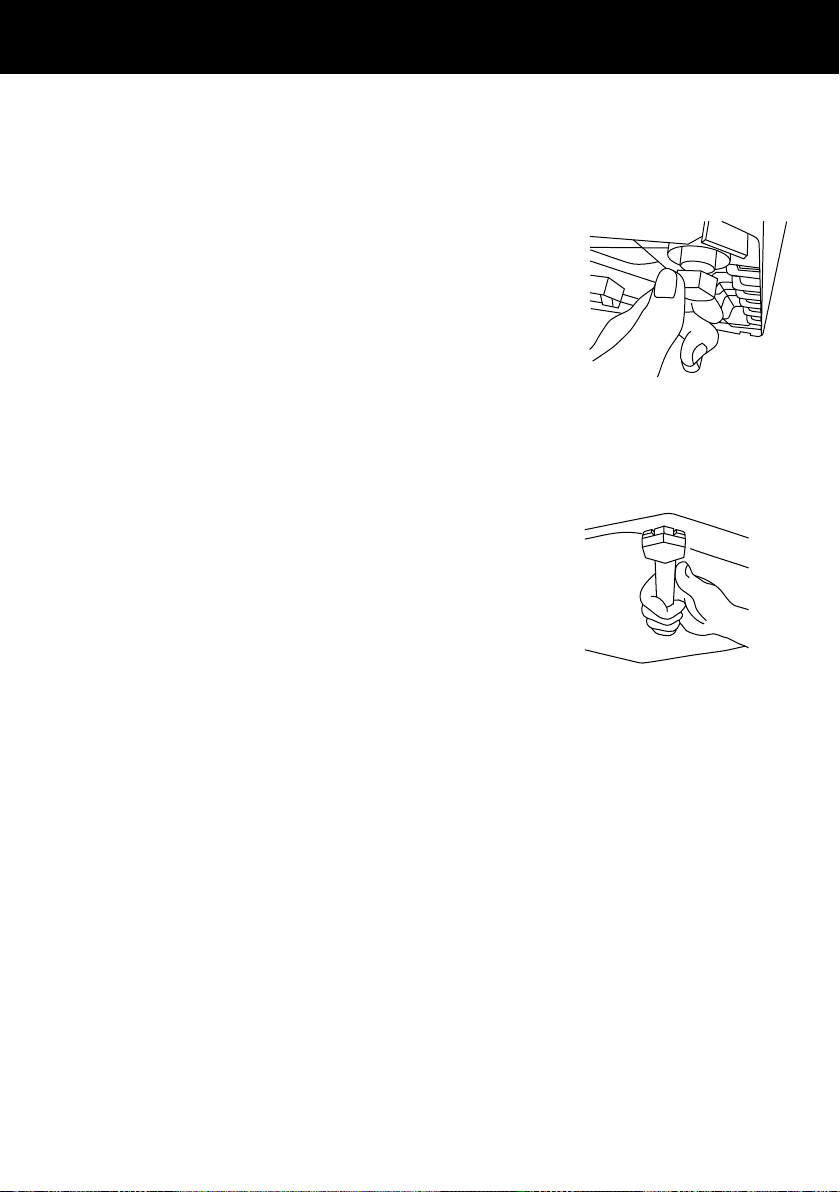
To remove the bolts:
Use a spanner or socket to unscrew and remove all four transit bolts at the back of the
1
washer dryer (A).
Pull the black rubber grommets to remove the bolt, grommet and white plastic spacers
2
from the machine. Keep the transit bolts in case they are required for future transit of the
machine. Never transport the machine without the transit bolts properly fixed in place.
Cover the bolt holes with the white plastic plugs which are attached to the machine and
3
located near each hole (B). Push to clip into place.
B
A
Removing the transit safety bolts
Installation location
IMPORTANT!
The washer dryer must be installed in a well-ventilated, dust-free environment.
The washer dryer must not be installed on any textured floor coverings (eg carpet,
rugs) to ensure that openings at the base of the machine are not obstructed.
Do not install the washer dryer behind a lockable door, sliding door, or behind a door
where the hinge is on the opposite side to that of the washer dryer in such a way that
the full opening of the door is inhibited. Ensure the washer dryer door can always be
opened fully.
Note: this washer dryer CANNOT BE INVERTED AND MOUNTED ON THE WALL.
10
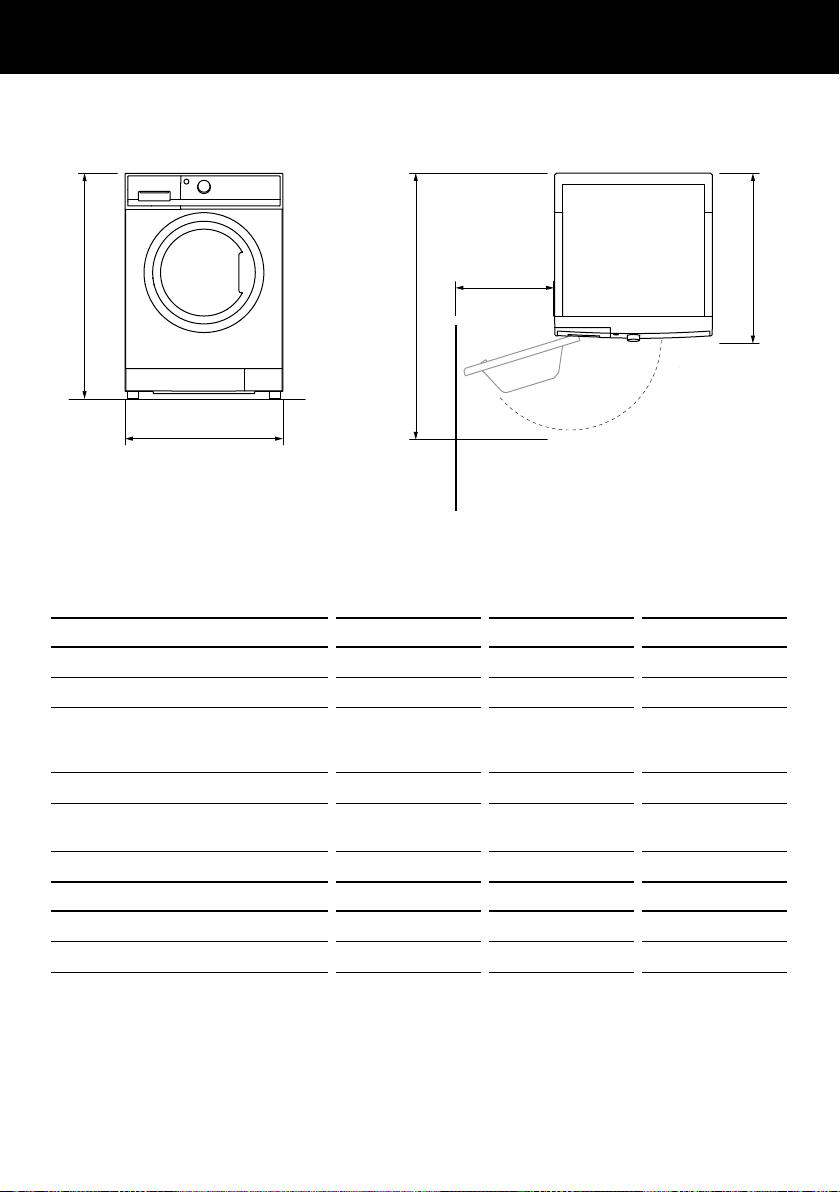
Product dimensions
A
C
INSTALLATION INSTRUCTIONS
D
E
B
TOP VIEWWallFRONT VIEW
WD7560P1 WD8060P1 WD8560F1
PRODUCT DIMENSIONS mm mm mm
Overall height of product 850 850 850
A
Overall width of product 600 600 600
B
Overall depth of product
C
(including dial and door
whenclosed)
Depth with door open 1010 1010 1065
D
Minimum door clearance to
E
adjacent wall
Standpipe height min. 800–1200 min. 800–1200 min. 800–1200
MAXIMUM CAPACITY kg kg kg
Wash capacity 7.5 8.0 8.5
Dry capacity 4.0 4.0 5.0
Note: the exact height of your washer dryer is dependent on how far the feet are
extended from the base of the machine. The space where you install your washer dryer
needs to be at least 40mm wider and 20mm deeper than its dimensions.
590 590 645
330 330 330
11
INSTALLATION INSTRUCTIONS
IMPORTANT!
This machine must not be installed and operated on a plinth.
Levelling the machine
It is IMPORTANT to level the machine to ensure good
spin performance, and to minimise noise, vibrations and
wear and tear on the washer dryer.
Before positioning the machine in its final position, check
1
that the machine is level, front to back and side to side.
Manoeuvre the product into its final position (we suggest
2
a minimum clearance of 20mm each side).
Use a spirit level to check that the machine is correctly
3
level. The washer dryer comes with four adjustable feet,
wind all four feet up or down until the dryer is correctly
level. Place the spirit level on top of your washer dryer in
the following places;
left to right,
back to front,
corner to corner.
The machine is considered level when the bubble sits in
the centre of the two lines when placed flat on top of
themachine.
Using the spanner provided, tighten the lock nuts against
4
the base of the machine to lock the feet in position.
Levelling the feet
Never unscrew the feet completely from their housings.
After levelling, the corners of the washer dryer cabinet
should be clear of the floor and the machine must not
rock in any direction.
12
Locking the feet

INSTALLATION INSTRUCTIONS
Connecting to the water supply
Inlet hose
IMPORTANT!
A new hose is provided with the washer dryer and
should be used to connect the washer dryer to the
water mains.
Old hoses should not be re-used.
We recommend that the inlet hose be changed every
5years. WARNING: Failure to do so may result in a
flood and damage to property.
Connect the straight end of the inlet hose to the cold tap and the elbow end to the
1
Straight
(tap) end
(machine) end
Inlet hose ends
machine inlet valve. Tighten the inlet hose end by hand until the hose seal just makes
contact with the tap sealing face and then tighten a further half-turn. Make sure there
are no kinks in the hose.
Turn the tap on and check for leaks. Check for leaks again after 24hours.
2
IMPORTANT!
The cold water temperature should not exceed35°C.
Water supply requirements:
Inlet water pressure: Maximum 1000kPa (150psi), Minimum 30kPa (4.5psi)
Inlet water flow rate: Minimum 6litres/minute
Note: an internal heater in the product will heat the cold water to the selected cycle
temperature.
Elbow
13
INSTALLATION INSTRUCTIONS
Draining
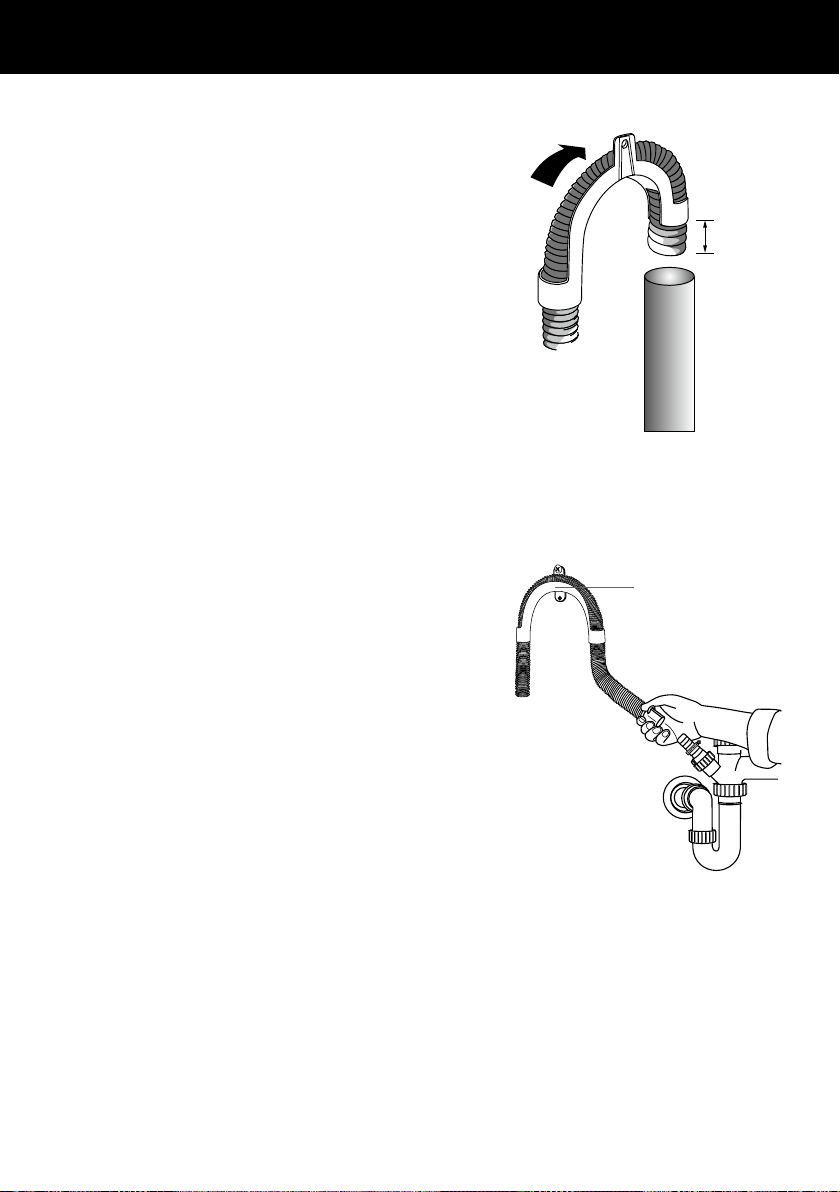
Drain hose placement in a stand pipe or tub
To guide the drain hose over the tub or
1
standpipe the hose guide must be fitted to
the drain hose. The height of the standpipe
or tub should be between 800–1200mm.
Secure the hose guide so it cannot become
2
dislodged from the standpipe or tub.
IMPORTANT!
If the drain hose is placed on the ground or
if the standpipe or tub is less than 800mm
high, the machine will continuously drain
while being filled (siphon).
Regularly check that your standpipe or tub
is free from lint or other obstructions, which
may affect how your machine works or may
cause flooding.
Attaching drain hose to spigot
Guide drain hose through hose guide
1
Secure hose guide to back wall of cupboard
2
using a screw. The height of the drain hose
should be between 500–800mm from
ground level.
Attach drain hose to spigot and secure using
3
a hose clamp ensuring the blanking insert is
cleared from spigot.
Check for leaks.
4
Pull hose
through
guide
(20mm)
maximum
Standpipe 800 – 1200mm
Fitting the drain hose guide
Height 500 – 800mm
from ground
The drain hose should be checked from time
to time and replaced if any damage (egwear,
cuts, bulges, kinks, leaks, etc) is found. Do
not bend the drain hose sharply, as this may
cause it to split.
In multi-storey apartments or any upper
floor, the machine should be installed on a
floor equipped with a drain.
Draining must comply with local by-laws.
14
Attaching drain hose to spigot

INSTALLATION INSTRUCTIONS
Electrical connection
This appliance must be connected to a 220V–240V, 50Hz, sinusoidal, minimum 10A
1
electricalsupply.
Uncoil the power cord, remove and discard the plastic pin cover and plug into a wallsocket.
2
Connect the appliance to an earthed outlet protected by a fuse of suitable capacity.
3
Check the power cord for damage and make sure it is not squashed or twisted when
installing the washer.
Always remove the power cord from a socket by the plug, not by the cord.
IMPORTANT!
If you are using an extension cord or a portable electrical outlet device (eg multi-socket
outlet box), ensure that it is positioned so that it does not come into contact with water
or moisture. FAILURE TO DO SO MAY RESULT IN DEATH OR ELECTRICAL SHOCK.
Do not touch or operate the machine with wet hands or with bare-feet.
A damaged power cord must be replaced by a Fisher & Paykel trained and supported
service technician, in order to avoid a hazard. The appliance must not be operated
until it is repaired, as there is a risk of electric shock.
Do not operate this machine if it has been damaged during transport. Contact your
Fisher & Paykel dealer or Fisher & Paykel trained and supported service technician.
SPARE PARTS
Available from your Fisher & Paykel dealer or a Fisher & Paykel trained and supported
service technician.
Hose Inlet Long (2m) Part No. 422680P
Hose Inlet Large Bore Part No. 426123P
Drain Hose Extension
(not suitable for attaching to a spigot) Part No. 425627P
15

INSTALLATION INSTRUCTIONS
Completing the installation
Installation test cycle
IMPORTANT!
Do this before you wash or dry any items in your washer dryer. This is to check that
your washer dryer is installed and functioning correctly prior to use.
Turn your washer dryer on by pressing the ‘POWER’ button.
1
Select the ‘Quick Wash 30’ cycle. Ensure the drum is empty and the door closed.
2
Touch the button. The machine will start to fill.
3
Observe the machine for any problems (eg leaking from the hose, excess noise
orvibrations).
The washer will beep and display any faults on the screen if there are any problems.
Refer to ‘Before you call for Service’ section at the back of this book.
Wait until you see water in the bottom of the drum.
4
Touch to stop the cycle, then press ‘POWER’ to turn the machine off.
5
Press ‘POWER’ again, select the ‘Spin’ cycle and touch .
6
Check the drain hose is firmly secured to the standpipe or tub, or spigot.
Observe that the machine pumps out the water, and spins.
IMPORTANT!
If there are any problems, you must address these before proceeding with normal
use. The washer dryer will automatically turn off at the end of the cycle if there are
noproblems.
16
 Loading...