

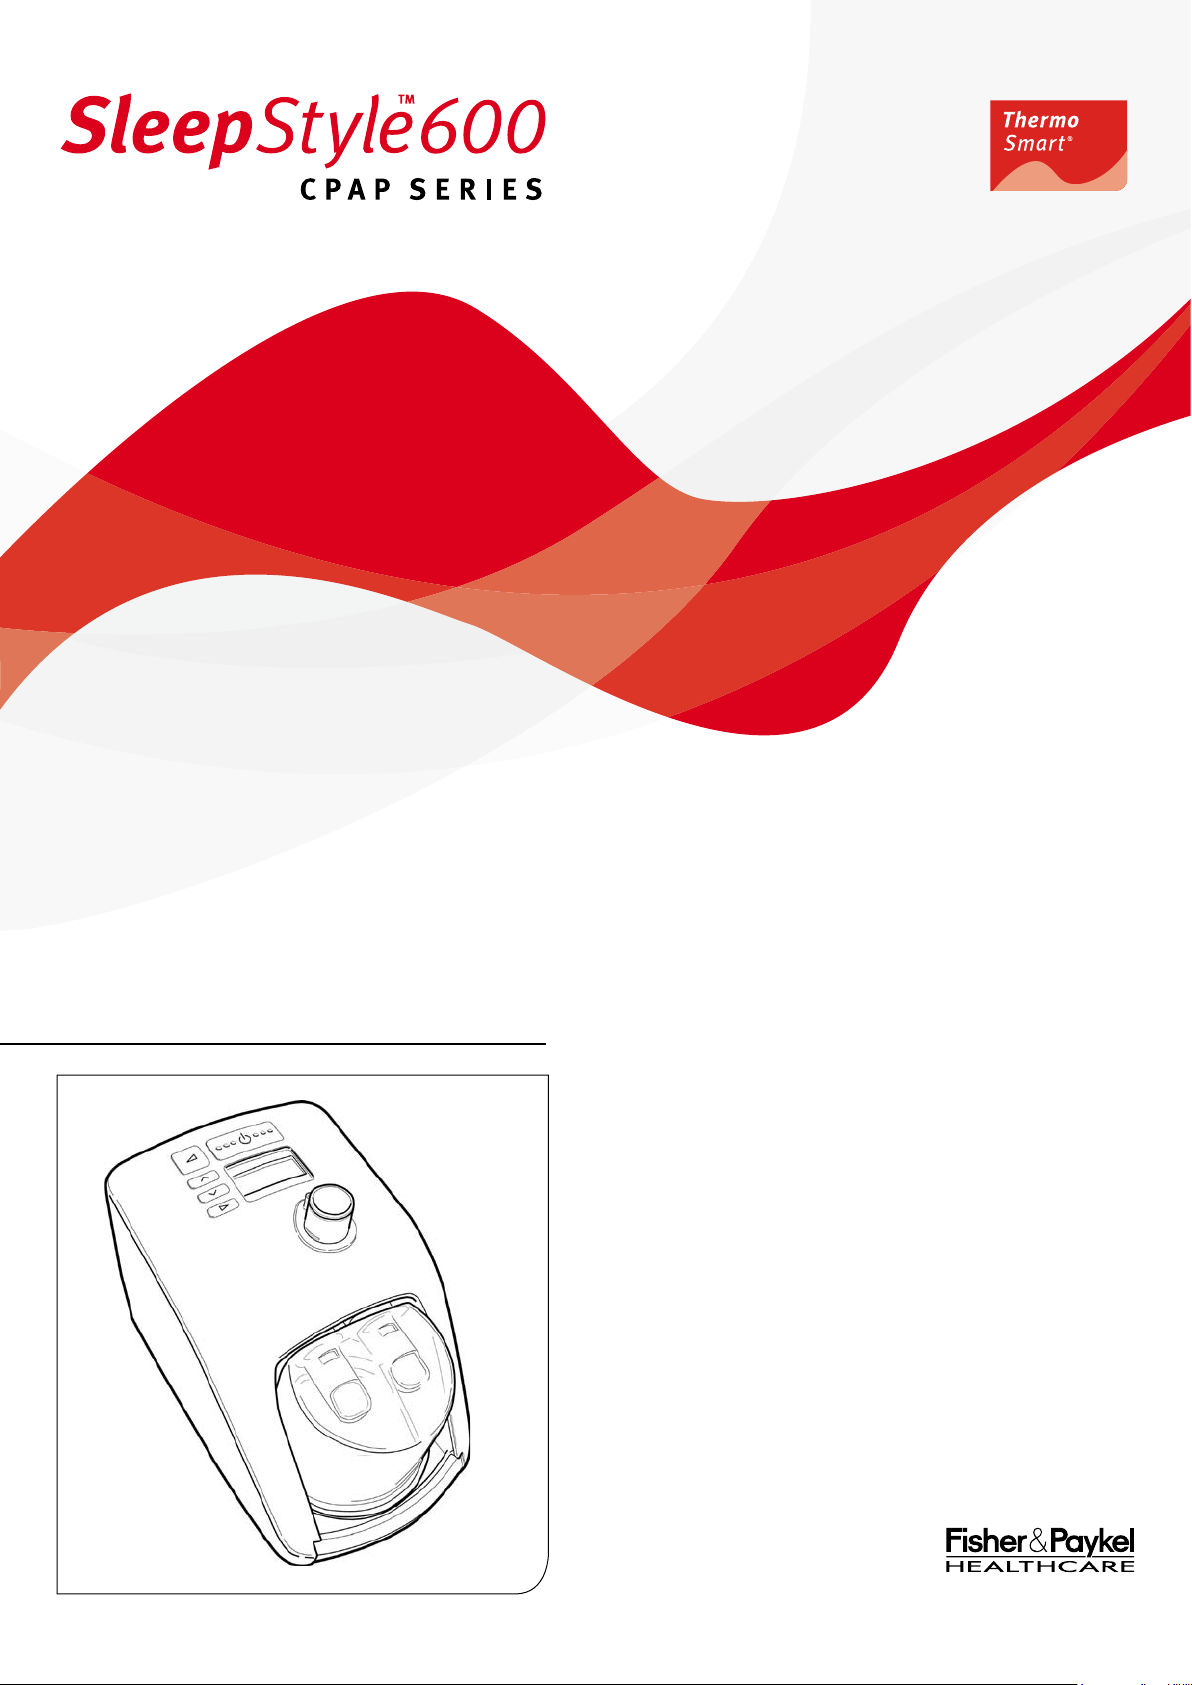
Operating Manual
The SleepStyle™ 600 CPAP Series has integrated
heated humidification and a heated breathing
tube. It is designed for use in the home or sleep
laboratory, for the treatment of Obstructive Sleep
Apnea.
For further assistance, please contact your local
Fisher & Paykel Healthcare office – see back cover
for details.
Please keep this manual for future reference.
Table of ConTenTs
1. Symbol Definitions ............................................................................................................................................................................... A - 2
2. Intended Use ......................................................................................................................................................................................... A - 2
3. Warnings ................................................................................................................................................................................................ A - 2
4. Oxygen Use Warnings ......................................................................................................................................................................... A - 2
5. Description of the Device .................................................................................................................................................................... A - 3
5.1 Package Contents .......................................................................................................................................................................... A - 3
5.2 Important Parts of the Device ....................................................................................................................................................... A - 3
5.3 Accessories ...................................................................................................................................................................................... A - 3
®
5.4 ThermoSmart
6. Cleaning and Maintenance ................................................................................................................................................................. A - 5
7. Setup Instructions ................................................................................................................................................................................. A - 5
8. Controls and Display ............................................................................................................................................................................ A - 6
8.1 Display Description and Functions .............................................................................................................................................. A - 6
8.2 Patient Menu Summary ................................................................................................................................................................. A - 7
8.3 Patient Menu - Additional Settings Summary ............................................................................................................................ A - 7
9. Frequently Asked Questions ............................................................................................................................................................... A - 8
10. Product Specifications ......................................................................................................................................................................... A - 8
11. Operating Conditions .......................................................................................................................................................................... A - 8
12. Storage and Transport Conditions ..................................................................................................................................................... A - 8
13. Troubleshooting .................................................................................................................................................................................... A - 8
14. Warranty ................................................................................................................................................................................................. A - 9
15. Appendix ............................................................................................................................................................................................... A - 9
Technology .......................................................................................................................................................... A - 4
English
PLEASE READ ALL INSTRUCTIONS BEFORE INITIAL USE
Caution: USA Federal Law restricts this device for sale by or on the order of a physician.
A - 1

1. symbol DefiniTions
Type BF
Applied Part
ATTENTION
Consult
accompanying
documents
Drip Proof
Alternating Current
Class II
Double Insulated
Power
On/Off
93/42/EEC
Class IIb
2. inTenDeD Use
The device is used to assist with patient breathing while sleeping for the purpose of treating Obstructive Sleep Apnea (OSA). This is done
by the delivery of Continuous Positive Airway Pressure (CPAP) in order to prevent airway obstruction. The addition of heated respiratory
humidification to the device relieves the drying and irritating effects on the patient airways which usually arises from use of a CPAP system.
The device is for use on adult patients at home or in the sleep lab. Please refer to the SleepStyle™ 600-Series product range listed in the
appendix section of this manual.
3. Warnings
PLEASE NOTE:- This manual refers to the SleepStyle™ 600 CPAP Series
unit as “the device”.
1. The device should only be used with masks, connectors and
delivery tubes recommended by Fisher & Paykel Healthcare,
or by your physician or respiratory therapist.
2. Never operate the device if:
a) it has a damaged power cord or plug, b) the heated
breathing tube has been damaged with holes, tears or kinks,
c) it has been dropped or damaged, d) it has been dropped
into water, e) it is not working properly, f) it is connected to a
PC during CPAP treatment.
Return the device to an authorised service center for
examination and repair.
3. Do not use the device when the room temperature exceeds 35
°C (95 °F) as this may lead to an elevated airflow temperature
which may give rise to an irritation of the airways.
4. Ensure an air filter is fitted when operating your unit.
5. Remove the humidification chamber before filling. Do not fill
water through the heated breathing tube connection.
6. Do not fill the chamber with boiling water.
7. When handling or operating the device, avoid tipping the
machine to prevent any chance of water entering the unit
enclosure. If this does occur, immediately disconnect the
power cord and discontinue use. Seek advice from your
homecare provider.
8. Place your device on a level surface lower than your head
height to prevent water entering the respiratory tubing should
the device be knocked over.
9. Do not store or use your device where it can fall or be pulled
into water. If water has entered the unit enclosure, disconnect
the power cord and discontinue use. Seek advice from your
homecare provider.
10. Never block the air openings of the device or place it on a soft
surface such as a bed or couch, where the filter area may be
blocked. Keep the air openings free of lint, hair or the like.
11. Ensure that the unit is dry before plugging into the power
socket.
12. A mask should not be used unless the device is switched on,
and operating properly. The vent hole(s) associated with the
mask should never be blocked.
13. Due to the operating temperature of the heater plate, avoid
making contact to the exposed heater plate or chamber base.
14. Ensure the water has cooled before emptying the chamber.
15. At low CPAP pressures, the flow through the mask may be
insufficient to clear all exhaled gas from the tubing, and
consequently some re-breathing may occur.
16. Adjusting the pressure control can result in ineffective therapy.
The pressure control must only be adjusted by a healthcare
professional.
17. Never drop or insert any object into any opening or heated
breathing tube.
18. Always switch off the device and unplug the power cord from
the power socket before cleaning.
19. Empty all the water from the chamber before transporting
your device.
20. To remove the heated breathing tube, always push the sleeve
up to avoid tube damage.
21. Refer all maintenance to qualified service personnel except as
outlined in this manual.
22. Do not use an insulating sleeve or any similar accessories
which are not approved by Fisher & Paykel Healthcare.
These may affect the humidification performance.
4. oxygen Use Warnings
If supplemental oxygen is used with the device, the oxygen flow must be turned off when the device is not operating. This ensures that
oxygen will not flow through the heated breathing tube and accumulate in the device enclosure.
• The device should be located in a position where ventilation around the device is not restricted.
• It is recommended that supplemental oxygen be administered at the mask.
• Oxygen should not be used while smoking or in the presence of an open flame.
• The use of oxygen in therapy requires that special care be taken to reduce the risk of fire. Any materials which will burn in air and
some that will not are easily ignited and burn rapidly in high concentrations of oxygen. Accordingly, for safety it is necessary that all
sources of ignition be kept away from the product and preferably out of the room in which it is being used.
• A spontaneous and violent ignition may occur if oil, grease or greasy substances come in contact with oxygen under pressure. These
substances must be kept away from oxygen regulators, cylinder valves, tubing and connections, and all other oxygen equipment.
• At a fixed flow rate of supplemental oxygen flow, the inhaled oxygen concentration will vary, depending on the pressure settings,
patient breathing pattern, mask selection and leak rate.
A - 2
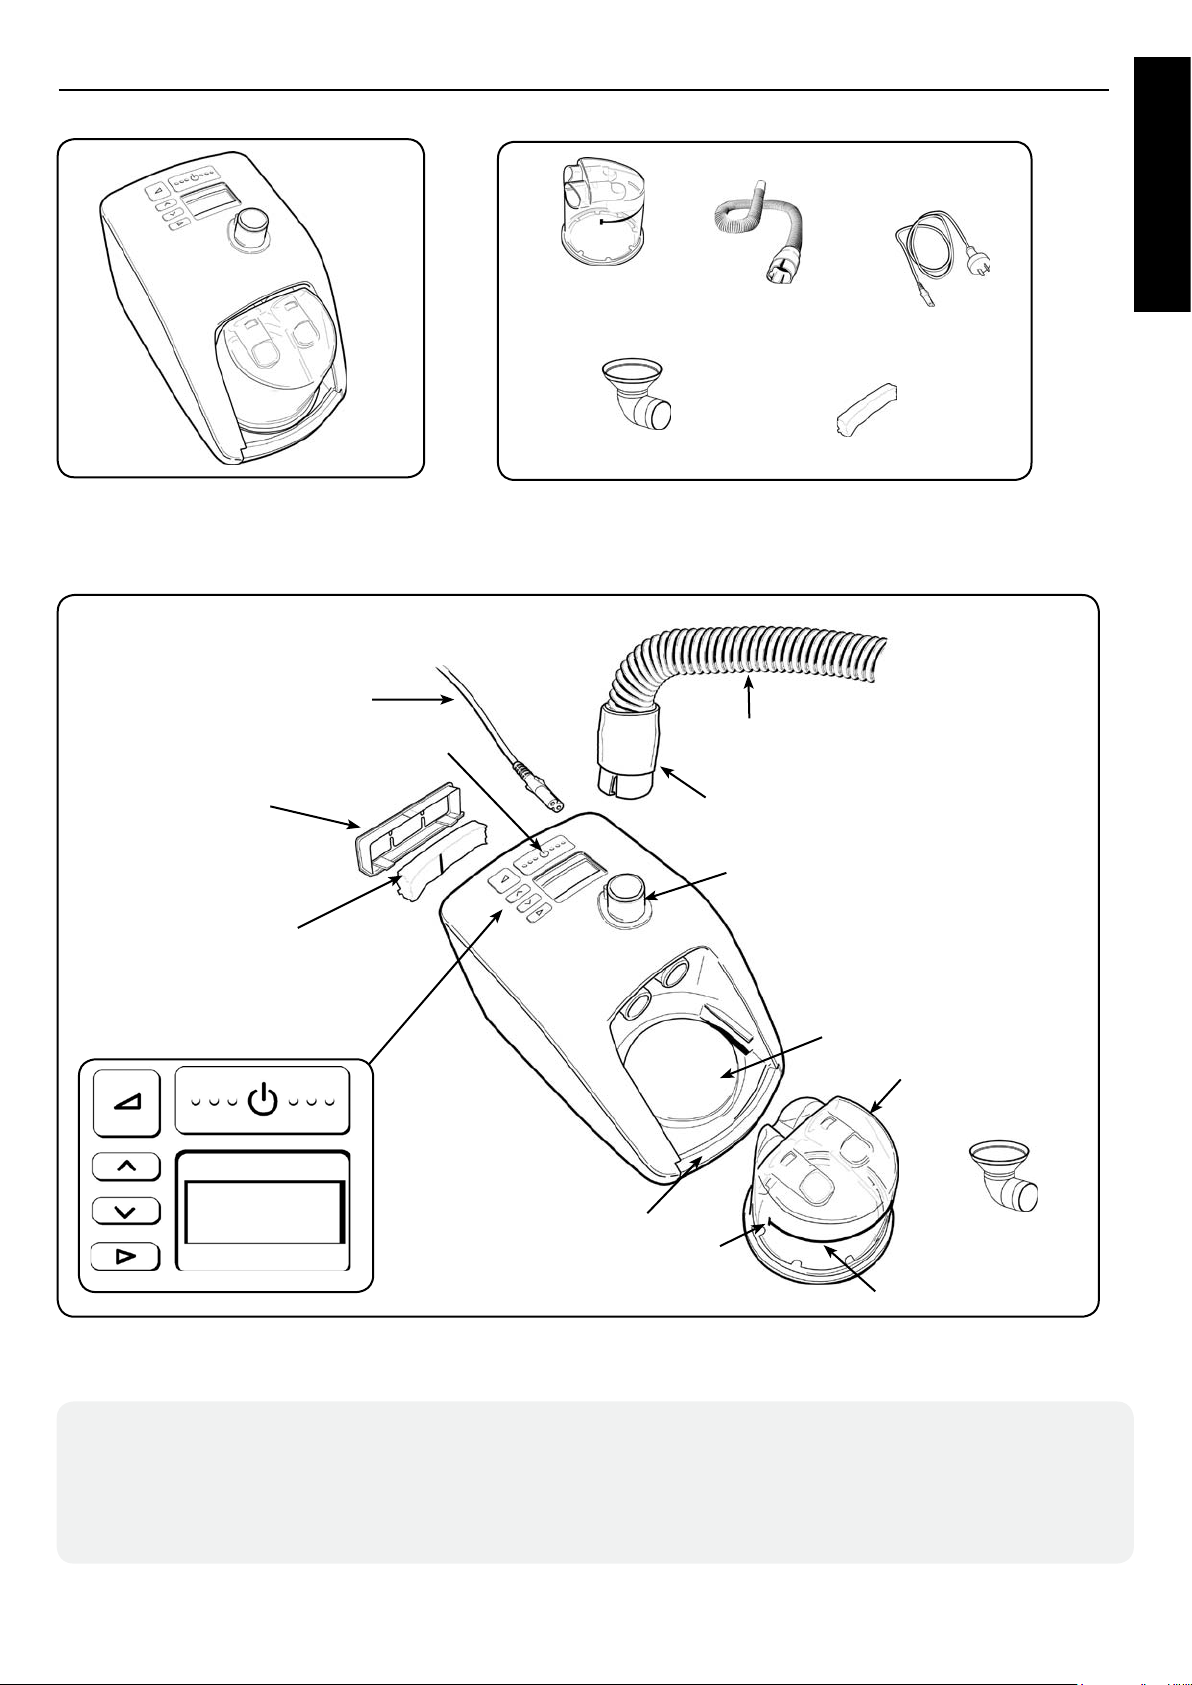
5. DesCripTion of The DeviCe
5.1 Package Contents
English
1 x SleepStyle™ 600 CPAP Series
5.2 Important Parts of the Device
POWER CORD
ON/OFF BUTTON
FILTER HOLDER
2 x Water Chamber
1 x Funnel
1 x ThermoSmart®
Heated Breathing
1 x Power Cord
Tube
1 x Spare Air Filter
Accessories
THERMOSMART® HEATED BREATHING TUBE
CONNECTOR with SLEEVE
THERMOSMART® HEATED BREATHING TUBE
CONNECTION PORT
AIR FILTER
DISPLAY
5.3 Accessories
HC365 Standard Humidification Chamber
HC360* Extended Life Humidification Chamber
900HC522 ThermoSmart® Heated Breathing Tube
900HC240 Filter (2-Pack)
900HC604 Outlet Cleaning Kit HC600
900HC230 ComplianceMaximizer™ Software
FINGER GUARD
WATER FILL LINE (vertical)
HEATERPLATE
WATER CHAMBER
FUNNEL
WATER LEVEL LINE
900HC232 Compliance Download Serial Cable
900HC607 TitrationMaximizer™ Software
900HC236 Isolated Serial Adapter
900HC226 Lead Extension Kit
900HC627 Elbow Funnel (10-Pack)
*Not available in all countries
A - 3

5.4 ThermoSmart® Technology
This device has been designed for optimal patient comfort and offers the unique heated breathing tube technology ThermoSmart®.
ThermoSmart® Technology allows for the delivery of optimal (higher and customized) levels of humidity to the patient, independent of
ambient temperature.
This device can be adjusted on two levels to achieve optimal comfort:
ThermoSmart® Humidity setting: this setting regulates the temperature of the heater plate, adjusting the humidity levels for the
comfort of the patient. Adjustment can be made from 1 to 4 with increments of 0.5. The device is preset to 2.5 which is suitable for
most patients.
• If you experience dryness or find the air too cool: increase the setting
• If you find there is too much moisture in the tube or the air feels too hot: decrease the setting
• If you do not achieve optimal comfort with this setting further adjustments can be made by altering your
setting.
ThermoSmart® Climate setting: this setting provides further adjustment options to the humidity by increasing the temperature in
the tube. Adjustment can be made from 1 to 3 with increments of 1. The device is preset to 2 which is suitable for most patients.
Note, if the climate setting is adjusted, the humidity setting will revert back to the default setting.
• ThermoSmart® Climate setting 3 is recommended for oral CPAP delivery.
• If you feel the range of settings offered by the ThermoSmart® Comfort setting are too dry or too cool: Increase the
ThermoSmart® Climate setting.
• If you feel the range of settings offered by the ThermoSmart
®
Comfort setting are too warm or too humid: Reduce the
ThermoSmart® Climate setting.
ThermoSmart® Climate
It is recommended to keep the (heated breathing) tube on top of bedding for the best humidity performance. To operate ThermoSmart
Humidity and Climate settings, refer to section 8 “Controls and Display” of this manual.
®
A - 4

6. Cleaning anD mainTenanCe
PLEASE NOTE: The device should be cleaned as required.
1. Switch off the device and unplug from the power socket.
2. Wipe the exterior of the device with a clean, damp (not wet) cloth and mild dishwashing detergent. Do not use harsh abrasives or
solvents, or these may damage the device.
DAILY
3.
Clean chamber, heated breathing tube and heated breathing tube connection port.
• Remove the heated breathing tube from the device by pulling sleeve upwards to unlock the connector. Then remove connector.
• Wash the heated breathing tube with soapy water, rinse and then hang-up the heated breathing
tube with its ends pointing to the floor to dry.
• Remove the chamber by pushing down the finger guard and pulling out the chamber.
• Pour out and discard the remaining water.
• For standard (HC365) chambers, clean and wash with soapy water, then rinse and dry.
• The extended life (HC360) chamber requires disassembly before cleaning. Push the base off the
4. WEEKLY
Thoroughly clean the chamber.
• Soak the inside of the chamber for 10 minutes in a solution of one part white vinegar to two parts
5. MAINTENANCE
• Replace the air filter when it becomes significantly discoloured, at least once every three months or after 1000 hours machine run
chamber top as shown in Fig. 1. Ensure the round seal at the base is not loose or damaged.
Wash the chamber top and base in a mild dishwashing detergent. Rinse thoroughly and dry. This
chamber may also be cleaned in a domestic dishwashing machine.
• Thoroughly wipe the inside of the heated breathing tube connection port with a clean damp, low
lint cloth.
water and rinse well with distilled water.
time. To do this, remove the filter holder from the back of the device as shown in Fig. 2. Ensure the vertical black line of the new
filter is facing towards the device, and fit both back to the device.
• Replace the chamber if it is cracked, discoloured or scratched.
• Replace the heated breathing tube after 4000 hours usage or once per year. A damaged tube needs to be replaced immediately.
Fig.1
Fig.2
English
7. seTUp insTrUCTions
When the chamber is fitted and filled, the device must remain upright, so that water
cannot enter the enclosure.
1. Remove your device from its packaging.
2. Place the device on a low shelf or on the floor beside your bed, the unit needs
to be placed below head height.
3. Remove water chamber from the packaging.
4. Remove the blue caps and discard them (Fig.1).
5. Fill the chamber up to the water filling line with distilled water only (Fig.2).
Never fill the chamber through the heated breathing tube connector port.
When moving your device, ensure that the water chamber is empty. Machine
failure due to water damage is not covered by warranty.
6. To attach the water chamber to the device, press down the finger guard and
slide the chamber on (Figs 3 and 4).
7. When the chamber is fitted correctly, the finger guard will click into place.
8. One end of the heated breathing tube has a grey plastic connector. Lift the
sleeve and slide connector on to the device. Push the sleeve down to lock
(Figs 5, 6 and 7).
9. Connect the other end of the heated breathing tube to the mask.
10. Plug the device power cord into your household power socket.
Fig.1
Fig.3
Fig.2
Fig.4
11. Switch on the device by pressing the on/off button (Fig.8). The current
ThermoSmart® Humidity setting is displayed.
12. For changing the setting refer to section 8 “Controls and Display”.
Your device is now ready for use.
A - 5
Fig.5
Fig.7
Fig.6
Fig. 8

8. ConTrols anD Display
8.1 Display Description and Functions
On/Off button
Ramp button
Up button
Increase Setting
Down button
Decrease Setting
Mode button
Step through the options
KEY FUNCTION & DESCRIPTION OPERATION
ON/OFF
Switches the device ON and OFF
TO SWITCH “ON”
Press button down briefly.
The device will default to display the ThermoSmart® Humidity setting.
TO SWITCH “OFF”
Remove your mask
Press button briefly
RAMP
Reduces pressure to a lower level
to help you fall asleep. The pressure
will gradually return to full operating
pressure over 20 minutes.
TO SWITCH “ON”
Press
(NB: to reset ramp during a cycle the device must be switched off first)
TO SWITCH “OFF”
Press
<
INCREASE/DECREASE
Adjusts settings up or down
<
MODE
To step through options.
PATIENT MENU DISPLAY OPERATION
For viewing CPAP settings, humidity,
compliance data, altitude and pressure
settings
hr
Press and button to raise or lower settings.
Press sequentially to step through and view options available.
TO VIEW ITEMS
Press key to sequentially view:
ThermoSmart® Humidity setting (default display)
For adjusting ThermoSmart® Humidity setting levels to minimize upper airway
side effects from CPAP use.
Press and button to raise or lower settings
Total run hours: displays the total number of hours the device has been
switched on (includes hours without mask use)
hr/
Average compliance hours per night: displays average number of hours
the device has been used at night with the mask on.
Check sum: displays information for the medical practitioner or the dealer to
check compliance.
Altitude setting: displays altitude setting. Press or to change altitude.
cmH2O
PATIENT MENU - Additional Settings DISPLAY OPERATION
To access additional settings:
From the Default setting
"THERMOSMART®
HUMIDITY"
Press the key for 3 seconds
3000
Pressure setting: displays pressure setting.
ThermoSmart® Climate setting*
To change the delivered temperature: Press for warmer more humid air
delivery. Press for cooler and drier air delivery.* Refer to Section 5.4
Altitude
Select “m” for metres or “ft” for feet using and keys.
Altitude setting
- Set the altitude level by pressing and keys
- Press to exit menu
Actual Pressure (Displays actual pressure)
cmH2O
Warning: Failure to select correct altitude setting (for any given location) will have an adverse effect on delivered pressure.
* When the ThermoSmart® Climate setting is altered the Humidity Setting will revert back to default setting 2.5
- Display reverts to default if the menu is not exited. Press button in order to
exit menu (only available in HC602).
A - 6

8.2 Patient Menu Summary
Model
HC604
Model
HC608
Press to activate
Ramp
Increase
Decrease
Mode
ThermoSmart®
Humidity Setting
(default)
<
or
<
ThermoSmart®
Humidity Setting
(default)
0,1,2,3,4
hr
±
0.5 Increment
hr
Average Hours
per night*
hr/
Average Hours
per night*
hr/
Press once to switch
device on/off
English
Display
Altitude Setting
Check sumTotal Run Time
Pressure
Check sumTotal Run Time
Setting
cmH2O
Pressure
Setting
cmH2O
Return to
Default
Return to
Default
8.3 Patient Menu - Additional Settings Summary
Mode
Advanced
Model
HC604
Patient Menu
Hold for 3 seconds
<
or
<
Increase/Decrease
ThermoSmart® Climate Setting
ft
or
<
or
<
Select Units
for Altitude
m
3000
Return to Default
<
or
<
Increase/Decrease
Altitude Level
Advanced
Model
HC608
Warning: Failure to select correct altitude setting (for any given location) will have an adverse effect on delivered pressure.
Patient Menu
Hold for 3 seconds
Actual
Pressure
cmH2O
A - 7
Return to Default

9. freqUenTly askeD qUesTions
Do I have to use distilled water with my device?
The use of distilled water will maximize the life of the water chamber. Water from the faucet will often contain minerals which can damage the
chamber, causing pitting in the base, even if the water is passed through a filter.
Can I use my device in other countries?
Yes. Simply use the appropriate electrical socket adaptor and the device will automatically adapt to any voltage supply.
Note: When moving your device, ensure that the water chamber is empty. Machine failure due to water damage is not covered by warranty.
Can I use supplemental oxygen with my device?
Yes, oxygen can be administered at the mask. Turn the device on before turning on the oxygen. Ensure that the oxygen source is turned off before
turning off the device to avoid oxygen accumulating in the machine.
When do I replace my water chamber?
Replace the chamber if the plastic walls of the chamber become cracked or cloudy or the chamber base becomes pitted.
(Note: If the chamber leaks at all, it should be replaced immediately).
Can I use my device without a heated breathing tube?
Yes you can, but you will not gain the optimum humidity performance the device offers.
The device will then not display the heated breathing tube symbol and show the following display:
10. proDUCT speCifiCaTions
DIMENSIONS: 273 mm x 170 mm x 175 mm
(10.7” x 6.7” x 6.9”)
WEIGHT: 2.1 kg (4.6 lbs) unit only
3.4 kg (7.5 lbs) packaged in
bag incl. accessories
ELECTRICAL RATINGS
Supply Frequency:
Supply Voltage and Current:
220-240 V (1.0 A, max 2.0 A)
Note: These values represent
DC to AC Inverter
requirements: 115 V - 200 W/300 W surge
230 V – 300 W/500 W surge
Heater Plate: max. 85 W
Heater Plate Temperature:
Heated breathing tube
Power Setting: max. 30 W
PERFORMANCE
Pressure Range:
Altitude Range:
Warm-up time:
Humidity delivered:
*measured at 22 ºC ambient temperature: 10 cmH2O at bias flow.
50-60 Hz
100-115 V (1.5 A, max 1.7 A),
average current.
max. 65 °C (149 °F)
4 to 20 cmH2O
0 to 3000 m, or 0 to 9000 ft
30 min
30 mg/l*
STANDARDS COMPLIANCE:
Designed to conform to the
requirements of:
UL60601-1
CSA C22.2/No. 601.1
AS3200.1.0
EN60601-1
The device complies with the electromagnetic compatibility
requirements of IEC 60601-1-2. In certain circumstances, the
device may affect or be affected by nearby equipment due
to the effects of electromagnetic interference. If this should
happen, try moving your unit or the location of the device
causing interference, or alternatively consult your homecare
provider.
IEC 60601-1
11. operaTing ConDiTions
AMBIENT TEMPERATURE: 5 - 35 ºC
HUMIDITY: 10 - 95% RH
ALTITUDE: 0 - 3000 m (9000 ft)
Above 1500 m (4500 ft) the maximum operating pressure will be reduced.
12. sTorage anD TransporT ConDiTions
The device should be stored and transported in environmental conditions of: 14 to 140 °F (-10 to 60 °C).
13. TroUbleshooTing
If you feel that your device is not operating correctly, consult your homecare dealer. Do not attempt to repair the device yourself.
Fisher & Paykel Healthcare have a policy of continued product improvement and
reserve the right to alter specifications without notice.
A - 8

14. WarranTy
Please contact your Fisher & Paykel Healthcare Provider regarding warranty.
15. appenDix
The following table lists the main difference in features across the SleepStyle™ 600 Product Range.
English
MODEL
HC604
HC608
NOTE:
●
All models are fully integrated with ThermoSmart
●
Some models are not available for sale in all countries.
Fully Integrated CPAP with
Heated Humidification
✓
✓
Patient Compliance
Monitoring (LCD & Download)
✓
✓
®
Auto Altitude Adjustment/
Leak Compensation
-
✓
Technology
A - 9

Fisher & Paykel Healthcare Offices:
INTERNATIONAL Fisher & Paykel Healthcare Limited, 15 Maurice Paykel Place, East Tamaki, Auckland 2013, P O Box 14 348, Panmure, Auckland 1741, New Zealand
Tel:+64 9 574 0100 Fax:+64 9 574 0158 Email: info@fphcare.com Website: www.fphcare.com
AUSTRALIA Tel: +61 3 9879 5022 Fax: +61 3 9879 5232 AUSTRIA Tel: 0800 29 31 23 Fax: 0800 29 31 22 BENELUX Tel: +31 40 216 3555 Fax: +31 40 216 3554
CHINA Tel: +86 20 3205 3486 Fax: +86 20 3205 2132 FRANCE Tel: +33 1 6446 5201 Fax: +33 1 6446 5221 GERMANY Tel: +49 7182 93777 0 Fax: +49 7182 93777 99
INDIA Tel: +91 80 4123 6041 Fax: +91 80 4123 6044 IRISH REPUBLIC Tel: 1800 409 011 ITALY Tel: +39 06 7839 2939 Fax: +39 06 7814 7709
JAPAN Tel: +81 3 3661 7205 Fax: +81 3 3661 7206 MIDDLE EAST Tel: +9 71 4 360 0849 Fax: +9 71 4 368 8110 NORTHERN IRELAND Tel: 0800 132 189
SPAIN Tel: +34 902 013 346 Fax: +34 902 013 379 SWEDEN Tel: +46 8 564 76 680 Fax: +46 8 36 63 10 SWITZERLAND Tel: 0800 83 47 63 Fax: 0800 83 47 54
UK (EU Authorized Representative) Fisher & Paykel Healthcare Ltd, Unit 16, Cordwallis Park, Clivemont Road, Maidenhead, Berkshire SL6 7BU, United Kingdom
Tel: +44 1628 626 136 Fax: +44 1628 626 146 USA Tel: 1800 446 3908 +1 949 453 4000 Fax: +1 949 453 4001
185044288 REV D
© Fisher & Paykel Healthcare Limited
 Loading...