


 Loading...
42EM
EN |
DUCTED FAN COIL unitS |
|
Installation instructions |
||
|
||
|
|
|
FR |
VENTILO-CONVECTEURS gainableS |
|
Manuel d’installation |
||
|
||
|
VENTILATOR-KONVEKTOREN MIT |
|
DE |
KANALANSCHLUSS |
|
|
Installationanweisungen |
|
IT |
Unità Fan Coil Canalizzate |
|
|
Manuale d’installazione |
|
ES |
Unidad de fan coil con conductos |
|
Manual de instalación |
||
|
||
|
|
|
|
VENTILATORCONVECTOR voor |
|
NL |
kanaalaansluiting |
|
|
Montagehandleiding |

|
ENGLISH |
|
|
|
FRANCAIS |
|
|
|
DEUTSCH |
|
|
Contents |
|
|
|
Table des Matières |
|
|
|
inhalt |
|
1 - PRECAUTIONS................................................. |
7 |
|
1 - PRECAUTIONS............................................... |
13 |
|
1 - BESTIMMUNGEN.......................................... |
19 |
|||
1.1 |
- Operating limits................................................ |
7 |
1.1 |
- Limites d’utilisation........................................ |
13 |
1.1 |
- Betriebs-Grenzwerte...................................... |
19 |
||
1.2 |
- Clearances required.......................................... |
7 |
1.2 |
- Réservation pour maintenance..................... |
13 |
1.2 |
- Erforderlicher freier Raum........................... |
19 |
||
1.3 |
- Receiving a shipment - installation methods 7 |
1.3 |
- Réception - Lieu d’implantation................... |
13 |
1.3 |
- Erhalt der Sendung - Installations- |
|
|||
1.4 |
- Supply voltage................................................... |
7 |
1.4 |
- Tension d’alimentation................................... |
13 |
|
|
methoden......................................................... |
19 |
|
2 - SAFETY CONSIDERATIONS |
7 |
|
2 - CONSIDERATIONS DE SECURITE |
13 |
1.4 |
- Versorgungsspannung..................................... |
19 |
|||
|
|
|
|
|
||||||
2.1 |
- General............................................................... |
7 |
2.1 |
- Généralités....................................................... |
13 |
|
2 - SICHERHEITSMASSNAHMEN.................. |
19 |
||
2.2 |
- Protection against electrocution..................... |
7 |
2.2 |
- Protection contre les électrocutions............. |
13 |
2.1 |
- Allgemeines..................................................... |
19 |
||
2.3 |
- General installation conditions....................... |
8 |
2.3 |
- Préconisation générale d’installation........... |
14 |
2.2 |
- Schutz gegen elektrische Schläge.................. |
19 |
||
2.4 |
- Caution for the control of the 42EM.............. |
8 |
2.4 |
- Préconisation concernant la régulation........ |
14 |
2.3 |
- Allgemeine Installationsbedingungen.......... |
20 |
||
2.5 |
- Conformity......................................................... |
8 |
2.5 |
- Conformité....................................................... |
14 |
2.4 |
- Warnung für die Atmosphera-Regelung...... |
20 |
||
3 - Installation OF THE UNIT |
8 |
|
3 - INSTALLATION de l’UNITE |
14 |
2.5 |
- Konformität..................................................... |
20 |
|||
|
|
|
|
|
||||||
3.1 |
- Installing the unit in the false ceiling.............. |
8 |
3.1 |
- Coordination entre unité et faux plafond........ |
14 |
|
3 - Installation DES GERÄTS.................. |
20 |
||
3.2 |
- Installation procedure...................................... |
8 |
3.2 |
- Procédure d’installation................................. |
14 |
3.1 |
- Installation des Geräts in der Zwischen- |
|
||
3.3 |
- Removal procedure.......................................... |
9 |
3.3 |
- Procédure de démontage............................... |
15 |
|
|
decke................................................................ |
20 |
|
4 - COMPONENTS |
9 |
|
4 - COMPOSANTS |
15 |
3.2 |
- Installationsvorgang....................................... |
20 |
|||
|
3.3 |
- Ausbauverfahren............................................. |
21 |
|||||||
4.1 |
- Fan motor assembly.......................................... |
9 |
4.1 |
- Motoventilateurs............................................. |
15 |
|
|
|
|
|
4.2 |
- Water coil......................................................... |
10 |
4.2 |
- Batterie à eau.................................................. |
16 |
|
4 - BAUTEILE........................................................ |
21 |
||
4.3 |
- Duct connection spigots................................. |
10 |
4.3 |
- Viroles de raccordement................................ |
16 |
4.1 |
- Ventilator-Motor-Baugruppe......................... |
21 |
||
4.4 |
- Optional filter and filter access...................... |
10 |
4.4 |
- Option filtre à air et accès.............................. |
16 |
4.2 |
- Wasserregister.................................................. |
22 |
||
4.5 |
- Fresh air controller......................................... |
10 |
4.5 |
- Régulateur de débit d’air neuf...................... |
16 |
4.3 |
- Kanalanschluss-Stutzen.................................. |
22 |
||
4.6 |
- Optional water flow control valves............... |
11 |
4.6 |
- Option vannes de régulation du débit |
|
4.4 |
- Wahlweiser Filter und Filterzugang.............. |
22 |
||
4.7 |
- Flexible pipe option........................................ |
12 |
|
|
d’eau................................................................. |
17 |
4.5 |
- Außenluftregler............................................... |
22 |
|
4.8 |
- Optional electric heater ................................ |
12 |
4.7 |
- Option flexible................................................. |
18 |
4.6 |
- Wahlweise Wasserregelventile....................... |
23 |
||
5 - codification |
12 |
4.8 |
- Option batterie électrique ............................ |
18 |
4.7 |
- Flexible Rohrleitungen (Option).................. |
24 |
|||
|
5 - COdification |
18 |
4.8 |
- Wahlweise Elektroheizung ............................ |
24 |
|||||
|
|
|
|
|
|
|
|
|||
|
|
|
|
|
|
|
|
5 - GERÄTECODES............................................. |
24 |
|
|
ITALIANO |
|
|
|
ESPAÑOL |
|
|
INDICE |
|
|
|
INDICE |
|
1 - PRECAUZIONI................................................ |
25 |
|
1 - PRECAUCIONeS............................................ |
32 |
||
1.1 |
- Limiti di funzionamento................................. |
25 |
1.1 |
- Límites de funcionamiento............................ |
32 |
|
1.2 |
- Spazi necessari................................................. |
25 |
1.2 |
- Espacio para el mantenimiento..................... |
32 |
|
1.3 |
- Ricevimento delle unità e modalità |
|
1.3 |
- Recepción de un envío - métodos de |
|
|
|
d’installazione.................................................... |
25 |
|
|
instalación....................................................... |
32 |
1.4 |
- Tensione di alimentazione.............................. |
25 |
1.4 |
- Tensión de alimentación................................. |
32 |
|
2 - CONSIDERAZIONI SULLA SICUREZZA.25 |
|
2 - Consideraciones de seguridad.... |
32 |
|||
2.1 |
- Generalità........................................................ |
25 |
2.1 |
- Generalidades................................................. |
32 |
|
2.2 |
- Precauzioni contro le folgorazioni................ |
26 |
2.2 |
- Precauciones contra la electrocución........... |
33 |
|
2.3 |
- Raccomandazioni per l’installazione............ |
26 |
2.3 |
- Recomendaciones para la instalación.......... |
33 |
|
2.4 |
- Precauzione per il controllo........................... |
26 |
2.4 |
- Precaución con el control de la 42EM.......... |
33 |
|
2.5 |
- Conformità....................................................... |
26 |
2.5 |
- Conformidad................................................... |
33 |
|
3 - INSTALLAZIONE DEI 42EM...................... |
26 |
|
3 - Instalación de la 42EM....................... |
33 |
||
3.1 |
- Installazione del 42EM in un controsoffitto... |
26 |
3.1 |
- Instalación de la unidad en falso techo........ |
33 |
|
3.2 |
- Procedura di installazione.............................. |
27 |
3.2 |
- Procedimiento de instalación........................ |
34 |
|
3.3 |
- Procedura di smontaggio............................... |
27 |
3.3 |
- Procedimiento de desmontaje....................... |
34 |
|
4 - COMPONENTI................................................ |
28 |
|
4 - COMPONENTES............................................. |
34 |
||
4.1 |
- Assieme motoventilante................................. |
28 |
4.1 |
- Conjunto motor/ventilador............................ |
34 |
|
4.2 |
- Batteria ad acqua............................................ |
28 |
4.2 |
- Batería de agua............................................... |
35 |
|
4.3 |
- Collari di collegamento del canale................ |
29 |
4.3 |
- Tomas de conexión de conductos.................. |
35 |
|
4.4 |
- Filtro (optional) e suo accesso....................... |
29 |
4.4 |
- Filtro (opción) y acceso al filtro.................... |
36 |
|
4.5 |
- Regolatore del flusso d’aria esterna............. |
29 |
4.5 |
- Aire de renovación......................................... |
36 |
|
4.6 |
- Valvole di controllo della portata d’acqua |
|
4.6 |
- Válvulas de control del caudal de agua |
|
|
|
(optional)......................................................... |
30 |
|
|
(opción)........................................................... |
36 |
4.7 |
- Tubi flessibili optional..................................... |
30 |
4.7 |
- Opción de tubo flexible.................................. |
37 |
|
4.8 |
- Batteria elettrica di riscaldamento |
|
4.8 |
- Calentador eléctrico (opción) ...................... |
37 |
|
|
(optional) ........................................................ |
30 |
|
|
|
|
|
|
|
|
5 - CODIFICACIÓN.............................................. |
38 |
|
5 - CODIFICA......................................................... |
31 |
|
|
|
|
|
|
NEDERLANDS |
|
|
INHOUD |
|
1 - VOORZORGSMAATREGELEN................. |
39 |
|
1.1 |
- Bedrijfslimieten............................................... |
39 |
1.2 |
- Benodigde vrije ruimte................................... |
39 |
1.3 |
- Ontvangen van een zending - montage- |
|
|
methoden......................................................... |
39 |
1.4 |
- Voedingsspanning........................................... |
39 |
2 - VEILIGHEID.................................................... |
39 |
|
2.1 |
- Algemeen......................................................... |
39 |
2.2 |
- Voorkomen van elektrische schokken.......... |
39 |
2.3- Algemene aanbevelingen voor de montage...40
2.4- Waarschuwing voor de regeling van de 42EM..40
2.5 |
- Conformiteit.................................................... |
40 |
3 - MONTAGE VAN DE 42EM UNIT............... |
40 |
|
3.1 |
- Montage van de unit boven het verlaagd |
|
|
plafond............................................................. |
40 |
3.2 |
- Montageprocedure......................................... |
40 |
3.3 |
- Demontage...................................................... |
41 |
4 - COMPONENTEN............................................ |
41 |
|
4.1 |
- Ventilatormotor............................................... |
41 |
4.2 |
- Waterbatterij.................................................... |
42 |
4.3 |
- Kanaalaansluitingen....................................... |
42 |
4.4 |
- Optioneel filter en toegang tot het filter...... |
42 |
4.5 |
- Verselucht......................................................... |
42 |
4.6 |
- Waterregelkleppen (optie)............................. |
43 |
4.7 |
- Flexibele waterslangen (optie)...................... |
44 |
4.8 |
- Elektrisch verwarmingselement (optie) ...... |
44 |
5 - CODERING...................................................... |
44 |
|

1 |
|
|
|
A |
|
|
|
|
|
|
C |
|
|
|
B |
|
A |
B |
C |
42EM T0 |
50 |
680 |
250 |
42EM T1 |
50 |
850 |
250 |
42EM T2 |
50 |
1250 |
250 |
42EM T3 |
50 |
1250 |
250 |
2 |
|
|
|
|
|
|
C |
|
|
|
B |
A |
|
|
|
|
A |
B |
C |
42EM T0 |
250 |
680 |
250 |
42EM T1 |
220 |
850 |
250 |
42EM T2 |
220 |
1250 |
250 |
42EM T3 |
220 |
1250 |
250 |
6
7 |
5 mm |
3 |
4 |
5 |
8
9 |
9b |
9a |
10 |
10a |
10a |
11 |

12 |
16 |
|
|
16a |
|
|
12a |
|
|
|
16b |
|
12c |
|
|
12b |
|
13 |
|
|
|
17 |
|
|
17a |
17a |
14 |
|
|
L
14a 14b |
14c |
15 |
|
|
|
15a |
|
|
|
|
|
|
5 |
6 |
|
|
|
|
|
|
|
|
|
2 |
3 |
4 |
|||
|
|
|
|
|
|
|
1 |
|
|||||
|
|
|
|
|
L |
L |
|
|
|||||
|
|
|
|
|
N |
|
|
|
|
||||
|
|
|
N |
N |
|
|
|
|
|
|
|||
|
|
|
|
|
|
|
|
|
|
||||
|
|
Cg |
|
|
|
|
|
|
|
|
|||
|
Hg |
|
|
|
|
|
|
|
|
|
|||
|
|
|
|
|
|
|
|
|
|
|
|||
|
|
|
|
|
|
|
|
|
|
|
|
||
|
|
|
|
|
|
|
|
|
|
|
|
|
|
|
|
|
|
|
|
|
|
|
|
|
|
|
15b |

18 |
42EM 0.5/1.0/2.1/2.2/2.3 |
|
|
Hot |
|
|
|
|
|
|
|
|
|
|
|
|
|
|
L |
|
|
|
|
|
|
R |
|
|
|
|
Cold |
|
|
|
|
|
|
|
|
4-w V |
2-w V |
|
|
|
|
|
|
|
Out |
|
|
Out |
|
|
|
|
|
In |
|
|
In |
|
19 |
42EM 3.1/3.2/3.3 |
|
|
|
|
|
|
|
L |
|
|
|
|
R |
|
|
|
|
Air |
|
|
|
Air |
|
|
61 |
|
|
|
|
|
|
|
||
|
|
|
|
|
|
|
Hot |
Cold |
|
|
|
|
|
|
|
|
|
|
In |
|
Out |
|
In |
Out |
|
|
|
|
|
|
|
|
|
||
|
|
|
|
|
Air |
|
|
|
|
|
|
In |
Out |
|
Out |
In |
|
|
|
|
|
|
|
|
||
|
|
In |
Out |
|
In |
Out |
|
|
|
|
|
|
|
|
|
||
|
|
|
|
|
Air |
|
|
|
|
|
|
In |
Out |
|
Out |
In |
|
|
|
|
|
|
|
|

|
|
ENGLISH |
|
|
|
FRANCAIS |
|
|
|
DEUTSCH |
Figure titles and legends: |
Figures et légendes: |
Abbildungen und Legende: |
||||||||
1 |
Clearance without return air plenum |
1 |
Dégagements sans plenum de reprise |
1 |
Erforderlicher freier Raum ohne Rückluftplenum |
|||||
2 |
Clearance with return air plenum |
2 |
Dégagements avec plenum de reprise |
2 |
Erforderlicher freier Raum mit Rückluftplenum |
|||||
3 |
Electrical danger pictogram |
3 |
Pictogramme “Danger électrique” |
3 |
Piktogramm “Elektrische Gefahr” |
|||||
4 |
Caution hand hazard pictogram |
4 |
Pictogramme “Attention à vos mains” |
4 |
Piktogramm “Gefahr für die Hände” |
|||||
5 |
General danger pictogram |
5 |
Pictogramme “Danger général” |
5 |
Piktogramm “Allgemeine Gefahr” |
|||||
6 |
Lifting unit for installation in a false ceiling |
6 |
Levage et installation en faux plafond |
6 |
Einbau in die Zwischendecke: Anheben des Geräts |
|||||
7/8 |
Levelling the unit |
7/8 |
Mise à niveau de l’unité |
7/8 |
Nivellierung des Geräts |
|||||
9 |
Condensate drain pipe |
9 |
Tuyauterie d’évacuation des condensats |
9 |
Kondensatablauf-Rohr |
|||||
|
9a |
20 mm/m fall in horizontal pipe run |
|
|
9a |
Pente de 20 mm/m |
|
|
9a |
20 mm/m Neigung, horizontale Leitung |
10 |
9b |
50 mm siphon |
10 |
9b |
Siphon de 50 mm |
10 |
9b |
Siphon 50 mm |
||
Several units connected to one condensate collector |
Raccordements d’unités multiples à un même |
Anschluss mehrerer Geräte an 1 Kondensatwanne |
||||||||
11 |
10a |
20 mm/m fall |
|
|
collecteur d’évacuation |
11 |
10a |
20 mm/m Neigung |
||
Fresh air controller modification |
11 |
10a |
Pente de 20 mm/m |
Modifikation des Außenluftreglers |
||||||
12 |
Fan assembly removal |
Modification du régulateur d’air neuf |
12 |
Ventilatorbaugruppen-Ausbauverfahren |
||||||
|
12a |
Removing fan access panel |
12 |
Démontage du motoventilateur |
|
|
12a |
Ventilator-Zugangsblech entfernen |
||
|
12b |
Position of torx screws |
|
|
12a |
Démonter le panneau d’accès |
|
|
12b |
Position der Torx-Schrauben |
13 |
12c |
Slide assembly down |
|
|
12b |
Position des vis Torx |
13 |
12c |
Baugruppe nach unten schieben |
|
Capacitor assembly |
13 |
12c |
Glisser l’ensemble vers le bas |
Kondensator-Austauschvorgang |
||||||
14 |
Fan speed controller |
Assemblage condensateur |
14 |
Ventilator-Drehzahlregler |
||||||
|
14a |
Low speed connector - red wire |
14 |
Réglage des vitesses |
|
|
14a |
Klemme niedrige Drehzahl - rotes Kabel |
||
|
14b |
Medium speed connector - grey wire |
|
|
14a |
Borne petite vitesse - fil rouge |
|
|
14b |
Klemme mittlere Drehzahl - graues Kabel |
|
14c |
High speed connector - black wire |
|
|
14b |
Borne moyenne vitesse - fil gris |
|
|
14c |
Klemme hohe Drehzahl - schwarzes Kabel |
15 |
L |
Live |
|
|
14c |
Borne grande vitesse - fil noir |
15 |
L |
Stromführendes Kabel |
|
Optional fan speed terminal block |
15 |
L |
Phase |
Wahlweiser Ventilatordrehzahl-Klemmblock |
||||||
|
15a |
Customer connection |
Câblage vitesse optional |
|
|
15a |
Kundenanschluss |
|||
16 |
15b |
Motor |
|
|
15a |
Raccordement client |
16 |
15b |
Motor |
|
Wiring 42EM sizes 2 and 3 |
16 |
15b |
Moteur |
Verdrahtung 42EM Größen 2 und 3 |
||||||
|
16a |
Motor |
Câblage 42EM tailles 2 et 3 |
|
|
16a |
Motor |
|||
17 |
16b |
Auto-transformer |
|
|
16a |
Moteur |
17 |
16b |
Auto-Transformator |
|
Electric heater removal |
17 |
16b |
Autotransformateur |
Elektroheizungs-Ausbauvorgang |
||||||
18 |
17a |
Location of screws |
Démontage de la batterie électrique |
18 |
17a |
Position der Schrauben |
||||
Coil inlet/outlet positions, sizes 0.5, 1 and 2 |
18 |
17a |
Position des vis |
Wassereinund -austritt, Größen 0.5, 1 und 2 |
||||||
19 |
Coil inlet/outlet positions, size 3 |
Positions entrées-sorties d’eau, tailles 0.5, 1 et 2 |
19 |
Wassereinund -austritt, Größe 3 |
||||||
|
In |
Water in |
19 |
Positions entrées-sorties d’eau, taille 3 |
|
|
In |
Wassereintritt |
||
|
Out |
Water out |
|
|
In |
Entrée d’eau |
|
|
Out |
Wasseraustritt |
|
R |
Right-hand connections |
|
|
Out |
Sortie d’eau |
|
|
R |
Anschlüsse rechts |
|
L |
Left-hand connections |
|
|
R |
Servitude droite |
|
|
L |
Anschlüsse links |
|
Hot |
Hot water, 4-pipe version (two 1/2” gas nuts) |
|
|
L |
Servitude gauche |
|
|
Hot |
Warmwasser, 4-Leiter-Version (zwei 1/2”- |
|
Cold |
Cold water (two 1/2” gas nuts) |
|
|
Hot |
Eau chaude version 4 tubes (2 écrous |
|
|
Cold |
Gasgewinde-Muttern) |
|
4-w V |
Four-way valves |
|
|
Cold |
tournant 1/2”) |
|
|
Kaltwasser (zwei 1/2”-Gasgewinde-Muttern) |
|
|
2-w V |
Two-way valves |
|
|
Eau froide (2 écrous tournant 1/2”) |
|
|
4-w V |
Vierwegeventil |
|
|
Air |
Air flow direction |
|
|
4-w V |
Vanne 4 voies |
|
|
2-w V |
Zweiwegeventil |
|
|
|
|
|
2-w V |
Vanne 2 voies |
|
|
Air |
Luftströmungsrichtung |
|
|
|
|
|
Air |
Air |
|
|
|
|
ITALIANO
Titoli e Legenda delle Figure:
1Spazi necessari sensa plenum di ripresa
2Spazi necessari con plenum di ripresa
3Ideogramma Pericolo Elettrico
4Ideogramma Pericolo per le Mani
5Ideogramma Pericolo Generale
6Sollevamento dell’unità per installazione in controsoffitto 7/8 Livellamento dell’apparecchio
9Linea di scarico della condensa
9a Pendenza di almeno 20 mm/m nei tratti orizzontali
9b Sifone con profondità di almeno 50 mm
10Collegamento di più unità ad un unico collectore 10a Pendenza di almeno 20 mm/m
11Modificazione del regolatore del flusso d’aria esterna
12Smontaggio dell’assieme motoventilante
12a Smontaggio del pannello d’accesso al ventilatore
12b Posizione da viti torx
12c Estrarre l’assieme dal basso
13Condensatore
14Regolatore della velocità del ventilatore
14a Morsetto per bassa velocità - cavo rosso
14b Morsetto per media velocità - cavo grigio
14c Morsetto per alta velocità - cavo nero L Sotto tensione
15Morsettiera per le velocità optional del ventilatore 15a Collegamento a cura del cliente
15b Motore
16 Collegamenti elettrici per 42EM grandezze 2 e 3
16a Motore
16b Autotrasformatore
17Sostituzione della batteria elettrica 17a Posizioni dei viti
18Posizioni di ingresso/uscita dell’acqua dalla batteria, grandezze 0.5, 1 e 2
19Posizioni di ingresso/uscita dell’acqua dalla batteria, grandezza 3
In |
Ingresso dell’acqua |
Out |
Uscita dell’acqua |
R |
Attacchi destri |
L |
Attacchi sinistri |
Hot |
Acqua calda, versione per distribuzione a 4 tubi |
Cold |
(due dadi con filettatura da 1/2” gas) |
Acqua refrigerata |
|
4-w V |
(due dadi con filettatura da 1/2” gas) |
Valvola a quattro vie |
|
2-w V |
Valvola a due vie |
Air |
Flusso d’aria |
ESPAÑOL
Títulos de figuras y leyendas:
1Espacio necesario sin plenum de aire de retorno
2Espacio necesario con plenum de aire de retorno
3Pictograma Peligro de descarga eléctrica
4Pictograma: Peligro para las manos
5Pictograma Peligro general
6Elevación de la unidad para instalación en un falso techo
7/8 Nivelación de la unidad
9Tubo de drenaje de condensado
9a Caída de 20 mm/m en recorrido horizontal
9b Sifón de 50 mm
10Varias unidades conectadas a un colector común 10a Caída de 20 mm/m
11Modificación del controlador de aire de renovación
12Desmontaje del conjunto del ventilador
12a Desmontaje del panel de acceso al ventilador
12b Posición de los tornillos torx
12c Deslizar el conjunto hacia abajo
13Condensador
14Controlador de velocidad del ventilador 14a Terminal velocidad baja - cable rojo
14b Terminal velocidad media - cable gris
14c Terminal velocidad alta - cable negro
L Activo
15Bloque de terminales de velocidad del ventilador opcional
15a Conexión del cliente
15b Motor
16Cableado de 42EM tamaños 2 y 3 16a Motor
16b Autotransformador
17Sustitución del calentador eléctricol 17a Posición de los tornillos
18Posiciones de entrada/salida de la batería, tamaños 0.5, 1 y 2
19Posiciones de entrada/salida de la batería, tamaño 3
In |
Entrada del agua |
Out |
Salida del agua |
R |
Conexiones por la derecha |
L |
Conexiones por la izquierda |
Hot |
Agua caliente, versión de 4 tubos (dos tuercas |
Cold |
de gas de 1/2 pulg.) |
Agua fría (dos tuercas de gas de 1/2 pulg.) |
|
4-w V |
Válvula de 4 vías |
2-w V |
Válvula de 2 vías |
Air |
Dirección del caudal de aire |
NEDERLANDS
Titels van afbeeldingen en verklaringen:
1Benodigde vrije ruimte zonder retourluchtplenum
2Benodigde vrije ruimte met retourluchtplenum
3Symbool Gevaar voor elektrische schokken
4Symbool Gevaar door bewegende delen
5Symbool Algemeen gevaar
6Tillen van de unit voor montage in verlaagd plafond 7/8 Op afschot plaatsen van de unit
9Condensaatafvoerleiding
9a Afschot van 20 mm/m over het horizontale leidingdeel
9b Sifon van 50 mm
10Meerdere units aangesloten op 1 condensaatopvangbak
10a Afschot van 20 mm/m
11Instellen van de verselucht regelaar
12Demontage van de ventilator
12a Verwijder het toegangspaneel
12b Plaats van de torx schroeven
12c Schuif de ventilator omlaag
13Condensator
14Regelaar ventilatorsnelheid
14a Laag toerental - rode kabel
14b Middelste toerental - grijze kabel
14c Hoog toerental - zwarte kabel
L Fase
15Klemmenstrook ventilatorsnelheid (optie) 15a Externe aansluiting
15b Motor
16Bedrading voor 42EM typen 2 en 3 16a Motor
16b Transformator
17Vervangen van het elektrisch verwarmingselement 17a Plaats van de schroeven
18Plaats van de batterij intrede/uitrede, typen 0.5, 1 en 2
19Plaats van de batterij intrede/uitrede, type 3
In |
Waterintrede |
Out |
Wateruittrede |
R |
Aansluitingen rechterzijde |
L |
Aansluitingen linkerzijde |
Hot |
Warm water, 4-pijps uitvoering (twee wartels |
Cold |
1/2” gas) |
Koud water (twee wartels 1/2” gas) |
|
4-w V |
Vierwegklep |
2-w V |
Tweewegklep |
Air |
Stromingsrichting van de lucht |
1 - PRECAUTIONS
1.1 - Operating limits
1.1.1 - Cooling mode
Minimum supply air temperature 12°C when the unit is installed where the ambient temperature is 27°C dry bulb with 65% relative humidity.
1.1.2 - Heating mode
Max. supply air temperature = 60°C to avoid damage of the discharge spigots. To avoid all risks of stratification, Carrier recommends to keep the supply air temperature below 35°C.
1.1.3 - Operating environment
The 42EM has been designed for indoor application in ‘urban’ conditions having a non-corrosive, dust-free and non-marine environment.
The concentrations of the following chemicals must not be exceeded in any event:
• |
SO2 |
< 0.02 ppm |
• |
H2S |
< 0.02 ppm |
• |
NO, NO2 |
< 1 ppm |
• |
NH3 |
< 6 ppm |
• |
N2O |
< 0.25 ppm |
Do not install a unit where flammable gases or products of an acidic or alkaline character may be present. The copper/ aluminium coil or components inside the unit could suffer irreparable corrosion damage in their presence.
1.1.4 - Recommended coil water quality
At installation handover, and then periodically every year, it is advised to analyse the water for bacteria (detection of ferro-bacteria, H2S-producing and sulphate-reducing bacteria) and chemicals (in order to avoid problems due to corrosion and scaling).
The water circuit must include all the necessary elements for the treatment of the water: filters, additives, intermediate exchangers, purges, drains, isolating valves, etc., according to the analysis results.
The results must be in accordance with the values shown below:
• Total hardness in mmol/l: |
1 < mmol/l < 1.5 |
|
• |
Chloride [CL-] |
< 10 mg/litre |
• |
Sulphate [SO 2-] |
< 30 mg/litre |
|
4 |
|
• |
Nitrate [NO3-] |
= 0 mg/litre |
• |
Dissolved iron: |
< 0.5 mg/litre |
• |
Dissolved oxygen: |
4 < [O2] < 9 mg/litre |
• |
Carbon dioxide [CO2] |
< 30 mg/litre |
• |
Resistivity: |
0 Ohm·m < Resistivity |
|
|
< 50 Ohm·m |
• |
pH: |
6.9 < pH < 8 |
1.2 - Clearances required
Without return air plenum: Fig. 1
With return air plenum: Fig. 2
1.3 - Receiving a shipment - installation methods
When receiving a shipment, check the condition of the goods and report any damage in transit to the shipping company. Do not unpack the units until just before they are due to be installed, and make sure they are as close as possible to the installation site when unpacking them. Do not place heavy articles of any sort on them.
1.4 - Supply voltage 230 V ± 10% - 50 Hz
Check that the supply voltage and frequency correspond to the values of the unit to be installed.
WARNING: Failure to take proper account of the above advice and unauthorised modification of the electrical connections will render the Carrier warranty on the product null and void.
2 - SAFETY CONSIDERATIONS
WARNING: Switch off the main electrical power supply to the unit and accessories (if installed) before doing any work on the unit.
2.1 - General
Installing, commissioning and servicing of the various components (unit, control system, hot and cold water system, air distribution system) can be dangerous unless certain aspects of the installation, such as the presence of mains electricity and hot or cold water in the air conditioning equipment, are taken into account. Only specially trained and qualified technicians and installers who have been fully trained on the product concerned are authorised to install, commission and service this equipment.
During servicing work, it is essential to apply all recommendations and instructions given in service leaflets, on labels or in the instructions delivered with the equipment, and to comply with any other relevant instructions.
Definition of the pictograms used:
•Electrical danger - Fig. 3
•Caution hand hazard - Fig. 4
•General danger - Fig. 5
Comply with all safety rules and regulations currently in force. Wear eye protectors and work gloves. Take care when moving or positioning equipment.
2.2 - Protection against electrocution
Only electricians qualified to the level recommended by the IEC (International Electrotechnical Commission) in its standard IEC 364, corresponding to Europe HD 384, France NFC 15 100 and UK IEE Wiring Regulations, may have access to electrical components. In particular it is obligatory to disconnect all power supplies to the unit and its accessories before carrying out any work. Disconnect the main power supply with an isolating device (not supplied by Carrier).

IMPORTANT: The components, which make up the different control loops described in this manual include electronic items. As such, they may generate or be harmed by electromagnetic interference unless they are installed and used in accordance with these instructions. The components making up these control systems conform to the requirements of electromagnetic compatibility in residential, commercial and light industrial areas. They also comply with the low-voltage directive.
2.3 - General installation conditions
IMPORTANT: The Carrier numeric controller, power module, or in general units fitted with controls loops must have an isolating device upstream (for example a doublepole circuit breaker). If necessary, an easily operated emergency stop device (such as a punch-button switch) must cut off the power to all equipment. These safety devices shall be sized and installed in accordance with IEC Recommendation 364, corresponding to Europe HD 384, France NFC 15 100 and UK IEE Wiring Regulations. These devices are not supplied by Carrier.
In general terms the following rules must be applied:
Upstream over-voltage protection |
|
Unit without electric heater |
T2A |
Standard unit sizes 0.5/1.0/2.1/3.1 with electric heater |
T10A |
Standard unit sizes 2.2/2.3/3.2/3.3 with electric heater |
T16A |
•Units must be provided with over-voltage protection upstream (not supplied by Carrier).
•The power disconnection device must be clearly labelled to identify which items of equipment are connected to it.
•The wiring of the components which make up the different control systems and the communication buses must be carried out in accordance with the latest rules and regulations by professional installers.
•The power supply cable must be doubly insulated and fixed using a cable clamp. A hole is provided for this purpose in the plastic Carrier controller housing. The cable must be clamped on the outer insulation.
•The control loop components must be installed in an environment, which conforms to their index of protection (IP).
•The maximum level of pollution is normally pollutant (level 2) and installation category II.
•The low-voltage wiring (communication bus) must be kept physically separate from the power wiring.
•In order to avoid interference with the communication links:
-Keep low-voltage wiring away from power cables and avoid using the same cable run (a maximum of 300 mm in common with the 230 V a.c., 30 A cable).
-Do not pass low-voltage wires through loops in the power cables.
-Do not connect heavy inductive loads to the same electrical supply (circuit breaker) used by the controllers, power modules or speed controllers.
-Use the screened cable type recommended by Carrier and make sure all cables are connected to the controllers and power modules.
2.4 - Caution for the control of the Atmosphera
IMPORTANT: It is not permitted to connect several Atmosphera units to the same control device (wall thermostat, electronic NTC controller, HDB controller, etc.)
2.5 - Conformity
This equipment has been declared to be in conformity with the main requirements of the following directives:
•Electromagnetic compatibility: 2004/108/EEC,
•Low-voltage directive: 2006/95/EEC.
3 - Installation OF THE UNIT
3.1 - Installing the unit in the false ceiling
The positioning of the unit must not create an obstacle that may lead to an unequal distribution and/or return flow of the air. The ceiling must be sufficiently even to allow a simple installation without danger from the unit. The supporting structure must be able to carry the unit weight and prevent deformation, breaks or vibrations during operation.
INSTALLATION PRECAUTIONS: During the installation process, remove all debris and construction material from the ducts to prevent any damage to the unit.
3.2 - Installation procedure
•Position the 42EM close to where it is to be installed in the ceiling void. For installation in a false ceiling use a hydraulic lift and a folding ladder to make the task easier (Fig. 6).
•Check that the clearances around the unit are sufficient to allow easy maintenance. Please refer to the diagram that shows the service clearances.
•Mark the position of the threaded hangers on the ceiling (if several units need to be installed, it may be advisable to produce a drilling template). The method of fixing the threaded hangers (not supplied by Carrier) depends on the ceiling type (maximum diameter of the threaded hangers is 10 mm). Once the threaded hangers are fixed to the ceiling, tighten the first nuts.
WARNING: When moving the units, do not use water pipes, condensate drain pan, valves or flexible pipes to lift them.
Lift the unit and align it on the threaded hangers, insert the second nuts and tighten them slightly.
NOTE: At this point do not tighten the nuts fully and do not clamp the unit up to the ceiling (leave a space between the ceiling and the unit). The nuts will be adjusted finally, when the unit has been connected to the pipework and ducts and levelled.
Level the unit (Fig. 7).
Adjust the hanger nuts so that the unit is inclined 0.5% towards the condensate drain pan. In the other direction (air flow direction) the unit must be perfectly level (Fig. 8).
Condensate drain pipe (Fig. 9): Use a flexible pipe with an inside diameter of 16 mm and provide a constant fall of 20 mm/m (9a) over the whole horizontal pipe run. Install a 50 mm (minimum) siphon (9b) to prevent gases and odours from flowing back into the ceiling void.
If several units are connected to a common collector, a device must be installed (Fig. 10). Before operating the unit, ensure that the water flows into the internal condensate drain pan by pouring some water into it. If problems are detected, check the drain pipe slope and look for possible obstructions. In all cases the connection duct(s) at the unit outlet must be insulated to prevent any condensate formation on the walls.
NOTE: The pressure losses of these ducts must be compatible with the unit performance. The duct must be as smooth as possible. Avoid sharp bends. Check that there are no leaks or kinks, and that there is no dirt or installation debris inside the ducts. Debris within the ducts might damage the fan wheel and the damper in the air diffusers.
When installation is complete - i.e. when the 42EM is attached to the ceiling, air ducts are complete, water manifolds are in position with stop valves ready on the connection stubs, and electrical installation is prepared - then connect the water pipes (Carrier recommends the use of flexible water pipes that can be supplied as an accessory). Each flexible pipe has a 1/2" gas screw connector, depending on the model. Ensure that a gasket (not supplied by Carrier) is installed between the screw connector and the stop valve.
When all units are installed, open the stop valves on the manifolds, bleed and then pressurize the circuits. To bleed the coils, slightly loosen the bleed screws. The installation can then be started.
NOTE: Do not switch on the power until all connections are made and earthed.
3.3 - Removal procedure
Switch off the unit power supply at the isolator provided for the purpose during installation (isolator not supplied by Carrier).
•Disconnect the power supply and connection cables.
•Close the isolating valves on the manifolds.
•Disconnect the flexible water pipes by unscrewing the gas connectors.
WARNING: Since the flexible water pipes do not have drain valves, a receiver must be provided to allow the cooling coil to be drained.
•Disconnect the supply air ducts.
•Disconnect the flexible condensate drain pipe. Drain the siphon into a suitable vessel.
•Support the unit lightly and release it by unscrewing the four nuts on the threaded hangers. Lower the unit carefully.
4 - COMPONENTS
4.1 - Fan motor assembly
4.1.1 - Fan assembly removal procedure
WARNING: Disconnect the power supply to the Atmosphera before carrying out any work on the unit.
Identify and note the wired fan speeds. If the fan develops a fault the whole assembly must be removed and replaced (Fig. 12).
•Remove the filter.
•Remove the fan access panel (12a).
•Disconnect the fan assembly power supply cables (power and control wiring for variable-speed motor).
•If necessary remove the controller (fixed with screws) to gain access to the maintenance screws of the panel supporting the fan.
•The fan assembly and its panel are held in place by four torx screws (T20) (12b). Remove these screws, then push in the two tabs on each side below the panel that supports the assembly and slide it down (12c).
•Remove the fan motor assembly.
NOTE: Be careful not to touch the fan blades during the removal process to avoid unbalancing the fans.
•For units with the electric heater option, disconnect the power supply cable to the heater. Withdraw the cable through the cable gland.
•Unscrew the electric heaters.
•Replacement of the fan motor assembly is by the reversal of the above procedure.
WARNING: The electrical connections to the fan motor must be made in accordance with the labels on the connector block.
For the variable-speed motor carefully separate the power wiring cable from the control wiring cable and pull them apart as far as possible.
4.1.2 - Capacitor replacement procedure (Fig. 13)
•Disconnect the power supply to the Atmosphera before carrying any work on the unit.
•Remove the filter.
•Remove the fan motor assembly access panel.
•Remove the capacitor that is attached to the motor chassis assembly.
•Disconnect the capacitor by withdrawing the flat spade connectors from the back of the capacitor.
•Replacement of the capacitor assembly is by the reversal of the above procedure.
4.1.3 - Fan wiring
42EM 0.5/1.0 wiring (multi-speerd version)
The fan motor has 6 speeds, provided by an auto-transformer, offering the installer greater flow control flexibility. Three speeds must be selected to allow connection of the fan motor in accordance with the applicable electromechanical or electronic regulations (minimum speed: terminal 6, maximum speed: terminal 1).
•42EM units equipped with factory-installed Carrier controller: Fig. 14.
•Units without electronic control: access to six selectable fan speeds from outside at the optional terminal block: Fig. 15 (15a = customer connection, 15b = motor).
Wiring for 42EM 2.1/2.2/2.3 and 42EM 3.1/3.2/3.3: Fig. 16
|
|
42EM size 2.1 |
42EM size 2.2 |
42EM size 2.3 |
|
|
42EM size 3.1 |
42EM size 3.2 |
42EM size 3.3 |
Neutral (com) |
1 |
White |
White |
White |
Phase connected |
2 |
Red |
Blue |
Black |
Not connected |
3 |
Blue |
Red |
Red |
Not connected |
4 |
Black |
Black |
Blue |
Wiring legend: |
= Terminal 6 |
Medium speed |
= Grey wire (14b) |
Minimum speed |
|||
Maximum speed |
= Terminal 1 |
High speed |
= Black wire (14c) |
Low speed |
= Red wire (14a) |
L |
= Live |
4.2 - Water coil
4.2.1 - Coil removal procedure
WARNING: Disconnect the power supply to the Atmosphera before carrying out any work on the unit.
•Close the isolating valves on the manifolds.
•Unscrew the union nuts to disconnect the flexible water pipes.
•Remove the valve actuators taking care to identify the cooling and heating valves.
•Disconnect the flexible condensate drain pipe which is held in place by a collar (the collar is not supplied by Carrier).
•Remove the two-way or four-way water flow control valve bodies. Depending how the Atmosphera is configured, the four-way valve coupling may be fitted with a heating/cooling changeover switch, if so do not remove it.
•Remove the 4 torx screws (T20) and slide out the coil and drain pan assembly.
•Replacement is by the reversal of the procedure described above. Ensure that all gaskets are changed (new gaskets fitted) and that the inlet and outlet connections to the coil are made correctly using an appropriate sealing compound applied to the valve body.
•Bleed all air from the coil during refilling.
ATTENTION: It is advisable to tighten the valve body to the coils with caution (15 N·m is sufficient) to ensure they are not damaged.
NOTE: It is possible to change the coil connection on site by changing the condensate pan and coil assembly in the guides.
For Size 3 the water inlet and outlet need to be reversed to achieve the published performance.
4.2.2 - Coil inlet/outlet positions
Water inlets/outlets, sizes 0.5, 1 and 2: Fig. 18.
Water inlets/outlets, size 3: Fig. 19.
ATTENTION: Carefully observe the direction indicated by the arrow on the valves, based on the connection side and the valve type.
4.3 - Duct connection spigots
These are manufactured from high density plastic with a VO fire rating, more or less equivalent to class M1 (French standard). They are encased inside the unit. The ducts should be fixed to these spigots using circular collars or adhesive. Screws and rivets should not be used.
WARNING: In order to guarantee good air tightness, the duct should overlap the whole of the spigot.
Make sure that the maximum supply air temperature does not exceed 60°C.
Do not lift or support the unit using the spigots, place loads on the spigots or damage the spigots during installation or operation.
4.4 - Optional filter and filter access
4.4.1 - Description
The Carrier Atmosphera is fitted with a 85% gravimetric filter (G3), according to standard EN 779. Medium fire rating M1, metal wire frame.
Different filter access options are available to suit different site requirements:
•Unit with non-ducted return air: Access is from the rear of the unit.
•Unit with ducted return air: Access is from below.
4.4.2 - Air filter replacement
Air filters should be changed regularly. Filter life depends on the rate at which the filter becomes clogged, which depends upon the cleanliness of the working environment.
If clogged filters are not changed they can increase the air pressure drop, trapped dust particles may be given off and entrained in the air supply, and the general performance of the Atmosphera may be degraded (as the air flow reduces).
NOTE: When installing an Atmosphera in a ceiling void, check that no T-bars will obstruct filter access and removal.
4.5 - Fresh air controller
4.5.1 - Fresh air controller with constant air volume
The 42EM Atmosphera can be fitted with a constant fresh air flow controller allowing the introduction of fresh air and the air change rate to be controlled.
The following range of fresh air controllers is available: Option a: 8.3 l/s (30 m3/h) (-10%; +20%)
Option b: 16.6 l/s (60 m3/h) (-10%; +20%)
10
Options a and b: the diameter of the spigot housing the fresh air flow controller is 125 mm.
The 16.6 1/s (60 m3/h) fresh air controller may be modified on site by relocating or removing two plastic restrictors in order to increase the maximum constant fresh air flow capacity to 44.4 1/s (160 m3/h). A label on the 42EM shows how to adjust the two plastic restrictors (Fig. 11).
Modification procedure
•Disconnect the fresh air duct from the spigot on the Atmosphera.
•Remove or reposition the two plastic restrictors, following the fresh air flow controller.
•Reconnect the fresh air duct to the spigot.
4.6.2 - Actuator replacement procedure
The actuators on both the chilled water and the hot water valves may be replaced if either develops a fault.
•Disconnect the power supply to the unit before carrying out any work on a unit.
•Disconnect the actuator power supply cable.
-230 V on/off type actuator used with the Carrier numeric controller: Disconnect the actuator power supply cable fitted with a quick connector.
-230 V on/off actuator used with an electronic thermostat: Remove the plastic protection cover held in place with two screws. Disconnect the actuator power supply cable connected to the quick connector. This can be done by pressing down the spring tongue using a screwdriver and pulling out the wire from the appropriate terminal.
•Uncouple the faulty actuator. Refitting is by the reversal of the procedure described above.
WARNING: Ensure that the actuator is firmly screwed to the valve body (maximum torque 15 N·m).
4.6.3 - Valve body replacement procedure
|
|
• Disconnect the power supply before carrying out any |
|
|
work on a unit. |
|
|
• Close the isolating valves on the manifolds. |
4.5.2 - Fresh air controller with variable air volume |
• Unscrew the union nuts to disconnect the flexible water |
|
pipes. |
||
The 42EM Atmosphera can be equipped with an optional |
• Remove the valve actuators taking care to identify the |
|
variable fresh air flow controller from 0 to 55 l/s (0 to 200 |
cooling and heating valves. |
|
m3/h). |
|
• Disconnect the flexible condensate drain pipe which is |
This is connected to the numeric Carrier controller and |
held in place by a collar (the collar is not supplied by |
|
Carrier). |
||
can regulate the fresh air intake in two ways: |
• Remove the two-way or four-way water flow control |
|
• either using a fixed rate set by the installer that can be |
valve bodies. Depending how the Atmosphera is con- |
|
reconfigured as required |
figured, the four-way valve coupling may be fitted with |
|
• or based on the CO2 level; in this case it is connected |
a heating/cooling changeover switch, if so do not |
|
to a CO2 |
sensor via the Carrier numeric controller |
remove it. |
(the CO2 |
sensor is located opposite the fresh air inlet). |
• Remove the 4 torx screws (T20) and slide out the coil |
NOTE: With the variable fresh air flow controller the |
and drain pan assembly. |
|
• Fit the new valve body to the coil (fit new gaskets). |
||
upstream pressure in the fresh air duct must be 180 Pa. |
• Refit the coil and condensate assembly. |
|
4.6 - Optional water flow control valves |
• Reconnect the flexible condensate drain pipe which is |
|
held in place by a collar (the collar is not supplied by |
||
|
|
Carrier). |
These valves are two-way or four-way type, with a body |
• Refit the valve actuators taking care to ensure that |
|
designed to withstand a 16 bar operating pressure. |
they are correctly fixed to the valve body. |
|
|
|
• Reconnect the flexible water pipes by tightening the |
4.6.1 - Electrothermal actuator (on/off) |
union nuts. Retighten all the water connections and |
|
The actuator is a 230 V a.c. on/off type. |
ensure that all gaskets have been changed and correctly |
|
|
|
fitted (maximum torque 15 N·m). |
To enable the installation to be filled with water, the |
• Open the isolating valves on the manifolds and purge |
|
water circuits to be equalised and the units to be purged, |
all air from the system. |
|
the actuators must be connected to the power supply to |
• Check that there are no leaks and reconnect the power |
|
open the valves via a command from the wall thermostats |
to the Atmosphera. |
|
or from the BMS. |
WARNING: When replacing a valve always ensure that |
|
|
|
|
|
|
the direction of flow through the valve is as shown by the |
|
|
arrow on the valve body. If the direction of flow is wrong, |
|
|
the valve body will deteriorate rapidly. |
11
4.7 - Flexible pipe option |
Electric heater replacement procedure: |
Minimum bending radius: |
• Remove the filter. |
• Remove the fan motor assembly access panel. |
|
• non-insulated pipes 72 mm |
• Identify and note the fan speeds wired to the auto- |
• insulated pipes 106 mm. |
transformer terminal block. Disconnect the power |
4.8 - Optional electric heater |
supply cable. |
• Remove the fan motor assembly. |
WARNING: Disconnect the power supply before carrying out any work on the unit.
NOTE: Be careful not to touch the fan blades during the removal process to avoid unbalancing the fans.
If the electric heater develops a fault, it must be replaced; |
• Disconnect the electric heater power supply cables |
this requires the removal of the fan motor assembly: Fig. 17 |
and remove them through the cable conduit. |
(17a = screw). |
• Unscrew the defective heater(s) and replace it (them). |
CAUTION: Do not touch the live metal heater elements |
• Replacement of the fan motor assembly is by the |
reversal of the above procedure. |
|
when the electric heater is connected to the power supply. |
|
5 - codification |
|
|
|
|
|
|
|
|
|
|
|
|
|
|
|
|
|
|
|
|
|
Fan motor speed wiring |
|
|
|
|
|
|
|
|
|
|
|
|
|
|
|
|
|
|
|
|
|
|
|
|
||||||||||||||||
|
|
|
|
|
|
|
|
|
|
|
|
|
|
|
|
|
|
|
|
|
|
|
|
|
|
|
|
|
|
|
|
|
|
|
|
|
|
|
|
|
|
|
|
|
|
|
|
|
|
|
|
|
|
|
|
|
|
|
|
|
|
|
|
|
|
|
|
|
Codification (last digit) |
|
|
|
|
|
|
|
|
|
|
|
|
|
|
|
|
|
|
|
|
|
|
|
|
|
|
|
|
|
|
|
|
|
|
|
|
|
|
|
|
|
|
W |
|
|
|
||||||
|
|
|
|
|
|
|
|
or option 600 |
|
|
|
|
|
|
|
|
|
|
|
|
|
|
|
|
|
|
|
|
|
|
|
|
|
|
|
|
|
|
|
|
|
|
|
|
|
|
|
|
|
|
|
|
|
|
|
|
||||
|
|
|
|
set |
|
|
Red wire |
|
|
|
|
|
|
|
|
|
|
|
|
|
|
|
|
|
|
|
|
|
|
|
|
|
|
|
|
|
|
|
|
|
|
|
|
|
|
|
|
|
|
|
|
|
|
|
|
|
|
|||
|
|
|
|
|
|
|
|
|
|
|
|
|
|
|
|
|
|
|
|
|
|
|
|
|
|
|
|
|
|
|
|
|
|
|
|
|
|
|
|
|
|
|
|
|
|
|
|
|
|
|
|
|
|
|
|
|
|
|
||
|
|
|
|
|
|
Grey wire |
|
|
|
|
|
|
|
|
|
|
|
|
|
|
|
|
|
|
|
|
|
|
|
|
|
|
|
|
|
|
|
|
|
|
|
|
|
|
|
|
|
|
|
|
|
|
|
|
|
|
||||
|
|
|
|
Fan |
|
|
|
|
|
|
|
|
|
|
|
|
|
|
|
|
|
|
|
|
|
|
|
|
|
|
|
|
|
|
|
|
|
|
|
|
|
|
|
|
|
|
|
|
|
|
|
|
|
|
|
|
|
|
|
|
|
|
|
|
|
|
Black wire |
|
|
|
|
|
|
|
|
|
|
|
|
|
|
|
|
|
|
|
|
|
|
|
|
|
|
|
|
|
|
|
|
|
|
|
|
|
|
|
|
|
|
|
|
|
|
|
|
|
|
||||
|
|
|
|
|
|
|
|
|
|
|
|
|
|
|
|
|
|
|
|
|
|
|
|
|
|
|
|
|
|
|
|
|
|
|
|
|
|
|
|
|
|
|
|
|
|
|
|
|
|
|
|
|
|
|
|
|
|
|
|
|
|
|
|
|
|
|
|
|
Wire marked L |
|
|
|
|
|
|
|
|
|
|
|
|
|
|
|
|
|
|
|
|
|
|
|
|
|
|
|
|
|
|
|
|
|
|
|
|
|
|
|
|
|
|
|
|
|
|
|
|
|
|
||
|
|
|
|
|
|
|
|
|
|
|
|
|
|
|
|
|
|
|
|
|
|
|
|
|
|
|
|
|
|
|
|
|
|
|
|
|
|
|
|
|
|
|
|
|
|
|
|
|
|
|
|
|
|
|
|
|
|
|||
|
|
|
|
|
|
|
|
|
|
|
|
|
|
|
|
|
Terminal marking (standard wiring), option 600 not selected |
|
|
|
|
|
|
|
|
|
|
|
|
|
|
|
|
|
||||||||||||||||||||||||||
|
|
|
|
|
|
|
|
|
|
|
|
|
|
|
|
|
|
|
|
|
|
|
|
|
|
Six wired |
||||||||||||||||||||||||||||||||||
|
|
|
|
|
|
|
|
|
|
|
|
|
|
|
|
|
|
|
|
|
|
|
|
|
|
|
||||||||||||||||||||||||||||||||||
|
|
|
|
|
|
|
|
|
|
|
|
|
|
|
|
|
|
|
|
|
|
|
|
|
|
|
|
|
|
|
|
|
|
|
|
|
|
|
|
|
|
|
|
|
|
|
|
|
|
|
|
|
|
|
|
|
||||
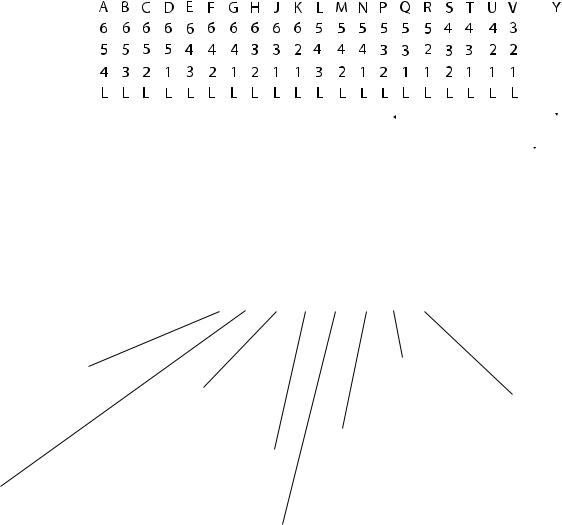
NOTE: Terminal 1 = highest speed, Terminal 6 = lowest speed. |
|
|
|
|
|
|
|
|
|
|
|
|
|
|
|
|
|
|
|
|
|
|
|
|
|
|
speeds |
|
||||||||||||||||||||||||||||||||
|
|
|
|
|
|
|
|
|
|
|
|
|
|
|
|
|
|
|
|
|
|
|
|
|
|
|
|
|
|
|
|
|
|
|
|
|
|
|
|
|
|
|
|
|
|
|
|
|
|
|
|
|
|
Variable- |
speed |
|
||||
|
|
|
|
|
|
|
|
|
|
|
|
|
|
|
|
|
|
|
|
|
|
|
|
|
|
|
|
|
|
|
|
|
|
|
|
|
|
|
|
|
|
|
|
|
|
|
|
|
|
|
|
|
|
LEC motor |
|
|||||
|
|
|
|
|
|
|
|
|
|
|
|
|
|
|
|
|
|
|
|
|
|
|
|
|
|
|
|
|
|
|
|
|
|
|
|
|
|
|
|
|
||||||||||||||||||||
|
|
|
|
|
|
|
|
|
Product type |
|
Size |
|
|
Modification code |
Coils |
andSupply airreturnplenum |
|
Valves |
|
motorsValve |
|
Control |
|
Sensors |
|
andFilteraccess |
|
airFresh |
|
wiringMotor |
|
|
|
|
|
|
|
|
||||||||||||||||||||||
|
|
|
|
|
|
|
|
|
|
|
|
|
|
|
|
|
|
|
|
|
|
|
|
|
|
|
|
|
|
|
|
|
|
|
|
|
|
|
|
|
|
|
|
|
|
|
|
|
|
|
|
|||||||||
|
|
|
|
|
|
|
|
|
|
|
|
|
|
|
|
|
|
|
|
|
|
|
|
|
|
|
|
|
|
|
|
|
|
|
|
|
||||||||||||||||||||||||
Product reference |
|
4 |
2 |
|
E |
|
M |
N |
|
N |
|
C |
A |
|
|
A |
|
|
A |
|
A |
|
|
A |
|
|
A |
|
A |
|
A |
|
A |
|
|
|
|
|
|
|
|
|||||||||||||||||||
Digit |
|
|
|
|
1 |
2 |
|
3 |
|
|
4 |
5 |
|
|
|
6 |
7 |
8 |
|
|
9 |
|
|
10 |
|
11 |
|
12 |
|
13 |
|
14 |
|
|
15 |
|
|
16 |
|
|
|
|
|
|
|
|
|
|||||||||||||
|
|
|
|
|
|
|
|
|
|
|
|
|
|
|
|
|
|
|
|
|
|
|
|
|||||||||||||||||||||||||||||||||||||
|
|
|
|
|
|
|
|
|
|
|
|
|
|
|
{ |
|
|
|
|
|
|
|
|
|
|
|
|
|
|
|
|
|
|
|
|
|
|
|
|
|
|
|
|
|
|
|
|
|
|
|
|
|
|
|
|
|
||||
|
0 |
5 |
|
|
|
|
|
|
|
|
|
|
|
|
|
|
|
|
|
|
|
|
|
|
|
|
|
|
|
|
|
|
|
|
|
|
|
|
|
|
|
|
|
|
|
|
|
|
|
|
|
|
|
|
|
|
|
|
|
|
|
|
|
|
|
|
|
|
|
|
|
|
|
|
|
|
|
|
|
|
|
|
|
|
|
|
|
|
|
|
|
|
|
|
|
|
|
|
|
|
|
|
|
|
|
|
|
|
|
|
|
|
|
|
|
|
|
||||
|
1 |
0 |
|
A |
2 pipes right |
|
|
|
|
|
|
|
|
|
|
|
|
|
|
|
|
|
|
|
|
|
|
|
|
|
|
|
|
|
|
|
|
|
|
|
|
|
|
|
|
|
|
|
|
|
|
|
|
|
|
|
|
|||
|
2 |
1 |
|
B |
2 pipes left |
|
|
|
|
|
|
|
|
|
|
|
|
|
|
|
|
|
|
|
|
|
|
|
|
|
|
|
|
|
|
|
|
|
|
|
|
|
|
|
|
|
|
|
|
|
|
|
|
|
|
|
|
|
|
|
|
2 |
2 |
|
C |
4 pipes right |
|
|
|
|
|
|
|
|
|
|
|
|
|
|
|
|
|
|
|
|
|
|
|
|
|
|
|
|
|
|
|
|
|
|
|
|
|
|
|
|
|
|
|
|
|
|
|
|
|
|
|
|
|||
|
2 |
3 |
|
D |
4 pipes left |
|
|
|
|
|
|
|
|
|
|
|
|
|
|
|
|
|
|
|
|
|
|
|
|
|
|
|
|
|
|
|
|
|
|
A |
|
G3 rear access |
|
|
|
|
|
|
|
|
|
|
|
|
||||||
|
3 |
1 |
|
E |
2 pipes/2 wires, right, low pressure |
|
|
|
|
|
|
|
|
|
|
|
|
|
|
|
|
|
|
|
|
|
|
|
|
|
|
|
|
B |
G3 access from below |
|
|
|
||||||||||||||||||||||
|
3 |
2 |
|
F |
2 pipes/2 wires left, low pressure |
|
|
|
|
|
|
|
|
|
|
|
|
|
|
|
|
|
|
|
|
|
|
|
|
|
|
|
|
|
|
|
|
|
|
|
|
|
|
|
|
|
|
|
|
|
|
|||||||||
|
|
|
|
- |
|
None |
|
|
|
|
|
|
|
|
|
|
|
|
|
|
|
|
|
|
|
|
|
|
|
|
|
|
|
|
|
|
|
|
|
|
|
|
|
|
||||||||||||||||
|
3 |
3 |
|
G |
2 pipes/2 wires, right, high pressure |
|
|
|
|
|
C |
|
2-way valve |
|
|
|
|
|
|
|
|
|
|
|
|
|
|
|
|
|
|
|
|
|
|
|
|
- |
|
None |
|
|||||||||||||||||||
|
|
|
|
|
H |
2 pipes/2 wires left, high pressure |
|
|
|
|
|
D |
|
4-way valve |
|
|
|
|
|
|
|
|
|
|
|
|
|
|
|
|
|
|
|
|
|
|
|
|
A |
125 mm ø fresh air spigot only |
RIGHT |
|||||||||||||||||||
|
|
|
|
|
|
|
|
|
|
|
|
|
|
|
|
|
|
|
|
|
|
|
|
|
|
|
|
|
|
- |
|
|
None |
|
|
|
|
|
|
|
B |
8.3 l/s (30 m3/h) |
||||||||||||||||||
|
|
|
|
|
|
|
|
|
|
|
|
|
|
|
|
|
|
K |
4-way valve + flexible piping |
|
|
|
|
|
|
|
|
|
|
|
|
|||||||||||||||||||||||||||||
|
|
|
|
|
|
|
|
|
|
|
|
|
|
|
|
|
|
|
|
|
|
|
|
|
|
|
|
|
|
C |
|
16.6-44.4 l/s (21/28/36) 60-160 m3/h |
||||||||||||||||||||||||||||
|
|
|
|
|
|
|
|
|
|
|
|
|
|
|
|
|
|
J |
2-way valve + flexible piping |
|
|
|
|
A |
|
Return air sensor |
|
|
|
(75/100/130) |
|
|
|
|
|
|
|
|||||||||||||||||||||||
|
|
|
|
|
|
|
|
|
|
|
|
|
|
|
|
|
|
|
|
|
|
|
|
|
|
|
|
|
|
|
|
|
|
|
|
|
|
|
|
|
|
|
|
|
|
|||||||||||||||
|
|
|
|
|
|
|
|
|
|
|
|
|
|
|
|
|
|
|
|
|
|
|
|
|
|
|
|
|
|
|
|
|
|
B |
|
Supply air sensor |
|
E |
|
Motorised fresh air valve adapter ø |
|
|||||||||||||||||||
|
|
|
|
|
|
|
|
|
|
|
|
|
|
|
|
|
|
|
|
|
|
|
|
0 |
|
None |
|
|
|
|
|
|
|
|
||||||||||||||||||||||||||
|
|
|
|
|
|
|
|
|
|
|
|
|
|
|
|
|
|
|
|
|
|
|
|
|
A |
|
230 V on/off |
|
|
C |
|
Change-over sensor |
|
|
|
125 mm |
|
|||||||||||||||||||||||
|
|
|
|
|
|
|
|
|
|
|
|
|
|
|
|
|
|
|
|
|
|
|
|
|
|
|
|
|
|
|||||||||||||||||||||||||||||||
|
|
|
|
|
|
|
|
|
|
|
|
|
|
|
|
|
|
|
|
|
|
|
|
|
|
|
|
|
|
|
|
|
|
|
D |
|
A + B |
|
|
|
|
|
|
|
J |
125 mm ø fresh air spigot only |
|
|||||||||||||
|
|
|
|
|
|
|
|
|
|
|
|
|
|
|
|
|
|
|
|
|
|
|
|
|
|
|
|
|
|
|
|
|
|
|
|
|
|
|
|
|
|
|
K |
8.3 l/s (30 m3/h) |
|
|||||||||||||||
|
|
|
|
|
|
|
|
|
|
|
|
|
|
|
|
|
|
|
|
|
|
|
|
|
|
|
|
|
|
|
|
|
|
|
E |
A + B + C |
|
|
|
|
|
LEFT |
||||||||||||||||||
|
|
B |
Modular unit with 2 supply air spigots |
|
|
|
|
|
|
|
|
|
|
|
|
|
|
|
|
|
|
|
|
|
|
|
|
F |
|
A + C |
|
|
|
|
|
|
|
L |
16.6-44.4 l/s (21/28/36) 60-160 m3/h |
|||||||||||||||||||||
|
|
C |
Modular unit with 3 supply air spigots |
|
|
|
|
|
|
|
|
|
|
|
|
|
|
|
|
|
|
|
|
|
|
|
|
|
|
|
|
|
|
|
|
|
|
(75/100/130) |
|
|
|
|
|
|
||||||||||||||||
|
|
G |
Modular unit with 1 supply air spigot at the end (in-line configuration) |
|
|
|
|
|
|
|
|
|
|
|
|
|
|
G |
|
B + C |
|
|
|
|
|
|
|
N |
Motorised fresh air valve adapter ø |
|
||||||||||||||||||||||||||||||
|
|
|
|
|
|
|
|
|
|
|
|
|
|
|
|
|
|
|
|
|
|
|
|
|
|
|
|
|
||||||||||||||||||||||||||||||||
|
|
H |
Modular unit with 1 supply air spigot at the side (opposite coil) |
|
|
|
|
|
|
|
|
|
|
|
|
|
|
|
|
|
|
|
|
|
|
|
|
|
|
|
|
|
|
125 mm |
|
|||||||||||||||||||||||||
|
|
J |
Modular unit with 4 supply air spigots |
|
|
|
|
|
|
|
|
|
|
|
|
|
|
|
|
|
- |
|
|
None |
|
|
|
|
|
|
|
|
|
|
|
|
|
|
|
|
|
|
|
|
|
|
|
|
|
|
|
|||||||||
|
|
|
|
|
|
|
|
|
|
|
|
|
|
|
|
|
|
|
|
A |
|
NTC |
|
|
|
|
|
|
|
|
|
|
|
|
|
|
|
|
|
|
|
|
|
|
|
|
|
|
|
|||||||||||
|
|
K |
Modular unit with 5 supply air spigots |
|
|
|
|
|
|
|
|
|
|
|
|
|
|
|
|
|
|
|
|
|
|
|
|
|
|
|
|
|
|
|
|
|
|
|
|
|
|
|
|
|
|
|
|
|
|
|||||||||||
|
|
|
|
|
|
|
|
|
|
|
|
|
|
|
|
|
|
|
|
B |
|
HDB |
|
|
|
|
|
|
|
|
|
|
|
|
|
|
|
|
|
|
|
|
|
|
|
|
|
|
|
|||||||||||
|
|
M |
Return air plenum 1 spigot and modular unit 1 supply air spigot (in-line configuration) |
|
|
|
|
|
|
|
|
|
|
|
|
|
|
|
|
|
|
|
|
|
|
|
|
|
|
|
|
|
|
|
||||||||||||||||||||||||||
|
|
|
|
|
D |
NTC + IAQ board |
|
|
|
|
|
|
|
|
|
|
|
|
|
|
|
|
|
|
|
|
|
|||||||||||||||||||||||||||||||||
|
|
N |
Return air plenum 1 spigot and modular unit 1 supply air spigot (U-shape configuration) |
|
|
|
|
|
|
|
|
|
|
|
|
|
|
|
|
|
|
|
|
|
|
|
|
|||||||||||||||||||||||||||||||||
|
|
|
|
|
E |
Terminal block with plastic cover |
|
|
|
|
|
|
|
|
|
|
|
|
|
|
|
|
|
|||||||||||||||||||||||||||||||||||||
|
|
P |
Return air plenum 2 spigots and modular unit 2 supply air spigots |
|
|
|
|
|
|
|
|
|
|
|
|
|
|
|
|
|
|
|
|
|
|
|
|
|
|
|||||||||||||||||||||||||||||||
|
|
|
|
|
|
|
|
|
|
|
|
F |
|
E + relay |
|
|
|
|
|
|
|
|
|
|
|
|
|
|
|
|
|
|
|
|
|
|
|
|
||||||||||||||||||||||
|
|
Q |
Return air plenum 3 spigots and modular unit 3 supply air spigots |
|
|
|
|
|
|
|
|
|
|
|
|
|
|
|
|
|
|
|
|
|
|
|
|
|
|
|
|
|
|
|
|
|
|
|
||||||||||||||||||||||
|
|
|
|
|
|
|
|
|
|
|
|
G |
E + relay + fuse holder |
|
|
|
|
|
|
|
|
|
|
|
|
|
|
|
|
|
|
|
|
|
||||||||||||||||||||||||||
|
|
R |
Return air plenum 4 spigots and modular unit 4 supply air spigots |
|
|
|
|
|
|
|
|
|
|
|
|
|
|
|
|
|
|
|
|
|
|
|
|
|
|
|
|
|
|
|
||||||||||||||||||||||||||
|
|
|
|
|
|
|
|
|
|
|
|
K |
NTC + fuse holder |
|
|
|
|
|
|
|
|
|
|
|
|
|
|
|
|
|
|
|
|
|
||||||||||||||||||||||||||
|
|
S |
Return air plenum 5 spigots and modular unit 5 supply air spigots |
|
|
|
|
|
|
|
|
|
|
|
|
|
|
|
|
|
|
|
|
|
|
|
|
|
|
|
|
|
|
|
||||||||||||||||||||||||||
|
|
|
|
|
|
|
|
|
|
|
|
L |
NTC + IAQ board + fuse holder |
|
|
|
|
|
|
|
|
|
|
|
|
|
|
|
|
|
||||||||||||||||||||||||||||||
|
|
T |
Compact unit with 1 return air spigot and 1 supply air spigot |
|
|
|
|
|
|
|
|
|
|
|
|
|
|
|
|
|
|
|
|
|
|
|
|
|
|
|||||||||||||||||||||||||||||||
|
|
|
|
|
|
|
|
|
|
|
|
M |
HDB + fuse holder |
|
|
|
|
|
|
|
|
|
|
|
|
|
|
|
|
|
|
|
|
|
||||||||||||||||||||||||||
|
|
U |
Compact unit with 2 return air spigots and 2 supply air spigots |
|
|
|
|
|
|
|
|
|
|
|
|
|
|
|
|
|
|
|
|
|
|
|
|
|
|
|
|
|
|
|
||||||||||||||||||||||||||
|
|
|
|
|
|
|
|
|
|
|
|
R |
E + fuse holder |
|
|
|
|
|
|
|
|
|
|
|
|
|
|
|
|
|
|
|
|
|
|
|
|
|||||||||||||||||||||||
|
|
V |
Compact unit with 3 return air spigots and 3 supply air spigots |
|
|
|
|
|
|
|
|
|
|
|
|
|
|
|
|
|
|
|
|
|
|
|
|
|
|
|
|
|
|
|
|
|
|
|||||||||||||||||||||||
|
|
|
|
|
|
|
|
|
|
|
|
|
|
|
|
|
|
|
|
|
|
|
|
|
|
|
|
|
|
|
|
|
|
|
|
|
|
|
|
|
|
|
|
|||||||||||||||||
12
1 - PRECAUTIONS
1.1 - Limites d’utilisation
1.1.1 - Mode froid
Température mini de soufflage 12°C lorsque l’appareil est installé dans une ambiance de 27°C BS (bulbe sec) et 65% HR (humidité relative).
1.1.2 - Mode chaud
La température de soufflage ne doit pas excéder 60°C sous peine de détérioration des supply air spigots. Carrier recommande de ne pas dépasser la température de 35°C au soufflage pour éviter tout risque de stratification, cause d’inconfort.
1.1.3 - Environnement d’utilisation
L’Atmosphera 42EM a été conçu pour fonctionner dans une atmosphère intérieure “urbaine” non corrosive, non empoussiérée, dans un environnement non marin. Les teneurs en composants chimiques ci-dessous ne doivent en aucun cas être dépassées :
• |
SO2 |
< 0.02 ppm |
• |
H2S |
< 0.02 ppm |
• |
NO, NO2 |
< 1 ppm |
• |
NH3 |
< 6 ppm |
• |
N2O |
< 0.25 ppm |
Ne pas installer l’unité dans des atmosphères comportant des gaz inflammables, ou des produits acides ou alcalins. La batterie en cuivre/aluminium et les composants internes pourraient subir une corrosion irrémédiable.
1.1.4 - Qualité de l’eau recommandée pour les batteries à eau
A la réception de l’installation, puis périodiquement tous les ans, il est conseillé de réaliser une analyse bactériologique (détection des ferro-bactéries, des bactéries productrices de H2S et réductrices des sulfates) et chimique de l’eau (afin d’éviter les problèmes d’entartrage et de corrosion). Le circuit d’eau doit inclure les éléments nécessaires au traitement de l’eau : filtres, additifs, échangeurs intermédiaires, purges, évents, vanne d’isolement etc... en fonction des résultats de l’analyse.
Les résultats d’analyse doivent correspondre aux valeurs
mentionnées ci-dessous : |
|
||
• Dureté totale en mmol/l |
1 < mmol/l < 1.5 |
||
• |
Chlorure CL-] |
< 10 mg/l |
|
• |
Sulfate [SO 2-] |
< 30 mg/l |
|
• |
|
4 |
= 0 mg/l |
Nitrate [NO -] |
|||
• |
Fer dissous |
3 |
< 0,5 mg/l |
|
|||
• |
Oxygène dissous |
4 < [O2] < 9 mg/l |
|
• |
Gaz carbonique [CO2] |
< 30 mg/l |
|
• |
Résistivité |
|
0 Ohm·m < Résistivité |
|
|
|
< 50 Ohm·m |
• |
pH |
|
6.9 < pH < 8 |
1.2 - Réservation pour maintenance
Sans plenum de reprise: Fig. 1
Avec plenum de reprise: Fig. 2
1.3 - Réception - Lieu d’implantation
Dès réception, vérifier l’état du matériel, déceler tout dommage éventuel dû au transport et adresser toute plainte à ce sujet par écrit au transporteur. Ne déballer qu’au moment de l’installation finale, le plus près possible du lieu d’implantation, et ne pas placer d’outils lourds sur l’emballage dans la période d’attente.
1.4 - Tension d’alimentation 230 V ± 10% - 50 Hz
Vérifier que la tension et la fréquence de l’alimentation correspondent à celles nécessaires à l’unité à installer.
ATTENTION: Carrier suspend l’effet de la garantie si ces points ne sont pas respectés, ou si des modifications électriques ont été apportées aux raccordements d’origine.
2 - CONSIDERATIONS DE SECURITE
NOTE: Avant toute intervention sur l’unité, couper l’alimentation électrique générale de l’unité et des accessoires éventuels.
2.1 - Généralités
L’installation, la mise en service et les opérations d’entretien des différents composants du système (unité, système de régulation, réseaux d’eau chaude, eau froide, aéraulique) peuvent être dangereuses si l’on ne tient pas compte de certains facteurs propres à l’installation tels que la présence de la tension secteur et la présence d’eau chaude ou d’eau froide dans le matériel de traitement d’air. Seuls des installateurs et des techniciens spécialement formés et qualifiés, ayant reçu une formation approfondie sur le produit concerné, sont autorisés à installer, à mettre en service et à entretenir ce matériel.
Lors de toute intervention, il convient d’appliquer toutes les recommandations et instructions qui figurent dans les notices d’entretien, sur les étiquettes ou dans les instructions accompagnant l’ensemble du matériel, ainsi que toutes les autres consignes de sécurité applicables.
Définition des pictogrammes utilisés:
•Danger électrique: Fig. 3.
•Attention à vos mains: Fig. 4.
•Danger général: Fig. 5.
Respecter tous les réglements et codes de sécurité en vigueur. Porter des lunettes de sécurité et des gants de travail. Manipuler avec précaution les matériels lors des opérations de manutention et de pose.
2.2 - Protection contre les électrocutions
Seul le personnel qualifié au sens des recommandations de la norme CEI 364 (Commission Electrique Internationale) équivalent à Europe HD 384, France NFC 15 100 ou UK IEE Wiring Regulation, doit avoir accès aux composants électriques. Il est en particulier obligatoire de couper l’ensemble des alimentations électriques de l’unité avant toute intervention. Couper l’alimentation principale à l’aide du dispositif de sectionnement (hors fourniture Carrier).
13

IMPORTANT: Les composants constituant les différents systèmes de régulation proposés, comportent de l’électronique. A ce titre, ils peuvent générer des perturbations électromagnétiques ou être perturbés s’ils ne sont pas installés et utilisés conformément aux présentes instructions. Les composants constituant ces boucles de régulation sont conformes aux exigences de compatibilité électromagnétique pour les environnements résidentiels, commerciaux et de l’industrie légère. Ils sont également conformes à la directive basse tension.
2.3 - Préconisation générale d’installation
IMPORTANT: Les régulateurs doivent posséder en amont un dispositif de sectionnement (disjoncteur bipolaire par exemple). En cas de nécessité, un dispositif d’arrêt d’urgence (interrupteur de type coup de poing par exemple) accessible doit permettre la mise hors tension de tous les appareils. Ils devront être dimensionnés et installés selon la recommandation CEI 364 équivalente à Europe HD 384, France NFC 15 100 ou UK IEE Wiring Regulation. Ces dispositifs sont hors fourniture Carrier.
D’une manière générale les règles suivantes doivent être observées:
Protection amont contre les surintensités |
|
Appareil sans batterie électrique |
T2A |
Appareil standard tailles 0.5 / 1.0 / 2.1 / 3.1 avec batterie électrique |
T10A |
Appareil standard tailles 2.2 / 2.3 / 3.2 / 3.3 avec batterie électrique |
T16A |
•Les appareils devront comporter une protection amont contre les courants de fuite à la terre (différentiel hors fourniture Carrier).
•Un repérage clair doit être effectué sur le dispositif de sectionnement afin de repérer les appareils qui lui sont connectés.
•Le câblage des composants constituant les différents systèmes de régulation ainsi que des bus de communication doit être effectué conformément aux règles de l’art par des installateurs professionnels.
•Le câble d’alimentation doit être muni d’une double isolation et maintenu par le cavalier anti-traction prévu à cet effet, ou l’attache-câble livré avec le régulateur numérique Carrier. Le câble d’alimentation doit être maintenu sur le double isolant.
•Les composants constituant ces différentes boucles de régulation doivent être installés dans un environnement en conformité avec leur indice de protection (IP).
•Le niveau de pollution maximum est normalement polluant (niveau 2) et la catégorie d’installation II.
•Le câblage basse tension (Bus de Communication) doit être physiquement séparé du câblage de puissance.
•Afin d’éviter les interférences avec les câbles de liaison - Séparer les câbles basse tension des câbles de
puissance, éviter d’utiliser le même chemin de câble (300 mm commun maximum avec le câble 230 V a.c., 30 A).
- Ne pas passer des câbles basse tension dans des boucles de câbles de puissance.
- Ne pas raccorder de charges inductives importantes sur la même source électrique (disjoncteur) servant à l’alimentation des équipements des régulateurs ou des modules de puissance.
- Utiliser le type de câble blindé préconisé par Carrier et maintenir les câbles reliés aux régulateurs et aux modules de puissance.
2.4 - Préconisation concernant la régulation de l’Atmosphera
IMPORTANT: Il est interdit de raccorder plusieurs Atmosphera sur un même organe de régulation (thermostat mural, régulation électronique NTC, HDB, etc...)
2.5 - Conformité
Ce matériel a été déclaré conforme aux exigences essentielles des directive suivantes :
•Compatibilité électromagnétique : 2004/108/CEE.
•Directive basse tension : 2006/95/CEE.
3 - INSTALLATION de l’UNITE
3.1 - Coordination entre unité et faux plafond
L’emplacement ne doit présenter aucun obstacle susceptible de provoquer une répartition et/ou une reprise d’air inégale. Le plafond doit être suffisamment plat pour permettre une installation simple et sans danger de l’unité.
La structure portante doit pouvoir supporter le poids de l’unité et empêcher les déformations, les ruptures ou les vibrations pendant le fonctionnement.
PRECAUTIONS D’INSTALLATION: Lors de l’installation de l’unité, s’assurer qu’aucun débris de construction resté dans les gaines ne puisse venir endommager l’unité.
3.2 - Procédure d’installation
•Positionner l’Atmosphera au sol, à l’endroit où il doit être installé dans le faux plafond. Pour une installation en faux plafond, un élévateur et une échelle pliante conviennent à une installation aisée des unités: Fig. 6.
•Vérifier que les dégagements autour de l’appareil sont suffisants pour permettre une maintenance aisée. Se reporter aux plans “réservations pour maintenance”.
•Marquer la position des tiges filetées au plafond (il peut être judicieux de confectionner un gabarit de perçage dans le cas ou l’on a plusieurs unités à installer). Le mode de fixation des tiges filetées, hors fourniture Carrier, dépend de la nature du plafond, (diamètre maximum de la tige filetée 10 mm). Une fois les tiges filetées encrées au plafond, visser les premiers écrous.
ATTENTION: Ne jamais lever l’unité en utilisant les tubulures apparentes, les vannes/flexibles, les faisceaux électriques, ou le bac à condensats.
Lever l’unité et l’engager dans les tiges filetées, placer les écrous et les serrer convenablement.
NOTE : Ne pas serrer à fond les écrous à ce stade et ne pas brider l’appareil à la dalle (laisser un espace entre la dalle et l’appareil). Le réglage des écrous sera effectué après le raccordement des tuyauteries ou flexibles et la mise à niveau de l’unité.
14
Mise à niveau: Fig. 7. |
4 - COMPOSANTS |
||
Régler à présent la position de l’appareil, de manière à |
4.1 - Motoventilateurs |
||
incliner l’unité de 0.5% vers l’évacuation des condensats. |
|||
Dans l’autre direction (sens de l’air) l’appareil devra être |
|
|
|
parfaitement de niveau: Fig. 8. |
4.1.1 - Procédure de démontage du motoventilateur |
||
Tuyauterie d’évacuation des condensats: Fig. 9. Utiliser un |
ATTENTION: Avant toute intervention sur ce produit, il est |
||
tuyau flexible ø intérieur 16 mm et réaliser une pente de 20 |
|||
impératif de sectionner l’alimentation électrique de l’unité. |
|||
mm/m (9a), sans accident de parcours, remontée, etc. |
|||
|
|
||
Prévoir un siphon de 50 mm (9b) au moins pour éviter la |
Repérer et noter les vitesses câblées. Dans le cas d’un dys- |
||
remontée de gaz ou d’odeurs d’égouts dans le faux plafond. |
|||
fonctionnement du motoventilateur, l’ensemble complet |
|||
|
|||
En cas de raccordements d’unités multiples à un même |
du motoventilateur devra être démonté et remplacé: Fig. 12. |
||
• |
Retirer le filtre. |
||
collecteur d’évacuation, un dispositif est à prévoir: Fig. 10. |
|||
• Démonter le panneau d’accès au motoventilateur (12a). |
|||
Avant de mettre l’unité en marche, vérifier que l’eau s’écoule |
|||
• Déconnecter les câbles d’alimentation du |
|||
convenablement dans le bac à condensats interne en versant |
|||
|
motoventilateur (puissance et contrôle pour moteur à |
||
de l’eau dedans. Si tel n’est pas le cas, vérifier que le tuyau |
|
||
|
vitesse variable). |
||
présente l’inclinaison requise et rechercher les causes |
|
||
• Retirer si nécessaire le régulateur (fixé par vis) afin |
|||
potentielles du problème rencontré. Les gaines de raccorde- |
|||
|
d’accéder aux vis de maintien de la cloison supportant |
||
ment (en sortie d’air de l’appareil) devront être calorifugées |
|
||
|
le ventilateur. |
||
afin d’éviter toute formation de condensation sur les parois. |
|
||
• L’ensemble motoventilateur avec sa cloison est fixé à |
|||
|
|||
NOTE: Les pertes de charge de ces gaines doivent être |
|
l’unité par 4 vis à empreinte étoile T20 Torx (12b). |
|
|
Dévisser ces vis puis rabattre les 2 languettes (de |
||
compatibles avec les performances de l’appareil. La gaine |
|
||
|
chaque côté en-dessous de la cloison) supportant |
||
doit être la plus tendue possible. Éviter les coudes courts. |
|
||
|
l’ensemble et faire glisser l’ensemble motoventilateur |
||
Vérifier que les gaines ne présentent pas de fuite d’air et |
|
||
|
vers le bas (12c). |
||
qu’elles ne soient pas écrasées.Veillez également à la |
|
||
• |
Démonter l’ensemble motoventilateur. |
||
propreté intérieure des gaines pour éviter des entraînements |
|||
|
|
||
de débris de construction. |
|
NOTE: Veiller à ne pas toucher les turbines lors du |
|
|
|
||
Lorsque l’installation est prête, à savoir l’unité 42EM fixée |
|
démontage du motoventilateur, l’équilibrage en serait |
|
au plafond, les raccordements aérauliques réalisés, les |
|
affecté. |
|
collecteurs hydrauliques posés avec les vannes d’arrêt en |
• Dans le cas d’une option batterie électrique, décon- |
||
attente sur les piquages, l’installation électrique préparée, |
|||
connecter la partie hydraulique (Carrier préconise l’utili- |
|
necter les câbles d’alimentation des batteries électri- |
|
sation de flexibles hydrauliques qui peuvent être fournis en |
|
ques. Faire passer ces câbles à travers le passe-fils |
|
accessoires). Chaque flexible est muni d’un écrou tournant |
|
prévu à cet effet. |
|
1/2” gaz suivant le modèle. Ne pas oublier d’intercaler un |
• Dévisser les batteries électriques. |
||
joint entre l’écrou tournant et la vanne d’arrêt (joint hors |
• Remplacer le motoventilateur et procéder au remon- |
||
fourniture Carrier). |
|
tage en appliquant la procédure en sens inverse. |
|
Lorsque toutes les unités sont installées, ouvrir les vannes |
ATTENTION: Lors de la connexion du câble d’alimen- |
||
d’arrêt situées sur les collecteurs, purger les circuits, puis |
tation du motoventilateur respecter les indications |
||
mettre en pression. Pour purger les batteries, desserrer légère- |
mentionnées sur le connecteur. |
||
ment les vis de purge. L’installation peut alors fonctionner. |
Dans le cas de moteur à vitesse variable, veiller à séparer |
||
NOTE: Ne mettre sous tension que lorsqu’ils sont tous |
|||
le câble puissance du câble contrôle et de les éloigner au |
|||
raccordés et mis à la terre. |
maximum. |
||
3.3 - Procédure de démontage |
4.1.2 - Procédure de remplacement du condensateur: Fig. 13 |
||
Couper l’alimentation électrique de l’appareil, à partir |
• Sectionner l’alimentation électrique de l’appareil |
||
|
avant toute intervention. |
||
du disjoncteur (hors fourniture Carrier) prévu à cet effet |
|
||
• |
Retirer le filtre. |
||
lors de l’installation. |
|||
• Démonter le panneau d’accès au motoventilateur |
|||
|
|||
• Déconnecter les câbles d’alimentation et raccordement. |
• Démonter le condensateur qui est fixé sur le châssis |
||
|
du support moteur. |
||
• Fermer les vannes d’isolement situées sur les collecteurs. |
|
||
• Déconnecter le condensateur en retirant les cosses |
|||
• Déconnecter les flexibles hydrauliques en dévissant |
|||
|
plates situées à l’arrière du condensateur. |
||
les écrous tournants. |
|
||
• Remplacer le condensateur, et procéder au remontage |
|||
|
|||
ATTENTION: Les flexibles hydrauliques n’étant pas |
|
en appliquant la procédure en sens inverse. |
|
|
|
||
munis de clapets, prévoir un récipient permettant de |
4.1.3 - Câblage ventilateur |
||
vidanger la batterie. |
|||
|
|
||
• Déconnecter les gaines de soufflage. |
Câblage EM 0.5 et 1.0 (version multi-vitesses): |
||
• Déconnecter le tuyau flexible d’évacuation des con- |
|||
densats, vidanger le siphon dans un récipient. |
Le motoventilateur dispose de 6 vitesses réalisées à partir |
||
• Soulever légèrement l’unité, dévisser les 4 écrous situés |
d’un autotransformateur procurant ainsi à l’installateur |
||
sur les tiges filetées. Descendre l’unité. |
une grande souplesse de réglage des débits. |
||
15
Loading...