


 Loading...
Supplement
NMPJ Ver. 1.1 User’s Manual
Networked Multi-Projection
Overview
Networked Multi-Projection
Setup and Instructions
Operation in Each Mode
Functions
ENG

Table of Contents |
|
Safety Instructions........................ |
4 |
Federal Communication Commission |
|
Notice ...................................................... |
4 |
Canadian Radio Interference |
|
Regulations ............................................ |
4 |
Open Source Software ................. |
7 |
Networked Multi-Projection |
|
Overview................................... |
9 |
Introduction to Networked Multi- |
|
Projection .................................... |
10 |
Installation ................................... |
12 |
System Requirements ......................... |
12 |
Installation ............................................ |
13 |
Uninstallation .............................. |
15 |
From Startup to Shutdown......... |
19 |
Operation in Each Mode........ |
25 |
Using the Projector in Direct |
|
Mode............................................. |
26 |
Procedure ............................................. |
26 |
Direct Mode Window............................ |
28 |
Using the Projector in Meeting |
|
Mode............................................. |
30 |
Creating a Session............................... |
30 |
Joining a Session ................................ |
35 |
Meeting Mode Window ........................ |
36 |
Using the Projector in Classroom |
|
Mode............................................. |
38 |
Leading a New Session ....................... |
38 |
Joining an Existing Session ............... |
42 |
Classroom Mode Window (Starting a |
|
Session) ................................................ |
44 |
Classroom Mode Window (Joining a |
|
Session) ................................................ |
46 |
Using the Projector in Broadcast |
|
Mode............................................. |
48 |
Procedure ............................................. |
48 |
Broadcast Mode Window .................... |
50 |
Functions................................ |
53 |
Using the Session Selection |
|
Menu............................................. |
54 |
Session Selection Menu...................... |
54 |
Finding Sessions ................................. |
55 |
Using the Projector Selection |
|
Menu............................................. |
56 |
Projector Selection Menu.................... |
56 |
Using Layout Functions ............. |
60 |
Completing Software Projection |
|
Settings ........................................ |
66 |
Reducing Windows to a Compact |
|
Size ............................................... |
68 |
Split-Screen Display With Non- |
|
Network Sources......................... |
69 |
Tips for Better Networked |
|
Projection..................................... |
70 |
Restrictions.................................. |
71 |
2

Use of this manual
This manual does not provide the detailed description of basic operation and functions for computer, web browser, projector and network. For instructions about each piece of equipment or software, please refer to the respective manual.
Trademarks
Ethernet is a registered trademark of Xerox Corporation. Microsoft, Windows, Windows Vista, Windows 7 and Windows 8 are registered trademarks of Microsoft Corporation in the United States and other countries. Internet Explorer is a registered trademark of Microsoft Corporation. JavaScript is a registered trademark or trademark of Oracle Corporation and its subsidiaries and affiliates in the United States and other countries.
Mac, Mac OS and Macintosh are registered trademarks of Apple, Inc. in the USA and other countries. PowerPC is a registered trademark of IBM Corporation. Intel Core is a registered trademark of Intel Corporation in the USA and other countries.
Other product or brand names in this manual are registered trademarks or trademarks of their respective owners.
*Unauthorized use of a part or whole of the contents in this manual is prohibited.
*The contents of this manual are subject to change without notice.
Symbols Used in This Manual
Meanings of the symbols used in this manual are as follows.  A precaution about operation or restriction is given here.
  Indicates supplemental information to note in use.
3

Safety Instructions
Federal Communication Commission Notice
Multimedia Projector, Model: WUX6000
This device complies with Part 15 of the FCC Rules. Operation is subject to the following two conditions:
(1)This device may not cause harmful interference, and
(2)this device must accept any interference received, including interference that may cause undesired operation.
Note: This equipment has been tested and found to comply with the limits for a Class B digital device, pursuant to Part 15 of the FCC Rules. These limits are designed to provide reasonable protection against harmful interference in a residential installation. This equipment generates, uses and can radiate radio frequency energy and, if not installed and used in accordance with the instructions, may cause harmful interference to radio communications. However, there is no guarantee that interference will not occur in a particular installation. If this equipment does cause harmful interference to radio or television reception, which can be determined by turning the equipment off and on, the user is encouraged to try to correct the interference by one or more of the following measures:
•Reorient or relocate the receiving antenna.
•Increase the separation between the equipment and receiver.
•Connect the equipment into an outlet on a circuit different from that to which the receiver is connected.
•Consult the dealer or an experienced radio / TV technician for help.
The cable with a ferrite core provided with the projector must be used with this equipment in order to comply with Class B limits in Subpart B of Part 15 of the FCC rules.
Use of a shielded cable is required to comply with class B limits in Subpart B of Part 15 of FCC Rules.
Do not make any changes or modifications to the equipment unless otherwise specified in the instructions. If such changes or modifications should be made, you could be required to stop operation of the equipment.
Canon U.S.A. Inc.
One Canon Park, Melville, New York 11747, U.S.A. Tel No. (631) 330-5000
4

Safety Instructions
 CAUTION IN USING THE PROJECTOR VIA NETWORKS
•When you find a problem with the projector, remove the power cable immediately and inspect the unit. Using the projector with failure may cause fire or other accidents.
•If you remotely use the projector via networks, carry out a safety check regularly and take particular care to its environment. Incorrect installation may cause fire or other accidents.
Caution in using network function
•We assume no responsibility for the loss or damage of data, or damage of the computer caused by using this projector. Making back-up copies of valuable data in your computer is recommended.
Safety instructions
Please read and understand all instructions thoroughly before using.
About safety symbols
The following symbols are used in this manual to alert you to important safety information. Always observe the instructions to reduce the risk of injury and property damage.
Indicates a potentially hazardous situation which, if not avoided, may cause death or serious injury.
Indicates a potentially hazardous situation which, if not avoided, may cause minor or moderate injury.
Instructions Safety
5

Safety Instructions
Safety information
Always mount and operate the product in accordance with the safety instructions specified by the projector and peripheral equipment makers.
•Do not attempt to disassemble or service the product yourself. Doing so may result in a fire, an electric shock, or product damage.
•If the projector emits a strange odor, or makes a strange noise, immediately turn the power and peripheral equipment off, unplug these devices, and contact your dealer.
•Do not drop the projector or subject it to strong shocks. Doing so may result in damage to the internal parts, an electric shock, a fire, or product damage.
•Do not touch the projector with wet hands when the power cord plugs of the projector or peripheral equipment inserted into the electrical outlet. Otherwise, an electric shock may result.
6

Open Source Software
The NMPJ software incorporates third-party software modules. For details, refer to the “Third-Party Software” PDF file on the included installation CD-ROM, in [thirdparty_software] > [NMPJ] > [LICENSE]. Each module’s license conditions are also available in the same folder.
NO WARRANTY
BECAUSE THE PROGRAM IS LICENSED FREE OF CHARGE, THERE IS NO WARRANTY FOR THE PROGRAM, TO THE EXTENT PERMITTED BY APPLICABLE LAW. EXCEPT WHEN OTHERWISE STATED IN WRITING THE COPYRIGHT HOLDERS AND/OR OTHER PARTIES PROVIDE THE PROGRAM “AS IS” WITHOUT WARRANTY OF ANY KIND, EITHER EXPRESSED OR IMPLIED, INCLUDING, BUT NOT LIMITED TO, THE IMPLIED WARRANTIES OF MERCHANTABILITY AND FITNESS FOR A PARTICULAR PURPOSE. THE ENTIRE RISK AS TO THE QUALITY AND PERFORMANCE OF THE PROGRAM IS WITH YOU. SHOULD THE PROGRAM PROVE DEFECTIVE, YOU ASSUME THE COST OF ALL NECESSARY SERVICING, REPAIR OR CORRECTION.
IN NO EVENT UNLESS REQUIRED BY APPLICABLE LAW OR AGREED TO IN WRITING WILL ANY COPYRIGHT HOLDER, OR ANY OTHER PARTY WHO MAY MODIFY AND/OR REDISTRIBUTE THE PROGRAM AS PERMITTED ABOVE, BE LIABLE TO YOU FOR DAMAGES, INCLUDING ANY GENERAL, SPECIAL, INCIDENTAL OR CONSEQUENTIAL DAMAGES ARISING OUT OF THE USE OR INABILITY TO USE THE PROGRAM (INCLUDING BUT NOT LIMITED TO LOSS OF DATA OR DATA BEING RENDERED INACCURATE OR LOSSES SUSTAINED BY YOU OR THIRD PARTIES OR A FAILURE OF THE PROGRAM TO OPERATE WITH ANY OTHER PROGRAMS), EVEN IF SUCH HOLDER OR OTHER PARTY HAS BEEN ADVISED OF THE POSSIBILITY OF SUCH DAMAGES.
NO SUPPORT
Canon Inc., and all its subsidiaries or its dealers do not make any support service regarding the source code. Canon Inc., and all its subsidiaries or its dealers shall not respond to any questions or enquiries, from you or any other customers, regarding the source code.
Software Source Open
7
8

Networked Multi-
Projection
Overview
Networked Multi-Projection
Overview
Operation in Each Mode
Functions
9

Introduction to Networked Multi-Projection
Networked Multi-Projection (NMPJ) is a projector function enabling projection of computer screens over a local network.
■ Projection Over a Network
Using this software, you can link multiple computers and multiple projectors, for a variety of projection scenarios.
LAN
Links computers and projectors via a network connection.
• Direct Mode
■ Split-Screen Projection of Multiple Images
Images from multiple computers can be projected at once, with the images projected in separate areas of a single screen.
LAN
Projection of multiple computer screens in split-screen display.
• Meeting Mode, Classroom Mode
■ Projection of an Image from Multiple Projectors at Once
Images from a single computer can be projected from multiple projectors at once.
LAN
Projection of one computer screen from multiple projectors.
• Meeting Mode, Classroom Mode, Broadcast Mode
10
Introduction to Networked Multi-Projection
$ % &
.#0
$ |
|
$ |
|
$ |
|
$ |
|
|
|
|
|
|
|
Among multiple computers in a network, projection of one computer screen from multiple projectors.
• Classroom Mode, Meeting Mode
For multi-monitor computers, you can project either the primary or secondary monitor.
■ Selecting the Projection Monitor
LAN
Select the primary or secondary monitor for projection
• Direct Mode, Meeting Mode, Classroom Mode, Broadcast Mode
For each computer, you can select the monitor to project.
LAN
Select the primary or secondary monitor of each computer
• Classroom Mode
• With some computers, it may not be possible to switch between projection of the primary and secondary monitor.
•Software responsiveness may decline when many computers and projectors are connected over the network.
•For computers that support three or more monitors, the monitor used for projection varies depending on the model of computer.
Overview Projection-Multi Networked
11

Installation
To use the NMPJ function, you must install the NMPJ software (hereafter, “the software”) on the computers to be used.
Instructions in this manual are for installation in a Windows 7 environment.
System Requirements
Software system requirements are as follows.
CPU |
Core 2 Duo P8600, 2.4 GHz or higher (32or 64-bit) |
Memory |
1 GB or more |
HDD |
32 GB or more |
Monitor |
Resolution: 1024x768 dots or more |
|
|
|
Cannot be installed on computers without a minimum resolution of |
|
1024x768. Additionally, operation is not ensured if the resolution is |
|
switched to less than 1024x768 after installation. |
|
|
Operating System
Windows Vista (Business) SP2
Windows 7 (Home/Professional/Ultimate) SP1
Windows 8 (Pro)
Windows 8.1 (Pro)
*Windows Vista compatibility is limited to 32-bit editions.
*Both 32and 64-bit editions of Windows 7 and later are supported.
• Operation is not ensured in other operating systems or editions.
• Menus are in English in all cases, except in Japanese and Simplified Chinese versions of the software.
•Operation is not ensured in operating systems other than English, Japanese, or Simplified Chinese OSes.
Network In TCP/IP network environments, projectors can be connected to computers via the following LAN connections.
Wired LAN (1000BASE-T, 100BASE-TX)
• Although the software also supports computer-projector communication over a router, operation is only ensured over one router hop. Additionally, to use Broadcast mode (P48) with projectors in other subnets, the router must support IPv4 multicast routing. Note that the router must be set up to route multicast addresses used by the software.
•If you are using an Aero style in Windows, this message may be displayed: “Do you want to change the color scheme to improve performance?”
Magnification Display magnification:
Cannot be installed on computers with display magnification set higher than 200%.
12
Installation
Installation
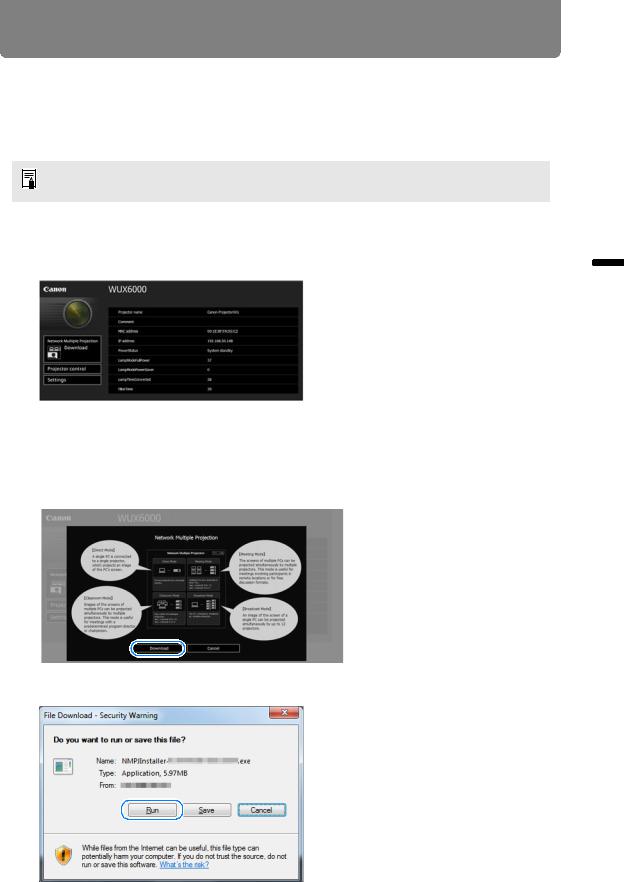
The software is stored in the projector’s internal memory. To install it on a computer, use a web browser on the computer to access the projector and download the software.
For instructions on connecting the projector to a network, refer to the projector user’s manual.
1 On the computer, start a web browser and connect to the projector.
For instructions on accessing the projector’s web screen from a browser, refer to the projector user’s manual.
For instructions on checking the projector’s IP address, refer to the projector user’s manual.
2 Click [Network Multiple Projection Download].
3 Click [Download].
4 When a confirmation message is displayed, click [Run].
Overview Projection-Multi Networked
13
Installation
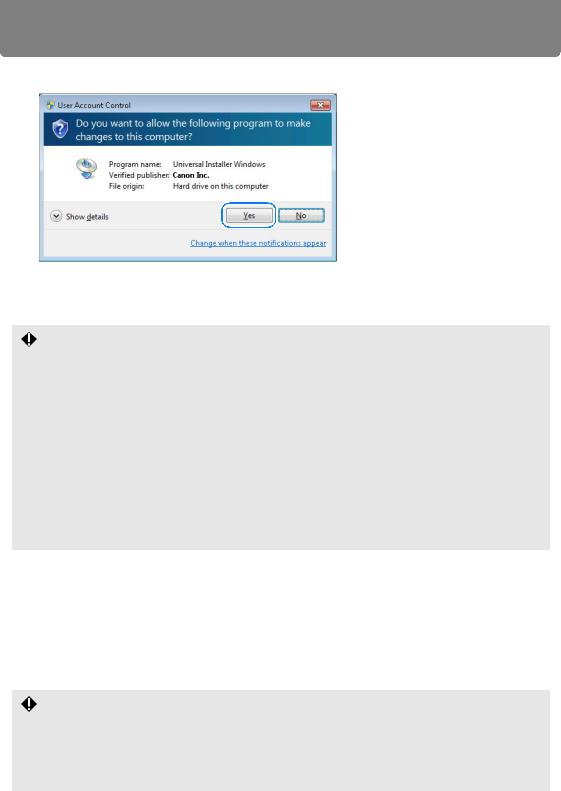
5 If a [User Account Control] message is displayed, click [Yes].
6 Next, follow the instructions displayed to complete the installation process.
• Confirmation or warning messages may be displayed during installation or uninstallation.
These messages request administrator credentials from the current user. If you are logged in as a user with administrator credentials, click [Yes] (or [Continue]) to continue.
•Depending on the software, you may not be able to continue without administrator credentials. If you are logged in as a standard user, switch to an administrator account and try again.
•You may need to restart the computer to complete the installation process. If restarting is requested, be sure to restart the computer.
•The software cannot be installed when the following setting is used in Windows 8.1. Control Panel > All Control Panel Items > Display > “Let me choose one scaling level for all my displays” selected > “Extra Large - 200%” selected.
Install the software using a setting other than “Extra Large - 200%.”
■Updating the Software
If the version of the software installed is older than a version available on a projector, you can update it by following the normal installation procedure. During the installation process, the version available is compared to the version
installed, and if it is newer, the current version is overwritten as the new version is installed. If overwriting is not necessary, the installation process ends.
Software Versions
The version of the software stored on the projector’s internal memory is 1.1.
•Any projectors purchased previously may have been shipped with version 1.0 of the software stored internally.
•The software will automatically detect if a newer version of the software is available on a projector. In this case, a message is displayed to notify you.
14

Uninstallation
■ Windows 7 or Earlier
These instructions are for uninstallation in Windows 7 or earlier versions of Windows.
1 Select [Start] > [All Programs] > [Canon NMPJ] > [Uninstall network multiple projection].
2 If a [User Account Control] message is displayed, click [Yes].
3 After the confirmation message is displayed, click [OK].
Overview Projection-Multi Networked
15
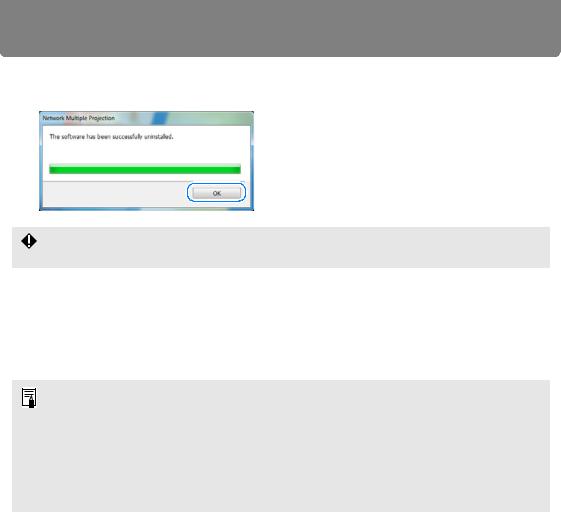
Uninstallation
4 After uninstallation is finished, click [OK] when the confirmation message is displayed.
You may need to restart the computer to complete the uninstallation process. If restarting is requested, always restart the computer.
5 Delete the following folder manually. Windows Vista
C:\Users\<User Name>\AppData\Local\Canon\NMPJ
Windows 7
C:\Users\<User Name>\AppData\Local\Canon\NMPJ
These files are hidden. To view hidden files, follow these steps.
Windows Vista
To view hidden files in Windows Explorer, select [Folder options] > [View] > [Show hidden files, folders, and drives].
Windows 7
In Windows Explorer, select [Tools] > [Folder Options] > [View] > [Show hidden files, folders, and drives].
16

Uninstallation
■ Windows 8 or Later
These instructions are for uninstallation in Windows 8 or later versions of Windows.
1 On the [Apps] screen, right-click the [Canon NMPJ] application icon.
2 In the menu displayed at the bottom of the [Apps] screen, click [Uninstall]. Otherwise, click [Uninstall] in the app bar and then [Uninstall] again on the screen displayed next.
Windows 8/8.1
Windows 8.1 Update
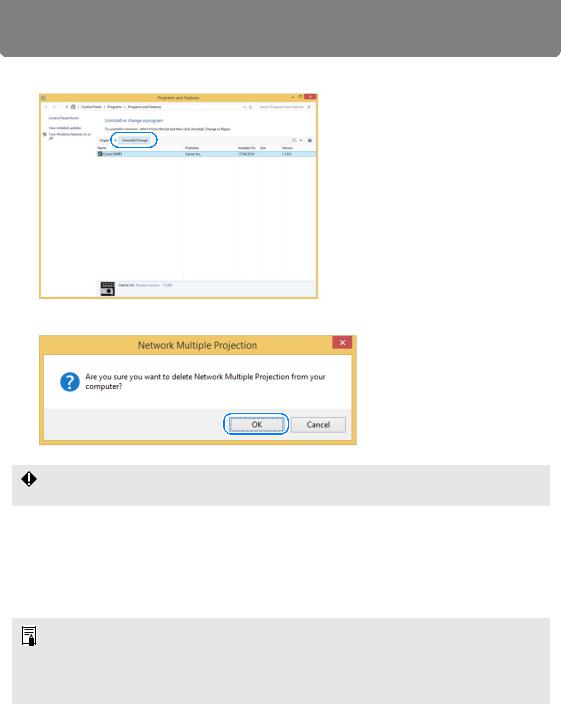
3 In the [Programs and Features] screen that is displayed, select [Canon NMPJ].
Overview Projection-Multi Networked
17
Uninstallation
4 Select [Uninstall/Change].
5 After the confirmation message is displayed, click [OK].
You may need to restart the computer to complete the uninstallation process. If restarting is requested, always restart the computer.
6 Delete the following folder manually. Windows 8
C:\Users\<User Name>\AppData\Local\Canon\NMPJ
Windows 8.1
C:\Users\<User Name>\AppData\Local\Canon\NMPJ
These files are hidden. To view hidden files, follow these steps.
Windows 8 or later
In Windows Explorer, select [Tools] > [Folder Options] > [View] > [Show hidden files, folders, and drives].
18
From Startup to Shutdown
The procedure from software startup to shutdown is as follows. Example windows shown here are from Direct mode.
(Windows 8 or Later)
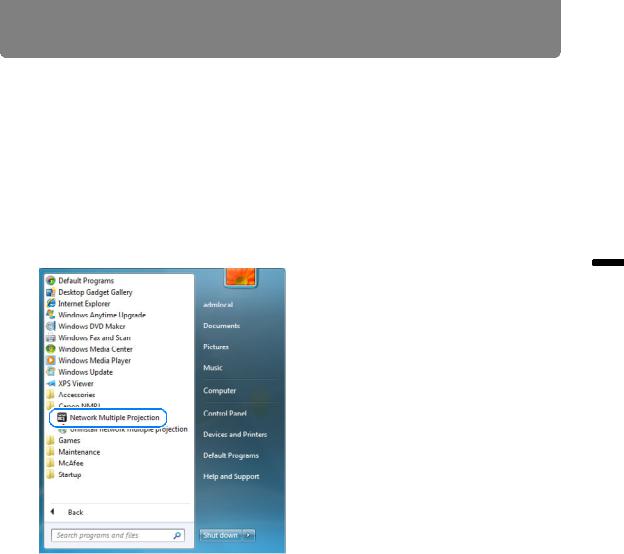
1 Select [Start] > [Apps] > [Canon NMPJ] > [Network Multiple Projection].
(Windows 7 or Earlier)
1 Select [Start] > [All Programs] > [Canon NMPJ] > [Network Multiple Projection].
Overview Projection-Multi Networked
19

From Startup to Shutdown
Windows Firewall
The following alert may be displayed the first time you start the software, depending on your Windows Firewall settings.
To enable communication with projectors, select all check boxes and click the [Allow access].
To change the settings after closing the alert, open the [Start] menu and select [Control Panel] > [System and Security] > [Windows Firewall] > [Allow an app through Windows Firewall].
Select [CANON Network Multiple Projection] in the list of allowed apps and features, and then select each check box.
20
From Startup to Shutdown
2 If the computer is equipped with multiple network adapters, or if one network adapter has been assigned multiple IP addresses (IP aliases), a selection screen is displayed. Click [OK] next to the desired network adapter.
The same three buttons are shown in the upper right of this window and subsequent windows. (Additional buttons are shown on some windows.)
[ |
|
] |
View software help. |
[ |
|
] |
Minimize the window to the taskbar. To view the window again, click the taskbar |
|
|
|
icon. |
[ |
|
] Close the window. |
|
3 On the mode selection window, click the desired mode.
(1) |
(2) |
(3) |
(4) |
(1) Direct Mode
When one computer is connected to one projector. (P28)
(2) Meeting Mode
When multiple computers are connected to multiple projectors. Useful when showing multiple computer screens during meetings or other events. (P36)
(3) Classroom Mode
When multiple computers are connected to multiple projectors. Gives a single computer (in the role of presenter) control over which computer screen and which projector is used for projection. (P44)
Overview Projection-Multi Networked
21

From Startup to Shutdown
(4) Broadcast Mode
When a single computer is connected to multiple projectors. Useful when multiple projectors are installed at various positions in an auditorium to project the same image. (P50)
4
5
Depending on the mode, you can create, join, or select a projection session.
Click [Start projecting].
Click [Start projecting] on the window to start projection.
6 To stop projection, click [Stop projecting].
7 To return to the mode selection menu, click |
or |
in the upper right. |
22
Loading...