


 Loading...
Network Camera
Operation Guide
Be sure to read this Operation Guide before using the network camera.
ENGLISH

Introduction
Thank you for purchasing a Canon Network Camera VB-S30D/VB-S31D/VB-S800D/VB-S900F (hereafter referred to as the
camera).
For indoor use only.
This Operation Guide explains the camera settings and operations. Read this guide carefully before using the camera to ensure correct use. Also, be sure to read the files in the LICENSE folder on the Setup CD-ROM.
For the latest information on this product (firmware and included software, user manuals, operating environment, etc.), please refer to the Canon Web Site.
Disclaimer
To the full extent permitted by laws and regulations, neither Canon Inc. nor any of its subsidiaries or affiliates shall be responsible for any financial losses that may be incurred as a result of the loss of recorded information or images, regardless of the internal or external cause of the loss.
EXCEPT AS SET FORTH IN THE LIMITED WARRANTY ACCOMPANYING THE CAMERA AND WITHOUT DETRACTING FROM ANY RIGHTS A CONSUMER MAY BE ENTITLED TO, AND TO THE FULL EXTENT PERMITTED BY LAWS AND REGULATIONS: (1) NEITHER CANON INC. NOR ANY OF ITS SUBSIDIARIES OR AFFILIATES MAKE ANY WARRANTY OF ANY KIND, EXPRESS OR IMPLIED, WITH REGARD TO THE MATERIAL IN THIS MANUAL OR WITH REGARD TO THE USE OF THE CAMERA INCLUDING, WITHOUT LIMITATION, IMPLIED WARRANTIES AS TO MARKETABILITY, MERCHANTABILITY, FITNESS FOR A PARTICULAR PURPOSE OR USE, OR NON-INFRINGEMENT AND (2) NEITHER CANON INC. NOR ANY OF ITS SUBSIDIARIES OR AFFILIATES SHALL BE LIABLE FOR ANY DIRECT, INCIDENTAL, OR CONSEQUENTIAL DAMAGES OF ANY NATURE RESULTING FROM THE USE OF THIS MATERIAL OR THE CAMERA.
Notes
1All rights reserved.
2The contents of this guide are subject to change without any prior notice.
3This document has been prepared with the utmost attention to accuracy. If you have any comments, however, please contact a Canon sales representative.
4Canon shall assume no liability for any outcome of using this product, regardless of Items 2 and 3 above.
To the full extent permitted by laws and regulations, neither Canon Inc. nor any of its subsidiaries or affiliates shall be liable for any losses, direct, incidental or consequential damages, or liabilities that may be incurred as a result of network security incidents such as unauthorized accesses.
<Network Security Recommendations>
–Change the password of the camera periodically.
–Change the HTTP or HTTPS port number of the camera.
–Limit access to the camera by network devices.
Copyright
Videos, images or sounds recorded with your camera may not be utilized or published without consent of copyright holders, if any, except in such a way as permitted for personal use under the relevant copyright law.
Notes on Privacy and Publicity Rights Regarding the Use of Video/Audio
When using the camera (for video or audio recording), it is the full responsibility of the user to protect privacy and avoid any violation of publicity rights. For example, obtain consent to install the camera in advance if specific buildings or rooms are to be monitored. Canon shall have no liability whatsoever in this regard.
Legal Notice
In some cases, camera monitoring may be prohibited by law or regulation, the details of which differ by country. Before using the camera, check the laws or regulations of the country or region where the camera is used.
Notes on Network Security
The user is responsible for the network security of this product and its use.
Take appropriate network security measures to avoid security breaches.
2

Trademark Notice
•Canon and the Canon logo are registered trademarks of Canon Inc.
•Microsoft, Windows, Windows Vista, Internet Explorer, Windows Server, Windows Media and ActiveX are trademarks or registered trademarks of Microsoft Corporation in the United States and other countries.
•Windows is legally recognized as the Microsoft Windows Operating System.
•This product comes with exFAT, a licensed file system technology from Microsoft.
•QuickTime is a trademark of Apple Inc.
•microSD, microSDHC and microSDXC Logos are trademarks of SD-3C, LLC.
•Other brands or product names in this guide are trademarks or registered trademarks of their respective companies.
 Warning
To reduce a risk of fire or electric shock, do not expose this product to rain or moisture.
Notes on the Included Software RM-Lite (Disclaimer)
Flaws or other problems with RM-Lite may result in recording failure or destruction or loss of recorded data. Canon shall have no liability whatsoever for any loss or damages incurred by the user as a result of such problems.
Notes on License Agreement for Included Software
For information on the License Agreement for Included Software, refer to the next file in the BundledSoftware folder in the Included Setup CD-ROM LICENSE folder.
Software Type |
File Name |
|
|
|
|
VB Initial Setting Tool |
|
|
|
|
|
Memory Card Unmount Tool |
VBTools-E.txt |
|
Backup Tool |
||
|
||
Restore Tool |
|
|
|
|
|
RM-Lite Network Video Recording |
RM-Lite-E.txt |
|
Software |
||
|
||
|
|
Introduction
Only for European Union and EEA (Norway, Iceland and Liechtenstein)
These symbols indicate that this product is not to be disposed of with your household waste, according to the WEEE Directive (2012/19/EU), the Battery Directive (2006/66/EC) and/or national legislation implementing those Directives.
If a chemical symbol is printed beneath the symbol shown above, in accordance with the Battery Directive, this indicates that a heavy metal (Hg = Mercury, Cd = Cadmium, Pb = Lead) is present in this battery or accumulator at a concentration above an applicable threshold specified in the Battery Directive.
This product should be handed over to a designated collection point, e.g., on an authorized one-for-one basis when you buy a new similar product or to an authorized collection site for recycling waste electrical and electronic equipment (EEE) and batteries and accumulators. Improper handling of this type of waste could have a possible impact on the environment and human health due to potentially hazardous substances that are generally associated with EEE. Your cooperation in the correct disposal of this product will contribute to the effective usage of natural resources.
For more information about the recycling of this product, please contact your local city office, waste authority, approved scheme or your household waste disposal service or visit www.canon-europe.com/weee, or www.canoneurope.com/battery.
This product is licensed under AT&T patents for the MPEG-4 standard and may be used for encoding MPEG-4 compliant video and/or decoding MPEG-4 compliant video that was encoded only (1) for a personal and non-commercial purpose or (2) by a video provider licensed under the AT&T patents to provide MPEG-4 compliant video. No license is granted or implied for any other use for MPEG-4 standard.
3

Open Source Software
The product (camera and included RM-Lite) contains Open Source Software modules. For details, see “ThirdPartySoftware-E.pdf” (Third-Party Software License) in the OpenSourceSoftware folder in the LICENSE folder on the Setup CD-ROM. Each module's license conditions are also available in the same folder.
Software under GPL and LGPL
If you would like to obtain the source code under GPL/ LGPL, please contact the dealer or sales agent where you purchased the product.
Security Export Control
This product is subject to security export control. Therefore, to export or carry it overseas may require an authorization by governmental agencies.
4
How to Read This Operation Guide
User Manuals
This camera comes with an “Installation Guide” and “Operation Guide” (this manual) included in the Setup CD-ROM.
Installation Guide (Included)
This guide provides notes and procedures on camera installation. Sections you should reference in this guide will be marked “Installation Guide” along with the name of the reference items.
Operation Guide (This Document)
This document explains the initial camera settings, Admin Tools settings, viewer operations, troubleshooting and the main camera specifications, etc. This document is included in the Setup CD-ROM.
In the Setup CD-ROM, the recording software RM-Lite (see “Chapter 1 Before Use” > “RM-Lite”) is also included. The following user manuals are available.
Network Video Recording Software RM-Lite
Administrator Manual
This document gives a detailed explanation of how to use RM-Lite.
Network Video Recording Software RM-Lite
Viewer Operation Guide
This is the operation guide for RM-Lite Viewer. For more details on operating procedures for the viewer, see the Administrator Manual.
How to use this Operation Guide
The assumed reading format of this user manual is on a computer screen.
Software Screenshots
The software screenshots shown in these user manuals are illustrative samples only. The screenshots may differ from the actual screens displayed.
Screenshots used with the explanations are generally from a Windows 8 computer connected to the VB-S30D. This document describes the case when [1920 x 1080 / 960 x 540 / 480 x 270] is selected for the video size set. If using a different video size set, substitute those sizes when reading this manual.
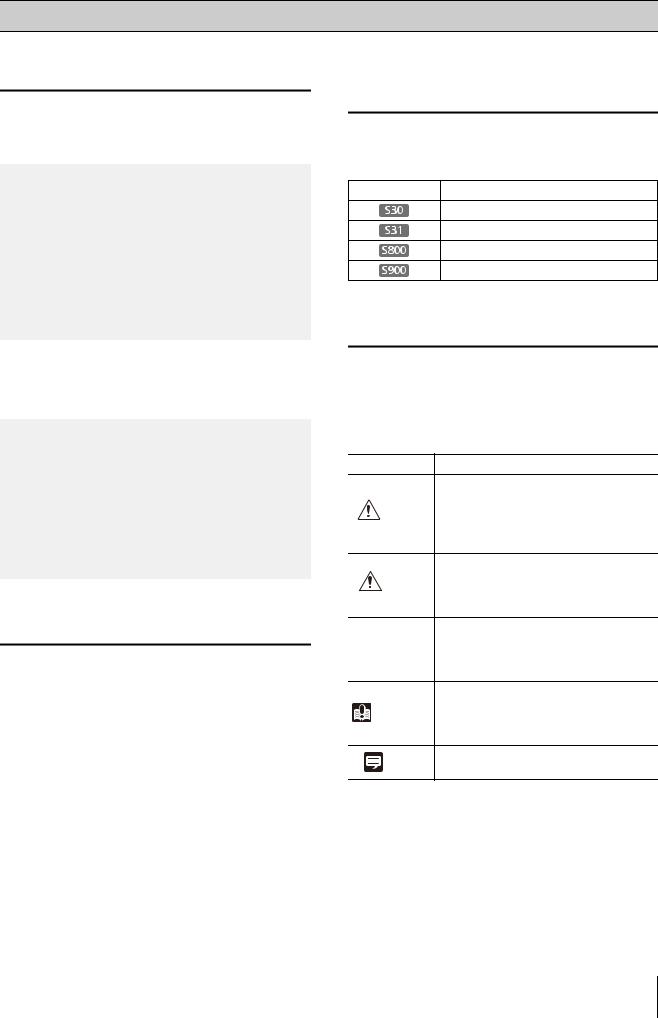
Icons Indicating Particular Camera
Models
In the descriptions of functions limited to particular models, the model names will appear or the following icons will be used to indicate those models.
Icon |
Camera Model |
|
|
VB-S30D
VB-S31D
VB-S800D
VB-S900F
Symbols Indicating Safety Precautions
This section explains symbols used in this Operation Guide. This Operation Guide uses the following symbols to indicate important information the user should know in order to use the product safely. Be sure to observe these items.
Symbol |
Meaning |
|
|
Failure to follow the instructions accompanied by this symbol may result
Warning in death or serious injury. Be sure to observe these warnings to ensure safety.
Failure to follow the instructions
Caution
accompanied by this symbol may result in injury. Be sure to observe these precautions to ensure safety.
Failure to follow the instructions
Caution
accompanied by this symbol may result in property damage. Be sure to observe these precautions.
This symbol indicates other actions or
information that should be noted. Important Important notes and restrictions are
provided. Be sure to read this section.
Note
Contains operational reference information or additional explanations.
5

Safety Precautions
The following items must be observed when using the camera.
If they are not observed, injury, death and/or property damage may occur. Read the following information carefully and observe the instructions without fail.
 Important Warnings
Caution
TO REDUCE THE RISK OF ELECTRIC SHOCK, DO NOT REMOVE COVER (OR BACK).
NO USER-SERVICEABLE PARTS INSIDE. REFER SERVICING TO QUALIFIED SERVICE PERSONNEL.
FDA regulation
This Network Camera has not been evaluated by the Food and Drug Administration (FDA) for use as a medical device. When incorporated into a system with medical applications, FDA regulations may apply. Therefore, please consult your legal advisor to determine whether FDA regulations apply.
FCC NOTICE
Network Camera, Model Name: VB-S30D/VB-S31D/ VB-S800D/VB-S900F
This device complies with Part 15 of the FCC Rules. Operation is subject to the following two conditions: (1) This device may not cause harmful interference, and (2) this device must accept any interference received, including interference that may cause undesired operation.
Note: This equipment has been tested and found to comply with the limits for a Class B digital device, pursuant to Part 15 of the FCC Rules. These limits are designed to provide reasonable protection against harmful interference in a residential installation.
This equipment generates, uses and can radiate radio frequency energy and, if not installed and used in accordance with the instructions, may cause harmful interference to radio communications.
However, there is no guarantee that interference will not occur in a particular installation. If this equipment does cause harmful interference to radio or television reception, which can be determined by turning the equipment off and on, the user is encouraged to try to correct the interference by one or more of the following measures:
•Reorient or relocate the receiving antenna.
•Increase the separation between the equipment and receiver.
•Connect the equipment to an outlet on a circuit different from that to which the receiver is connected.
•Consult the dealer or an experienced radio/TV technician for help.
Do not make any changes or modifications to the equipment unless otherwise specified in the manual. If such changes or modifications should be made, you could be required to stop operation of the equipment. Canon U.S.A., Inc.
One Canon Park, Melville, New York 11747, U.S.A. Tel No. 1-800-OK-CANON (1-800-652-2666)
6

Precautions for Use
 Warning
•If you discover defective conditions such as smoke, strange sounds, heat or strange odors, immediately stop using the camera and contact your nearest dealer.
Continued use of the product may cause fire or electric shock.
•Do not disassemble or modify the camera.
•Do not spill water or other liquid inside the camera, spray the camera with water, or otherwise make it wet.
•Do not insert foreign objects into the camera.
•Do not use flammable sprays near the camera.
•Do not leave LAN cables connected when the camera is not in use for long periods.
•Do not damage the connecting cable.
This may cause fire or electric shock.
•Do not use with medical devices or other life-support systems.
Depending on the computer and network environment, high-precision video transmission cannot be guaranteed due to video delay or loss.
Canon will assume no liability for any accident or damage resulting from use of the camera in the aforementioned devices or systems.
Caution
•Do not capture the sun, halogen lamps, and other very bright light sources or subjects.
•Do not expose the camera to strong impact or vibration.
•
 Do not forcibly turn the rotating parts of the camera by hand.
This may cause malfunction.
This installation should be made by a qualified service person and should conform to all local codes.
Safety Precautions
Precautions for Use of Built-In Camera Functions and
Included Software
Caution
•Do not use the built-in camera functions or included software listed below in cases requiring a high level of reliability:
–Intelligent functions
–Network video recording software RM-Lite
These features do not guarantee high-precision capture and cannot support applications beyond their intended range of use. Canon will assume no liability for any accident or damage resulting from the use of these functions.
Notes on Cleaning
 Warning
•Do not use alcohol, thinner, benzine or any other flammable solvent.
This may cause fire or electric shock.
7

Maintenance
Turn off the power before cleaning the camera.
Cleaning of Exterior
1 Dampen a soft cloth with water or diluted neutral detergent and wipe away the grime gently.
2 Wipe with a dry cloth.
Cleaning of Lens
Use a commercial lens cleaner to remove grime on the lens surface.
• Auto focus may not work properly if the lens surface is dusty or dirty.
•Be aware that scratches on the lens surface may result in poor video capture.
Cleaning the Top Cover
Grime on the top cover will reduce video quality, so periodic cleaning is required.
If the surface of the top cover cannot be cleaned well, remove it following the steps below to clean it more thoroughly.
1Remove the top cover.
See steps in “Installing the Camera” in the “Installation Guide” included with the camera to remove the top cover.
2Dampen a soft cloth with water or diluted neutral detergent and wipe away the grime gently.
3Wipe with a dry cloth.
4Reattach the top cover to its original position. Periodically check the brackets and screws for rust and loosening to prevent injuries and equipment damage due to falling items.
For inspections, please contact the dealer where you purchased the product.
Disposing of the Camera
Dispose of the camera in accordance with local laws and regulations.
8

Table of Contents |
|
|
|
Introduction .................................................................................................................. |
2 |
|
Disclaimer ............................................................................................................................... |
2 |
|
Notes on Network Security...................................................................................................... |
2 |
|
Copyright................................................................................................................................. |
2 |
|
Notes on Privacy and Publicity Rights Regarding the Use of Video/Audio ............................ |
2 |
|
Trademark Notice.................................................................................................................... |
3 |
|
Notes on the Included Software RM-Lite (Disclaimer) ........................................................... |
3 |
|
Notes on License Agreement for Included Software .............................................................. |
3 |
|
Only for European Union and EEA (Norway, Iceland and Liechtenstein)............................... |
3 |
|
Open Source Software ............................................................................................................ |
4 |
|
Security Export Control ........................................................................................................... |
4 |
|
How to Read This Operation Guide............................................................................. |
5 |
|
User Manuals .......................................................................................................................... |
5 |
|
How to use this Operation Guide ............................................................................................ |
5 |
|
Icons Indicating Particular Camera Models............................................................................ |
5 |
|
Symbols Indicating Safety Precautions................................................................................... |
5 |
|
Safety Precautions....................................................................................................... |
6 |
|
Maintenance............................................................................................................................ |
8 |
|
Disposing of the Camera ........................................................................................................ |
8 |
Chapter 1 |
Before Use |
|
|
Features..................................................................................................................... |
14 |
|
Camera Software....................................................................................................... |
15 |
|
Installed Software.................................................................................................................. |
15 |
|
Included Software ................................................................................................................. |
15 |
|
Additional License (Sold Separately).................................................................................... |
15 |
|
Network Video Recording Software (Sold Separately) ......................................................... |
15 |
|
RM-Lite (See the “Administrator Manual”) ............................................................................ |
17 |
|
Operating Environment.............................................................................................. |
18 |
|
VB Initial Setting Tool, Admin Viewer/VB Viewer, Admin Tools............................................. |
18 |
|
RM-Lite .................................................................................................................................. |
18 |
|
Notes on Operating Environment .............................................................................. |
19 |
|
Notes on Use When the [Windows Firewall] Function is Enabled ........................................ |
19 |
|
Notes on Use with Internet Explorer 9 or Greater and Windows Server 2008/ |
|
|
Windows Server 2012 ....................................................................................................... |
19 |
|
Notes on Use with Windows Server 2008/Windows Server 2012 ......................................... |
20 |
|
Notes on Use with Windows Vista/Windows 7/Windows 8/Windows Server 2012................ |
21 |
|
Notes for Windows 8/Windows Server 2012 ......................................................................... |
21 |
9

Chapter 2 |
Initial Settings |
|
|
Preparing the Camera for Use................................................................................... |
24 |
|
Installing the Necessary Software ............................................................................. |
26 |
|
Notes on Use with Internet Explorer 9 or Greater and Windows Server 2008/ |
|
|
Windows Server 2012 ....................................................................................................... |
27 |
|
Performing Initial Settings for the Camera................................................................. |
28 |
|
Checking the Camera Video...................................................................................... |
29 |
Chapter 3 |
Top Page of the Camera |
|
|
Accessing the Top Page of the Camera .................................................................... |
32 |
|
Accessing the Top Page of the Camera ............................................................................... |
32 |
|
User Authentication............................................................................................................... |
32 |
Chapter 4 |
Setting Page |
|
|
Setting Menu.............................................................................................................. |
34 |
|
Accessing the Setting Menu ...................................................................................... |
35 |
|
Setting Menu ......................................................................................................................... |
35 |
|
Items Common to All Setting Pages...................................................................................... |
35 |
|
[Network] Setting Administrator Password, LAN, IP Address, DNS, etc ................... |
37 |
|
[Date and Time] Setting Date and Time .................................................................... |
40 |
|
[Camera] Setting Initial Camera Settings and External Device Name....................... |
42 |
|
[Video] Setting Video Size, Quality and Frame Rate ................................................. |
46 |
|
[RTP] RTP Server, Audio Multicast and RTP Streaming........................................... |
49 |
|
[Upload] Setting HTTP/FTP Upload and E-mail Notification...................................... |
51 |
|
[Server] Setting the Video Server, Audio Server and HTTP Server .......................... |
54 |
|
[Event] Setting Video Record, Volume Detection, External Device Output/ |
|
|
Input and Timer .................................................................................................... |
56 |
|
[Access Control] Setting User Access Privileges....................................................... |
60 |
|
[IPsec] Setting IPsec.................................................................................................. |
62 |
|
[SSL/TLS] Setting HTTP Communication Encryption................................................ |
65 |
|
[802.1X] Network Port Authentication Settings.......................................................... |
67 |
|
[Memory Card] Memory Card Operations and Settings............................................. |
69 |
|
[Reboot Item] Setting Items Requiring Rebooting ..................................................... |
72 |
|
[Maintenance] Viewing Current Settings, Event Logs and |
|
|
Performing Maintenance ...................................................................................... |
73 |
|
[Camera Angle] Digital Zoom Settings ............................................................... |
74 |
10
|
|
Table of Contents |
Chapter 5 |
Admin Tools |
|
|
Admin Tools Overview............................................................................................... |
76 |
|
Admin Tools ......................................................................................................................... |
76 |
|
Privacy Mask Setting Tool .................................................................................................... |
76 |
|
Panorama Creation Tool ...................................................................................................... 76 |
|
|
View Restriction Setting Tool ................................................................................................ 76 |
|
|
Preset Setting Tool ............................................................................................................... |
77 |
|
Intelligent Function Setting Tool ........................................................................................... |
77 |
|
Log Viewer ........................................................................................................................... |
77 |
|
Recorded Video Utility ......................................................................................................... |
77 |
|
Accessing the Admin Tools ....................................................................................... |
78 |
|
Launching the Admin Tools .................................................................................................. |
78 |
|
Privacy Mask Setting Tool ......................................................................................... |
79 |
|
Display Screen of Privacy Mask Setting Tool........................................................................ |
79 |
|
Setting the Privacy Mask Area .............................................................................................. |
80 |
|
Changing/Deleting a Privacy Mask Area .............................................................................. |
82 |
|
Panorama Creation Tool........................................................................................... |
83 |
|
Display Screens of Panorama Creation Tool ........................................................................ |
84 |
|
Capturing a Panorama Image............................................................................................... |
84 |
|
Saving/Deleting a Panorama Image on the Camera............................................................. |
85 |
|
Saving a Panorama Image as Image Files/Opening from Image Files................................. |
85 |
|
View Restriction Setting Tool.................................................................................... |
86 |
|
Display Screens of View Restriction Setting Tool.................................................................. |
87 |
|
Setting View Restrictions....................................................................................................... |
88 |
|
Preset Setting Tool .................................................................................................... |
90 |
|
Display Screens of Preset Setting Tool ................................................................................. |
91 |
|
Setting the Preset .................................................................................................................. |
92 |
|
Preset Tour ........................................................................................................................... |
95 |
|
Intelligent Function Setting Tool ................................................................................ |
97 |
|
Display Screen of Intelligent Function Setting Tool............................................................. |
100 |
|
Flow of Intelligent Function Setting ..................................................................................... |
101 |
|
Setting Intelligent Function Detection Settings ................................................................... |
103 |
|
Log Viewer............................................................................................................... |
109 |
|
Display Screens of Log Viewer ........................................................................................... |
109 |
|
Downloading Log Files........................................................................................................ |
110 |
|
How to View Logs................................................................................................................ |
110 |
|
Recorded Video Utility ............................................................................................. |
112 |
|
Display Screens of Recorded Video Utility ......................................................................... |
112 |
|
Confirming Recorded Video................................................................................................ |
113 |
|
Narrowing Down the Number of Videos.............................................................................. |
113 |
|
Downloading Video ............................................................................................................. |
114 |
|
Exporting to Video Files That Can Be Played Back ............................................................ |
114 |
|
Playing Back Videos ........................................................................................................... |
114 |
|
Deleting Videos ................................................................................................................... |
116 |
|
Displaying Memory Card Information ................................................................................. |
116 |
11

|
Control for Admin .................................................................................................... |
117 |
|
Using Control for Admin...................................................................................................... |
117 |
Chapter 6 |
Admin Viewer/VB Viewer |
|
|
Overview of Viewer.................................................................................................. |
120 |
|
Major Differences Between the Admin Viewer and the VB Viewer ..................................... |
120 |
|
User Authorities and Camera Control Privileges................................................................. |
120 |
|
Launching the Viewer .............................................................................................. |
123 |
|
Launching the Viewer.......................................................................................................... |
123 |
|
Shutting Down the Viewer ................................................................................................... |
123 |
|
Connecting from Admin Tools............................................................................................. |
123 |
|
How to Operate the Viewer...................................................................................... |
124 |
|
Display Screens of Admin Viewer ....................................................................................... |
124 |
|
VB Viewer ............................................................................................................................ |
125 |
|
Obtaining Camera Control Privileges.................................................................................. |
126 |
|
Controlling the Camera ....................................................................................................... |
127 |
|
Cropping and Displaying Part of Video (Digital PTZ) ........................................................ |
128 |
|
Setting Video and Audio ..................................................................................................... |
130 |
|
Checking Information .......................................................................................................... |
132 |
|
Performing Operations and Settings in the Admin Viewer....................................... |
133 |
|
Magnifying Part of the Video (Viewer PTZ) ......................................................................... |
133 |
|
Using Control for Admin...................................................................................................... |
134 |
|
Displaying Event Status ...................................................................................................... |
139 |
|
Recording to a Memory Card Manually .............................................................................. |
140 |
Chapter 7 |
Appendix |
|
|
Memory Card Access .............................................................................................. |
142 |
|
Modifiers .................................................................................................................. |
144 |
|
Troubleshooting ....................................................................................................... |
146 |
|
List of Log Messages............................................................................................... |
148 |
|
Log Messages on the Camera............................................................................................ |
148 |
|
List of Viewer Messages.......................................................................................... |
157 |
|
Messages Displayed in the Information Field ..................................................................... |
157 |
|
Restore Default Settings.......................................................................................... |
159 |
|
Restoring the Initial Setting from the Maintenance Page in the Web Browser.................... |
159 |
|
Restoring Factory Default Settings with the Reset Switch on the Camera.......................... |
159 |
|
List of Factory Default Settings................................................................................ |
161 |
|
Specifications........................................................................................................... |
168 |
|
Index ........................................................................................................................ |
172 |
12

Chapter 1
Before Use
Camera Features
Software Information
Operating Environment and Precautions

Features
This camera integrates both camera and server functions into a compact network camera.
Compact and Lightweight |
Small and light while maintaining full HD video quality, and easy to install. |
|
|
Low Illumination Video Capture |
The camera can capture color video even with low subject illumination. |
|
|
Equipped with AF Zoom Lens |
The camera is equipped with a 3.5x optical (4x digital) zoom lens with auto focus. |
|
|
Pan/Tilt Functions |
You can operate camera angle controls remotely. |
|
|
Smart Shade Control Auto Mode |
The camera analyzes the video brightness, and automatically adjusts the exposure |
|
compensation and dark space compensation levels. |
|
|
3 Video Size Categories |
Video sizes can be selected from 1080p, 720p, and 4:3 categories. |
|
|
Video Distribution |
Supports two video compression methods (JPEG/H.264). Multi-stream distribution is also |
|
supported using different video sizes belonging to the same category. |
|
|
Custom Settings |
Preset camera settings can be applied (or loaded) when switching between day/night |
|
mode or by a timer. |
|
|
Supports microSD/microSDHC/ |
You can record video and logs when uploading fails, and record video as JPEG or H.264 |
microSDXC memory cards* |
files to memory cards (manual, timer, and event recording are supported). Recorded Video |
|
Utility in Admin Tools allows you to search and play back recorded video. |
|
|
Intelligent Functions |
The camera boasts a variety of intelligent functions that offer the wide array of detection options. |
|
Moving object detection, abandoned object detection, removed object detection, |
|
tempering detection, passing detection, volume detection. |
|
|
Small-Scale Video Monitoring via RM-Lite |
By using the supplied network video recording software, RM-Lite, you can record and |
Software (Supplied) |
display live video from up to four cameras. |
|
|
|
|
* In this manual, the memory card that can be used with the camera is referred to as “memory card”.
14

Camera Software
Installed Software
Admin Viewer/VB Viewer
(See Chapter 6 “Admin Viewer/VB Viewer”)
There are two types of Viewer: the VB Viewer, which can be used by Guest Users, and the Admin Viewer for Administrators.
The VB Viewer allows users to configure basic camera controls and display video.
The Admin Viewer lets you monitor all camera controls and events.
Admin Tools (See Chapter 5 “Admin Tools”)
The following tools for configuring camera settings and performing management functions are available:
•Privacy Mask Setting Tool
•
 Panorama Creation Tool
•
 View Restriction Setting Tool
•Preset Setting Tool
•Intelligent Function Setting Tool
•Log Viewer
•Recorded Video Utility
Included Software
The included Setup CD-ROM contains the following software. Install the software on a computer to use it.
VB Initial Setting Tool
(See Chapter 2 “Initial Settings”)
This tool performs initial settings for the camera.
RM-Lite (p. 17)
This software displays and records video from up to four cameras in real time.
Proxy Authentication Admin Viewer/Admin Tools
This software lets you use Admin Viewer/Admin Tools via a proxy server with proxy authentication. It is saved in the ProxyAuthSupport folder on the Setup CD-ROM.
Backup and Restore Tools
The Backup and Restore tools back up camera setting information to the computer. Information from multiple cameras can be saved at the same time.
The tools can also restore information saved on the computer to the camera.
Memory Card Unmount Tool
This software allows you to mount/unmount memory cards inserted in specified cameras, and acquire information from memory cards.
Additional License (Sold Separately)
You can purchase additional licenses as necessary.
Canon H.264 Additional User License AULVB (Sold Separately)
Additional license added for viewing H.264 video with multiple computers via Admin Viewer or Recorded Video Utility.
Admin Tools Certificate
This electronic certificate is required to use the Admin Viewer and Admin Tools.
.NET Framework 3.5 SP1/.NET Framework 4.5
This execution environment is required to use the software included in the camera.
Network Video Recording Software (Sold
Separately)
RM-64/RM-25/RM-9
This software allows network cameras to be used for multipoint surveillance, and for recording and playing back videos from the camera. The number of cameras
1
Use Before
15

that can be registered with RM-64/RM-25/RM-9 varies: 64, 25, or 9 cameras can be registered.
RM-V
This additional license lets you install RM-64/RM-25/RM-9 Viewer on multiple computers. Purchase the license to be able to view video captured by the camera from multiple sites and for other similar purposes.
RM-Lite-V
This additional license lets you install the RM-Lite Viewer on multiple computers. Purchase the license to be able to view video captured by the camera from multiple sites and for other similar purposes.
16

Camera Software
RM-Lite (See the “Administrator Manual”)
The installer (RMLiteInstall.exe) can be found in the Applications folder on the Setup CD-ROM.
RM-Lite Software Configuration
Type |
Overview |
|
|
|
|
|
License |
||||||
RM-Lite Storage Server |
Up to four cameras can be registered to record video. |
1 license |
|||||||||||
|
|
|
|
|
|
|
|
|
|
|
|
|
|
|
|
|
|
Plays recorded video saved in the storage server and displays live |
|
||||||||
RM-Lite Viewer |
video (JPEG/H.264) captured by the camera. |
1 license |
|||||||||||
|
|
|
|
Up to four cameras can be registered for the viewer. |
|
||||||||
|
|
|
|
|
|
|
|
|
|
|
|
|
|
RM-Lite Viewer |
RM-Lite Storage Server |
|
|||||||||||
|
|
|
|
|
|
|
|
|
|
|
|
|
|
|
|
|
|
|
|
|
|
|
|
|
|
|
|
|
|
|
|
|
|
|
|
|
|
|
|
|
|
|
|
|
|
|
|
|
|
|
|
|
|
|
|
|
|
|
|
|
|
|
|
|
|
|
|
|
|
Network
 Flow of Video from the Camera
 Flow of Recorded Video
VB-S30D, VB-S31D, VB-S800D, VB-S900F, VB-H41, VB-H610VE, VB-H610D, VB-H710F, VBSupported cameras M40, VB-M600VE, VB-M600D, VB-M700F, VB-C60, VB-C500VD/VB-C500D, VB-C300,
VB-C50i/VB-C50iR, VB-C50FSi/VB-C50Fi
 Important
•To add the RM-Lite Viewer, purchase RM-Lite-V (sold separately).
•The VB-S30D/VB-S31D/VB-S800D/VB-S900F/VB-H41/VB-H610VE/VB-H610D/VB-H710F/VB-M40/VB-M600VE/VB-M600D/VB-M700F cannot be used with Network Video Recording Software older than RM-Lite. Users of VK-64/VK-16 must switch to RM-Lite.
For details, visit our website.
 Note
Note
For details on the usage and functions of RM-Lite, see the “Administrator Manual”.
1
Use Before
17

Operating Environment
For the latest information on this product (firmware and included software, user manuals, operating environment, etc.), please refer to the Canon Web Site.
VB Initial Setting Tool, Admin Viewer/VB Viewer, Admin Tools
CPU |
Intel Core i7-2600 or higher |
|
|
|
|
|
Windows Vista Ultimate/Business/Enterprise/Home Premium SP2 32/64-bit |
|
|
Windows 7 Ultimate/Professional/Enterprise/Home Premium SP1 32/64-bit |
|
|
Windows 8/Windows 8 Pro/Windows 8 Enterprise 32/64-bit *4 |
|
Operating Systems*1 |
Windows 8.1/Windows 8.1 Pro/Windows 8.1 Enterprise 32/64-bit *4 |
|
Windows Server 2008 Standard SP2 32/64-bit |
||
|
||
|
Windows Server 2008 R2 Standard SP1 64-bit |
|
|
Windows Server 2012 Standard 64-bit *4 |
|
|
Windows Server 2012 R2 Standard 64-bit *4 |
|
Web Browser*2 |
Internet Explorer 8/9 32-bit |
|
Internet Explorer 10/11 |
||
|
||
|
|
|
Memory |
2 GB or more |
|
|
|
|
Viewer Display |
1920 x 1080 or higher |
|
|
|
|
|
.NET Framework 3.5 SP1 (When using Internet Explorer 8/9) |
|
Software*3 |
– Must be installed on Windows Vista and Windows Server 2008 systems |
|
|
||
|
.NET Framework 4.5 (When using Internet Explorer 10/11) |
|
|
– Must be installed on Windows 7 and Windows Server 2008 R2 systems |
|
|
|
|
Audio |
When using the camera's audio feature, the computer audio support feature is |
|
required. |
||
|
||
|
|
*1 Set the Control Panel’s font size (DPI) for Admin Tools and Admin Viewer to 100% or 125%. *2 The browser must support JavaScript, XAML browser applications, and IFRAME (HTML tag).
The VB Viewer requires cookies.
*3 Installation is unnecessary if only VB Viewer will be used. .NET Framework 3.5 SP1 and 4.5 are provided on the included setup CD-ROM, and the appropriate installer is selected automatically depending on the version of Internet Explorer.
*4 The included software or the software installed on the camera cannot be started from the Start screen added to Windows 8 and later.
RM-Lite
For operating environment details, refer to “Operating Environment” in the “Administrator Manual”.
18

Notes on Operating Environment
Notes on Use When the [Windows Firewall] Function is Enabled
When the VB Initial Setting Tool is started, the [Windows Security Alert] dialog box may appear.
If the [Windows Security Alert] dialog box appears, click [Unblock].
Once this button is clicked, the warning dialog box will no longer appear.
If the [Windows Security Alert] dialog box does not appear, the Windows firewall warning function may be disabled. Follow the procedure below to add the [VB Initial Setting Tool] as a Windows Firewall exception.
1 Click [Windows Firewall] in [Control Panel] > [System and Security].
2 Click [Allow an app or feature through Windows Firewall] > [Change settings] > [Allow another app].
3 Select [VB Initial Setting Tool], and then click [Add].
Notes on Use with Internet Explorer 9 or Greater and Windows Server 2008/ Windows Server 2012
Registering the Top Page of the Camera as a Trusted Site
In Internet Explorer 9 or greater and Windows Server 2008/ Windows Server 2012, the security level for Internet sites and intranet sites on Internet Explorer is set to [High] by default. Thus, when accessing the Admin Viewer/VB Viewer, the camera's Setting Page or the Admin Tools, a content block dialog box appears and the page fails to display correctly. To correct this problem, follow the procedure below to register the top page as a trusted site.
1 |
Access the Admin Viewer/VB Viewer and the Setting |
Page from the top page of the camera with Internet |
Explorer.
The following dialog box appears.
2 Click [Add].
The [Trusted sites] dialog box appears.
1
Use Before
19

3 If selected, clear the [Require server verification (https:) for all sites in this zone] checkbox.
4 Enter the IP address of the camera under [Add this Web site to the zone], and then click [Add].
Note that even when the content block dialog box does not appear, JavaScript is sometimes disabled under the standard security settings, which may limit operations on the setting page and the Admin Viewer/VB Viewer.
Register the page as a trusted site as this automatically enables JavaScript settings.
If the content block dialog box does not appear, follow the procedure below to display the [Trusted Sites] dialog box.
1 Click [Tools] > [Internet Options] from the Internet Explorer menu to display the [Internet Options] dialog box.
2 Click the [Security] tab.
3 Click and select [Trusted sites], and then click [Sites].
The [Trusted sites] dialog box appears.
This completes the trusted site registration process.
Notes on Use with Windows Server 2008/ Windows Server 2012
Registering “about:internet” and the Camera Host Name
Admin Viewer and Admin Tools will not start when IE ESC (Internet Explorer Enhanced Security Configuration) is enabled in Windows Server 2008/Windows Server 2012. Before using the tools, register “about:internet” and the host name for the connected camera in the Internet Explorer “local intranet” and “trusted sites” lists.
 Important
When “about:internet” is registered, the security level in Windows 7 is the same as when using Internet Explorer. After using the Admin Viewer/Admin Tools, it is recommended that you remove “about:internet” and the camera name as necessary and restore the original security level.
Web Browser Security Settings When Using SSL Connection
When an SSL connection to the camera is made from a web browser (Internet Explorer 9/10/11) in Windows Server 2008/Windows Server 2012, the following operations may display the content block dialog box and prevent further operation.
•Startup of Admin Tools or Admin Viewer
•Audio reception from VB Viewer
This happens when Internet Explorer Enhanced Security Configuration (IE ESC) is enabled in Internet Explorer 9/ 10/11. Use the procedures below to change this setting.
1 Click [Internet Options] in the [Tools] menu in Internet Explorer 9/10/11 and click the [Advanced] tab.
2 Clear the [Do not save encrypted pages to disk] checkbox in [Security].
20
 Important
Note that when IE Enhanced Security Configuration is turned back on, the [Do not save encrypted pages to disk] checkbox also becomes enabled.
Notes on Operating Environment
4 The [Sound] dialog box appears.
Click the [Playback] tab to confirm that an audio device has been installed. (If no audio device is installed, refer to your computer manual.)
Enabling the Sound Function to Use Audio
In Windows Server 2008/Windows Server 2012, the sound function is disabled by default.
To receive audio with the Viewer, follow the steps below to enable the sound function.
1 Open [Control Panel] and click [Hardware].
 Note
Note
If [Control Panel] is in the classic view, double-click [Sound].
2 Click [Sound].
3 When the [Audio Service Not Running] message appears, click [Yes].
Notes on Use with Windows Vista/ Windows 7/Windows 8/Windows Server 2012
The following restrictions apply.
RM-Lite
For important information on the RM-Lite operating environment, see the “Administrator Manual”.
Notes for Windows 8/Windows Server 2012
Each software application, including Admin Viewer and Admin Tools, cannot be started from the Start screen.
1
Use Before
21

22

Chapter 2
Initial Settings
Preparing the Camera for Use
Initial Setting Tool Installation
Initial Settings

Preparing the Camera for Use
Performing Initial Settings for the Camera
Before installing the camera, read this chapter and use the VB Initial Setting Tool to configure the IP address.
“Installing the Necessary Software” (p. 26)
“Performing Initial Settings for the Camera” (p. 28)
▼
Checking Video
When initial settings are complete, access the camera via a web browser and check the video using the VB Viewer.
“Checking the Camera Video” (p. 29)
▼
Installing the Camera
Install the camera to suit the operating environment it will be used in.
“Installation Guide”
▼
Configuring the Camera from the Setting Page
The setting page lets you configure basic camera settings, network operations, user registration, and access restrictions.
“Chapter 4 Setting Page”
▼
Using Admin Tools
Admin Tools let you set viewing restrictions, make preset settings, and make settings for using intelligent functions. In addition, you can review logs to check on the camera's operation status.
“Chapter 5 Admin Tools”
▼
Using Admin Viewer/VB Viewer
The camera's built-in Admin Viewer/VB Viewer features an Admin Viewer for administrators and a VB Viewer for guest users. Use the VB viewer to check distribution to guest users and Admin Viewer to check all operations.
“Chapter 6 Admin Viewer/VB Viewer”
▼
24

Preparing the Camera for Use
Operating
If an error message appears or the camera fails to operate correctly, see the error message and log message information in “Chapter 7 Appendix”.
“Chapter 7 Appendix”
 Important
Before starting operations, make sure that the setting page and Admin Tools settings are functioning correctly.
2
ettingsS Initial
25

Installing the Necessary Software
Install the following software to perform initial settings for the camera.
•VB Initial Setting Tool: Software required for performing initial camera settings
•Admin Tools Certificate: An electronic certificate that is required for using Admin Viewer and Admin Tools
•.NET Framework 3.5 SP1/.NET Framework 4.5: The execution environment required for network camera software (not
required if already installed on the computer)
You can perform either an Easy Installation or a Custom Installation of the software.
 Note
Note
•All computer users will be able to use Admin Viewer and Admin Tools if the Admin Tools certificate was installed by the installer.
•Select [Custom Installation] and install only the “Admin Tools Certificate” if you intend to use the Admin Viewer and Admin Tools on a computer other than the one where the VB Initial Setting Tool is installed.
1
2
3
Insert the Setup CD-ROM included in the camera in the disc drive on the computer.
After confirming that all other applications have been closed, click the [Start] menu > [My Computer].
Double-click the CD-ROM icon > [Applications] folder > [VBToolsInstall.exe].
[Custom Installation]: The user can select and install desired software.
The installation screen appears.
4 Select the installation method.
[Easy Installation]: VB Initial Setting Tool and Admin Tools certificate are installed.
5 After selecting [Easy Installation], click [Next] and after selecting [Custom Installation], select the checkboxes of the software you want to install and click [Next].
The User License Agreement screen appears.
6 Read through the user license agreement and click [Yes] if you accept it.
Installation starts.
26
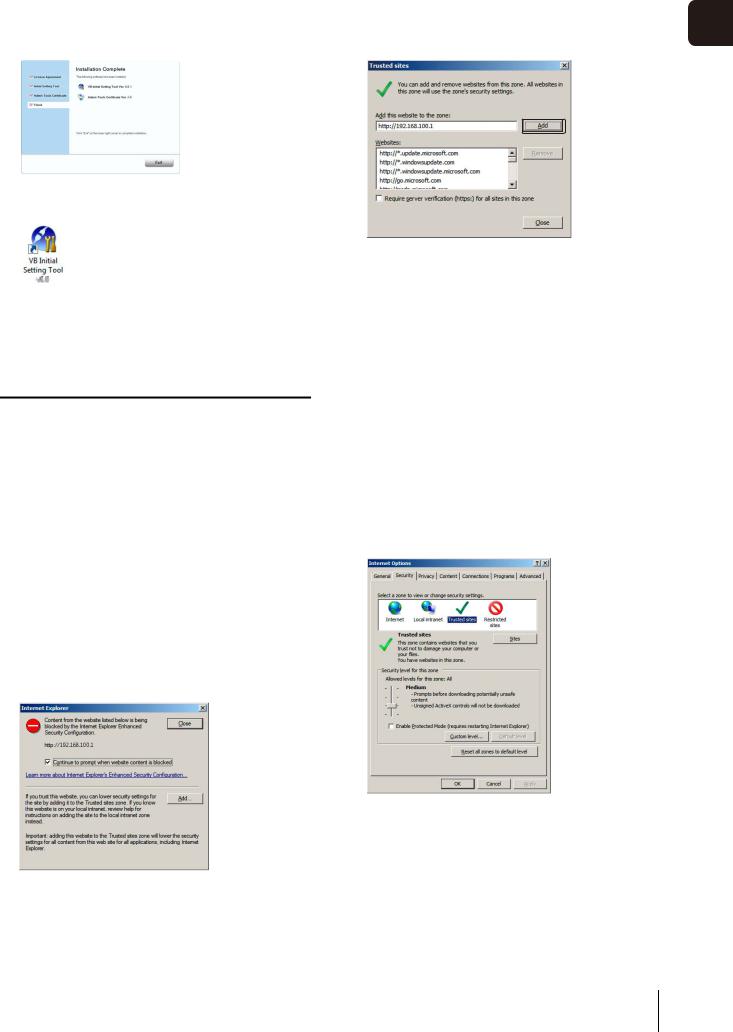
7 When the installation complete screen appears, click [Exit] or [Reboot].
The VB Initial Setting Tool icon appears on the desktop.
Notes on Use with Internet Explorer 9 or Greater and Windows Server 2008/ Windows Server 2012
Registering the Top Page of the Camera as a Trusted Site
In Internet Explorer 9 or greater and Windows Server 2008/ Windows Server 2012, the security level for Internet sites and intranet sites on Internet Explorer is set to [High] by default. Thus, when accessing the Admin Viewer/VB Viewer, the camera's Setting Page or the Admin Tools, a content block dialog box appears and the page fails to display correctly. To correct this problem, follow the procedure below to register the top page as a trusted site.
1 |
Access the Admin Viewer/VB Viewer and the Setting |
Page from the top page of the camera with Internet |
Explorer.
The following dialog box appears.
2 Click [Add].
The [Trusted sites] dialog box appears.
Installing the Necessary Software
3 If selected, clear the [Require server verification (https:) for all sites in this zone] checkbox.
4 Enter the IP address of the camera under [Add this Web site to the zone], and then click [Add].
Note that even when the content block dialog box does not appear, JavaScript is sometimes disabled under the standard security settings, which may limit operations on the setting page and the Admin Viewer/VB Viewer.
Register the page as a trusted site as this automatically enables JavaScript settings.
If the content block dialog box does not appear, follow the procedure below to display the [Trusted Sites] dialog box.
1 Click [Tools] > [Internet Options] from the Internet Explorer menu to display the [Internet Options] dialog box.
2 Click the [Security] tab.
3 Click and select [Trusted sites], and then click [Sites].
The [Trusted sites] dialog box appears.
This completes the trusted site registration process.
2
ettingsS Initial
27

Performing Initial Settings for the Camera
Use the VB Initial Setting Tool to configure the camera network.
1 Connect the camera and computer to the network and turn on the camera (“Installation Guide” > “Connecting the Camera”).
2 Launch the VB Initial Setting Tool.
To launch the VB Initial Setting Tool, double-click the [VB Initial Setting Tool] icon on the desktop.
The VB Initial Setting Tool will automatically detect the camera connected to the network and display the camera's MAC address, IP address and model name. The factory setting IP address is set to 192.168.100.1. The MAC address can be found on the label on the camera (“Installation Guide” > “Part Names”).
 Important
•Twenty minutes after the camera is turned on, it will stop issuing IP address assignments requests and VB Initial Setting Tool detection will be disabled. In such cases, turn the camera off and on again.
•There may be cautionary information, depending on your operating environment. Read “Notes on Operating Environment” (p. 19) before performing initial settings.
•The VB Initial Setting Tool cannot be used with cameras that are behind a router.
3 Select a MAC address, and then click [Initial Setting].
Click to select
4 Enter the user name “root” and factory default setting password “camera”, and then the appropriate IP address and subnet mask.
To use a setting other than the default gateway setting, clear the [Enter a default gateway address] checkbox.
After settings are complete, click [OK].
Setup progress is shown in the window.
 Note
Note
•To ensure security, be sure to change the administrator password (p. 32).
•Contact your System Administrator for the appropriate IP address, subnet mask and gateway address.
5 Click [OK].
 Important
To obtain an IP address from a DHCP server or set IPv6, first use the VB Initial Setting Tool to temporarily configure an IPv4 static address that can communicate with the computer. Then, in [Network] on the setting page, change [IPv4 Address Setting Method] to [Auto (DHCP)] in the [IPv4] area (p. 37), or configure an IPv6 address.
28

Checking the Camera Video
Once initial settings are complete, check the video on the camera with the VB Viewer. When doing so, set the computer network settings to comply with the IP address and subnet mask settings on the camera.
1 Click to select the camera's MAC address which will be checked, and then click [Settings].
Click to select
2 This will launch the web browser and display the top page of the camera. Click [VB Viewer].
The viewer launches and displays the camera video.
If the top page of the camera does not appear or the VB Viewer does not launch, see “Troubleshooting” (p. 146) in “Chapter 7 Appendix”.
 Important
•The camera video cannot be checked until the network settings in the computer are configured for the IP address and subnet that are set in the camera.
•Do not change the camera HTTP port from 80 if you want to open the setting page by clicking [Settings]. See “HTTP Server” (p. 55) for more information on HTTP port settings.
2
ettingsS Initial
29

30
Loading...