


Photo Printer
Series
Direct Printing Guide
Photo Printer
Direct Printing Guide

Contents
Contents
Operation Panel and Menu Display. . . . . . . . . . . . . . . . . . . . . . . . . . . . . . . . . . . . . . . . . . . . . . . . . . . . .3
Operation Panel Names and Functions . . . . . . . . . . . . . . . . . . . . . . . . . . . . . . . . . . . . . . . . . . . . . . . . . .3
Menu Displays . . . . . . . . . . . . . . . . . . . . . . . . . . . . . . . . . . . . . . . . . . . . . . . . . . . . . . . . . . . . . . . . . . . . .5
Using a Memory Card. . . . . . . . . . . . . . . . . . . . . . . . . . . . . . . . . . . . . . . . . . . . . . . . . . . . . . . . . . . . . . . . . . . . 8
Memory Cards Supported by This Printer . . . . . . . . . . . . . . . . . . . . . . . . . . . . . . . . . . . . . . . . . . . . . . . 8
Inserting a Memory Card. . . . . . . . . . . . . . . . . . . . . . . . . . . . . . . . . . . . . . . . . . . . . . . . . . . . . . . . . . . . . .9
Removing a Memory Card . . . . . . . . . . . . . . . . . . . . . . . . . . . . . . . . . . . . . . . . . . . . . . . . . . . . . . . . . . . .10
Loading Paper . . . . . . . . . . . . . . . . . . . . . . . . . . . . . . . . . . . . . . . . . . . . . . . . . . . . . . . . . . . . . . . . . . . . . . . . . . . . 11
Changing the Print Settings . . . . . . . . . . . . . . . . . . . . . . . . . . . . . . . . . . . . . . . . . . . . . . . . . . . . . . . . . . . . 17
Printing a Photograph . . . . . . . . . . . . . . . . . . . . . . . . . . . . . . . . . . . . . . . . . . . . . . . . . . . . . . . . . . . . . . . . . . 20
Printing a Photo Displayed on the LCD – Single-photo print. . . . . . . . . . . . . . . . . . . . . . . . . . . . . . . 20 Specifying How Many Copies to Print for Each Photo – Multi-photo print. . . . . . . . . . . . . . . . . . . . 22
Other Useful Functions . . . . . . . . . . . . . . . . . . . . . . . . . . . . . . . . . . . . . . . . . . . . . . . . . . . . . . . . . . . . . . . . . 23
Searching for Photos with the Shooting Date. . . . . . . . . . . . . . . . . . . . . . . . . . . . . . . . . . . . . . . . . . . 23 Printing a Specified Area – Trimming . . . . . . . . . . . . . . . . . . . . . . . . . . . . . . . . . . . . . . . . . . . . . . . . . .25 Specifying the Layout . . . . . . . . . . . . . . . . . . . . . . . . . . . . . . . . . . . . . . . . . . . . . . . . . . . . . . . . . . . . . . 26 Printing on the Sticker – Sticker print . . . . . . . . . . . . . . . . . . . . . . . . . . . . . . . . . . . . . . . . . . . . . . . . . 28 Printing in Your Favorite Color Tone – Color balance . . . . . . . . . . . . . . . . . . . . . . . . . . . . . . . . . . . . 29 Other Printing Functions. . . . . . . . . . . . . . . . . . . . . . . . . . . . . . . . . . . . . . . . . . . . . . . . . . . . . . . . . . . . . 31
Changing the Other Settings . . . . . . . . . . . . . . . . . . . . . . . . . . . . . . . . . . . . . . . . . . . . . . . . . . . . . . . . . . .33
Printing Photographs Directly from a Digital Camera . . . . . . . . . . . . . . . . . . . . . . . . . . . . . . .35
Printing Photographs Directly from a PictBridge Compliant Device . . . . . . . . . . . . . . . . . . . . . . . . .35
Printing Photographs from a Wireless Communication Device . . . . . . . . . . . . . . . . . . . 40
Setting the Page Size, Media Type, and Layout When Printing From a Mobile Phone . . . . . . . . . . 40 Performing Infrared Communication . . . . . . . . . . . . . . . . . . . . . . . . . . . . . . . . . . . . . . . . . . . . . . . . . . 42 Performing Bluetooth Communication . . . . . . . . . . . . . . . . . . . . . . . . . . . . . . . . . . . . . . . . . . . . . . . . .43
Using Data in the Memory Card on the Computer . . . . . . . . . . . . . . . . . . . . . . . . . . . . . . . . . . 46
Browsing Photos in the Memory Card on the Computer . . . . . . . . . . . . . . . . . . . . . . . . . . . . . . . . . . 46 Saving Data in the Memory Card onto the Computer . . . . . . . . . . . . . . . . . . . . . . . . . . . . . . . . . . . . . 46 Setting up the Card Slot as the Memory Card Drive of the Computer . . . . . . . . . . . . . . . . . . . . . . . .47
Replacing an Ink Tank . . . . . . . . . . . . . . . . . . . . . . . . . . . . . . . . . . . . . . . . . . . . . . . . . . . . . . . . . . . . . . . . . . 48 Getting the Ink Level Information . . . . . . . . . . . . . . . . . . . . . . . . . . . . . . . . . . . . . . . . . . . . . . . . . . . . 48 Knowing When to Replace Ink Tank . . . . . . . . . . . . . . . . . . . . . . . . . . . . . . . . . . . . . . . . . . . . . . . . . . . 49 Replacing Ink Tanks . . . . . . . . . . . . . . . . . . . . . . . . . . . . . . . . . . . . . . . . . . . . . . . . . . . . . . . . . . . . . . . 49
1

Contents
Printing Maintenance . . . . . . . . . . . . . . . . . . . . . . . . . . . . . . . . . . . . . . . . . . . . . . . . . . . . . . . . . . . . . . . . . . . 52
When Printing Becomes Faint or Colors are Incorrect . . . . . . . . . . . . . . . . . . . . . . . . . . . . . . . . . . . . . 52 Printing the Nozzle Check Pattern. . . . . . . . . . . . . . . . . . . . . . . . . . . . . . . . . . . . . . . . . . . . . . . . . . . . . 53 Examining the Nozzle Check Pattern . . . . . . . . . . . . . . . . . . . . . . . . . . . . . . . . . . . . . . . . . . . . . . . . . . 53 Print Head Cleaning . . . . . . . . . . . . . . . . . . . . . . . . . . . . . . . . . . . . . . . . . . . . . . . . . . . . . . . . . . . . . . . . 54 Print Head Deep Cleaning . . . . . . . . . . . . . . . . . . . . . . . . . . . . . . . . . . . . . . . . . . . . . . . . . . . . . . . . . . . 55 Aligning Print Head - Auto head align . . . . . . . . . . . . . . . . . . . . . . . . . . . . . . . . . . . . . . . . . . . . . . . . . . 56
Troubleshooting . . . . . . . . . . . . . . . . . . . . . . . . . . . . . . . . . . . . . . . . . . . . . . . . . . . . . . . . . . . . . . . . . . . . . . . . . 57
Index . . . . . . . . . . . . . . . . . . . . . . . . . . . . . . . . . . . . . . . . . . . . . . . . . . . . . . . . . . . . . . . . . . . . . . . . . . . . . . . . . . . . . . 71
2

Operation Panel and Menu Display
The names and functions of the controls on the operation panel, how to display the menus, and the items in the menus are described below:
Operation Panel Names and Functions
(1) |
(2) |
(3) |
(4) |
(5) |
(6) |
(7) |
(8) |
(9) |
(10) |
(11)(12) |
(13)(14) |
(15) |
(16) |
(1)POWER Button
Press to turn the printer on or off.
POWER Lamp
Off: the printer is turned off.
Lighting: the printer is ready to print, is currently printing, or is currently initializing. Flashing: the printer is preparing to turn on or off.
*When the POWER lamp and the Alarm lamp flash alternately, an error has occurred that may require a service call.
(2)Feed Switch Button
Select the paper source between the auto sheet feeder and cassette.
(3)Menu Button
Displays menus. See “Menu Displays” on page 5.
(4)LCD Monitor
When you perform direct printing, the image, the menu, and the setting items are displayed here.
(5)Settings Button
Allows you to set the page size, media type, Bordered/Borderless printing, printing with the date, etc. See “Changing the Print Settings” on page 17.
3

(6)Trimming Button
Allows you to trim the photo being displayed on the screen. See “Printing a Specified Area – Trimming” on page 25.
(7)
 Buttons
Press to enlarge or reduce the photo being displayed. Pressing this button in trimming mode allows you to enlarge/reduce the area to be trimmed. See “Printing a Specified Area – Trimming” on page 25.
(8)Save Button
Saves data in the memory card onto the computer’s hard disk. See “Saving Data in the Memory Card onto the Computer” on page 46.
(9)Easy-PhotoPrint Startup Button
Starts Easy-PhotoPrint. See “Browsing Photos in the Memory Card on the Computer” on page 46.
(10)Alarm Lamp
Lighting: an error has occurred and the printer is not ready to print.
*When the POWER lamp and the Alarm lamp flash alternately, an error has occurred that may require a service call.
(11)Back Button
Allows you to return to the previous screen.
(12)OK Button
Allows you to make a selection. For example, selecting a photo to be printed, selecting a menu item or other settings.
If an error occurs, press to resume printing after resolving a printer problem.
(13)

 Buttons
Allows you to select the option on the LCD: selecting a menu item or photo, specifying the number of copies to print, making print settings, or scrolling the screen.
(14)Search Button
Looks up target photos in the memory card using the shooting date as the search key. See “Searching for Photos with the Shooting Date” on page 23.
(15)Print Button
Press to start printing according to the settings displayed on the LCD.
(16)Stop/Reset Button
Press to cancel the settings you have made. If this button is pressed during printing, the printer aborts printing.
4
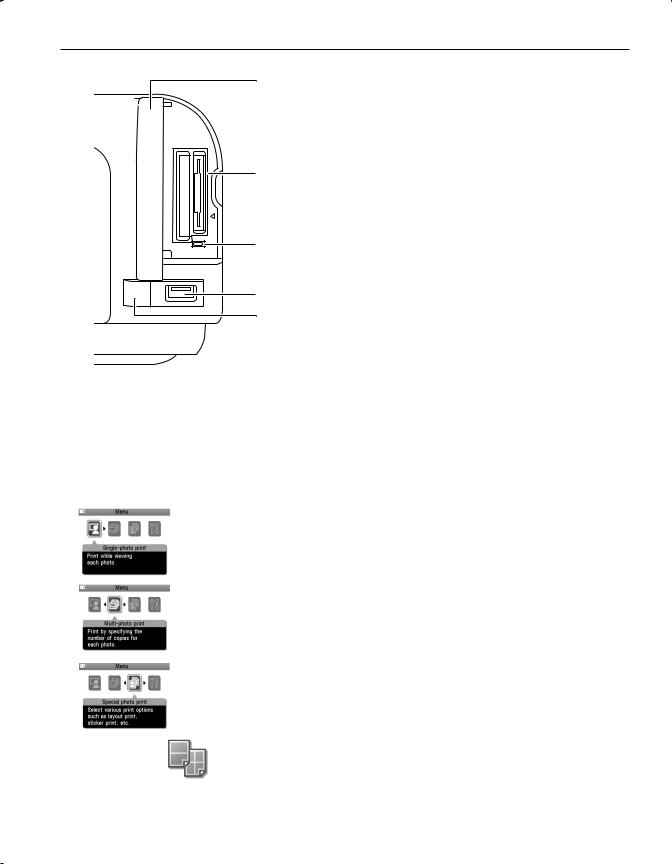
(17) |
(17)Card Slot Cover |
|
|
Close this after inserting a memory card. |
|
|
(18)Card Slot |
|
|
Set the memory card containing photos here. |
|
|
(19)Indicator Lamp |
|
|
The indicator lamp lights when a memory card has |
|
(18) |
been inserted in the card slot and flashes while the |
|
|
printer is accessing to the memory card. |
|
|
(20)Direct Print Port |
|
|
Connects the printer to a PictBridge-compatible |
|
(19) |
digital camera or digital video camcorder. See |
|
“Connecting to a PictBridge Compliant Device” on |
||
|
||
|
page 35. |
|
|
When using optional Bluetooth unit*, connect this |
|
(20) |
port. |
(21) |
*The Bluetooth unit is not available to some regions |
|
due to the law of the countries or the regulations. |
||
|
||
|
For details, contact the Customer Care Center. |
|
|
See “Printing Photographs from a Wireless |
|
|
Communication Device” on page 40 or the |
|
|
Bluetooth User’s Guide. |
|
|
(21)IrDA Interface Port |
|
|
Connects the printer to a mobile phone through a |
|
|
wireless IrDA connection. |
Menu Displays
With the Menu button pressed, the Menu screen appears. You can print photos with various options as well as maintain the printer using items on the Menu.
Single-photo print
You can view the photos in the memory card on the LCD and print them. See “Printing a Photo Displayed on the LCD – Single-photo print” on page 20.
Multi-photo print
You can specify how many copies to print for each photo and print them at once. See “Specifying How Many Copies to Print for Each Photo – Multi-photo print” on page 22.
Special photo print
Provides useful print options below.
Layout print
Prints photos in various layouts such as tiling, album, postcard, etc. See “Specifying the Layout” on page 26.
5
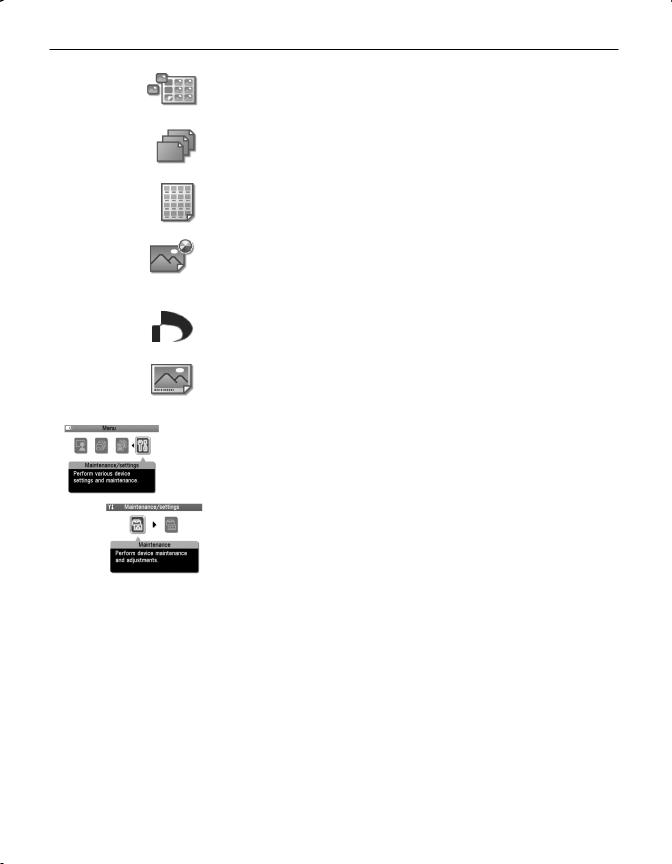
Sticker print
Prints photos on the Canon Photo Stickers. See “Printing on the Sticker – Sticker print” on page 28.
Print all photos
Prints all photos in the memory card. See “Other Printing Functions” on page 31.
Photo Index print
Prints an index of all photos in the memory card. See “Other Printing Functions” on page 31.
Color balance
Prints nine color balance sample photos on a sheet of paper. You can select your favorite color tone from them and print it. See “Printing in Your Favorite Color Tone – Color balance” on page 29.
DPOF print
Prints photos according to the DPOF settings set on the digital camera. See “Other Printing Functions” on page 31.
Captured info
Prints the photo information on the margin of photos. See “Other Printing Functions” on page 31.
Maintenance/settings
You can select a maintenance item or a setting item in this menu.
Maintenance
Displays the maintenance items below.
Nozzle check
Prints a check pattern to ensure that ink is output correctly, or that the print head is aligned properly. See “Printing the Nozzle Check Pattern” on page 53.
Cleaning
Cleans the print head when nozzles are clogged. See “Print Head Cleaning” on page 54.
Deep cleaning
See “Print Head Deep Cleaning” on page 55.
Auto head align
Aligns the print head automatically. See “Aligning Print Head - Auto head align” on page 56.
Manual head align
See “Adjusting the Print Head Manually” on page 59.
Head alignment print
See “Aligning Print Head - Auto head align” on page 56.
6

Roller cleaning
See “Paper feed roller is dirty” on page 63.
Bottom plate cleaning
See “Inside of the printer is dirty” on page 62.
Device settings
Displays the setting items below.
Print settings
Quiet mode
See “Changing the Other Settings” on page 33.
Prevent paper abrasion
See “If the printed surface is still scratched” on page 64.
Wireless print settings
Sets the page size, layout and so on for Wireless and Bluetooth Communication. See “Printing Photographs from a Wireless Communication Device” on page 40.
Bluetooth settings
See “Printing Photographs from a Wireless Communication Device” on page 40.
Language selection
Sets the Language displayed on the LCD. See “Changing the Other Settings” on page 33.
Other settings
Date display
See “Changing the Other Settings” on page 33.
Read/write attribute
See “Setting up the Card Slot as the Memory Card Drive of the Computer” on page 47.
Adjust contrast
See “Changing the Other Settings” on page 33.
Slide show setting
See “Changing the Other Settings” on page 33.
Reset setting
See “Changing the Other Settings” on page 33.
Save settings
See “Changing the Print Settings” on page 17.
Load settings
See “Changing the Print Settings” on page 17.
7
Using a Memory Card
Let’s take a look at different types of memory cards and how to insert and remove them.
Memory Cards Supported by This Printer
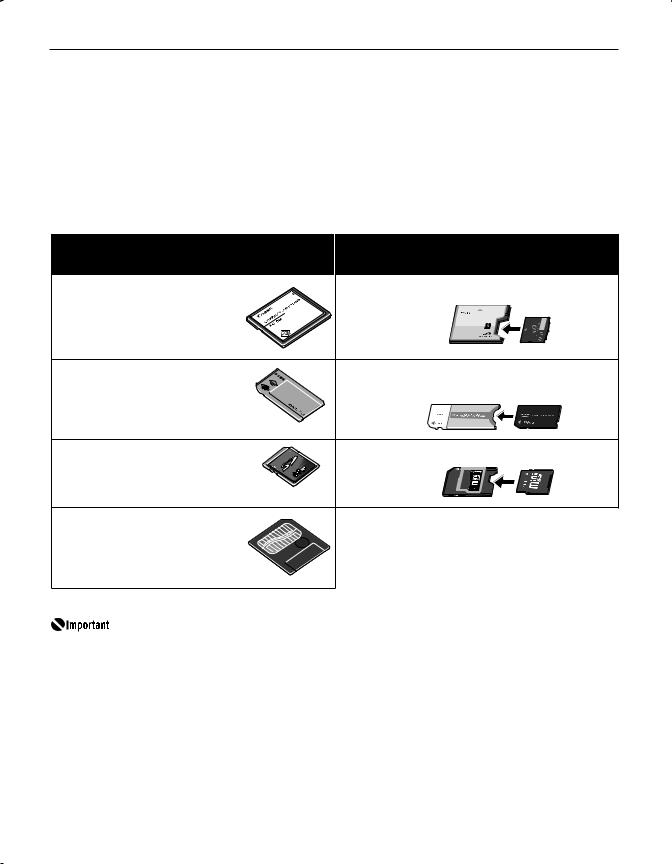
Supported memory cards are as follows:
Memory Cards which can be inserted |
Memory Cards which can be used through a |
||
directly |
special adapter |
||
CompactFlash (CF) Card |
xD-Picture Card*1 |
||
Microdrive |
|
|
|
*Supports TYPE I/TYPE II |
|
|
|
(3.3V). |
|
|
|
Memory Stick |
Memory Stick Duo*2 |
||
Memory Stick PRO |
Memory Stick PRO Duo*2 |
||
Secure Digital (SD) Card |
miniSD Card*2 |
||
MultiMedia Card (ver.3.31) |
|
|
|
SmartMedia Card |
*1 |
Purchase the CompactFlash Card Adapter |
|
*Supports 3.3V card only |
|
for xD-Picture Card separately. |
|
(1MB and 2MB cards not |
*2 |
Use the special adapter supplied with the |
|
supported) |
|||
|
card. |
||
|
|
||
This printer accepts images taken with a camera compatible with the Design rule for Camera File system (Exif2.21 compliant), TIFF (Exif2.21 compliant), and DPOF (Ver. 1.00 compliant).
Photos stored in a memory card not supported by the digital camera may fail in loading or be damaged. For types of memory cards supported by the digital camera, refer to your digital camera user’s manual.
Use the digital camera to format a memory card. Memory card data formats may not be compatible with computer-specific formats.
Images edited on the computer may result in improper printing.
Please use only one type of memory card at a time.
8
Inserting a Memory Card
1
2
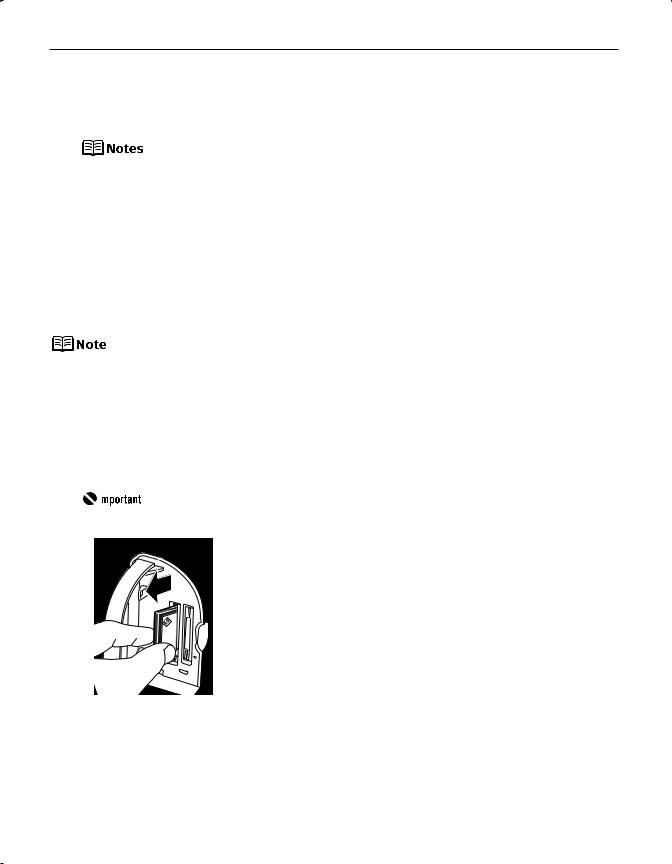
Open the card slot cover.
Insert the memory card in the card slot.
If you use a CompactFlash (CF) card or Microdrive Insert it into the left slot until it stops with its end projecting as shown.

 The indicator lamp lights.
* For xD-Picture Card, use the special adapter.
If you use a SmartMedia card
Insert it into the right slot until it stops with its end projecting as shown.

 The indicator lamp lights.
If you use a Memory Stick/Memory Stick PRO/SD card/ Multimedia card (ver.3.31)
Insert it into the right slot until it stops with its end projecting as shown.
 The indicator lamp lights.
*For Memory Stick Duo/Memory Stick PRO Duo/miniSD Card, use the special adapter.
Do not try to insert the memory card into the card slot any further than the position where it stops; otherwise, the printer or the memory card will be damaged.
9
3 Ensure that the indicator lamp lights after flashing for a moment, and then close the card slot cover.
When Read/write mode is selected, you cannot print the photos in the memory card. After using the card slot as the memory card drive of the computer, remove the memory card, then be sure to select Read-only mode again. See “Setting up the Card Slot as the Memory Card Drive of the Computer” on page 47.
If you have used a computer to edit or process the data stored in the memory card, be sure to print photos from the computer. Using the operation panel to print photos may result in improper printing.
Removing a Memory Card
If you use the printer connected to your computer, follow the instructions for removal of the memory card from the computer. For the procedure, see “Setting up the Card Slot as the Memory Card Drive of the Computer” on page 47.
1 Open the card slot cover.
2 Ensure that the indicator lamp is not flashing, then remove the memory card.
Removing the memory card or turning off the printer while the indicator lamp is flashing can damage the data stored in the memory card.
3 Close the card slot cover.
.
10

Loading Paper
This section describes how to load the paper and select the page sizes and media types from the operation panel.
Print Media to Avoid
Do not use the following types of paper. Using such paper will not only produce unsatisfactory results, but can also cause the printer to jam or malfunction.
•Folded, curled or wrinkled paper
•Damp paper
•Excessively thin paper (less than 64 gsm or 17 lb)
•Excessively thick paper* (more than 105 gsm or 28 lb) *non-Canon genuine paper
•Picture postcards
•Postcards with an affixed photos or stickers
•Any type of paper with holes
About the Auto Sheet Feeder and Cassette
You can use both the auto sheet feeder and the cassette to feed paper.
Loading paper in the auto sheet feeder is easy, and is convenient if you frequently switch to and print on various sizes or types of paper.
Loading paper in the cassette allows you to print without reloading paper for each job. This is convenient for loading a large volume of the type of paper you regularly print onto.
Loading paper in both the auto sheet feeder and cassette makes the following paper feed methods available:
•Changing the paper source to feed different types/sizes of paper
If you load plain paper in the cassette and photo paper in the auto sheet feeder, changing the paper source allows you to print on both types of paper without removing and reloading paper. To change the paper source, use the Feed Switch button on the printer.
•Choosing the paper source to match the location of the printer
You can use just the auto sheet feeder or cassette according to the location of the printer. For Example, if you intend to install the printer in a small place, such as on a shelf with minimal space, you can use just the cassette for printing.
You cannot load sticker paper or credit card-sized paper in the cassette.
Depending on the size or type of paper you use, you may have to use the auto sheet feeder. When using only the cassette, check that the printer can perform the operations you require.
11
Loading the Print Media in the Auto Sheet Feeder
In this example, description is provided using Photo Paper Plus Glossy 4" x 6"/101.6 x 152.4 mm in your printer.
See “Media Types for Card Direct Printing” on page 16 for compatible paper.
1 Flatten the four corners of the paper before loading it.
If the paper is curled, gently bend the corners in the opposite direction until the paper becomes completely flat. See “Back of Paper is Smudged/ Paper Does Not Feed Properly/Printed Surface is Scratched” on page 62.
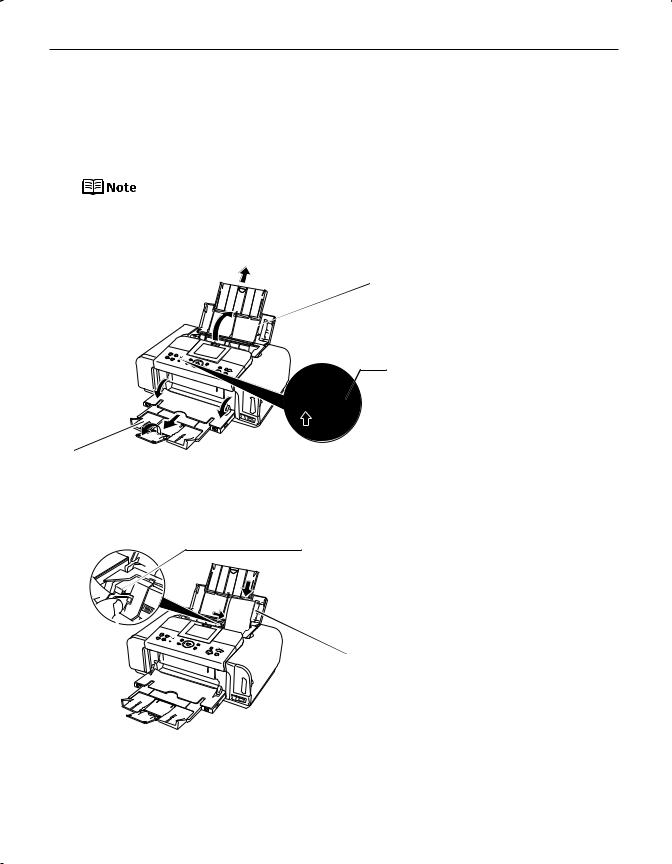
2 Prepare to load the paper.
|
2 |
(1) 1. Open the paper support. |
|
|
|
|
|
2. Pull out the paper support |
1 |
|
extension to support the paper. |
|
|
Auto sheet feeder lamp |
1 |
|
(3) Press the Feed Switch button so that |
|
|
the auto sheet feeder lamp lights. |
2
(2)1. Put your fingers in the notches in either side of the paper output tray and pull down to open it.
2.Pull out the paper output tray extension completely.
3 Load the paper.
Load limit mark
Do not load the stack of paper beyond this load limit mark.
 (1) Load the paper into the auto sheet feeder with the print side facing UP.
(2) Align the paper stack against the cover guide on the right side of the paper support.
Ensure that the cover guide stands when you load paper in the auto sheet feeder.
(3) Pinch the paper guide and slide it against the left side of the paper stack.
12
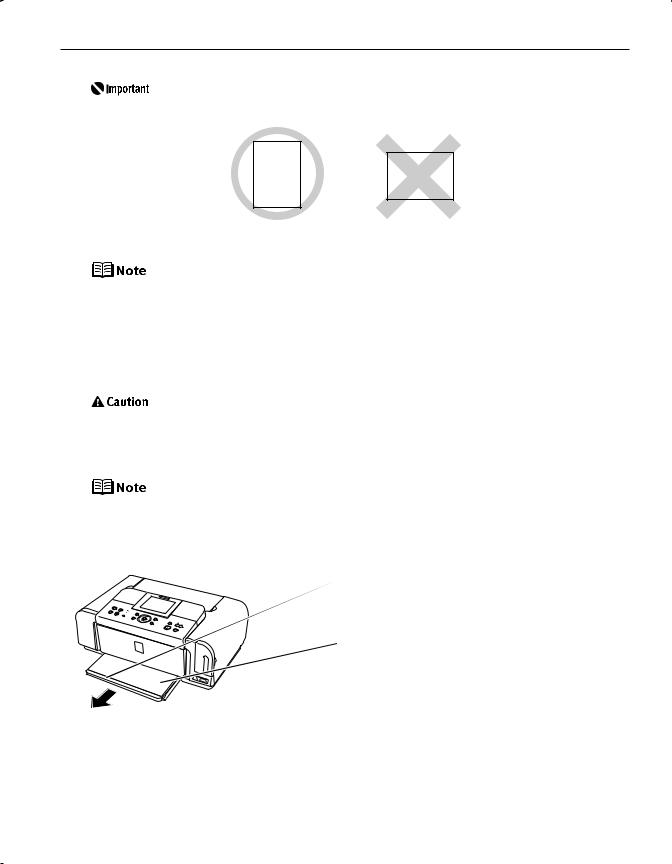
Always load paper in portrait orientation. Loading paper in landscape orientation can cause the paper to be jammed.
Portrait |
Landscape |
Do not touch the printed surface until the ink dries. For specific drying times, refer to the instructions packaged with your media.
Loading the Print Media in the Cassette
In this example, description is provided using Photo Paper Plus Glossy 4" x 6"/101.6 x 152.4 mm in your printer.
See “Media Types for Card Direct Printing” on page 16 for compatible paper.
You cannot load sticker paper or credit card-sized paper in the cassette.
1 Flatten the four corners of the paper before loading it.
If the paper is curled, gently bend the corners in the opposite direction until the paper becomes completely flat. See “Back of Paper is Smudged/ Paper Does Not Feed Properly/Printed Surface is Scratched” on page 62.
2 Prepare to load the paper.
(1) Pull out the cassette from the printer.
(2) Remove the cover on the cassette.
13
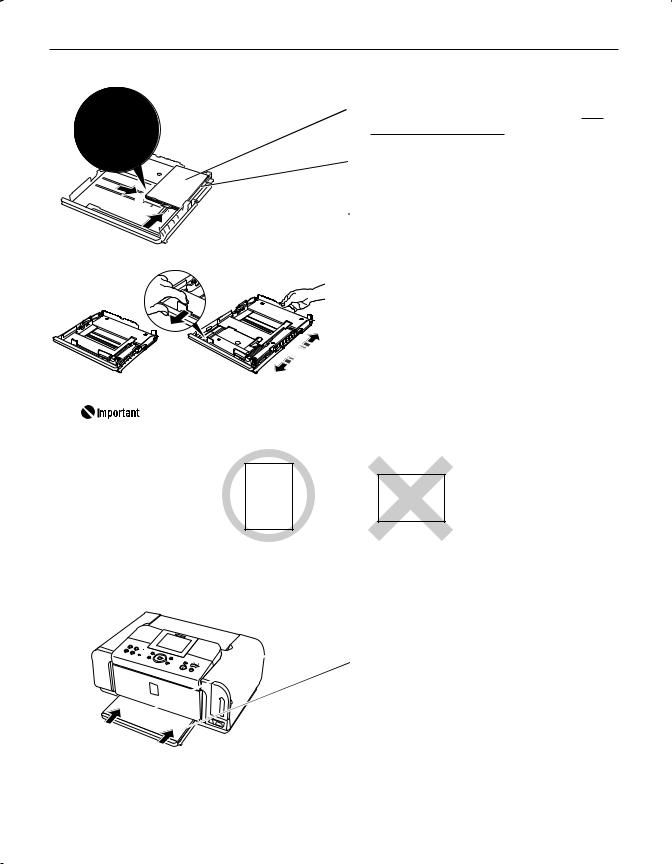
3 Loading the paper. (Print side facing DOWN)
 (1) Load the paper into the cassette with the print side facing DOWN.
 (2) Align the paper stack against the right side of the cassette.

 (3) Slide the paper guides to fit the loaded paper stuck.
Adjust the size of the cassette. When loading A5-size or larger paper
(nonstandard-size paper: 203 mm/8 inches or more in length), extend the cassette.
When loading 5" x 7" or smaller paper (nonstandard-size paper: less than 203 mm/8 inches in length), do not extend the cassette.
Always load paper in portrait orientation. Loading paper in landscape orientation can cause the paper to be jammed.
Portrait |
Landscape |
4 Insert the cassette into the printer.
 (1) Set the cover on the cassette.
 (2) Insert the cassette into the printer. Push the cassette all the way into the printer.
Once extended to load paper of A5-size or larger, the cassette does not fit in the printer body as shown on the left.
14
5 Prepare the paper output tray.
 (2) Press the Feed Switch button so that the cassette lamp is lights.
 Cassette lamp
1
2
(1)1. Put your fingers in the notches in either side of the paper output tray and pull down to open it.
2.Pull out the paper output tray extension completely.
Do not touch the printed surface until the ink dries. For specific drying times, refer to the instructions packaged with your media.
15

Media Types for Card Direct Printing
You can use the following Canon genuine paper:
Media Type |
Paper Support Load Limit |
Page Size |
Media Type |
|
|
|
|
Plain Paper |
A4/Letter: up to 150 |
[A4]/[8.5"x11"(LTR)] |
[Plain paper] |
|
sheets |
|
|
|
|
|
|
Photo Paper Pro*1 |
A4/Letter: up to 10 sheets |
[A4]/[8.5"x11"(LTR)] |
[Photo Paper Pro] |
|
101.6 x 152.4 mm/4" x |
[4"x6"(101.6x152.4)] |
|
|
6": up to 20 sheets |
|
|
|
|
|
|
Photo Paper Plus |
A4/Letter: up to 10 sheets |
[A4]/[8.5"x11"(LTR)] |
[Photo Plus Glossy] |
Glossy*1 |
|
|
|
101.6 x 152.4 mm/ |
[4"x6"(101.6x152.4)] |
|
|
|
4" x 6": up to 20 sheets |
|
|
|
|
|
|
|
127 x 177.8 mm/ |
[5"x7"(127x177.8)] |
|
|
5" x 7": up to 10 sheets |
|
|
|
|
|
|
Photo Paper Plus |
A4/Letter: up to 10 sheets |
[A4]/[8.5"x11"(LTR)] |
[Photo Plus Glossy] |
Semi-Gloss*1 |
|
|
|
101.6 x 152.4 mm/4" x |
[4"x6"(101.6x152.4)] |
|
|
|
6": up to 20 sheets |
|
|
|
|
|
|
Matte Photo Paper |
A4/Letter: up to 10 sheets |
[A4]/[8.5"x11"(LTR)] |
[Matte Photo Paper] |
|
|
|
|
|
101.6 x 152.4 mm/4" x |
[4"x6"(101.6x152.4)] |
|
|
6": up to 20 sheets |
|
|
|
|
|
|
Glossy Photo Paper |
A4/Letter: up to 10 sheets |
[A4]/[8.5"x11"(LTR)] |
[Glossy Photo Paper] |
|
|
|
|
|
101.6 x 152.4 mm/4" x |
[4"x6"(101.6x152.4)] |
|
|
6": up to 20 sheets |
|
|
|
|
|
|
|
Credit Card: up to 20 |
[Credit card] |
|
|
sheets*3 |
|
|
Photo Stickers*2*3 |
1 sheet |
– |
– |
When using plain paper (64 gsm or 17 lb) up to 150 sheets can be set. *1: When loading a stack of paper, the printed side may be marked when it
is fed in. If this happens, load paper one sheet at a time.
*2: When printing on sticker paper, select Sticker print from Special photo print. When printing photos in a mobile phone on sticker paper, select
Stickers x16 in the Wireless print settings screen. For details, see “Printing Photographs from a Wireless Communication Device” on page 40.
*3: You can load only in the auto sheet feeder. Do not load in the cassette.
16
Changing the Print Settings
You can change the print settings such as page size, media type, Bordered or Borderless print, etc.
To Change Print Settings
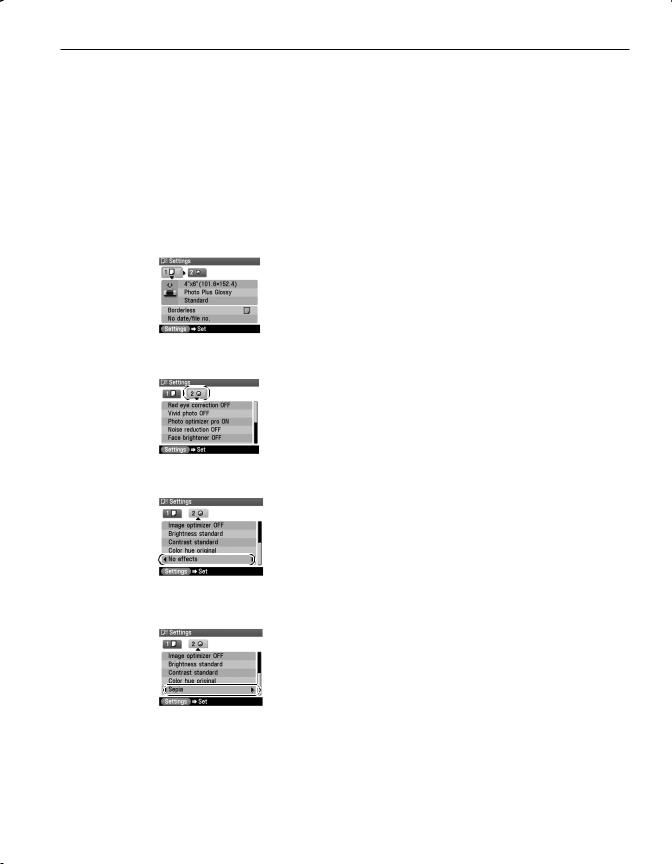
This section describes the steps to change the print settings using the Effects setting as an example. For information on each item, see “Print Setting Items” on page 18.
1 Press the Settings button.
Print setting screen is displayed.
2 Select the Setting tab.
Use the buttons to select the Setting tab.
Select tab 2.
3
4
5
Select the setting item.
Use the  button to select the setting item.
Select No effects here.
Change the setting.
Use the  buttons to change the setting.
Change to Sepia here.
Complete setting.
Press the Settings button.
17
You can save the current settings. Once you save the settings, the saved settings are loaded when the printer is turned on.
1.Press the Menu button.
2.Use the  buttons to select Maintenance/settings and then press the OK button.
3.Use the  buttons to select Device settings and then press the OK button.
4.Use the buttons to select Save settings and then press the OK button.
5.Use the buttons to select Yes and then press the OK button. When you select Load settings, you can load the saved settings.
Print Setting Items
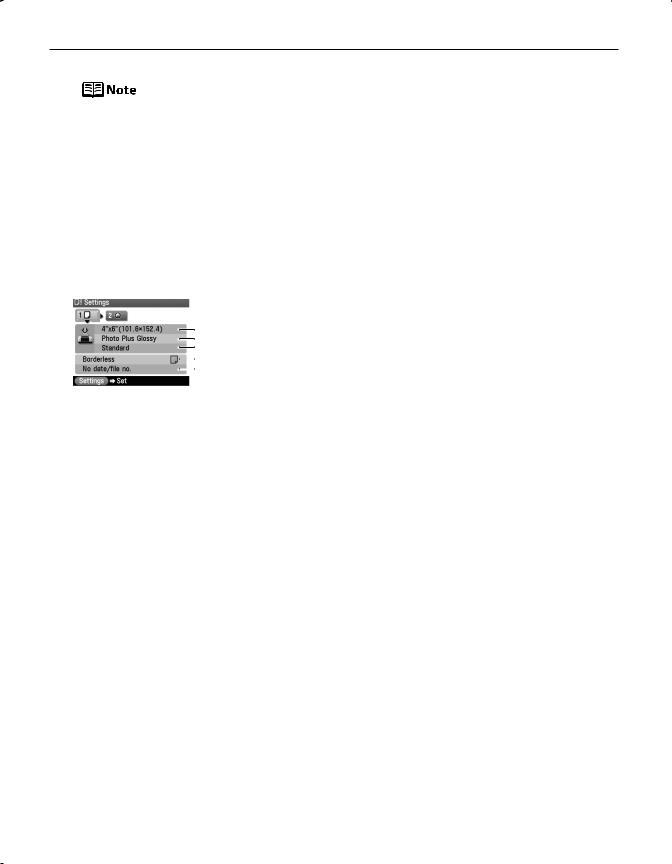
Tab 1:
(1)Allows you to set the page size, media type, Bordered/
(2)Borderless printing, and printing with the date.
(3)
 (4)(5) (1) Select the page size.
4"x6"(101.6x152.4), 5"x7"(127x177.8), 8.5"x11"(LTR), A4, Credit card
(2)Select the media type.
Photo Paper Pro, Photo Plus Glossy, Matte Photo Paper, Glossy Photo Paper, Plain paper
(3)Select the printing quality. Standard/High
(4)Select the Bordered or Borderless print. Bordered/Borderless
(5)Select whether to print the shooting date, file number, or not. No date/file no., Print date only, Print file no. only, Print date & file no.
18
(1)
(2)
(3)
(4)
(5)
(6)
(7)
(8)
(9)
(10)
Tab 2:
Allows you to optimize photos with the functions below.
(1)Correct red-eye caused by reflection when the flash hits a person’s eyes.
Red eye correction ON/Red eye correction OFF
(2)Activate/deactivate Vivid Photo function.
This function makes green and blue more lively. Vivid photo ON/Vivid photo OFF
(3)Activate/deactivate the Photo Optimizer Pro function. This function automatically optimizes brightness and tone of a photo.
Photo optimizer pro ON/Photo optimizer pro OFF
(4)Activate/deactivate the function.
This function reduces the noise on blue areas like the sky as well as on black areas.
Noise reduction ON/Noise reduction OFF
(5)Activate/deactivate Face brightener function.
This function brightens a darkened face on the photo taken against the light.
Face brightener ON/Face brightener OFF
(6)Correct the contours and smooths out the jaggedness. Image optimizer ON/Image optimizer OFF
(7)Adjust brightness.
Brightness +2, Brightness +1, Brightness standard, Brightness -1, Brightness -2
(8)Adjust contrast.
Contrast +2, Contrast +1, Contrast standard, Contrast -1, Contrast -2
(9)Adjust color hue.
Color hue red +2, Color hue red +1, Color hue original, Color hue yellow +1, Color hue yellow +2
(10)Apply the effect to print a photo in sepia or like an illustration.
No effects, Sepia, Simulate illustration
19
Printing a Photograph
Let’s select a photo stored on the memory card of the digital camera, and print it.
If you leave the printer more than five minutes without using any button on the operation panel, the LCD goes into sleep mode automatically. Press the OK button to turn on the LCD again.
Printing a Photo Displayed on the LCD – Single-photo print
1 Prepare to print.
Preparing to print
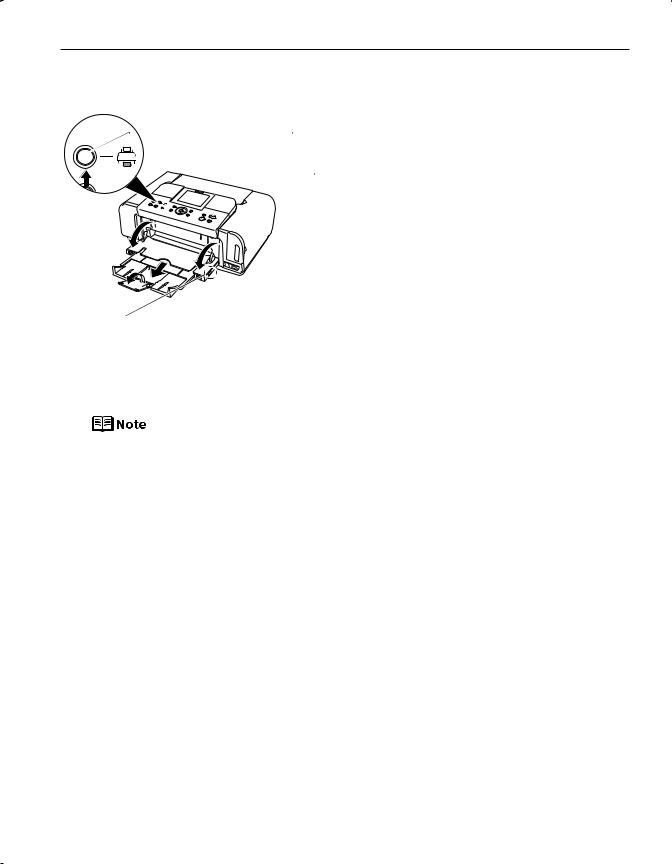
(1)Turn on the printer.
(2)Load the paper.
See “Loading Paper” on page 11.
(3)Insert the memory card in the card slot. See “Inserting a Memory Card” on page 9.
(4)Ensure the paper source.
Ensure that the proper paper source is selected. Press the Feed Switch button to change the paper source.
 Auto sheet feeder lamp
 Cassette lamp
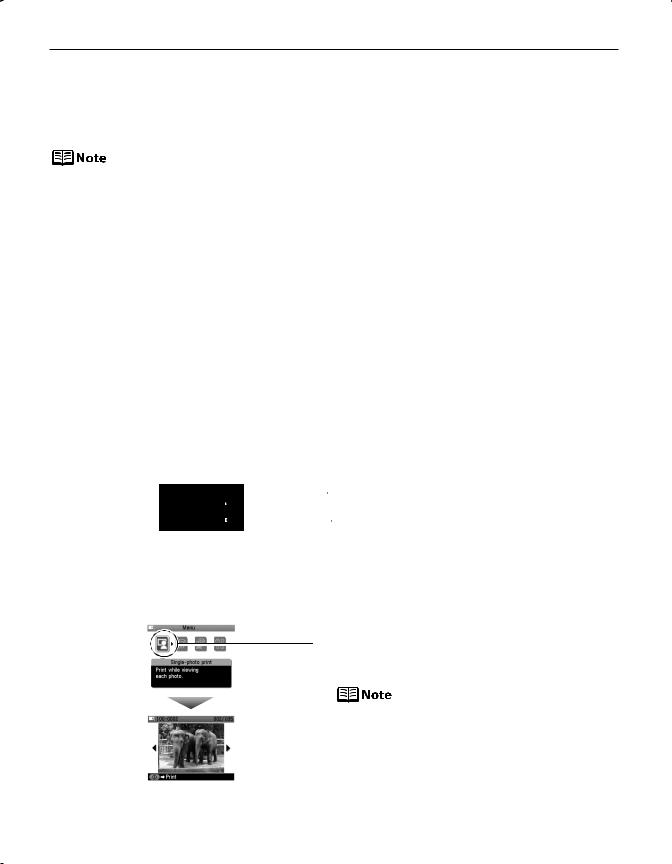
2 Select the print mode.
(1)Press the Menu button.
The Menu screen is displayed.
(2) Use the 
 buttons to select Single-photo print and then press the OK button.
The Single-photo print screen is displayed.
The watch icon may appear while photos are being imported from the memory card.
20
3 Select the photo to print.
(1) Use the buttons to select the
photo to print.
 (2) Press the Print button.
The print confirmation screen is displayed.
Displaying Photos Automatically on the LCD – Slide Show
You can automatically display photos stored in a memory card on the LCD.
To start the slide show, press the OK button on the Single-photo print screen.
To stop the slide show, press the Stop/Reset button during the slide show.
You can do...
You can zoom in/out on the photo on the LCD using the 
 buttons.
See “Searching for Photos with the Shooting Date” on page 23.
See “Printing a Specified Area – Trimming” on page 25.
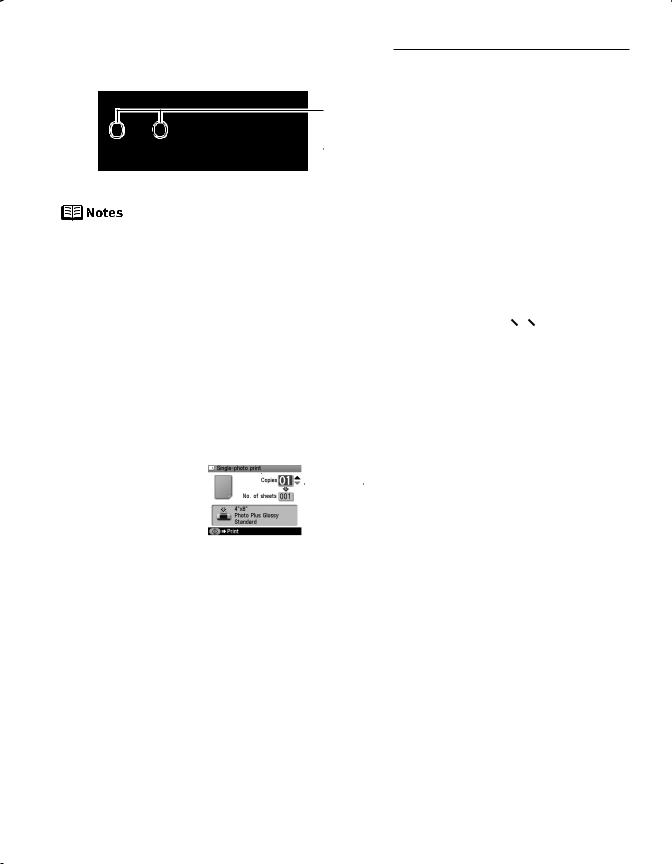
4 Start printing.
(1)Confirm the settings.
To change any of the settings, press the Settings button. See “Changing the Print Settings” on page 17.
 (2) Press the
  buttons to specify the number of copies to print.
(3) Press the Print button. The selected photo will be printed.
21
Specifying How Many Copies to Print for Each Photo – Multi-photo print
You can specify how many copies to print for each photo.
1
2
Prepare to print.
See “Preparing to print” on page 20.
Select the print mode.
(1)Press the Menu button.
(2)Use the  buttons to select Multi-photo print and then press the OK button. The photo selection screen is displayed.
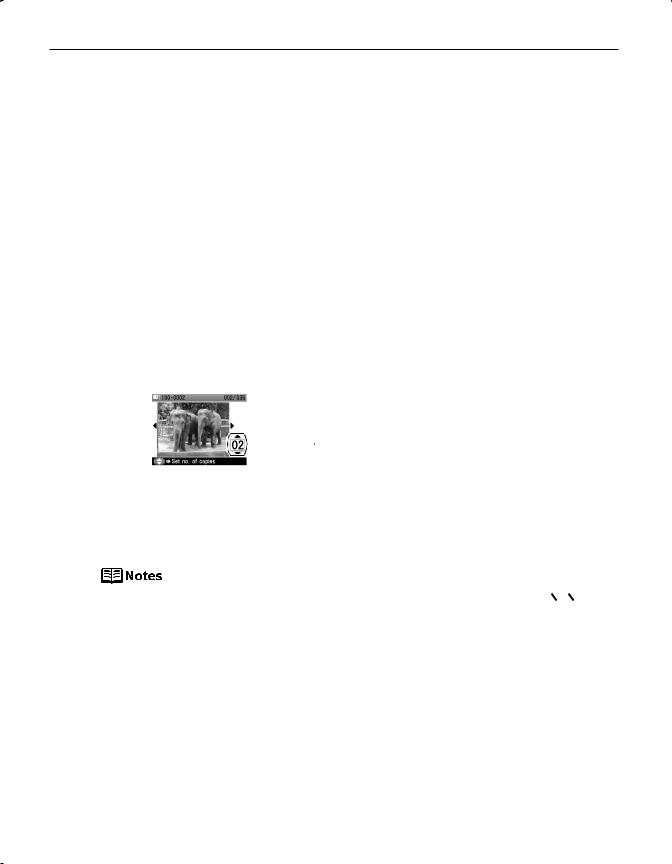
3
4
Specify the number of copies to print.
(1) Use the 
 buttons to select the photo you wish to print.
 (2) Use the
  buttons to specify the number of copies to print.
(3)Repeat steps (1) and (2) and specify the number of copies for each photo you wish to print.
(4)Press the OK button.
The print confirmation screen is displayed.
You can do...
You can zoom in/out on the photo on the LCD using the 
 buttons.
See “Searching for Photos with the Shooting Date” on page 23.
See “Printing a Specified Area – Trimming” on page 25.
Start printing.
(1)Confirm the settings.
To change any of the settings, press the Settings button. See “Changing the Print Settings” on page 17.
(2)Press the Print button.
The specified number of copies for each photo will be printed.
22
 Loading...