


Radio / Cassette
Bremen
RCM 127
Operating instructions

Table of contents |
|
Traffic safety .................................................................. |
2 |
Important information ................................................... |
3 |
Quick reference ............................................................. |
5 |
KeyCard - Anti-theft system ....................................... |
10 |
Detailed operating instructions ................................. |
14 |
First-time installation ............................................................... |
14 |
Operating the radio with RDS .................................................. |
17 |
RDS information ...................................................................... |
23 |
PTY - Programme Type ........................................................... |
25 |
Traffic message reception with RDS-EON ................ |
29 |
Traffic Memo (TIM) ...................................................... |
32 |
Warning .............................................................................. |
37 |
Operating the tape player ........................................... |
39 |
Operating the CD changer (optional) ........................ |
44 |
Operating the AUX mode ............................................ |
52 |
Audio settings ............................................................. |
53 |
DNC ......................................................................................... |
54 |
EQ (equalizer) .......................................................................... |
56 |
Manual equalizer ..................................................................... |
56 |
Hi-fi calibration ......................................................................... |
57 |
Programming with DSC .............................................. |
61 |
Muting the audio source while using the car phone................ |
66 |
Specifications .............................................................. |
67 |
Traffic safety
As the driver of a motor vehicle, it is your responsibility to pay attention to the traffic situation at all times. Never use your car radio in a way that could distract you.
Please keep in mind that you travel a distance of 14 m per second at a speed of only 50 km/h.
Should the traffic situation become particularly demanding, we advise you not to use the car radio equipment.
Always make sure that you are still able to hear any warning signals coming from outside of the vehicle, such as police or fire engine sirens, so that you can react accordingly.
As a result, you should always select a moderate volume for playing your car radio equipment while you are driving.
2
Important information
Precautions
Before operating your new car radio for the first time, please read the following information carefully.
Installation
If you would like to install your new car radio yourself or add other audio components to the existing ones, then please read the enclosed instructions on installation and connection carefully.
Car phone
If there is a mobile telephone installed in your vehicle, the radio, tape player or CD player (optional) can be muted automatically when the phone is being used.
It is possible to program the system so that traffic messages or the playback of stored traffic messages always have priority over the use of the telephone. (For more information, please refer to the section on muting the audio source while using the car phone.)
Accessories
Use accessories and spare parts approved by Blaupunkt only.
You can use the following Blaupunkt products with this car radio:
Amplifier: All Blaupunkt amplifiers, the pre-amp out cable 7 607 893 093 is required.
Sub out: Subwoofer pre-amp out for connecting an amplifier.
Changer: CDC F 07
Remote control:
With the infrared remote control RC 07 you can control all of the important functions of your car radio system from the steering wheel.
Navigation: The Blaupunkt RGN 06 navigation component can be added to allow active route guidance (expected to be available: mid 1997)
Navigation components can only be installed by specialised Blaupunkt navigation dealerships.
Other components are currently in the planning.
3
DEUTSCH |
ENGLISH |
FRANÇAIS |
ITALIANO |
NEDERLANDS |
SVENSKA |
ESPAÑOL |
PORTUGUÊS |
|
|
|
|
|
|
|
|

1 |
2 |
3 |
4 |
5 |
6 |
7 |
8 |
9 |
10 |
11 |
14 |
13 |
12 |
15
2
Remote control RC 07
(optional)
 13 1
13 1 
Mute
4
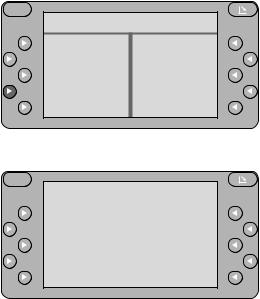
Quick reference
1ON / Mute
Switching on/off: Press ON.
To switch the set on with the ON button, the KeyCard has to be inserted. The unit will play at the pre-adjusted volume level (VOL FIX).
To switch the set off, press ON for longer than 0.5 seconds.
Mute:
On/off:
Press ON or  on the remote control briefly. MUTE will appear in the display when the mute function has been activated.
The set will switch off automatically if it is set to mute for longer than 5 minutes.
Switching the set on for the first time:
If the set is switched on for the first time or after the power supply has been disconnected, the FIRST INSTALL menu will appear in the display.
If you would like to alter any of the settings, read the instructions in the section on “First installation”.
You can exit the FIRST INSTALL menu by pressing the selection button marked EXIT  .
.
Switching on/off with the KeyCard:
Switch the set on by pressing ON.
Note
First read the information in the section on the “KeyCard anti-theft system”.
Switching on/off with the ignition:
It is possible to switch the set on and off with the vehicle ignition if it has been installed to do so.
After the set has been switched off using the ignition, a double beep will remind you to remove the KeyCard before you leave the vehicle.
Switching the set on when the ignition is off:
The set can be switched on again by pressing ON if the KeyCard is left in the set after the double beep.
After playing for one hour, the set will switch off again automatically in order to save battery power.
If you press ON again, the set will play again for one hour.
5
DEUTSCH |
ENGLISH |
FRANÇAIS |
ITALIANO |
NEDERLANDS |
SVENSKA |
ESPAÑOL |
PORTUGUÊS |
|
|
|
|
|
|
|
|
2+ / -
Adjusting the volume:
The volume can be adjusted from VOLUME +0 to VOLUME +80. Press + or - to adjust the volume in either direction in 15 increments per second.
Each time the set is switched on, it will play at the preadjusted volume level. The pre-adjusted volume level (VOL FIX) can be altered. Read the information in the section on “Programming with DSC – VARIOUS”.
Switching the volume to zero immediately:
Press ON briefly. MUTE will then appear in the display and the volume will be reduced to zero immediately.
Press ON again, and the set will resume playing at the volume level last set.
The set will switch off automatically if it is set to mute for longer than 5 minutes.
3TIM (traffic memo) Setting the TIM times:
Press TIM for approximately 1 second.
Recalling stored traffic messages: Press TIM briefly.
Switching TIM off while using a car wash:
Press ON to switch the set off and then press TIM.
TIM-FUNCTION DEACTIVATED will appear briefly in the display. The motor antenna will retract.
Be sure to read the section on “Traffic Memo (TIM)” for more important information.
4TU (tuner)
Press this key to switch to operating the radio (main menu). If you press TU while the radio is playing, the set will switch between the main menu and the menu selected last.
5CC (compact cassette)
Press to switch to operating the tape player.
6CDC (CD changer)
Press to switch to operating the CD changer (optional).
If the Blaupunkt CDC F 07 changer has not been connected, NO CHANGER CONNECTED will appear in the display.
7AUX
Press to switch to any additional equipment connected. Refer to “Accessories” to find out which auxiliary equipment can be added to this system.
6

8S (select) Press S briefly:
The current time will appear in the display header.
The menu for the sound settings will appear in the display. Press  /
/  to retrieve the function you would like to alter.
Press  /
/ or << / >> to select TREBLE, BASS, FADER or
BALANCE.
If LOUDNESS is highlighted in the display, this means that this function is currently active. Switch it off by pressing the corresponding softkey again. Refer to the section on “Programming with DSC – VARIOUS” to set the intensity.
The settings for EQ (equalizer) and DNC are described separately.
DSC main menu:
Press S for approximately 1 second.: This activates the DSC MAIN MENU.
Here you can adjust the programmable basic settings. For further information, read: “Programming with DSC”.
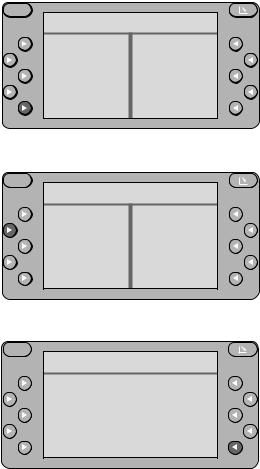
9Display/Selection menu
The selected mode of operation and the functions which can be selected appear in the display.
It is possible to preselect colour, illumination and other settings. Refer to the operating instructions in the section on “Display settings”.
:Display header
Indicates the current selections, e.g. when operating the radio, the station; when operating the tape player, the track.
; Cassette eject
Open/close panel. Eject/insert cassette.
< /
/  Softkeys
Use these keys to select the functions appearing in the display (a new menu will appear).
Other functions can be switched on/off (alternates between normal and highlighted display).
Press EXIT  to return to the previous (main) menu.
7
DEUTSCH |
ENGLISH |
FRANÇAIS |
ITALIANO |
NEDERLANDS |
SVENSKA |
ESPAÑOL |
PORTUGUÊS |
|
|
|
|
|
|
|
|

= Multi-functional rocker switch or remote control but- |
CD changer mode (optional) |
tons (optional) |
|
Radio mode |
|
<</>> Switching between reception and memory table (preference menu)
 /
/ Scrolling in the selected table
 up /
up /  down
down
Using the remote control, you can select the following or previous station.
Cassette mode
 /
/ Select the title (S-CPS)
  forwards /
  reverse
>> fast forward
<<fast rewind
Stop the function by pressing the opposite key.
Select CD >> up
<< down
Select track
up: Press  briefly.
down: Press  two or more times in quick succession.
CUE - fast forward (audible):
Hold  pressed down.
Restart same track:
Press  briefly.
Review - fast reverse (audible):
Hold  pressed down.
Additional functions for the rocker switch:
Other settings can be selected in combination with the S (select) key.
8

>KeyCard anti-theft system
You must insert the KeyCard in order to be able to operate this set.

 KeyCard
Inserting the KeyCard
While the KeyCard tongue is protruding out of its opening, insert the KeyCard into the slot with the contact area facing up.
If necessary, press the KeyCard tongue to release it. Be sure to read the information in the section on the “KeyCard anti-theft system”.
Flashing KeyCard tongue
It is possible to program this unit so that the KeyCard tongue will flash when the set is switched off and the KeyCard has been removed. This flashing light indicates to thieves that it is useless to try and steal the set.
The flashing light can be switched off if desired.
For further information, read the section on “Programming with DSC”.
?SRC
Remote control (optional)
Press SRC as often as necessary in order to switch between the different operating modes for radio, tape player, CD changer (optional), AUX (if activated).
9
DEUTSCH |
ENGLISH |
FRANÇAIS |
ITALIANO |
NEDERLANDS |
SVENSKA |
ESPAÑOL |
PORTUGUÊS |
|
|
|
|
|
|
|
|
The KeyCard anti-theft system
One KeyCard is included with the set.
You can, however, also use a second KeyCard with your set. You can purchase a second KeyCard at any specialised dealership.
Starting up the unit
•Press ON to switch the set on.
With the KeyCard tongue protruding out of its opening, insert the KeyCard into the slot with the contact area facing up. Make sure that the KeyCard is inserted properly.
The car radio is now ready to operate.
If a KeyCard which does not belong to the set is inserted, KEYCARD ERROR will appear in the display. Do not attempt to use the equipment in this case.
After approximately 10 seconds the unit will switch off automatically.
If you insert any other type of card (e.g. telephone or credit card) into the slot, the display will indicate THIS IS NO KEYCARD for approximately 2 seconds.
Remove the incorrect card and insert the correct KeyCard into the unit. Following KEYCARD ERROR or THIS IS NO KEYCARD
•press ON to switch the unit on.
KeyCard
10
Removing the KeyCard
•Press the KeyCard tongue. The KeyCard can now be removed.
•Pull the KeyCard out of the slot.
“Training” the second KeyCard / replacing the KeyCard
A KeyCard can be “trained” as an additional KeyCard if the unit is still being operated with the original KeyCard.
If you want to “train” a second KeyCard:
•insert the original KeyCard and switch the unit on.
•Press S for approximately 1 second. DSC-MAIN MENU will appear in the display header.
•Select the following functions one after the other:  KEYCARD (playback will be set to mute) and
  LEARN KC.
PLEASE CHANGE CARD will appear in the display.
•Remove the original KeyCard and insert the new KeyCard.
LEARNING READY will then appear in the display, the new KeyCard is now “trained”.
The new KeyCard can now be used to operate the set.
This car radio will not accept more than two KeyCards.
When trying to “train” a third KeyCard, the KeyCard which was not used in the “training” process will automatically become invalid.
S
DSC-MAIN MENU
TUNER
DISPLAY
VARIOUS
KEYCARD EXIT
S
DSC-KEYCARD
LEARN KC
READ KC
S
LEARN KEYCARD
PLEASE
CHANGE
CARD
EXIT
11
DEUTSCH |
ENGLISH |
FRANÇAIS |
ITALIANO |
NEDERLANDS |
SVENSKA |
ESPAÑOL |
PORTUGUÊS |
|
|
|
|
|
|
|
|
Displaying the radio pass data
After inserting the original KeyCard, you can have the radio pass data such as the model name, the product number (7 6...) and the serial number shown in the display.
•Insert the original KeyCard and switch the unit on.
•Press S for approximately 1 second. DSC-MAIN MENU will appear in the display header.
•Select the following functions one after the other:  KEYCARD and
 READ KC.
The radio pass data will appear in the display. If the data does not appear in the display, then a replacement KeyCard or an incorrect (WRONG) KeyCard has been inserted.
•Press EXIT  (repeatedly if necessary) to exit the menu.
Short Additional Memory (S.A.M)
Using the second KeyCard which can be purchased at any specialised dealership, you can program a short text by selecting the DSC menu item READ KC. This text might be the telephone number of a car repair service or the emergency call number of your auto club.
Any specialised dealer with the proper equipment can program the desired text with up to a maximum of 54 characters onto the KeyCard.
Turn On Message (T.O.M.)
Using the second KeyCard which can be purchased at any specialised dealership, you can program the unit to display a selected “Turn On Message” after the set is switched on.
Any specialised dealer with the proper equipment can program the desired text with up to a maximum of 48 characters onto the KeyCard.
Each time you switch on your car radio using the second KeyCard, this text will appear in the display.
S
DSC-MAIN MENU
TUNER
DISPLAY
VARIOUS
KEYCARD EXIT
S
DSC-KEYCARD
LEARN KC
READ KC
EXIT
S
READ KEYCARD
Bremen RCM 127 7646860010BP6860
T.......
EXIT
12
Optical indication of anti-theft protection
Flashing KeyCard tongue
When the radio has been switched off and the KeyCard removed, the KeyCard tongue can be programmed to flash as a warning to thieves.
The following requirements must be fulfilled for this to function correctly:
The positive power supply line and the permanent +12 V lead must be connected properly, as described in the installation instructions.
In the DSC mode, the LED setting must be switched to “LED ON”.
If necessary, please refer to the section on “Programming with DSC – VARIOUS, KC LED”.
Switching off the flashing light
The flashing light can be switched off by pushing in the KeyCard tongue to lock it. Before inserting the KeyCard, make sure that the KeyCard tongue is in the out position.
If you would like to deactivate the flashing tongue permanently, switch the LED setting to “LED OFF” in the DSC menu.
For further information, read the section on “Programming with DSC – VARIOUS, KC LED”.
Taking care of your KeyCard
In order to ensure that the KeyCard always functions correctly, it is important for the contacts to be free from any foreign particles. Avoid direct skin contact.
If necessary, clean the KeyCard contacts using a cotton swab dipped in alcohol.
13
DEUTSCH |
ENGLISH |
FRANÇAIS |
ITALIANO |
NEDERLANDS |
SVENSKA |
ESPAÑOL |
PORTUGUÊS |
|
|
|
|
|
|
|
|
Detailed operating instructions
First-time installation
If the set is switched on for the first time or after the power supply has been disconnected, FIRST INSTALL will appear in the display header.
Using this menu you can adjust the following settings:
CLOCK |
Set the clock |
OWNER-ID |
Enter proof of ownership |
AUX-IN |
Activate AUX / Enter name of auxiliary equipment |
NORM SET |
Reset to original factory settings |
Press EXIT  to exit the menu.
You can activate this menu if you switch the radio off, then press down S and hold it while you switch the set on again.
Setting the clock
•Press  CLOCK. The current time will appear in the display header.
• Press  - HOURS / HOURS +
  to alter the hours and
  - MIN / MIN +
  to alter the minutes.
When you have completed the setting,
•press EXIT  .
.
Entering OWNER ID
On four lines (max. 64 characters) you can enter information as proof of ownership.
•Press  OWNER-ID. OWNER-ID will appear in the display header.
•Press  /
/ to select the characters.
S
FIRST INSTALL
CLOCK OWNER-ID AUX-IN NORM SET
EXIT
S
CLOCK |
12:27 |
- HOURS |
HOURS + |
- MIN |
MIN + |
|
EXIT |
S
FIRST INSTALL
CLOCK OWNER-ID AUX-IN NORM SET
EXIT
14
•Press << / >> to select the entry position.
If you are at one of the end positions (first or last character), you can move directly to the opposite end position by pressing << / >>.
Press  /
/  in order to select the line. Press
  CLEAR to delete the entire entry.
Press EXIT  to exit the menu. The last setting will be stored automatically.
Activating AUX / Entering the name of the auxiliary equipment
If you want to operate an additional piece of equipment, you must activate the AUX setting first. You can enter any name (max. 8 characters) for this equipment.
•Press  AUX-IN.
•Press  AUX. The function is activated when AUX is highlighted. AUX can now also be selected with the RC 07 remote control.
•Press  AUX-NAME and enter the name of the auxiliary equipment, such as Walkman.
•Press  /
/ to select the characters.
•Press << / >> to select the entry position.
Press  CLEAR to delete the entire entry.
Press EXIT  to exit the menu. The last setting will be stored automatically.
S
OWNER-ID
________________
________________
________________
________________
CLEAR EXIT
S
FIRST INSTALL
AUX
AUX-NAME
EXIT
S
W A L K M A N
CLEAR EXIT
15
DEUTSCH |
ENGLISH |
FRANÇAIS |
ITALIANO |
NEDERLANDS |
SVENSKA |
ESPAÑOL |
PORTUGUÊS |
|
|
|
|
|
|
|
|
Resetting to original factory settings
Using NORM SET you can return all of the altered settings except for the current time to the original factory settings.
Warning!
You will delete all of the adjusted settings such as DSC, OWNER-ID, equalizer settings, preference tables, etc.
If you want to reset all of the altered settings to the original factory settings,
• press  NORM SETfor approximately 4 seconds. The following message will appear in the display:
PLEASE WAIT.
ALL ADJUSTMENTS ARE SET TO DEFAULT VALUES.
As soon as the FIRST INSTALL menu appears in the display, the settings have all been returned to the original factory settings.
Press EXIT  to exit the menu.
S
FIRST INSTALL
CLOCK OWNER-ID AUX-IN NORM SET
EXIT
S
PLEASE WAIT
ALL ADJUSTMENTS
ARE SET TO
DEFAULT VALUES
16

Radio operation with RDS (Radio Data System)
This radio is equipped to receive the following wavebands: FM, MW and LW.
In combination with the two FM tuners, the Radio Data System guarantees excellent reception quality and more convenience when listening to the radio.
RDS functions such as station recognition, including a regional identifier, and the display of the station name have become standard features. Using PTY (programme type identification) you can select which type of programme, e.g. news, sports, light classical music, etc., you would like to listen to. However, the PTY signal is not yet broadcast by all radio stations.
During FM operation, the station names in the reception table indicate which stations you can tune into. Stations which do not transmit an RDS signal are listed at the bottom of the table along with their frequencies.
The display header indicates the current status.
You can use the softkeys to select the corresponding stations directly.
It is possible to store a preference table (memory table) for each of the wavebands. These tables will display the stations you have stored.
Switching to the radio mode
•Press TU (tuner). The TU main menu will appear in the display (radio menu). The display will indicate the status selected last.
Selecting the waveband
You must have the TU main menu in the display.
•Press TU once or repeatedly as necessary.
•Select the desired waveband with the corresponding softkey, e.g. select
 FM.
FM.
The display will now show the reception table, i.e. all of the stations within reception range will be displayed for this waveband.
S
|
NDR 2 |
||
FM |
|
|
R-TEXT |
MW |
|
|
REGIONAL |
LW |
|
|
|
TA |
|
|
|
PTY |
|
|
|
17
DEUTSCH |
ENGLISH |
FRANÇAIS |
ITALIANO |
NEDERLANDS |
SVENSKA |
ESPAÑOL |
PORTUGUÊS |
|
|
|
|
|
|
|
|
Switching from the reception table to the preference table
During FM reception, you can choose whether you want to display the reception table including all of the stations currently within reception range or the preference menu with all of the stations you have previously stored.
The display header will be highlighted in the preference menu.
During MW or LW reception, it is only possible to display the preference menu.
In order for this function to operate properly, it is necessary to store stations first. Otherwise, the search menu will appear for MW and LW reception and the reception table for FM reception.
Switching from one table to the other
•Press << or >>.
Scrolling in the table
The table may consist of several pages.
To scroll through the entries:
•press  or
or  .
.
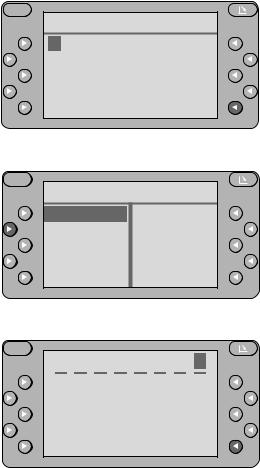
Selecting a station . . .
The display header will indicate the station name or, if the set does not receive an RDS signal, the station frequency of the station currently playing.
There are several different ways of selecting a station:
. . . from the reception or preference table
•When listening to an FM station, select the desired table by pressing << />>.
•Select the station by pressing  or
or  .
.
The station name or the frequency will appear in the display header.
S
NDR 2
SEARCH |
|
BREMEN 3 |
|
SCAN |
|
HR 3 |
|
D-Radio |
|
NDR1 NDS |
|
BREMEN 1 |
|
NDR |
2 |
BREMEN 2 |
|
NDR |
3 |
S
NDR1 NDS
SEARCH |
|
HR 1 |
|
SCAN |
|
HR 3 |
|
ANTENNE |
|
NDR |
2 |
MDR LIFE |
|
NDR1 NDS |
|
BROCKEN |
|
NDR |
3 |
18
Note:
If a station is displayed but crossed out in the preference menu, this means that either the reception is very poor or that the station could not be clearly identified as the one stored.
Stations on the same frequency which do not transmit an RDS signal cannot be clearly differentiated from one another.
. . . by station search or manually
You must select the station search menu first.
You can switch from the reception or preference table
•by pressing  SEARCH.
The search menu has been selected when SCAN appears in the upper left corner of the display.
Start the station search function by pressing
• (up) or
  (down).
The station search will stop at the next station within reception range.
The station search sensitivity selected LOCAL or DX (distant) will be highlighted in the display.
•You can toggle between the two levels of station search sensitivity by pressing the corresponding softkey  .
.
The station search sensitivity can be set separately for LOCAL and DX. For more information refer to the section on “Programming with DSC – TUNER, S-LO or S-DX”.
If you hold down  /
/ , the station search will run forwards or backwards quickly.
Start the manual station search by pressing << or >>, the frequency will move up or down in increments.
If you hold << or >> down, then the frequencies will run through quickly.
S
NDR 2
SEARCH |
|
BREMEN 3 |
|
SCAN |
|
HR 3 |
|
D-Radio |
|
NDR1 NDS |
|
BREMEN 1 |
|
NDR |
2 |
BREMEN 2 |
|
NDR |
3 |
S
NDR 2 92.10
SCAN
LOCAL
DX
STORE
EXIT
19
DEUTSCH |
ENGLISH |
FRANÇAIS |
ITALIANO |
NEDERLANDS |
SVENSKA |
ESPAÑOL |
PORTUGUÊS |
|
|
|
|
|
|
|
|
. . . with SCAN
The SCAN feature will briefly play all of the stations listed in the table displayed.
FM SCAN
If the reception table is displayed, all of the FM stations within reception range will be scanned.
If the preference table is displayed (display header highlighted), all of the stored FM stations will be scanned.
Start SCAN:
•Press  SCAN.
SCAN.
The display will indicate the station name, or if no RDS signal is received, the frequency of the station being scanned. SCAN will appear in the display header.
End SCAN:
•Press EXIT  , the last station scanned will begin normal play.
MW/LW SCAN
If the preference table is displayed (display header highlighted), all of the stored stations will be scanned.
In the SEARCH menu it is possible to scan all of the stations currently within reception range.
Select the corresponding menu.
Select preference table:
•Press TU,  MW or
MW or  LW.
LW.
S
NDR1 NDS
SEARCH |
|
HR 1 |
|
SCAN |
|
HR 3 |
|
ANTENNE |
|
NDR |
2 |
MDR LIFE |
|
NDR1 NDS |
|
BROCKEN |
|
NDR |
3 |
S
S C A N
NDR 3
EXIT
S
756
FM
MW
LW
20
Select SEARCH menu:
•Press TU,  MW or
MW or  LW,
LW,  SEARCH
If no stations have been stored on the MW waveband it is not possible to select SEARCH. SCAN can only be used in the SEARCH menu.
Start SCAN:
•Press  SCAN.
SCAN.
If no station is selected during the scanning process then the station that was selected originally will be played.
End SCAN:
•Press EXIT  , the last station scanned will begin normal play.
Storing stations
FM stations
Up to 16 FM stations from the reception table can be stored in the preference table.
Select reception table to store stations:
•Press TU and  FM one after the other, the display header should not be highlighted, if it is, switch by pressing << or >>.
The stations within reception range will appear in the display.
Store selected station:
•Press  or
or  for the station you wish to store, e.g. NDR 2, for approximately 1 second until you hear a beep.
This station will be stored in the preference table. The stations will appear in the order in which they are stored.
You will hear a double beep when the table is full. Then you have already stored 16 FM stations.
S
|
756 |
|
|
|
|
SEARCH |
|
621 |
SCAN |
|
828 |
756 |
|
836 |
1566 |
|
944 |
612 |
|
|
S
756
SCAN
LOCAL
DX
STORE
EXIT
S
NDR 2
SEARCH |
|
BREMEN 3 |
|
SCAN |
|
HR 3 |
|
D-Radio |
|
NDR1 NDS |
|
BREMEN 1 |
|
NDR |
2 |
BREMEN 2 |
|
NDR |
3 |
21
DEUTSCH |
ENGLISH |
FRANÇAIS |
ITALIANO |
NEDERLANDS |
SVENSKA |
ESPAÑOL |
PORTUGUÊS |
|
|
|
|
|
|
|
|
 Loading...