


CDA-W550E
1
R
CD/Cassette/DSP Receiver
CDA-W550E
RECEIVER
E
40W
x
4
• OWNER'S MANUAL (page 2- page 68)
Please read this manual to maximize your
enjoyment of the outstanding performance and
feature capabilities of the equipment, then retain
the manual for future reference.

2
English
3
English
Precautions
DO NOT DISASSEMBLE OR ALTER. Doing so may lead to accident, fire or electric
shock.
KEEP SMALL ARTICLES OUT OF THE REACH OF CHILDREN. If swallowed,
consult a physician immediately.
USE THE CORRECT AMPERE RATING WHEN REPLACING FUSES. Failure to do
so may result in fire or electric shock.
HALT USE IMMEDIATELY IF A PROBLEM APPEARS. When problems occur such
as a lack of sound or video, foreign objects inside the unit, smoke coming out, or
noxious odors, stop use immediately and contact the dealer where you bought the
equipment. Failure to do so may result in an accident or injury.
DO NOT OPERATE THE EQUIPMENT OR LOOK AT THE SCREEN WHILE DRIV-
ING THE VEHICLE. Operating the equipment may distract the driver from looking
ahead of the vehicle and cause accident. Always stop the vehicle in a safe location
before operating this equipment.
DO NOT RAISE THE VOLUME EXCESSIVELY. Keep the volume at a level where
you can still hear outside noises while driving. Driving while unable to hear outside
noises could be the cause of accident.
DO NOT USE THIS EQUIPMENT FOR PURPOSES OTHER THAN STATED FOR
THE VEHICLE. Failure to do so may result in electric shock or injury.
DO NOT PLACE FOREIGN OBJECTS IN INSERTION SLOTS OR GAPS. Do not
insert hands, fingers or foreign objects in the disc insertion slots. Doing so may result
in personal injury or damage to the equipment.
DO NOT MIX NEW BATTERIES WITH OLD BATTERIES. INSERT WITH THE
CORRECT BATTERY POLARITY. When inserting the batteries, be sure to observe
proper polarity (+ and –) as instructed. Rupture or chemical leakage from the battery
may cause fire or personal injury.
The exclamation point within an equilateral triangle and "WARNING"
are intended to alert the user to the presence of important operating
instructions.
Failure to heed the instructions will result in severe injury or death.
Caution
Warning
DO NOT BLOCK VENTS OR RADIATOR PANELS. Blocking them may cause heat to
build up inside and may result in fire.
STOP THE VEHICLE IF UNIT OPERATION MIGHT INTERFERE WITH DRIVING.
The exclamation point within an equilateral triangle and "CAUTION" are
intended to alert the user to the presence of important operating instruc-
tions.
Failure to heed the instructions will result in severe injury or death.
4
English
Contents
Page
6 ...................................................................................Precautions
Basic Operation
9 ................................................................... Initial System Start-Up
9 ............................................................. Turning Power On and Off
10 ................................................................. Subwoofer On and Off
10 ..............................................................................Demonstration
11 ................................................................. Sound Guide Function
12 ..................................................................CD Text Scroll Setting
13 .......................................................... Turning Mute Mode On/Off
14 .................................................Adjusting Volume/Balance/Fader
15 .................................. Level Indicateur Display Pattern Switching
16 ............................................................ Display Angle Adjustment
17 ............................................................Using the Function Button
18 ......................................................................... Clock Operation
Radio Operation
20 ............................................................................. Manual Tuning
21 ................................................................ Automatic Seek Tuning
22 ................................................Manual Storing of Station Presets
23 ................................................................ Mono/Stereo Switching
24 ..........................................Automatic Memory of Station Presets
25 ......................... Storing into Direct Access Preset (D.A.P.) Band
26 .............................................................Tuning to Preset Stations
27 .......................................................................Displaying the Title
28 ..............................................................................Titling Stations
CD Operation
30 .................................. Opening and Closing the Movable Display
31 .......................................................................................Playback
33 ........................................................ Fast Forward and Backward
33 ..................................................................................Repeat Play
34 ..................................................................... Music Sensor (Skip)
35 ...................................................................M.I.X. (Random Play)
36 ......................................................................Scanning Programs
37 ...............................................................Displaying the Title/Text
38 ....................................................................................Titling Disc
40 .................................................................CD Shuttle Operation
5
English
Contents
Page
Cassette Player Operation
44 .......................................................................................Playback
45 .....................................................Dolby B NR (Noise Reduction)
45 ..................................................................................Repeat Play
46 ............................................................ Fast Forward and Rewind
46 ..................................................................... Blank Skip (B.SKIP)
47 ........................................................................... Manual Reverse
47 ......................................................................Scanning Programs
48 .................................................................Program Sensor (P.S.)
Surround Operation
49 .................................................................DSP Surround Presets
50 ...................................................Adjusting the Surround Settings
Equalizer Operation
51 ......................................................................... Equalizer Presets
52 .................................................. Adjusting the Equalizer Settings
53 ...............................................Memorizing the Equalizer Settings
54 ................Recalling the Memorized Equalizer/Surround Settings
55 .......................................................... Switching Graphic Screens
L.P.S. Operation
56 ....................... Choosing the Listening Position Selector (L.P.S.)
57 .......................................................................... Remote Control
60 .....................................................................................Disc Care
61 ....................................................................In Case of Difficulty
66 .............................................................................Specifications
6
English
Precautions
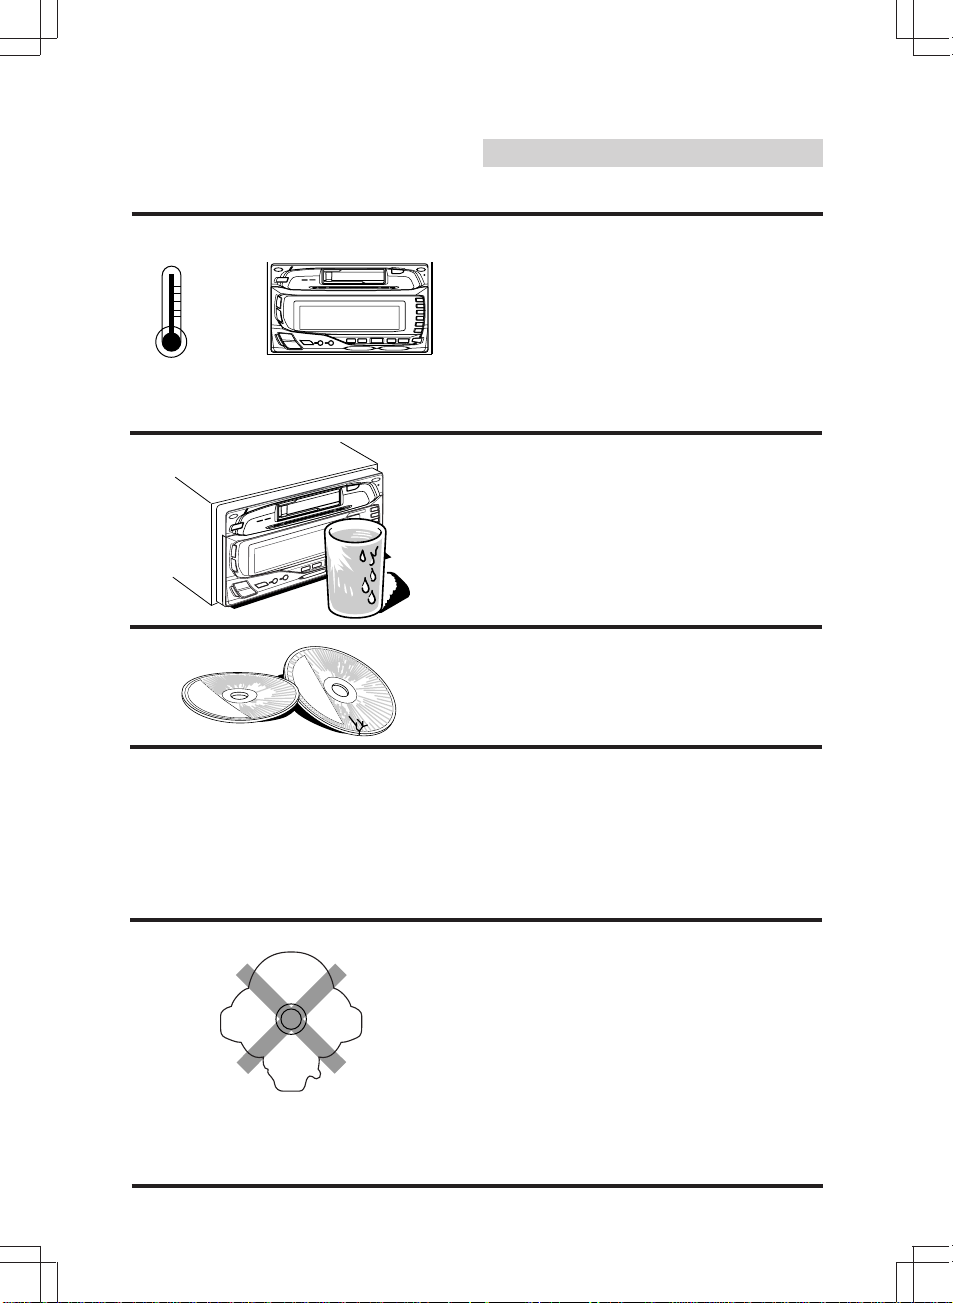
Thermal Protection Circuit
Be sure the temperature inside the vehicle is
between +60°C (+140°F) and –10°C (+14°F)
before attempting to play a disc. If the tempera-
ture is over +60°C (+140°F), the protection
circuit functions to stop the CD player, and
"High Temp." is displayed.
Moisture Condensation
You may notice the CD playback sound
wavering due to condensation. If this happens,
remove the disc from the player and wait about
an hour for the moisture to evaporate.
Damaged Disc
Do not attempt to play cracked, warped, or
damaged discs. Playing a bad disc could
severely damage the playback mechanism.
Maintenance
If you have problems, do not attempt to repair
the unit yourself. Return it to your Alpine dealer
or the nearest Alpine Service Station for
servicing.
Irregular Shaped Discs
Make sure the discs you use in this unit do not
have any irregularities. The outer and inner
edges should be round and smooth. Use of
irregularly shaped discs may cause damage to
the mechanism.
+60°C
–10°C
7
English
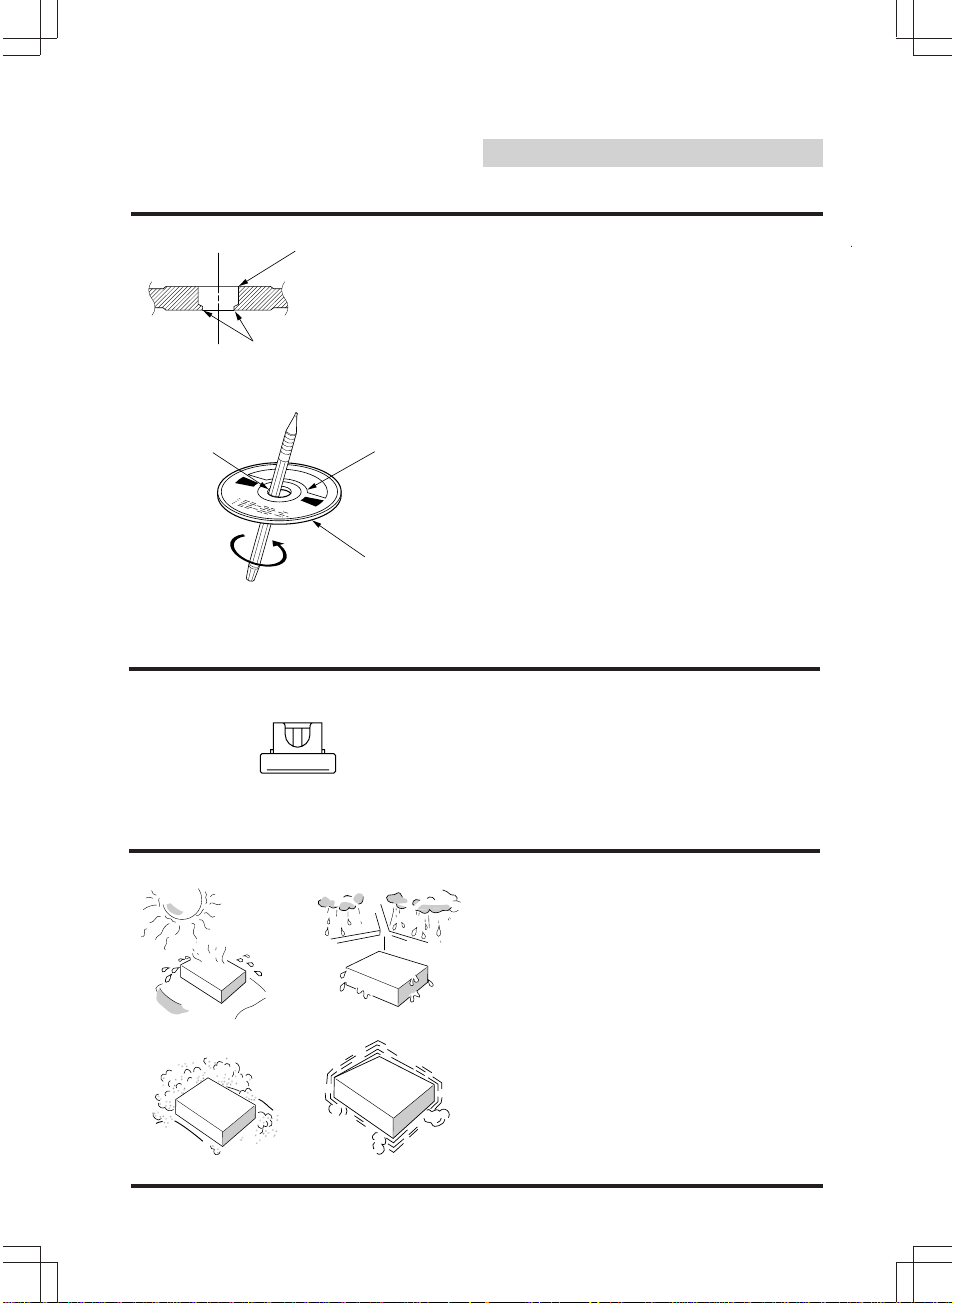
New Discs
As a protective measure, the CD player will
automatically eject discs that have either been
inserted incorrectly or have irregular surfaces. If
a new disc is ejected immediately after loading,
use your finger to feel around the outer edge of
the CD and its center hole. If you feel any small
bumps or irregularities, this could inhibit proper
loading of the disc. To remove the bumps, rub
the inside edge of the hole and outside edge of
the disc with a ball-point pen or other such
instrument, then insert the disc again.
Fuse Replacement
When replacing the fuse(s), the replacement
must be of the same amperage as shown on
the fuse holder. If the fuse blows more than
once, carefully check all electrical connections
for shorted circuitry. Also have your vehicle’s
voltage regulator checked.
Installation Location
Make sure the CDA-W550E player/receiver will
not be exposed to:
• Direct sun and heat
• High humidity
• Excessive dust
• Excessive vibrations
Precautions
Bumps
Center Hole
New Disc
Center Hole
Outside (Bumps)
8
English
Precautions
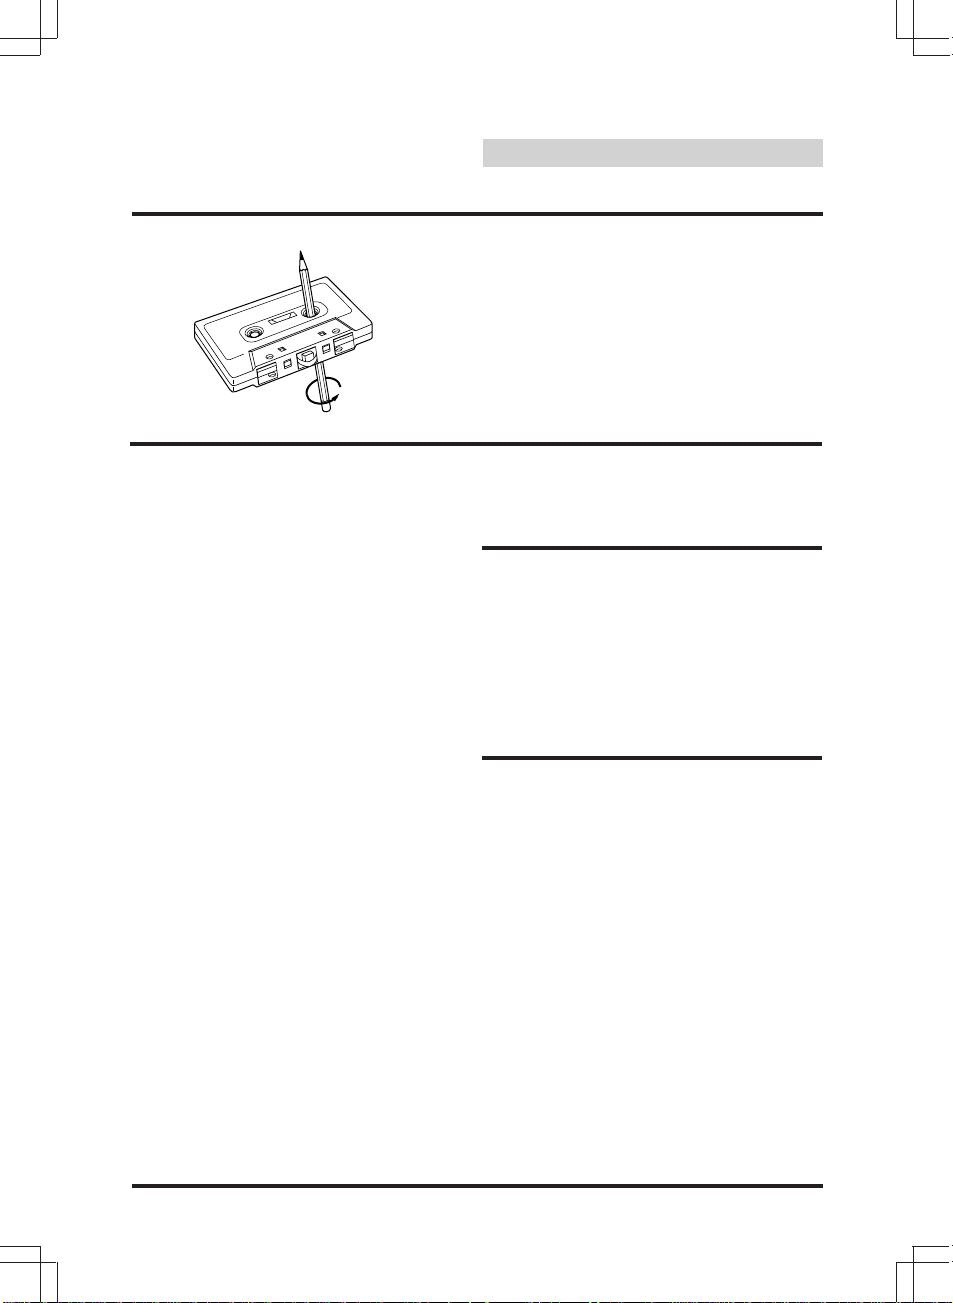
Tape Slack
Check and make sure any slack in the tape is
taken up before inserting the tape into the unit.
A loose tape can get caught in the mechanism
and cause damage to the unit and the tape
itself. Tighten the tape by inserting a pencil or a
similar instrument into the spindle hole and turn
until all the slack has been taken up.
Excessively Thin Tape
C-120 type cassette tapes are not recom-
mended for use in automobile tape players.
Precision Tape Mechanism
Prevent any foreign objects from entering the
cassette opening as the precision mechanism
and tape head may be damaged.
Never play dirty or dusty tapes – they can
damage the tape head.
Tape Head Cleaning
Periodic cleaning (approximately every 20
hours of use) of the tape head with a wet type
head-cleaning cassette tape (available at audio
stores) is necessary for best performance.
9
English
Basic Operation
1
1
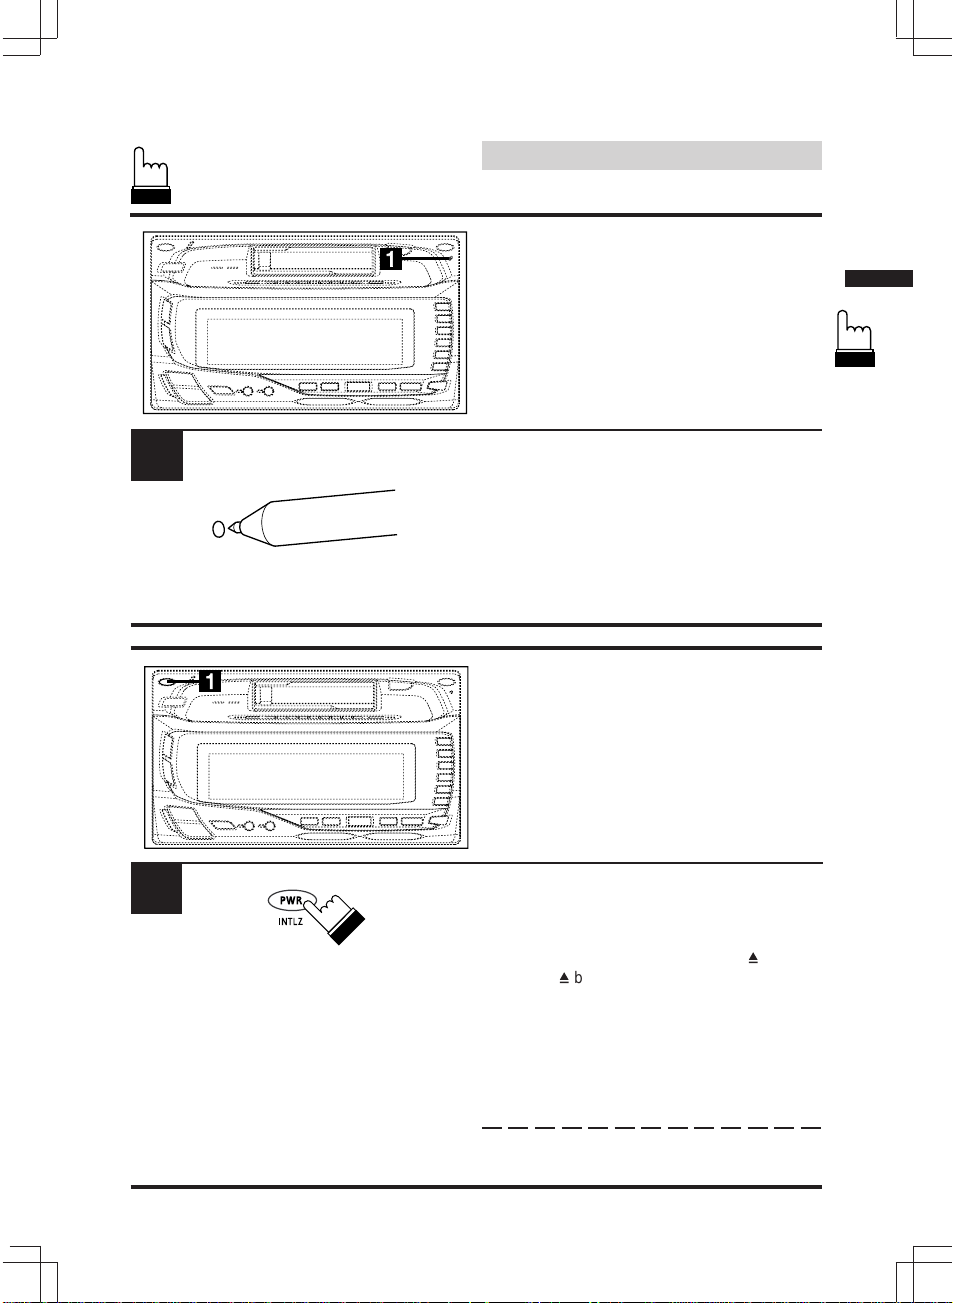
Initial System Start-Up
Immediately after installing or applying power to
the unit, it should be initialized. At the upper-
right corner of the front panel is a small button.
Using a pencil or other pointed object, press
this reset button to complete the initialization
procedure.
Turning Power On and Off
Press the PWR button to turn on the unit.
Note: The unit can be turned on by pressing
any other button except the CD
h
and
CST
h
buttons.
The volume level gradually increases to the
previous level you were listening to before the
unit was turned off.
Press the PWR button again to turn off the unit.
10
English
Basic Operation
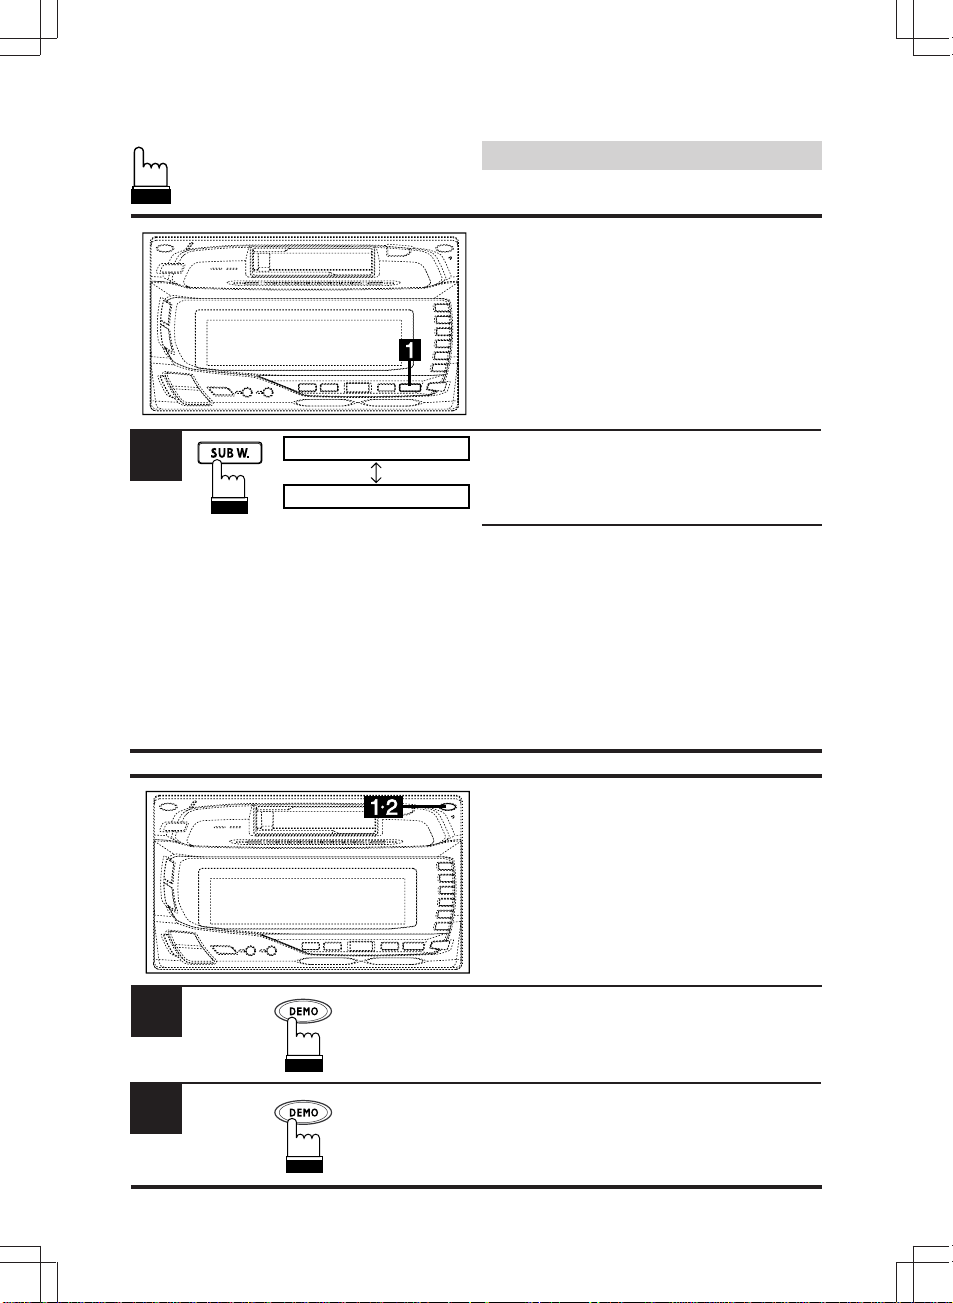
Subwoofer On and Off
This unit is not equipped with a low pass filter.
Turn on the Subwoofer Output when an
amplifier having the built-in filter is connected to
drive your subwoofer.
Press the SUB W. button to display Subwoofer
ON.
Each press will toggle the subwoofer on and off.
Notes:
• Initial mode is "Subwoofer OFF."
• Leave the "Subwoofer OFF" as long as the
Subwoofer output is not being used.
• When the subwoofer is turned on, the
subwoofer output level can be adjusted. For
more details, refer to the Adjusting Volume/
Balance/Fader section on page 14.
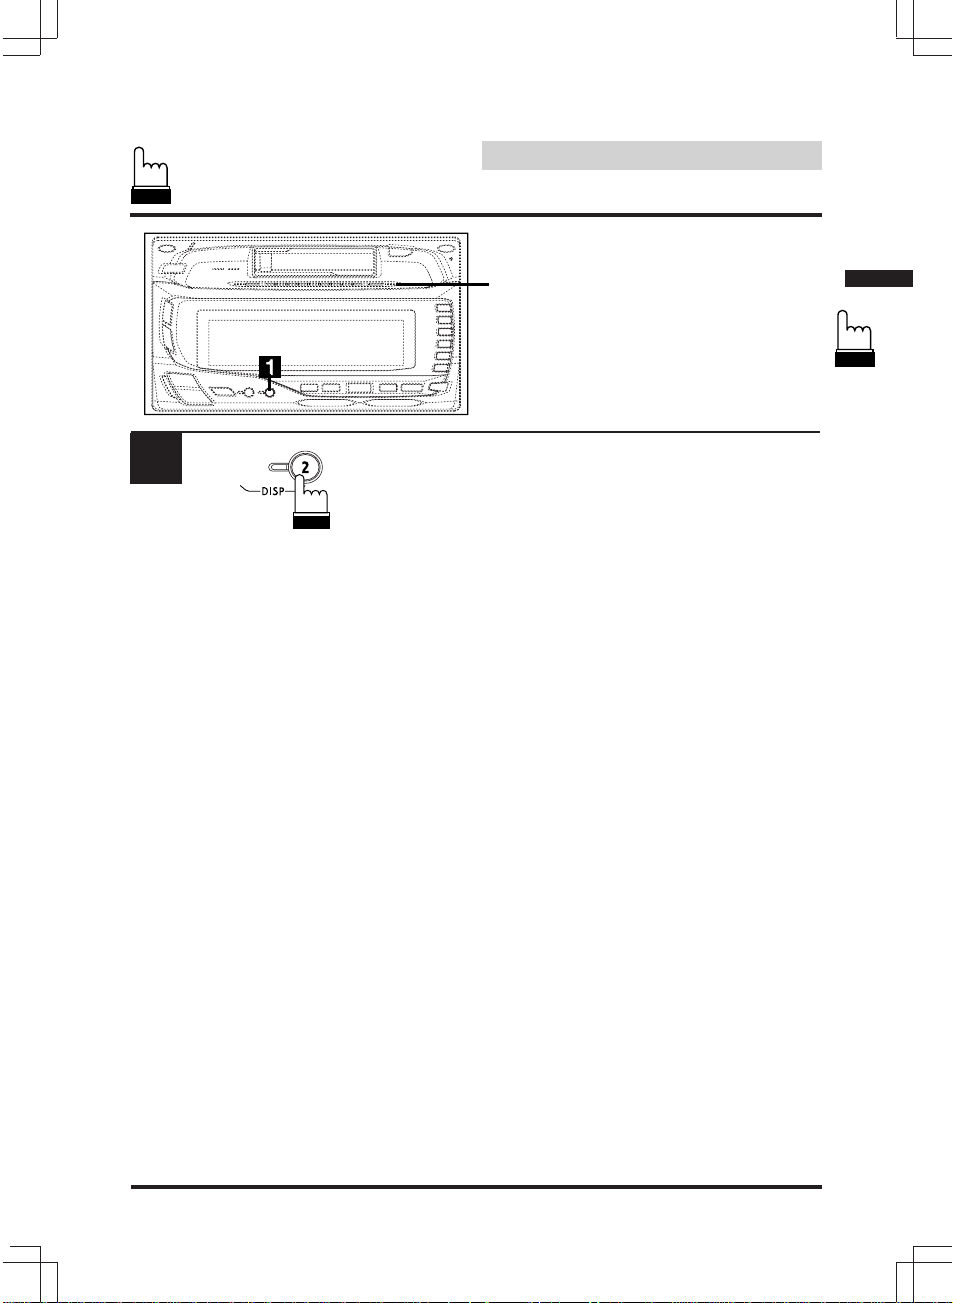
Demonstration
This device has a demonstration mode to show
off only the display effects.
Press the DEMO (demonstration) button.
The demonstration mode will be activated and
will automatically display the display effects.
To cancel the demonstration mode, press the
DEMO button again.
1
Subwoofer ON
Subwoofer OFF
2
1
11
English
Basic Operation
1
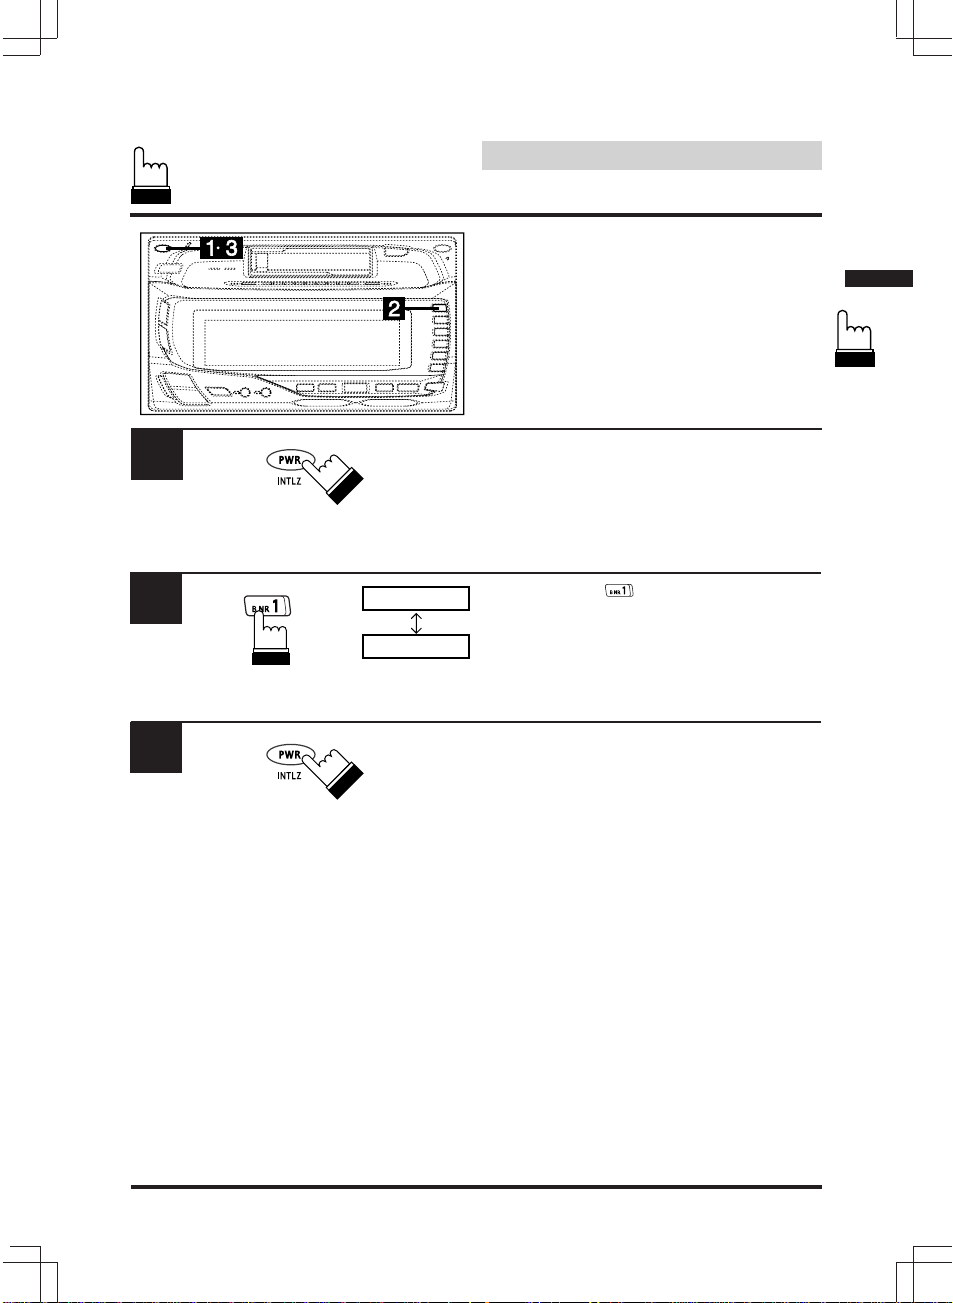
Sound Guide Function
This function will give audible feedback with
varying tones depending upon the button
pressed.
Press and hold the INTLZ button for more than
3 seconds.
Press the Preset button and the display
shows "BEEP ON."
Pressing the button again turns the Sound
Guide function off. "BEEP OFF" will be
displayed and no tones will be heard.
Press the INTLZ button to activate the normal
mode.
Notes:
• Initial mode is "BEEP ON".
• The warning buzzer when opening and
closing the movable display will sound
regardless of the BEEP ON/OFF setting.
2
BEEP ON
BEEP OFF
3
12
English
Basic Operation
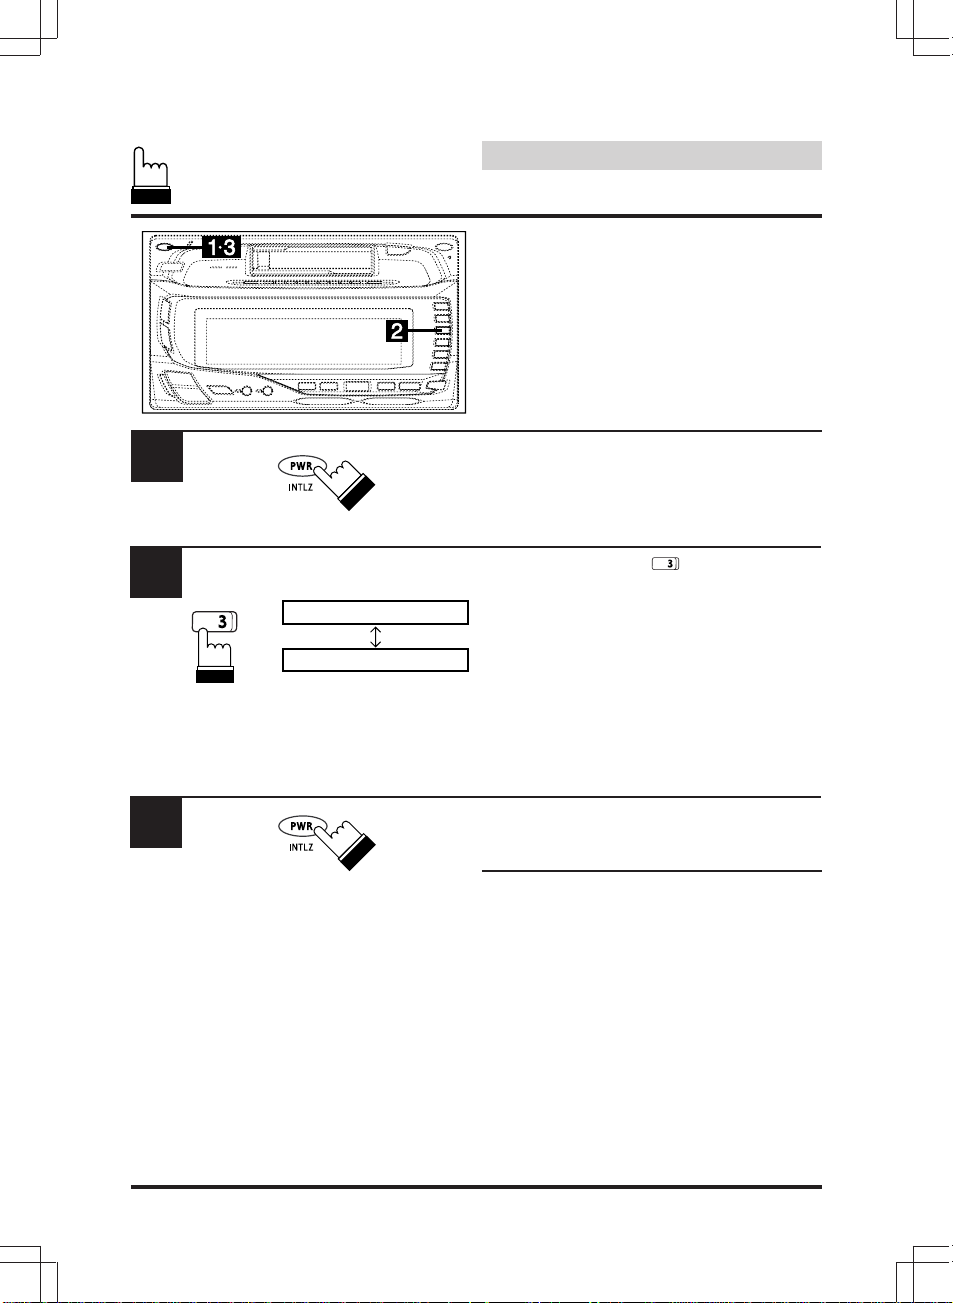
CD Text Scroll Setting
With the built-in CD player of this device, the
disc or track name recorded on the disc will
scroll if longer than 16 characters. This scrolling
feature is available only with text compatible
CDs pre-recorded with text. The scrolling
feature will not work for titles that were input
manually as these are limited to 16 characters.
Press and hold the INTLZ (initialize) button for
at least 3 seconds.
Press the preset button (SCRL) and select
SCROLL AUTO or SCROLL MANUAL.
• SCROLL AUTO: the display of CD text is
scrolled continuously.
• SCROLL MANUAL: the display is scrolled
only when a disc is loaded or when a track is
changed and the text information exceeds
16 digits.
It is also possible to scroll the display by
pressing the SCRL button.
When the setting is completed, press the INTLZ
button to return to the normal mode.
Note: Initial mode is "SCROLL AUTO".
1
2
SCROLL AUTO
SCROLL MANUAL
3
13
English
Basic Operation
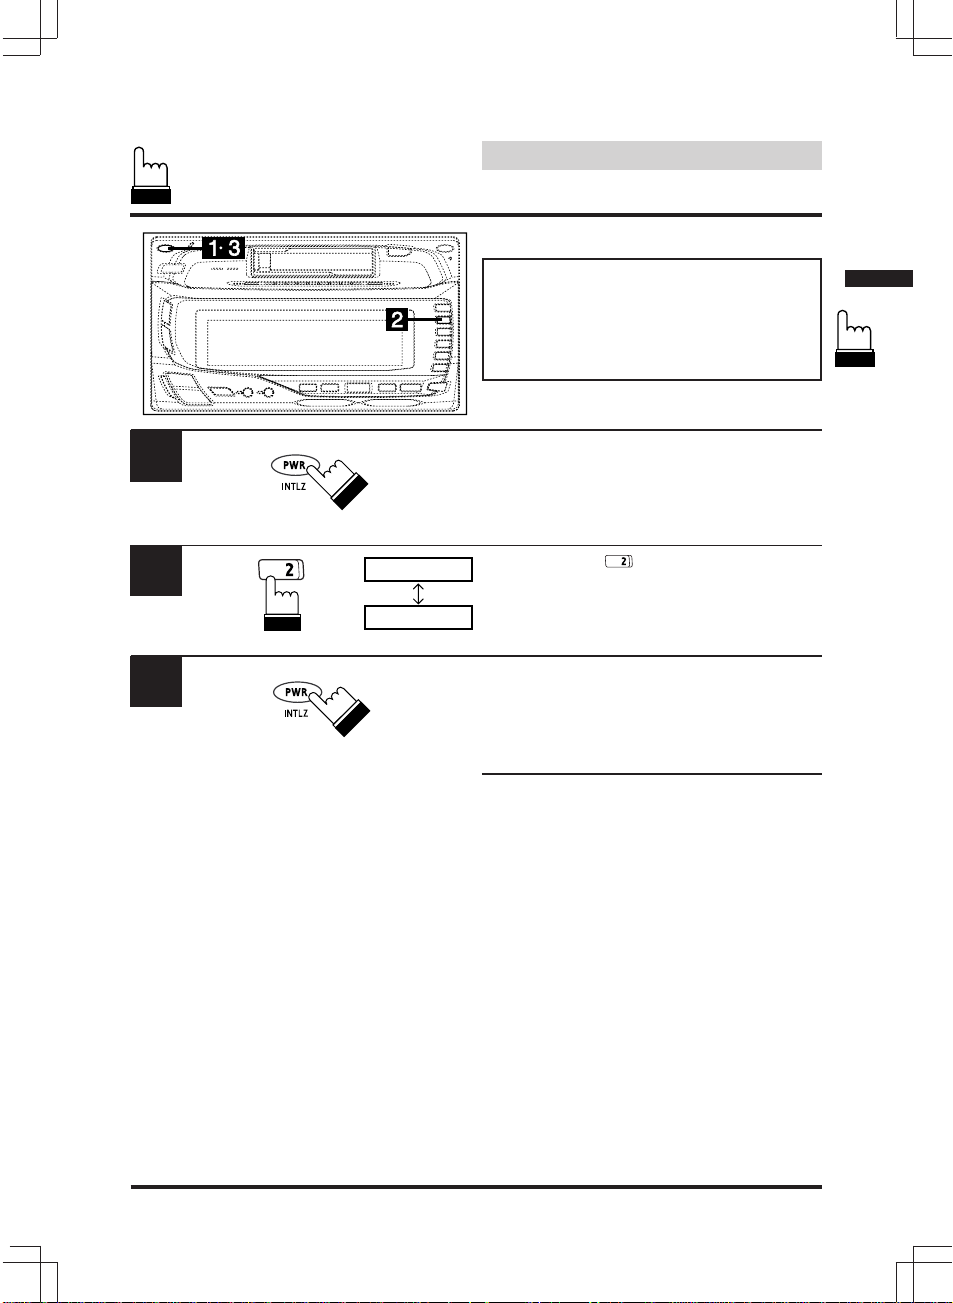
Turning Mute Mode On/Off
If a device having the interrupt feature is
connected, audio will be automatically muted
whenever the interrupt signal is received from
the device. This function can be turned ON or
OFF from the head unit by following procedure
below.
Press and hold the INTLZ button for at least 3
seconds.
Press the Preset button to select the MUTE
ON or OFF mode.
Press the INTLZ button to activate the normal
mode.
Note: Initial mode is "MUTE ON".
1
2
MUTE ON
MUTE OFF
3

14
English
Basic Operation
1
Adjusting Volume/Bal-
ance/Fader
Press and release the MODE button repeatedly
to choose the desired mode.
Notes:
• If the or button is not pressed in 5
seconds after selecting the BALANCE and
FADER modes, the unit automatically
returns to the VOLUME mode.
• With the Subwoofer mode turned on,
Subwoofer output level can be adjusted.
Press the button or until the desired sound
is obtained in each mode.
2
VOL
FAD
BAL
Sub-W
15
English
Basic Operation
1
Level Indicator
Level Indicator Display
Pattern Switching
Press and hold the DISP2 button for at least 2
seconds.
Each press of the button changes the display
pattern.
Indicator 1 The indicators will flash outward
from the center following the audio
levels.
Indicator 2 The indicators will flash outward
from the center regardless of the
audio levels.
Indicator 3 All the indicators flash according to
the audio levels.
Note: There is no display indication for the
selected mode. confirm the display
pattern by viewing the level indicator.
16
English
Basic Operation
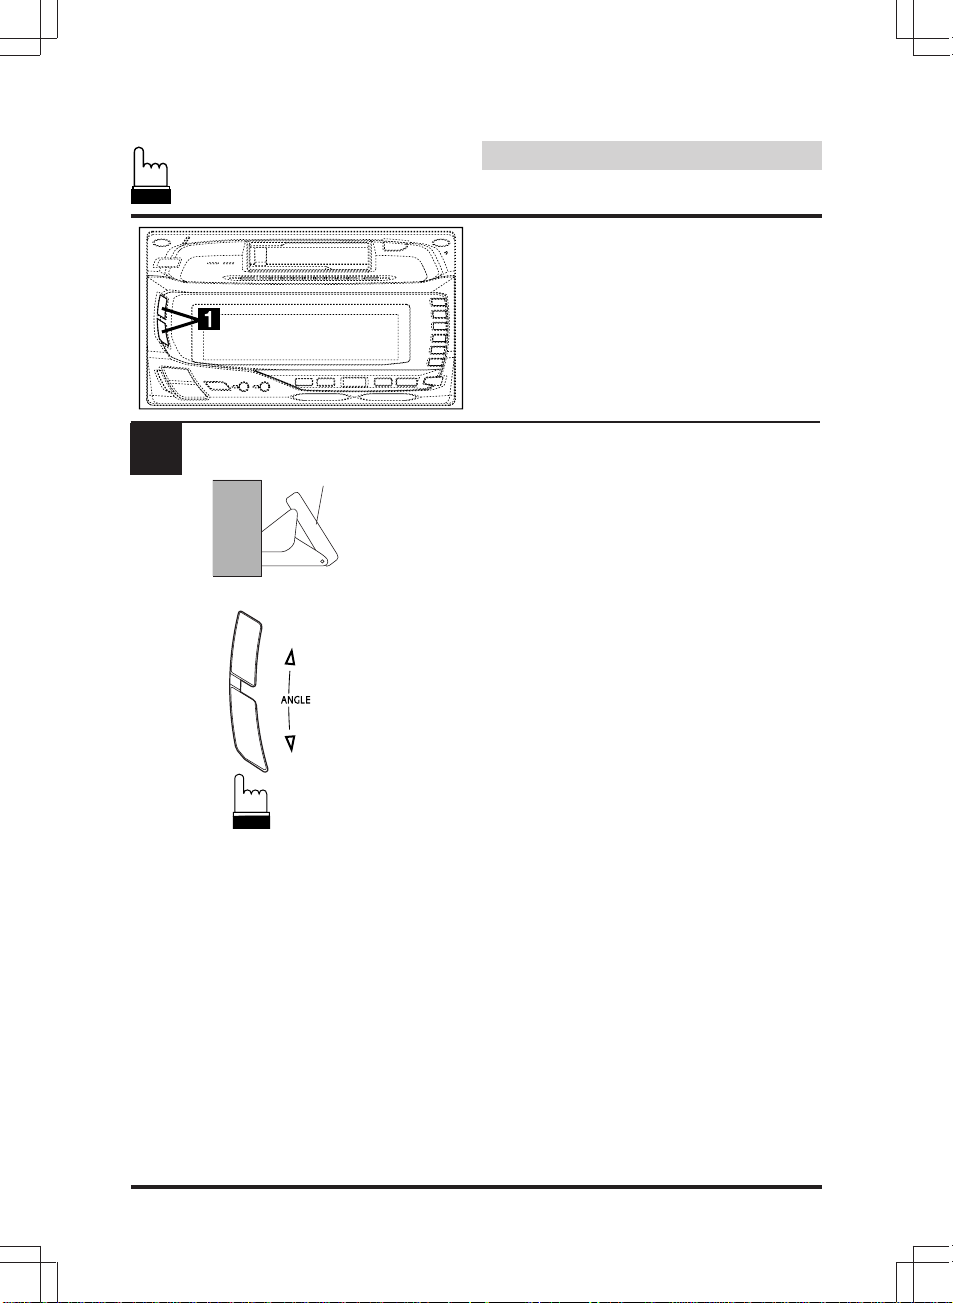
Display Angle Adjustment
It is possible to adjust the angle (5 steps) of the
movable display according to the user prefer-
ence.
Press the ANGLE button.
Notes:
• The display will close a half minute after the
ignition key is turned to the OFF position.
• The adjusted angle of the display is stored in
memory. There is no need to re-adjust the
angle when turning the power back on.
Caution
Be careful not to let fingers (or any other object)
get caught when the display is opening or
closing, or when adjusting the display angle.
This could cause an injury or malfunction as a
result. The back of the movable display will get
very warm under normal operating conditions.
This is not a malfunction. Do not touch.
1
Movable display
Upward
Downward
17
English
Basic Operation
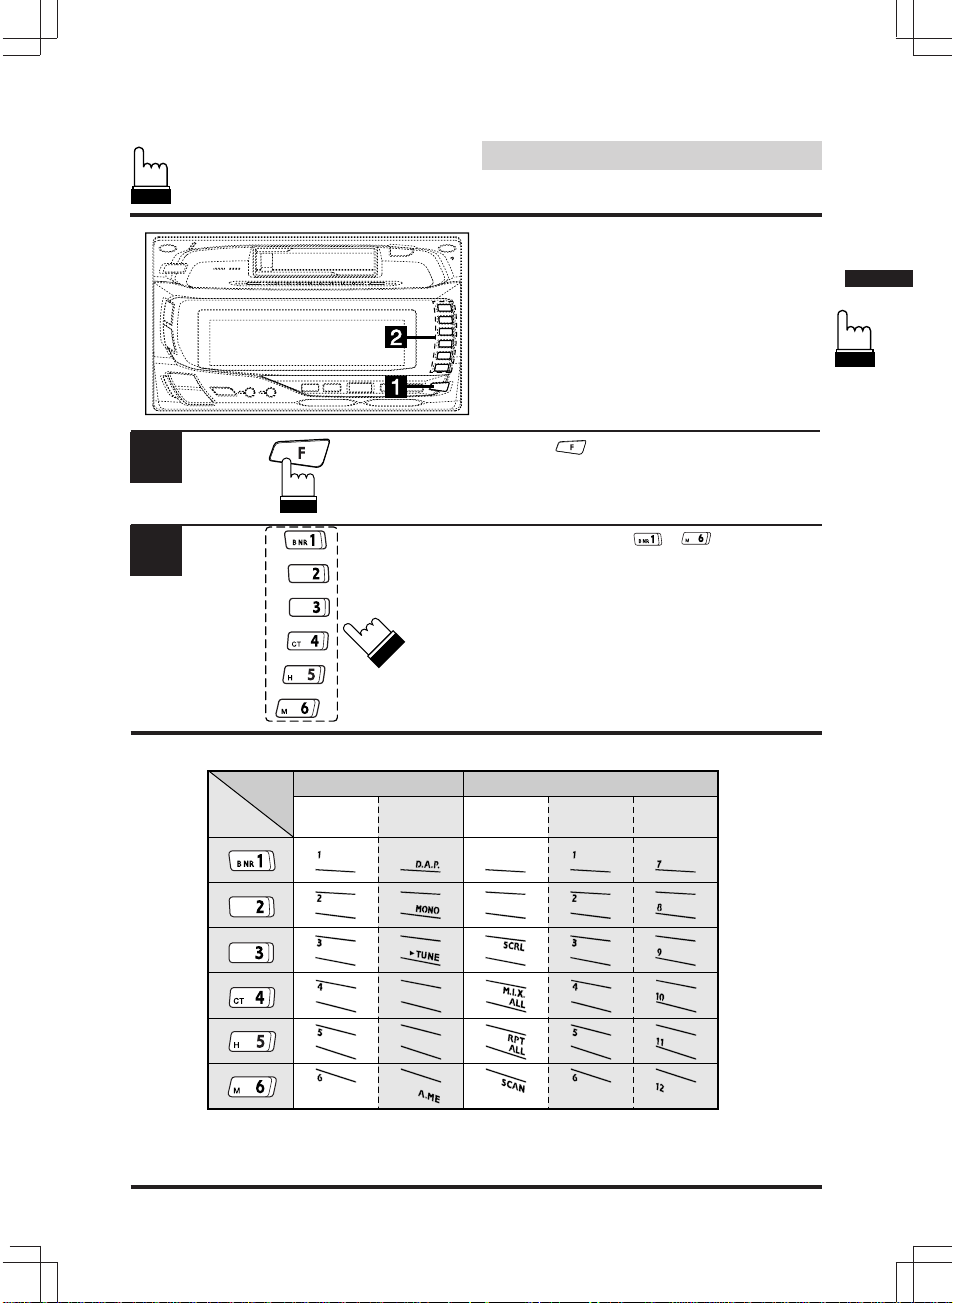
Using the Function Button
The chart below describes the function of each
preset button. The function will change
depending upon the source selected and the
condition of the FUNCTION switch, ON or OFF.
Note: This function is not available for the built-
in CD/cassette of this device.
Press the (FUNCTION) button. The
function mode will change each time you press
the button. (Refer to the chart below.)
Press any one of the – buttons.
1
2
RADIO
OFF ON OFF ON1 ON2
(12CD Shuttle
connected)
CD Shuttle
Function
Mode
Switch
*
Note: * When connecting to the CD Shuttle
applicable with CD Text.
18
English
Clock Operation
1
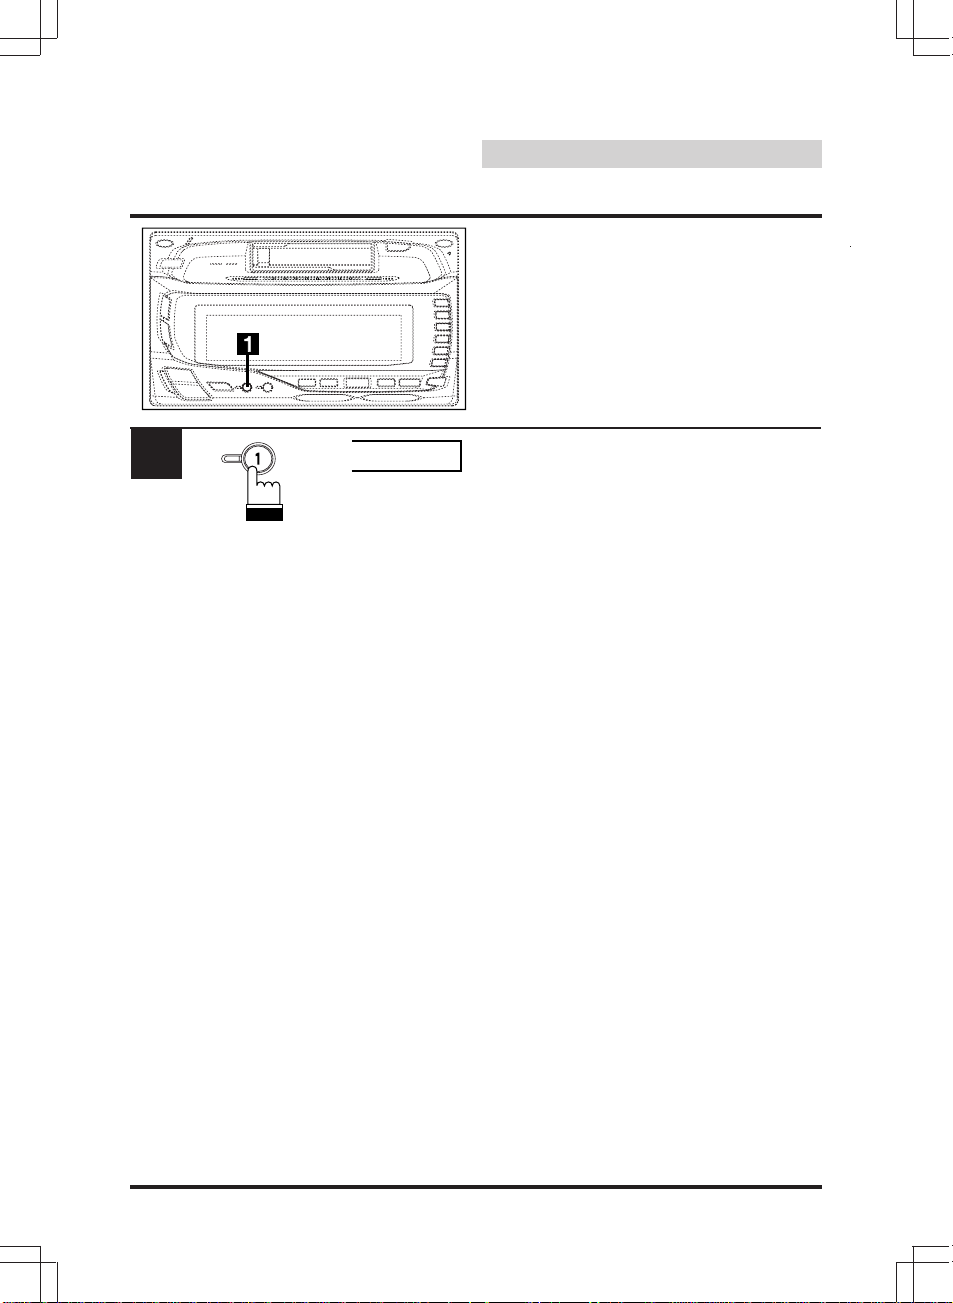
Displaying Time
Press the DISP1 button.
The mode will change every time the button is
pressed.
Select the time display mode.
Notes:
• When the power is off, the time will not be
displayed regardless of whether the DISP1
button is pressed.
• The battery may be discharged when using
this device for extended periods with the
engine off. This could cause the engine to
fail to start.
12:00
19
English
Clock Operation
1
2
3
4
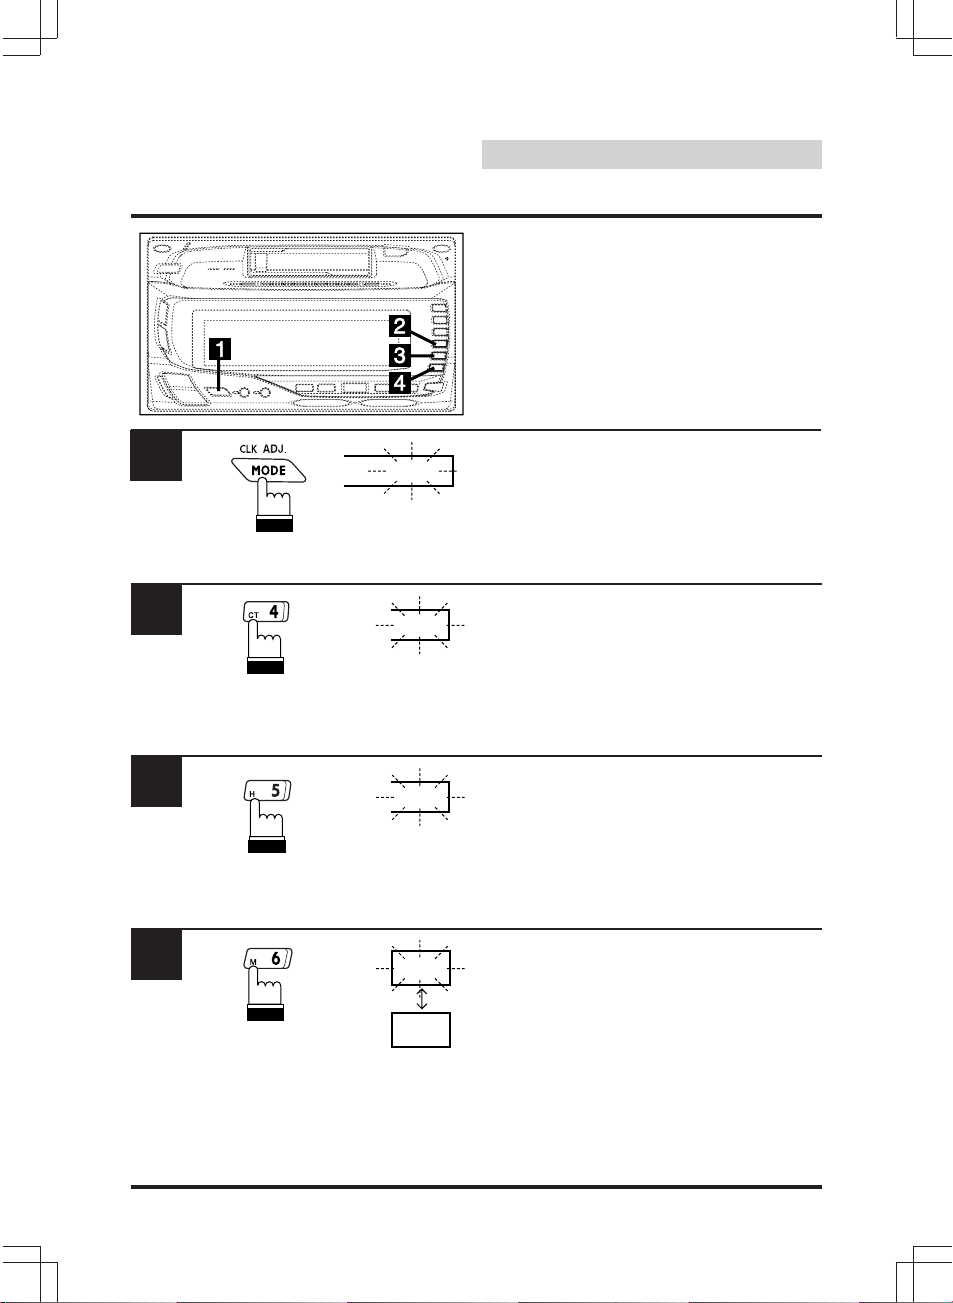
Setting Time
Make sure you are in the Clock mode by
pressing the Clock button (see page 18). Then,
press and hold the CLK ADJ. button for at least
2 seconds. The time indication will begin to
blink.
To set the time to the nearest hour, press the
CT button while the time indication is blinking.
For example, if the time shown in the display is
9:35, the CT function will change it to 10:00. If
the display shows 9:29, the CT function will set
the time to 9:00.
Example: To adjust to 9:35
Press the "H" button to adjust the hours while
the time indication is blinking.
Press the "M" button to adjust the minutes while
the time indication is blinking.
The time automatically sets after 5 seconds of
inactivity.
12:30
9:00
9:35
9:35
12:00
20
English
Radio Operation
1
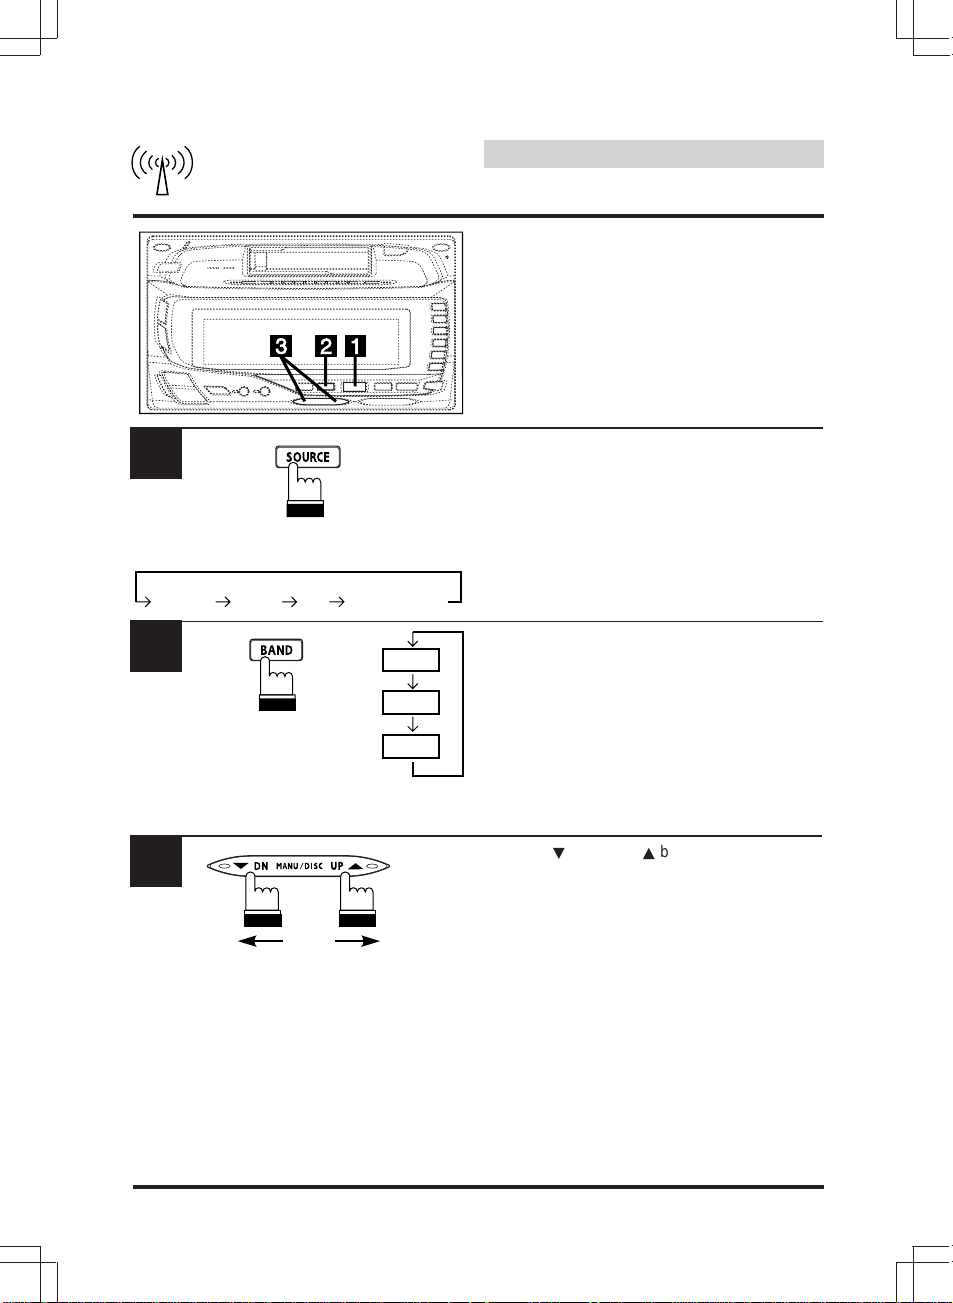
Manual Tuning
Press the SOURCE button to select the radio
mode.
(* Only with the CD shuttle connected.)
Press the BAND button repeatedly until the
desired radio band is displayed.
Press the
9
DN or UP
8
button to move
downward or upward one step respectively until
the desired station frequency is displayed.
Note: The "ST" indicator in the display shows
that a stereo broadcast is being received.
2
3
FM1
FM2
AM
Downward
Upward
TUNER
CD CHANGER
TAPE
*
CD
21
Operación de la
radio
Réception
radio
English
Radio Operation
1
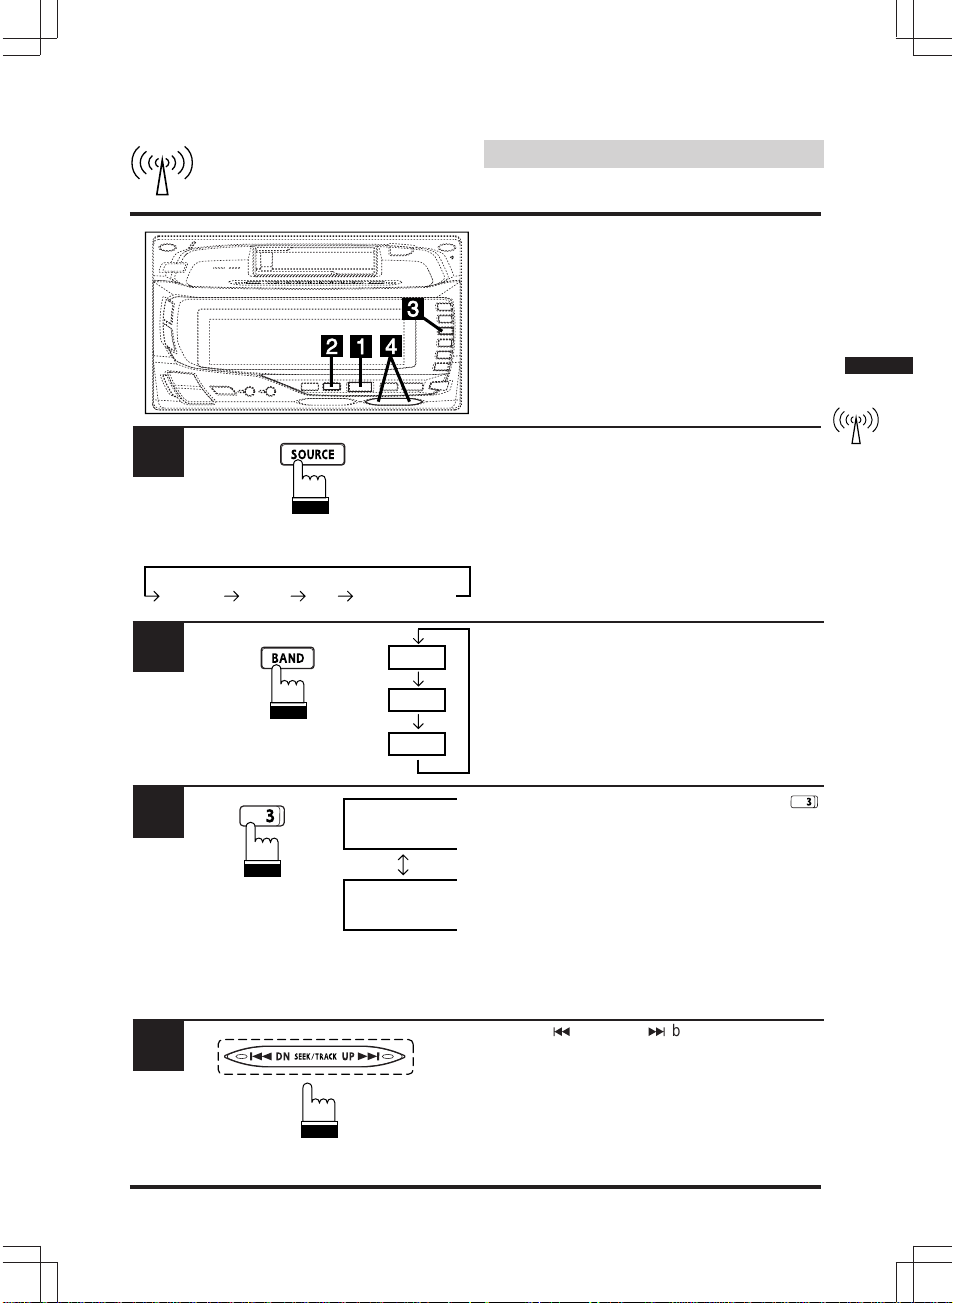
Automatic Seek Tuning
Press the SOURCE button to select the mode.
(* Only with the CD shuttle connected.)
Press the BAND button repeatedly until the
desired radio band is displayed.
When the Function mode is ON*, press the
(TUNE) button to illuminate the DX indicator in
the display. With the DX mode activated, both
strong and weak stations will be tuned auto-
matically.
Press again to return to the local mode. The DX
indicator will turn off and only strong stations
will be tuned.
* Refer to "Using the Function button" on page
17.
Press the
c
DN or UP
f
button to automati-
cally seek a station downward or upward
respectively.
The unit will stop at the next station it finds.
Press the same button again to seek next
station.
2
3
FM1
FM2
AM
DX SEEK
SEEK
4
TUNER
CD CHANGER
TAPE
*
CD
 Loading...